

Page 1

Garantía limitada por cinco (5) años
Taylor® garantiza este producto contra defectos en los materiales y en la mano de obra durante 5 (cinco) años
para el comprador original, a partir de la fecha de compra original
desgastes que sean consecuencia de accidentes, uso inadecuado, abuso, uso comercial ni ajustes y/o reparaciones
no autorizadas. No la devuelva al vendedor minorista. Si esta báscula requiere mantenimiento (o cambio a nuestro
entender) mientras esté en garantía, sírvase empacar el artículo cuidadosamente y envíelo con el franqueo pagado,
junto con el recibo de la tienda en el que aparezca la fecha de compra y una nota explicando el motivo de la
devolución a:
(exclusión de las baterías)
. No cubre daños ni
Taylor Precision Products
2220 Entrada Del Sol, Suite A
Las Cruces, New Mexico 88001 USA
No existen garantías expresas excepto las enunciadas anteriormente. Esta garantía le otorga derechos legales
específicos y es posible que usted tenga otros derechos que varíen de un estado a otro. Para obtener información
adicional sobre el producto, o información de la garantía en otro sitio fuera de los EE.UU., sírvase contactarnos a
través de www.taylorusa.com.
©2012 Taylor Precision Products y sus compañías afiliadas, todos los derechos reservados. HoMedics® es una
marca comercial registrada de HoMedics, Inc., y Progress Tracker™ es una marca registrada de HoMedics, Inc. y
sus compañías afiliadas.
Fabricado en China.
No es legal para uso comercial.
Distribuido por
Taylor Precision Products, Inc.
Oak Brook, IL 60523, U.S.A.
Todos los derechos reservados.
IB-SC373C
Page 2
ProgressTracker™
Digital Scale
El manual en
español empieza
a la página 9
Instruction Manual and
Warranty Information
Year
5
Limited Warranty
SC-373
Page 3

Thank you for your HoMedics Digital Scale purchase.This, like the entire HoMedics product
line, is built with high-quality craftsmanship to provide years of dependable service. We hope
you will find it to be the finest product of its kind.
First Time Setup
1. This scale operates on four AA batteries (included). Install batteries before proceeding. Be
sure to observe proper +/- polarities as marked inside the battery compartment.
2. Some models have a static cling label on the lens to prevent scratching.
Remove before use.
3. Set the “LB/KG/ST” unit of measure switch located on the back of the scale for pounds,
kilograms or stones.
NOTE: The switch is pre-set to pounds.
4. The scale needs to be initialized before first use or after battery installation. Step lightly on
the scale platform disregarding the reading and step off. Wait for the scale to automatically
turn off. The scale is now ready for use.
NOTE: The scale may need to be initialized if it is moved or bumped.
Helpful Hints:
It is normal for your weight to fluctuate during the day and from one day to another.
Slight changes in your weight are normal. For best results:
1. Weigh yourself without clothing whenever possible. Clothes can vary in weight.
2. Weigh yourself at the same time of day under the same conditions.
3. Allow for weight fluctuations due to food or drink in your system.
Getting Started - Setting “Starting Weight”
Place the scale on a flat, hard surface. Carpeted or uneven floors may affect accuracy.
Decide what MEMORY Location you would like (1-4).
1. With scale off, press the SET BUTTON and use the
or BUTTON to select MEMORY
Location.
2. Press and hold SET button until 0.0 appears in the top display
window.
3. Step on the scale. Use caution, so it does not tip. Be careful that the
floor is not wet, or the scale may move. Place feet evenly on platform
(Figure 1). Stand still while the scale measures CURRENT weight.
Both CURRENT weight and LAST weight are displayed.
NOTE: 0.0 will show in LAST weight display window.
4. Scale turns off automatically.
5. Repeat steps 1-4 above to set the Starting Weight for other users.
Figure 1
To prevent accidentally deleting a Starting Weight, you can not set the Starting Weight if a user
MEMORY location is already taken. Use a different MEMORY location or refer to the
Delete Starting Weight From Memory section, on page 3.
Using the Scale – ProgressTracker Mode
1. With scale off, press the SET BUTTON.
2. Use the
or BUTTON to find your personal Starting Weight MEMORY Location (1-4).
3. Press and hold SET button until 0.0 appears in the top display window.
4. Step on the scale.
5. CURRENT Weight and LAST Weight will show for 4 seconds (Figure 4).
6. Next, Pounds Lost Since LAST Weight and % of Pounds Lost Since LAST Weight will show
for 4 seconds (Figure 5).
7. Finally, TOTAL Pounds Lost Since Starting Weight and TOTAL % of Pounds Lost Since
Starting Weight will show for 4 seconds (Figure 6).
2
Page 4
NOTE: This step will only appear if you have weighed yourself at least twice since setting
USER
lb
USER
lb
WT
USER
lb
USER
WT TL
USER
lb
USER
lb
WT TL
your Starting Weight.
8. Scale turns off automatically.
NOTE: Pounds lost and % of pounds lost will show as a negative number under the
symbol. Pounds gained and % of pounds gained will show as a positive number
under the
symbol.
As the scale is used for an extended period of time, changes in weight will be displayed on
three consecutive screens. See Example 1 on Page 4.
Using the Scale – Weight-Only Mode
1. Step on the scale and stand still.
2. Weight will lock in, flash, and display for 10 seconds.
3. Scale turns off automatically.
Using the Scale – Delete Starting Weight From Memory
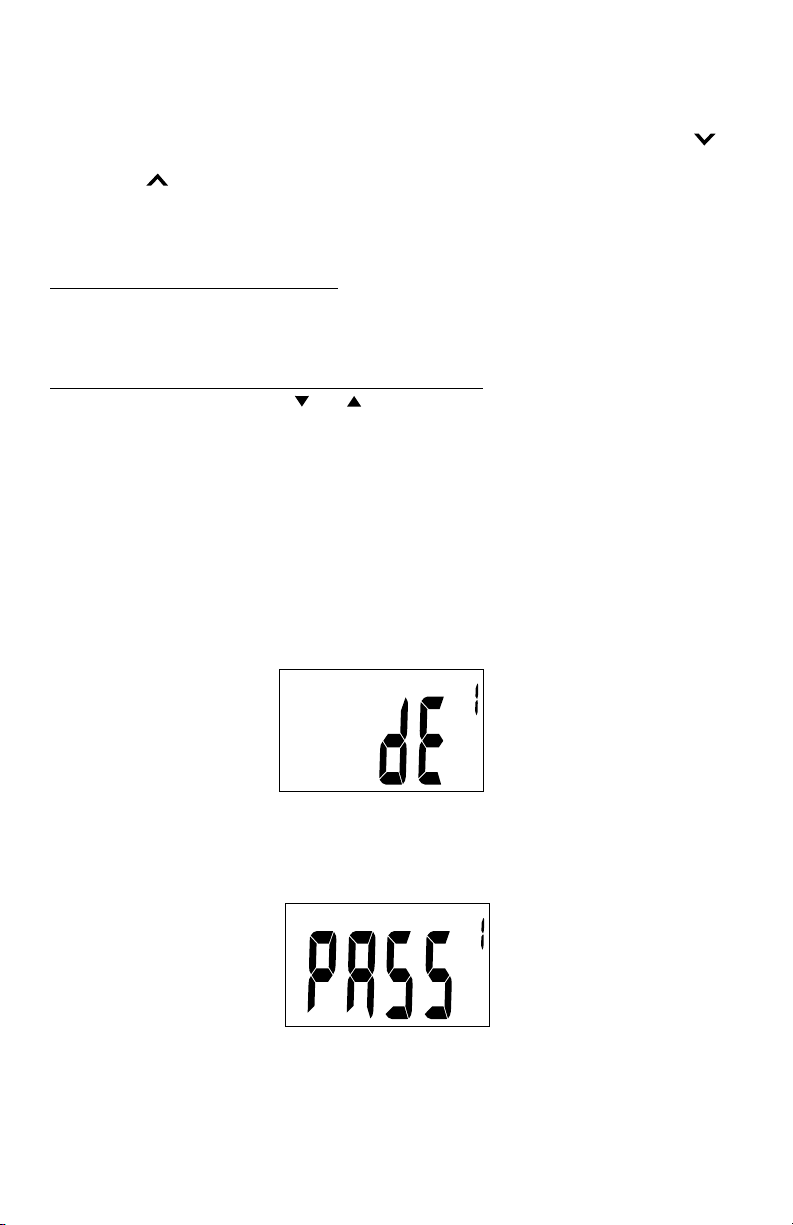
1. With scale off, press the SET,
and BUTTONS at the same time until
dE + USER 1 appears in the top display window (Figure 2).
2. To delete USER 1, press and hold the SET BUTTON until PASS appears in the display
window (Figure 3).
3. If you do NOT want to delete USER 1, wait for the display to cycle through each MEMORY
Location. When the MEMORY Location you want is shown on the display, press and hold
the SET BUTTON until PASS shows on the display. PASS confirms the MEMORY location
data has been deleted.
Scale will turn off automatically once all MEMORY locations have cycled through.
4. To set a new Starting Weight, see Getting Started – Setting “Starting Weight”.
USER
Figure 2
USER
Figure 3
3
Page 5
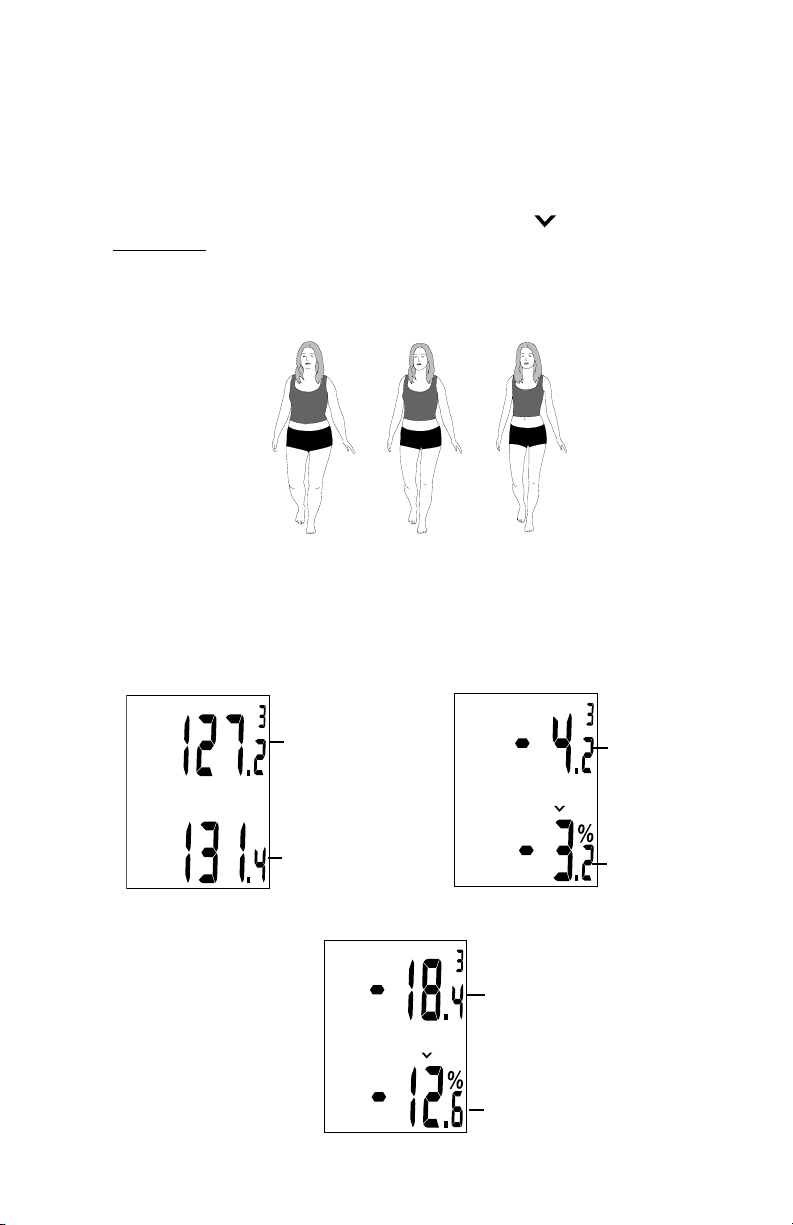
EXAMPLE 1: Three months ago, USER 3 had a Starting Weight of 145.6 lbs. She last
USER
lb
WT
USER
lb
WT TL
USER
lb
WT TL
weighed herself one week ago and weighed 131.4 lbs. Today, she weighs 127.2 lbs.
1. First, her CURRENT and LAST weight, in pounds, are shown on the screen (Figure 4).
2. Next, the amount of weight she has lost (indicated by the
symbol) since she
last weighed herself one week ago, is shown on the screen, as both pounds and
percentage of weight lost (Figure 5).
3. Finally, the TOTAL amount of weight she has lost since Day 1, is shown on the
screen, as both TOTAL pounds lost and TOTAL percentage of weight lost (Figure 6).
EXAMPLE 1:
Day 1
1 Week Ago
Today
LAST WT
145.6 lbs
(Starting Weight)
USER
lb
Figure 4
User 3
Current Weight
Last Weight
User 3:
131.4 lbs
(Last Weight)
USER
WT TL
Figure 6
User 3:
127.2 lbs
(Current Weight)
USER
lb
Pounds Lost
WT
% Weight Lost
Figure 5
lb
Total Pounds Lost
Total % Weight Lost
4
Page 6

Reaching Target Weight
Maintaining proper weight is essential to healthy living. The Body Mass Index (BMI) is
the most widely accepted measurement of weight according to health professionals.
Use the chart below to determine your own BMI by matching your height in the left
hand column with your weight in the top row. Your BMI is represented by the number
that is a match between your height and your weight. Remember to eat right and
exercise.
Body Mass Index
BODY WEIGHT (lbs.)
290
280
270
260
250
240
230
220
210
200
190
140
130
120
110
100
21
5’0”
19
20
5’1”
18
20
5’2”
18
19
5’3”
17
18
5’4”
17
18
5’5”
16
17
5’6”
16
17
5’7”
15
16
5’8”
15
16
5’9”
14
15
5’10”
14
HEIGHT (ft./in.)
15
5’11”
14
14
6’0”
13
14
6’1”
13
14
6’2”
12
13
6’3”
12
13
6’4”
12
13
6’5”
11
29
27
25
23
28
26
24
22
27
25
23
22
26
24
23
21
25
24
22
20
25
23
21
20
24
22
21
19
23
22
20
18
22
21
19
18
22
20
19
17
21
20
18
17
21
19
18
16
20
19
17
16
19
18
17
15
19
18
16
15
18
17
16
14
18
17
15
14
17
16
15
14
37
35
33
31
36
34
32
30
34
33
31
29
33
32
30
28
32
31
29
27
31
30
28
26
30
29
27
25
29
28
26
25
28
27
25
24
28
26
25
23
27
25
24
23
26
25
23
22
25
24
23
21
25
23
22
21
24
23
21
20
23
22
21
19
23
21
20
19
22
21
20
19
45
43
41
39
44
42
39
37
42
40
38
36
41
39
37
35
40
38
36
34
38
37
35
33
37
36
34
32
36
35
33
31
35
34
32
30
34
33
31
29
33
32
30
28
32
31
29
28
31
30
28
27
30
29
27
26
30
28
27
25
29
28
26
24
28
27
26
24
27
26
25
24
53
51
49
47
51
49
47
45
50
48
46
44
48
46
44
43
46
45
43
41
45
43
42
40
44
42
40
39
42
41
39
38
41
40
38
37
40
39
37
36
39
37
36
35
38
36
35
34
37
35
34
33
36
34
33
32
35
33
32
31
34
33
31
30
33
32
31
29
32
31
30
29
310
300
57
55
53
51
50
48
47
45
44
43
41
40
39
38
37
36
35
34
33
61
59
55
59
57
53
57
55
52
55
53
50
53
52
48
52
50
47
50
49
46
49
47
44
47
46
43
46
44
42
45
43
41
43
42
39
42
41
38
41
39
37
40
39
36
39
38
35
38
37
37
36
34
350
340
330
320
69
67
65
63
66
64
63
61
64
62
61
59
62
60
59
57
60
59
57
55
58
57
55
53
57
55
53
52
55
53
52
50
53
52
50
49
52
50
49
47
50
49
47
46
49
48
46
45
48
46
45
44
46
45
44
42
45
44
42
41
44
43
41
40
43
41
40
39
42
40
39
38
180
170
160
150
390
380
370
360
76
74
72
71
74
72
70
68
72
70
68
66
69
67
66
64
67
65
64
62
65
63
62
60
63
62
60
58
61
60
58
57
59
58
56
55
58
56
55
53
56
55
53
52
55
53
52
50
53
52
50
49
52
50
49
48
50
49
48
46
49
48
46
45
48
46
45
44
46
45
44
43
BMI Ranges
(For adults 20 yrs. & older)
Underweight: Less than 18.5
Normal: 18.5-24.9
Overweight: 25.0-29.9
Obese: 30.0-39.9
Extremely Obese: Greater than 40.0
400
78
76
73
71
69
67
65
63
61
59
58
56
54
53
51
50
49
48
NOTE: BMI has some limitations. It can overestimate body fat in people who are
very muscular, and it can underestimate body fat in people who have lost muscle
mass, such as the elderly. Consult your physician to determine what is most ideal
for you.
5
Page 7

Low Battery
This scale is equipped with a low battery indicator. Replace the batteries when “Lo” is
displayed or readings grow dim or become irregular.
Battery Replacement
1. Use 4 AA batteries only.
2. Open battery compartment on bottom of unit by pushing tab in direction of “open”
arrow and lifting up hinged lip.
3. Remove old batteries from compartment.
4. When installing batteries, observe proper +/- polarities as marked inside the battery
compartment. Incorrect battery installation may cause damage to the unit. Do
not mix different types of batteries together (e.g. alkaline with carbon-zinc or old
batteries with new).
5. Close the battery cover. Be sure it clicks shut.
BATTERY PRECAUTIONS
• Donotmixoldandnewbatteries.
• Donotmixalkaline,standard(carbon-zinc),orrechargeable(ni-cad,ni-mh,etc)
batteries.
• Cleanthebatterycontactsandalsothoseofthedevicepriortobattery
installation.
• Removeusedbatteriespromptly.
• Iftheunitisnotgoingtobeusedforalongperiodoftime,removebatteriesto
prevent damage due to possible battery leakage.
NOTE: Please recycle or dispose of batteries per local regulations.
WARNING: Batteries may pose a choking hazard. Do not let children handle
batteries.
Trouble Shooting
In Case of Difficulty...
1. Move scale to a location where it will not be bumped. If scale is bumped while being
activated or while in use, an inaccurate reading may occur. Initialize the scale as
described in First Time Setup #4.
2. Make sure the batteries are properly installed.
Note: Special Displays
Weight Mode: Unstable weight, begin again
Weight over load; remove weight immediately
Low battery; Replace batteries
Lo
6
Page 8

Precautions
1. Clean exposed parts with a soft, slightly damp cloth. To remove stains, use a mild
soap. Never use detergents, excess water, treated cloths, harsh cleaning agents, or
sprays.
2. Do not immerse the scale in water.
3. Do not attempt to lubricate or open the scale casing as this will void warranty.
4. Treat the scale with care. It contains sensitive electronic parts. Avoid rough
treatment. Do not jump on, drop or kick the scale. Treat it with care to ensure the
best performance.
5. This scale is designed to read weights between 25 - 400 lbs, 12 - 180 kgs and 1 st
11 lbs - 28 st 8 lbs in graduations of 0.2 lbs or 0.1 kgs. To prevent damage, do not
place more than 400 lbs, 180 kgs or 28 st 8 lb (stones) on it.
6. Do not store the scale where you store cleaning chemicals. The vapors from some
household products may affect the electronic components of the scale. Do not store
the scale resting on its side.
7. This scale is an extremely sensitive weighing device. In order to prevent run down of
the batteries, do not store anything on the scale.
8. Remove the batteries if the scale will not be used for a long period of time.
9. Use care when stepping on the scale so it does not tip.
10. Be careful that the floor is not wet, or the scale may move.
NOTE: This scale is designed for personal use only, not for professional,
commercial or industrial use.
This device complies with Part 15 of the FCC Rules. Operation is subject to the following
two conditions: (1) this device may not cause harmful interference, and (2) this device
must accept any interference received, including interference that may cause undesired
operation.
Note: The manufacturer is not responsible for any radio or TV interference caused by
unauthorizedmodicationstothisequipment.Suchmodicationscouldvoidtheuser
authority to operate the equipment.
Note: This equipment has been tested and found to comply with the limits for a Class
B digital device, pursuant to Part 15 of the FCC Rules. These limits are designed to
provide reasonable protection against harmful interference in a residential installation.
This equipment generates, uses, and can radiate radio frequency energy and, if not
installed and used in accordance with the instructions, may cause harmful interference
to radio communications. However, there is no guarantee that interference will not occur
in a particular installation. If this equipment does cause harmful interference to radio
or television reception, which can be determined by turning the equipment off and on,
the user is encouraged to try to correct the interference by one or more of the following
measures:
•Reorientorrelocatethereceivingantenna.
•Increasetheseparationbetweentheequipmentandreceiver.
•Connecttheequipmentintoanoutletonacircuitdifferentfromthattowhich
the receiver is connected.
•Consultthedealeroranexperiencedradio/TVtechnicianforhelp.
7
Page 9

Five (5) Year Limited Warranty
This scale is warranted against defects in materials of workmanship five (5) years of the original purchaser from date
of retail purchase (excluding batteries). It does not cover damages or wear resulting from accident, misuse, abuse,
commercial use, or unauthorized adjustment and/or repair. Do not return to retailer. Should this scale require service
(or replacement at our option) while under warranty, please pack the item in the original packaging and return it
prepaid, along with store receipt showing date of purchase and a note explaining reason for return to:
Taylor Precision Products
2220 Entrada Del Sol, Suite A
Las Cruces, New Mexico 88001 USA
There are no express warranties except as listed above. This warranty gives you specific legal rights, and you may
have other rights which vary from state to state. For additional product information, or warranty information outside
the USA, please contact us through www.taylorusa.com.
©2012 Taylor Precision Products, Inc. and its affiliated companies, all rights reserved. HoMedics® is a registered
trademark, and Progress Tracker™ is a trademark of HoMedics, Inc. and its affiliated companies. All rights reserved.
Made in China.
Not legal for trade.
Distributed by
Taylor Precision Products, Inc.
Oak Brook, IL 60523, U.S.A.
IB-SC373C
Page 10

Balanza Digital
ProgressTracker™
Manual de instrucciones e
información de garantía
Garantía limitada de
5 años
SC-373
Page 11

Gracias por su compra de la Balanza Digital de HoMedics. Este producto, al igual que toda la línea
de productos HoMedics, está fabricado con mano de obra de alta calidad para brindarle años de
servicio confiable. Esperamos que lo encuentre como el mejor producto de su clase.
Configuración para el primer uso
1. Esta balanza funciona con cuatro baterías AA (incluidas). Instale las baterías antes de proceder.
Asegúrese de respetar la posición correcta de las polaridades +/- como se indica dentro del
compartimiento de las baterías.
2. Algunos modelos tienen una etiqueta de adherencia por estática en el lente, para evitar
rasguños. Quítela antes de usar.
3. Ajuste el interruptor de la unidad de medida “LB/KG/ST” ubicado al respaldo de la unidad,
para libras, kilos o stones.
ATENCIÓN: El interruptor viene preajustado de fábrica para libras.
4. La balanza debe inicializarse antes del primer uso o después de instalar las baterías. Párese con
cuidado en la balanza, ignore la lectura, y vuelva a bajarse de ella. Espere hasta que la balanza
se apague automáticamente. La balanza está ahora lista para usar.
ATENCIÓN: Puede que la balanza deba inicializarse nuevamente si se mueve
o se golpea.
Sugerencias Útiles:
Es normal que su peso fluctúe durante el día y de un día para otro.
Unos cambios pequeños de su peso son normales. Para lograr los mejores resultados:
1. Pésese sin ropa cuando sea posible. El peso de la ropa puede variar.
2. Pésese a la misma hora del día y bajo las mismas condiciones.
3. Permita un margen de fluctuación en el peso debido a comidas o bebidas en su organismo.
Para Empezar – Ajuste del “Starting Weight” (Peso inicial)
Coloque la balanza en una superficie firme y plana. Los pisos disparejos o con alfombras pueden
afectar la precisión. Decida cuál ubicación en MEMORIA usted desea usar (de 1 a 4).
1. Con la balanza apagada, presione el BOTÓN SET (ajuste) y use los BOTONES
o para
seleccionar la ubicación de MEMORIA.
2. Presione y sostenga el botón SET hasta que 0.0 aparezca en la ventana superior de la pantalla.
3. Súbase a la balanza. Ponga cuidado para que la balanza no se vuelque. Cerciórese que el suelo
no esté mojado, o la balanza podría moverse. Coloque los pies parejos
sobre la plataforma (Figura 1). Quédese quieto mientras la balanza
calcula su peso ACTUAL (current). La pantalla muestra ambos, el peso
ACTUAL (current) y el MÁS RECIENTE (last).
ATENCIÓN: 0.0 aparece en la ventana del peso MÁS RECIENTE (last).
4. La balanza se apaga automáticamente.
5. Repita los pasos de 1 a 4 de arriba para ingresar el Peso Inicial de otros
usuarios.
Para prevenir la cancelación accidental de un Peso Inicial, usted no
puede ingresar el Peso Inicial si la posición de MEMORIA de un usuario ya está
Figura 1
tomada. Use una ubicación de MEMORIA
diferente o refiérase a la sección Borrar Peso Inicial de la Memoria, en la página 11.
Uso de la Balanza – Modo ProgressTracker (registro de progreso)
1. Con la balanza apagada, presione el BOTÓN SET.
2. Use los BOTONES
o para encontrar su ubicación de MEMORIA del Peso Inicial
personal (1-4).
3. Presione y sostenga el botón SET hasta que 0.0 aparezca en la ventana superior de la pantalla.
4. Súbase a la balanza.
5. El Peso ACTUAL (current) y MÁS RECIENTE (last) aparecen durante 4 segundos (Figura 4).
6. Luego, Libras perdidas desde el Peso MÁS RECIENTE y el % de libras perdidas desde el Peso
MÁS RECIENTE (last) aparecen por 4 segundos (Figura 5).
7. Finalmente, el TOTAL de libras perdidas desde el Peso Inicial y el % TOTAL de libras perdidas
desde el Peso Inicial aparecen por 4 segundos (Figura 6).
10
Page 12

ATENCIÓN: Este paso sólo aparece si usted se ha pesado al menos dos veces desde
USER
lb
USER
lb
WT
USER
lb
USER
WT TL
USER
lb
USER
lb
WT TL
que ha ingresado su Peso Inicial.
8. La balanza se apaga automáticamente.
ATENCIÓN: Las libras perdidas y el % de libras perdidas aparecen como números
negativos bajo el símbolo
números positivos bajo el símbolo
. Las libras ganadas y el % de libras ganadas aparecen como
.
Cuando la escala se usa durante un largo período de tiempo, los cambios de peso
aparecen en tres pantallas consecutivas. Vea el ejemplo 1 en la página 12.
Uso de la balanza – Modo de Peso Solamente
1. Súbase a la balanza y permanezca quieto.
2. El peso queda fijo, destella y queda en pantalla por 10 segundos.
3. La balanza se apaga automáticamente.
Uso de la balanza – Para borrar el Peso Inicial (Starting Weight) de la memoria
1. Con la balanza apagada, presione los BOTONES SET,
y al mismo tiempo hasta que
dE + USER 1 aparece en la ventana superior (Figura 2).
2. Para borrar el USER 1 (usuario 1), presione y sostenga el BOTÓN SET hasta que PASS
aparezca en la ventana de la pantalla (Figura 3).
3. Si NO desea borrar el USER 1, espere que la pantalla pase por cada ubicación de
MEMORIA. Cuando la ubicación de MEMORIA que usted desea aparece en pantalla,
presione y sostenga el BOTÓN SET hasta que PASS aparezca en pantalla. PASS
confirma que los datos en la ubicación de MEMORIA han sido borrados.
La balanza se apaga automáticamente una vez que ha pasado por todas las ubicaciones
de MEMORIA.
4. Para ingresar un Nuevo Peso inicial (starting weight), vea Para Empezar – Ajuste del
“Starting Weight” (peso inicial).
USER
Figura 2
USER
Figura 3
11
Page 13

EJEMPLO 1: Hace tres meses, el USUARIO 3 tenía un Peso inicial de 145,6 lbs.
USER
lb
WT
USER
lb
WT TL
USER
lb
WT TL
Ella se pesó la última vez hace una semana y su peso fue de 131,4 lbs. Hoy, su
peso es de 127,2 lbs.
1. Primero aparecen en pantalla su peso ACTUAL (current) y MÁS RECIENTE (last),
en libras (Figura 4).
2. Después, aparece en pantalla la cantidad de peso que ella ha perdido (indicado
por el símbolo
) desde la última vez que ella se pesó hace una semana, en
libras y en porcentaje de peso perdido (Figura 5).
3. Finalmente, aparece en pantalla la cantidad TOTAL de peso que ella ha perdido
desde el Día 1, como TOTAL de libras perdidas y porcentaje TOTAL de peso
perdido (Figura 6) .
EJEMPLO 1:
Día 1
Hace 1 Semana
Hoy
LAST WT
USER
Figura 4
Usuario 3:
145,6 libras
(Peso inicial –
Starting Weight)
lb
Peso actual
(Current Weight)
Peso más reciente
(Last Weight)
Usuario 3:
131,4 libras
(Peso más
reciente –
Last Weight)
USER
WT TL
Figura 6
Current Weight)
lb
Libras perdidas
(Pounds Lost)
% de peso
perdido (%
Weight Lost)
Usuario 3:
127,2 libras
(Peso actual –
USER
WT
Figura 5
lb
Total de libras
perdidas (Total
Pounds Lost)
% total de peso
perdido (Total %
Weight Lost)
12
Page 14

100
19
18
18
17
17
16
16
15
15
14
14
14
13
13
12
12
12
11
5’0”
5’1”
5’2”
5’3”
5’4”
5’5”
5’6”
5’7”
5’8”
5’9”
5’10”
5’11”
6’0”
6’1”
6’2”
6’3”
6’4”
6’5”
110
21
20
20
19
18
18
17
17
16
16
15
15
14
14
14
13
13
13
120
23
22
22
21
20
20
19
18
18
17
17
16
16
15
15
14
14
14
130
25
24
23
23
22
21
21
20
19
19
18
18
17
17
16
16
15
15
140
27
26
25
24
24
23
22
22
21
20
20
19
19
18
18
17
17
16
150
29
28
27
26
25
25
24
23
22
22
21
21
20
19
19
18
18
17
160
31
30
29
28
27
26
25
25
24
23
23
22
21
21
20
19
19
19
170
33
32
31
30
29
28
27
26
25
25
24
23
23
22
21
21
20
20
180
35
34
33
32
31
30
29
28
27
26
25
25
24
23
23
22
21
21
190
37
36
34
33
32
31
30
29
28
28
27
26
25
25
24
23
23
22
200
39
37
36
35
34
33
32
31
30
29
28
28
27
26
25
24
24
24
210
41
39
38
37
36
35
34
33
32
31
30
29
28
27
27
26
26
25
220
43
42
40
39
38
37
36
35
34
33
32
31
30
29
28
28
27
26
230
45
44
42
41
40
38
37
36
35
34
33
32
31
30
30
29
28
27
240
47
45
44
43
41
40
39
38
37
36
35
34
33
32
31
30
29
29
250
49
47
46
44
43
42
40
39
38
37
36
35
34
33
32
31
31
30
260
51
49
48
46
45
43
42
41
40
39
37
36
35
34
33
33
32
31
270
53
51
50
48
46
45
44
42
41
40
39
38
37
36
35
34
33
32
280
55
53
51
50
48
47
45
44
43
41
40
39
38
37
36
35
34
33
290
57
55
53
52
50
48
47
46
44
43
42
41
39
38
37
36
35
34
300
59
57
55
53
52
50
49
47
46
44
43
42
41
39
39
38
37
36
310
61
59
57
55
53
52
50
49
47
46
45
43
42
41
40
39
38
37
320
63
61
59
57
55
53
52
50
49
47
46
45
44
42
41
40
39
38
330
65
63
61
59
57
55
53
52
50
49
47
46
45
44
42
41
40
39
340
67
64
62
60
59
57
55
53
52
50
49
48
46
45
44
43
41
40
350
69
66
64
62
60
58
57
55
53
52
50
49
48
46
45
44
43
42
360
71
68
66
64
62
60
58
57
55
53
52
50
49
48
46
45
44
43
370
72
70
68
66
64
62
60
58
56
55
53
52
50
49
48
46
45
44
380
74
72
70
67
65
63
62
60
58
56
55
53
52
50
49
48
46
45
390
76
74
72
69
67
65
63
61
59
58
56
55
53
52
50
49
48
46
400
78
76
73
71
69
67
65
63
61
59
58
56
54
53
51
50
49
48
BODY WEIGHT (lbs.)
HEIGHT (ft./in.)
Logrando el Peso Deseado
170
33
32
31
30
29
28
27
26
25
25
24
23
23
22
21
21
20
20
210
200
190
180
41
39
37
35
39
37
36
34
38
36
34
33
37
35
33
32
36
34
32
31
35
33
31
30
34
32
30
29
33
31
29
28
32
30
28
27
31
29
28
26
30
28
27
25
29
28
26
25
28
27
25
24
27
26
25
23
27
25
24
23
26
24
23
22
26
24
23
21
25
24
22
21
PESO CORPORAL (libras)
230
220
45
43
44
42
42
40
41
39
40
38
38
37
37
36
36
35
35
34
34
33
33
32
32
31
31
30
30
29
30
28
29
28
28
27
27
26
270
260
250
240
51
49
47
49
47
45
48
46
44
46
44
43
45
43
41
43
42
40
42
40
39
41
39
38
40
38
37
39
37
36
37
36
35
36
35
34
35
34
33
34
33
32
33
32
31
33
31
30
32
31
29
31
30
29
290
280
300
57
55
53
59
55
53
51
57
53
51
50
55
52
50
48
53
50
48
46
52
48
47
45
50
47
45
44
49
46
44
42
47
44
43
41
46
43
41
40
44
42
40
39
43
41
39
38
42
39
38
37
41
38
37
36
39
37
36
35
39
36
35
34
38
35
34
33
37
33
32
36
34
340
330
320
310
67
65
63
61
64
63
61
59
62
61
59
57
60
59
57
55
59
57
55
53
57
55
53
52
55
53
52
50
53
52
50
49
52
50
49
47
50
49
47
46
49
47
46
45
48
46
45
43
46
45
44
42
45
44
42
41
44
42
41
40
43
41
40
39
41
40
39
38
40
39
38
37
360
350
71
69
68
66
66
64
64
62
62
60
60
58
58
57
57
55
55
53
53
52
52
50
50
49
49
48
48
46
46
45
45
44
44
43
43
42
400
390
380
370
78
76
74
72
76
74
72
70
73
72
70
68
71
69
67
66
69
67
65
64
67
65
63
62
65
63
62
60
63
61
60
58
61
59
58
56
59
58
56
55
58
56
55
53
56
55
53
52
54
53
52
50
53
52
50
49
51
50
49
48
50
49
48
46
49
48
46
45
48
46
45
44
Mantener el peso apropiado es fundamental para una vida saludable. El Índice de Masa
Corporal (BMI) es la medida del peso más comúnmente aceptada según los profesionales
de la salud. Use la tabla que aparece debajo para determinar su propio BMI haciendo
corresponder su altura en la columna de la izquierda con su peso en la línea de arriba.
Su BMI está representado por el número que corresponde entre su altura y su peso.
Recuerde comer adecuadamente y hacer ejercicio.
Índice de Masa Corporal (BMI)
5’0”
5’1”
5’2”
5’3”
5’4”
5’5”
5’6”
5’7”
5’8”
5’9”
5’10”
ALTURA (ft./in.)
5’11”
6’0”
6’1”
6’2”
6’3”
6’4”
6’5”
130
120
110
100
25
23
21
19
24
22
20
18
23
22
20
18
23
21
19
17
22
20
18
17
21
20
18
16
21
19
17
16
20
18
17
15
19
18
16
15
19
17
16
14
18
17
15
14
18
16
15
14
17
16
14
13
17
15
14
13
16
15
14
12
16
14
13
12
15
14
13
12
15
14
13
11
160
150
140
31
29
27
30
28
26
29
27
25
28
26
24
27
25
24
26
25
23
25
24
22
25
23
22
24
22
21
23
22
20
23
21
20
22
21
19
21
20
19
21
19
18
20
19
18
19
18
17
19
18
17
19
17
16
Rangos de BMI
(Para adultos de 20 años y más)
Peso insuficiente: Menos de 18,5
Normal: 18.5 - 24.9
Sobrepeso: 25.0 - 29.9
Obeso: 30.0 - 39.9
Obeso mórbido: Más de 40,0
Atención: El BMI tiene algunas limitaciones. Puede sobreestimar la grasa corporal en
personas que son muy musculosas. Puede subestimar la grasa corporal en personas
que han perdido masa muscular, como los ancianos. Consulte a su médico para
determinar cuál es lo ideal para usted.
13
Page 15

Baterías bajas
Esta balanza está equipada con un indicador de baterías bajas. Reemplace las
baterías cuando aparece “Lo” (bajo), o las lecturas son poco claras o irregulares.
Cambio de las baterías
1. Use sólo 4 baterías AA.
2. Abra el compartimiento de las baterías, que se encuentra en la parte inferior de la
balanza, empujando la lengüeta en dirección de la flecha “open” (abrir)
y levantando la pestaña en bisagra.
3. Retire las baterías viejas del compartimiento.
4. Cuando instala las baterías, respete la posición correcta de las polaridades +/como se indica dentro del compartimiento de las baterías. La instalación incorrecta
de las baterías puede dañar la unidad. No combine diferentes tipos de baterías
(p. ej. alcalinas con cinc-carbono o baterías viejas con nuevas).
5. Cierre la tapa del compartimiento de las baterías. Asegúrese de que cierre con un
chasquido.
PRECAUCIONES SOBRE LA BATERÍAS
• Nomezclebateríasusadasybateríasnuevas.
• Nomezclebateríasalcalinas,estándar(carbón-zinc)orecargables(níquel-
cadmio, níquel-metal hidruro, etc.).
• Limpieloscontactosdelasbateríasaligualquelosdeldispositivoantesde
instalar las baterías.
• Retirelasbateríasusadasrápidamente.
• Silaunidadnosevaausarduranteunperíododetiempoprolongado,retirelas
baterías para evitar daños debido a posibles pérdidas de las baterías.
ATENCIÓN: Por favor recicle o deseche las baterías de acuerdo a las normas
locales.
ADVERTENCIA: Las baterías pueden causar un riesgo de sofocamiento. No deje
que los niños manejen las baterías.
Diagnóstico y resolución de problemas
En Caso de Problemas...
1. Coloque la balanza en un lugar donde no reciba golpes. Si la balanza se golpea
mientas está activada o en uso, puede dar lecturas incorrectas. Para el primer uso
de la balanza, vea Configuración para el primer uso #4.
2. Asegúrese de que las baterías estén instaladas correctamente.
Atención: Símbolos especiales
Modo de Peso: Peso inestable, vuelva a empezar
Exceso de peso; retire el peso de inmediato
Lo
Baterías bajas; Sustituya las baterías
14
Page 16

Precauciones
1. Limpie las partes expuestas con un paño suave, apenas húmedo. Para quitar
manchas, use un jabón suave. No use nunca detergentes, agua en exceso,
paños tratados, productos de rociado por aerosol o agentes de limpieza muy
agresivos.
2. No sumerja la balanza en el agua.
3. No trate de lubricar o abrir la cubierta de la báscula porque esto anularía la garantía.
4. Trate la balanza con cuidado. Contiene piezas electrónicas delicadas. Evite el
manejo descuidado. No la deje caer, no la patee ni salte sobre ella. Trátela con
cuidado para asegurar el mejor funcionamiento.
5. Esta balanza está diseñada para lecturas de peso entre 25 - 400 lbs., 12 – 180 kgs
y 1 stone 11 lbs. - 28 st 8 lbs., en graduaciones de 0,2 lbs. o 0,1 kgs. Para evitar
daños, no coloque más de 400 lbs., 180 kgs. o 28 stones 8 lbs. sobre ella.
6. No guarde la balanza en el mismo lugar donde guarda productos químicos.
Los vapores de algunos productos domésticos pueden afectar a los componentes
electrónicos de la balanza. No guarde la balanza sobre su lado.
7. Esta balanza es un dispositivo para pesar extremadamente sensible. Para evitar el
agotamiento de las baterías, no guarde nada sobre la balanza.
8. Retire las baterías si la balanza no se va a utilizar por un largo tiempo.
9. Ponga cuidado cuando se para en la balanza para que ésta no se vuelque.
10. Cerciórese que el suelo no esté mojado, o la balanza podría moverse.
ATENCIÓN: Esta balanza ha sido diseñada para uso personal solamente, no para
uso profesional, comercial o industrial.
Este dispositivo cumple con la Parte 15 de las Normas FCC. El funcionamiento está sujeto a las dos condiciones siguientes: (1) este dispositivo no puede causar interferencia
dañina y (2) este dispositivo debe aceptar cualquier interferencia recibida, incluyendo
interferencia que pueda causar un funcionamiento no deseado.
Nota: el fabricante no se responsabiliza por ninguna interferencia de radio o TV
causadapormodicacionesnoautorizadasaesteequipo.Talesmodicacionespodrían
anular la autoridad del usuario para operar el equipo.
Nota: este equipo ha sido probado y se ha determinado que cumple con los límites
de un dispositivo digital Clase B de acuerdo con la Parte 15 de las Normas FCC. Estos
límites están diseñados para proporcionar protección razonable contra la interferencia
dañina en una instalación residencial. Este equipo genera, usa y puede emitir energía
de radiofrecuencia y, si no se instala y utiliza de acuerdo con las instrucciones, puede
causar interferencia dañina a las comunicaciones de radio. Sin embargo, no existe
garantía de que la interferencia no ocurrirá en una instalación en particular. Si este
equipo causa interferencia dañina a la recepción de radio o televisión, lo cual puede
determinarse encendiendo y apagando el equipo, se anima al usuario a intentar corregir
la interferencia a través de una o más de las siguientes medidas:
•Cambielaorientaciónoubicacióndelaantenaderecepción.
•Aumentelaseparaciónentreelequipoyelreceptor.
•Conecteelequipoauntomacorrienteenotrocircuito,dondenoestéconectado
el receptor.
•Consultealdistribuidoroauntécnicoderadio/TVexperimentadoparaobtener
ayuda.
15
 Loading...