

Page 1
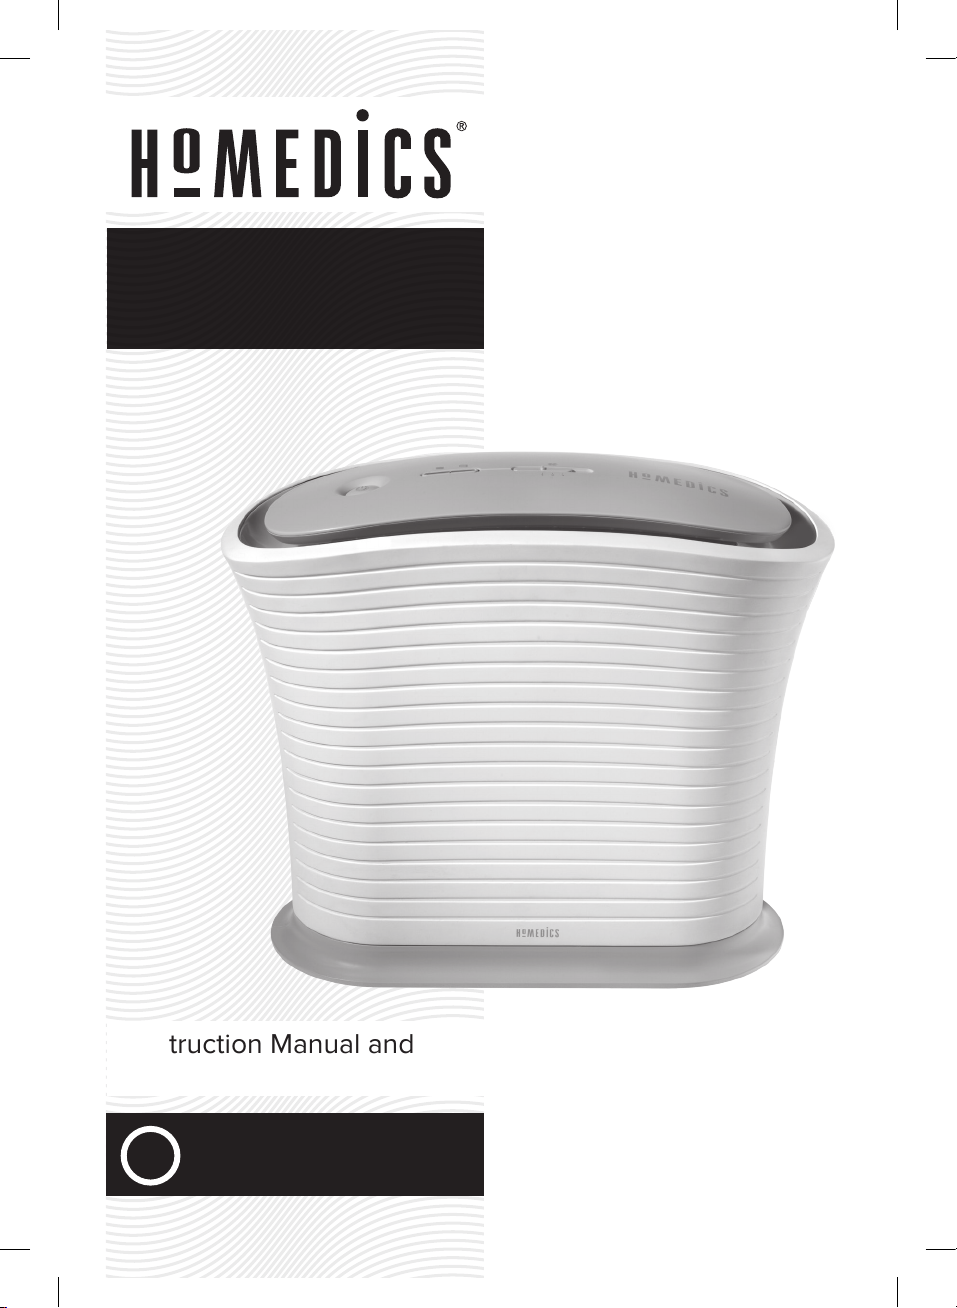
True Hepa
Air Purifier
Instruction Manual and
Warranty Information
year limited warranty
1
AP15AU
iHOM4959 AP15AU manual v3 FA.indd 1 15/09/2016 9:18 AM
Page 2
READ ALL INSTRUCTIONS BEFORE USE. SAVE THESE INSTRUCTIONS FOR FUTURE REFERENCE.
Operating Instructions
Before Turning the Unit On
• Take the air purifier out of the box and remove the clear protective plastic bag.
• Place the air purifier on a firm level surface.
• Locate the pre-filter inside the box and remove the protective plastic bag.
• Install the Pre-filter and make sure the True HEPA filter is firmly in place.
Fig. 1
1. Open the back grill by pulling on
the tabs on either side of the top
of the grill cover. Fig. 1
2. Open the cover outward until
Main Features of the HoMedics True HEPA Air Purifier
Operating Instructions
Before Turning the Unit On
• Take the air purifier out of the box and remove the clear protective plastic bag.
• Place the air purifier on a firm level surface.
• Locate the pre-filter inside the box and remove the protective plastic bag.
• Install the pre-filter and make sure the True HEPA filter is firmly in place.
Fig. 1
Fig. 2
1. Open the back grill by pulling on
the tabs on either side of the top
of the grill cover. Fig. 1
2. Open the cover outward until
the tabs at the bottom of the grill
cover easily slide away from the
unit. Fig. 2
3. The top of the carbon pre-filter
has 2 slots for installation. Hang
the carbon pre-filter on the
top tabs and secure under the
bottom tabs. Fig. 3
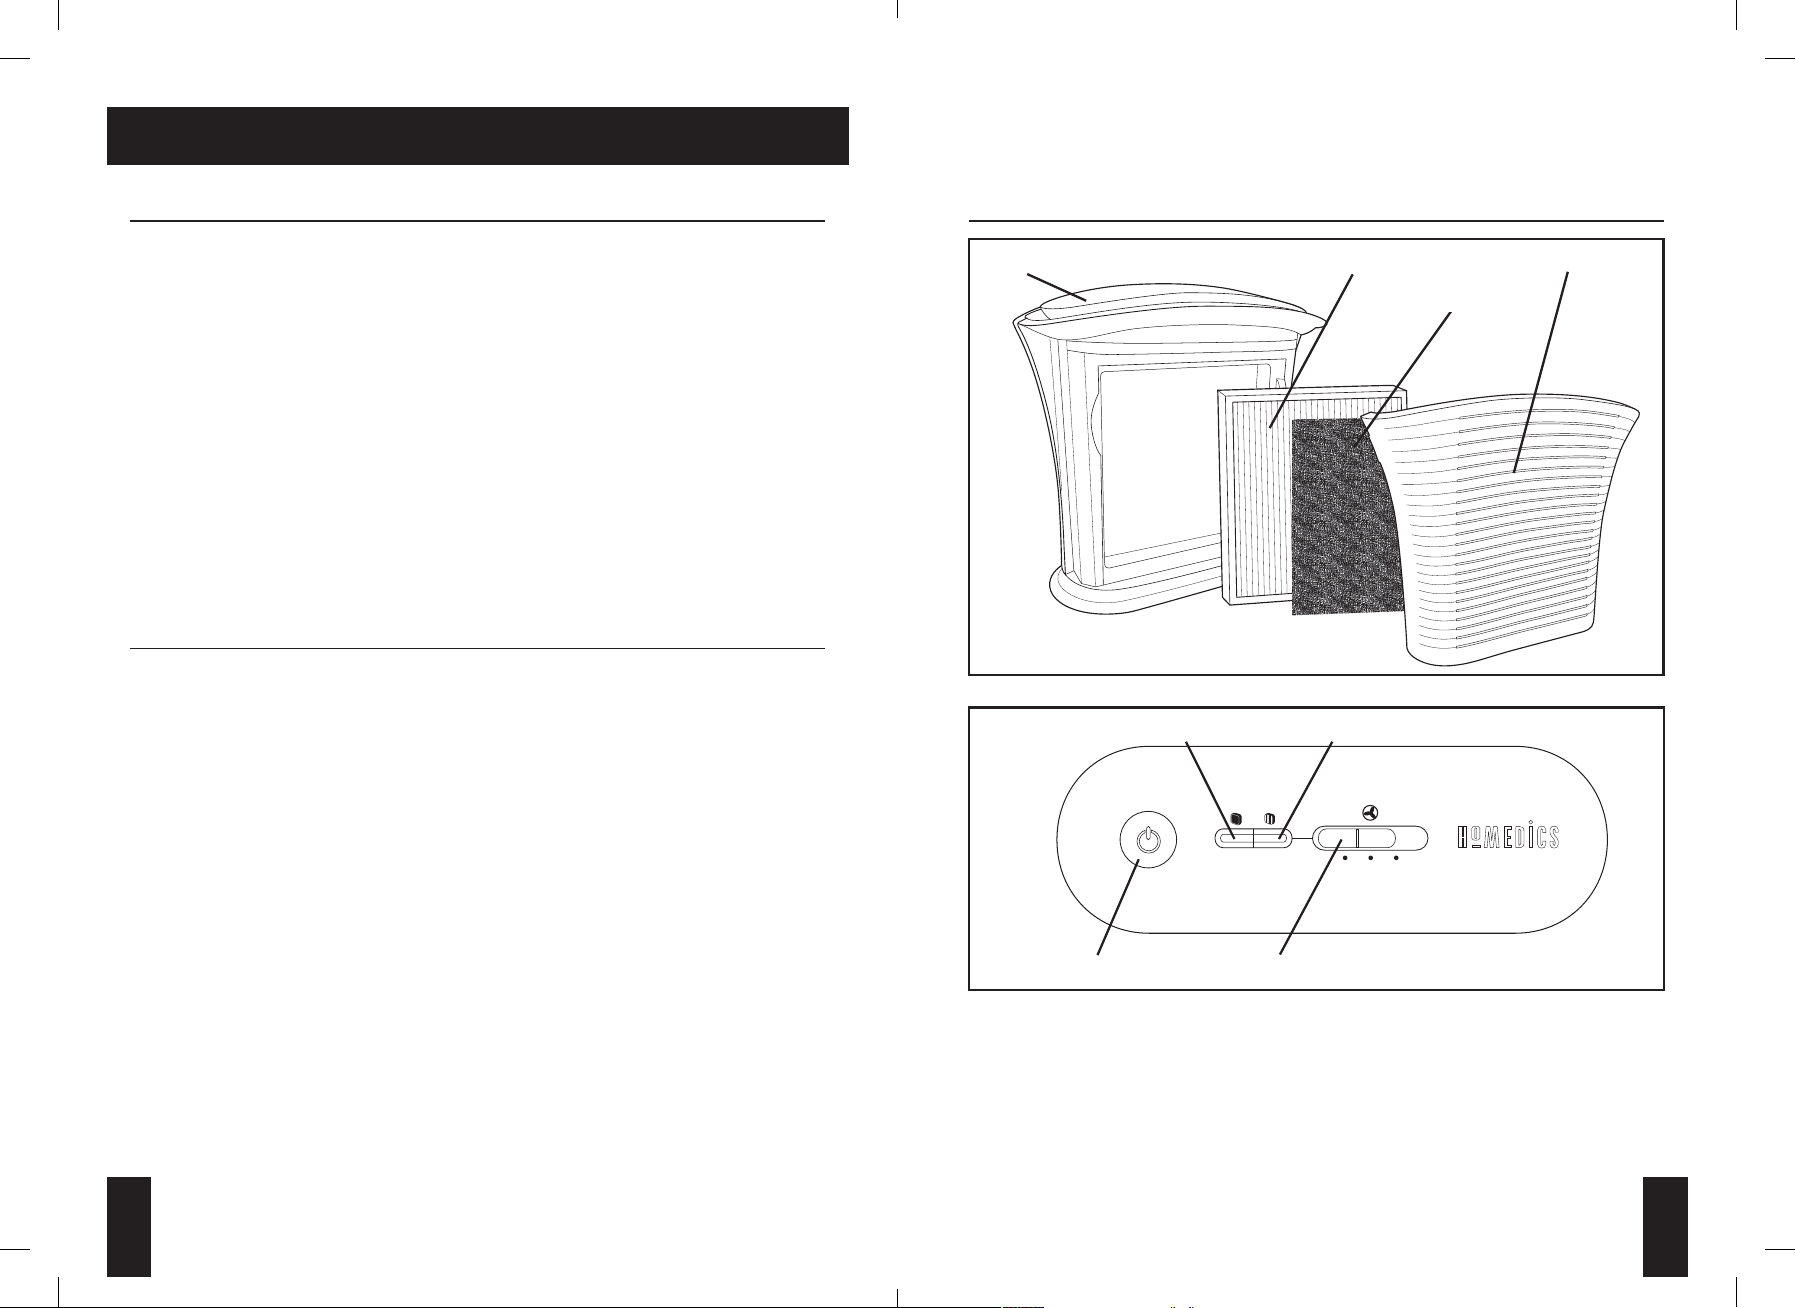
Main Features of the HoMedics True HEPA Air Purifier
Control Panel
Main Unit
Pre-Filter
HEPA Filter
Grill Cover
WHEN USING ELECTRICAL PRODUCTS, ESPECIALLY WHEN CHILDREN ARE PRESENT, BASIC
SAFETY PRECAUTIONS SHOULD ALWAYS BE FOLLOWED, INCLUDING THE FOLLOWING:
• Always unplug the air purifier from the electrical outlet immediately after using and before cleaning or
replacing filters.
• Keep cord away from heated surfaces.
• Always place the air purifier on a firm, level surface.
• Always place the air purifier at least six (6) inches away from walls and three (3) feet from heat sources such
as stoves, radiators, or heaters.
• DO NOT reach for an appliance that has fallen into water. Unplug it immediately.
• DO NOT place or store appliance where it can fall or be pulled into a tub or sink.
• DO NOT place in or drop into water or other liquid.
• Keep dry - DO NOT operate in wet or moist conditions.
• Check your air purifier cord and plug connections. Faulty wall outlet connections or loose plugs can cause the
outlet or plug to overheat. Be sure the plug fits tightly in the outlet.
• Appliance not indended for use by persons (including children) with reduced physical, sensory or mental
capabilities, or lack of experience and knowledge, unless they have been given supervision or instruction
concerning use of appliance by person responsible for their safety.
• Children should be supervised to ensure they do not play with appliance.
WARNING:
TO REDUCE THE RISK OF BURNS, ELECTRIC SHOCK, FOR OR INJURY TO PERSONS:
• Always unplug the air purifier when not in use.
• Do not operate the air purifier with a damaged cord or plug, or after the air purifier malfunctions, or has been
dropped or damaged in any manner. Return to HoMedics Consumer Relations for examination, electrical or
mechanical adjustment, or repair.
• This air purifier is not intended for use in bathroom, laundry areas and similar moist indoor locations.
• Do not run cord under carpeting. Do not cover cord with throw rugs, runners or similar coverings. Do not route
cord under furniture or appliances. Arrange cord away from trac areas where it can be tripped over.
• To disconnect the air purifier, first turn controls to the OFF position, then remove plug from outlet.
• Do not tilt or move the air purifier while it is in operation. Shut o and remove plug from outlet before moving.
• Do not insert or allow foreign objects to enter any ventilation or exhaust opening as this may cause an electric
shock or fire, or damage the air purifier.
• Do not block air intakes or exhaust in any manner. Do not use on any soft surface, like a bed, where openings
may become blocked.
• Use this air purifier only for its intended use as described in this manual. Any other use not recommended by
the manufacturer may cause fire, electric shock, or injury to persons.
• DO NOT use outdoors.
• This product is intended for household use only.
MAIN FEATURES:IMPORTANT SAFEGUARDS:
Control Panel
Main Unit
HEPA Filter
Carbon Pre-Filter
Pre-Filter
Replace Pre-filter Indicator Button Replace HEPA Filter Indicator Button
Power ON/OFF
Fan Speed Selection (Low/Medium/High)
1 2 3
Grill Cover
2 3
iHOM4959 AP15AU manual v3 FA.indd 2-3 15/09/2016 9:18 AM
Page 3

HOW TO USE:
Operating Instructions
Before Turning the Unit On
• Take the air purifier out of the box and remove the clear protective plastic bag.
• Place the air purifier on a firm level surface.
• Locate the pre-filter inside the box and remove the protective plastic bag.
• Install the Pre-filter and make sure the True HEPA filter is firmly in place.
1. Open the back grill by pulling on
the tabs on either side of the top
of the grill cover. Fig. 1
Operating Instructions
Before Turning the Unit On
• Take the air purifier out of the box and remove the clear protective plastic bag.
• Place the air purifier on a firm level surface.
• Locate the pre-filter inside the box and remove the protective plastic bag.
• Install the Pre-filter and make sure the True HEPA filter is firmly in place.
Fig. 1
1. Open the back grill by pulling on
the tabs on either side of the top
of the grill cover. Fig. 1
2. Open the cover outward until
the tabs at the bottom of the grill
cover easily slide away from the
unit. Fig. 2
Operating Instructions
Before Turning the Unit On
• Take the air purifier out of the box and remove the clear protective plastic bag.
• Place the air purifier on a firm level surface.
• Locate the pre-filter inside the box and remove the protective plastic bag.
• Install the Pre-filter and make sure the True HEPA filter is firmly in place.
Fig. 1
Fig. 2
1. Open the back grill by pulling on
the tabs on either side of the top
of the grill cover. Fig. 1
2. Open the cover outward until
the tabs at the bottom of the grill
cover easily slide away from the
unit. Fig. 2
3. The top of the carbon pre-filter
has 2 slots for installation. Hang
the carbon pre-filter on the
top tabs and secure under the
bottom tabs. Fig. 3
automatically after the selected timer interval has elapsed. Use the timer setting
whenever you wish to maintain air quality over a given time period (up to 12
hours), but do not wish to leave your air purifier running continuously.
To select timed operation, press the TIMER Control until desired timer setting
is reached. Timer interval selected is indicated by the illuminated time interval to
the right of the timer control. To deselect timed operation, cycle through all timer
settings until no timer interval is illuminated.
Replace Pre-Filter Indicator Button
4. The True HEPA filter will be resting
inside the unit. Make sure the filter is
firmly seated inside the unit with the Air
Flow arrows pointing toward the inside
of the air purifier. Fig 4
Fig. 4
5. Place the tabs at the bottom of the grill
cover into the base of the unit. Gently
push the grill cover back into place
until you hear a click sound indicating
that the grill is firmly latched. Fig. 5
Plug the power cord into a standard
AC outlet.
automatically after the selected timer interval has elapsed. Use the timer setting
whenever you wish to maintain air quality over a given time period (up to 12
hours), but do not wish to leave your air purifier running continuously.
To select timed operation, press the TIMER Control until desired timer setting
is reached. Timer interval selected is indicated by the illuminated time interval to
the right of the timer control. To deselect timed operation, cycle through all timer
settings until no timer interval is illuminated.
Replace Pre-Filter Indicator Button
The Replace Pre-Filter Indicator illuminates when to replace the Odor Reducing Pre-
Filter based on the air purifier’s hours of use.
Replace True HEPA Filter Indicator Button
The Replace True HEPA Filter Indicator illuminates when to replace the True HEPA
filter based on the air purifier’s hours of use.
Filter Replacement
It is recommended to check the filters on occasion if used to remove stronger odors
or under heavy pollen conditions.
4. The True HEPA filter will be resting
inside the unit. Make sure the filter is
firmly seated inside the unit with the Air
Flow arrows pointing toward the inside
of the air purifier. Fig 4
• Take the air purifier out of the box and remove the clear protective plastic bag.
• Place the air purifier on a firm level surface.
• Locate the Pre-Filter inside the box and remove the protective plastic bag.
1. Open the back grill by pulling on the tabs on either side of the top of the grill cover. Fig. 1
2. Open the cover outward until the tabs at the bottom of the grill cover easily slide away from the unit. Fig. 2
3. The top of the carbon pre-filter has 2 slots for installation. Hang the carbon pre-filter on the top tabs and
secure under the bottom tabs. Fig. 3
4. The True HEPA filter will be resting inside the unit. Make sure the filter is firmly seated inside the unit with the
Air Flow arrows pointing toward the inside of the air purifier. Fig 4
5. Place the tabs at the bottom of the grill cover into the base of the unit. Gently push the grill cover back into
place until you hear a click sound indicating that the grill is firmly latched. Fig. 5
Plug the power cord into a standard 240V power outlet.
Fig. 1
Fig. 4
Fig. 2
Fig. 5
Fig. 3
HOW TO USE CONTINUED:
1. ON/OFF AND FAN SPEED SETTINGS
• To turn the air purifier on, press the ON/OFF button. When the air purifier is on, the ON/OFF button and fan
speed indicator will illuminate and the air purifier will start to operate.
• To turn the air purifier display lights o, press the ON/OFF button a second time.
• To turn the air purifier o, Press the ON/OFF button a third time.
• This air purifier has 3 fan speed settings: LOW (1), MEDIUM (2), and HIGH (3). The higher the fan speed setting,
the faster the air will be purified. To select or change fan speed, press the FAN SPEED button until desired
speed is reached.
REPLACE PREFILTER INDICATOR BUTTON
The Replace Pre-Filter Indicator illuminates when to replace the Odour Reducing Pre-Filter based on the air
purifier’s hours of use.
REPLACE TRUE HEPA FILTER INDICATOR BUTTON
The Replace True HEPA Filter Indicator illuminates when to replace the True HEPA filter based on the air purifier’s
hours of use.
FILTER REPLACEMENT
It is recommended to check the filters on occasion if used to remove stronger odours or under heavy pollen
conditions.
REPLACING THE ODOUR REDUCING PREFILTER
For optimal performance, replace every 3-months under normal usage conditions. Once the Odour Reducing
Pre-Filter has been replaced, press and hold the Replace Pre-Filter Button for 3-seconds to reset the indicator.
To purchase genuine HoMedics replacement Odour Reducing Pre-Filters, contact HoMedics Australia on
(03) 8756 6500 or visit www.homedics.com.au.
REPLACING THE TRUE HEPA FILTER
For optimal performance, replace every 12-months under normal usage conditions. Once the True HEPA Filter has
been replaced, press and hold the Replace HEPA Filter Button for 3-seconds to reset the indicator.
To purchase genuine HoMedics replacement True HEPA Filters, contact HoMedics Australia on (03) 8756 6500 or
visit www.homedics.com.au.
4 5
iHOM4959 AP15AU manual v3 FA.indd 4-5 15/09/2016 9:18 AM
Page 4

CLEANING AND MAINTENANCE:
For best performance, we recommend:
• NEVER use water or any household cleaners or detergents to clean the True HEPA filter or Pre-filter.
• Clean o the outside of the unit with a dry cloth once a month.
• NEVER use water, wax, polish, or any chemical solution to clean the outside of the unit.
• Clean o the grill cover using a damp cloth or the brush attachment of your vacuum once a month.
• NEVER use wax, polish, or any chemical solution to clean the grill cover.
• Replace the Pre-Filter every 3 months under normal usage conditions.
• Replace the True HEPA Filter every 12 months under normal usage conditions.
• Always use genuine HoMedics® replacement filters for optimal performance.
TROUBLESHOOTING:
PROBLEM POSSIBLE CAUSE SOLUTION
Unit will not operate • Unit is not plugged in
Reduced airflow or
poor filtering
Excessive Noise • The unit is not level • Place the unit on a flat, level surface
• No power to unit
• The back grill may be
blocked
• True HEPA filter may be
clogged
• Pre-filter may be clogged
• Plug unit in
• Press the ON/OFF button to turn the power on
• Check circuits, fuses, try a dierent outlet
• Check to make sure nothing is blocking the back
grill and air outlet
• Replace the filters
Replace filter light
remains lit after filter
replacement
The air purifier seems
to be producing odours
• The appropriate replace
filter indicator needs to
be reset
• The filters need replacing • Replace the filters as needed
• Press and hold the appropriate replace filter button
for 3 seconds
6 7
iHOM4959 AP15AU manual v3 FA.indd 6-7 15/09/2016 9:18 AM
Page 5

Distributed by
One year limited warranty
We or us means HoMedics Australia Pty Ltd ACN 31 103 985 717 and our contact details are set out at the end of this warra nty;
You
Supplier means the authorised distributor or retailer of the Goods that sold you the Goods in Australia and New Zealand; and
Goods means the product or equipment which was accompanied by this warranty and purchased in Australia and New Zealand.
For Australia:
to be of acceptable quality and the failure does not amount to a major failure. This is not a complete statement of your legal rights as a consumer.
For New Zealand:
The Warranty
HoMedics sells its products with the intent that they are free of defects in manufacture and workmanship under normal use and service. In the
unlikely event that your HoMedics product proves to be faulty within 1 year from the date of purchase due to workmanship or materials only,
date of purchase for products used commercially/professionally.
Te
other applicable law and without excluding such rights and remedies warranty against defects:
1. The Goods are designed to withstand the rigors of normal household use and are manufactured to the highest standards using the highest
2.
whatsoever that are beyond the control of HoMedics.
3. This Warranty does not extend to the purchase of used, repaired or second-hand products or to products not imported or supplied by
4. This Warranty ex tends only to consumers and does not extend to Suppliers.
5.
6.
Warranty Period (or three months, whichever is the longest).
7.
8.
damages.
9. This warranty is only valid and enforceable in Australia and New Zealand.
Making a Claim:
In order to claim under this Warranty you must return the Goods to the Supplier (place of purchase) for replacement. If this is not possible,
please contact our customer service department at the address bel ow.
•All r
•
Contact: HoMedics Australia Pty Ltd, 14 Kingsley Close, Rowville, VIC 3178 | Phone: (03) 8756 6500
iHOM4959 AP15AU manual v3 FA.indd 8 15/09/2016 9:18 AM
 Loading...