

Homedics AG-3501TL Instruction Manual
HoMedics Service Center
1.800.466.3342
8:30am – 7:00pm
(hora del ESTE )
de lunes a viernes
Dirección postal:
HoMedics Service Center
Dept. 168, Suite 3
43155 West Nine Mile Rd
Novi, MI 48375
Correo electrónico:
cservice@homedics.com
GARANTÍA LIMITADA POR DOS AÑOS
HoMedics vende sus productos con la intención de que no tengan defectos de fabricación ni de mano de
obra por un plazo de dos años a partir de la fecha de compra original, con las siguientes excepciones.
HoMedics garantiza que sus productos no tendrán defectos de material ni de mano de obra bajo
condiciones de uso y servicio normales. Esta garantía se extiende únicamente a consumidores y no a
distribuidores.
Para obtener servicio para su producto HoMedics, envíe por correo el producto y su recibo de compra
fechado (como comprobante de compra), con franqueo pago, a la siguiente dirección:
HoMedics Service Center
Dept. 168, Suite 3
43155 West Nine Mile Rd
Novi, MI 48375
No se aceptarán pagos contra entrega.
HoMedics no autoriza a nadie, incluyendo, pero sin limitarse a, distribuidores, posteriores consumidores
compradores del producto a un distribuidor, o compradores remotos, a obligar a HoMedics de forma
alguna más allá de las condiciones aquí establecidas. La garantía de este producto no cubre daños
causados por uso inadecuado o abuso, accidente, conexión de accesorios no autorizados, alteración del
producto, instalación inadecuada, reparaciones o modificaciones no autorizadas, uso inadecuado de la
fuente de energía/electricidad, cortes de energía, caída del producto, funcionamiento incorrecto o daño
de una pieza de funcionamiento debido al no cumplimiento del mantenimiento recomendado por el
fabricante, daños durante el transporte, robo, descuido, vandalismo, condiciones climáticas, pérdida de
uso en el período durante el cual el producto está en una instalación de reparación o a la espera de piezas
o reparación, o cualquier otra condición, sin importar cual sea, que se encuentre fuera del control de
HoMedics.
Esta garantía es válida únicamente si el producto es comprado y operado en el país en el cual se compró
el producto. Un producto que requiera modificaciones o adaptación para habilitar su funcionamiento
en cualquier país que no sea aquél para el que fue diseñado, fabricado, aprobado y/o autorizado, o la
reparación de productos dañados por estas modificaciones no están cubiertos bajo esta garantía.
LA GARANTÍA AQUÍ ESTABLECIDA SERÁ LA ÚNICA Y EXCLUSIVA GARANTÍA. NO HABRÁ NINGUNA OTRA
GARANTÍA EXPRESA NI IMPLÍCITA, INCLUYENDO NINGUNA GARANTÍA DE COMERCIALIZACIÓN O APTITUD
NI NINGUNA OTRA OBLIGACIÓN POR PARTE DE LA COMPAÑÍA CON RESPECTO A PRODUCTOS
CUBIERTOS POR ESTA GARANTÍA. HOMEDICS NO TENDRÁ RESPONSABILIDAD ALGUNA POR NINGÚN
DAÑO INCIDENTAL, CONSECUENTE NI ESPECIAL. BAJO NINGÚN CONCEPTO ESTA GARANTÍA REQUERIRÁ
MÁS QUE LA REPARACIÓN O CAMBIO DE ALGUNA PIEZA O PIEZAS QUE SE HALLEN DEFECTUOSAS
DENTRO DEL PERÍODO DE VIGENCIA DE ESTA GARANTÍA. NO SE EFECTUARÁN REEMBOLSOS. SI NO HAY
PIEZAS DE REPUESTO DISPONIBLES PARA LOS MATERIALES DEFECTUOSOS, HOMEDICS SE RESERVA
EL DERECHO DE REALIZAR SUSTITUCIONES EN VEZ DE REPARAR O CAMBIAR.
Esta garantía no se extiende a la compra de productos abiertos, usados, reparados, embalados otra vez y/o
abiertos y vueltos a cerrar, incluyendo entre otras cosas la venta de dichos productos en sitios de remate
por Internet y/o la venta de dichos productos por revendedores o mayoristas. Todas y cada una de las
garantías cesarán y terminarán inmediatamente con respecto a cualquier producto o pieza del mismo que
estén reparados, cambiados, alterados o modificados sin el consentimiento previo explícito y por escrito
de HoMedics.
Esta garantía le proporciona derechos legales específicos. Es posible que usted tenga derechos adicionales
que pueden variar de un país a otro. Debido a las regulaciones de ciertos países, es posible que algunas
de las limitaciones y exclusiones no se apliquen en su caso.
Por más información con respecto a nuestra línea de productos en los EE.UU., visítenos en: www.
homedics.com
M
A
o
e
m
k
a
T
e
s
a
e
l
P
Register
Your Product At:
www.homedics.com/register
Your valuable input regarding this
product will help us create
the products you will
want in the future.
e
n
t
N
o
w
©2008-2010 HoMedics, Inc. y sus compañías afiliadas, reservados todos los derechos. HoMedics® es una
marca registrada de HoMedics Inc. y sus compañías afiliadas. Reservados todos los derechos.
Personal de los Estados Unidos Trainer ® y son marcas registradas Destress ®
de la Corporación de Salud Internacional.
IB-AG3501TL
El manual
en español
empieza a la
página 15
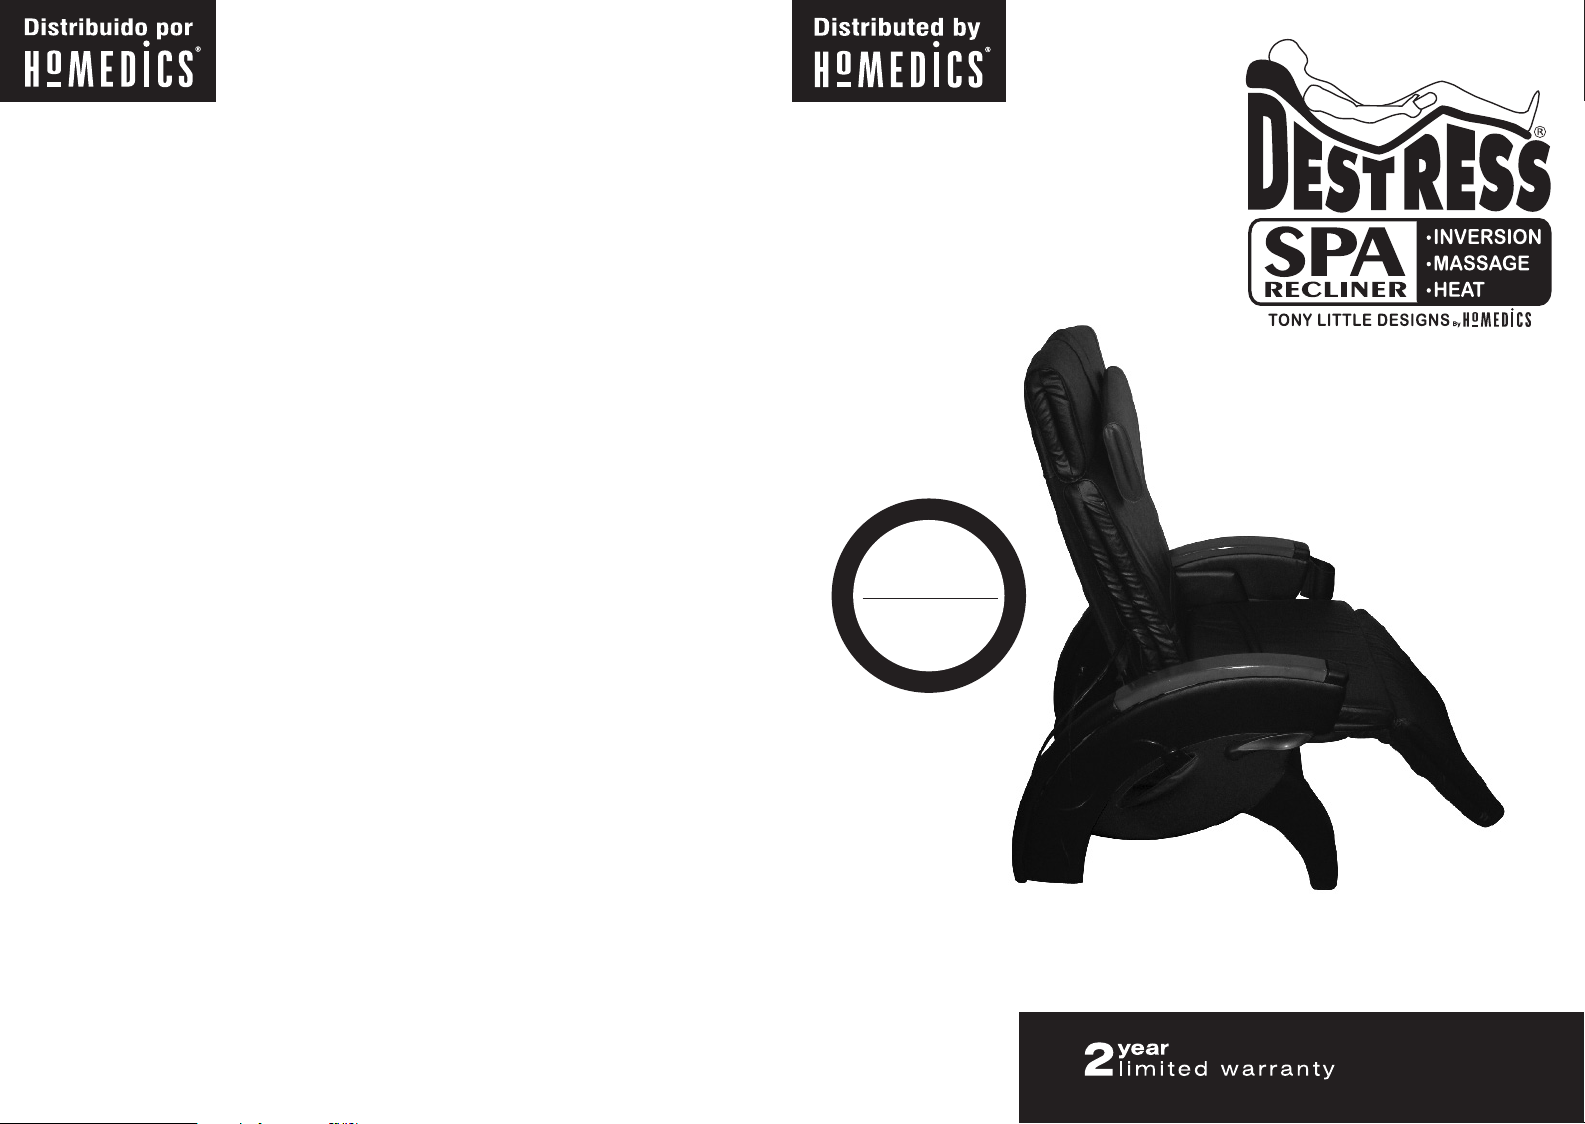
Instruction Manual and
Warranty Information
AG-3501TL
AG-3501CBNTL
AG-3501BRGTL

A NOTE FROM TONY LITTLE
My commitment is to you the customer and always will
be. I will always do my best to bring you innovative,
useful, quality of life enhancing products that cover all
categories of health fitness and wellness.
Enjoy life, Believe in Yourself and Always Go For It!
America’s Personal Trainer
®
IMPORTANT SAFEGUARDS
WHEN USING ELECTRICAL PRODUCTS, ESPECIALLY WHEN CHILDREN ARE PRESENT, BASIC SAFETY PRECAUTIONS SHOULD
ALWAYS BE FOLLOWED, INCLUDING THE FOLLOWING:
READ ALL INSTRUCTIONS BEFORE USING
DANGER
• ALWAYS unplug the appliance from the electrical outlet immediately after using and
before cleaning.
• DO NOT reach for an appliance that has fallen into water. Unplug it immediately.
WARNING
• An appliance should never be left unattended when plugged in. Unplug from outlet when not
in use and before putting on or taking off parts or attachments.
• Close supervision is necessary when this appliance is used by, on or near children or disabled
persons.
• Use this appliance only for its intended use as described in this manual. Do not use
attachments not recommended by HoMedics; specifically any attachments not provided with
the unit.
• NEVER operate this appliance if it has a damaged cord or plug, if it is not working properly,
if it has been dropped or damaged, or dropped into water. Return it to HoMedics Service
Center for examination and repair.
• Keep cord away from heated surfaces.
• NEVER drop or insert any object into any opening.
- TO REDUCE THE RISK OF ELECTRIC SHOCK:
- TO REDUCE THE RISK OF BURNS, ELECTRIC SHOCK,
FIRE OR INJURY TO PERSONS:
Please Note:
Hands and
fingers should
rest comfortably
on top of arm
rests. When
moving the
recliner between
resting positions,
fingers can be
pinched if placed
into the areas
of the leg noted
on the yellow
caution sticker.
(See yellow
caution sticker
on recliner legs.)
• DO NOT operate where aerosol (spray) products are being used or
where oxygen is being administered.
• DO NOT operate under a blanket or pillow. Excessive heating can occur
and cause fire, electrocution or injury to persons.
• DO NOT carry this appliance by supply cord or use cord as handle.
• To disconnect, turn all controls to the “OFF” position, then remove plug
from outlet.
• NEVER operate the appliance with the air openings blocked. Keep the
air openings free of lint, hair, and the like.
• Use heated surfaces carefully. May cause serious burns. Do not use
over insensitive skin areas or in the presence of poor circulation. The
unattended use of heat by children or incapacitated persons may be
dangerous.
SAVE THESE INSTRUCTIONS
Caution— Please read all instructions carefully
before operating.
• This product is not intended for medical use. It is intended only to pro-
vide a luxurious massage.
• Consult your doctor prior to using this product, if
- You are pregnant
- You have a pacemaker
- You have any concerns regarding your health
• Not recommended for use by diabetics.
•
NEVER leave the appliance unattended, especially if children are present.
• NEVER cover the appliance when it is in operation.
• DO NOT use this product for more than 60 minutes at a time.
• Extensive use could lead to the products excessive heating and shorter
life. Should this occur, discontinue use and allow the unit to cool
before operating.
• NEVER use this product directly on swollen or inflamed areas or skin
eruptions.
• DO NOT use this product as a substitute for medical attention.
• DO NOT use this product before bed. The massage has a stimulating
effect and can delay sleep.
• This product should NEVER be used by any individual suffering from
any physical ailment that would limit the user’s capacity to operate the
controls.
• This product should never be used by any individual suffering from any
ailments that would limit or altogether inhibit the user’s capacity to feel
or have any sensation in the body part that the product is being
used on.
• This unit should not be used by children or invalids without adult
supervision.
2
3
Important Notice:
If you experience any
type of distortion or
interference to radio
or television reception
when turning the unit
to the ON position,
immediately turn
the unit off. Wait a
few seconds before
turning the unit on and
distortion/interference
should be eliminated.
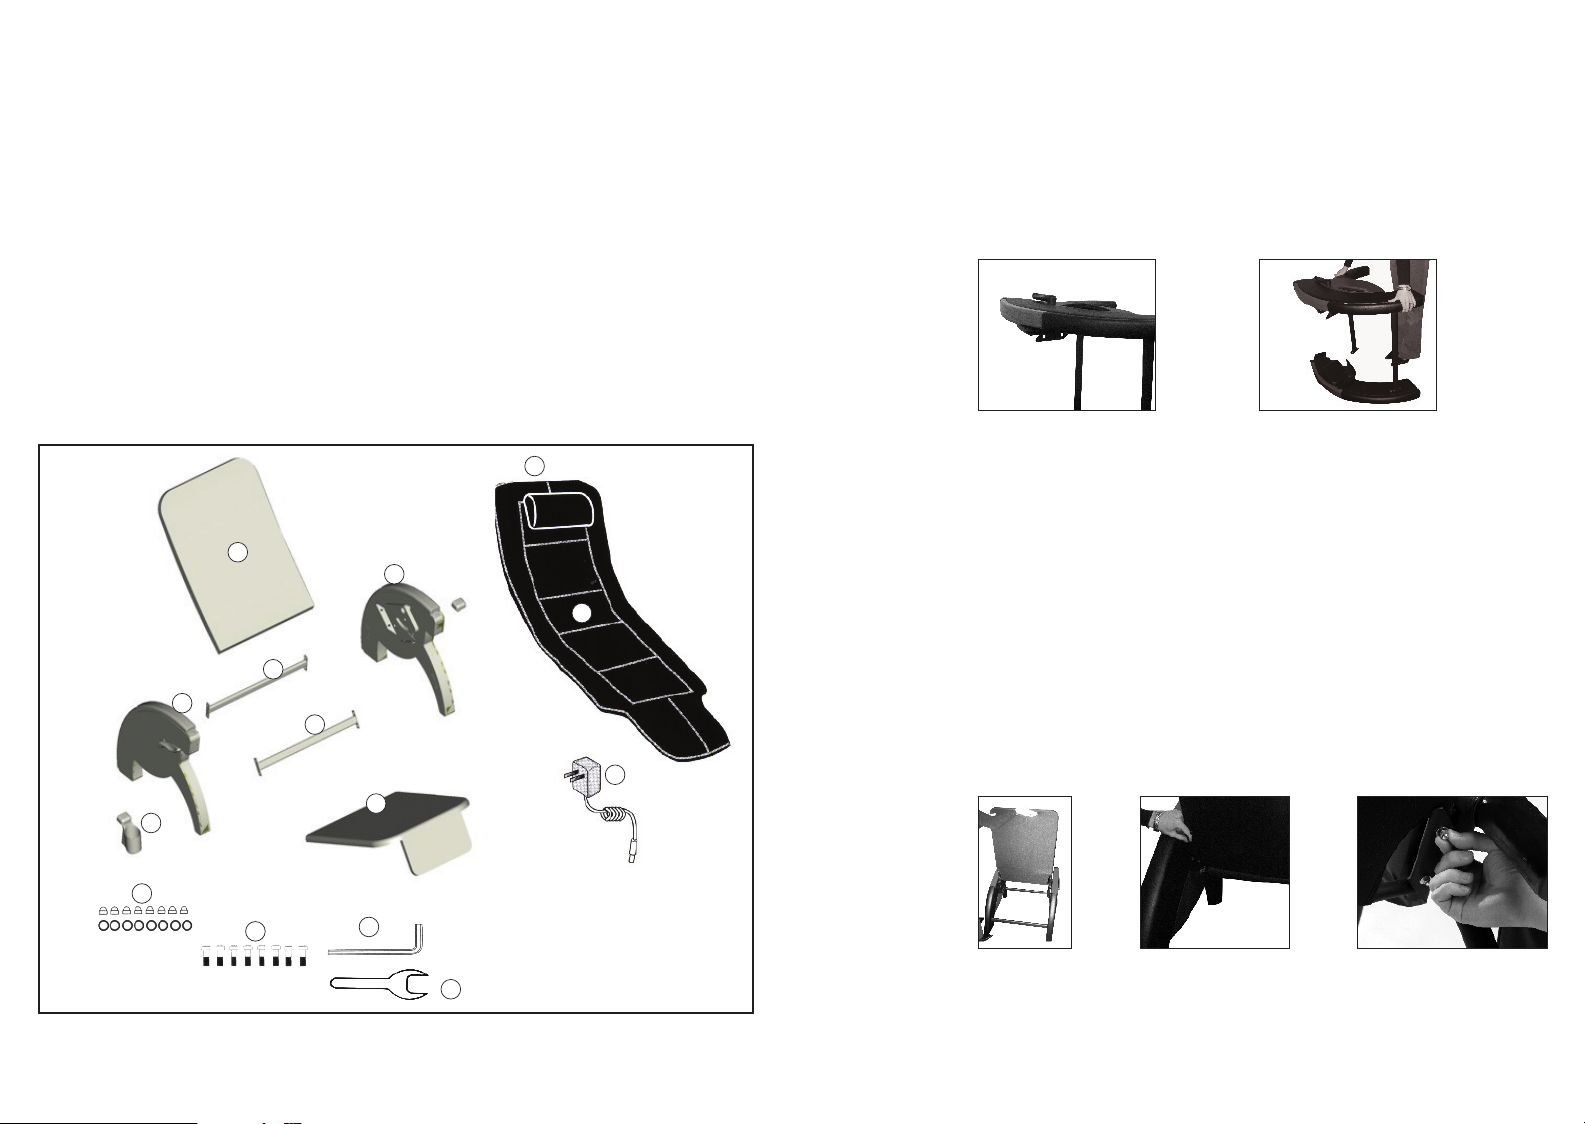
Assembly Instructions
1. Carefully remove all contents from the packaging and inspect the
product to make sure all components of the recliner are present.
These should include (figure 1):
• Right side armrest with hand control pocket (A)
• Left side armrest (B)
• Crossbars (C) & (D)
• Cup holder (E)
• Back and leg frames with attached slip covers (F) (G)
• Small nuts and washers (8) (H)
• Large bolts (8) (I)
• Allen wrench (J1)
• Open end wrench (J2)
• Massage mat with attached hand control (K)
• Detachable headrest (L)
• AC adaptor (M)
2. Assemble Chair Base:
• Attach both crossbars (figure 2) to the right hand armrest, matching
corresponding numbers, and insert large bolts. Tighten partially with
Allen wrench.
• Attach both crossbars to left side armrest, matching the corresponding
letters, and insert large bolts (figure 3). Tighten partially
with the Allen wrench. Stand base upright.
Figure 2
L
G
B
D
A
C
E
H
I
F
J1
H
K
M
J2
3. Attach Back Frame to Base:
• Slide the back of the chair into the frame with the straps facing the
chair (figure 4).
• Align the back by inserting the large bolts into the frame.
• Place a washer and nut over each bolt to secure the Back
Frame to the Chair Base. Use open end wrench to tighten partially
(figures 5A and 5B).
Figure 4
Figure 5A
Figure 3
Figure 5B
Figure 1
4
5
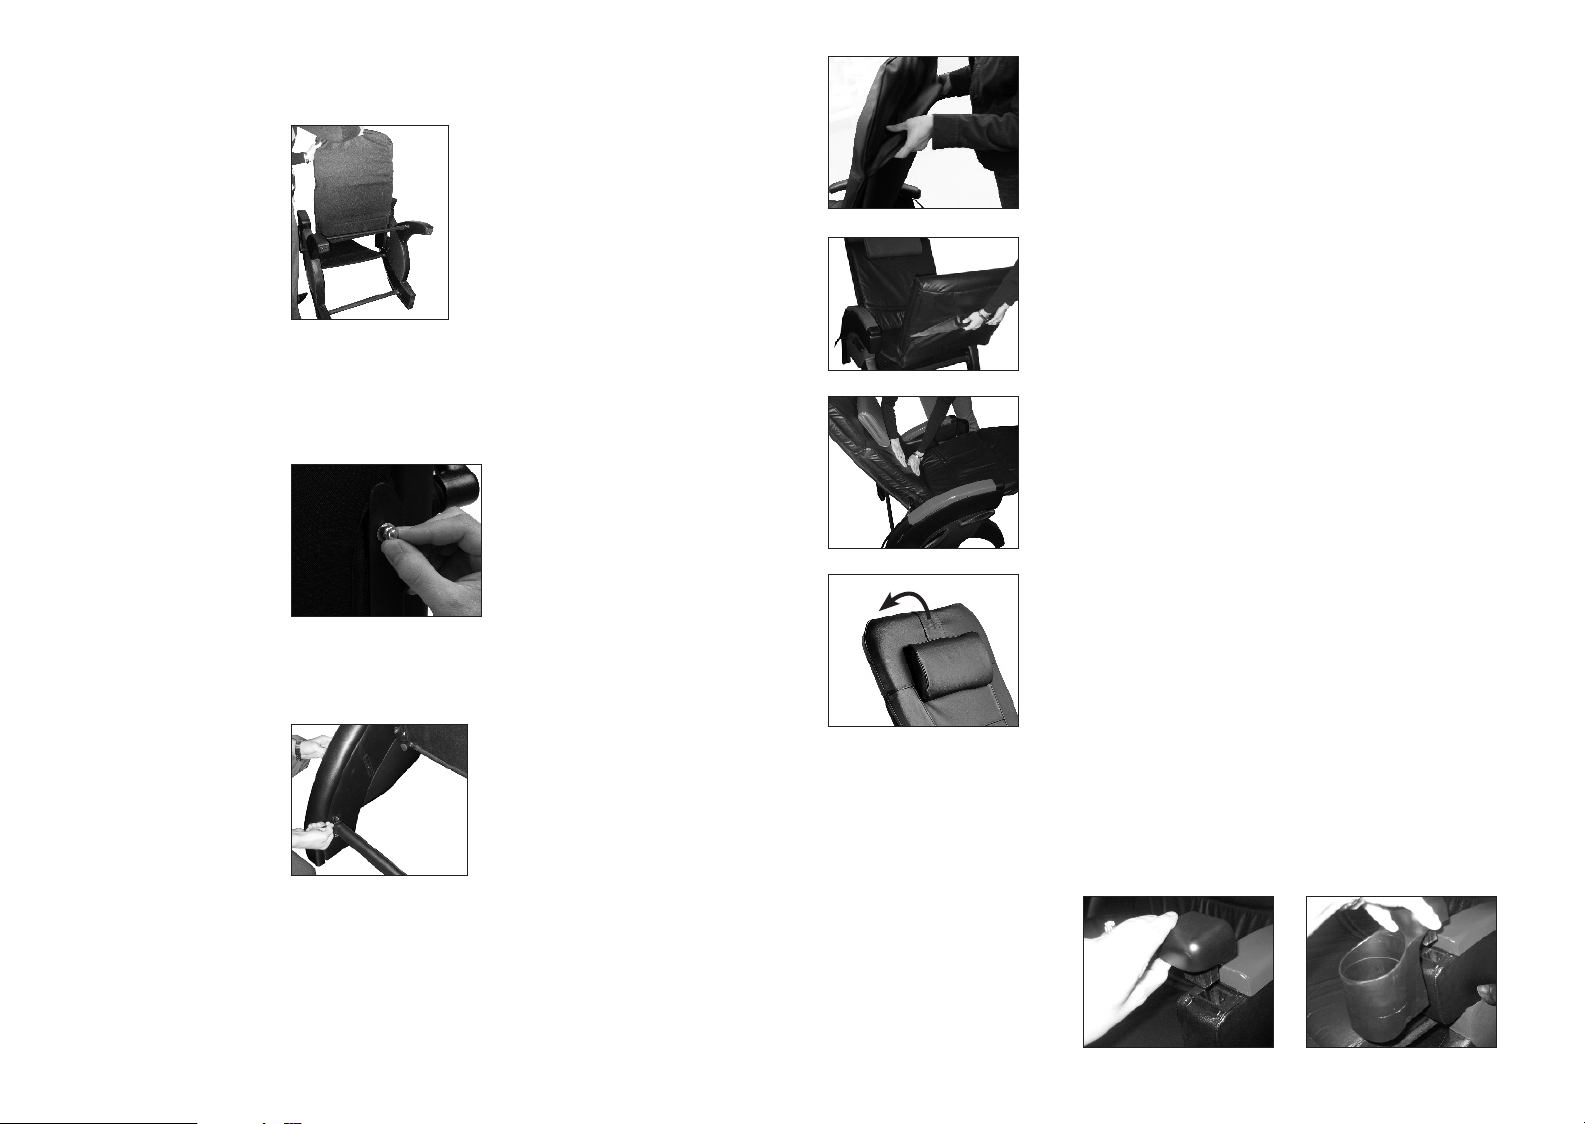
4. Attach Seat/Leg Frame to Base:
• Flip the chair on its back and slide the seat in place. Place into frame
with the straps facing the back of the chair (figure 6).
Figure 6
• Align the seat by inserting large bolts into the frame.
• Place washer and nut over each bolt to secure the Seat Frame to the
Chair Base. Use open end wrench to tighten partially (figure 7).
Figure 7
5. Add Massage Cushion:
• Slide the top pocket of the massage cushion over the top of the back
frame (figure 9).
Figure 9
• Slide the bottom pocket over the foot frame by lifting up the footrest
(figure 10).
Figure 10
• Smooth down the massage cushion and make it flush with the frame
(figure 11).
Fi gure 1 1
• The pillow can be repositioned or completely removed by adjusting the
strap on the back of the chair (figure 12).
• Stand chair upright and adjust so the base is level. Completely tighten
all nuts and bolts now (figure 8).
Figure 8
6
Figure 12
6. Finishing Details:
• Remove all letter and number stickers.
• To add the cup holder, remove the T-block cover and insert the cup
holder into either armrest (figures 13A and 13B).
• Feed the power and hand control cord through the back of the frame.
Be sure the cords are not twisted.
• Attach the power cord to the adaptor and store the hand control in the
pocket on the right side.
Figure 13A
Figure 13B
7

Instructions for Inversion
Massage Recliner Use
Your Inversion Massage recliner is designed to provide relaxation in
a variety of positions utilizing the easy lock levers on each side of the
armrests. The ideal position for optimum relaxation is one in which the
feet are above the heart.
NOTE: The Inversion Massage recliner design has a weight limit of
300 pounds. Persons exceeding this body weight should not use
this recliner.
• Before sitting in the Inversion Massage recliner, be sure it is in the
complete upright position by unlocking the levers and pulling the
backrest forward until it stops.
• Lock the recliner into the upright position by pulling the levers back
towards your head.
• Sit in the chair, unlock levers by pushing forward and lean back
slowly. Sitting all the way back in the seat will make it easier to recline.
To adjust the angle of the chair, hold on to the armrests and lean
back or forward until you reach the desired position. Lock the position
into place by pulling the levers back towards your head.
• The footrest may be raised by pulling it upward. Each position will
sound with a click. To lower the footrest, raise it until it stops and then
push it back towards the floor.
• Before getting out of the Inversion Massage recliner, be sure to return
it to its full upright position and lock into place.
• Stand up using the armrests for support.
Tip: To help you recline, slowly raise your hands above your head and
lean back. Lock in your desired position with the easy lock levers. To sit
upright, unlock the levers and move hands slowly towards your knees
while leaning slightly forward. This will bring the recliner back to its full
upright position.
Note:
Heat only
works with
massage
function
activated
AC Power Adaptor Information
Your massage cushion is powered by an attached custom AC home adaptor.
Use only the supplied AC home adaptor as other similar-looking adaptors may
cause irreparable damage to the unit and will void your warranty.
Automatic Shut Off
The Inversion Massage recliner has been designed for convenience and safety.
As a special precaution against falling asleep while using the unit, or leaving the
unit on while it is still in operation, we’ve programmed it to automatically stop
working 60 minutes after receiving your last command. Any time you change
massage functions, the timer will reset. This special feature should not be
considered as a substitute for OFF. Always remember to turn your unit off when
not in use.
Please Note:
For added protection of your unit: When the heat is left on it will automatically
shut off after 15 minutes.
Power Adaptor Instructions
Connect the adaptor jack to the massage cushion’s power receptacle
located along the right side of the cushion. Once inserted, plug
the other end into an AC power outlet. Use only the AC power adaptor
provided with this unit.
8
9
 Loading...