

Add-On Device Quick Start Guide
1 2
Add-On Device Quick Start Guide
What’s inside:
1x Garage Door Control Button
1x Power Adapter 2x U-fork Wires
Garage Door
Control Button
Quickstart Guide
Model No. WGO2001
Mounting Accessories
and Double-sided Tape
Option 1: Add it with your existing home8 system
Step 1: Assemble your device and accessories
1 . Unpack your device and accessories.
2. Pair the Garage door control button with the Security
Shuttle within 1-10 feet to make sure the connection is
working well.
3. Connect the included power adapter to the Garage
door control button and plug it in.
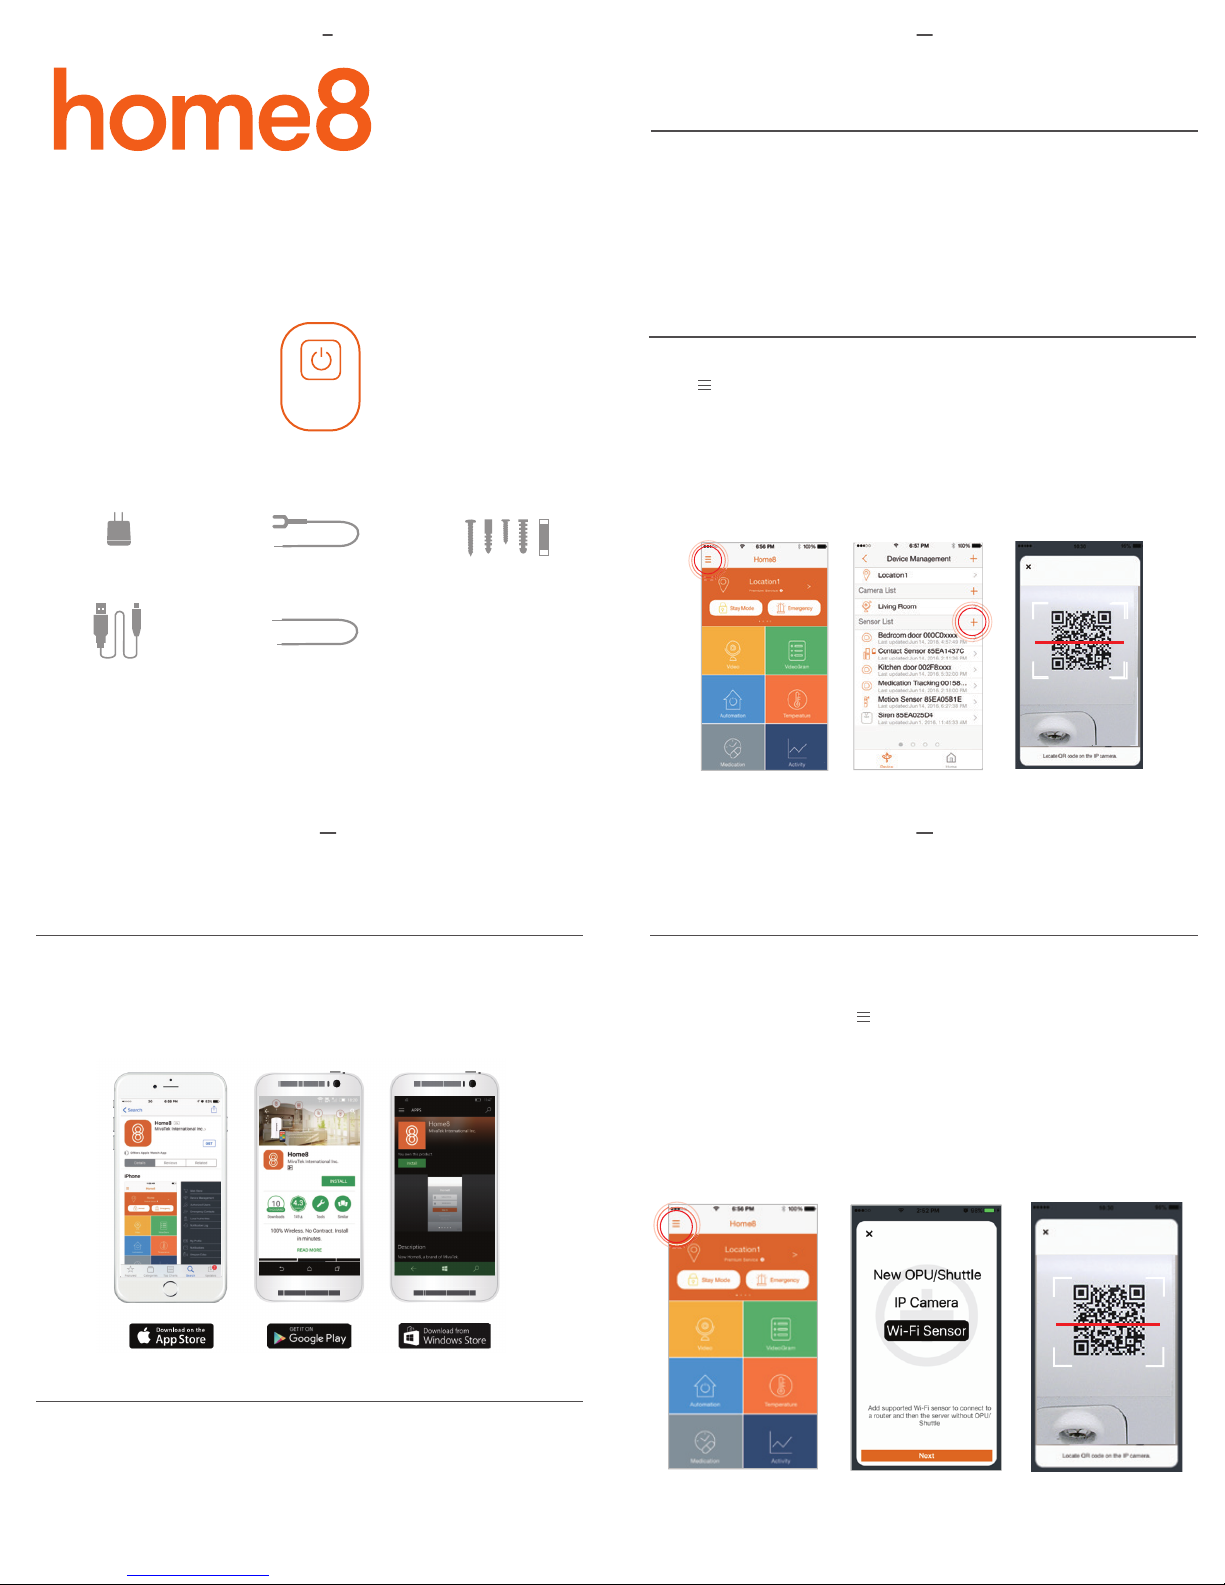
Step 2: Add a device
1 . Open the Home8 app, tap on the menu button
" " and select “Device Management”.
2. Press the add button ‘+’ next to “Sensor”.
3. Follow the app instructions to scan the QR code
located on the back of the device
4. When the activation is completed, the LED status
light will become solid green.
1x Power Cable
Add-On Device Quick Start Guide Add-On Device Quick Start Guide
2x 18-Gauge Wires
3 4
Option 2: Add it with Virtual OPU
Step 1: Set up your smartphone Step 3: Add it to the System with Vitural OPU
1 . Connect your Smartphone to Wi-Fi.
2. Download the Home8 app from the App Store,
Google Play, or Windows store.
3. Follow the steps to create an account.
Note: Make sure your Wi-Fi router is on.
Make sure the Wi-Fi of your smartphone is on
1. Tap the side bar “ ” to show the sidebar menu;
then, tap “Device Management”.
2. Swipe left across the screen and select “Wi-Fi Sensor”.
3. Follow the on-screen instructions. When finished,
press “Next”.
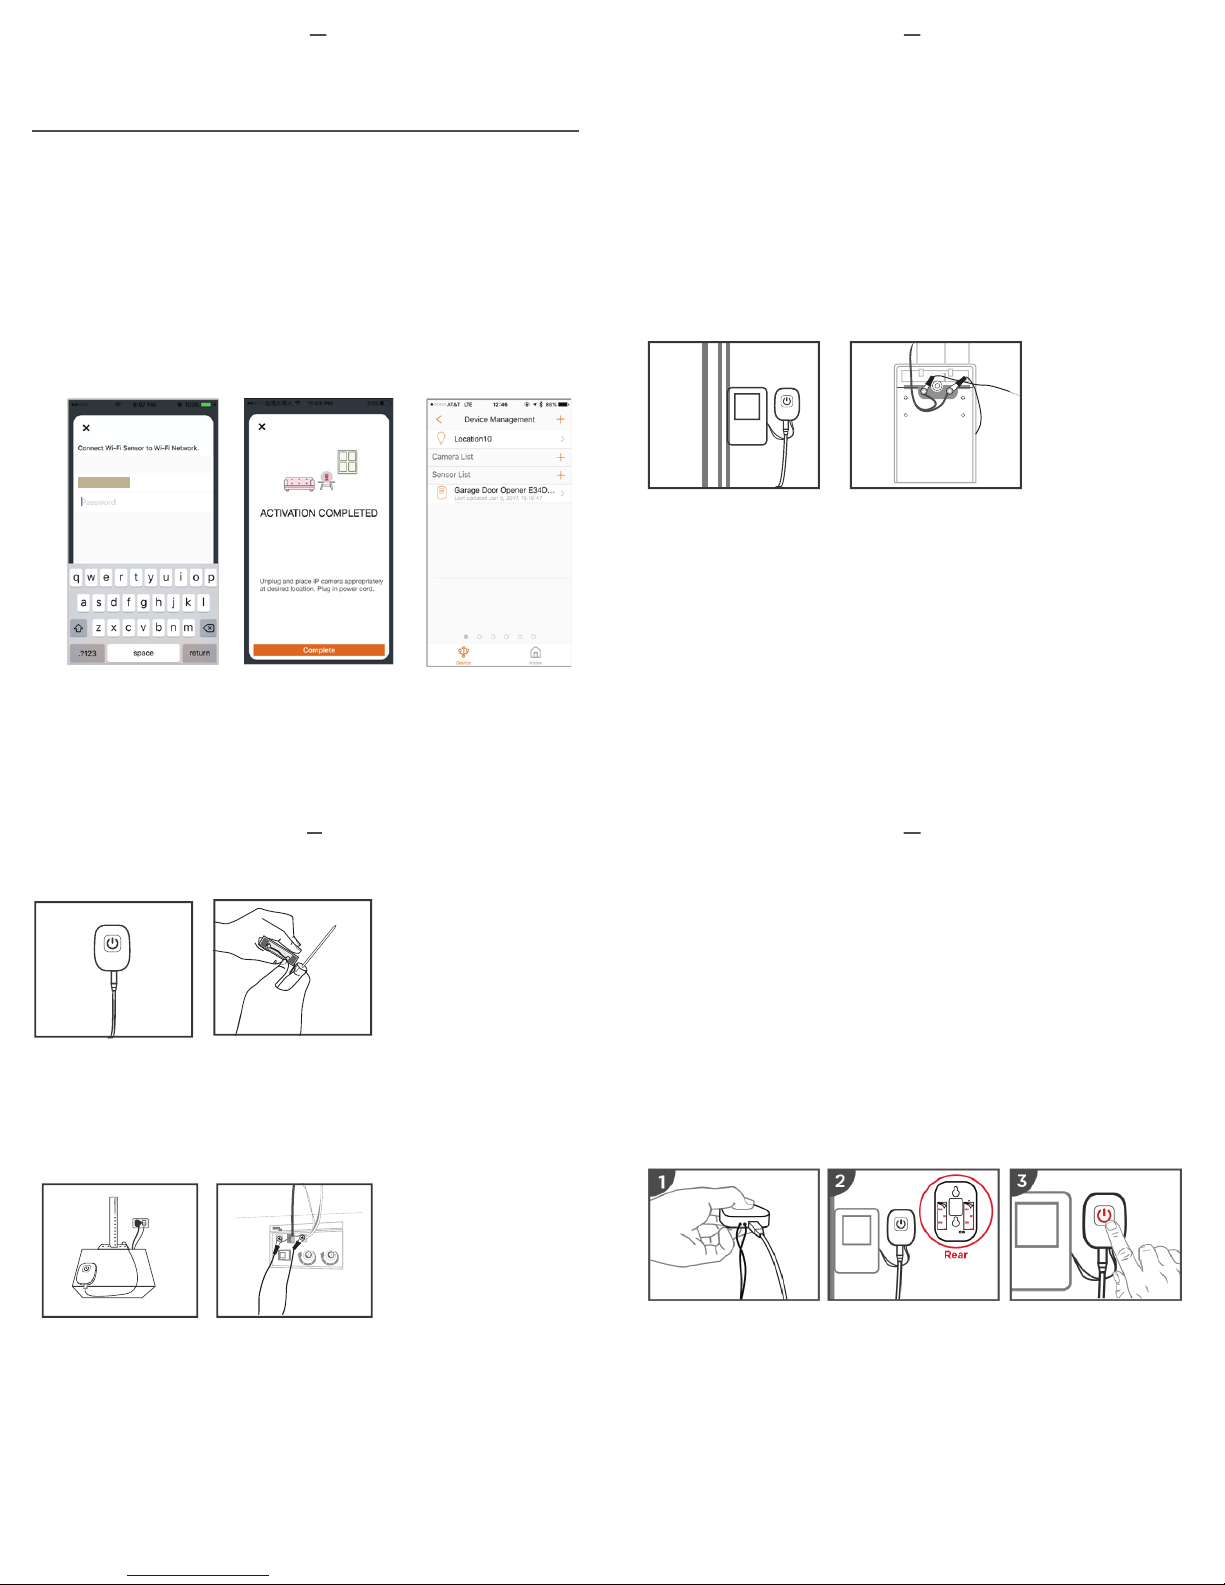
Step 2: Assemble your device and accessories
1. Before the device is powered on, press and hold
down the button.
2. While holding down the button, attach the power cable.
3. Continue holding down the button for 5 seconds until
blinking (orange-red) starts.
Add-On Device Quick Start Guide Add-On Device Quick Start Guide
5 6
Option 2: Add it with Virtual OPU
Step 4: Connect the Device to the Wi-Fi Network
1. After scanning the QR code located on the back
of the device, the system will ask you to enter your
Wi-Fi password then follow the on-screen
instruction to complete the process.
2. When the activation is completed, the LED status
light will become solid green. The sensor now is
added to the device management page.
Choose Your Installation Method
Review the 3 installation methods below and refer
to the user manual of your specific garage door
opener before you install your garage door control
button.
For more information, including a list of compatible
garage door openers, visit home8alarm.com/faq.
Method 1: Use it with your wall existing switch
With existing wall switch
• Unscrew your existing garage door wall switch
• Locate the two wires that connect to your garag motor.
Loosen the screws that hold them in place
• Attach one U-fork wire under each screw and tighten
• Re-mount your existing wall switch
Attach U-fork wires
Add-On Device Quick Start Guide Add-On Device Quick Start Guide
Method 2: Replace your existing wall switch
Replacing existing switch
• Remove your garage door wall switch completely
• Continue to next step
Remove switch completely
7 8
Mount and test your device
• Unscrew your existing
garage door wall switch
• Locate the two wires
that connect to your
garage motor. Loosen
the screws that hold
them in place
1 . Insert the loose wires into the bottom of your Home8
garage door control button (one per hole, the order
doesn’t matter).
2. Plug in your Home8 garage door control button with
the included power cable and adapter, then mount
your control button with screws or double-sided tape.
3. In the Home8 app, navigate to Automation >
Garage Door Opener and press the red power button.
Your app should now be able to operate your garage
door.
Method 3: Attach it to your garage door motor
• Access the wire panel
on your garage door
motor unit
Attached to motor
• Locate the two wires that connect to your garage door wall
switch. If you have trouble finding them, please refer to the
user manual of your garage door motor to determine which
wires connect to your wall switch. Or give us a call, we’ll be
happy to help.
• Depending on your motor, use U-fork wires or straight
wires to connect your new garage door control button to
your garage door motor
• Continue to next step
Wire to garage door motor
Troubleshooting Tips
If you’re having trouble adding your device, you may need to
reset it
• Press the reset button on the back of the device with a pin
for approximately 5 seconds
• The LED will flash red and green then orange to green
flashing
• Return to Step 2 and add the device again
 Loading...