

Mini Outdoor Full HD 2-Camera
Interactive Security Camera System
Quickstart Guide
Model No. V63020US
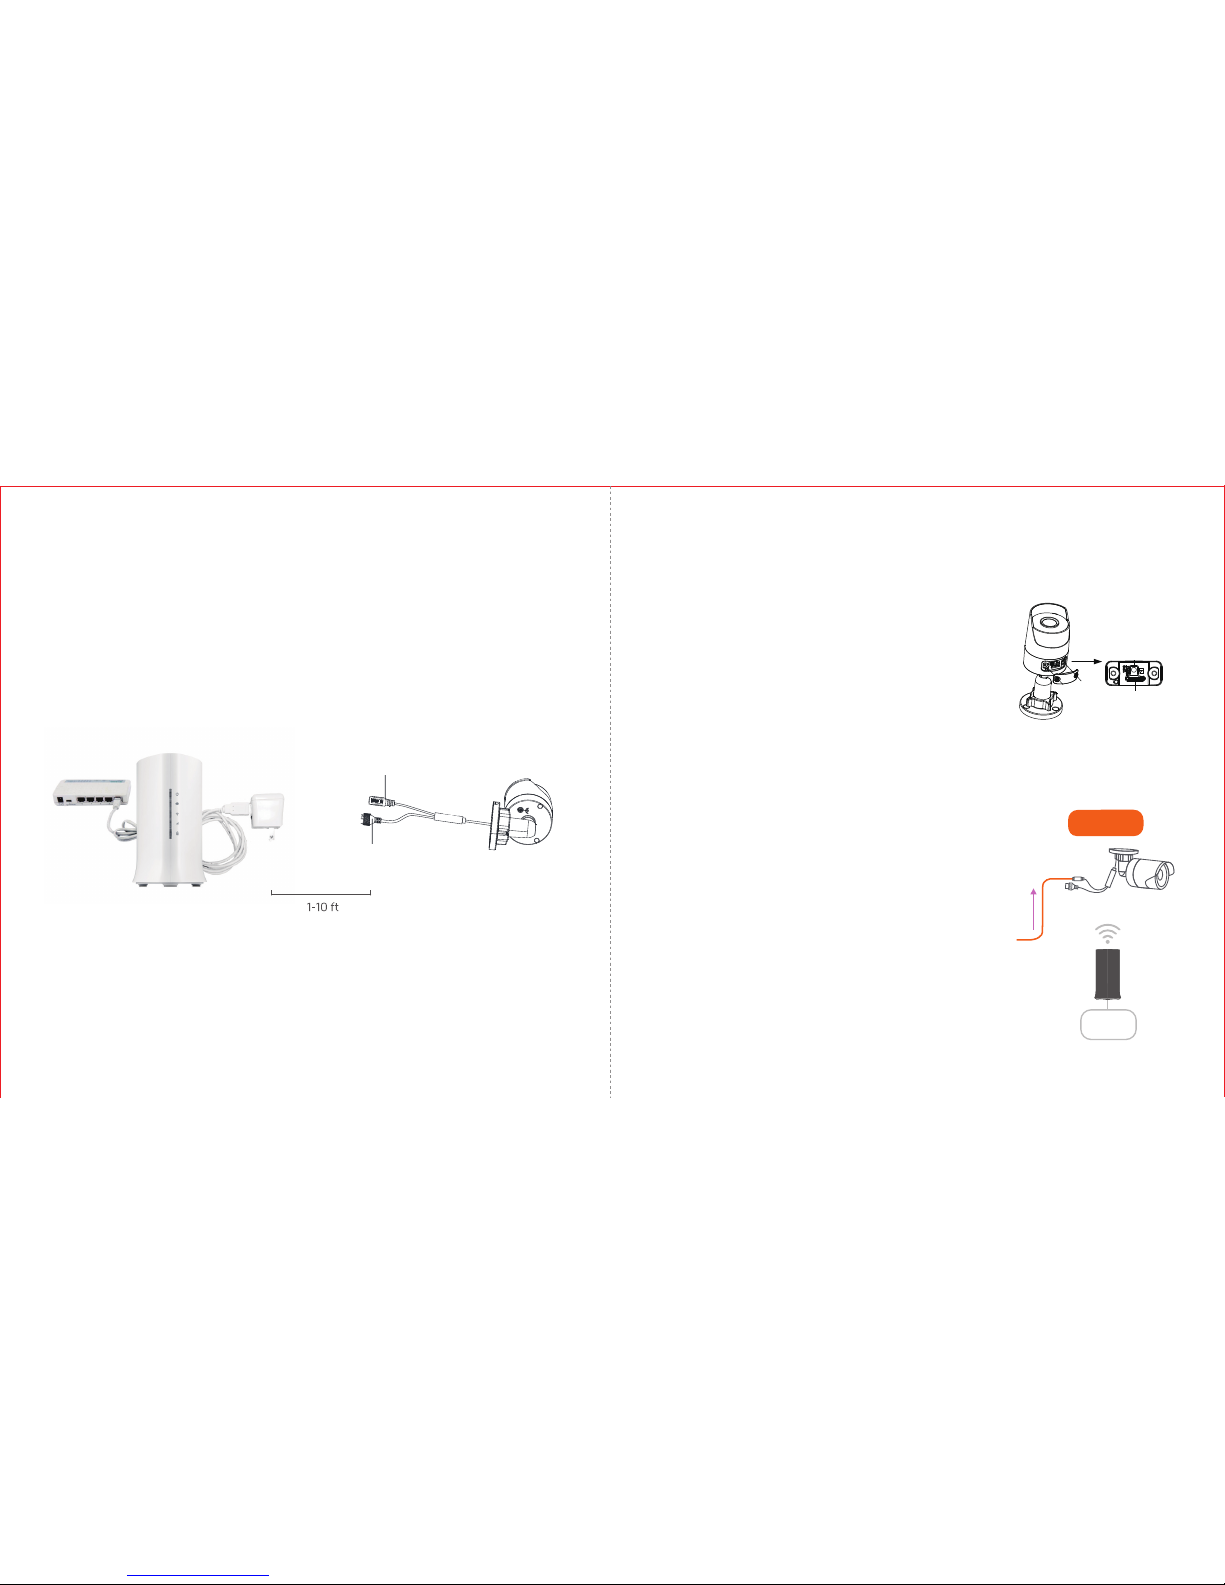
Network data
Router
Electrical Power
PoE Injector
(not included)
Wired (PoE)
Option 2: Wired
Make sure a PoE Injector and two Cat5 cables
are available before the connection. (PoE
Injector and Cat5 cables are not included in
the package)
ii.
i.
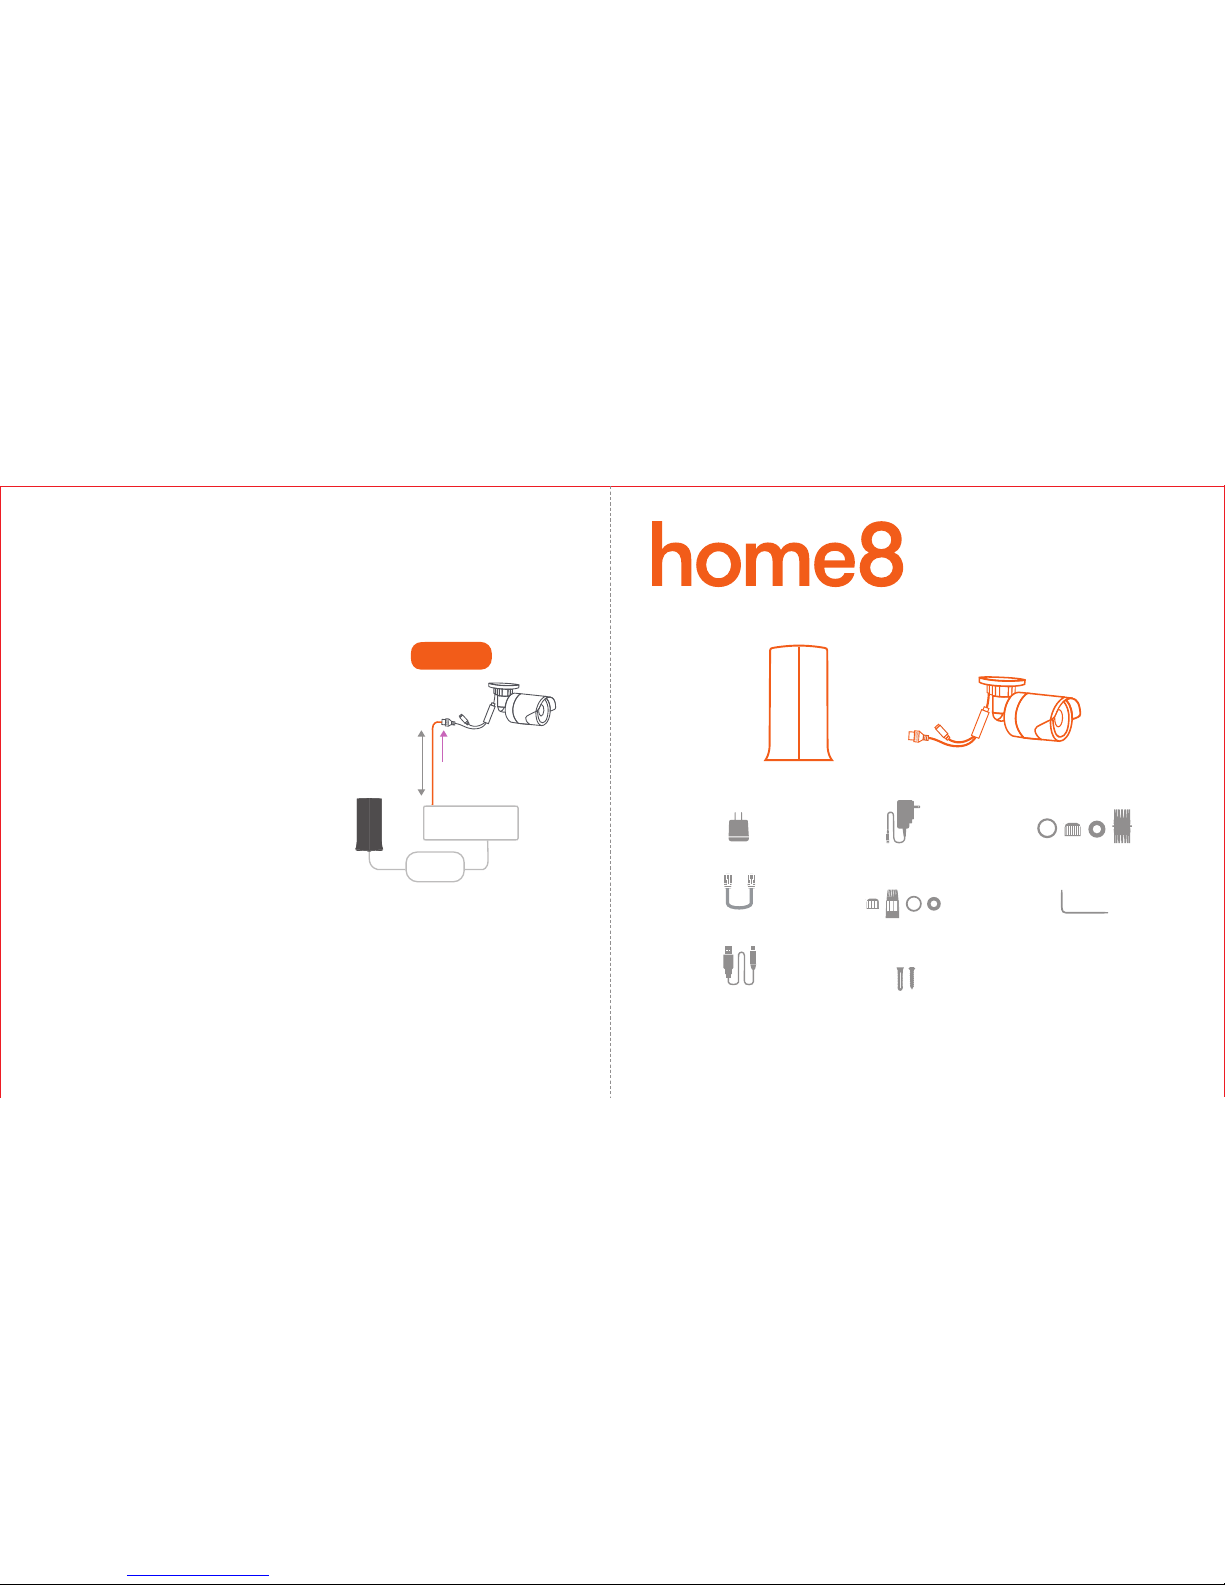
What’s inside:
1x Security Shuttle
What you’ll need:
1x USB power adapter
1x Ethernet cable
1x USB power cable
• Broadband Internet • iPhone or Android phone • Home router
2x Mini outdoor Full HD cameras
2x Wrenches
2x Power adapters
Power waterproof cases
Cable waterproof cases
Mounting accessories
Using a Cat5 cable, connect the PoE
Injector to the same router that the Home8
Security Shuttle is connected. Using the
other Cat5 cable, connect the PoE Injector
to the Camera's Ethernet interface and DC
power will be delivered to the Camera and
data will be transferred. Power on the PoE
Injector.
Step 1: Unpack your devices and accessories
1. Unpack your devices and accessories.
2. Pair the Camera with Security Shuttle within 1-10 feet to make sure the connection is working well.
1
2
4
3
5
6
7
9
8
10
11
Power supply interface
Ethernet interface
* Ethernet cable is not included.
Step 2: Power on the Camera and connect it to the system
microSD Card Slot
WPS/RESET
Network data
Electrical Power
Wireless
Router
1. Insert the microSD* card into the Camera Card Slot before
powering up the Camera, if you want to have continuous
video recording.
NOTE - microSD Card not included. You can proceed to
section Step 2.2 Power on the Camera and Connect.
You can also purchase a microSD Card at a later time and
insert this by following Step 2.1 to enable the continuous
video recording feature.
*
Option 1: Wireless
Connect the included power adapter to the
Camera’s power supply interface.
2. Power on the Camera and connect it to the system.
There are two methods for powering and connecting.
Please review the two options and decide which
option you would like to use:

V1.099200255MIG
Troubleshooting Tips
Are your devices communicating with Security Shuttle?
How to reset the camera if the app tells you to do so:
• Use the wrench to open the cover which is located on the bottom of camera.
• Make sure the camera is powered off first. Press down the RESET button, then power on the camera,
continue holding down the RESET button for around 10 seconds until the IR LED goes off.
• Return to the app and follow the onscreen instructions.
Need help installing your Home8 system?
Call 1-844-800-6482, Mon-Fri 9am-7pm, Pacific.
http:// www.home8alarm.com/download/
support@home8alarm.com
• If your devices don’t connect to Security Shuttle, they might be too far away. Take them to a location
that’s closer to Security Shuttle and try again.
• If they do connect, you’ll know the range of your sensor and where to install a range extender.
• Alternatively, you can move Security Shuttle closer to your device.
• If your devices still don’t communicate with Security Shuttle, even when they’re in the same room,
navigate to > Device Management > + on the Home8 app to add your devices again.
Step 3: Set up your smartphone
Your phone will disrupt the setup process if it goes to sleep. So before you register your devices,
disable the autolock feature on your smartphone. You can enable it after you’ve set up your system.
Next:
• Connect your smartphone to your home Wi-Fi
• Download the Home8 app from the App Store or Google Play
• Follow the on-screen instructions and set up your account

axis Adjustment
0°~90°
Adjusng Nut
0°~360°
0°~360°
• Loosen the adjusting nut.
• Adjust the pan direction [0° to 360°].
• Adjust the tilt direction [0° to 90°].
• Rotate the camera [0° to 360°] to adjust
the lens to the surveillance angle.
• Tighten the adjusting nut to complete
the installation.
4. Adjust the surveillance angle.
2. Route the corresponding cables.
3. Secure the camera to the wall with the supplied screws.
Secure the Camera to the Wall
Step 5: Installation
Ceiling Mounting
Hole
Hole
Hole
Mounting
Step 4: Before mounting your device
Both wall mounting and ceiling mounting are suitable for the Camera. Wall mounting will be taken as
an example in this section. If you decide to go with the ceiling mounting as your method of installation,
then you can use the wall mounting steps as a reference.
1. Drill the screw holes into the wall according to the drill template.
1. Before mounting your camera, see if it is within Security Shuttle's range by taking the Camera to the
place where you want it to be mounted and plug it in.
2.Wait until you see live streaming video from the Home8 app before mounting.
 Loading...