

HOME8 IPC2203 Quick Start Manual
3. After the activation is completed, you will see the message “System is ready!” on the screen. By tapping “OK”,
a virtual gateway and the camera will be added to the device management page.
4. (2-A) You now can unplug the cable from the camera or leave it attached.
5. Go to Step 5.
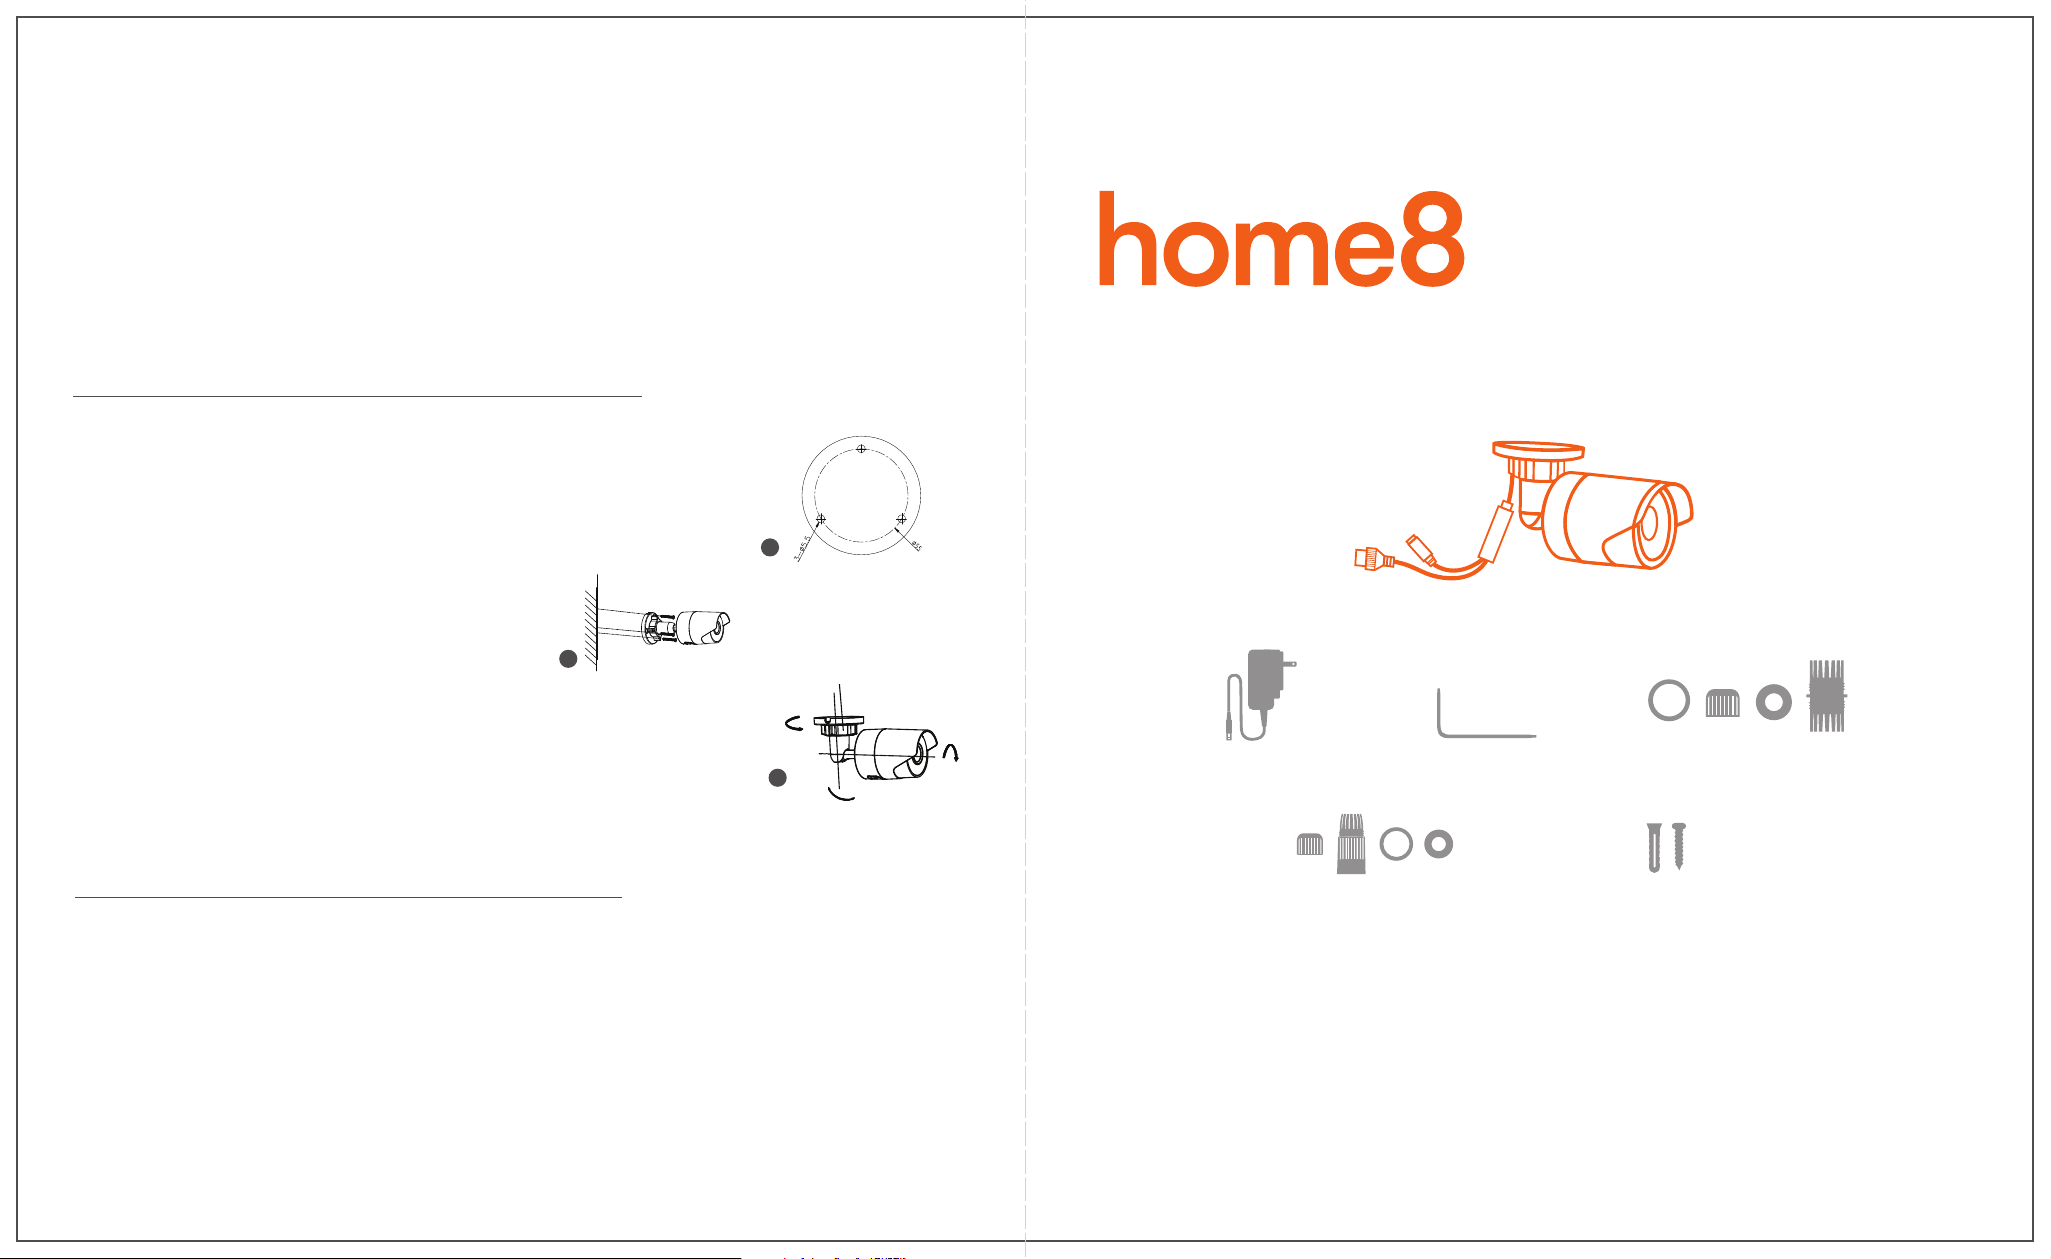
Mini Outdoor Full HD Camera
Add-on Device
Quickstart Guide
Model No. IPC2203
Step 5: Installation
Both wall mounting and ceiling mounting are suitable for the Camera. Wall
mounting will be the example in this section. If you decide to go with ceiling
mounting as your method of installation, then you can use the wall mounting
steps as a reference.
1. Drill the screw holes into the wall according to the drill template.
2. Route the corresponding cables.
3. Secure the camera to the wall with the supplied screws.
4. Adjust the surveillance angle.
• Loosen the adjusting nut.
• Adjust the pan direction [0° to 360°].
• Adjust the tilt direction [0° to 90°].
• Rotate the camera [0° to 360°] to adjust
the lens to the surveillance angle.
• Tighten the adjusting nut to complete the installation.
3
Secure the Camera to the Wall
1
0°~360°
4
Hole
Ceiling Mounting
Mounting
Hole
Adjusting Nut
Adjusng Nut
0°~90°
axis Adjustment
Hole
0°~360°
Troubleshooting Tips
If you’re having trouble adding your device, you may need to reset it.
• Use the wrench to open the cover which is located on the bottom of the camera.
• Make sure the camera is powered off first. Press down and hold the RESET button for around 10 seconds until the
IR LED goes off, and then power on the camera.
• Return to the app and follow the onscreen instructions.
What’s inside:
1x Mini Outdoor Full HD Camera
1x Wrench
Cable Waterproof Cases
To save video clips locally or turn on the continuous recording function, a MicroSD card (FAT32, SDHC type)
is needed.
Note:
1. Please insert the MicroSD card into the camera when it is powered off to avoid damage to the MicroSD card.
2. Video recording service require service subscription, please visit our website for more information
Operates on 2.4GHz Wi-Fi signal
Note: 2.4GHz has better Wi-Fi transmission distance and is less prone to interruption from the obstruction of solid objects.
Virtual gateway does not support 5GHz Wi-Fi features.
Mounting Accessories
Power Waterproof Cases1x Power Adapter
V1.13
All Home8 add-on devices have to work with Home8 systems.
Option 1: Add it with your existing Home8 system
1
2
4
3
5
6
7
1
2
4
3
5
6
7
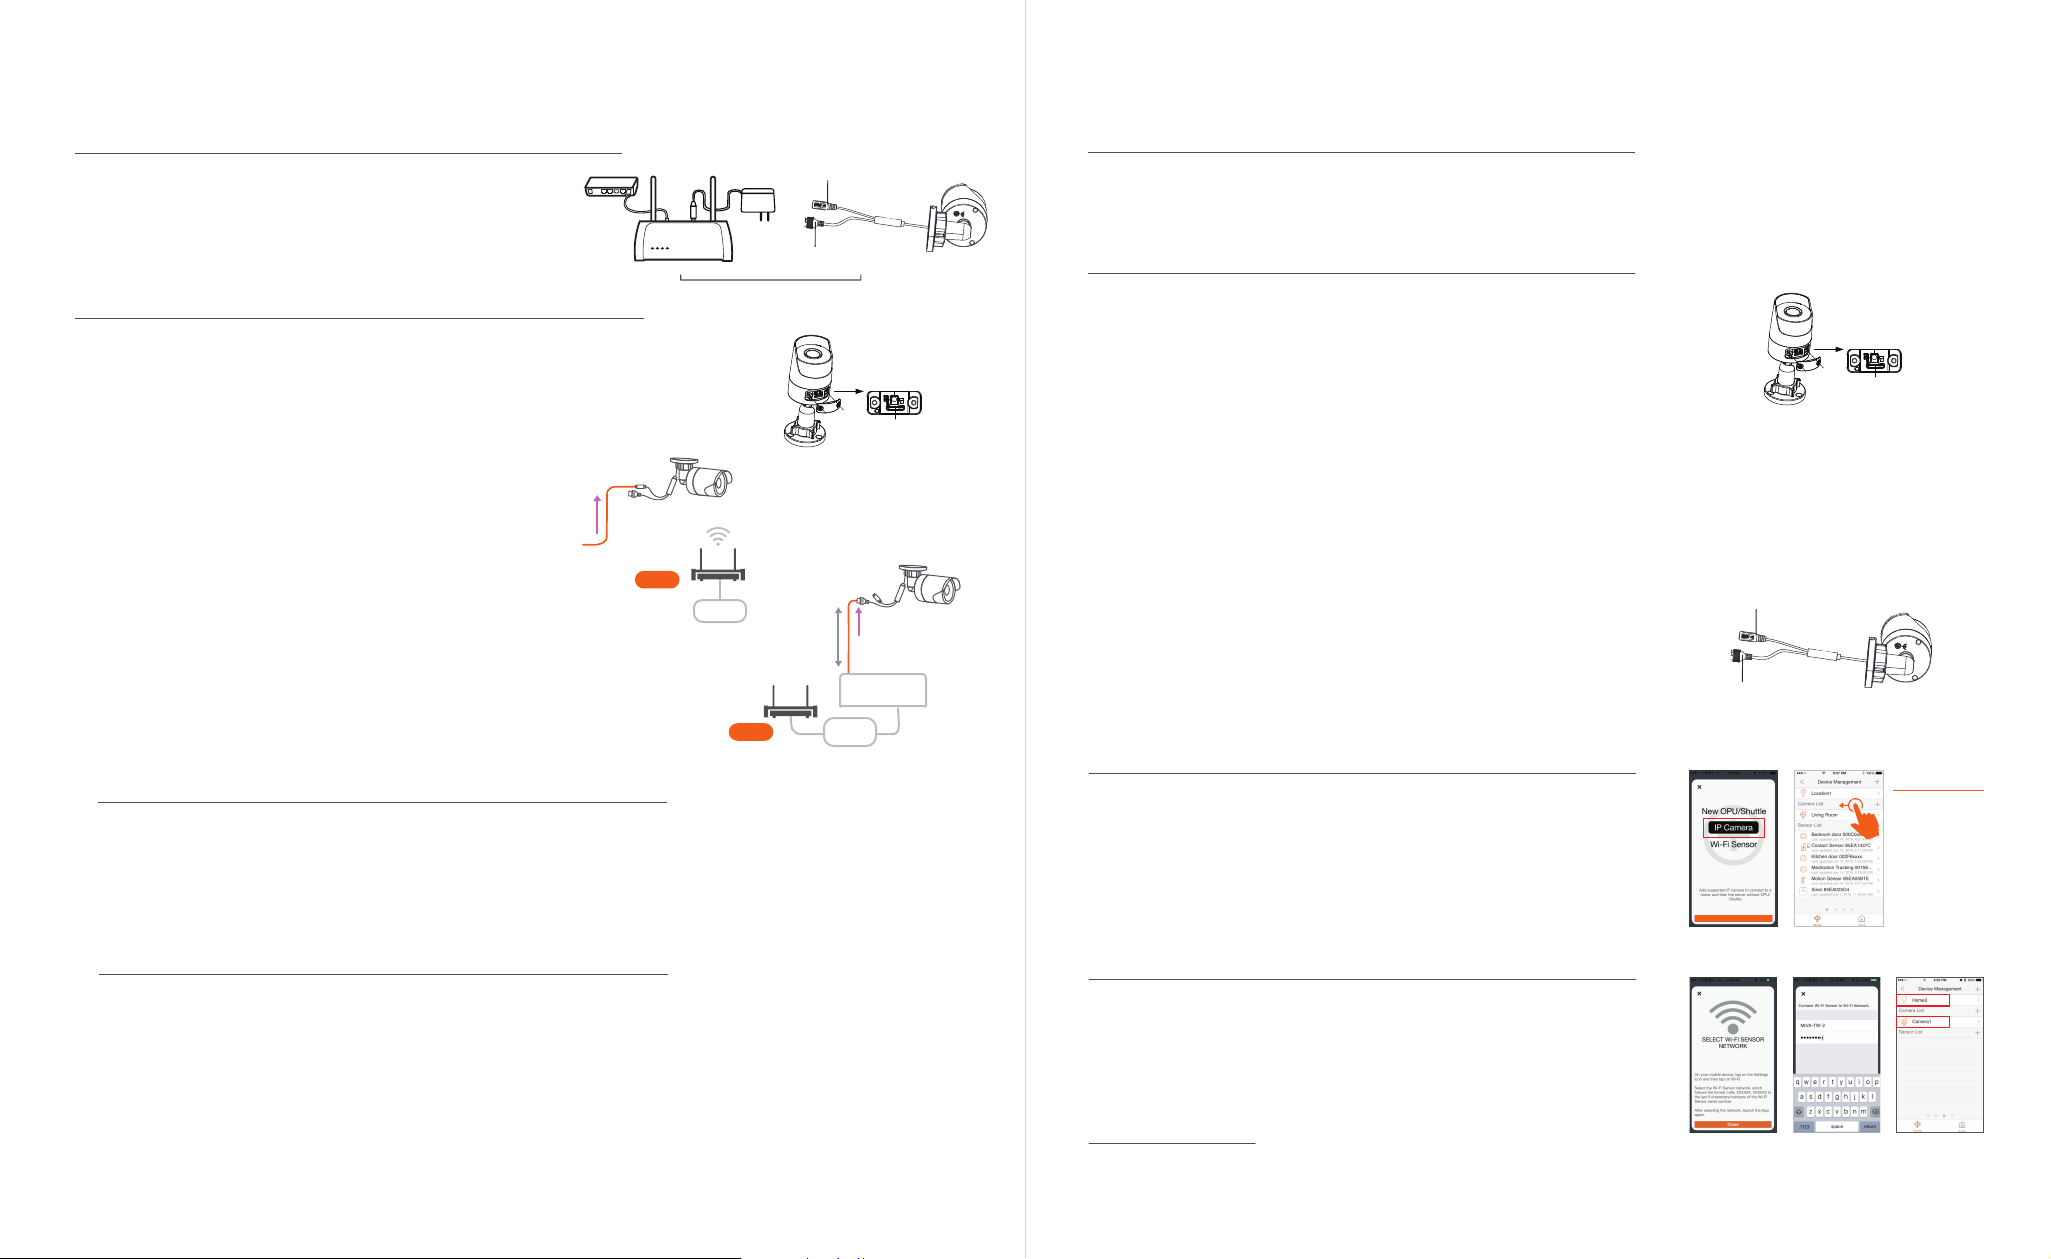
Step 1: Assemble your device and accessories
1 . Unpack your devices and accessories.
2. Pair the device with the Security Shuttle within 1-10 feet
to make sure the connection is working well.
Step 2: Power on the Camera and connect it to the system
1 . Insert the microSD* card into the Camera Card Slot before powering up
the Camera. You can also purchase a microSD Card at a later time.
2. There are two methods for powering and connecting.
Please review the two options and decide which option you
would like to use:
1-A: Wireless
Connect the included power adapter to the Camera’s
Electrical Power
power supply interface.
1-B: Wired
Connect the PoE Injector to your home router with an Ethernet cable.
Using the other Ethernet cable, connect the PoE Injector to the
Camera's Ethernet interface.
Power on the PoE Injector.
* Note: PoE Injector and Ethernet cables are not included in the package.
Step 3: Add a device
1 . Open the Home8 app, tap on the menu button "≡" and select “ Device Management ”.
2. Press the add button " + " next to Camera List.
3. Follow the app instructions to scan the QR code located on the device.
* Note: If the scan is incomplete, you will be asked to enter the serial number (SN) of the device.
Network data
1-A
Router
1-B
Power supply interface
8
9
Ethernet interface
* Ethernet cable is not included.
1-10 ft
* NOTE - microSD Card not included.
FAT32 format.
Network data Electrical Power
10
WPS/RESET
microSD Card Slot
PoE Injector
(Not Included)
Router
Option 2: Add it with Virtual Gateway (without Security Shuttle)
Step 1: Set up your smartphone
11
1 . Connect your Smartphone to Wi-Fi.
2. Download the Home8 app from the App Store, Google Play, or Windows store and create an account.
Step 2: Assemble your device and accessories
1 . Insert the microSD* card into the Camera Card Slot before powering up the
Camera. You can also purchase a microSD Card at a later time.
2. There are two methods for powering and connecting.
Please review the two options and decide which option you
would like to use:
* NOTE - microSD Card not included.
WPS/RESET
microSD Card Slot
FAT32 format.
2-A:
Connect the Camera to your home router with an Ethernet cable* and power on the camera.
* For the best data transmission quality, the maximum length of Ethernet cable is 100 meters.
2-B:
Connect the PoE Injector to your home router with an Ethernet cable.
Using the other Ethernet cable, connect the PoE Injector to the
Power supply interface
8
10
Camera's Ethernet interface.
Power on the PoE Injector.
9
*
Note: PoE Injector and Ethernet cables are not included in the package.
Ethernet interface
* Ethernet cable is not included.
Step 3: Add it to the System with Vitural Gateway
Note: Make sure your Wi-Fi router is on.
Make sure the Wi-Fi of your smartphone is on
1. Tap the side bar “≡” and select “Device Management”.
2. Select “IP Camera”.
3. Follow the on-screen instructions. When finished, press “Next”.
Next
11
* Existing users:
Please swipe left
across the screen
1 . Before mounting your camera, see if it is within the Security Shuttle's range by taking the Camera to the
place where you want it to be mounted and plug it in.
2. Wait until you see live streaming video from the Home8 app before mounting.
3. Go to Step 5.
Step 4: Before mounting your device
Step 4: Sync Virtual Gateway with Wi-Fi Network
1. After scanning the QR code, select your Wi-Fi network and enter
the password if necessary. When finished, tap “Join”.
2. Follow the on-screen instructions.
Continue to next page
2
 Loading...