


EnergyShield
™
Installation Guide
FAQ
Note:
••Some devices may not be included in
certain packages. Also, power adapter
images in this guide are for reference
only, please refer to the actual power
adapter plug in the package.
The latest version of Installation Guide
can be found on our website.
Installation Guide
Guide d'Installation
Installationsanleitung
Guida all'installazione
Guía de instalación
Guia de Instalação
Installatiehandleiding
Installation Guide
(A) OPU (B) OPU Power Adapter
(C) Ethernet Cable
(D) 16GB USB Flash Drive
(G) Smart Plug
Internet
Router
(Not included)
(A)
(D)
(C)
(B)
Assemble the OPU station and connect to
a DHCP-enabled router
Assemble the system according to the provided picture.
It is recommended that the OPU be placed on a 3-5ft
(0.91-1.52m) high platform.
Note: Once the OPU is up and running, to establish proper connection
to it, power up the remaining devices within 5 feet of the OPU. When
connection is established and working, the devices can be moved to
their desired locations.
(E) IP Camera Mounting Screw &
Screw Anchors
(F) IP Camera Power
Adapter
PARTS FOR STEP
3
PARTS FOR STEP
4
PARTS FOR STEP
7
Package Contents
Download the Oplink App
Android: Open Google Play Store. Search for "Oplink
Connected" and install the application.
iPhone: Open App Store. Search for "Oplink Connected"
and install the application.
Windows: Open Marketplace. Search for "Oplink
Connected" and install the application.
Set up an account with your smartphone
Launch the "Oplink Connected" application. Follow the
instructions on the application page to activate your
account using your phone number.
Installationsanleitung Step Guide
STEP
1
STEP
2
STEP
3
Power up the IP Camera
Plug the IP Camera into an outlet within 5 feet of the OPU
to establish connection. Once connection is established
and working, the IP Camera can be moved to its desired
location.
Note: Should the placement of the camera cause the image to be upsidedown, use the Flip feature in the App to correct this matter. Video > Single
Video Mode > Image Setting.
The camera can be
moved and mounted
after the initial activation.
(E)
(F)
STEP
4
Installation Guide
Note: When the activation process
cannot be completed normally, the
App will ask you to scan the OPU's
QR code, located on the back of the
OPU, to continue.
Congratulations! You have
successfully installed the
security system!
Water Leak
Sensor
Sonic & Heat
Sensor
Smart PlugGarage Door
Sensor
Inactivity
Sensor
Motion Sensor Door/Window
Sensor
Remote Control
Panic ButtonSiren
STEP
5
Security & Safety Devices Care & Automation Devices
STEP
6
STEP
7
(Sample of QR Code)
Start devices activation on the app
Tap the Next Button
to go to the "Activating" screen.
(Activation process takes approximately 2 minutes)
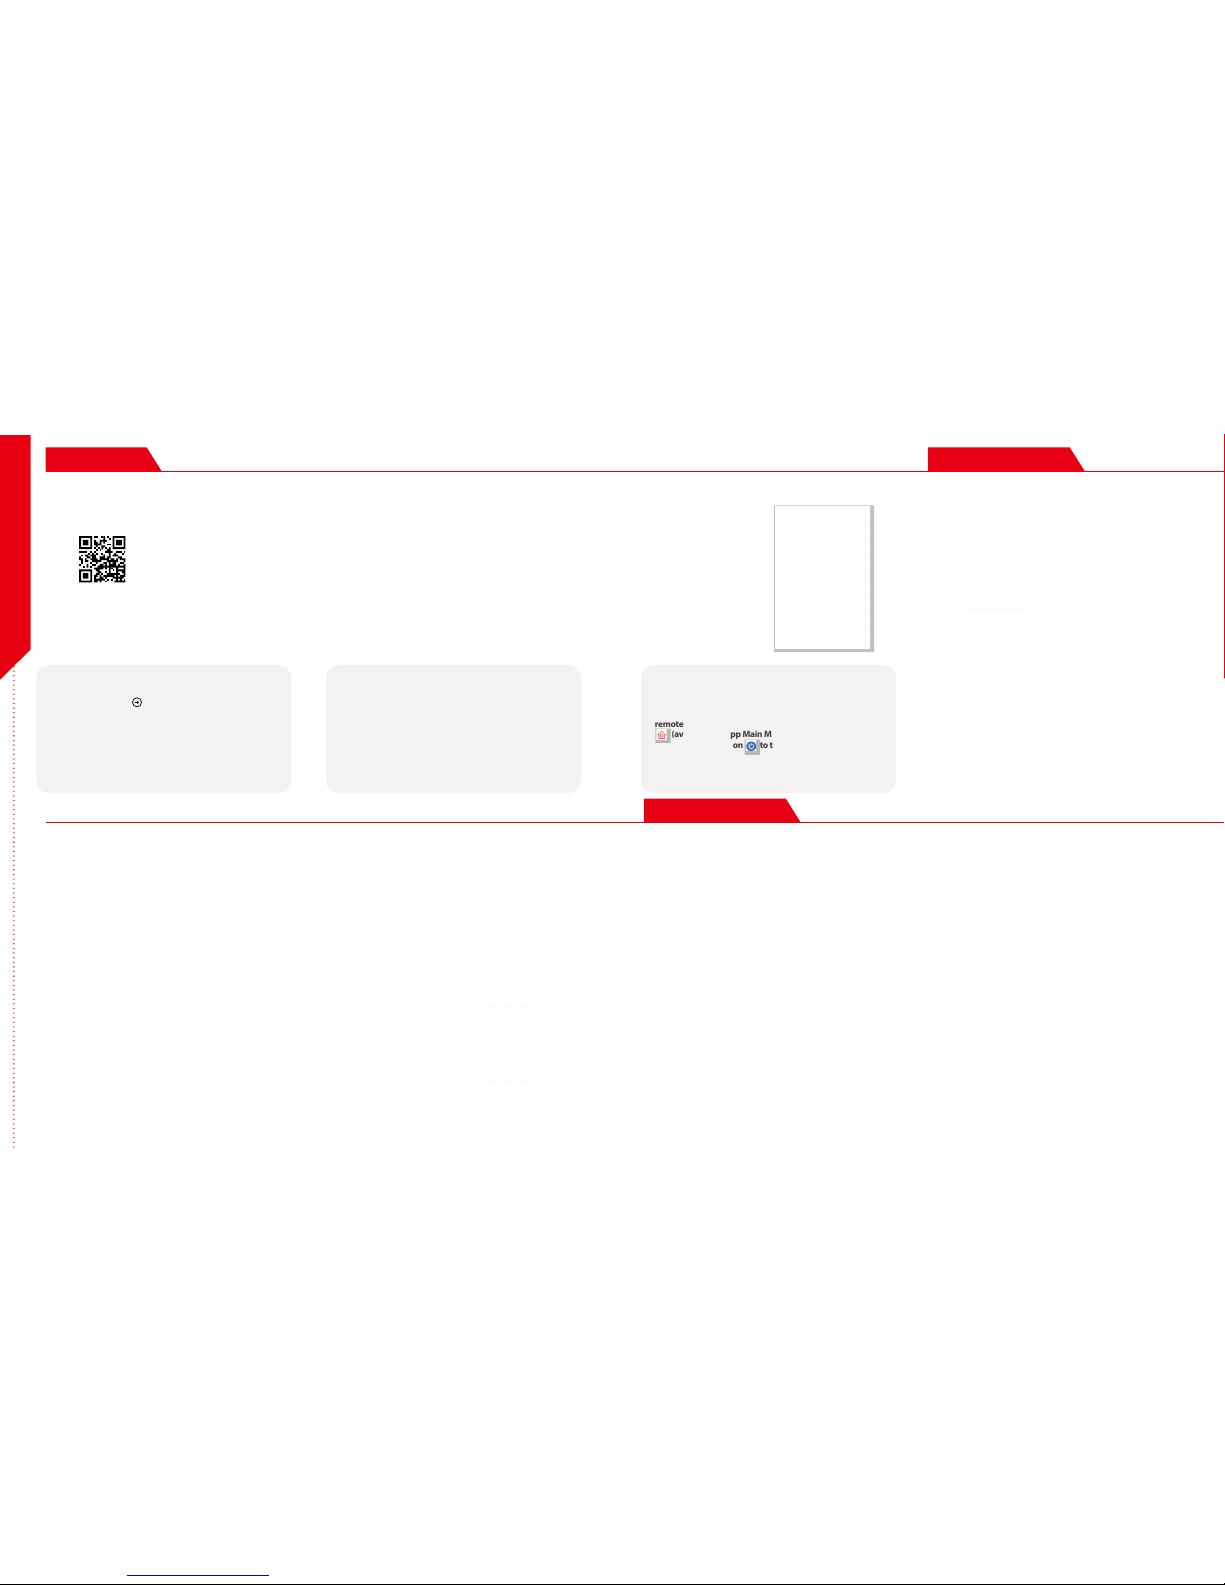
Control the Smart Plug
Connect the Smart Plug into a standard household
electrical outlet, then plug in a light or appliance to it. To
remotely control the Smart Plug, tap on the "Automation"
(available via App Main Menu or Video Single mode)
then the power button
to toggle on/o. Additionally,
you can also manually control the smart plug by pressing
on/o buttom on the plug.
Activation completed
When you see the "System is ready!" message, your system
is ready for use.
Note: Your IP Camera status will be updated after 10 minutes.
Wireless RF RepeaterWi-Fi Repeater
Wi-Fi Pan & Tilt IP CameraWi-Fi IP Camera
Add-on Devices
Product Packages
Cameras & Repeaters
You may expand your system's functions and features with a variety
of Oplink add-on devices.
TripleShield™ C1S3
The basic product package
provides a home security system
which can satisfy the demands of
small families or single people, and
is suitable for houses smaller than
90 square meters.
TripleShield™ C2S6
The premium product package
provides a thorough and complete
home security system which can
satisfy the demands of big families
and is suitable for houses larger
than 90 square meters.
AlarmShield™ S6
The sensor-only product package
provides a alarm-and-alerts home
security system which can satisfy
the demands of big families and is
suitable for houses larger than 90
square meters.
CareShield™ C1S2
The healthcare package provides
a reliable home caring emergency
alert system which can satisfy the
demands of elder parents.
Step Guide
(G)
Guide d'Installation
(A) OPU (B) OPU Adaptateur
d'alimentation
(C) Câble d'Ethernet
(D) 16GB USB Flash Drive
(G) Prise intelligente
Internet
Routeur
(non inclus)
(A)
(D)
(C)
(B)
Assemblez la station OPU et connectezvous à un routeur avec DHCP activé
Assemblez le système selon l'image fournie. Il est
recommandé de placer l'OPU sur une plateforme de 3 à 5
ft (0,91-1,52 m) de haut.
Remarque : Une fois que l'OPU est installé et en cours d'exécution, pour
établir une connexion correcte, allumez les dispositifs restants à moins de
5 ft. (1,52cm) de l' OPU . Lorsque la connexion est établie et fonctionne,
les appareils peuvent être déplacés vers leurs emplacements souhaités.
(E) Caméra IP Vis de montage &
Vis d'ancrage
(F) Adaptateur
d'Alimentation de
Caméra IP
PIÈCES POUR L'ÉTAPE
3
PIÈCES POUR L'ÉTAPE
4
PIÈCES POUR L'ÉTAPE
7
Contenu du Paquet
Téléchargez l'App Oplink
Android : Ouvrir Google Play Store. Cherchez « Oplink
Connected » et installer l'application.
iPhone : Ouvrir App Store. Cherchez « Oplink Connected »
et installer l'application.
Windows : Ouvrir Marketplace. Cherchez « Oplink
Connected » et installer l'application.
Créez un compte avec votre téléphone
intelligent
Lancez l'application « Oplink Connected ». Suivez les
instructions pour créer puis activer votre compte avec
votre numéro de téléphone.
Guide d'Installation
ÉTAPE
1
ÉTAPE
2
ÉTAPE
3
Allumez la caméra IP
Branchez la caméra IP à une prise de courant à moins de 5
ft (1,52 m) de la OPU pour établir une connexion. Lorsque
la connexion est établie et fonctionne, la caméra IP peut
être déplacée vers l'emplacement souhaité.
Remarque : Si l'image est à l'envers ç cause de l'emplacement de la
caméra, utilisez la fonction Flip pour y remédier. Vidéo > Mode vidéo
unique>Paramètre d'Image.
La caméra peut être
déplacée et montée
après l'activation initiale.
(E)
(F)
ÉTAPE
4

Guide d'Installation
Note : Lorsque le processus
d'activation ne peut pas être
complété normalement, l'APP vous
demandera de scanner le code QR
d'OPU , situé au dos de l'OPU, pour
continuer.
Félicitations ! Vous avez
correctement installé le
système de sécurité !
Détecteur de
fuite d'eau
Capteur de Sons
et de Chaleur
Prise
intelligente
Capteur de
Porte de Garage
Capteur
d'Inactivité
Capteur de
mouvement
Capteur de Porte /
Fenêtre
Commande à
distance
Bouton de
panique
Sirène
ÉTAPE
5
Dispositifs de Sécurité et Sureté Dispositifs de Soins et d'Automatisation
ÉTAPE
6
ÉTAPE
7
(Code QR d'échantillon)
Commencer l'activation du dispositif sur
l'App
Appuyez sur le Bouton Next
pour accéder à l'ecran
"Activation en cours". (Le processus d'activation prend
environ 2 minutes)
Contrôler la Prise Intelligente
Branchez la prise intelligente a une prise de courant
électrique standard, puis brancher une lampe ou un
appareil sur la prise . Pour commander à distance la prise
intelligente, tapez sur "Automatisation"
(disponible
par le Menu Principal d'APP ou le mode Vidéo Unique)
puis sur le bouton d'allumage
pour basculer "Marche/
Arrêt". En plus, vous pouvez également manuellement
commander la prise intelligente en appuyant sur le bouton
"Marche/Arrêt" de la prise.
Activation terminée
Lorsque vous voyez le message « Le système est prêt! »,
votre système est prêt à l'emploi.
Remarque : L'état de votre caméra IP sera mis à jour après 10 minutes.
Répéteur Sans FilRépéteur Wi-Fi
Caméra IP Wi-Fi avec
fonction panoramique et
d'inclinaison
Caméra IP Wi-Fi
Dispositifs Supplémentaires
Paquets de Produits
Caméras et Répéteurs
Vous pouvez aussi augmenter les fonctions et caractéristiques
de votre système avec une variété de dispositifs supplémentaires
d'Oplink.
TripleShield™ C1S3
Le paquet de base du produit
fournit un système de sécurité de
la maison qui peut satisfaire les
demandes de petites familles ou
de personnes seules, et convient
aux maisons de moins de 90
mètres carrés.
TripleShield™ C2S6
Le paquet Premium du produit
fournit un système détaillé et
complet de sécurité à la maison
qui peut satisfaire les demandes
de grandes familles et convient
aux maisons de plus de 90 mètres
carrés.
AlarmShield™ S6
Le paquet de produit uniquementcapteur fournit un système de
sécurité à la maison d'alarmeet-alertes qui peut satisfaire les
demandes de grandes familles et
convient aux maisons de plus de
90 mètres carrés.
CareShield™ C1S2
Le paquet de soins de santé fournit
un système d'alerte d'urgence
de soins à domicile fiable qui
peut satisfaire les demandes des
parents plus âgés.
Guide d'Installation
(G)
Installationsanleitung
(A) OPU Zentraleinheit (B) Netzteil für OPU
Zentraleinheit
(C) Ethernet-Kabel
(D) 16 GB USB-Flash-
Laufwerk
(G) Smart-Plug
Internet
Router
(nicht enthalten)
(A)
(D)
(C)
(B)
Montieren Sie die OPU-Zentraleinheit und
verbinden Sie diese mit dem beigefügten
Ethernet-Kabel zu einem DHCP-fähigen
Router
Montieren Sie das System gemäß der Abbildung. Es wird
empfohlen, die OPU-Zentraleinheit in 1m - 1.5m Höhe zu
platzieren.
Hinweis:Wenn die OPU Zentraleinheit aktiv ist, sollten Sie zur Herstellung
einer korrekten Verbindung mit weiteren Komponenten diese in max.
1,5m Abstand von der OPU-Zetraleinheit in Betrieb nehmen.
(E) IP-Kamera
Befestigungsschrauben
& Dübel
(F) Netzteil für IP-
Kamera
TEILE FÜR SCHRITT
3
TEILE FÜR SCHRITT
4
TEILE FÜR SCHRITT
7
Verpackungsinhalt
Laden Sie die Oplink-App herunter
Android: Önen Sie den Google Play Store. Suchen Sie
nach "Oplink Connected" und installieren Sie die App.
iPhone: Öffnen Sie den App Store. Suchen Sie nach
"Oplink Connected" und installieren Sie die App.
Windows: Önen Sie den Marketplace. Suchen Sie nach
"Oplink Connected" und installieren Sie die App.
Richten Sie ein Konto mit Ihrem
Smartphone ein
Starten Sie die App "Oplink Connected". Folgen Sie den
Anweisungen der Anwendung, um das Konto mit Ihrer
Telefonnummer zu aktivieren.
Installationsanleitung
SCHRITT
1
SCHRITT
2
SCHRITT
3
Inbetriebnahme der IP-Kamera
Stellen Sie die IP-Kamera in max. 1,5m Abstand
von der OPU-Zentraleinheit auf und stellen Sie die
Stromversorgung her. Sobald die Verbindung zur
Zentraleinheit hergestellt wurde, können Sie die IPKamera an ihrem Bestimmungsort montieren.
Hinweis: Sollte die Platzierung der Kamera dazu führen, dass das Bild auf
dem Kopf steht, verwenden Sie die Flip-Funktion in der Oplink-App, um
dieses Problem zu lösen: Video > Single-Video-Modus > Bildeinstellung
korrigieren.
Die Kamera kann nach der
ersten Inbetriebnahme
bewegt und montiert
werden.
(E)
(F)
SCHRITT
4

Installationsanleitung
Hinweis: Wenn der Aktivierungsprozess
nicht erfolgreich abgeschlossen wurde,
wird die App Sie bitten, den QR-Code auf
der Rückseite der OPU-Zentraleinheit zu
scannen um fortzufahren.
SCHRITT
5
SCHRITT
6
SCHRITT
7
(Beispiel eines QR-Code)
Kontrolle für Smart Plug
Verbinden Sie den Smart Plug in Ihrem Haushalt mit
einer normalen elektrischen Steckdose. Dann Licht oder
Gerät daran anschließen. Um Smart Plug fernbedient zu
steuern, drücken Sie auf "Automatisierung"
(Verfügbar
via App Hauptmenü oder Videoeinzelmodus), dann den
Anschaltknopf
drücken, um es an-/auszuschalten. Sie
können das Smart Plug auch manuell steuern, indem Sie
den An-/Aus-Knopf auf dem Stecker drücken.
Zusatzgerät
Produktpakete
TripleShield™ C1S3
Das Basis-Produktpaket beitet ein
Sicherheitssystem für das eigene
Zuhause, für die Bedürfnisse
von kleinen Familien und
Einzelpersonenhaushalten. Es ist
auch für Häuser mit weniger als 90
qm nutzbar.
TripleShield™ C2S6
Das Premiumproduktpaket
bietet ein komplettes
Haussicherheitssystem, für die
Bedürfnisse von großen Familien.
Es eignet sich für Häuser mit mehr
als 90 qm.
AlarmShield™ S6
Das Nur-Sensor-Paket bietet ein
Alarm- und Warnungssystem für
Haussicherheit, für die Bedürfnisse
von großen Familien. Es eignet sich
für Häuser mit mehr als 90 qm.
CareShield™ C1S2
Das Gesundheitssystem bietet
ein verläßliches Alarmsysstem für
häusliche Krankenpege, vor allem
für die Bedürfnisse von Senioren.
Installationsanleitung
Starten Sie den Geräte-Aktivierung in der
Oplink-App
Drücken Sie auf den Nächstes-Knopf
, um zum
"Aktivierung"-Bildschirm zu gelangen.
(Der Aktivierungsvorgang dauert ca. 2 Minuten.)
Herzlichen Glückwunsch!
Sie haben Ihr SicherheitsSystem erfolgreich
installiert!
Aktivierung abgeschlossen
Wenn Sie die Meldung "System ist bereit!" sehen, ist Ihr
Sicherheits-System einsatzbereit.
Hinweis: Ihr IP-Kamera-Status wird nach 10 Minuten aktualisiert.
WLAN-Repeater
433MHz
WLAN-Repeater
Wi-Fi Schwenk- &
Neigekamera
Wi-Fi IP-Kamera
Kameras & Repeater
Sie können Ihre Systemfunktionen und -Features mit einer Vielzahl
an Opplink Add-On-Geräten erweitern.
Akkustik- &
Hitzesensor
Garagentürsensor
Bewegungssensor Tür-/Fenster-
Sensor
Fernbedienung
Sirene
Sicherheits- und Schutzgeräte
WasserlecksensorSmart-Plug
Inaktivitäts-
Sensor
Alarmschalter
Wartungs- & Automatisationsgeräte
(G)

Guida all'installazione
(G) Smart Plug
Internet
Router
(non incluso)
(A)
(D)
(C)
(B)
(E) Telecamera IP Viti di montaggio &
Tasselli
(F) Adattatore di
alimentazione della
telecamera IP
COMPONENTI PER LA FASE
3
COMPONENTI PER LA FASE
4
COMPONENTI PER LA FASE
7
Contenuto della confezione
Installationsanleitung Guida di installazione
FASE
1
FASE
2
FASE
3
Accendere la telecamera IP
Collegare la telecamera IP alla presa a 1,5 m da OPU per
stabilire la connessione. Una volta stabilita e attivata la
connessione, la telecamera IP può essere spostata nella
posizione desiderata.
Nota: Se il posizionamento della telecamera provoca l'immagine sia
capovolta, utilizzare la funzione di vibrazione in App per correggere questo
problema: Video > Modalità video singolo > Impostazioni immagine.
La telecamera può essere
spostata e montata dopo
l'attivazione iniziale.
(E)
(F)
FASE
4
(A) OPU (B) Adattatore di
alimentazione OPU
(C) Cavo Ethernet
(D) Flash Drive USB da 16GB
Scaricarel'App Oplink
Android: Aprire Google Play Store. Cercare "Oplink
Connected" e installare l'applicazione.
iPhone: Aprire l'App Store. Cercare "Oplink Connected" e
installare l'applicazione.
Windows: Aprire Marketplace. Cercare "Oplink
Connected" e installare l'applicazione.
Creare un account con lo smartphone
Avviare l'applicazione "Oplink Connected". Seguire le
istruzioni sulla pagina dell'applicazione per attivare il
tuo account utilizzando il numero di telefono.
Montare la stazione OPU e connettersi a un
router abilitato per DHCP
Montare il sistema come secondo la figura fornita. Si
consiglia di posizionare OPU su una piattaforma alta
0,91-1,52m.
Nota: Una volta che il OPU è attivo e funziona, per stabilire il corretto
collegamento ad essa, alimentare i dispositivi rimanenti a 1,5 m da OPU.
Una volta stabilita e attivata la connessione, i dispositivi possono essere
spostati nella posizione desiderata.

Guida all'installazione
Complimenti! Hai terminato
correttamente l'installazione
del sistema di sicurezza!
FASE
5
FASE
6
FASE
7
Controllare la Smart Plug
Connettere la Smart Plug all'interno di una presa elettrica
standard domestica quindi collegare a quest'ultima una
luce o un elettrodomestico. Per controllare la smart plug in
modalità remota, toccare "Automazione"
(disponibile
nel Menu Principale App o modalità Singolo Video) quindi
il pulsante
per selezionare on/o. In aggiunta, puoi
anche controllare manualmente la smart plug premendo il
pulsante on/o sulla spina.
Kit prodotto
TripleShield™ C1S3
Il kit di base del prodotto fornisce
un sistema di sicurezza per la casa
che può soddisfare le necessità
delle piccole famiglie o dei single,
ed è idoneo per abitazioni più
piccole di 90 metri quadrati.
TripleShield™ C2S6
Il kit premium del prodotto
fornisce un sistema di sicurezza
per la casa completo e accurato
che può soddisfare le esigenze
delle grandi famiglie ed è idoneo
per abitazioni con una superficie
superiore a 90 metri quadrati.
AlarmShield™ S6
Il kit prodotto solo-sensore
fornisce un sisrtema di sicurezza
per la casa di tipo allarme-e-avvisi
che può soddisfare le esigenze
delle grandi famiglie ed è idoneo
per abitazioni con una superficie
superiore a 90 metri quadrati.
CareShield™ C1S2
Il pacchetto Healthcare garantisce
un affidabile sistema di allerta di
emergenza sanitaria da abitazione
che può soddisfare le necessità dei
famigliari anziani.
Installationsanleitung Guida di installazione
Dispositivo add-on
Nota: Quando il processo di
attivazione non può essere
completato normalmente, l'App vi
chiederà di effettuare la scansione
del codice QR del OPU, che si trova
sul retro del OPU, per continuare.
(Esempio codice QR)
Avviare l'attivazione del dispositivo sull'App
Toccare il Pulsante Avanti
per andare alla schermata
"Attivazione in corso". (Il processo di attivazione richiede
circa 2 minuti)
Attivazione completa
Quando appare il messaggio "Il sistema è pronto!", il
sistema è pronto all'uso.
Nota: Lo stato della telecamera IP verrà aggiornato dopo 10 minuti.
Ripetitore WirelessRipetitore Wi-Fi
Telecamera a tazza Wi-Fi
e IP inclinata
Telecamera IP
Wi-Fi
Telecamere e Ripetitori
Puoi estendere le funzioni e caratteristiche del tuo sistema a un'ampia
gamma di dispositivi aggiunti Oplink.
Sensore di calore
e di suono
Sensore porta
garage
Sensore di
movimento
Sensore per porta/
nestra
Telecomando
Sirena
Dispositivi di sorveglianza e sicurezza
Sensore Perdita
Acqua
Smart Plug
Sensore di
inattività
Pulsante
anti-panico
Dispositivi di assistenza e automazione
(G)

Guía de instalación
(G) Plug inteligente
Internet
Router
(no incluido)
(A)
(D)
(C)
(B)
(E) Cámara IP Tornillos de montaje &
Tacos para tornillos
(F) Adaptador de
alimentación para
la Cámara IP
COMPONENTES PARA EL PASO
3
COMPONENTES PARA EL PASO
4
COMPONENTES PARA EL PASO
7
PASO
1
PASO
2
PASO
3
Encendido de la Cámara IP
Para establecer la conexión de la cámara IP enchúfela a un
toma corriente que esté a una distancia de unos 1,5 m de la
OPU. Una vez establecida la conexión y en funcionamiento,
ya puede colocar la cámara IP a la posición deseada.
Nota: En el caso de que la colocación de la cámara haga que la foto salga al
revés, use la función Voltear en la aplicación para corregir este efecto. Des
de el menú: Video> Modo de video individual> Conguración de imagen.
Una vez haya realizado
la activación inicial de la
cámara, ya puede mover
y montar la cámara.
(E)
(F)
PASO
4
Contenido del Paquete
Guía de conguración
(A) OPU (B) Adaptador de
alimentación para la OPU
(C) Cable Ethernet
(D) USB Flash Drive de 16GB
Descargue la aplicación Oplink
Android: Abra Google Play Store. Busque por "Oplink
Connected" e instale la aplicación.
iPhone: Abra App Store. Busque por "Oplink Connected"
e instale la aplicación.
Windows: Abra Marketplace. Busque por "Oplink
Connected" e instale la aplicación.
Configure una cuenta para su teléfono
inteligente
Abra la aplicación "Oplink Connected". Siga las
instrucciones que aparecen en la página de la aplicación
para activar su cuenta, deberá introducir su número de
teléfono.
Monte la estación OPU y conéctela a un
router habilitado para DHCP
Monte el sistema según lo indicado en la imagen
suministrada. Se recomienda colocar el OPU sobre una
plataforma de unos 0.91-1.52m respecto al suelo.
Nota: Una vez que el OPU está en funcionamiento, para establecer una
conexión adecuada a la misma, encienda los dispositivos restantes
separados unos 1.5 m de la OPU. Cuando se haya establecido la conexión
y todo el sistema empiece a funcionar, puede colocar los dispositivos a su
ubicación deseada.

Guía de instalación
¡Felicidades! Ha instalado
con éxito el sistema de
seguridad!
PASO
5
PASO
6
PASO
7
Control del Smart Plug
Conecte el Smart Plug a un tomacorriente doméstico
estándar y enchufe en una luz o aparato a la misma.
Para controlar el Smart Plug de forma remota, toque en
"Automatización" (disponible a través del menú principal
de la aplicación o modo Video simple), luego encienda el
botón de encendido
para activar / desactivar. Además,
también se puede controlar manualmente el Smart Plug
pulsando el botón encendido / apagado en el enchufe.
Paquetes de productos
TripleShield™ C1S3
El paquete de producto básico
ofrece un sistema de seguridad
de hogar que puede satisfacer las
necesidades de pequeñas familias
o de personas individuales, y es
adecuado para casas menores de
90 metros cuadrados.
TripleShield™ C2S6
El paquete de producto de alta
calidad proporciona un sistema de
seguridad amplia y completa que
puede satisfacer las necesidades
de las familias numerosas y es
adecuado para casas de más de 90
metros cuadrados.
AlarmShield™ S6
El paquete de sensor-único
proporciona un sistema de
seguridad de alarma y alertas
para el hogar que puede satisfacer
las necesidades de las familias
numerosas y es adecuado para
casas de más de 90 metros
cuadrados.
CareShield™ C1S2
El paquete de cuidado de salud
ofrece un sistema fiable de alerta
de emergencia para cuidado
del hogar que puede satisfacer
las necesidades de los adultos
mayores.
Guía de conguración Dispositivo Add-on
Nota: Cuando el proceso de
activación no se puede completar
con normalidad, la aplicación le
pedirá que escanee el código QR del
OPU, situado en la parte posterior del
OPU y así completar la activación.
(Escanear el Código QR)
Inicio de la activación del dispositivo en la
aplicación
Toque en el siguiente botón
para ir a la pantalla
"Activando". (El proceso de activación tardará
aproximadamente 2 minutos)
Activación completada
Cuando veas el mensaje "El sistema está listo!", su sistema
ya está listo para utilizarlo.
Nota: El estado de su cámara IP se actualizará pasados 10 minutos.
Repetidor
Inalámbrico
Repetidor Wi-Fi
Cámara Wi-Fi Panorama
y IP inclinada
Cámara Wi-Fi IP
Cámaras y repetidores
Puede ampliar las funciones y características de su sistema con una
variedad dispositivos adjuntos de OPLINK.
Sensor Sónico
y Caloríco
Sensor de Puerte
de Garaje
Sensor de
movimiento
Sensor Puerta/
Ventana
Control remoto
Sirena
Dispositivos de Securidad y Protección
Sensor de fugas
de agua
Plug inteligente
Sensor de
inactividad
Botón de pánico
Dispositivos de Cuidado y Automoción
(G)

Guia de Instalação
(G) Smart Plug
Internet
Router
(não incluído)
(A)
(D)
(C)
(B)
(E) Câmara IP Parafusos de
Montagem & Buchas
(F) Adaptador de
Energia de Câmara IP
PEÇAS PARA PASSO
3
PEÇAS PARA PASSO
4
PEÇAS PARA PASSO
7
PASSO
1
PASSO
2
PASSO
3
Ligue a Câmara IP
Ligue a Câmara IP a uma tomada dentro de 5 pés do OPU
para estabelecer a conexão. Assim que estiver ligado, a
câmara IP pode ser movida para o local desejado.
Nota: Caso a colocação da câmara zer com que a imagem que virada ao
contrário, utilize a função de Girar na App para corrigir. Vídeo > Modo de
Vídeo Único > Denição de Imagem.
A câmara pode ser
movida e montada após
a ativação inicial.
(E)
(F)
PASSO
4
Conteúdos da Embalagem
Guia de Denição
(A) OPU (B) Adaptador de
Energia OPU
(C) Cabo Ethernet
(D) Flash Drive USB 16GB
Transra a App Oplink
Android: Abra a Google Play Store. Procure por "Oplink
Connected" e instale a aplicação.
iPhone: Abra a App Store. Procure por "Oplink Connected"
e instale a aplicação.
Windows: Abra o Marketplace. Procure por "Oplink
Connected" e instale a aplicação.
Dena uma conta com o seu smartphone
Execute a aplicação "Oplink Connected". Siga as
instruções na página da aplicação para ativar a sua
conta com o seu número de telefone.
Monte a estação OPU e ligue a um router
adequado para DHCP
Monte o sistema de acordo com a imagem fornecida. É
recomendado que o OPU seja colocado numa plataforma
alta (0.91 - 1.52m).
Nota: Assim que o OPU estiver montado e a funcionar, para estabelecer
a conexão, ligue os dispositivos restantes dentro de 5 polegadas de
distância do OPU. Quando estabelecer a conexão, os dispositivos podem
ser movidos para os locais desejados.

Guia de Instalação
Parabéns! Concluiu a
instalação do sistema de
segurança!
PASSO
5
PASSO
6
PASSO
7
Controlar a Ficha Smart
Ligue a Ficha Smart a uma tomada elétrica doméstica
normal, e depois ligue uma luz ou um aparelho à Ficha.
Para controlar remotamente a Ficha Smart, carregue em
"Automatização"
(disponível no Menu Principal da
Aplicação ou no modo Vídeo Único) e depois no botão de
ligar
para para alternar entre ligado/desligado. Além
disso, também pode controlar a Ficha Smart manualmente,
pressionando o botaão ligar/desligar na própria cha.
Pacotes de Produtos
TripleShield™ C1S3
O pacote básico do produto
fornece um sistema de segurança
doméstico que pode satisfazer as
necessidades de pequenas famílias
ou pessoas solteiras e é adequado
para casas com menos de 90
metros quadrados.
TripleShield™ C2S6
A embalagem do produto
premium fornece um sistema
de segurança doméstico mais
rigoroso e completo que pode
satisfazer as necessidades de
famílias mais numerosas e é
adequado para casas com mais de
90 metros quadrados.
AlarmShield™ S6
A embalagem do produto
apenas com o sensor fornece um
sistema de segurança doméstico
de alarme-e-alertas que pode
satisfazer as necessidades de
famílias grandes e é adequado
para casas com mais de 90 metros
quadrados.
CareShield™ C1S2
o pacote de cuidados de saúde
fornece um sistema de confiança
para cuidados domésticos,
com alerta de emergência de
confiança que pode satisfazer as
necessidades de parentes mais
idosos.
Guia de Denição Dispositivo Add-On
Nota: Quando o processo de
ativação não puder ser completado
normalmente, a App irá pedir que
leia o código QR do OPU, que se
encontra na parte de trás do OPU,
para continuar.
(Exemplo de Código QR)
Inicie a ativação do dispositivo na App
Pressione o Botão Avançar
para ir para o écrã "A
ativar". (O processo de ativação demora aproximadamente
2 minutos).
Ativação completa
Quando vir a mensagem "Sistema pronto!", o seu sistema
está pronto a ser utilizado.
Nota: O estado da sua Câmara IP será actualizado após 10 minutos.
Repetidor sem osRepetidor Wi-Fi
Câmara Wi-Fi IP com
ajuste horizontal (Pan) e
de inclinação (Tilt)
Câmara Wi-Fi IP
Câmaras e Repetidores
Pode expandir as funções e características do seu sistema com uma
variada gama de dispositivos adicionais Oplink.
Sensor de
Som e Calor
Sensor para Porta
de Garagem
Sensor de
Movimento
Sensor de Porta/
Janela
Controlo Remoto
Sirene
Dispositivos de Segurança
Sensor de
fuga de água
Smart Plug
Sensor de
Inactividade
Botão de Pânico
Dispositivos de Proteção e Automatização
(G)

Installatiehandleiding
(G) Smart plug
Internet
Router
(niet meegeleverd)
(A)
(D)
(C)
(B)
(E) IP Camera Montageschroeven &
Pluggen
(F) IP Camera
Stroomadapter
ONDERDELEN VOOR STAP
3
ONDERDELEN VOOR STAP
4
ONDERDELEN VOOR STAP
7
STAP
1
STAP
2
STAP
3
Inschakelen van de IP Camera
Schakel de IP camera in binnen een straal van 1,5 meter
van het OPU station door de bijbehorende adapter in het
stopcontact te steken. Zodra verbinding is gelegd, kan de
IP camera naar de uiteindelijke plek worden verplaatst.
Opmerking: Als de plaatsing van de camera tot gevolg heeft dat het beeld
ondersteboven staat, gebruik dan de Flip functie in de app om dit te
corrigeren. Video > Enkele Video Mode > Beeldinstellingen.
De camera kan worden
verplaatst en gemonteerd
na de eerste activering.
(E)
(F)
STAP
4
(A) OPU (B) OPU Stroomadapter
(C) Netwerk Kabel
(D) 16GB USB Stick
Inhoud Verpakking
Instellingenhandleiding
Download de Oplink App
Android: Open de Google Play Store. Zoek naar "Oplink
Connected" en installeer de app.
iPhone: Open de App Store. Zoek naar "Oplink
Connected" en installeer de app.
Windows: Open de Appstore. Zoek naar "Oplink
Connected" en installeer de app.
Creëer een account via uw smartphone
Start de "Oplink Connected" app. Volg de instructies om
uw account te activeren via uw mobiele nummer.
Installeer het OPU station en sluit deze aan
een router die DHCP ondersteunt
Monteer het systeem volgens de meegeleverde
afbeelding. Het wordt aangeraden om de OPU op een
hoogte van 3-5ft (0,91-1,52m) neer te zetten.
Opmerking: Om een optimaal resultaat te behalen, schakel de overige
apparaten binnen een straal van 1,5 meter van het werkende OPU station
in. Zodra de verbindingen zijn gemaakt, kunnen de apparaten op hun
uiteindelijke plek worden geplaatst.

Installatiehandleiding
Gefeliciteerd! U
heeft met succes het
beveiligingsssyteem
geïnstalleerd!
STAP
5
STAP
6
STAP
7
Gebruik van de Smart plug
Sluit de Slimme Stekker aan op een standaard huisstopcontact, en sluit er dan een lamp of apparaat op
aan. Om de Slimme Stekker op afstand te besturen klikt
u op "Automatisering"
(beschikbaar via het app
Hoofdmenu of de Enkele Video mode), en dan op de aan/
uitknop
om in/uit te schakelen. U kunt de stekker
echter ook handmatig bedienen via een druk op de aan/
uitknop op de stekker.
Oplink Sets
TripleShield™ C1S3
Het basispakket bevat een volledig
alarmsysteem geschikt voor de
meeste woningen en panden.
TripleShield™ C2S6
Het premiumpakket bevat
een uitgebreid alarmsysteem
ook geschikt voor de zakelijk
gebruiker.
AlarmShield™ S6
Het sensorpakket bevat het
uitgebreide alarmsysteem zonder
observatiemogelijkheden.
CareShield™ C1S2
Dit pakket voorziet in zowel
alarmering als zorg-op-afstand.
Instellingenhandleiding Aan te sluiten Apparaten
Opmerking: als het activatie proces niet
kan worden afgerond, dan zal de app
vragen om de QR code van de OPU,
wat zich bevindt op de achterzijde van
de OPU.
(Voorbeeld van de QR Code)
Start het activeren van apparaten in de app
Druk op <Volgende >
voor het Activatie scherm. (het
activatie proces duurt ongeveer twee minuten)
Activering afgerond
Zodra u het “Systeem is gereed!” bericht ziet is uw systeem
klaar voor gebruik.
Opmerking: Uw IP Camerastatus wordt na 10 minuten bijgewerkt.
Draadloze RepeaterWi-Fi Repeater
Wi-Fi Pan & Tilt IP CameraWi-Fi IP Camera
Camera's & Repeaters
U kunt uw Oplink systeem uitbreiden met verschillende Oplink
apparaten.
Sonische &
Hittesensor
Garagedeursensor
Bewegingsensor Deur/Raamsensor
Afstandsbediening
Sirene
Beveiligings- & Veiligheidsapparatuur
Water sensorSmart plug
InactiviteitsensorSOS button
Zorg- & Automatiseringsapparatuur
(G)


TripleShield™ C1S3TripleShield™ C2S6
AlarmShield™ S6CareShield™ C1S2

FAQ
Yes! You can take the USB ash drive from the OPU device and plug it directly to your PC and
access the recorded video.
(Remember to plug the USB ash drive back into the OPU when nished.)
At Oplink, we take your security seriously. There are two levels of security steps we provide to ensure
your data are secured. First, Oplink requires all users to go through an authentication process with
encrypted transmission during sign-in. Secondly, after the authentication process, everything is
encrypted during the transmission of all contents via the internet; Oplink App uses bank-level AES data
encryption.
While we cannot email you the existing account password, you may request for a new password by
going to the Oplink Connected App login page, and tap the “Forgot password?” link and then go
through the steps to request a randomly generated password to be sent to your registered email.
(Password can be changed by tapping on the Sidebar Menu button on the app Main Menu, and then
tap “My Prole”)
With your privacy in mind, Oplink stores your videos locally. Event-triggered video recordings are
stored on your local ash drive plugged in your OPU's USB port, and for the live video clips manually
recorded, they are stored on your smart device.
Oplink Connected App is built to support multi-location management. You can manage as many
locations as you would like, and we do not place a limit on the number of Oplink Systems you can
purchase.
Q
Can I save the video(s) recorded on the ash drive to my PC?
Q
How can I be certain other people are not stealing my identity on the cloud?
Q
How do I retrieve my Oplink Mobile App password?
Q
How can I be sure unauthorized people are unable to look at my videos on the cloud?
Q
How many locations can I manage from my Oplink Connected App?
We recommend you to change your password as soon as possible by using any of the following methods
to sign in to your account to make the change to the password:
- Use a smart device with Oplink Connected App installed.
- Visit web.OplinkConnected.com on a web browser.
Alternatively, you may also contact us to disable your account for you.
Because Oplink System is a fully IoT interactive system, it will require the following:
- Broadband Internet connection (dial-up connections are not supported)
- Internet Router with an available LAN port.
- Smartphone with a Data Plan (for using the App features such as push notication, and video
streaming)
Yes, visit www.OplinkConnected.com, and then browse to the Support section to access user manuals.
If a camera is showing as “oine,” try power cycle the camera rst and wait approximately two minutes, if
the oine situation persists, try moving the camera closer to the OPU and power cycle the device again.
After the methods above, if the oine status is still not resolved, please contact Oplink Technical Support
for further troubleshooting assistance.
First, try checking your internet connection, if the connection is working properly, then unplug the
network cable from your OPU for 10 seconds, and then reconnect it. If the OPU is still oine after 5
minutes, please contact Oplink Technical Support for further troubleshooting assistance.
Q
If I lose my smartphone, what should I do?
Q
What are the requirements prior to purchasing an Oplink System?
Q
Is there a place I can view the user manual online?
Q
What can I do if a camera is oine?
Q
What can I do if my system is oine?

For more information, please visit
www.OplinkConnected.com
© 2014 Oplink Communications, Inc.
All rights reserved.
 Loading...