

Page 1
HCW 12
instruction manual
használati utasítás
návod na použ itie
manual de utilizare
uputstvo za upotrebu
navodilo za uporabo
uputa za uporabu
návod k použ ití
használati utasítás
návod na použ itie
manual de utilizare
uputstvo za upotrebu
navodilo za uporabo
návod k použ ití
uputa za uporabu
Page 2

Page 3
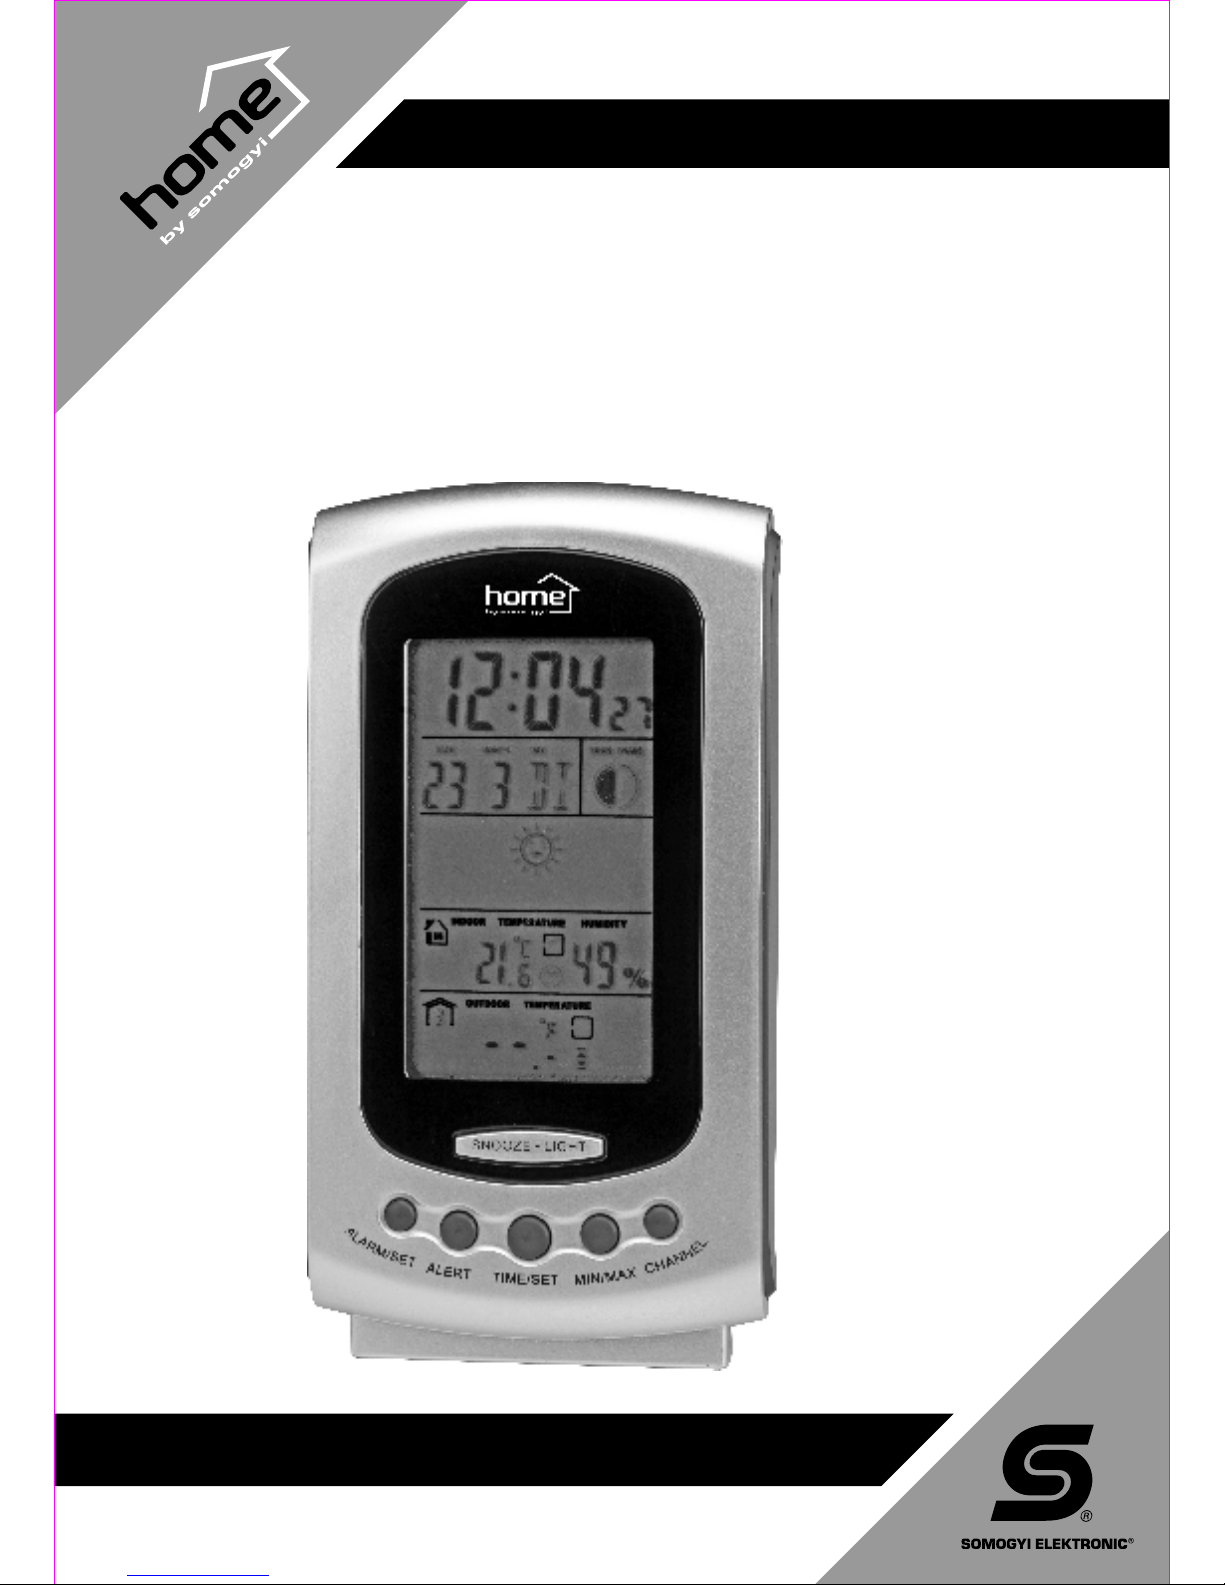
HCW 12
• shows weather forecast with animated symbols
• DCF-77 radio control (Frankfurt)
• time zone selector
• date display, alarm function
• measures indoor and outdoor temperature
• measures indoor humidity
• displays changes in temperature and humidity
• displays current moon phase
• displays battery level (for indoor and outdoor unit)
• included: 1 indoor unit, 2 outdoor units
• can be extended by one additional outdoor unit (HCKK 01)
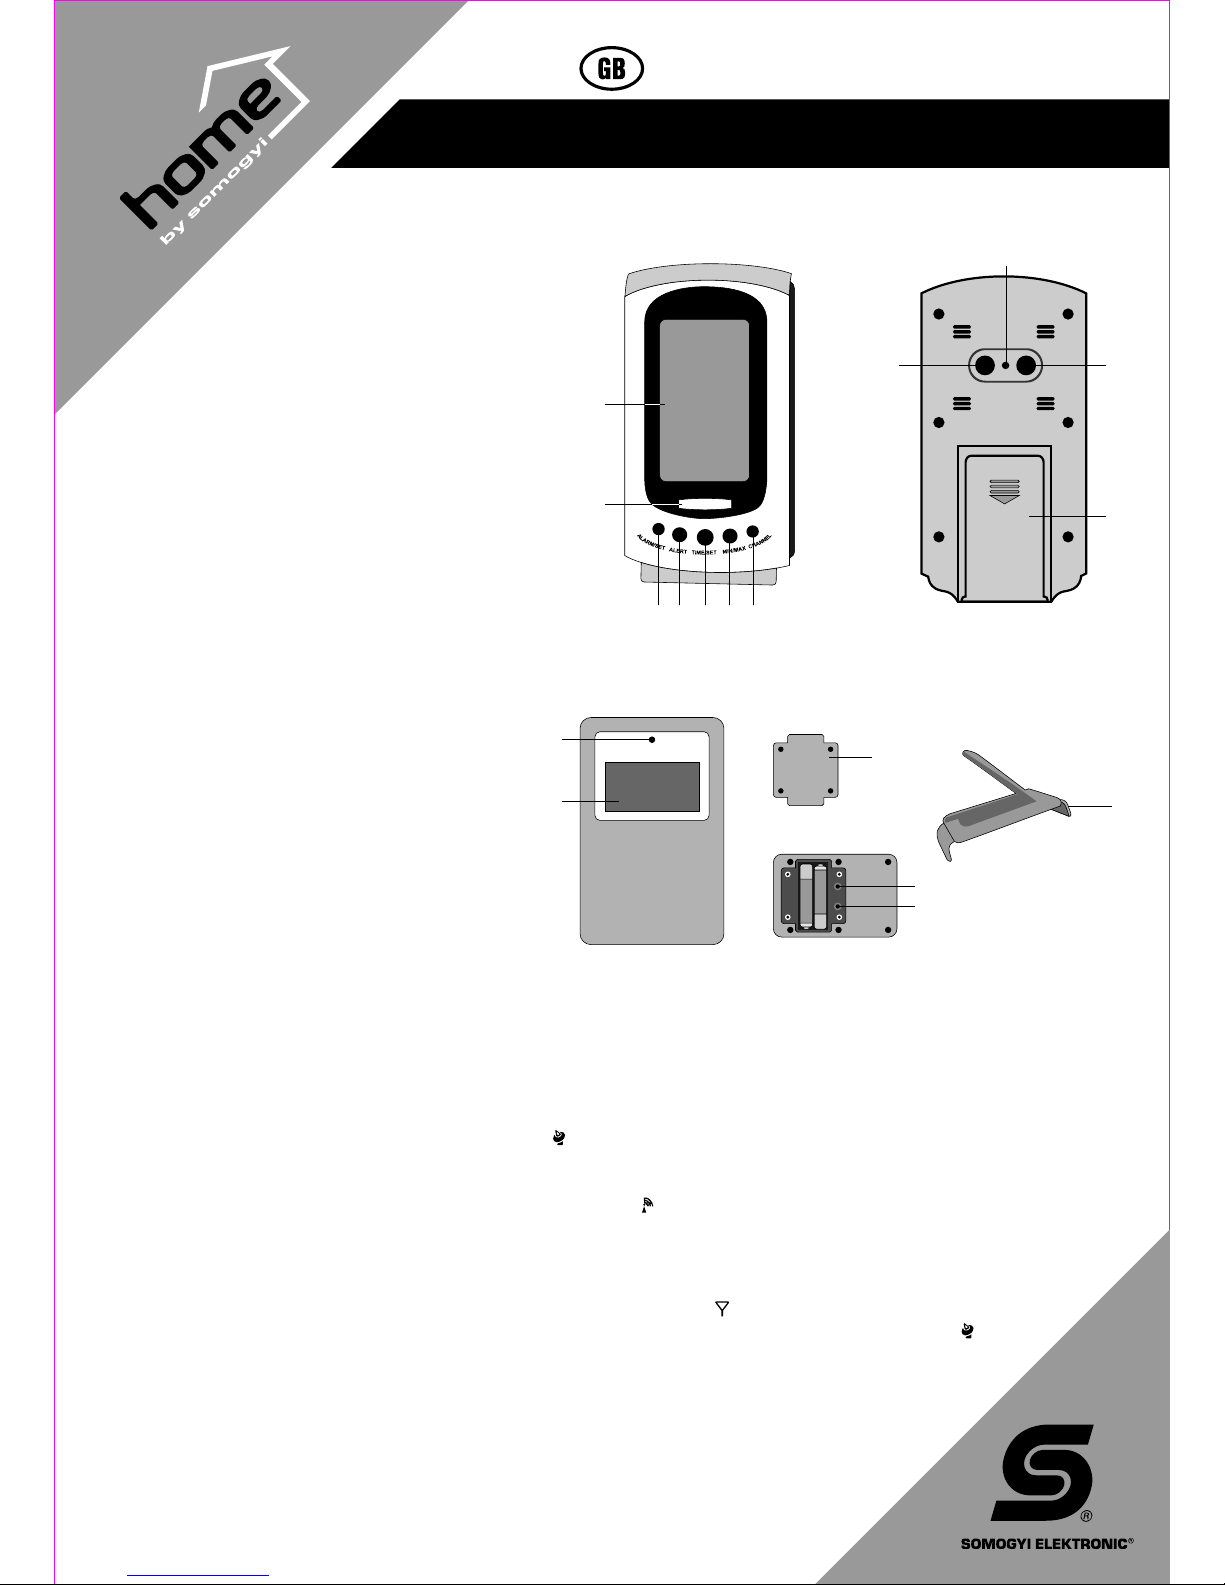
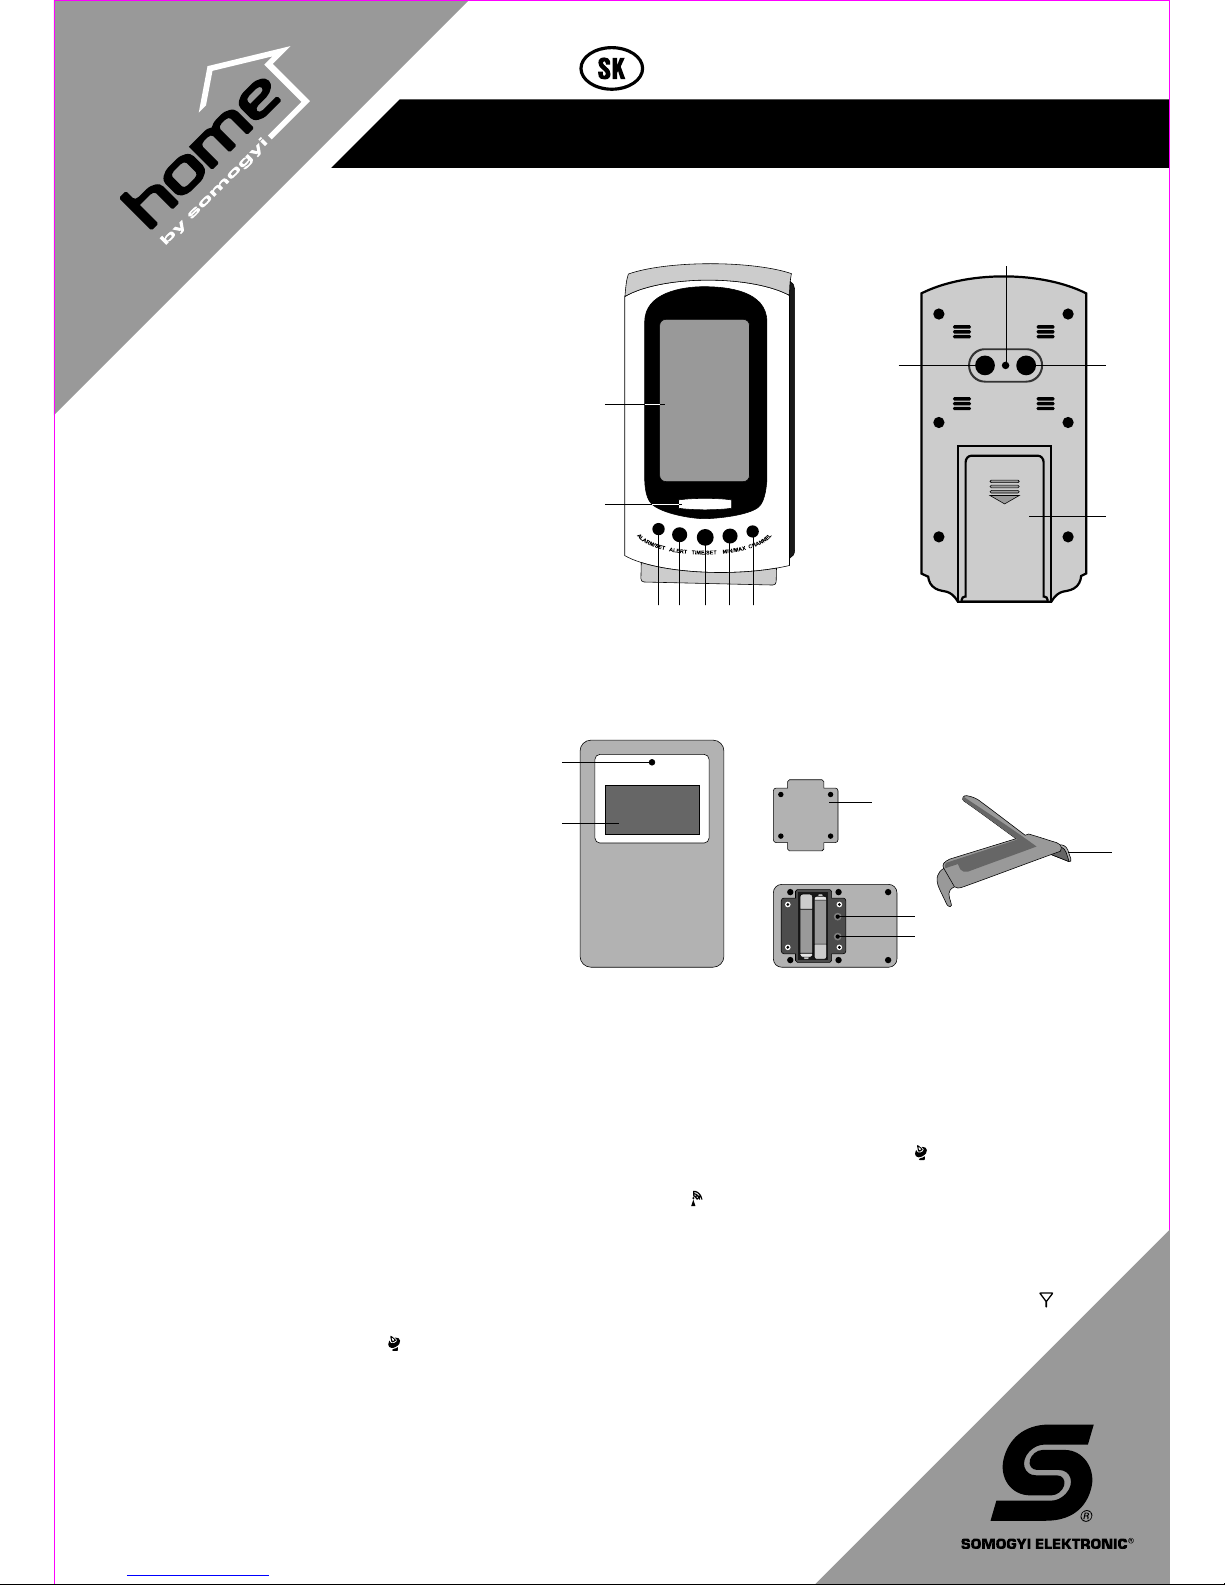
Indoor unit
1. Display
2. SNOOZE-LIGHT – turns on backlight for 5 seconds
3. ALARM/SET – set the alarm
4. ALERT – set temperature alert
5. TIME/SET – set time, date, and time zone
6. MAX/MIN – show maximum and minimum values for
indoor and outdoor temperature, and indoor humidity
7. CHANNEL – outdoor unit channel selector
8. UP – step to previous, select 12/24 hour time format
9. RESET – revert all settings to factory default
0 0
10. DOWN – step to next, C/ F selector
11. Battery compartment lid
Outdoor unit
12. LED indicator
13. Display
14. Battery compartment lid
0 0 0 0
15. C/ F – select between C/ F
16. Tx – signal transmission
17. Holder / stand
14
REMOTE SENSOR
12
13
SNOOZE • LIGHT
4
5 6
7
3
1
2
10
11
8
9
15
16
17
Installation
1. Remove the indoor unit’s battery compartment lid (11) and insert the batteries with the correct polarity. The backlight comes on, the
display becomes active, and the product emits a beep to indicate that it is ready for use.
2. Now remove the outdoor unit’s battery compartment lid (14) by unscrewing the 4 screws, and insert the batteries with the correct polarity.
When the batteries are inserted, the product begins to transmit its signal for the indoor unit.
3. The indoor unit automatically begins seeking for the signals of the outdoor units within range. If a signal is found, the display shows the
external temperature along with the channel number, and the symbol flashes up, accompanied by a beep.
4. After 3 minutes the product begins seeking for the atomic clock’s signal, and continues seeking for 7 minutes. If the product is located in a
place where the signal of the atomic clock located in Frankfurt (DCF-77) is available, the clock is automatically set to the exact current time.
In this case, the following variant of the icon is shown in the display: . If the radio signal is not available, the atomic clock symbol
disappears, and the clock starts counting from 0:00.
Registration of the outdoor unit
When turned on, the outdoor unit sends a signal for the indoor unit every 30 seconds, but you can also trigger the signal manually.
Place the outdoor unit close to the indoor one, and press the Tx button (16). The symbol appears on the outdoor unit. If the
indoor unit receives the signal, its display shows the external temperature along with the channel number, and the symbol
flashes up, accompanied by a beep.
When using multiple outdoor sensors, they are identified by the numbers 1, 2 and 3. The packaging of the outdoor unit
(HCKK 01) as well as the product itself indicates the product’s channel (CH1, CH2 and CH3 for channel 1, 2 and 3,
respectively). The kit includes the HCW 12 indoor unit and two outdoor units registered for channels CH1 and
CH2. This allows for the addition of a third outdoor unit, which must use CH3. Turn on the outdoor units one by
one, after each other. Do not insert the batteries into more than one outdoor unit at the same time. Only insert
batteries into the second outdoor unit when the first one is already working; follow the same procedure for
the third unit. This helps prevent interference between outdoor units during registration. You cannot
register outdoor units while the product is seeking for the DCF-77 radio signal.
weather station with 2 outdoor sensors
Page 4
The product’s transmission range in an open area is approximately 25 meters. It can be used to measure either outdoor temperature, or the
temperature in another room within the same house. To ensure accuracy, do not expose to direct sunlight. The battery's voltage might
decrease when the external temperature sinks near or below the freezing point, which can result in a reduced transmission range. Walls,
concrete and metal surfaces between the two devices also decrease the transmission range, it is therefore recommended to place them as
close to each other as possible. When used in a house with more than one floor, place the external sensor higher than the central unit
(upstairs). Interference may occur near computers and other electronic devices.
The external sensor has a one-line display that shows the selected channel and the temperature.
You can select either Celsius or Fahrenheit as the unit of measurement for temperature by pressing the button under the battery
compartment lid (15).
When you are using several outdoor units, you can choose which channel’s temperature to display by pressing CHANNEL (7); the number
shown next to the Outdoor Temperature section of the display (1, 2 or 3) indicates the current channel.
Next to the indoor and outdoor temperature the display also shows an icon that indicates whether the temperature is rising or sinking.
0
Whenever the temperature changes by 1C, either the or icon is shown to indicate the direction of the change. The means that the
temperature is constant.
Setting the time from the radio signal
If the product fails to set the clock automatically when turned on, you can still synchronize manually later. Press and hold DOWN (10) for 2
seconds. The display shows the radio signal icon . You can press and hold the button again to pause seeking for the signal.
If the process is working properly, symbols of radio signals will also appear flashing around the image of the tower. If they do not appear,
then the signal at your location is too weak to receive. In such cases turn the device around or place it somewhere else. (The clock has a
built-in ferrite antenna similar to those used in AM radios.) Depending on the signal’s strength, synchronization may take up to 2-10
minutes. After that the image of the transmission tower is shown permanently without flashing. If the signal is weak, the icon disappears.
If synchronization is successful, the display may also show DST (for summer “Daylight Savings Time”).
Once the clock has been set automatically, you can also change the current time zone. For detailed instructions see the section about
“Setting the time manually.”
* Clocks controlled by a radio signal have a special built-in radio receiver besides the traditional quartz clock. This unit receives the signals
of the DCF-77 radio tower located in Mainflingen (near Frankfurt, Germany) and corrects the time accordingly at regular intervals. Because
the radio signals transmit the information of an atomic clock, such devices effectively have the precision of an atomic clock. The maximum
deviation from the exact time in 1 million years is 1 second. Such clocks can be used conveniently because the setting of the exact date
and time and the transition between summer and winter time is fully automatic and requires no human interaction.
Reception is appropriate within a 1500-2000 km range. If there is no reception, the device still functions as a normal quartz clock.
Setting the time manually
If the radio signal is too weak to synchronize the clock automatically, you need to set the current time manually.
Press and hold TIME/SET (5) for 2 seconds; the number for the current year will start flashing (the default value is 2000). You can adjust the
value using the UP (8) and DOWN (10) buttons. When you have reached the desired value, press TIME/SET (5) to move on to the following
fields:
Year - Month - Day - Display language - Hour - Minute - Time zone
Language codes: GE: German; EN: English; IT: Italian; FR: French; NE: Dutch; ES: Spanish; DA: Danish
Time zone: you can set an offset between -12 and +12 hours. This value is used when synchronizing automatically with the signal of the
DCF-77 station, and it represents the offset from the time in Frankfurt. If you change your time zone, the clock will show the corresponding
time the next time it is synchronized.
The product shows the moon phase automatically based on the current date.
Alarm
Press and hold ALARM/SET (3) for 2 seconds. The display will then show 0:00AL, and you can use the UP (8) and DOWN (10) buttons to
change the hour. If you press ALARM/SET (3) again, you can move on the set the minute.
Pressing ALARM/SET (3) again activates the alarm, which is confirmed by the icon at the top of the display. To turn off the alarm, press
ALARM/SET (3) again.
The alarm will sound for 2 minutes, growing stronger in 4 steps. It can be stopped by pressing any of the buttons. If you press SNOOZE, the
alarm will stop, but it will sound again in 5 minutes.
Checking recorded temperature and humidity values
In normal mode the device displays the current indoor and outdoor temperature and the indoor or outdoor humidity. In the meantime, the
minimum and maximum values for all of these are constantly recorded.
1. Select a channel using the UP button depending on which external temperature's minimum and maximum values you want to check.
2. Press MAX/MIN repeatedly. First the maximum, then the minimum values are displayed. When you press the button for the third time,
the display reverts to the currently measured values.
3. Clearing the memory: When the minimum or maximum value is displayed, press MAX/MIN again and hold it for 3 seconds. The stored
minimum and maximum values are cleared at the same time, i.e., they are replaced by the current value. The memory for the external unit
that is currently displayed will be cleared.
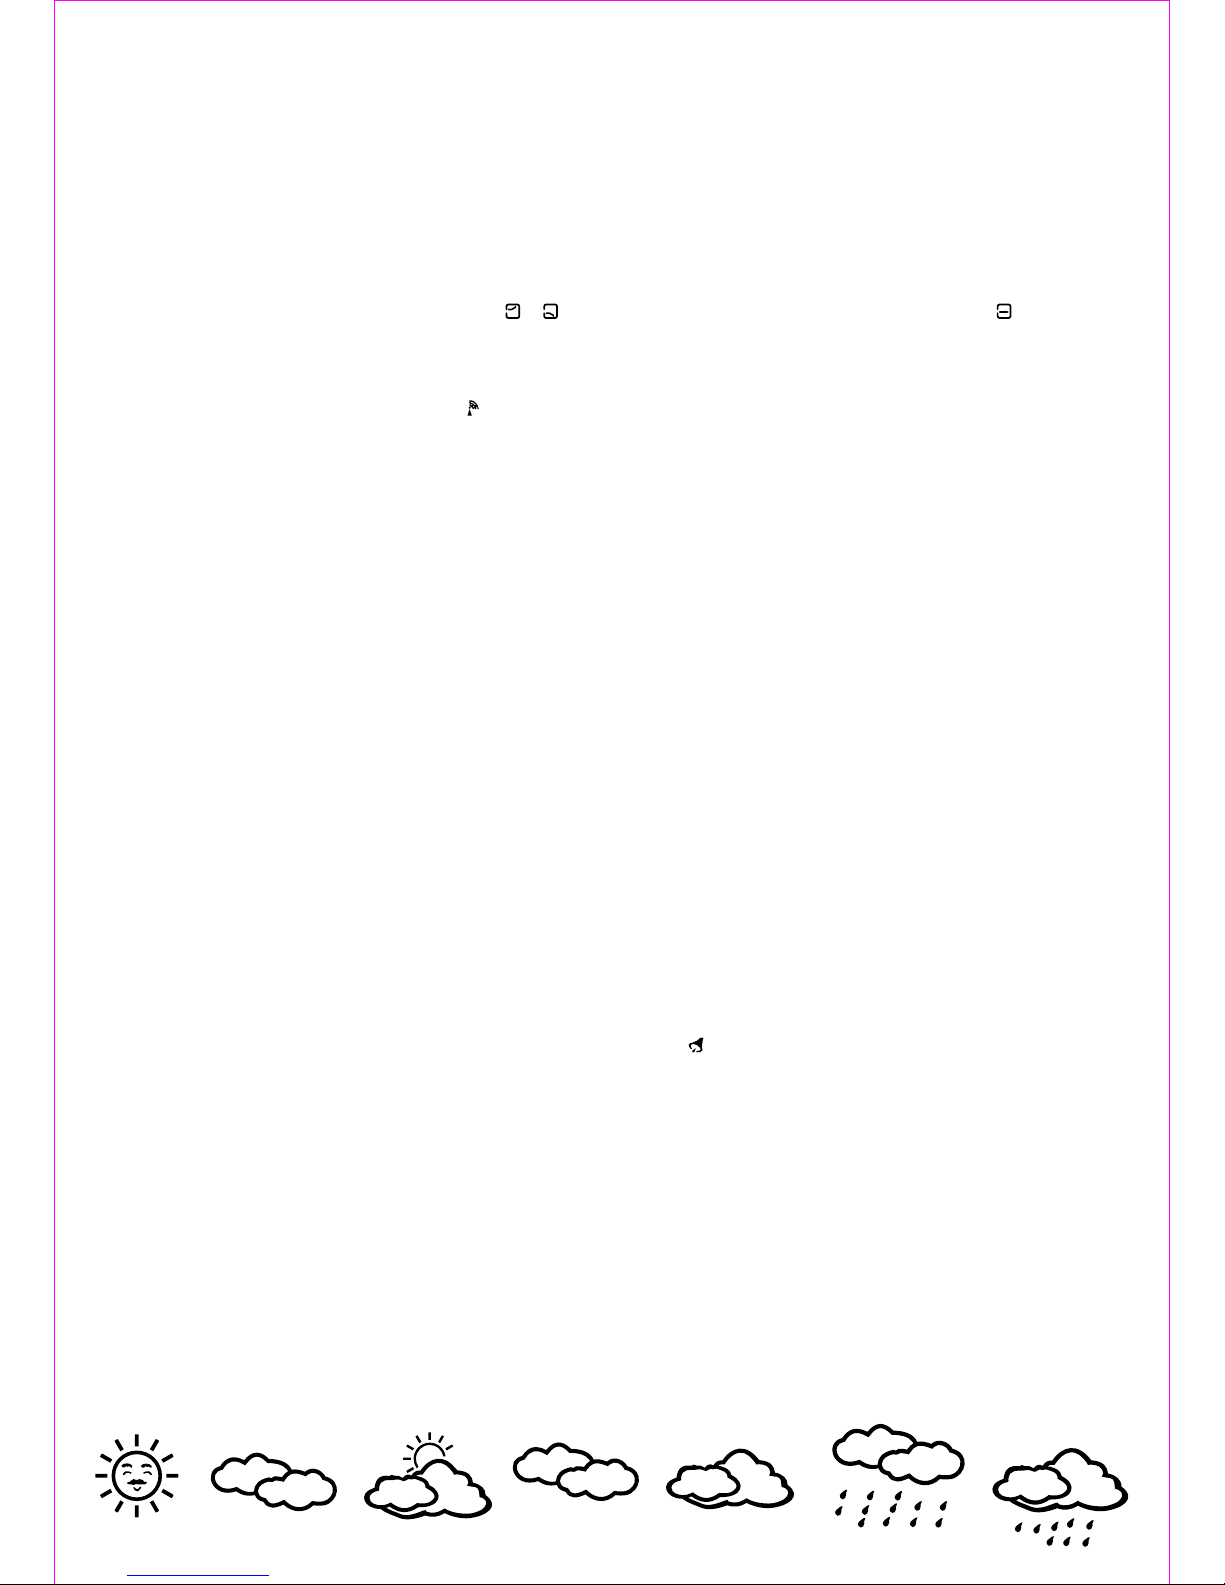
Barometer – weather forecast
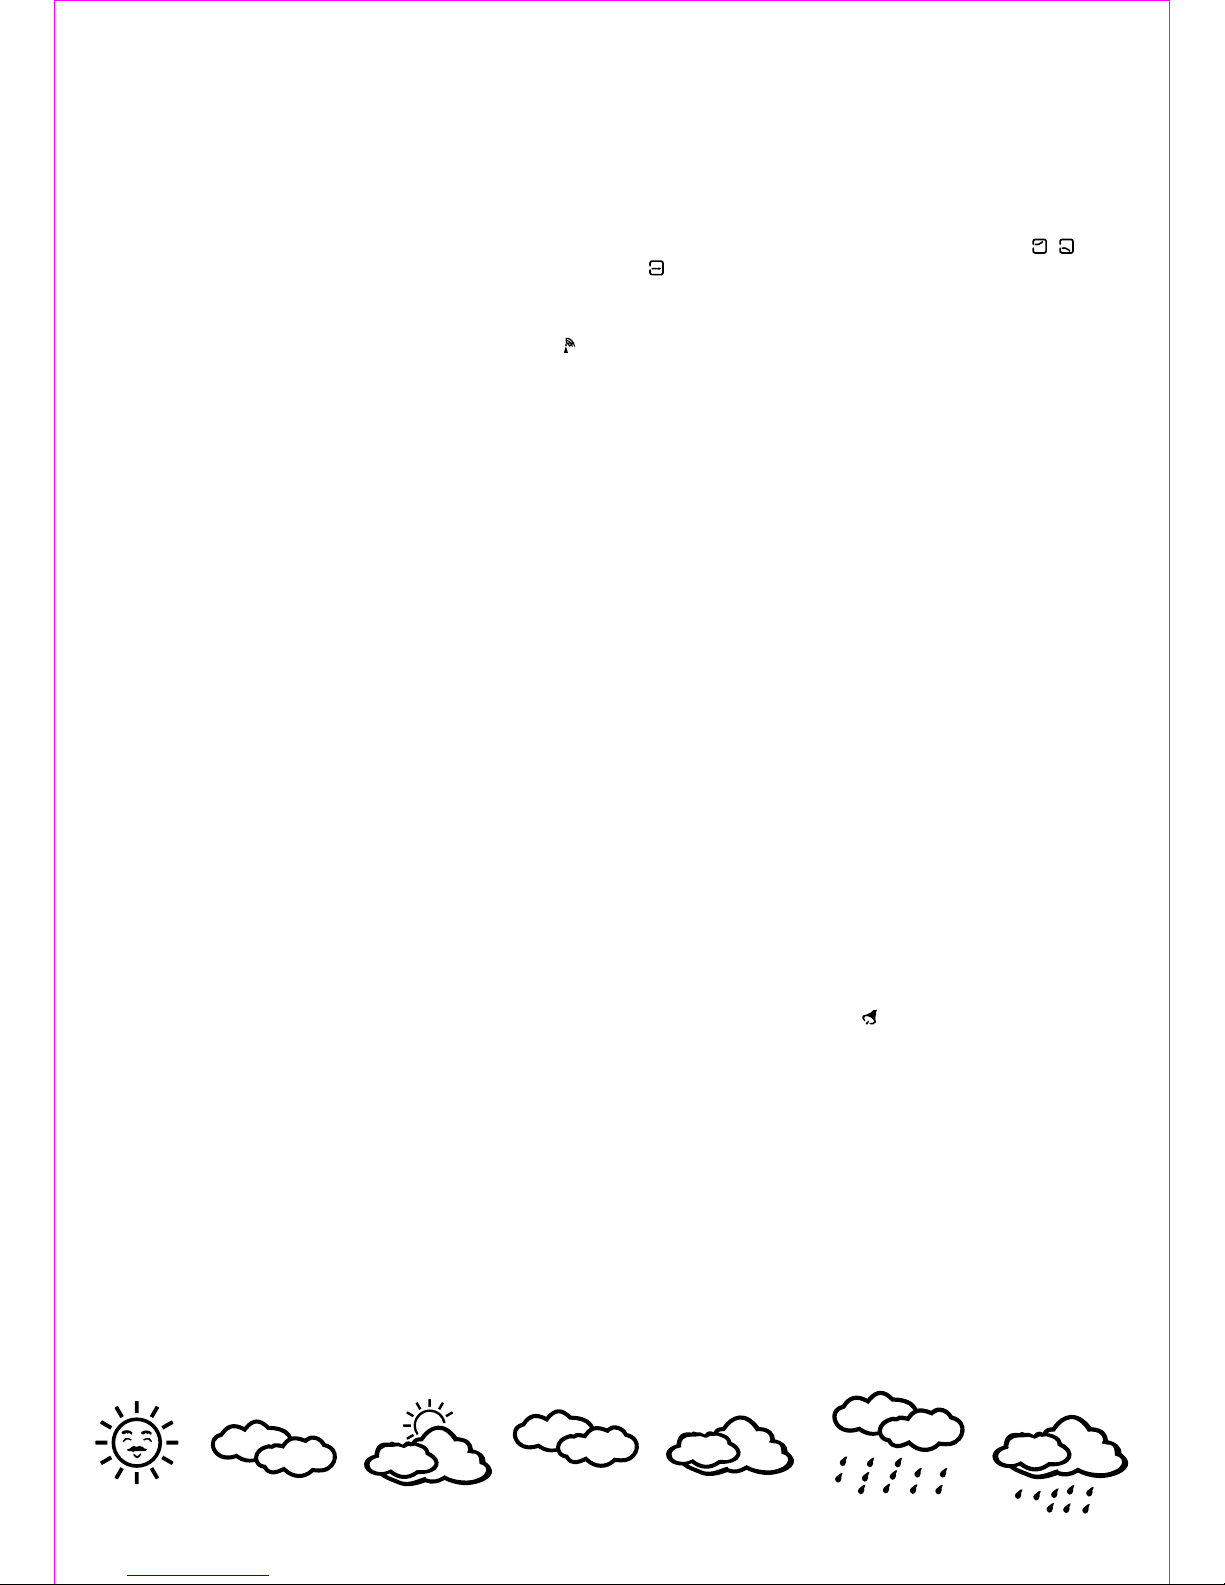
The barometer can approximately forecast the weather you can expect in the next 12-24 hours based on the change of air pressure. The
four possible icons are: sunny, slightly cloudy, cloudy, rainy. The sun that appears at night predicts a clear sky and rising air pressure.
sunny slightly cloudy cloudy rainy
±
Page 5
Note: as we know, no method can predict the weather with 100% reliability. This device provides weather forecasts that are approximately
75% reliable. Because it was designed for indoor use, its operation depends on the speed and extent of the change in the local
microclimate. Larger changes in weather that happen more quickly (i.e., rain after sunshine) are predicted more precisely and decidedly
than slow changes.
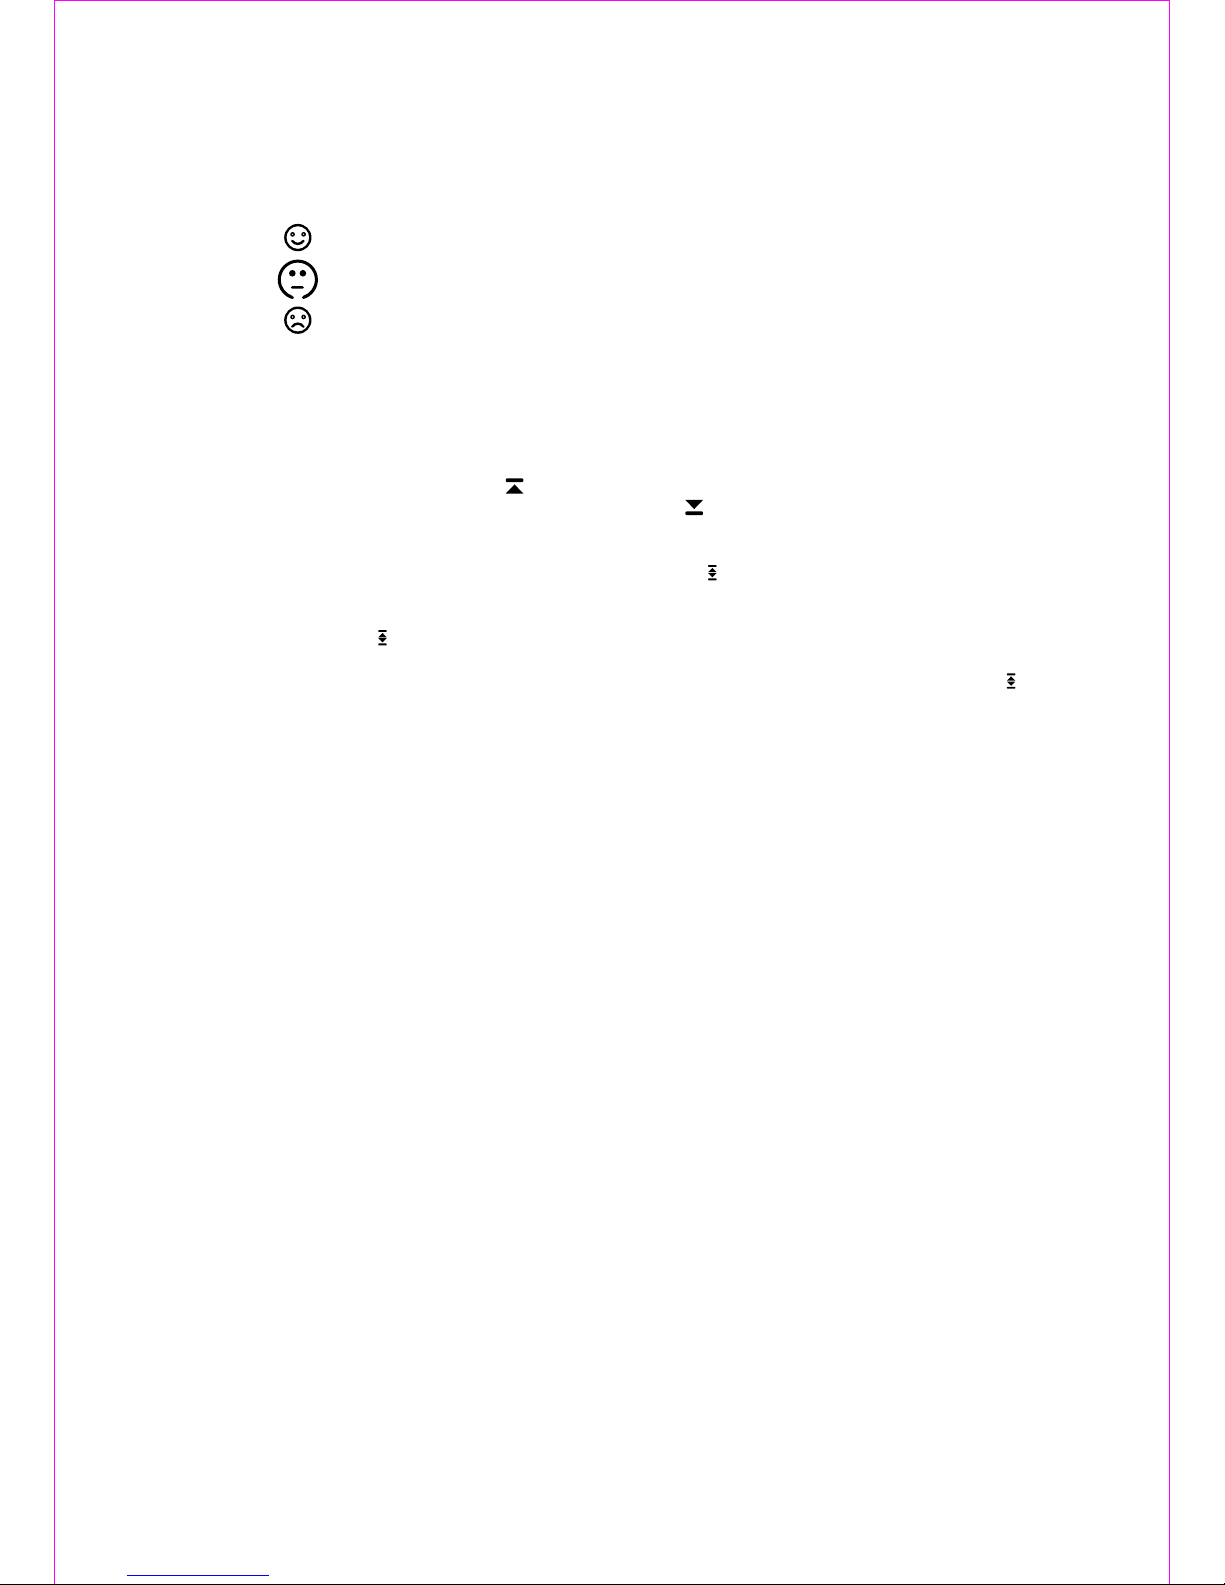
Humidity levels
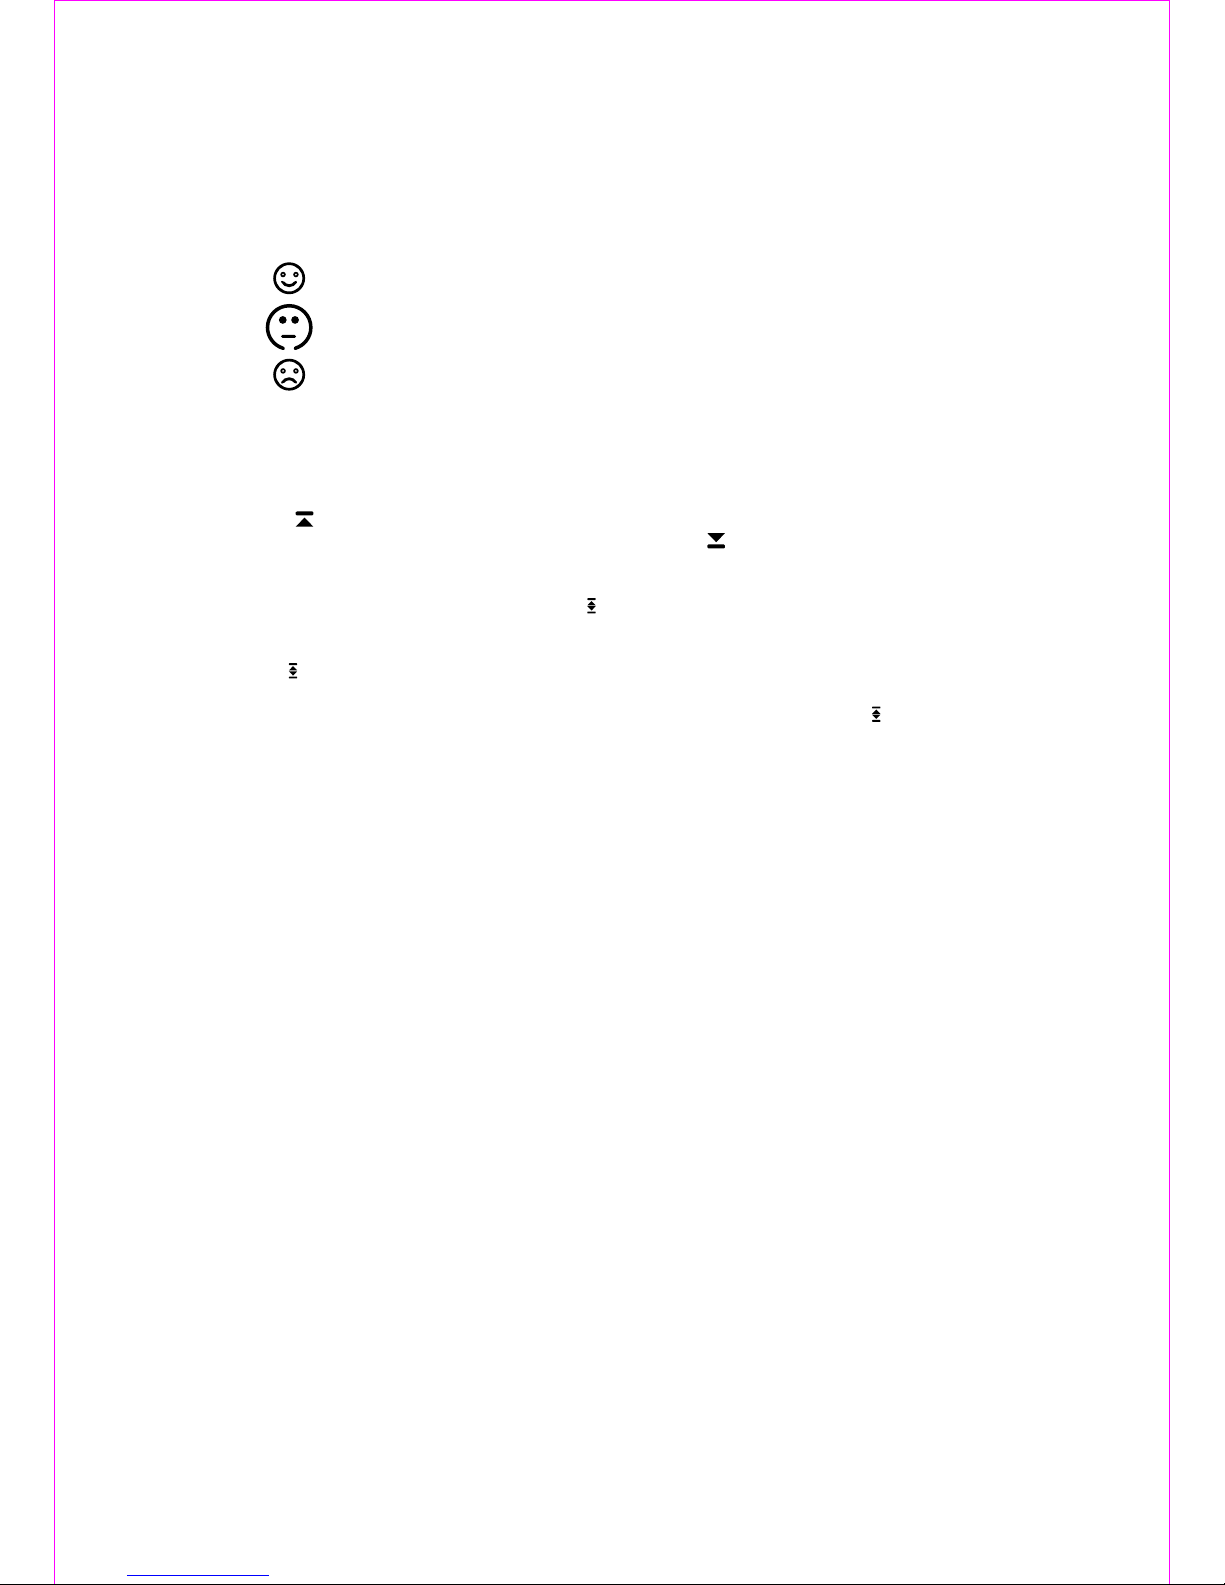
Next to the current indoor humidity value, a small icon reflects the level of human comfort associated with it. The different levels are:
Degree of comfort Icon Temperature range Humidity Note
0
Comfortable 20 C - 28 C 40% - 70% Ideal temperature and humidity
0 0
Humid 20 C - 28 C Above 70% Too humid
0 0
Dry 20 C - 28 C Below 40% Too dry
If the temperature measured by the product is outside the indicated range, no icon is displayed.
Setting the temperature alert
The product allows you to set an alert that will sound if the temperature measured by one of the outdoor units passes a specified upper or
lower limit.
Press and hold ALERT (4) for 2 seconds. The upper limit then appears flashing in the place where the outdoor unit’s temperature is
normally shown (the factory default is 70°C), and the icon is also shown. You can adjust the value using the UP (8) and DOWN (10)
buttons. If you press ALERT (4), you can set the lower limit in the same way; the then appears flashing in the display.
If you are using multiple outdoor units you can set an upper and lower limit for each of these, after selecting the desired channel using the
CHANNEL (7) button.
After setting the limits the alert function becomes active, which is indicated by the symbol in the display. You can press ALERT (4) to turn
off this function.
When the temperature measured by the outdoor unit reaches the value you set previously, the product emits a short beep, the displayed
temperature starts flashing, and the icon appears, also flashing. The displayed value and the icon will keep flashing as long as the
measured temperature is within the specified range. The beep repeats once per minute; you can press any key to turn it off.
If the outdoor unit that triggers the alert belongs to a different channel than the one that is currently displayed, only the icon will start
flashing, but not the displayed temperature. You can find the channel by pressing CHANNEL (7) repeatedly: the displayed value starts
flashing when you encounter the alert’s channel.
Replacing the batteries
The central unit constantly monitors the status of the batteries and warns you when they need to be replaced. The battery symbol that
appears next to the indoor or outdoor temperature signals that the batteries in the given unit are exhausted.
Only long-life alkaline batteries are recommended. Do not mix batteries that are of a different type or have been used for different amounts
of time.
Do not forget to re-register the outdoor unit after replacing the batteries.
Warnings
Do not expose the product or the sensors to direct sunlight.
Do not place it next to an air conditioner, heater or fan.
Do not clean the product with aggressive or scratching cleaning materials.
The central unit is designed for indoor use only.
The outdoor sensor is protected from spattering water only: do not submerge it, and protect it from heavy rain.
Protect all units from extreme temperatures, moisture and dust.
For the clear reception of radio signals the products should be placed away from sources of interference and metal surfaces.
Make sure no objects or liquids get into the inside of the product through the openings on its cover.
Never disassemble the product; consult a technician if repair is needed.
Handle with care; never drop the product. Do not continue using the product if it is damaged.
Technical parameters
clock:. . . . . . . . . . . . . . . . . . . . . . . . DCF-77 radio signal controlled quartz clock
clock precision:. . . . . . . . . . . . . . . . . . . . . . . . . . . . . 1 second / 1 million years
0
outdoor temperature range:. . . . . . . . . . . . . . . . . . . . . . . . . . . . . . . . - 50 – 70 C
0
indoor temperature range:. . . . . . . . . . . . . . . . . . . . . . . . . . . . . . . . . . . 0 – 50 C
0
display resolution:. . . . . . . . . . . . . . . . . . . . . . . . . . . . . . . . . . . . . . . . . . . 0,1 C
humidity measurement range:. . . . . . . . . . . . . . . . . . . . . . . . . . . . . . . 20 – 95 %
humidity measurement precision:. . . . . . . . . . . . . . . . . . . . . . . . . . . . . . . . . 1 %
range of external sensor in an open area: . . . . . . . . . . . . . . . . . . . . . . . . . . 25 m
operating frequency:. . . . . . . . . . . . . . . . . . . . . . . . . . . . . . . . . . . . . 433,9 MHz
number of outdoor units: . . . . . . . . . . . . . . . . . . . . . . . . . . . . . . . . . . . . . . max 3
type of external unit that can be used:. . . . . . . . . . . . . . . . . . . . . . . . . . HCKK 01
power supply: outdoor units: .. . . . . . . . . 2 x AAA (1,5 V) batteries (not included)
central unit: . . . . . . . . . . . 2 x AA (1,5 V) batteries (not included)
included:. . . . . . . . . . . . . . . . . . . . . . . . . . . . . . . . . 2 HCKK 01 outdoor sensors
. . . . . . . . . . . . . . . . . . . . . . . . . . . . . . . . . wall mount / stand for the outdoor unit
dimensions of the central unit / display:. . . . . . . . . . . . 85 x 160 x 40 / 45 x 80 mm
outdoor unit dimensions: .. . . . . . . . . . . . . . . . . . . . . . . . . . . . . 60 x 95 x 25 mm
0
±
Page 6

HCW 12
idő járás-állomás 2 külső érzékelő vel
• várható időjárás előrejelzése animált szimbólumokkal
• DCF-77 (Frankfurt) rádiójel vezérlés
• időzóna állítási lehetőség
• dátum kijelzés, ébresztés funkció
• külső- és belső hőmérséklet mérése
• belső páratartalom mérése
• hőmérséklet, páratartalom változásának jelzése
• aktuális holdfázis megjelenítése
• elem-állapot megjelenítése (belső- és külső egység)
• tartozék: 1 belső egység, 2 külső egység
• további 1 külső egységgel bővíthető (HCKK 01)
Beltéri készülék
1. Kijelző
2. SNOOZE-LIGHT – Háttérvilágítás bekapcsolás 5 mp-ig
3. ALARM/SET (ébresztés) – ébresztés beállítása
4. ALERT (riasztás) – hőmérséklet riasztás beállítás
5. TIME/SET – idő, dátum, időzóna beállítás
6. MAX/MIN (maximum/minimum) – maximum-minimum,
külső-belső hőmérséklet, belső páratartalom esetében
7. CHANNEL – külső egység csatorna választás
8. UP (fel) gomb – léptetés, 12/24 órás formátum beállítás
9. RESET – gyári beállítások visszaállítása
0 0
10. DOWN (le) gomb – léptetés C/ F választás
11. Elemtartó fedél
Külső egység
12. Visszajelző LED
13. Kijelző
14. Elemtartó fedél
0 0 0 0
15. C/ F gomb - C/ F választás
16. Tx gomb – jeladás
17. Rögzítő / tartó
14
REMOTE SENSOR
12
13
SNOOZE • LIGHT
4
5 6
7
3
1
2
10
11
8
9
15
16
17
Üzembe helyezés
1. Távolítsa el a központi elemtartó fedelét (11.) majd a helyes polaritásnak megfelelően helyezze bele az elemeket. A készülék a kijelző
háttérvilágításának bekapcsolásával és a teljes kijelző bekapcsolásával és egy hangjelzéssel jelzi, hogy üzemkész.
2. Ezután távolítsa el a 4 csavar segítségével a külső egység elemtartó fedelét (14.), majd a helyes polaritásnak megfelelően helyezze
bele az elemeket. Ekkor az egység automatikusan jelet küld a beltéri egység felé.
3. A készülék elkezdi keresni a környezetében elérhető külső egységek jelét. Amennyiben sikerül a vétel, megjeleníti a mért külső
hőmérsékletet a beállított csatorna sorszámával, és hangjelzés kíséretében felvillantja a szimbólumot.
4. 3 perc elteltével a készülék automatikusan keresni kezdi az atomóra jelét (7 percig). Amennyiben az óra elhelyezkedése lehetővé teszi
a frankfurti atomóra jelének vételét (DCF-77), akkor az óra automatikusan beáll a pontos időre, ekkor a rádiójel ikon alábbi változata
jelenik meg a kijelzőn: . Ha nem sikerül a vétel, akkor az atomóra jel eltűnik, az óra nem áll be automatikusan, hanem számlál tovább a
kezdeti 0:00 időtől.
Külső egység regisztrációja
A bekapcsolás után a külső egység kb. 30 mp-ként jelet küld a beltéri egység felé, de lehetőség van manuálisan is megtenni ezt.
Helyezze a külső egységet a beltéri közelébe, majd nyomja meg annak „Tx” gombját (16.) A kültéri egységen megjelenik
a szimbólum. A beltéri egység a jel sikeres vételekor megjeleníti a mért külső hőmérsékletet a beállított csatorna
sorszámával, és hangjelzés kíséretében felvillantja a szimbólumot.
Több külső érzékelő együttes alkalmazása esetén az 1-2-3 sorszám azonosítja be azokat. A külső egység (HCKK 01)
külső csomagolásán és a terméken is található egy csatorna jelzés (CH1- 1-es csatorna, CH2- 2-es csatorna, CH3- 3as csatorna). A HCW 12-es készülékhez a csomagban CH1 és CH2-es külső egységet mellékeltünk. Így még egy
külső egységgel bővíthető, melyen a jelzésnek CH3-nak kell lennie. A külső egységeket egymás után helyezze
üzembe. Nem szabad egyszerre több külső egységbe behelyezni az elemeket. Az első egység megfelelő
működése után szabad a második, majd a második egység működébe lépése után a harmadik egységet
beüzemelni. Ezzel elkerülhető, hogy a regisztráció folyamán egymást zavarják. A DCF-77 rádiójel
keresése közben nem lehet regisztrációt végezni!
Page 7
A hatótávolsága nyílt terepen kb. 25 méter. Alkalmas egy házon belüli másik helyiség, vagy a külső hőmérséklet mérésére. A pontos
működés érdekében tűző naptól védett helyet igényel. A külső hőmérséklet fagyponthoz közelire csökkenésekor az elem feszültsége,
ezzel együtt pedig a működési távolság csökkenhet. A két készülék közötti falak, beton és fém felületek szintén lerövidítik a
hatótávolságot, ezért a lehető legközelebb helyezze el őket egymáshoz. Emeletes lakás esetében a külső érzékelő legyen magasabban
(az emeleten). Számítógép vagy más elektromos berendezés közelében működési zavar léphet fel.
A külső érzékelő rendelkezik egy egysoros kijelzővel, amin látható a beállított csatorna, a mért hőmérséklet.
Lehetőségünk van a hőmérséklet mértékegységének váltására, Celsius illetve Fahrenheit között az elemtartó fedél alatti gombbal (15).
A készüléken több külső egység beállítása esetén a CHANNEL (7) gomb segítségével lehet léptetni a különböző csatornák között, ekkor
az Outdoor Temperature rész melletti kis ablakban 1-2-3 érték változik.
0
A belső és a külső egység mért adatai mellett található egy tendenciát mutató ikon. A hőmérséklet 1 C-os változása esetén a / ikonok
valamelyike jelenik meg a változástól függően (növekedés, csökkenés). A ikon változatlan hőmérsékletet jelent.
A rádiójel vezérlésű óra beállítása
Amennyiben a kezdeti beállítás sikertelen volt, lehetőség van újabb próbálkozásokra. Nyomja meg és tartsa lenyomva 2 mp-ig a „DOWN
(le) gomb”-ot (10). Ekkor a kijelzőn megjelenik a rádióvétel jele . A gomb újbóli nyomva tartásával szüneteltetheti jel keresését.
Megfelelő működés esetén a torony körül villogó rádióhullámok is láthatóak. Amennyiben ez utóbbiak nem jelennek meg, az azt jelenti,
hogy az adott használati helyen rosszak a vételi viszonyok. Ez esetben próbálja meg a készüléket elfordítani, esetleg máshova áthelyezni.
(Az óra beépített ferritantennával rendelkezik, hasonlóan az AM rádiókészülékekhez.) A vételi viszonyoktól függően a szinkronizálás 2-10
percig is eltarthat. Utána az adótorony jele már folyamatosan látható. Gyenge vétel esetén viszont eltűnik.
Sikeres vétel esetén megjelenhet a kijelzőn a DST (Daylight Saving Time) felirat, ami a nyári időszámítást jelenti.
Az órajel sikeres vétele után lehetőség nyílik az időzóna módosítására is. Ennek részletes leírása a „Manuális órabeállítás” menüpont
alatt található.
* A rádiójel vezérlésű órák a hagyományos kvarc-óramű mellett rendelkeznek egy beépített speciális rádióvevővel is. Ez a Mainflingenben
működő (Németország, Frankfurt mellett) DCF-77 elnevezésű adótorony által sugárzott rádiójelet veszi és ez alapján – rendszeres
időközönként – korrigálja a pontos idő beállítását. Mivel a rádiójelek egy atomóra kódolt információit hordozzák, az ilyen típusú készülékek
atomóra pontossággal rendelkeznek. A pontos időtől való eltérés 1 millió év alatt max. 1 másodperc lehet. Ezen órák kényelmes
használatát biztosítja, hogy a pontos idő és a naptár beállítása, valamint a téli-nyári időszámítás átállítása is teljesen automatikusan,
emberi beavatkozás nélkül megy végbe.
Az adótorony 1500-2000 km-es körzetében biztosított a jó minőségű vétel. Amennyiben a használati helyen vételkiesés történne,
hagyományos kvarcóraként működnek tovább.
Manuális órabeállítás
Amennyiben nem sikerül a vételi viszonyok miatt az óra automatikus szinkronizálása, manuálisan állítsa be azt.
Tartsa nyomva 2 másodpercig a TIME/SET (5) gombot, ekkor elkezd villogni az év értéke (alapbeállítás 2000). Az értéket az UP (fel) gomb
(8)és a DOWN (le) gomb (10) segítségével lehet változtatni. A beállítás után a TIME/SET (5) gombot nyomja meg, ekkor a következő
értékeket lehet egymás után beállítani:
Év – Hónap – Nap – Kijelzés nyelve – Óra – Perc – Időzóna
Nyelvkódok: GE: német, EN: angol, IT: olasz, FR: francia, NE: holland, ES: spanyol, DA: dán
Időzóna: az értéket -12 és +12 között lehet állítani. Ezt az értéket az automatikus szinkronizálásnál (DCF-77 jel) veszi figyelembe, és a
frankfurti időhöz képest eszerint állítja be az órát. Az érték a beállítást követő következő sikeres szinkronizálásnál módosul eszerint.
A készülék a dátumtól függően a holdfázist automatikusan beállítja.
Ébresztés
Tartsa nyomva 2 másodpercig az ALARM/SET (3) gombot. Ekkor a 0:00AL felirat jelenik meg és az óra értékét lehet állítani az UP (fel) gomb
(8)és a DOWN (le) gomb (10) segítségével. Az ALARM/SET (3) gomb újbóli lenyomásával a perc értékét lehet állítani az előbb leírt módon.
Az ébresztést az ALARM/SET (3) gomb lenyomásával lehet élesíteni, ekkor a kijelző felső részén a „ ” ikon jelenik meg. Kikapcsolni a
ALARM/SET (3) gomb újbóli lenyomásával lehet.
Az ébresztőhang 2 percig hallható, 4 lépésben erősödő intenzitással és kikapcsolható bármely gombbal. A SNOOZE gomb lenyomása
után elhallgat, de az ébresztés 5 perc múlva újraindul.
Memorizált hőmérsékletek és a páratartalom ellenőrzése
Normál üzemmódban a kijelzőről a pillanatnyi belső és külső hőmérséklet, valamint a belső és külső páratartalom olvasható le. Azonban
ezek minimum és maximum értékei folyamatosan rögzítésre kerülnek.
1. Válasszon ki egy csatornát aszerint, hogy melyik külső hőmérsékletnek szeretné ellenőrizni a minimum és maximum értékeit.
2. Nyomja meg többször a MAX/MIN billentyűt. Először a maximális, majd a minimális értékek jelennek meg. Harmadik gombnyomásra az
aktuális adatok olvashatók.
3. A memória törlése: a MAX vagy MIN értékek lehívása után a MAX/MIN újbóli benyomásával és 3 másodperces nyomva tartásával.
Együtt törlődik a minimum, illetve a maximum érték, vagyis az aktuális értékre vált át. A külső érzékelők közül az éppen megjelenítésre
kerülő adatai törlődnek.
Barométer – időjárás előrejelzése
A barométer a légnyomásváltozás alapján előrejelzi a hozzávetőlegesen 12-24 óra múlva várható állapotot. A négy lehetséges ábra:
napos, kissé felhős, felhős, esős. Az éjszaka megjelenő nap a tiszta égre, emelkedő légnyomásra utal.
napos kissé felhős felhős esős
±
Page 8
Megjegyzés: amint tudjuk, 100%-os pontosságot semmilyen időjárás előrejelzés sem tud garantálni. Ez a készülék hozzávetőlegesen
75%-os megbízhatóságú előrejelzést biztosít. Mivel beltéri használatra tervezték, működése függ a helyi mikroklíma változásának
gyorsaságától és mértékétől. A nagyobb, gyorsabban végbemenő időjárási változásokat (pl. napsütést követő eső) pontosabban,
határozottabban jelzi, mint a lassan lezajló folyamatokat.
Páratartalom fokozatai
A belső páratartalom értéke mellett található egy kis ikon, mely a mért értékből következtetve ábrázolja az emberi szervezet komfort
érzetét. A lehetséges fokozatok a következők:
Komfort érzet Ikon Hőmérséklettartomány Páratartalom értéke Megjegyzés
0
Kényelmes 20 C - 28 C 40% - 70% Ideális hőmérséklet és páratartalom
0 0
Nedves 20 C - 28 C 70% felett Túl nagy páratartalom
0 0
Száraz 20 C - 28 C 40% alatt Elégtelen páratartalom
Ha a jelzett hőmérséklet tartományon kívül esik a mért érték, akkor egyik ikon se jelenik meg a kijelzőn!
Hőmérséklet riasztás beállítása
A készüléken lehetőség van egy olyan jelzés beállítására, mely egy adott külső egységen mért hőmérséklet szint elérésekor jelez.
Tartsa nyomva 2 másodpercig az ALERT (4) gombot. Ekkor a külső egység hőmérséklet helyén villogni kezd a felső érték (gyári
0
beállításkor ez 70C) és a jel. Az UP (fel) gomb (8)és a DOWN (le) gomb (10) segítségével lehet ezt az értéket állítani. Az ALERT (4)
gomb újbóli lenyomásával az alsó értéket lehet ugyanilyen módon állítani ekkor a jel villog a kijelzőn.
Több külső egység esetén mindegyikhez külön lehet ezeket az értékeket beállítani, a az adott csatornára váltva a CHANNEL gomb (7)
segítségével.
Az értékek beállítása után a riasztás funkció aktív lesz, ekkor a jel jelenik meg a kijelzőn. Az ALERT (4) gomb lenyomásával ki tudja
kapcsolni ezt a funkciót.
Amikor a külső egység hőmérséklete eléri a beállított értéket, a beltéri egység rövid hangjelzést ad, és a kijelzőn elkezd villogni a
hőmérséklet értéke és a jelzés. Ezek mindaddig villognak, míg a hőmérséklet az adott tartományban van. A hangjelzés percenként
megismétlődik, annak kikapcsolása bármely gomb lenyomásával elérhető.
Ha nem a kijelzőn megjelenített csatorna értéke érte el a riasztási szintet, akkor az érték nem, csak a jel villog. A CHANNEL gomb (7)
segítségével megkereshető a riasztott csatorna, mert az érték annál villog.
Az elemcsere szükségessége
A központi egység folyamatosan ellenőrzi az elemek állapotát, és figyelmeztet, ha azok kicserélésre szorulnak. A belső vagy külső
hőmérséklet mellett megjelenő elem szimbólum az adott egység elemeinek gyenge állapotát jelzi.
Kizárólag tartós, alkáli elemek használata ajánlott. Ne keverjen különböző típusú és állapotú elemeket!
Ne feledje, hogy elemcsere után ismét össze kell hangolni a központi és külső egységeket.
Figyelmeztetések
Ne érje közvetlenül napfény sem az érzékelőt, sem a készüléket!
Ne helyezze légkondicionáló, fűtőberendezés vagy ventilátor közelébe!
Ne kezelje agresszív vagy karcoló tisztítószerekkel!
A központi egység csak beltéri használatra alkalmas!
A külső mérőegység freccsenő víz ellen védett, ne merítse azt folyadékba, és ne tegye ki erős esőzésnek!
Minden egységet óvjon szélsőséges hőmérsékleti igénybevételtől, párától és portól!
Tartsa szem előtt, hogy a jó rádiókapcsolat érdekében zavarmentes helyen, fém felületektől távol legyenek a készülékek.
Ügyeljen arra, hogy a nyílásokon keresztül semmilyen tárgy vagy folyadék ne kerülhessen a készülékbe!
Soha ne próbálja meg szétszerelni a készülékeket, javítását bízza szakemberre!
Legyen elővigyázatos, ne ejtse le a készüléket. Sérülés esetén tilos tovább használni!
Műszaki adatok
óra:. . . . . . . . . . . . . . . . . . . . . . . . . . DCF-77 rádiójel vezérelt kvarc óramű
óra pontossága: .. . . . . . . . . . . . . . . . . . . . . . . 1 másodperc / 1 millió év
0
külső hőmérséklettartomány: . . . . . . . . . . . . . . . . . . . . . . . . . . - 50 – 70 C
0
belső hőmérséklettartomány: . . . . . . . . . . . . . . . . . . . . . . . . . . . . 0 – 50 C
0
leolvasás felbontása: . . . . . . . . . . . . . . . . . . . . . . . . . . . . . . . . . . . . 0,1 C
belső páratartalom mérése:. . . . . . . . . . . . . . . . . . . . . . . . . . . . . 20 – 95 %
páratartalom mérés felbontása: . . . . . . . . . . . . . . . . . . . . . . . . . . . . . . 1 %
külső érzékelő hatótávolsága nyílt terepen: . . . . . . . . . . . . . . . . . . . . 25 m
működési frekvencia: . . . . . . . . . . . . . . . . . . . . . . . . . . . . . . . . 433,9 MHz
külső mérőegységek száma:. . . . . . . . . . . . . . . . . . . . . . . . . . . . max. 3 db
a rendszerbe illeszthető külső egység típusa: . . . . . . . . . . . . . . . HCKK 01
tápellátás: külső mérőegység:. . . . . . . 2 x AAA (1,5 V) elem (nem tartozék)
központi egység:. . . . . . . . 2 x AA (1,5 V) elem (nem tartozék)
mellékelve: . . . . . . . . . . . . . . . . . . . . . . . 2 db HCKK 01 külső mérőegység
. . . . . . . . . . . . . . . . . . . . . . . . fali akasztó / kitámasztó a külső egységhez
központi egység / kijelző mérete: . . . . . . . . . . . . 85 x 160 x 40 / 45 x 80 mm
külső egység mérete:. . . . . . . . . . . . . . . . . . . . . . . . . . . . . 60 x 95 x 25 mm
0
±
Page 9
HCW 12
• predpoveď počasia animovanými symbolmi
• riadenie rádiovým signálom DCF-77 (Frankfurt)
• možnosť nastavenia časovej zóny
• zobrazenie dátumu, funkcia budenia
• meranie vonkajšej a vnútornej teploty
• meranie vnútornej vlhkosti
• signalizácia zmeny teploty, vlhkosti
• zobrazenie aktuálnej fázy mesiaca
• zobrazenie stavu batérií (vnútorná a vonkajšia jednotka)
• súčiastky: 1 vnútorná jednotka, 2 vonkajšia jednotka
•možnosť rozšírenia o ďalšie 1 vonkajšie jednotky (HCKK 01))
Vnútorná jednotka
1. Displej
2. SNOOZE-LIGHT – Zapnutie zadného osvetlenia počas 5s
3. ALARM/SET (budenie) – nastavenie budenia
4. ALERT (signalizácia) – nastavenie signalizácie teploty
5. TIME/SET – nastavenie času, dátumu, časovej zóny
6. MAX/MIN (maximum/minimum) – maximum-minimum,
vonkajšia-vnútorná teplota, v prípade vnútornej vlhkosti
7. CHANNEL – vonkajšia jednotka výber kanálu
8. UP (hore) tlačidlo – krokovanie, nastavenie 12/24h formátu
9. RESET – návrat ku fabrickým nastaveniam
0 0
10. DOWN (dole) tlačidlo – krokovanie, nastavenie C/ F
11. Kryt batérie
Vonkajšia jednotka
12. Kontrolka LED
13. Displej
14. Kryt batérie
0 0 0 0
15. C/F tlačidlo – nastavenie C/ F
16. Tx tlačidlo– signalizácia
17. Fixačný prostriedok / konzola
14
REMOTE SENSOR
12
13
SNOOZE • LIGHT
4
5 6
7
3
1
2
10
11
8
9
15
16
17
Uvedenie do prevádzky
1. Odstráňte kryt batérie centrálnej jednotky,(11.) potom vložte batérie. Dbajte na správnu polaritu. Po zapnutí displeja, zadného
osvetlenia prístroj signalizuje pípaním fázu prevádzkovej pohotovosti.
2. Odstráňte kryt puzdra na batérie vonkajšej jednotky pomocou 4 skrutiek (14.), potom vložte do neho batérie, pričom dbajte na správnu
polaritu. Vtedy jednotka automaticky zasiela údaje vnútornej jednotke.
3. Prístroj začne vyhľadať signály vonkajších jednotiek, ktorí sa nachádzajú v jeho okolností. Po prijatí signálu zobrazí nameranú
vonkajšiu teplotu spolu s poradovým číslom nastaveného kanálu, a po zvukovej signalizácie objaví sa symbol .
4. Po 3 min prístroj automaticky začne vyhľadávať signál z atómovej hodiny(počas 7 min). Ak poloha hodinky umožní prijatie signálu
(DCF-77), nastavenie prebieha automaticky, a na displeji budete vidieť symbol: . Ak sa nepodarí príjem signálu, symbol atómovej hodiny
zmizne, nastavenie neprebieha automaticky, ale počíta ďalej od počiatočného času 0:00.
Registrácia vonkajšej jednotky
Po zapnutí vonkajšia jednotka v rytme cca. 30s vysiela signál k vnútornej jednotke, ale máte možnosť nastaviť aj manuálne. Položte
vonkajšiu jednotku do blízkosti vnútornej jednotky, potom stlačte tlačidlo „Tx” (16.) Na vonkajšej jednotke sa objaví symbol .
Vnútorná jednotka po prijatí signálu zobrazí nameranú vonkajšiu teplotu spolu s poradovým číslom nastaveného kanálu, a po
zvukovej signalizácie objaví sa symbol .
Pri použití väčšieho počtu vonkajších jednotiek, poradové čísla 1-2-3 slúžia na ich rozlišovanie. Na vonkajšej obale
vonkajšej jednotky (HCKK 01) a na výrobku tiež môžete nájsť symbol kanálu (CH1-kanál 1, CH2- kanál 2, CH3- kanál
3). V obale k prístroju HCW 12 sme priložili vonkajšiu jednotku CH1 a CH2. Tak je možné rozšíriť ešte jednou
vonkajšou jednotkou, na ktorej signál musí byť CH3. Vonkajšiu jednotku nastavíte do prevádzky po jednom.
Nesmiete batérie naraz vložiť do viac vonkajších jednotiek. Tak sa môžete vyhnúť tomu, aby sa rušili
navzájom počas registráciu. Počas hľadania rádiového signálu DCF-77 nie je možné vykonať registráciu!)
meteorologická stanica s 2 vonkajš ími senzormi
Page 10

Dosah na otvorenom teréne je pribl. 25 metrov. Je vhodná na meranie teploty v druhej miestnosti v rámci domu alebo na meranie vonkajšej
teploty. Pre dosiahnutie presného merania nevystavujte jednotku priamemu slnečnému žiareniu. Pri poklese teploty pod bod mrazu sa
môže znížiť napätie batérií, čo je spojené s možným znížením dosahu. Steny, betónové a kovové plochy medzi dvomi prístrojmi taktiež
0 0
môžu znížiť dosah, preto ich umiestnite čo najbližšie k sebe. Nevystavujte prístroj teplotám pod -20 C a nad +50 C! V poschodových
budovách vonkajšia jednotka sa umiestňuje vždy vyššie ako vnútorná, centrálna (na poschodí). Umiestnením v blízkosti počítača alebo
iných elektrických zariadení môže nastať rušenie.
Vonkajší senzor je vybavený jednoriadkovým displejom, na ktorom je zobrazený nastavený kanál, nameraná teplota.
Môžete vybrať jednotku teploty, Celsius alebo Fahrenheit s tlačidlom, ktoré sa nachádza pod krytom na batérie (15).
V prípade nastavenia viacerých vonkajších jednotiek na prístroji môžete krokovať medzi kanálmi pomocou tlačidla CHANNEL (7), vtedy 12 -3 údaje sa zmenia v okienku vedľa Outdoor Temperature.
0
Vedľa vnútornej a vonkajšej nameranej hodnoty môžete nájsť symbol tendencie. V prípade 1 C zmene teploty sa objaví symbol
/ (stúpajúca teplota, klesajúca teplota). Symbol znamená nezmenenú hodnotu.
Nastavenie rádiovým signálom riadených hodín
Ak nastavenie bolo neúspešné, môžete skúšať znova. Tlačte tlačidlo „DOWN“ počas 2s (10). Na displeji sa objaví symbol . Opätovým
tlačením tohto tlačidla môžete zapauzovať vyhľadávanie signálu.
V prípade vhodnej prevádzky sa na displeji okolo znaku vysielajúcej veže objavia aj blikajúce znaky rádiových signálov. Ak sa tak nestane
to znamená, že na danom mieste je slabý príjem. V takomto prípade skúste prístroj pootočiť alebo premiestniť. (Hodiny sú vybavené
zabudovanou feritovou anténou podobne ako AM rádioprijímače.) V závislosti od kvality prijímaných signálov synchronizácia môže trvať 2
až 10 minút. Po úspešnej synchronizácii je znak vysielača trvale zobrazený na displeji. Pri slabom príjme rádiových signálov tento znak
vysielača zmizne.
V prípade dobrého prijímania signálu sa objaví na displeji DST (Daylight Saving Time), ktorý naznačí letný čas.
Po dobrom príjme signálu môžete nastaviť aj časové pásmo. Detailný opis môžete nájsť v bode „Manuálne nastavenie času“.
* Rádiovým signálom riadené hodiny popri klasickej kremennej mechanike majú aj vstavaný špeciálny prijímač rádiových signálov.
Prijímajú signál z vysielača DCF-77 nachádzajúceho sa v Mainflingene (Nemecko, pri Frankfurte) a podľa toho koriguje
– v pravidelných intervaloch – nastavenie presného času. Nakoľko signály obsahujú kódované informácie atómových hodín, presnosť
takýchto typov hodín sa zhoduje s presnosťou atómových hodín. Odchýlka presného času je max. 1 sekunda za 1 milión rokov.
Nastavenie presného času, kalendára a prestavenie letného - zimného času je plne automatické, bez zasahovania človeka, čo zabezpečí
pohodlné používanie týchto hodín.
Dobrý príjem signálu je zabezpečený v okruhu 1 500 – 2 000 km od vysielacej veže. V prípade, že na danom mieste je výpadok príjmu,
hodiny fungujú ako klasické kremenné hodiny.
Manuálne nastavenie času
Ak sa nepodarí automatická synchronizácia, nastavte hodinky manuálne.
Podržte tlačidlo TIME TIME/SET (5) po dobu 3 sekúnd, začne blikať hodnota roka (základné nastavenie 2000). Hodnotu môžete meniť s
tlačidlom UP (hore) (8)a s tlačidlom DOWN (dole) (10). Po nastavení, ak tlačíte tlačidlo TIME/SET (5) máte možnosť po jednom nastaviť
nasledovné údaje:
Rok– Mesiac – Deň – Výber jazyka – Hodiny– Minúty – Časové pásmo
Kódy jazyka: GE: nemecký, EN: anglický, IT: taliansky, FR: francúzsky, NE: holandský, ES: španielsky, DA: dánsky
Časová zóna: nastavenie hodnoty medzi -12 a +12. Túto hodnotu pri automatickej synchronizácii (DCF-77) signálom nastaví aktuálny
správny čas. Nastavenie sa zmení po najbližšej úspešnej synchronizácii.
Prístroj podľa dátumu automaticky nastaví fázu Mesiaca.
Budenie
Tlačte tlačidlo ALARM/SET (3) počas 2s. Objaví sa 0:00AL, a môžete nastaviť hodnotu hodiny pomocou tlačidla UP (hore) (8)a DOWN
(dole) (10). Opätovým stlačením ALARM/SET (3) môžete nastaviť hodnotu minúty.
Budenie nastavte s tlačidlom ALARM/SET (3), na displeji hore uvidíte symbol „ ”. Vypnúť môžete opätovým stlačením tlačidla
ALARM/SET (3).
Zvukový signál budenia trvá 2 minúty, pričom jeho intenzita sa zosilňuje v 4 krokoch a vypnúť ho možno hociktorým tlačidlom. Ak aktivujete
funkciu opakovaného budenia, zvukový signál sa opäť zapne po 5-minútovej prestávke.
Kontrola uložených hodnôt teploty a vlhkosti
V základnom režime na displeji je zobrazená aktuálna vnútorná a vonkajšia teplota, ako aj vnútorná a vonkajšia vlhkosť. Avšak ich
minimálne a maximálne hodnoty sa neustále ukladajú do pamäti.
1. Zvoľte si jeden kanál na základe toho, ktorej vonkajšej teploty by ste chceli skontrolovať minimálne a maximálne hodnoty.
2. 2. Stlačte viackrát tlačidlo MAX/MIN. Najprv sa zobrazia maximálne, potom minimálne hodnoty. Na tretie stlačenie sa zobrazia aktuálne
údaje.
3. Vymazanie pamäte: po zobrazení MAX alebo MIN hodnôt opätovným stlačením tlačidla MAX/MIN a jeho 3-sekundovým podržaním.
Súčasne sa vymaže minimálna, respektíve maximálna hodnota, čiže sa zmenia na aktuálnu hodnotu. Vymažú sa tie údaje toho
vonkajšieho senzoru, ktoré sú práve zobrazené.
Barometer – predpoveď počasia
Barometer predpovedá zmeny počasia na nasledujúcich 12/24 hodín podľa zmien tlaku vzduchu. Štyri možných symbolov: mierne
zamračené, zamračené, dážď, búrka, slnečno. Znak slnka zobrazený v noci znamená jasnú oblohu a stúpajúci tlak vzduchu.
Slnečno mierne zamračené zamračené dážď
±
Page 11

Poznámka: je všeobecne známe, že počasie sa nedá predpovedať na 100 %. Tento prístroj zabezpečí približne 75 % spoľahlivosť. Keďže
prístroj bol skonštruovaný pre použitie vo vnútornom prostredí, jeho prevádzka závisí od rýchlosti a veľkosti zmien miestnej mikroklímy.
Väčšie, rýchlejšie prebiehajúce zmeny (napr. dážď po slnečnom počasí) predpovedá presnejšie, než pomalšie prebiehajúce zmeny
počasia.
Stupne vlhkosti
Vedľa hodnoty vnútornej vlhkosti sa nachádza malá ikona, ktorá na základe nameraných hodnôt znázorní pocit komfortu ľudského
organizmu. Možné stupne sú nasledovné:
Pocit komfortu Ikon Rozsah teploty Hodnota vlhkosti Poznámka
0
Komfortný 20 C - 28 C 40% - 70% Ideálna teplota a vlhkosť
0 0
Vlhký 20C - 28 C Nad 70% Príliš vysoká vlhkosť
0 0
Vlhký 20C - 28 C Pod 40% Nedostatočná vlhkosť
V prípade, ak signalizovaná hodnota nie je v rozsahu tých hodnôt, na displeji nebudete vidieť ani jeden symbol!
Nastavenie hodnôt teplotného alarmu
Na prístroji môžete nastaviť signál, ktorý vydáva sygnál pri dosiahnutí hodnoty danej vonkajšej jednotky.
Tlačte tlačidlo ALERT (4) počas 2s. Na vonkajšej jednotke na mieste teploty začne blikať horná hodnota (pri fabrickom nastavení to je
70°C) a symbol . Hodnoty môžete nastaviť tlačidlami UP (hore) (8) a DOWN (dole) (10). Ak stlačíte opätovne ALERT (4) spodnú
hodnotu môžete takým istým spôsobom nastaviť. Vtedy na displeji bliká symbol .
Ak používate viac vonkajších jednotiek, hodnoty nastavte po jednom s pomocou tlačidla CHANNEL (7).
Funkcia bude aktívna po nastavení hodnôt, vtedy na displeji sa objaví symbol . Tú funkciu môžete vypnúť s tlačidlom ALERT (4).
Ak teplota vonkajšej jednotky dosiahne nastavenú hodnotu, vnútorná jednotka vydáva krátky zvukový signál, na displeji začne blikať
hodnota teploty a symbol . Tieto dovtedy blikajú, kým teplota je v danom rozsahu. Zvuková signalizácia sa zopakuje v každej minúte,
vypnúť môžete hociktorým tlačidlom.
Ak nie na displeji uvedený kanál dosiahol úroveň alarmu, v tom prípade hodnota nebliká, len symbol . Pomocou tlačidla CHANNEL (7)
môžete nájsť kanál alarmu tak, že hodnota bliká tam.
Potreba výmeny batérií
Centrálna jednotka neustále kontroluje stav batérií a signalizuje potrebu ich výmeny. Na tento stav upozorňuje znak batérie, ktoré sa
objaví vedľa vnútornej alebo vonkajšej teploty. Odporúča sa použiť výlučne alkalické batérie, s dlhou životnosťou. Nemiešajte batérie
rôzneho typu a stavu! Nezabúdajte, že po výmene batérií treba znovu zosúladiť centrálnu a vonkajšiu jednotku.
Upozornenia
Nevystavujte prístroj, ani senzor priamemu slnečnému žiareniu!
Neumiestňujte do blízkosti klimatizácie, ohrievača alebo ventilátora!
Nepoužívajte agresívne alebo drsné čistiace prostriedky!
Centrálna jednotka je vhodná pre použitie len vo vnútornom prostredí!
Vonkajšia jednotka je odolná voči striekajúcej vode, ale neponárajte ju do vody a nevystavujte silnému dažďu!
Jednotky nevystavujte teplotným extrémom, chráňte ich pred parou a prachom!
V záujme dobrého rádiového spojenia prístroj umiestnite na nerušené miesto, mimo blízkosti kovových povrchov.
Dbajte o to, aby cez otvory do prístroja nevnikla voda ani iné predmety!
Prístroj nerozoberajte, opravu prístroja zverte odborníkovi!
Prístrojom zaobchádzajte opatrne, nenechajte ho padnúť. V prípade poškodenia sa jeho ďalšie používanie zakazuje!
Technické údaje
hodiny: . . . . . . . . . . . . . . . . . . . . . . . . . . . . . rádiovým signálom DCF-77 riadené kremenné hodiny
presnosť hodiny: . . . . . . . . . . . . . . . . . . . . . . . . . . . . . . . . . . . . . . . . . . . . . . 1 sec. / 1 milión rokov
0
rozsah merania vonkajšej teploty:. . . . . . . . . . . . . . . . . . . . . . . . . . . . . . . . . . . . . . . . . . - 50 – 70 C
0
rozsah merania vnútornej teploty. . . . . . . . . . . . . . . . . . . . . . . . . . . . . . . . . . . . . . . . . . . . . 0 – 50 C
0
rozlíšenie odčítania: . . . . . . . . . . . . . . . . . . . . . . . . . . . . . . . . . . . . . . . . . . . . . . . . . . . . . . . . 0,1 C
meranie vnútornej vlhkosti: . . . . . . . . . . . . . . . . . . . . . . . . . . . . . . . . . . . . . . . . . . . . . . . . 20 – 95 %
rozlíšenie merania vlhkosti:. . . . . . . . . . . . . . . . . . . . . . . . . . . . . . . . . . . . . . . . . . . . . . . . . . . . . 1 %
dosah vonkajšej jednotky na otvorenom teréne: . . . . . . . . . . . . . . . . . . . . . . . . . . . . . . . . . . . . 25 m
prevádzková frekvencia: . . . . . . . . . . . . . . . . . . . . . . . . . . . . . . . . . . . . . . . . . . . . . . . . . 433,9 MHz
počet vonkajších jednotiek: . . . . . . . . . . . . . . . . . . . . . . . . . . . . . . . . . . . . . . . . . . . . . . . . max. 3 ks
typ vhodnej vonkajšej jednotky: . . . . . . . . . . . . . . . . . . . . . . . . . . . . . . . . . . . . . . . . . . . . . HCKK 01
napájanie; vonkajšia jednotka: . . . . . . . . . . . 2 x AAA (1,5 V) batérie (nie sú súčasťou príslušenstva)
centrálna jednotka: . . . . . . . . . . . . 2 x AA (1,5 V) batérie (nie sú súčasťou príslušenstva)
príslušenstvo: . . . . . . . . . . . . . . . . . . . . . . . . . . . . . . . . . . . . . . . . 2 ks HCKK 01 vonkajšej jednotky
. . . . . . . . . . . . . . . . . . . . . . . . . . . . . . . . . . . . . . . nástenný držiak / podpera pre vonkajšiu jednotku
centrálna jednotka / rozmery displeja:. . . . . . . . . . . . . . . . . . . . . . . . . . . . 85 x 160 x 40 / 45 x 80 mm
rozmery vonkajšej jednotky:. . . . . . . . . . . . . . . . . . . . . . . . . . . . . . . . . . . . . . . . . . . 60 x 95 x 25 mm
0
±
Page 12

HCW 12
• prognoza vremii probabile prin pictograme animate
• radiocontrol DCF-77 (Frankfurt)
• permite setarea fusului orar
• afişarea datei, funcţie de ceas deşteptător
• măsurarea temperaturii exterioare şi interioare
• măsurarea umidităţii interioare
• indică schimbarea temperaturii şi a umidităţii
• afişarea fazei lunare actuale
• afişarea stării bateriei (unitate interioară şi exterioară)
• accesorii: 1 unitate interioară, 2 unităţi exterioare
• poate fi completată cu o unitate exterioară adiţională (HCKK 01)
Aparat pentru interior
1. Monitor
2. SNOOZE-LIGHT - pornirea iluminării de fond timp de 5 secunde
3. ALARM/SET (alarmă) – setarea ceasului deşteptător
4. ALERT (alarmă) – setarea alarmei de temperatură
5. TIME/SET – setarea datei, a timpului şi a fusului orar
6. MAX/MIN (maximum/minimum) – afişarea valorii minime
sau maxime ale temperaturii externe-interne măsurate
şi ale umidităţii interne
7. CHANNEL – selectarea canalului unităţii externe
8. Buton UP (sus) – navigare, setarea formatului
ceasului de 12/24 de ore
9. RESET – resetarea setărilor din fabrică
0 0
10. Buton DOWN (jos) – navigare, setarea formatului C/ F
11. Capacul compartimentului bateriei
Unitate externă
12. LED de verificare
13. Monitor
14. Capacul compartimentului bateriei
0 0 0 0
15. Buton C/ F – setarea formatului C/ F
16. Buton Tx - semnalizare
17. Dispozitiv de fixare / suport
14
REMOTE SENSOR
12
13
SNOOZE • LIGHT
4
5 6
7
3
1
2
10
11
8
9
15
16
17
Punerea în funcţiune
1. Îndepărtaţi capacul compartimentului central pentru baterie (11), apoi introduceţi bateriile noi ţinând cont de polaritatea corectă.
Aparatul va semnala faptul că este gata de funcţionare prin pornirea iluminării de fond a monitorului, prin pornirea întregului monitor şi
printr-un semnal sonor.
2. Îndepărtaţi capacului compartimentului pentru baterie (14) a unităţii externe prin intermediul şurubului 4, apoi introduceţi bateriile noi
ţinând cont de polaritatea corectă. În acest moment, unitatea va trimite automat un semnal către unitatea internă.
3. Aparatul va începe să caute semnalul unor unităţi externe din apropierea sa. Dacă recepţia este corespunzătoare, aparatul va afişa
temperatura externă măsurată cu numărul de ordine al canalului setat şi, concomitent cu un semnal sonor, va afişa scurt simbolul .
4. După 3 minute, aparatul va începe automat să caute semnalul ceasului atomic (timp de 7 minute). Dacă poziţia ceasului permite
recepţionarea semnalului emis de ceasul atomic din Frankfurt (DCF-77), ceasul va seta automat timpul exact şi pe monitor va apare
următoarea variantă a pictogramei sau iconului care reprezintă semnalul radio: . Dacă recepţia nu este corespunzătoare, simbolul
ceasului atomic va dispare, ceasul nu se va seta automat, ci va începe să afişeze timpul începând cu ora 0:00.
Înregistrarea unităţii externe
După pornire, unitatea externă va trimite un semnal către unitatea internă la fiecare 30 de secunde, dar acest lucru se poate
realiza şi manual. Aşezaţi unitatea externă în apropierea unităţii interne, apoi apăsaţi butonul "Tx" (16) de pe acesta. Unitatea
externă va afişa simbolul . În cazul în care recepţia este corespunzătoare, unitatea internă va afişa temperatura externă
măsurată cu numărul de ordine al canalului setat şi, concomitent cu un semnal sonor, va afişa scurt simbolul .
În cazul în care se utilizează mai mulţi senzori externi, aceştia vor fi identificaţi cu numerele de ordine 1-2-3. Atât pe
ambalajul extern al unităţii externe (HCKK 01), cât şi pe produs apare semnul unui canal (CH1- canalul 1, CH2canalul 2, CH3- canalul 3). Aparatul HCW 12 este furnizat împreună cu o unitate externă CH1 şi una CH2. Prin
urmare, aparatul poate fi extins cu încă o unitate externă pe care trebuie să apară indicatorul CH3. Porniţi
unităţile externe pe rând. Evitaţi să introduceţi concomitent bateriile în mai multe unităţi externe. După
pornirea primei unităţi externe puteţi porni cea de-a doua unitate, apoi, după ce a doua unitate
porneşte, puteţi pune în funcţiune şi cea de-a treia unitate. În acest mod se pot evita interferenţele în
cursul înregistrării. (Înregistrarea nu se poate efectua în timpul căutării semnalului DCF-77!
staţ ie meteo cu 2 senzori externi
Page 13

Raza de acţiune în câmp deschis este de aprox. 30 m. Se poate folosi pentru măsurarea temperaturii într-o altă încăpere din casă, sau
pentru măsurarea temperaturii din exterior. Pentru o măsurare exactă se recomandă evitarea razelor directe ale soarelui. Dacă
0
temperatura din exterior scade sub C, puterea bateriei va slăbi, ceea ce poate micşora raza de acţiune. Raza de acţiune fiind influenţată şi
de corpurile sau de pereţii aflaţi între unitatea de emisiei şi recepţie, se recomandă amplasarea lor cât mai aproape. Dacă casa are etaj, se
recomandă amplasarea unităţii exterioare cât mai sus, la etaj. Proximitatea calculatoarelor sau a altor echipamente electrice sau
electronice poate influenţa funcţionarea aparatului.
Unitatea exterioară dispune de un afişaj de un rând pe care se poate vedea canalul setat şi temperatura.
Aveţi posibilitatea de a schimba unitatea de măsură între Celsius şi Fahrenheit cu ajutorul butonului de sub capacul compartimentului
bateriei (15).
În cazul utilizării mai multor unităţi externe, puteţi să navigaţi între diferitele canale cu ajutorul butonului CHANNEL (7). În acest caz,
valoarea afişată (1-2-3) în fereastra mică de lângă Outdoor Temperature se va schimba.
0
Lângă datele măsurate de unitatea internă şi cea externă, va apare şi un icon care indică tendinţele. În cazul schimbării temperaturii cu 1 C
va apare una dintre icoanele / în funcţie de sensul schimbării (creştere, scădere). Iconul indică o temperatură neschimbată.
Setarea ceasului comandate prin semnal radio
Dacă setarea iniţială nu a reuşit, există posibilitatea să încercaţi din nou. Ţineţi apăsat butonul „DOWN (jos)” (10) timp de 2 secunde. În
acest moment, monitorul va afişa simbolul recepţiei radio . Puteţi opri căutarea semnalului radio ţinând apăsat butonul din nou.
Dacă recepţia se desfăşoară în condiţii normale, în jurul turnului apar semnale de radio pâlpâitoare. Dacă aceste semnale nu apar,
înseamnă că în acea locaţie recepţia este defectuoasă. În acest caz, încercaţi să rotiţi aparatul sau să schimbaţi locaţia. (Ceasul este dotat
cu o antenă internă din ferită, similar cu un receptor AM.) În funcţie de condiţiile de recepţie sincronizarea poate dura între 2 şi 10 minute. În
continuare, simbolul turnului de emisie va rămâne vizibil permanent. Dacă recepţia nu este corespunzătoare, simbolul va dispărea.
Dacă recepţia este corespunzătoare, pe ecran va apare afişajul DST (Daylight Saving Time) care indică ora oficială de vară.
După recepţia corespunzătoare a semnalului ceasului, puteţi modifica şi fusul orar. Prezentarea detaliată se găseşte în secţiunea
„Setarea manuală a ceasului”.
*Pe lângă mecanismul de funcţionare tradiţional cu cuarţ, ceasurile comandate prin unde radio au în interior şi un receptor special pe unde
radio. Acesta recepţionează semnalul emis de turnul DCF-77 din Mainflingen (Germania, lângă Frankfurt), şi pe baza căruia se poate
modifica periodic ora exactă. Deoarece semnalul radio transmite informaţia unui ceas atomic, acest aparat are precizia unui ceas atomic.
Eroarea maximă de la timpul exact este de ±1 secundă într-un interval de 1 milion de an. Exploatarea acestor echipamente nu necesită
intervenţie umană, deoarece atât ora şi data exactă, cât şi modificările orei oficiale se setează automat.
Turnul de emisie asigură o recepţie bună într-o rază de 1500-2000 km. Dacă în locul de exploatare recepţia semnalului devine imposibilă,
ceasul va funcţiona în continuare ca şi un ceas obişnuit cu cuarţ.
Setarea manuală a ceasului
Dacă condiţiile de recepţie nu permit sincronizarea automată a ceasului, puteţi seta ceasul manual.
Ţineţi apăsat butonul TIME/SET (5) timp de 2 secunde până începe să pâlpâie anul (setarea de bază este anul 2000). Pentru modificarea
valorii puteţi folosi butoanele UP (sus) (8) sau DOWN (jos) (10). După setarea valorii, apăsaţi butonul TIME/SET (5); puteţi seta, pe rând,
următoarele valori:
An – lună – zi – limba – ora – minut – fus orar
Cod limbă: GE: germană, EN: engleză, IT: italiană, FR: franceză, NE: olandeză, ES: spaniolă, DA: daneză.
Fus orar: poate lua valori între -12 şi +12. Această valoare este folosită în sincronizarea automată (semnal DCF-77) şi ceasul se va seta prin
raportare la timpul din Frankfurt. După setare, această valoare se va schimba în funcţie de acesta în momentul următoarei sincronizări.
Aparatul va seta automat fazele lunii în funcţie de dată.
Alarmă
Ţineţi apăsat butonul ALARM/SET (3) timp de 2 secunde. Va apare afişajul 0:00AL; puteţi modifica valoarea afişată folosind butoanele UP
(sus) (8) sau DOWN (jos) (10). Apăsând din nou butonul ALARM/SET (3), puteţi seta minutul, urmând procedura descrisă mai sus.
Alarma poate fi activată prin apăsarea butonului ALARM/SET (3), după care în partea de sus a monitorului va apare iconul „ ”. Alarma
poate fi dezactivată apăsând din nou butonul ALARM/SET (3).
Aparatul va emite sunetul alarmei timp de 2 minute al cărui intensitate va creşte în faza 4 şi poate fi oprit prin apăsarea oricărui buton.
Alarma poate fi oprită temporar prin apăsarea butonului SNOOZE, dar după 5 minute va începe din nou.
Memorarea temperaturii şi verificarea umidităţii aerului
În starea iniţială a aparatului pe afişor putem vedea temperatura interioară şi exterioară, precum şi umiditatea aerului în interior şi exterior.
Valorile curente minime şi maxime sunt, însă, înregistrate în continuu.
1. Selectaţi un canal (buton UP) în funcţie de temperatura exterioară pe care doriţi să o verificaţi (valori minime şi maxime).
2. Prin apăsarea repetată a butonului MAX/MIN, pe ecran vor apărea mai întâi valorile maxime, apoi cele minime. La a treia apăsare vor fi
afişate datele actuale.
3. Ştergerea memoriei: după afişarea valorilor minime şi maxime, ţineţi apăsat butonul MAX/MIN timp de 3 secunde. Valorile minime şi
maxime sunt şterse, după care vor fi afişate valorile actuale. În cazul senzorilor externi, se vor fi şterge datele care tocmai urmează să fie
afişate.
Barometru – prognoză meteo
În funcţie de umiditatea aerului, barometrul ne indică aproximativ starea vremii peste 12-24 de ore. Cele patru figuri posibile: uşor înnorat,
înnorat, ploios, furtunos, însorit. Dacă apare figura „soare pe cer senin” în timpul nopţii, acesta indică creşterea presiunii atmosferice.
însorit uşor înnorat înnorat ploios
Page 14

Notă: După cum ştim cu toţii, nu poate fi garantată o prognoză exactă 100%. Acest aparat asigură o prognoză cu o precizie de 75%.
Deoarece a fost proiectat pentru interior, funcţionarea lui depinde de viteza şi valoarea de schimbare a microclimei respective. Schimbările
mai importante, mai bruşte (ex. ploaie după vreme însorită) pot fi indicate cu o precizie mai mare, decât cele care se produc mai lent.
Domeniul de măsurare a umidităţii
Pe monitor, lângă indicatorul umidităţii puteţi vedea un icon mic care indică starea de confort a organismului pe baza valorii măsurate.
Gradele posibile sunt următoarele:
Starea de confort Icon Temperatură Umiditate Notă
0
Confortabil 20 C - 28 C 40% - 70% Temperatură şi umiditate ideală
0 0
Umed 20 C - 28 C peste 70% Umiditate prea mare
0 0
Uscat 20 C - 28 C sub 40% Umiditate insuficientă
Dacă temperatura măsurată este în afara domeniului de măsurare, pe monitor nu va fi afişat niciun icon!
Setarea alarmei de temperatură
Aparatul vă permite să setaţi o valoare de temperatură măsurată de o anumită unitate externă, peste care aparatul va emite un semnal.
Ţineţi apăsat butonul ALERT (4) timp de 2 secunde. În acest moment, în locul temperaturii măsurate de unitatea externă va începe să
pâlpâie valoarea superioară (setarea din fabrică: 70°C) şi simbolul . Pentru modificarea valorii puteţi folosi butoanele UP (sus) (8) sau
DOWN (jos) (10). Prin aceeaşi procedură, apăsând din nou butonul ALERT (4), puteţi modifica valoarea inferioară, după care pe monitor
va începe să pâlpâie simbolul .
În cazul în care folosiţi mai multe unităţi externe, aceste valori pot fi setate separat pentru fiecare unitate, schimbând canalele cu ajutorul
butonului CHANNEL (7).
După setarea valorilor, alarma va fi activată, iar pe monitor va apare simbolul . Funcţia poate fi dezactivată prin apăsarea butonului
ALERT (4).
Când temperatura măsurată de o unitate externă atinge valoarea setată unitatea va emite un semnal sonor scurt, iar pe monitor va începe
să pâlpâie valoarea măsurată şi simbolul . Acestea vor continua să pâlpâie până când temperatura se mişcă în intervalul specificat.
Semnalul sonor va fi repetat la fiecare minut; funcţia poate fi dezactivată prin apăsarea oricărui buton.
Dacă valoarea critică nu a fost atinsă de canalul afişat pe monitor, atunci valoarea nu va fi afişată, ci va pâlpâi doar simbolul . Puteţi căuta
canalul activat prin intermediul butonului CHANNEL (7), valoarea pâlpâind în cazul acestui canal.
Schimbarea bateriilor
Unitatea centrală verifică permanent starea bateriilor şi va da un semnal de avertizare dacă devine necesară schimbarea acestora.
Simbolul bateriei care apare lângă valoarea temperaturii interne sau externe indică faptul că bateriile trebuie schimbate.
Vă recomandăm să folosiţi baterii alcaline, mai durabile. Nu folosiţi baterii cu nivel de încărcare diferit!
Nu uitaţi că unităţile trebuie resincronizate de fiecare dată când schimbaţi bateriile.
Avertismente
Feriţi atât senzorul, cât şi aparatul de razele directe ale soarelui!
Nu amplasaţi aparatul în apropierea unor dispozitive de aer condiţionat, de încălzire sau a unor ventilatoare!
Nu curăţaţi aparatul cu agenţi de curăţare agresivi sau abrazivi!
Unitatea centrală poate fi folosită doar în interior!
Deşi unitatea exterioară este protejată împotriva stropilor de apă, nu o scufundaţi în lichide şi nu o expuneţi la ploi puternice!
Feriţi toate unităţile de temperaturile extreme, de umiditate sau praf!
Pentru o recepţie bună a semnalelor radio, aparatele trebuie amplasate în locuri ferite de interferenţe, departe de suprafeţe metalice.
Aveţi grijă să evitaţi intrarea unor obiecte sau lichide în aparat prin orificiile sale!
Nu încercaţi să demontaţi aparatul! Reparaţiile pot fi efectuate doar de către un specialist!
Aveţi grijă să nu scăpaţi aparatul din mâini. În caz de deteriorare nu folosiţi aparatul!
Date tehnice
ceas: . . . . . . . . . . . . . . . . . . . . . . . . . . ceas cuarţ comandat prin semnal radio DCF-77
precizia ceasului: .. . . . . . . . . . . . . . . . . . . . . . . . . . . . . . . 1 secunde / 1 milion de ani
0
domeniu de temperatură exterioară:. . . . . . . . . . . . . . . . . . . . . . . . . . . . . . . - 50 – 70 C
0
domeniu de temperatură interioară: . . . . . . . . . . . . . . . . . . . . . . . . . . . . . . . . . 0 – 50 C
0
rezoluţie: . . . . . . . . . . . . . . . . . . . . . . . . . . . . . . . . . . . . . . . . . . . . . . . . . . . . . . . . 0,1 C
măsurarea umidităţii interioare:.. . . . . . . . . . . . . . . . . . . . . . . . . . . . . . . . . . . 20 – 95 %
rezoluţia măsurării umidităţii:. . . . . . . . . . . . . . . . . . . . . . . . . . . . . . . . . . . . . . . . . . . 1 %
raza de acţiune a senzorului extern în câmp deschis:. . . . . . . . . . . . . . . . . . . . . . . 25 m
frecvenţă de funcţionare. . . . . . . . . . . . . . . . . . . . . . . . . . . . . . . . . . . . . . . . . 433,9 MHz
numărul de unităţi externe: . . . . . . . . . . . . . . . . . . . . . . . . . . . . . . . . . . . . . . max. 3 buc
tipul unităţilor externe care pot fi conectate:.. . . . . . . . . . . . . . . . . . . . . . . . . . HCKK 01
alimentare: unitate externă: . . . . . . . . . . . . . . . 2 baterii AAA (1,5 V) (nu sunt accesorii)
unitate centrală:. . . . . . . . . . . . . . . . . 2 baterii AA (1,5 V) (nu sunt accesorii)
inclus: . . . . . . . . . . . . . . . . . . . . . . . . . . . . . . . . . . . . . . . 2 buc unităţi externe HCKK 01
. . . . . . . . . . . . . . . . . . . . . . . . . suport pentru perete / distanţier pentru unităţile externe
dimensiunile unităţii centrale / monitorului: . . . . . . . . . . . . . 85 x 160 x 40 / 45 x 80 mm
dimensiunile unităţii externe:. . . . . . . . . . . . . . . . . . . . . . . . . . . . . . . . . 60 x 95 x 25 mm
0
±
Page 15

HCW 12HCW 12
• prognoza vremena sa animiranim simbolima
• radio kontrola DCF-77 (Frankfurt)
• podešavanje vremenskih zona
• Ispis datuma, budilnik
• merenje spoljne i unutrašnje temperature
• merenje unutrašnje vlažnosti vazduha
• indikacija promene temperature i vlažnosti vazduha
• prikaz mesečevog ciklusa
• prikaz stanja baterija (unutrašnja i spoljna jedinica)
• pribor: 1 unutrašnja jedinica, 2 spoljne jedinice
• proširiv sa još jednom spoljnom jedinicom (HCKK 01)
Unutrašnja jedinica
1. Displej
2. SNOOZE-LIGHT – Pozadinsko osvetljenje u trajanju 5 sek.
3. ALARM/SET (budilnik) – podešavanje budilnika
4. ALERT (alarm) – podešavanje alarma za temperaturu
5. TIME/SET – podešavanje sata, datuma, vremenske zone
6. MAX/MIN (maximum/minimum) – maks. min. prikaz unutrašnje
i spoljnje temperature unutrašnje vlažnosti vazduha
7. CHANNEL – promena kanala spoljne jedinice
8. UP (prema gore) taster – koračanje, prikaz sata 12/24
9. RESET – povrat na fabrička podešavanja
0 0
10. DOWN (prema dole) taster – koračanje, prikaz temperature C/ F
11. Poklopac držača baterije
Spoljna jedinica
12. LED indikator
13. Displej
14. Poklopac držača baterije
0 0 0 0
15. C/ F taster - odabir C/ F
16. Tx taster – predaja
17. Nosač
14
REMOTE SENSOR
12
13
SNOOZE • LIGHT
4
5 6
7
3
1
2
10
11
8
9
15
16
17
Puštanje u rad
1. Skinite poklopac baterije sa unutrašnje jedinice (11.) i pazeći na polaritet postavite baterije. Uključiće se pozadinsko osvetljenje,
uključiće se displej, oglasiće se zvučni signal.
2. Odstranite 4 šarafa sa poklopca baterije spoljne jedinice (14.), pazeći na polaritet postavite bateriju, tada će spoljna jedinica automatski
da šalje signal unutrašnjoj jedinici.
3. Unutrašnja jedinica započinje traženje signala spoljne jedinice. Ako je prijem uspešan na displeju će se pojaviti merena vrednost sa
spoljne jedinice, redni broj nameštenog kanala i uz pratnju zvučnog signala na displeju će da trepne simbol .
4. Nakon isteka 3 minute unutrašnja jedinica automatski započinje traženje signal za podešavanje tačnog vremena (DCF-77), traženje
traje 7 minuta. Ukoliko smeštaj centralne jedinice odgovara prijemu (DCF-77) signala iz frankfurta tačno vreme će se automatski prikazati.,
u tom slučaju na displeju će se pojaviti sledeći simbol: . Ako prijem signala nije uspešan neće se automatski prikazati tačnio vreme, sat
počinje da pokazuje vreme od 0:00 sati.
Registracija spoljne jedinice
Nakon isteka 30 sek., posle uključenja spoljna jedinica automatski šalje signal unutrašnjoj jedinici za registraciju ali se registracija može
izvršiti i manualno. Spoljnu jedinicu postavite u blizinu unutrašlje jedinice i stisnite taster „Tx” (16.). Na spoljnoj jedinici će se pojaviti
simbol . Ako je prijem uspešan na displeju će se pojaviti merena vrednost sa spoljne jedinice, redni broj nameštenog kanala i uz
pratnju zvučnog signala na displeju će da trepne simbol .
Ako želite koristiti više spoljnih jedinica treba obratiti pažnju na redne brojeve 1-2-3. Spoljna jedinica je pod oznakom HCKK
01. Prilikom kupovine dodatne spoljnje jedinice obratite pažnju na kanal kojim komunicira sa unutrašnjom jedinicom
(CH1 – prvi kanal, CH2 – dugi kanal, CH3 – treći kanal) kanali su označeni i na ambalaži i na samom uređaju. Uređajem
HCW 12 se već isporučuju dve spojnje jedinice sa kanalima CH1 i CH2 tako da ste u mogućnosti dodati još jednu
spoljnu jedinicu koja treba da je sa CH3 kanalom. Spoljne jedinice uključujte (registrujte) jedan po jeda, ne sme
se istovremeno postaviti baterije u sve spoljne jedinice. Redom treba da se registruju spoljne jedinice, treba
da se sačeka da spoljna jedinica započne komunikaciju sa unutrašnjom jedinicom i nakon toga se sme
registrovati naredna spoljna jedinica. Ovako se može sprečiti smetnja u komunikaciji spoljnih jedinica i
unutrašnje jedinice. Registracija spoljnih jedinica je nemoguća dok unutrašnja jeduinica traži DCF-77
radio signal tačnog vremena!
meteorološ ka stanica sa dve spoljne jedinice
Page 16

Domet na otvorenom oko 25 metara. Pogodna za merenje temperature drugih prostorija ili spoljne temperature. Radi tačnog merenja (kao
i svaki drugi termomatar) postavlja se u hladovinu. Pri niskim temperaturama smanjuje se napon baterije, samim tim i domet spoljne
jedinice. Prepreke (zidovi, beton, metalne površine..) između spoljne i unutrašnje jedinice smanjuju domet, stoga ih treba postaviti što
bliže jedan drugom. Spoljnu jedinicu ne izlažite ekstremnim temperaturama. Računari i drugi uređaji mogu da ometaju rad uređaja.
Na spoljnoj jedinici nalazi se i jedan displej sa kojeg se može očitati merena vrednost i broj kanala.
Moguće je i birati ispis temperature u Celsius ill Fahrenheit stepenima. Odabir se radi tasterom (15) koji se nalazi ispod poklopca baterije.
Ukoliko su više spoljnih jedinica registrovani na unutrašnju jedinicu, podatke sa spoljnih jedinica možete očitati pritiskom taster CHANNEL
(7) kad će se pored očitane vrednosti moći i očitati i broj kanal 1-2-3.
0
Pored merenih vrednosti nalaze se i ikonica koja ukazuje na tendenciju temperature. U slučaju temperaturne promene od1 C pojaviće se
jedan od simbola / u zavisnosti dali opada ili se povećava temperatura. Ikonica ukazuje na konstantnu temperaturu bez promene.
Podešavanje radiokontrolisanog sata
Ukoliko je automatska sinhronizacija bila neuspešna, proceduru možete pokrenuti i manualno. Držite pritisnuto taster „DOWN (dole)” (10)
2 sekunde. Na displeju će se pojaviti simbol primanja radio signala . Držanjem tastera možete zaustaviti traženje radio signal.
Ako je prijem uspešan oko simbola antene počinje treptati simbol radio talasa. Ako nema treptućeg simbol radio talasa znači da je je
prijem signala memoguć na mestu gde je unutrašnja jedinica postavljena. U tom slučaju probajte okrenuti ili premestiti uređaj (u uređaj je
ugrađena feritna antena, slična onome u FM radio prijemnicima) U zavisnosti od jačine signala sinhronizacija tačnog vremena može da
potraje od 2 do 10 minuta, budite strpljivi. Nakon sinhronizacije simbol predajnika konstantno svetli na displeju. Ako je prijem signala
nemoguć simbol neće da svetli na displeju.
Ako je prijem uspešan na displeju će se pojaviti i ispis DST (Daylight Saving Time) što označava letlje računanje vremena.
Nakon uspešne sinhronizacije moguće je podešavanje vremenske zone. Podešavanje ovog parametra možete pročitati u zaglavlju
„Manualno podešavanje sata”.
* Radiokontrolisani satovi pored klasičnih kvarcnih satova imaju ugrađen prijemnik koji u određenim intervalima prima signal tačnog
vremena i koriguje na vašem satu. Predajnik se nalazi u Mainflingenu pored Frankfurta u Nemačkoj, predajnik je nazvan DCF-77. Pošto
primljeni signali potiču od jednog “atomskog sata “ odstupanje je 1sekunda u roku od milion godina.
Predajnik šalje signal u krugu od 1500 do 2000 km ukoliko se sat (prijemnik) nalazi izvan dometa predajnika, sat funkcioniše kao običan
kvarcni sat.
Manualno podešavanje sata
Ako niste uspeli sinhronizovati sat, tačno vreme podesite ručno.
Držite pritisnuto taster TIME/SET (5) 2 sekunde, započinje treptati ispis godine (u osnovnom položaju 2000). Podesite tekuću godinu
tasterima UP (gore) (8)ili DOWN (dole) (10). Nakon podešene godine stisnite taster TIME/SET (5), nakon pritiska tastera podesite sledeću
vrednost:
Godina – Mesec – Dan – Jezik ispisa – Sat – Minuta – Vremenska zona
Jezički kodovi: GE: namački, EN: engleski, IT: italijanski, FR: francuski, NE: holandski, ES: spanski, DA: danski
Vremenska zona: Vrednost se može podesiti od -12 do +12 sati. Uređaj ovu vrednost uzima u obzir prilikom automatske sinhronizacije
(DCF-77 jel), oduzima ili dodaje vrednost prilikom prikaza vremena. Preračun će se aktivirati nakon prvog prijema signala za
sinhronizaciju.
Uređaj u zavisnosti od datuma automatski prikazuje mesečev ciklus.
Budilnik
Držite pritisnuto taster ALARM/SET (3) 2 sekunde. Na disleju počinje treptati ispis 0:00AL tada se može podesiti vreme buđenja,
podešavanje se radi tasterima UP (gore) (8) i DOWN (ldole) (10). Nakon posešenih sati stisnite taster ALARM/SET (3) da bi po gore
opisanoj proceduri podesili minute.
Budilnik se aktivira tasterom ALARM/SET (3) kada će se i na gornjem delu displeju pojaviti simbol „ ”. Isključuje se ponovnim pritiskom
tastera ALARM/SET (3).
Budilnik se oglašava u trajanju 2 minute u 4 intervala jačine zvuka, prekida se pritiskom bilo kojeg tastra. Tasterom SNOOZE možete
prekinuti buđenje ali će se nakon 5 minuta ponovo aktivirati.
Provera memorisanih vrednosti temperature i vlažnosti vazduha
U normalnom položaju sa displeja možete očitati spoljnu i unutrašnju temperaturu i vlažnost vazduha. Urađaj automatski memoriše
maksimalne i minimalne vrednosti.
1. Odaberite jedan kanal shodno tome kojoj spoljnoj jedinici želite proveriti minimalne i maksimalne vrednosti.
2. Pritisnite više puta taster MAX/MIN. Prvo se može očitati maksimalna a nakon toga minimalna merena vrednost. Nakon trećeg pritiska
tastera možete očitati aktuelne vrednosti.
3. Brisanje memorisanih MAX i NIN vrednosti možete uraditi pritiskom tastera MAX/MIN u trajanju od tri sekunde. Odjednom se brišu
minimalne i maksimalne merene vrednosti. Na displeju se pojavljulju aktuelne vrednosti. Brišu se vrednosti trenutno aktuelne spoljne
jedinice (vrednosti svake spoljne jedinice treba posebno brisati).
Barometar – prognoza vremena
Barometar na osnovu promene vazdušnog pritiska prognozira vrema za narednih 12 do 24 sata. Prikaz četiri različitih simbola: sunčano,
umereno oblačno, oblačno, kišovito. Ukoliko se noću poljavljuje simbol sunca to ukazuje na razvedravanje (vedro nebo) porast pritiska.
sunčano umereno oblačno oblačno kišovito
±
Page 17

Napomena: kao što znamo ni jedna prognoza vremena nije 100% tačna tako i ovaj uređaj radi sa tačnošću od oko 75%. Pošto je uređaj
projektovan za unutrašnju upotrebu na merene podatke utiču i mikroklimatsi uslovi. Uređaj je precizniji pri naglim promenama
meteoroloških uslova neko kod dugotrajnih promena.
Podeoci o vlažnosti vazduha
Na displeju pored prikaza vrednosti unutrašnje vlažnosti vazduha nalazi se ikonica koja na osnovu merenih vrednosti procenjuje osećaj
konfora judskog organizma. Simboli mogu biti:
Osećaj konfora Ikonica Temperaturni opseg Vrednost vlažnosti Opis
0
Ugodno 20 C - 28 C 40% - 70% Idealna temperatura i vlažnost vazduha
0 0
Vlažno 20 C - 28 C iznad 70% Previsoki vlažnost vazduha
0 0
Suvo 20 C - 28 C ispod 40% Preniski vlažnost vazduha
Ako su merene vrednosti van opsega, na displeju se neće pojaviti ni jedan simbol!
Podešavanje alarma temperature
Moguće je podesiti jednu vrednost sa jedne spoljne jedinice kada će se centralna jedinica oglasiti.
Držite pritisnuto taster ALERT (4) 2 sekunde. Tada počinje treptati gornja vrednost spoljne jedinice (fabrička vrednost je 70°C) i simbol .
Tasterima UP (gore) (8) i DOWN (dole) (10) podesite gornju vrednost. Pritisnite taster ALERT (4) i podesite i doljnju vrednost, tada svetli
simbol .
U slučaju više spoljnih jedinica ove vrednosti možete podesiti za svaku ponaosob, podešavanje se odnosi na namešteni kanal CHANNEL
(7) taster.
Nakon podešenih vrednosti funkcija će biti aktivna, na displeju će se pojaviti simbol . Ova se funkcija može isključiti tasterom ALERT (4).
Ako se na spoljnoj jedinici postigne podešana vrednost, unutrašnja jedinica će se oglasiti kratkim zvučnim signalom, počinje treptati
temperaturna vrednost i simbol . Treptanje ne prestaje dok je temperatura izvan podešene vrednosti, zvučni signal će se ponavljati
svakog minuta. Isključivanje se radi pritiskom bilo kojeg tastera.
Ako se na displeju ne prikazuje kanal sa kojeg je alarmiranje, temperatura neće treptati samo simbol . Tasterom CHANNEL (7) možete
proveriti sa koje soljnje jedinice je došao signal za alarm.
Potreba za zamenom baterija
Centralna, unutrašnja jedinica prati stanje baterija i javlja ukoliko je baterije potrebno menjati. Takođe jedan simbol koji se nalazi pored
spoljne temperature označava i stanje baterija aktuelne spoljne jedinica.
Isključivo koristite trajne alkalne baterije, nemojte mešati stare sa novim i različitim tipovima baterija!
Ne zaboravita da je nakon zamene baterija potrebna ponovna sinhronizacija (registracija) spoljnih jedinica.
Napomene
I unutrašnju i spoljnu jedinicu štitite od direktnog uticaja sunca!
Ne postavljaljte ih blizu klima uređaja i grejnih tela!
Ne koristite agresivna sredstva za čišćenje!
Unutrašnja jedinica je projektovana za unutrašnju upotrebu!
Spoljnu jedinicu tako montirajte da ne dođe u direktan kontakt sa kišom i drugim padavinama!
Sve komponente čuvajte od ekstremnih meteoroloških uslova, pare i prašine!
Obratite pažnju da uređaji nesmetano mogu primati radio signale, da ne budu blizu metalnih predmeta i debelih zidova.
Obratite pažnju da ništa ne upadne ili ucuri u uređaj!
Nikada ne rastavljaljte uređaj, eventualne popravke poverite stručnom licu!
Čuvajte uređaj da se ne slomi, oštećeni uređaj je zabranjeno koristiti!
Tehnički podaci
sat: . . . . . . . . . . . . . . . . . . . . . . . . . . . . radio kontrolisani DCF-77, kvarcni sat
preciznost: . . . . . . . . . . . . . . . . . . . . . . . . . . . . . . . . . 1 sek. / 1 milion godina
0
spoljni merni opseg:. . . . . . . . . . . . . . . . . . . . . . . . . . . . . . . . . . . . - 50 – 70 C
0
unutrašnji merni opseg: . . . . . . . . . . . . . . . . . . . . . . . . . . . . . . . . . . . 0 – 50 C
0
preciznost očitavanja:. . . . . . . . . . . . . . . . . . . . . . . . . . . . . . . . . . . . . . . 0,1 C
merenje unutrašnje vlažnosti vazduha:.. . . . . . . . . . . . . . . . . . . . . . 20 – 90 %
preciznost očitavanja: . . . . . . . . . . . . . . . . . . . . . . . . . . . . . . . . . . . . . . . . 1 %
domet spoljne jedinice na otvorenom:. . . . . . . . . . . . . . . . . . . . . . . . . . . . 25 m
radna frekvencija:. . . . . . . . . . . . . . . . . . . . . . . . . . . . . . . . . . . . . . 433,9 MHz
broj spoljnih jedinica: . . . . . . . . . . . . . . . . . . . . . . . . . . . . . . . . . . maks. 3 kom
tip dodatnih spoljnih jedinica:. . . . . . . . . . . . . . . . . . . . . . . . . . . . . . . HCKK 01
napajanje; spoljna jedinica: . . . . . . . . . . 2 x AAA (1,5 V) baterija (nije u sklopu)
unutrašnja jedinica:.. . . . . . . . . . . 2 x AA (1,5 V) baterija (nije u sklopu)
priloženo: . . . . . . . . . . . . . . . . . . . . . . . . . . . 2 kom. HCKK 01 spoljne jedinice
. . . . . . . . . . . . . . . . . . . . . . . . . . . . . . . . . zidni nosač / naslon spoljne jedinice
unutrašnja jedinica / displej: . . . . . . . . . . . . . . . . . . . 85 x 160 x 40 / 45 x 80 mm
spoljna jedinica: . . . . . . . . . . . . . . . . . . . . . . . . . . . . . . . . . . . 60 x 95 x 25 mm
0
±
Page 18

HCW 12HCW 12
• napoved vremena z animiranimi znaki
• radio kontrola DCF-77 (Frankfurt)
• nastavitev vremenskih pasov
• Izpis datuma, budilka
• merjenje zunanje in notranje temperature
• merjenje notanje vlažnosti zraka
• kazalo spremembe temperature in vlažnosti zraka
• prikaz luninih men
• prikaz stanja baterij (notranje in zunanjih enot)
• pribor: 1 notranja enota , 2 zunanji enoti
• razširljiv s še eno zunanjo enoto (HCKK 01)
Notranja enota
1. Zaslon
2. SNOOZE-LIGHT – Osvetljeno ozadje v trajanju 5 sek.
3. ALARM/SET (budilka) – nastavitev budilke
4. ALERT (alarm) – nastavitev alarma za temperaturo
5. TIME/SET – nastavitev ure, datuma, vremenskega pasu
6. MAX/MIN (maximum/minimum) – maks. min. prikaz
notranje in zunanje temperature, notranje vlažnosti zraka
7. CHANNEL – sprememba zunanje enote
8. UP (gor ) stikalo – korakanje, prikaz ure 12/24
9. RESET – povratek na tovarniško nastavitev
0 0
10. DOWN (dol) stikalo – korakanje, prikaz temperature C/ F
11. Pokrov držala baterije
Zunanja enota
12. LED indikator
13. Zaslon
14. Pokrov dražala baterije
0 0 0 0
15. C/ F stikalo - izbira C/ F
16. Tx stikalo – oddajnik
17. Nosilec
14
REMOTE SENSOR
12
13
SNOOZE • LIGHT
4
5 6
7
3
1
2
10
11
8
9
15
16
17
Delovanje
1. Snemite pokrov baterije z notranje enote (11.) in pozorno vstavite baterije (pazite na polarnost). Vklopilo se bo osvetljeno ozadje,vklopil
se bo zaslon, oglasil se bo zvočni signal.
2. Odstranite 4 vijake s pokrova baterije zunanje enote (14.), in pozorno vstavite baterije (pazite na polarnost), takrat bo zunanje enota
avtomatsko poslala signal notranji enoti .
3. Notranja enota začenja iskanje zunanje enote. Če je sprejem uspešen se bo na zaslonu pojavila izmerjena vrednost iz zunanje enote,
zaporedna številka nameščenega kanala in z zvočnim signalom bo na zaslonu utripal znak: .
4. Po izteku 3 minut notranja enota avtomatsko začenja iskanje signala za nastavitev točnega časa (DCF-77), iskanje traja 7 minut.
Vkolikor namestitev zunanje enote odgovarja sprejemu (DCF-77) signala iz Frankfurta se bo točen čas avtomatsko prikazal, v tem
primeru se bo na zaslonu pojavil naslednji znak: . Če sprejem signala ni uspešen se ne bo avtomatsko prikazal točen čas, ura bo kazala
čas od 0:00 ur.
Registracija zunanje enote
Po izteku 30 sek., po vklopu zunanja enota avtomatsko pošilja signal notranji enoti za registracijo,oz registracija se lahko naredi tudi
ročno. Zunanjo enoto postavite v bližini notranje enote in pritisnite stikalo „Tx” (16.). Na zunanji enoti se bo pojavil znak . Če je
sprejem uspešen se bo na zaslonu pojavila izmerjena vrednost iz zunanje enote, zaporedna številka nameščenega kanala in z
zvočnim signalom bo na zaslonu utripal znak .
Če želite uporabljati več zunanjih enot bodite pozorni na zaporedne številke 1-2-3. Zunanja enota je z oznako HCKK 01.
Pri nakupu dodatne zunanje enote bodite pozorni na kanal kateri komunicira z notranjo enoto (CH1 – prvi kanal, CH2 –
dugi kanal, CH3 – tretjii kanal) kanali so označeni in na embalaži in na sami napravi . Z napravo HCW 12 se že
pošiljata dve zunanji enoti s kanaloma CH1 in CH2 tako da imate možnost dodati še eno zunanjo enoto katera
mora imeti CH3 kanal. Zunanje enote vklapljajte (registrirajte) eno po eno, ne smete v njih istočasno vstavljati
baterije. Po vrstnem redu se morajo registrirat zunanje enote, potrebno je počakati da zunanja enota začne
komunikacijo z notranjo enoto in po tem se sme registrirati naslednja zunanja enota. Tako se lahko
prepreči motnja v komunikaciji zunanjih enot in notranje enote. Registracija zunanjih enot je
nemogoča dokler notranja enota išče DCF-77 radio signal točnega časa!
meteo postaja z dvema zunanjima enotama
Page 19

Doseg na odprtem okoli 25 metrov. Primerno za merjenje temperature drugih prostorov ali zunanje temperature. Zaradi točnega merjenja
(kakor vsak drugi termometer) postavlja se v hladovino. Pri nizkih temperaturah se zmanjšuje napetost baterije, s tem pa tudii doseg
zunanje enote. Prepreke (zidi, beton, metalne površine) med zunanjo in notranjo enoto zmanjšujejo doseg, zatorej jih je potrebno postaviti
čim bliže enega drugemu. Zunanjo enoto ne izpostavljajte ekstremnim temperaturam. Računalniki in druge naprave lahko motijo
delovanje naprave.
Na zunanji enoti se nahaja tudi zaslon s katerega se lahko odčita merjena vrednost in število kanala.
Mogoče je izbirati izpis temperature v Celsius ali Fahrenheit stopinjah. Izbira je mogoča s tipko (15) katera se nahaja pod pokrovom
baterije.
Vkoliko je več zunanjih enot registriranih na notranjo enoto, podatke iz zunanjih enot lahko odčitate s pritiskom tipke CHANNEL (7) ko se
bo zraven odčitane vrednosti lahko odčitala tudi številka kanala 1-2-3.
0
Zraven merjenih vrednosti se nahaja tudi ikonica katera pokaže na tendencijo temperature. V primeru temperaturne spremembe do 1 C se
pojavi eden od simbolov / v odvisnosti ali pada ali se povečuje temperatura. Ikonica pokaže na konstantno temperaturo brez
sprememb.
Nastavitev radiokontrolirane ure
Vkoliko je avtomatska sinhronizacija bila neuspešna, postopek lahko zaženete ročno. Držite pritisnjeno tipko „DOWN (dol)” (10) 2
sekunde. Na ekranu se pojavi simbol sprejema radio signala .
Z držanjem tipke lahko zaustavite iskanje radio signala.
Če je sprejem uspešen okoli simbola antene začne utripati simbol radio valov. Če ni utripajočega simbola radio valov, pomeni da je
sprejem signala nemogoč na mestu kjer je notranja enota postavljena. V tem primeru poskusite obrniti ali premestiti napravo (v napravo je
vgrajena feritna antena, podobna tistim v FM radio spejemnikih. V odvisnosti od moči signala sinhronizacija točnega časa lahko traja dalje
od 2 do 10 minut, bodite potrpežljivi. Po sinhronizaciji simbol predajnika konstantno sveti na ekranu. Če je sprejem signala nemogoč
simbol ne bo svetil na ekranu.
Če je sprejem uspešen na ekranu se pojavi izpis DST (Daylight Saving Time) kar označuje poletno računanje časa.
Po uspešni sinhronizaciji je mogoče nastavljanje časovne zone. Nastavitev tega parametra lahko preberete v poglavju „Ročna nastavitev ure”.
*Radiokontrolirane ure zraven klasičnih kvarcnih ur imaju vgrajen sprejemnik kateri v določenih intervalih sprejema signal točnega časa in
korigira na vaši uri. Predajnik se nahaja v Mainflingenu zraven Frankfurta v Nemčiji, predajnik se imenuje DCF-77. Ker sprejeti signali
izhajajo iz ene “atomske ure “, je odstopanje 1sekunda v roku milijon let.
Predajnik pošlje signal v krugu od 1500 do 2000 km vkoliko se ura (prejemnik) nahaja izven dosega predajnika, ura deluje kakor navadna
kvarcna ura.
Ročna nastavitev ure
Če niste uspeli sinhronizirati ure, točen čas nastavite ročno.
Držite pritisnjeno tipko TIME/SET (5) 2 sekunde, začne utripati izpis leta (v osnovnem položaju 2000). Nastavite tekoče leto s tipkama UP
(gor) (8) ali DOWN (dol) (10). Po nastavitvi leta stisnite tipko TIME/SET (5), po pritisku tipke nastavite naslednjo vrednost:
Leto – Mesec – Dan – Jezik izpisa – Ura – Minuta – Časovna zona
Kratice jezikov : GE: nemški, EN: angleški, IT: italijanski, FR: francoski, NE: holandski, ES: španski, DA: danski
Časovna zona: Vrednost se lahko nastavi od -12 do +12 ur. Naprava to vrednost vzame v obzir pri avtomatski sinhronizaciji (DCF-77 jel),
odvzema ali dodaja vrednost pri prikazu časa. Preračun se bo aktiviral po prvem sprejemu signala za sinhronizacijo.
Naprava v odvisnosti od datuma avtomatsko prikazuje mesečni ciklus.
Budilka
Držite pritisnjeno tipko ALARM/SET (3) 2 sekunde. Na ekranu začne utripati izpis 0:00AL takrat se lahko nastavi čas bujenja, nastavitev se
izvede s tipkama UP (gor) (8) in DOWN (dol) (10). Po nastavitvi ure stisnite tipko ALARM/SET (3) da bi po zgoraj opisanem postopku
nastavili minute.
Budilka se aktivira s tipko ALARM/SET (3) ko se bo na zgornjem delu ekrana pojavil simbol „ ”. Izklopi se s ponovnim pritiskom tipke
ALARM/SET (3).
Budilka se oglaša v trajanju 2 minute v 4 intervalih jakosti zvoka, prekine se s pritiskom bilo katere tipke. S tipko SNOOZE lahko prekinete
bujenje a se bo po 5 minutah ponovno aktiviralo.
Preverjanje shranjenih vrednosti temperature in vlažnosti zraka
V normalnem položaju z ekrana lahko odčitate zunanjo in notranjo temperaturo in vlažnost zraka. Naprava avtomatsko shranjuje
maksimalne in minimalne vrednosti.
1. Izberite en kanal primerno tej kateri zunanji enoti želite preveriti minimalne in maksimalne vrednosti.
2. Pritisnite več krat tipko MAX/MIN. Najprej se lahko odčita maksimalna a po tem minimalna merjena vrednost. Po tretjem pritisku tipke
lahko odčitate aktualne vrednosti.
3. Brisanje shranjenih MAX in MIN vrednosti lahko izvedete s pritiskom tipke MAX/MIN v trajanju treh sekund. Naenkrat se brišejo
minimalne in maksimalne merjene vrednosti. Na ekranu se pojavljaljo aktualne vrednosti. Brišejo se vrednosti trenutno aktualne zunanje
enote (vrednosti vsake zunanje enote je potrebno posebej brisati).
Barometer – napoved vremena
Barometer na podlagi sprememb zračnega pritiska napoveduje vreme za naslednjih 12 do 24 ur. Prikaz štiri različnih simbolov : sončno,
zmerno oblačno, oblačno, deževno. Če se ponoči pojavlja simbol sonca to kaže na jasnitev (jasno nebo) rast pritiska.
sončno zmerno oblačno oblačno deževno
±
Page 20

Opomba: vedimo da ni nobena napoved vremena 100% točna ,tako tudi ta naprava deluje s točnostjo do 75%. Ker je naprava izdelana za
notranjo uporabo, na merjene podatke vplivajo mikroklimatski pogoji. Naprava je natančnejša pri naglih spremembah meteoroloških
pogojev, kakor pri dolgotrajnih spremembah.
Podatki o vlažnosti zraka
Na ekranu ob prikazu vrednosti notranje vlažnosti zraka se nahaja ikonica katera na podlagi merjenih vrednosti precenjuje občutek
udobja človeškega organizma. Simboli so lahko:
Občutek udobja Ikonica Temperaturni obseg Vrednost vlažnosti zraka Opis
0
Ugodno 20 C - 28 C 40% - 70% Idealna temperatura in vlažnost
0 0
Vlažno 20 C - 28 C Nad 70% Previsoka vlažnost zraka
0 0
Suho 20 C - 28 C Pod 40% Prenizka vlažnost zraka
Če so merjene vrednosti izven obsega, se na ekranu ne bo pojavil niti en simbol!
Nastavitev alarma temperature
Mogoče je nastaviti eno vrednost z ene zunanje enote, ko se bo centralna enota oglasila.
Držite pritisnjeno tipko ALERT (4) 2 sekunde. Takrat začne utripati zgornja vrednost zunanje enote (tovarniška vrednost je 70°C) in simbol
. S tipkama UP (gor) (8) in DOWN (dol) (10) nastavite zgornjo vrednost. Pritisnite tipko ALERT (4) in nastavite tudi spodnjo vrednost,
takrat sveti simbo .
V primeru več zunanjih enot te vrednosti lahko nastavite za vsako posamezno, nastavitev se nanaša na nameščeni kanal CHANNEL (7)
tipka.
Po nastavljenih vrednostih bo funkcija aktivna, na ekranu se pojavi simbol . Ta funkcija se lahko izključi s tipko ALERT (4).
Če se na zunanji enoti doseže nastavljena vrednost, notranja enota se oglasi s kratkim zvočnim signalom, začne utripati temperaturna
vrednost in simbol . Utripanje se ne ustavi dokler je temperatura izven nastavljene vrednosti, zvočni signal se ponavlja vsako minuto.
Izključevanje se vrši s pritiskom katere koli tipke.
Če se na ekranu ne prikazuje kanal s katerega je alarmiranje, temperatura ne bo utripala samo simbol . S tipko CHANNEL (7) lahko
preverite s katere zunanje enote je prišel signal za alarm.
Potreba za zamenjavo baterij
Centralna, notranja enota spremlja stanje baterij in javlja če je baterije potrebno zamenjati. Prav tako simbol kateri se nahaja zraven
zunanje temperature označuje tudi stanje baterij aktualne zunanje enote.
Izključno uporabljajte trajne alkalne baterije, ne mešajte stare z novimi in različne tipe baterij!
Ne pozabite da je po zamenjavi baterij potrebna ponovna sinhronizacija (registracija) zunanjih enot.
Opombe
Notranjo in zunanjo enoto ščitite pred direktnim vplivom sonca!
Ne postavljajte jih blizu klima naprav in grelnih teles!
Ne uporabljajte agresivna sredstva za čiščenje!
Notranja enota je izdelana za notranjo uporabo!
Zunanjo enoto tako montirajte, da ne pride v direkten kontakt z dežjem in drugimi padavinami!
Vse komponente zavarujte pred ekstremnimi meteorološkimi pogoji, paro in prahom!
Bodite pozorni da naprava lahko nemoteno sprejema radio signale, da niso blizu kovinskih predmetov in debelih zidov.
Bodite pozorni da nič ne pride v napravo ali teče vanjo!
Nikoli ne razstavljaljte napravo, morebitna popravila zaupajte strokovnim osebam!
Varujte napravo da se ne polomi, okvarjene naprave je prepovedano uporabljati!
Tehnični podatki
ura:.. . . . . . . . . . . . . . . . . . . . . . . . . . . radio kontrolirana DCF-77, kvarcna ura
natančnost:. . . . . . . . . . . . . . . . . . . . . . . . . . . . . . . . . . . . . 1 sek. / 1 milijon let
0
zunanji merilni obseg:. . . . . . . . . . . . . . . . . . . . . . . . . . . . . . . . . . . . - 50 – 70 C
0
notranji merilni obseg:. . . . . . . . . . . . . . . . . . . . . . . . . . . . . . . . . . . . . . 0 – 50 C
0
natančnost odčitavanja: . . . . . . . . . . . . . . . . . . . . . . . . . . . . . . . . . . . . . . 0,1 C
merjenje notranje vlažnosti zraka:.. . . . . . . . . . . . . . . . . . . . . . . . . . . 20 – 90 %
natančnost odčitavanja:. . . . . . . . . . . . . . . . . . . . . . . . . . . . . . . . . . . . . . . . 1 %
doseg zunanje enote na odprtem:. . . . . . . . . . . . . . . . . . . . . . . . . . . . . . . . 25 m
delovna frekvenca:.. . . . . . . . . . . . . . . . . . . . . . . . . . . . . . . . . . . . . 433,9 MHz
število zunanjih enot: . . . . . . . . . . . . . . . . . . . . . . . . . . . . . . . . . . . maks. 3 kom
tip dodatnih zunanjih enot:.. . . . . . . . . . . . . . . . . . . . . . . . . . . . . . . . . HCKK 01
napajanje: zunanja enota: . . . . . . . . . . . . . 2 x AAA (1,5 V) baterija (ni priložena)
notranja enota:. . . . . . . . . . . . . . . 2 x AA (1,5 V) baterija (ni priložena)
priloženo:. . . . . . . . . . . . . . . . . . . . . . . . . . . . . . 2 kom. HCKK 01 zunanje enote
. . . . . . . . . . . . . . . . . . . . . . . . . . . . . . . . stenski nosilec / naslon zunanje enote
notranja enota / ekran: . . . . . . . . . . . . . . . . . . . . . . . . 85 x 160 x 40 / 45 x 80 mm
zunanja enota:. . . . . . . . . . . . . . . . . . . . . . . . . . . . . . . . . . . . . . 60 x 95 x 25 mm
0
±
Page 21

HCW 12HCW 12
• předpověď počasí pomocí kreslených symbolů
• časové řízení radiovým signálem DCF-77 (Frankfurt)
• možnost volby časového pásma
• ukazatel datumu, režim buzení
• měření vnitřní i venkovní tepoty
• měření vnitřní vlhkosti
• indikace změn teploty a vlhkosti
• ukazatel aktuální fáze měsíce
• indikace stavu baterie (zvlášť pro vnitřní nebo vnější
jednotkupříslušenství: 1x vnitřní jednotka, 2x venkovní jednotka
• rozšiřitelná o další 1 venkovní jednotku (HCKK 01)
Vnitřní (centrální) jednotka
1. Displej
2. SNOOZE-LIGHT – zapnutí podsvícení na 5 sec.
3. ARM/SET (buzení) – nastavení budíku
4. ALERT (poplach) – nastavování teplotního poplachu
5. TIME/SET – nastavování času, datumun a časové zóny
6. MAX/MIN– maximální-minimální a venkovni-vnitřní teplota,
v případě vnitřní vlhkosti
7. CHANNEL – volba kanálu spojení s vnější jednotkou
8. UP (nahorů) – krokování vpřed, volba 12/24 hod. časového formátu
9. RESET – návrat k továrním nastavením
0 0
10. DOWN (dolů) – krokování zpět, volba jednotek teploty ( C/ F )
11. Kryt baterií
Vnější jednotka
12. LED indikace
13. Displej
14. Kryt baterií
0 0 0 0
15. Tlačítko C/ F - volba tepl. jednotek ( C/ F )
16. Tlačítko Tx – odeslání signálu
17. Upevňovací držák
14
REMOTE SENSOR
12
13
SNOOZE • LIGHT
4
5 6
7
3
1
2
10
11
8
9
15
16
17
Uvedení do provozu
1. Otevřete víko (11) baterií centrální jednotky, poté umístěte baterie tak, aby jejich polarita souhlasila s označením v držáku. Přístroj
signalizuje pohotovostní stav rozsvícením podsvícení displeje, aktivováním displeje a jedním zvukovým signálem.
2. Poté odšroubováním 4 šroubků odevřete víčko (14) baterií vnější jednotky a baterie umístěte do držáku, dbajíc na jejich správnou
polaritu. Pak jednotka automaticky odešle signál směrem k řídící vnitřní jednotce.
3. Přístroj začne vyhledávat signál dosažitelných vnějších jednotek. Pokud je příjem úspěšný, indikuje venkovní teplotu s pořadovým
číslem kanálu spojení a v doprovodu zvukového znamení se objeví symbol .
4. Po uplynutí 3 minut přístroj automaticky zahájí vyhledávání řídícího signálu vysílače časového etalonu po dobu 7 minut. Pokud je
přístroj v dosahu radiového signálu vysílače atomových hodin (DCF-77) ve Frankfurtu, automaticky se nastaví na přesný čas a na displeji
vidíme ikonku radiového spojení . Pokud se radiové spojení nedá uskutečnit, pak ikonka atomových hodin zmizí, hodiny se nenařídí
automaticky, pouze pokračují v počítání času od počátečních 0:00
Zaregistrování venkovní jednotky
Po zapnutí venkovní jednotka vysílá každých 30 sec. identifikační signál pro řídící vnitřní jednotku. Toto lze uskutečnit také ručním
ovládáním tak, že poblíž vnitřní, řídící jednotky umístíte venkovní jednotku a stlačíte její tl. Tx (16). Na displeji venkovní jednotky se
objeví symbol . Vnitřní jednotka indikuje úspěšný příjem signálu tím, že se na jejím displeji objeví venkovní jednotkou
naměřená teplota s pořadovým číslem kanálu spojení a v doprovodu zvukového znamení problikne symbol .
V případě společného použití několika vnějších měřicích jednotek se tyto rozlišují přiřazeným pořadovým číslem 1 - 2 - 3
kanálu spojení. Na obalu venkovní jednotky i na přístroji samotném je natištěno označení vysílacího kanálu pro spojení
(CH1 je kanál č.1, CH2 je kanál č.2, CH3 je kanál č.3). Příslušenstvím sady přístroje HCW 12 jsou také 2 vnější
jednotky na kanálech CH1 a CH2, takže je sada rozšířitelná ještě o jednu další vnější jednotku, tato ovšem musí
mít označení CH3. Vnější jednotky aktivujte postupně. Nesmí se zapnout (umístěním baterií) několik vnějších
jednotek najednou. Po správném uvedení do provozu první jednotky sa může aktivovat jednotka druhá a
popřípadě po jejím uvedení do provozu i jednotka třetí. Tímto postupným oživováním jednotek se
vyloučí jejich vzájemné rušení. V průběhu vyhledávání řídícího časového signálu DCF-77 se nedá
provádět registrace vnějších jednotek!
meteostanice se 2 venkovními č idly
Page 22

Dosah přístroje je v otevřeném terénu cca 25 metrů. Meteostanice je vhodná také pro měření ve více místnostech uvnitř budovy nebo pro
venkovní měření. Pro přesnost měření je nutné umístit přístroje na místech, chráněných od přímého slunečního žáru. Při venkovních
teplotách kolem bodu mrazu už může dosah venkovní jednotky klesat z důvodu poklesu napětí baterií vlivem chladu. Zdi, betonové a
kovové konstrukce mezi přístroji také značně ovlivňují dosah přístrojů, proto je umísťujte, pokud možno, v co nejmenší vzájemné
vzdálenosti. V případě poschoďové budovy ať je venkovní jednotka o patro výše než jednotka cenrální. Při umístění v blízkosti počítače
nebo jiného elektrického zařízení může být správná funkce stanice rušena.
Vnější jednotka má jednořádkový displej na kterém je indikována měřená teplota a číslo kanálu.
Je možné přepnutí měřicích jednotek teploty mezi stupni Celsia a Fahreheita tlačítkem (15) pod krytem baterií.
V případě použití více vnějších jednotek můžete krokovat mezi jejich jednotlivými kanály pomocí tl. CHANNEL (7), pak se vedle části
Outdoor Temperature objeví okénko s číslem (1,2,3) kanálu jednotky.
0
Vedle naměřených údajů vnitřní a vnější jednotky je ikonka, udávající tendenci teplotních změn. Jakmile se teplota změní i 1 , objeví se
některý ze symbolů / podle stoupající nebo klesající tendence, popř. ikonka při setrvalé teplotě.
Seřizování radiovým signálem řízených hodin
Pokud prvotní nastavení nebylo úspěšné, máte možnost opakování pokusů
Podržte po 2 sec. tl. DOWN-dolů(10). Na displeji se znázorní symbol radiového příjmu . Novým podržením tohoto tlačítka lze přerušit
vyhledávání řídícího časového signálu.
Pokud je příjem vyhovující, pak jsou vidět kolem vysílací věže symbolu vidět blikající radiové vlny. Pokud se neobjeví, znamená to že v
daném místě jsou příjmové podmínky této radiostanice nevyhovující. V tomto případě se pokuste stanici pootočit, popř. řemístit jinam
(radiohodiny mají vestavěnou ferritovou anténu, podobně jako AM radiopřijímače). V závislosti od příjmových podmínek může
synchronizace trvat 2 - 10 minut. Poté je symbol radiověže zviditelněn již průběžně, avšak v připadě slabého příjmu zmizí.
Pokud je příjem vyhovující, může se na displeji objevit nápis DST(Daylight Saving Time) což znamená indikaci nastavení letního času.
Při úspěšném příjmu časového radiosignálu lze přepínat časová pásma. Podrobnosti najdete v kapitole „Ruční seřizování hodin”.
* Radiovým signálem řízené hodiny mají vedle klasického krystalového hodinového strojku ještě navíc vestavěný radiopřijímač. Ten je
naladěn na příjem jediné frekvence - vysílače s názvem DCF-77 v Mainflingenu u Frankfurtu v Německu, který v pravidelných intervalech
vysílá korekční časový signál, řízený kódovanými informacemi atomových hodin a proto takto vybavené přístroje mají přesnost
atomových hodin, kde časová odchylka od přesného času může být 1 sec za 1 milion let. Takové hodiny mají velmi zjednodušenou
obsluhu, protože seřizování kalendáře, hodin a také přestavění letního/zimního času je automatické, bez zásahu lidské ruky. Signál
časového radiovysílače je kvalitní v okruhu 1500 - 2000 km. Pokud by nastal výpadek řídicího signálu, pak hodiny fungují nadále jako
klasické krystalové (quartz).
Ruční seřizování hodin
Pokud není možná automatická synchronizace hodin kvůli příjmovým poměrům, pak je nutno provést manuální seřízení.
Podržte po dobu 2 sec. tl.TIME/SET (5), na displeji bude blikat hodnora roku (v továrním nastavení r. 2000). Číselný údaj lze měnit pomocí
tl. UP-nahorů (8) a DOWN-dolů (10). Po nastavení roku přepněte na další nastavovaní v pořadí:
Rok - Měsíc - Den - Jazykový kód - Hodiny - Minuty - Čas. pásmo pomocí tl. TIME/SET (5)
Jazykové kódy: GE=němčina, EN=angličtina, IT=italština, FR=francouzština, NE=hollandština, ES= španělština, DA=dánština
Časové pásmo: údaj lze nastavit v rozmezí -12 a +12. Tento údaj zohlední hodiny při automatické synchronizaci s řídícím časovým
signálem (DCF radiosignál) a seřídí čas v poměru nastaveného pásma a frankfurtského času. Časový údaj se přestaví při první úspěšné
synchronizaci.
Měsíční fáze přístroj nastaví automaticky dle seřízení datumu.
Buzení
Podržte po dobu 2 sec. tl.ALARM/SET (3). Na displeji se objeví údaj 0:00AL, u kterého lze měnit číselný údaj hodin pomocí tl. UP-nahorů
(8) a DOWN-dolů (10), po novém stlačení tl. ALARM/SET (3) nastavíte stejným způsobem minuty.
Tlačítkem ALARM/SET (3) aktivujete režim budíku, přitom se na displeji objeví symbol . Zrušení režimu buzení se provede rovněž
jedním stlačením tl. ALARM/SET (3).
Budící signál zní po dobu 2 minut, s postupně se zvětšující hlasitostí ve 4 stupních a dá se vypnout stlačením kteréhokoliv tlačítka. Když
stlačíte tl. SNOOZE, pak se po uplynutí 5 minut ozve budící signál opakovaně.
Prohlížení záznamů teplot a vlhkostí v paměti
V normálním provozním režimu je na displeji indikována okamžitá vitřní/venkovní teplota a vnitřní/venkovní vlhkost, přitom se jejich
minimální a maximální hodnoty průběžně zaznamenávají do paměti stanice.
1. Zvolte jeden kanál, u kterého si hodláte prohlédnout záznamy min. a max. venkovních údajů.
2. Postupně stláčejte tl.MAX/MIN. Nejprve se ukážou maximální, pak minimální zaznamenané hodnoty, třetím stlačením opět vyvoláte
aktuální údaje.
3. Mazání záznamů (paměti) se provede po vyvolání záznamu hodnot podle bodů 1 a 2 podržením tl.MAX/MIN. pod obu 3 sec. Společně
se smažou záznamy min. a max. hodnot, tudíž se přepne na aktuální hodnoty. Záznamy z vnějších jednotek se mažou u právě prohlížené
jednotky.
Barometr – předpověď počasí
Barometr předpovídá očekávaný stav počasí v horizontu 12 - 24 hodin na základě změn tlaku vzduchu. Displej udává čtyři animací počasí:
slunečno, polooblačno, oblačno, deštivo. Sluníčko, objevující se v noci předpovídá na příští den jasnou oblohu a stoupající tlak.
slunečno polooblačno oblačno deštivo
±
Page 23

Poznámka: Jak známo, žádná předpověď počasí není zaručena na 100%. Tato meteosanice má přibližně 75% -ní spolehlivost
předpovědi. Jelikož je konstruována pro vnitřní použití, její měření závisí také na rychlosti a míře změn mikroklimatu v dané budově. Větší
a rychlejší změny počasí (např. deštivo po slunečném počasí) signalizuje spolehlivěji a rozhodněji než plíživé, nevýrazné procesy.
Stupně vlhkosti vzduchu
Vedle údajů vnitřní vlhkosti najdeme ikonku, znázorňující pocit osobní pohody na základě naměřených hodnot. Mohou nastat tyto tři
varianty:
Pocit pohody Ikonka Rozmezí teplot Vlhkost Poznámka
0
Pohodlí 20 C - 28 C 40% - 70% Ideální teplota
0 0
Vlhko 20 C - 28 C nad 70% Přílišná vlhkost
0 0
Sucho 20 C - 28 C pod 40% Nedostatečná vlhkost
Pokud jsou naměřené hodnoty mimo udávané rozmezí teplot, pak se na displeji neobjeví žádný ze symbolů!
Nastavení teplotního poplachu
Meteostanice má možnost nastavení režimu poplachové signalizace při dosažení nastavené úrovně venkovní teploty.
Podržte po dobu 2 sec. tl. ALERT(4). Pak na místě pro indikaci venkovní teploty bude blikat horní nastavená hodnota (továrním nastavení
je 70°C) a symbol . Pomocí tl.UP-nahorů (8) a DOWN-dolů (10) můžete tuto hodnotu přenastavit. Dalším stlačením tl. ALERT(4) pak
přepnete na nastavení spodní hodnoty teplotní meze pro poplachovou signalizaci, které provedete stejným způsobem jako u horní meze,
přitom na displeji vedle číselných údajů bliká ikonka . V případě více vnějších jednotek lze nastavit tyto meze individuálně po přepnutí
na danou jenotku pomocí tl. CHANNEL(7).
Tento režim teplotního poplachu se aktivuje ihned po nastavení mezních hodnot a na displeji je tento stav indikován symbolem . Režim
se zruší dalším stlačením tl. ALERT(4).
Jakmile teplota, měřená vnější jednotkou dosáhne nastavenou hodnotu, pak toto oznámí vnitřní řídicí jednotka krátkým zvukovým
signálem a na displeji se rozbliká symbol , který bliká do té doby, než se teplota vráti do normálního rozmezí. Zvukový signál, který se dá
vypnout podobně jako budík kterýmkoliv tlačítkem, se opakuje každou minutu.
Pokud mezní hodnoty pro poplach dosáhne jiná, než číslem kanálu právě displejem indikovaná jednotka, pak bliká jenom symbol , údaj
mezní hodnoty NE. Pak lze pomocí tl. CHANNEL(7) vyhledat poplach signalizující jednotku, právě u ní bliká i číselný údaj překročené
meze teploty.
Výměna baterií
Centrální jednotka meteostanice průběžně sleduje stav napětí baterií a předem upozorní na potřebu jejich výměny. Pokud se vedle
vnitřních nebo vnějších teplotních údajů objeví symbol baterie, pak je tím indikován stav vybití baterií dané jednotky. Doporučuje se použití
výhradně trvanlivých alkalických baterií. Nekombinujte baterie různých typů, značek a v různém stavu. Nezapomeňte že po výměně
baterií se musí sladit řídící centrální jednotka s jednotkami externími.
Upozornění
Dbejte aby samotný přístroj ani externí čidla nebyly vystaveny přímému slunečnímu žáru!
Neumísťujte poblíž klimatizace, topného zařízení nebo ventilátoru!
Nečistěte agresivními nebo abrazivními čisticími prostředky!
Centrální jednotka je určena pouze pro vnitřní použití!
Vnější měřicí jednotka je chráněna proti odstřikující vodě, neponořujte ji však do kapaliny a nevystavujte přímému dešti!
Všechny jednotky chraňte před účinky mezních teplot, vlhkosti a prachu!
Pro dobré radiové spojení dbejte aby jednotky byly umístěny na místech bez poruch signálu, vzdáleně od kovových konstrukcí.
Dbejte aby přes otvory přístrojů nevnikly žádné cizí předměty a tekutiny!
Nezkoušejte nikdy rozebírat přístroje, jejich opravu svěřte odborníkovi!
Buďte opatrní, neupusťte přístroj na zem. V případě poškození je další používání zakázáno!
Technické údaje
hodiny: . . . . . . . . . . . . . . . . . . . krystalový hodinový strojek řízený radio signálem DCF-77
přesnost hodin:.. . . . . . . . . . . . . . . . . . . . . . . . . . . . . . . . . . . . . . . . . 1 sec. / 1 milion let
0
rozmezí měření venkovních teplot:. . . . . . . . . . . . . . . . . . . . . . . . . . . . . . . . - 50 až +70 C
0
rozmezí měření vnitřních teplot: . . . . . . . . . . . . . . . . . . . . . . . . . . . . . . . . . . . . . . 0 – 50 C
0
rozlišení tepl. hodnot: . . . . . . . . . . . . . . . . . . . . . . . . . . . . . . . . . . . . . . . . . . . . . . . . 0,1 C
rozsah měření vnitřní vlhkosti: . . . . . . . . . . . . . . . . . . . . . . . . . . . . . . . . . . . . . . 20 – 95 %
rozlišení hodnot vlhkosti:. . . . . . . . . . . . . . . . . . . . . . . . . . . . . . . . . . . . . . . . . . . . . . . . 1 %
dosah vnější jednotky v otevřeném terénu:. . . . . . . . . . . . . . . . . . . . . . . . . . . . . . . . . 25 m
provozní frekvence: . . . . . . . . . . . . . . . . . . . . . . . . . . . . . . . . . . . . . . . . . . . . . . 433,9 MHz
počet vnějších jednotek: . . . . . . . . . . . . . . . . . . . . . . . . . . . . . . . . . . . . . . . . . . . max. 3 ks
typ kompatibilní vnější jednotky: . . . . . . . . . . . . . . . . . . . . . . . . . . . . . . . . . . . . . HCKK 01
napájení - vnější měřicí jednotka:. . . . . . . . . 2 x baterie AAA (1,5 V) - není příslušenstvím
- centrální jednotka: . . . . . . . . . . 2 x baterie AA (1,5 V) - není příslušenstvím
příslušenství sady:. . . . . . . . . . . . . . . . . . . . . . . . . . . 2 ks vnější měřicí jednotky HCKK 01
. . . . . . . . . . . . . . . . . . . . . . . . . . . . . . . . . . . . . . . . . . . . . závěsy/držáky k montáži na zeď
rozměry centrální jednotky / displeje:.. . . . . . . . . . . . . . . . . . . 85 x 160 x 40 / 45 x 80 mm
rozměry vnější jednotky: . . . . . . . . . . . . . . . . . . . . . . . . . . . . . . . . . . . . . . 60 x 95 x 25 mm
0
±
Page 24

HCW 12HCW 12
• Prikaz vremenskih prilika koje se očekuju s animiranim simbolima
• Upravljanje DCF-77 (Frankfurt) radio signalom
• Mogućnost podešavanja vremenskih zona
• Prikaz datuma, funkcija buđenja
• Mjerenje vanjske i unutarnje temperature
• Mjerenje unutarnje vlažnosti zraka
• Prikaz izmjena u temperaturi i vlažnosti zraka
• Prikaz aktualne Mjesečeve mijene
• Prikaz stanja baterije (unutarnja i vanjska jedinica)
• pribor: 1 unutarnja jedinica, 2 vanjske jedinice
• može se proširiti s 1 daljom jedinicom (HCKK 01)
Unutarnji uređaj
1. Displej
2. SNOOZE-LIGHT – Uključivanje osvjetljavanja pozadine na 5 sekundi
3. ALARM/SET (buđenje) – podešavanje buđenja
4. ALERT (alarmiranje) – podešavanje alarmiranja temperature
5. TIME/SET – podešavanje vremena, datuma, vremenske zone
6. MAX/MIN (maksimum/minimum) – maksimum-minimum,
kod vanjske-unutarnje temperatura, odnosno unutarnje vlažnosti zraka
7. CHANNEL – izbor kanala kod vanjske jedinice
8. UP (gore) tipka – korak unaprijed, podešavanje formata sata od 12/24
9. RESET – vraćanje na tvornička podešavanja
0 0
10. DOWN (dolje) tipka – korak na dolje, izbor C/ F
11. Poklopac kutije za baterije
Vanjska jedinica
12. LED za povratno signaliziranje
13. Displej
14. Poklopac kutije za baterije
0 0 0 0
15. C/ F tipka - izbor C/ F
16. Tx tipka – davanje signala
17. Dio za fiksiranje / držač
14
REMOTE SENSOR
12
13
SNOOZE • LIGHT
4
5 6
7
3
1
2
10
11
8
9
15
16
17
Puštanje u rad
1. Odstranite poklopac centralne kutije za baterije (11.) zatim pazeći na polaritet stavite baterije na odgovarajuće mjesto. Uređaj
uključivanjem osvjetljavanja pozadine displeja, uključivanjem cijelog displeja, odnosno jednim zvučnim signalom prikazuje kako je
spreman za rad.
2. Zatim uz pomoć 4 vijka odstranite poklopac kutije za baterije na vanjskoj jedinici (14.), i pazeći na polaritet stavite baterije na
odgovarajuće mjesto. Tada jedinica automatski šalje jedan signal prema unutarnjoj jedinici.
3. Uređaj počinje tražiti sve dostupne signale vanjskih jedinica u svojoj okolini. Ukoliko je prijem uspješan, prikazuje se vrijednost mjerene
vanjske temperature uz davanje rednog broja podešenog kanala, i uz jedan zvučni signal zatreperi simbol .
4. Nakon 3 minute uređaj automatski počinje tražiti signal atomskog sata (do 7 minuta). Ukoliko položaj sata omogućuje prijem
frankfurtskog atomskog sata (DCF-77), tada se sat automatski podešava na točno vrijeme, tada se sljedeća verzija ikonice radio signala
pojavljuje na displeju: . Ukoliko prijem ne uspije, tada nestaje signal atomskog sata, sat se ne podešava automatski, već se aktivira na
poziciji 0:00.
Registracija vanjske jedinice
Nakon uključivanja vanjska jedinica otprilike 30 sekundi šalje signale unutarnjoj jedinici, ali postoji mogućnost i manualnog slanja
signala. Postavite vanjsku jedinicu u blizinu unutarnje jedinice, zatim pritisnite tipku „Tx” (16.) Na vanjskoj jedinici se pojavljuje
simbol . Kod uspješnog prijema signala na unutarnjoj jedinici se pojavljuje izmjerena vanjska temperatura uz prikaz rednog
broja podešenog kanala, i uz jedan zvučni signal simbol zatreperi.
U slučaju skupnog primjenjivanja više vanjskih senzora oni se identificiraju pod rednim brojevima 1-2-3. Na vanjskom
pakiranju vanjske jedinice (HCKK 01) i na proizvodu se vidi jedna oznaka za kanal (CH1- kanal 1, CH2- kanal 2,
CH3- kanal 3). Uz uređaj HCW 12 u paketu se daju vanjske jedinice CH1 i CH2. On se može još proširiti s jednom
vanjskom jedinicom čija oznaka mora biti CH3. Vanjske jedinice treba pustiti u rad jednu za drugom. Ne smije
se u više vanjskih jedinica postaviti baterija u isto vrijeme. Tek nakon uspješnog priključivanja prve vanjske
jedinice se može priključiti druga, odnosno tek nakon uspješnog priključivanja druge vanjske jedinice se
može priključiti treća vanjska jedinica. Ovime se zaobilaze smetnje do kojih bi došlo kod registracije
vanjskih jedinica u isto vrijeme. U toku traženja DCF-77 radio signala ne smije se vršiti registracija!
stanica za prikazivanje vremenskih prilika s 2 vanjska senzora
Page 25

Domet na otvorenom je oko 25 metara. Uređaj je pogodan za mjerenje temperature u drugoj prostoriji unutar jednog objekta, odnosno za
mjerenje vanjske temperature. U cilju točnog funkcioniranja treba držati zaštićeno od sunčevih zraka. Kod vanjskih jedinica kod
temperature blizu nuli smanjuje se učinak baterije i ujedno s ovim se smanjuje duljina funkcioniranja. Zidovi, betonske i metalne površine
između dva uređaja umanjuju domet signala, stoga uređaje postavimo najbliže što je moguće jedan drugome. U slučaju objekta na kat,
vanjski senzor se treba postaviti više (na katu). U blizini kompjutora ili drugog električnog uređaja može nastupiti smetnja u funkcioniranju.
Vanjski senzor raspolaže jednim jednolinijskim displejom, na kojem se vidi podešeni kanal i mjerena temperatura.
Postoji mogućnost za izmjenu jedinice za mjere – Celsius ili Fahrenheit – tipkom koja se nalazi ispod poklopca kutije za baterije (15).
U slučaju podešavanja više vanjskih jedinica na uređaju se može uz pomoć tipke CHANNEL (7) prelaziti s jednog kanala na drugi, tada se
pored vrijednosti vanjske temperature u malom prozorčiću mijenja vrijednost 1-2-3.
Pored podataka koji su mjereni na unutarnjim i vanjskim jedinicama se nalazi i ikona za prikaz tendencije. U slučaju izmjene temperature
0
za 1 C jedna od ikona / se pojavljuje u ovisnosti o promjeni (smanjenje, povećanje). Ikona prikazuje neizmijenjenu temperaturu.
Podešavanje sata koji se upravlja radio-signalom
Ukoliko je početno podešavanje bilo neuspješno, imate mogućnost to ponoviti. Pritisnite i držite pritisnutu 2 sekunde tipku „DOWN (dolje)
(10). Tada se na displeju pojavljuje oznaka za radio prijem . Ponovnim držanjem pritisnute tipke se može pauzirati s traženjem signala.
U slučaju pravilnog funkcioniranja vide se i radio valovi oko tornja. Ukoliko se oni ne pojave, to znači da su u ovom datom položaju uporabe
veoma loši uvjeti prijema signala. U ovom slučaju pokušajmo zaokrenuti uređaj, odnosno po mogućnosti negdje drugdje postaviti. (Sat
raspolaže ugrađenom feritnom antenom, slično AM radio uređajima) U ovisnosti o okolnostima prijema sinkronizacija može trajati i 2-10
minuta. Nakon toga se oznaka signalnog tornja neprekidno vidi. Međutim, u slučaju slabog prijema oznaka nestaje.
U slučaju uspješnog prijema na displeju se može pojaviti oznaka DST (Daylight Saving Time) koja označava ljetno računanje vremena.
Nakon uspješnog prijema signala imate mogućnost izmijeniti i vremensku zonu. Detaljni opis ovoga se nalazi u točki menija „Manualno
podešavanje sata”.
*Satovi koji se upravljaju radio signalom su pored mehanizma klasičnog kvarcnog sata opskrbljeni i jednim ugrađenim specijalnim radioprijemnikom. On prima radio signale koji se emitiraju iz tornja-predajnika DCF-77 u Mainflingen-u (Njemačka, pokraj Frankfurta) i prema
njima – u određenim vremenskim periodima – vrši korekciju točnog vremena. Budući da radio signali u sebi sadrže informacije koje su
kodirane s atomskog sata, uređaji ovog tipa prikazuju vrijeme s točnošću atomskog sata. Razlika od točnog vremena u periodu od milijun
godina je maksimalno 1 sekunda. Ovi satovi pružaju vrlo ugodnu primjenu pošto se podešavanje točnog vremena i kalendara, odnosno
zimskog i ljetnog računanja vremena vrši automatski, bez ikakve ljudske intervencije.
Prijem dobre kvalitete je osigurana u oblasti od 1500-2000 km od signalnog tornja. Ukoliko na mjestu uporabe nema prijema, tada uređaj
funkcionira dalje kao kvarcni sat.
Manualno podešavanje sata
Ukoliko zbog okolnosti prijema ne uspije automatska sinkronizacija sata, onda ga možemo manualno podesiti.
Držite 2 sekunde pritisnutu tipku TIME/SET (5), tada počinje treperiti vrijednost godine (osnovno podešena godina je 2000.). Vrijednost
možemo mijenjati uz pomoć tipki UP (gore)(8) i DOWN (dolje)(10). Nakon podešavanja pritisnite tipku TIME/SET (5), tada se mogu
podesiti sljedeće vrijednosti jedna za drugom:
Godina – Mjesec – Dan – Jezik displeja – Sat – Minuta – Vremenska zona
Kodovi jezika: GE: njemački, EN: engleski, IT: talijanski, FR: francuski, NE: nizozemski, ES: španjolski, DA: danski
Vremenska zona: vrijednost se može podesiti između -12 i +12. Ova vrijednost se uzima u obzir kod automatske sinkronizacije (DCF-77
signal), i prema frankfurtskom vremenu se podešava sat. Vrijednost se prema ovome podešava kod prve uspješne sinkronizacije koja
slijedi nakon podešavanja.
Uređaj u ovisnosti o datumu automatski podešava Mjesečeve mijene.
Buđenje
Držite 2 sekunde pritisnutu tipku ALARM/SET (3). Tada se pojavljuje natpis 0:00AL i vrijednost sata se može podesiti uz pomoć tipki UP
(gore)(8) i DOWN (dolje)(10). Ponovnim pritiskom na tipku ALARM/SET (3) možete podesiti vrijednost minute na već spomenuti način.
Buđenje se aktivira pritiskom na tipku ALARM/SET (3), tada se na gornjem dijelu displeja pojavljuje ikona „ ”. Isključivanje funkcije se vrši
ponovnim pritiskom na tipku ALARM/SET (3).
Zvuk buđenja se čuje 2 minute, pojačava se u 4 stupnja i isključuje se s bilo kojom tipkom. Nakon pritiska na tipku SNOOZE zvuk se odmah
gasi, ali nakon 5 minuta buđenje se ponovo aktivira.
Memorizirane temperature i kontrola vlažnosti zraka
U normalnom modu rada na displeju se može pročitati trenutna unutarnja i vanjska temperatura, nadalje unutarnja i vanjska vlažnost
zraka. Međutim, njihove maksimalne i minimalne vrijednost se neprekidno memoriziraju.
1. Izaberite jedan kanal na kojem želite provjeriti minimalnu i maksimalnu vrijednost vanjske temperature.
2. Pritisnite više puta tipku MAX/MIN. Prvo se prikazuje maksimalna, a zatim minimalna vrijednost. Na treći pritisak se prikazuje aktualna
vrijednost.
3. Brisanje memorije: vrši se nakon kontrole MAX ili MIN vrijednosti s ponovnim pritiskom na tipku MAX/MIN u periodu od 3 sekunde.
Zajedno se briše minimalna, odnosno maksimalna vrijednost, odnosno prebacuje se na aktualnu vrijednost. Među vanjskim senzorima se
brišu podaci s onog čiji se podaci upravo prikazuju.
Barometar – prognoza vremena
Barometar prema izmjenama u zračnom tlaku daje prognozu vremenskih prilika koje se očekuju narednih 12-24 sati. Mogući prikazi:
sunčano, mjestimično oblačno, oblačno, kišovito. Prikaz sunca tokom noći predstavlja prognozu vedrog neba i povećanog zračnog tlaka.
sunčano mjestimično oblačno oblačno kišovito
±
Page 26

Napomena: kao što je poznato, ne postoji prognoza vremenskih prilika koja daje 100%-u garanciju. Ovaj uređaj osigurava prognozu od
oko 75% pouzdanosti. Pošto je osmišljen za unutarnju uporabu, njegovo funkcioniranje ovisi o brzini i intenzitetu izmjene lokalne
mikroklime. Uređaj točnije daje prognozu izmjena u vremenskim prilikama većeg intenziteta, odnosno bržeg zbivanja (npr. kiša nakon
sunčanog perioda od onih koji se sporije odvijaju.
Stupnjevi vlažnosti zraka
Pored vrijednosti unutarnje vlažnosti zraka se nalazi jedna mala ikona, koja prema mjerenoj vrijednosti prikazuje osjećaj komfornosti koja
ona čini na ljudski organizam. Mogući stupnjevi su sljedeći::
Osjećaj komfornosti Ikona Opseg temperature Vrijednost vlažnosti zraka Napomena
0
Ugodni 20C - 28 C 40% - 70% Idealna temperatura i vlažnost zraka
0 0
Vlažni 20C - 28 C Iznad 70% Prevelika vlažnost zraka
0 0
Suhi 20 C - 28 C Ispod 40% Nedovoljna vlažnost zraka
Ukoliko mjerena vrijednost padne izvan označenog opsega temperature, tada se na displeju ne pojavljuje nijedna ikona!
Podešavanje alarmiranja temperature
Na uređaju se može podesiti jedan takav signal, koji se alarmira u slučaju postizanja jednog određenog nivoa mjerene temperature na
jednoj danoj vanjskoj jedinici.
Držite 2 sekunde pritisnutu tipku ALERT (4). Tada na mjestu temperature vanjske jedinice počinje treptati gornja vrijednost (kod tvorničkog
podešavanja to je 70°C) i oznaka . Uz pomoć tipki UP (gore)(8) i DOWN (dolje)(10) ova vrijednost se može podesiti. Ponovnim
pritiskom na tipku ALERT (4) na sličan način se može podesiti i donja vrijednost, tada na displeju treperi oznaka .
U slučaju više vanjskih jedinica, za svaku posebno se mogu podesiti ove vrijednosti, dok se prijelaz na određeni kanal vrši uz pomoć tipke
CHANNEL (7).
Nakon podešavanja vrijednosti funkcija alarmiranja će biti aktivna, tada se na displeju pojavljuje oznaka . Pritiskom na tipku ALERT (4)
možemo isključiti ovu funkciju.
Kada temperatura vanjske jedinice dostigne podešenu vrijednost, unutarnja jedinica daje jedan kratki zvučni signal i na displeju počinje
treptati vrijednost temperature i oznaka . Oni sve do tada trepere dok je temperatura unutar danog opsega. Zvučni signal se ponavlja
svake minute, njegovo isključivanje se vrši uz pomoć bilo koje tipke.
Ukoliko nivo alarmiranja nije dostigla vrijednost na kanalu koji je prikazan na displeju, tada vrijednost ne treperi, već samo oznaka . Uz
pomoć tipke CHANNEL (7) može se pronaći kanal gdje je alarmiranje aktivirano, jer tamo vrijednost treperi.
Potreba za izmjenom baterija
Centralna jedinica neprekidno provjerava stanje baterija i upozorava ukoliko ih je potrebno izmijeniti. Simbol baterije koji se pojavljuje
pored unutarnje ili vanjske temperature prikazuje slabo stanje baterije date jedinice.
Preporučuje se uporaba isključivo dugotrajnih, alkalnih baterija. Nemojte miješati baterija različitog tipa i stanja napunjenosti!
Nemojte zaboraviti da nakon izmjene baterije ponovo treba sinkronizirati centralnu i vanjsku jedinicu.
Upozorenja
Senzore i uređaje zaštitite od neposrednih sunčevih zraka!
Nemojte postaviti uređaj u blizini klima uređaja, uređaja za grijanje ili ventilatora!
Nemojte koristiti agresivne deterdžente ili jetka sredstva!
Centralna jedinica je pogodna samo za unutarnju uporabu!
Vanjska mjerna jedinica je zaštićena od kapanja vode, nemojte je stavljati u tekućinu, niti je izlagati velikim oborinama!
Sve jedinice zaštitite od ekstremnih utjecaja temperature, od vlage i prašine!
Pripazite da uređaj bude postavljen na mjesto koje je daleko od metalnih predmeta u cilju neometanog prijema radio valova.
Pripazite da kroz otvore u uređaj ne uđe nikakav predmet niti tekućina!
Nikada nemojte pokušati rastaviti uređaj, za popravke se javite stručnoj osobi!
Budite pažljivi, nemojte ispustiti uređaj. U slučaju oštećenja uređaj se ne smije dalje koristiti!
Tehnički podaci
sat:. . . . . . . . . . . . . . . . . . kvarcni mehanizam sata s upravljanjem na DCF-77 radio signal
točnost sata: .. . . . . . . . . . . . . . . . . . . . . . . . . . . . . . . . . . . . . 1 sekunda / milijun godina
0
opseg vanjske temperature: .. . . . . . . . . . . . . . . . . . . . . . . . . . . . . . . . . . . . . - 50 – 70 C
0
opseg unutarnje temperature: . . . . . . . . . . . . . . . . . . . . . . . . . . . . . . . . . . . . . . . 0 – 50 C
0
prikaz vrijednosti:. . . . . . . . . . . . . . . . . . . . . . . . . . . . . . . . . . . . . . . . . . . . . . . . . . . 0,1 C
mjerenje unutarnje vlažnosti zraka:. . . . . . . . . . . . . . . . . . . . . . . . . . . . . . . . . . . 20 – 95 %
prikaz mjerenja vlažnosti zraka: . . . . . . . . . . . . . . . . . . . . . . . . . . . . . . . . . . . . . . . . . . 1 %
domet vanjskog senzora na otvorenom: . . . . . . . . . . . . . . . . . . . . . . . . . . . . . . . . . . 25 m
frekvencija funkcioniranja: . . . . . . . . . . . . . . . . . . . . . . . . . . . . . . . . . . . . . . . . 433,9 MHz
broj vanjskih mjernih jedinica:. . . . . . . . . . . . . . . . . . . . . . . . . . . . . . . . . . . . . . max. 3 kom
tip vanjske jedinice koja se može priključiti u sustav: . . . . . . . . . . . . . . . . . . . . . . HCKK 01
napajanje: vanjska mjerna jedinica:. . . . . . . . . . . . . . . 2 x AAA (1,5 V) baterija (nije pribor)
centralna jedinica: .. . . . . . . . . . . . . . . 2 x AA (1,5 V) baterija (nije pribor)
u priboru:. . . . . . . . . . . . . . . . . . . . . . . . . . . . . . . 2 kom. HCKK 01 vanjske mjerne jedinice
. . . . . . . . . . . . . . . . . . . . . . . . . . . . . . . . . . . . . . . zidni držač/ postolje za vanjsku jedinicu
Dimenzije centralne jedinice / displeja . . . . . . . . . . . . . . . . . . . . 85 x 160 x 40 / 45 x 80 mm
Dimenzije vanjske jedinice:. . . . . . . . . . . . . . . . . . . . . . . . . . . . . . . . . . . . 60 x 95 x 25 mm
0
±
Page 27

Page 28

Eng. szám: S5998K766
®
Importálja: SOMOGYI ELEKTRONIC
9027 Győr, Gesztenyefa út 3. • www.sal.hu
Származási hely: Kína
í
Uvoznik za SRB: Elementa d.o.o.
Jovana Mikića 56, 24000 SUBOTICA, SRBIJA
Tel:++381(0)24 686 270
www.elementa.rs
Zemlja uvoza: Mađarska • Zemlja porekla: Kina
Distributer za SLO: Elementa Elektronika d.o.o.
Osek 7a, 2235 Sveta Trojica • tel –fax; +386 2 729 20 24 • Web: www.elementa-e.si
Država porekla:Kitajska
Distribútor: Somogyi Elektronic Slovensko s.r.o.
Záhradnícka 10, 945 01 Komárno, SK
Tel.: +421/0/ 35 7902400
www.salshop.sk
Krajina pôvodu: Č na
Importator: S.C. SOMOGYI ELEKTRONIC S.R.L.
J12/2014/13.06.2006 C.U.I.: RO 18761195
Comuna Gilău, judeţul Cluj, România
Str. Principală nr. 52 Cod poştal: 407310
Telefon: +40 264 406 488 • Fax: +40 264 406 489
www.somogyi.ro
Ţara de origine: China
HCW 12
 Loading...