


HOLUX
GR-230
Bluetooth GPS Receiver
User’s Guide
Aug. 01, 2003
HOLUX Technology Inc.
8F-11, No. 26, Tai-Yuen St., Chu-Pie City, Hsin-chu, Taiwan
TEL: 03-5526268 FAX: 03-5526108
E-Mail: info@holux.com.tw Website: www.holux.com.tw
All Right Reserved

HOLUX GR-230 Bluetooth GPS Receiver Manual
Table of Contents
TABLE OF CONTENTS ..............................................................................................................2
1. OVERVIEW ..........................................................................................................................3
2. PACKING LIST ....................................................................................................................4
3. MAIN FUNCTIONS .............................................................................................................5
4. TECHNICAL SPECIFICATION ........................................................................................6
4.1. BASIC SPECIFICATION ....................................................................................................6
4.2. ACQUISITION TIME (AVERAGED)....................................................................................6
4.3. RECEIVER ACCURACY ....................................................................................................6
4.4. USE LIMITATION .............................................................................................................6
4.5. POWER SUPPLY ...............................................................................................................6
4.6. OUTPUT AND INTERFACE ................................................................................................ 7
4.7. PHYSICAL ........................................................................................................................7
4.8. OTHER FUNCTIONS......................................................................................................... 7
5. GETTING STARTED...........................................................................................................8
5.1. HARDWARE DESCRIPTION .............................................................................................. 9
5.2. SOFTWARE INSTALLATION ............................................................................................ 12
5.3. INSTALLATION OF TESTING PROGRAM ......................................................................... 13
6. OPTIONAL ACCESSORIES............................................................................................. 15
7. DRIVER INSTALLATION................................................................................................ 16
7.1 SYSTEM REQUIREMENT................................................................................................ 16
7.2 INSTALLATION...............................................................................................................16
7.3 IMPORTANT ...................................................................................................................16
8. WARRANTY .......................................................................................................................16
9. TROUBLE SHOOTING.....................................................................................................17
2
HOLUX GR-230 Bluetooth GPS Receiver Manual
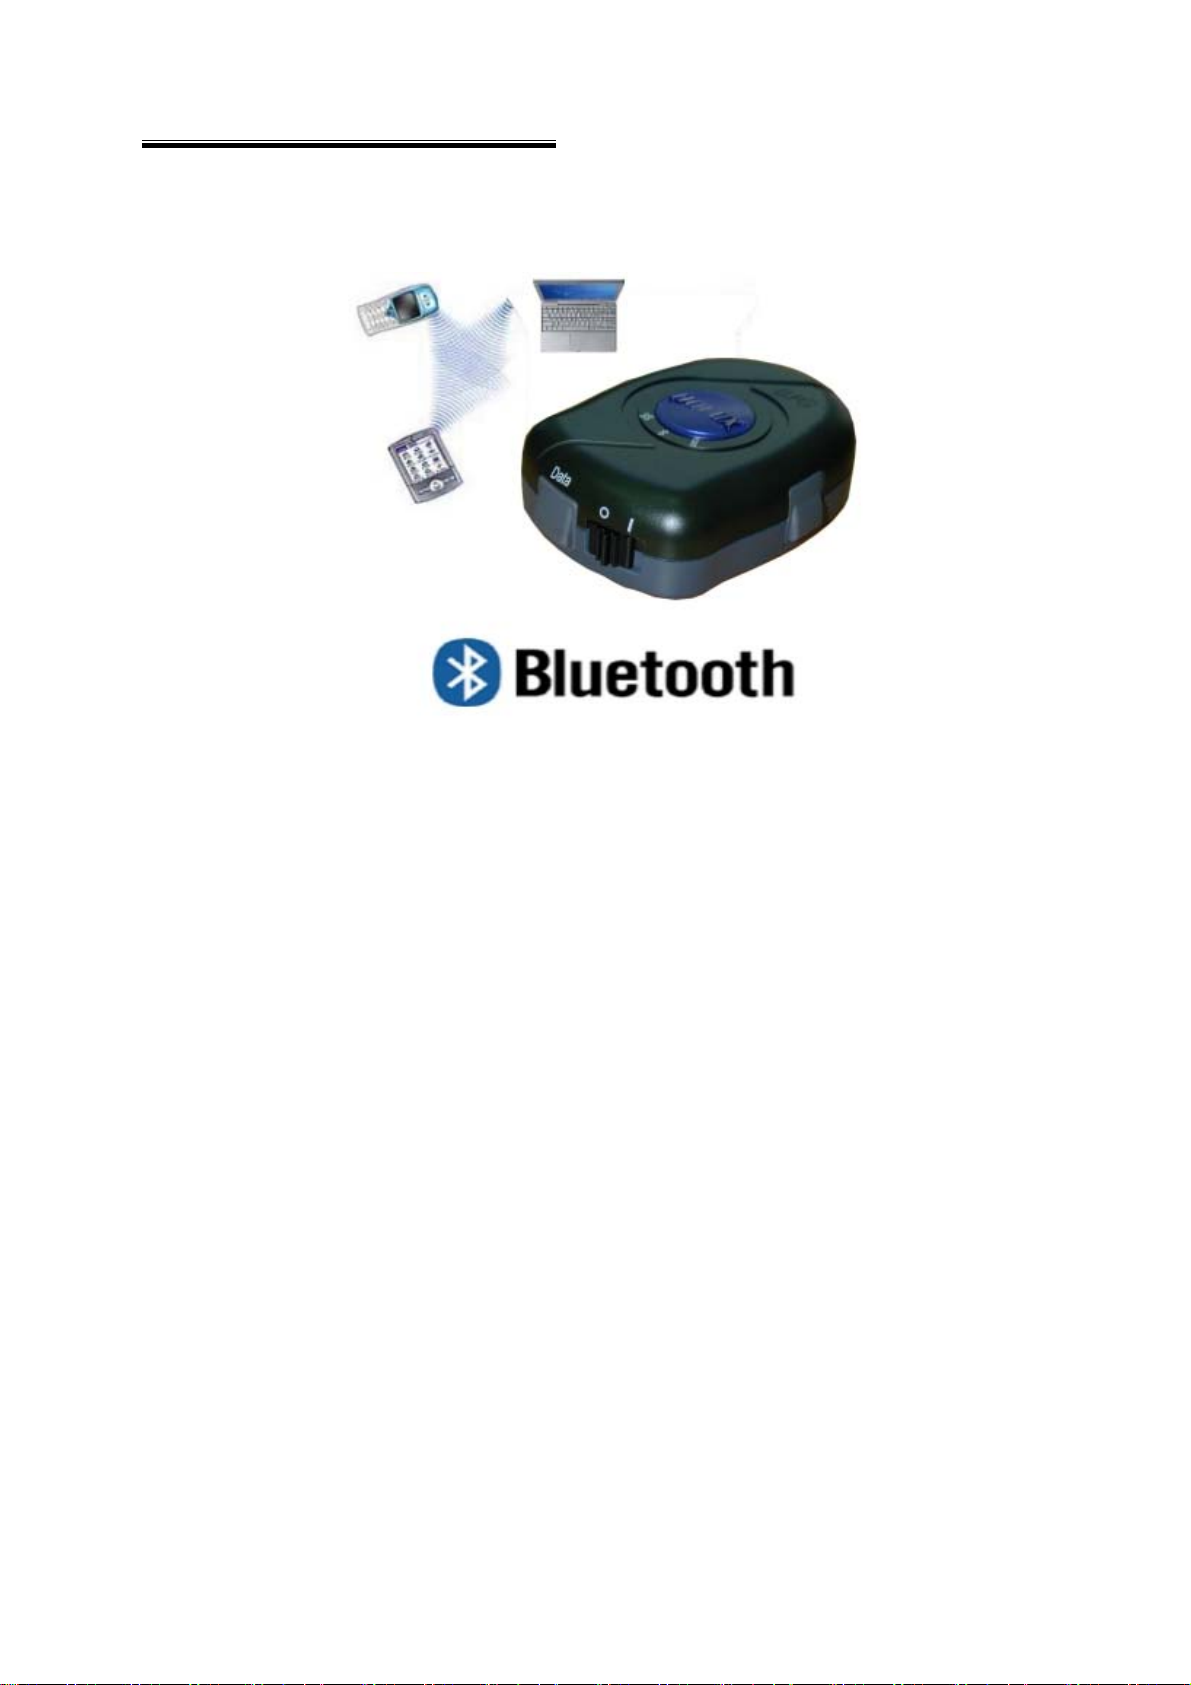
1. Overview
(Fig.1)
The HOLUX GR-230 Smart wire-less Bluetooth GPS Receiver (Fig. 1) is a total
solution GPS receiver with Bluetooth, UART interface and built-in rechargeable battery
for high sensitivity to tracking signal. GR-203 design is based on SiRF Star IIe/LP low
power Architecture.
GR-230 is a dual-function GPS receiver. Not only transmit satellite information
through the PDA or Notebook with Bluetooth interfaces but also is a G-Mouse GPS
receiver through a data cable to deliver satellite signal to the device without Bluetooth
interface.
This positioning application meets strict needs such as car navigation, mapping,
surveying, security, agriculture and so on. Only clear view of sky and certain power
supply are necessary to the unit. GR-230 contacts to other device through Bluetooth
device, compatible interface of RS-232 or USB, and built-in recharge battery to save
satellite information such as the status of satellite signal, the last location, date and time
of last use.
With low power consumption, the GR-230 tracks up to 12 satellites at a time,
re-acquires satellite signals in 100 ms and updates position data every second.
Trickle-Power allows the unit operates a fraction of the time and Push-to-Fix permits
user to have a quick position fix even though the receiver usually stays off.
3

HOLUX GR-230 Bluetooth GPS Receiver Manual
2. Packing List
Congratulations on your purchase of the GR-230 GPS Receiver. We hope it will be
useful to you for a long time. Before you begin, make sure that your package includes
the following items. If any of these items are missing, please contact your local HOLUX
dealer or distributor.
HOLUX GR-230 Bluetooth GPS receiver 1 Set
Travel power supply / Cigarette adapter 1 Set
AC Multi Power Plug Adapter 1 Set
Manual and Driver CD 1 Piece
GR-230 Quick guide 1 Piece
Warranty card 1 Piece
4

HOLUX GR-230 Bluetooth GPS Receiver Manual
3. Main functions
GR-230 provides a series of functions. It is well suited to system integration and
users who use PDA, Notebook PC with Bluetooth device。
Built in SiRF Star IIe/LP Low power consumption chipset。
12 parallel satellite-tracking channels for fast acquisition and reacquisition。
High speed signal acquisition using 1920 time/frequency search channels。
Built-in WAAS/EGNOS Demodulator without additional any hardware。
Compatible with Bluetooth Serial Port Profile (SPP) completely。
Built-in rechargeable Lithium-ion battery without external power supply。
Provide Continue mode and Power saving mode for user’s requirement。
Provide expand terminal contact to other system without Bluetooth device。
Built-in rechargeable battery for memory and RTC backup and for fast Time To
First Fix (TTFF)。
Support NMEA0183 v2.2 data protocol and SiRF binary code。
4 colors LED to show the status of device。
Active antenna connector for getting better satellites signal。
FLASH based program memory. New software revisions upgradeable through
serial interface。
Small, sleek, and lightweight design easily fits in your hand。
Enhanced algorithms -SnapLock and SnapStart provide superior navigation,
performance in urban, canyon and foliage environments。
For Car navigation, Marine navigation, Fleet management, AVL, Personal
navigation, Tracking System, and Mapping device application。
5

HOLUX GR-230 Bluetooth GPS Receiver Manual
4. Technical Specification
4.1. Basic Specification
Chipset:SiRF Star IIe/LP chipset.
Channels: 12 parallel satellite-tracking channels.
Frequency: 1575.42 MHZ.
Receiver: L1, C/A code.
4.2. Acquisition Time (averaged)
Reacquisition: 0.1sec.
Snap start: < 3 seconds (at < 25 minutes off period)
Cold start: < 45 seconds.
Warm start:< 38 seconds .
Hot start: < 8 seconds
Update rate: 1 second continuously
4.3. Receiver Accuracy
Normal: 5-25 meters CEP without SA.
Enable EGNOS or WAAS:
Position: < 2.2 meters, horizontal 95% of time。
< 5 meters, Vertical 95% of time。
Velocity: within 0.1 meters / second。
Time: 1 microsecond synchronized GPS time。
4.4. Use Limitation
Altitude: < 18,000 meters (60,000 feet) 。
Velocity: :< 515 meters / second (700Knots) 。
Acceleration: 4 G.
Jerk: 20 meters / second, max
4.5. Power Supply
External Voltage: 5VDC +/- 10%
Batteries:
Main Power: Built-in rechargeable Lithium-ion for system power.
Backup Power: Rechargeable Lithium-ion battery for memory & RTC backup.
Working voltage: 80-90mA (Normal mode).
30mA (Power Saving).
Working period (In Battery full power status):
> 9 hours on Continue mode.
> 16 hours on Power Saving mode.
6

HOLUX GR-230 Bluetooth GPS Receiver Manual
4.6. Output and Interface
Output
I. Output protocol
Baud Rate: 9600 bps
Data bit: 8
Parity: No
Stop bit: 1
II. Format. NMEA0183 V2.2: GPGGA (1time/1 sec), GPGSA (1 time/1 sec.),
GPGSV (1time /5 sec.), GPRMC (1time /1 sec.), (GLL, VTG or SiRF binary
format for optional).
III. Datum: WGS84.
Input/ Output Interface:
I. Compatible Bluetooth Serial Port Profile (SPP), Version1.1 and class 2(up
to 10 meter range).
II. In/Out Port. GPS signal (Out)/Command(In) with CMOS/TTL Level。Mini
USB Type B Connector and Cable option:
(a) GR230-A1(RS232 data cable)
(b) GR230-A2 (USB data cable)
(c) GR230-A3 (Mini USB port to PS2 port ).
External Antenna interface:
3.0V input MCX type active antenna connector。
4.7. Physical
Size: 77.9 × 56.9 × 22.8 mm。
Weight: < 70 g 。
Operating Temperature
Storage Temperature: -20 to + 85
Operating humidity
4.8. Other Functions
Bluetooth frequency: 2.4 ~2.48GHZ。
: -10 to + 60
: 5% to 95% No condensing。
Bluetooth Input Sensitivity: -80dbm。
Low sensitivity of receiving satellite signal
LED Functions
: Indicate Bluetoothh status, GPS status, Battery Status and
: -175dBW。
Battery charging status。
7

HOLUX GR-230 Bluetooth GPS Receiver Manual
5. Getting Started
STEP 1. Charge Battery
Please charge battery till LED off for the first time.
Power cable plug in Power cable connect to power socket
↓
Charge Battery
Note:
Power too low ----- Red LED
Normal -------------- Green LED
Full ------------------- LED off
Mini USB power socket
STEP 2. Turn on Power
Bluetooth Status –
Turn on Power
Searching…
Matching
Successful
Transferring Data
Blue LED blinking
(1 time / 1 sec)
GPS Status ---
Matching
Unsuccessful
Blue LED blinking
(1 time / 3 sec)
Standby Mode
Put GR-230 in clear view of the sky without any obstruction for
better satellite acquiring .
Turn on Power
↓
Search GPS -------- steady orange LED on
↓
Position Fixed ------ orange LED blinking
8

HOLUX GR-230 Bluetooth GPS Receiver Manual
5.1. Hardware Description
1). GR-230 Body description see Fig. 2:
LED of GPS
(Orange)
LED of Bluetooth
(Blue)
LED of Battery
(Red / Green)
External Antenna Port
2). LED status :
SYMBOL COLOR STATUS DESCRIPTION
Bluetooth
Battery
GPS
Power Jack & Data Port
Blue Blinking
Red Light on Power too low
Green Light on In charging
N/A Light off Normal
Light on Acquiring Satellites
Orange
Blinking Position Fixed
Power Switch
(Fig.2)
3 times / 1 sec Search Bluetooth Device
1 time / 3 sec Standby Mode
1 time / 1 sec Transferring Data
3). Power Switch :
1 : Power on
0 : Power off
9

HOLUX GR-230 Bluetooth GPS Receiver Manual
4). Optional accessories, and connector description, see Fig. 3 and Fig. 4。
PC/Notebook
USB port
PC/Notebook
RS232 port
USB Cable
(GR230-A2)
RS232 Cable
(GR230-A1)
Mini USB
USB C
(GR230-
able
A2)
(Fig.3)
1. Connect to Cigarette iPAQ 38xx Cable
(CA-IPAQ38xx) PDA
2. Connect to Cassio
Cable PDA
(CA-CASSIOPEIA)
. Other PDA cable contact to factory.
3
Convert cable
GR230-A3
(Fig.4)
10

HOLUX GR-230 Bluetooth GPS Receiver Manual
3) connector,
External active antenna see Fig. 5。
Connector type: MCX.
Active power voltage: 3.0V
(Fig.5)
4)
Power Jack & Data Port, see Fig. 6。
Jack type: Mating face of 5 p
in Mini USB Type B female。
Pin definition see table 1。
1 5
(Fig.6)
l
Tab e 1
Pin Pin Name tion
Signal and descrip
1 GND Signal ground, Battery charging ground.
2 VOUT Unregulated voltage out: 3.6 V max 100mA.
3 TXD
it Data. From organizer to peripheral.(Voltage Level is 3.3V ~ Transm
5.0V).
e Data. Form peripheral to organizer.(Voltage level is 3.3V ~ Receiv
4 RXD
5.0V).
Positive terminal of DC adaptor that powers the internal charging
5 VCHARG Li-Ion battery. The approved power supply is 5.0V +/-
circuit of
5%@1A.
11

HOLUX GR-230 Bluetooth GPS Receiver Manual
5.2. Software Installation
The following is the steps of software installation to setup on PDA, DELL AXIM with
Bluetooth Manager. For other PDA, the steps may be a little different.
( Bluetooth Manger is one of popular program used for Bluetooth device)
1. Open “Bluetooth Manager” on your
pocket pc.
1.1 Press “New”
1.2 Press “Connect”
2. Search Bluetooth device “HOLUX
GR-230”
2.1 Select “Explore a Bluetooth device”
2.2 Press “Next”
3. Found the Bluetooth device and
enter passkey
3.1 Tap “HOLUX GR-230”
3.2 Passkey: 6268
4. Connect to SPP Slave
→
→
4.1 Select SPP slave
4.2 Press “ Next”
4.3 Press “Finish”
5. Finish Bluetooth Manager Setup
5.1 Tap and Hold “HOLUX GR-230: SPP
slave”
5.2 Press “Connect”
5.3 Finish Bluetooth setup
→
→
12

HOLUX GR-230 Bluetooth GPS Receiver Manual
5.3. Installation of testing program
(GPSViewer.exe is compatible with Microsoft Pocket PC or other operation system
alike.)
1). Install Microsoft ActiveSync to your PC, refer to your Pocket PC manual for
installation procedure, as Fig. 5.
2). Setup your Pocket PC cradle to Desktop PC UART port. The Microsoft
ActiveSync will detect your Pocket PC automatically.
Setup your Pocket PC cradle to Desktop PC UART port. The Microsoft ActiveSync
will detect your Pocket PC automatically, as Fig. 7.
(Fig. 7)
3). Double click the GPSViewer.exe on your PC, then Holux GPSViewer.exe
program will install automatically, as Fig. 8.
(Fig. 8)
4) Push “Start”→ “Programs”→ “GPSViewer” on PDA, as Fig. 9.
13

HOLUX GR-230 Bluetooth GPS Receiver Manual
(Fig. 9)
5) The following window is show after executing GPSViewer, as Fig. 10.
(Fig. 10)
6) Setup Baud rate: 9600, then push “Scan” bottom to scan your COM Port (Example
theIPAQ 3970 is the output port COM8). Select your COM Port (COM1 ~ COM10),
then push “Open GPN” bottom, as Fig. 11, Fig. 12, and Fig. 13.
(Fig. 11) (Fig. 12) (Fig. 13)
14

HOLUX GR-230 Bluetooth GPS Receiver Manual
7) Select “GPS Status” to show the satellite diagram like below, as Fig. 14.
(Fig. 14)
6. Optional accessories
GR-230 has many accessories to satisfy customers’ requirement see table 2. After
using GR-230 with the following accessories, it can transmit message with PDA, Note
Book easily.
Table 2
Item Description Note
GR230-A1 1.5M RS232 data cable
GR230-A2 1.5M USB data cable
GR230-A3 Output convert to GM-210’s PDA Car charger adaptor
GR230-B1 2M 28db MCX connector active antenna
15

HOLUX GR-230 Bluetooth GPS Receiver Manual
7. Driver Installation
You can use any GR230 accessories data cable without installing driver except
GR230-A2 USB cable. The following is the steps of installation GR230-A2 USB
cable.
7.1 System Requirement
CPU: IBM, Pentium, or other compatible PC.
Memory: above 16 MB
System: Windows 98/Me/2000/XP
7.2 Installation
I. Run GR230 USB folder driver [ HOLUX GPS USB Driver Installer].
II. Connect GR-230-A2 USB connector to computer without GR-230 GPS receiver.
While the computer automatically starts the installation program, please direct
the driver to the GR230 USB folder.
7.3 Important
Verify the COM port to start using your own navigation software.
I. Click <Start> menu, select → <Setting>, then enter→ <Controller>
II. After entering <Controller>, and select <System>.
III. Select <Device Manager>.
IV. Find the < Connector(COM & LPT)> and check the Virtual COM Port, which
was created by the USB driver.
Please note that the virtual COM port number might be different from every
computer. Before using navigation software, please confirm the COM Port numbers
created by your computer and provided by your navigation software. Otherwise, the
navigating software won’t receive the satellite signal, because of the un-match
COM Port setting.
8. Warranty
The GR-230 is warranted to be free from defects in material and functions for a
period of one year from the date of purchase. Any failure of this product within this period
under normal conditions will be replaced at no charge to the customers.
16

HOLUX GR-230 Bluetooth GPS Receiver Manual
9. Trouble Shooting
Problems Reasons Methods
Connect an external antenna, which
Weak or no GPS signal can be
No position
output but
timer is
counting
Execute fail Bluetooth function unstable
Can not turn
on the COM
port
Can not find
out GR-230
received at the place of GR-230
At outdoor space but GPS signal
is blocked by building or car roof.
Install GR-230 incompletely or
operate the device is being used
with same COM port
Poor connection
No action for few minutes may
locate as a open space to your GR-230
and then run GPSViewer Cold start
function.
Go outdoor and run GPSViewer Cold start
function to try again, or connect an
external antenna to improve the poor
GPS signal.
Power On/Off GR-230.
Re-Start PDA or PC and reference sec 5.2
re-install s
Install GR-230 completely or stop other
device that is being used.
Re-Start PDA or PC and reference sec.
5.2 re-install s
oftware
oftware.
No Signal
cause Pocket PC entry power
save mode. It will close the COM
port at the same time.
Weak or no GPS signal when
using GR-230 indoor
Close the application and execute it again
to reopen the COM port.
Connect an external antenna to your
GR-230.
17

HOLUX GR-230 Bluetooth GPS Receiver Manual
Federal Communications Commission (FCC) Statement
15.21
You are cautioned that changes or modifications not expressly approved by the part
responsible for compliance could void the user’s authority to operate the equipment.
15.105(b)
This equipment has been tested and found to comply with the limits for a Class B
digital device, pursuant to part 15 of the FCC rules. These limits are designed to provide
reasonable protection against harmful interference in a residential installation. This
equipment generates, uses and can radiate radio frequency energy and, if not installed
and used in accordance with the instructions, may cause harmful interference to radio
communications. However, there is no guarantee that interference will not occur in a
particular installation. If this equipment does cause harmful interference to radio or
television reception, which can be determined by turning the equipment off and on, the
user is encouraged to try to correct the interference by one or more of the following
measures:
-Reorient or relocate the receiving antenna.
-Increase the separation between the equipment and receiver.
-Connect the equipment into an outlet on a circuit different from that to which
the receiver is connected.
-Consult the dealer or an experienced radio/TV technician for help.
You are cautioned that changes or modifications not expressly approved by the party
responsible for compliance could void your authority to operate the equipment.
FCC RF Radiation Exposure Statement:
This Transmitter must not be co-located or operating in conjunction with any other
antenna or transmitter.
18
 Loading...