

Holtkoetter 5556 User Manual
ASSEMBLY INSTRUCTIONS FOR
205 Hardman Avenue South, South Saint Paul, MN 55075
Voice: (800) 899-5444 • Fax: (888) 552-8661
e-mail: customerservice@holtkoetter.com
www.holtkoetter.com
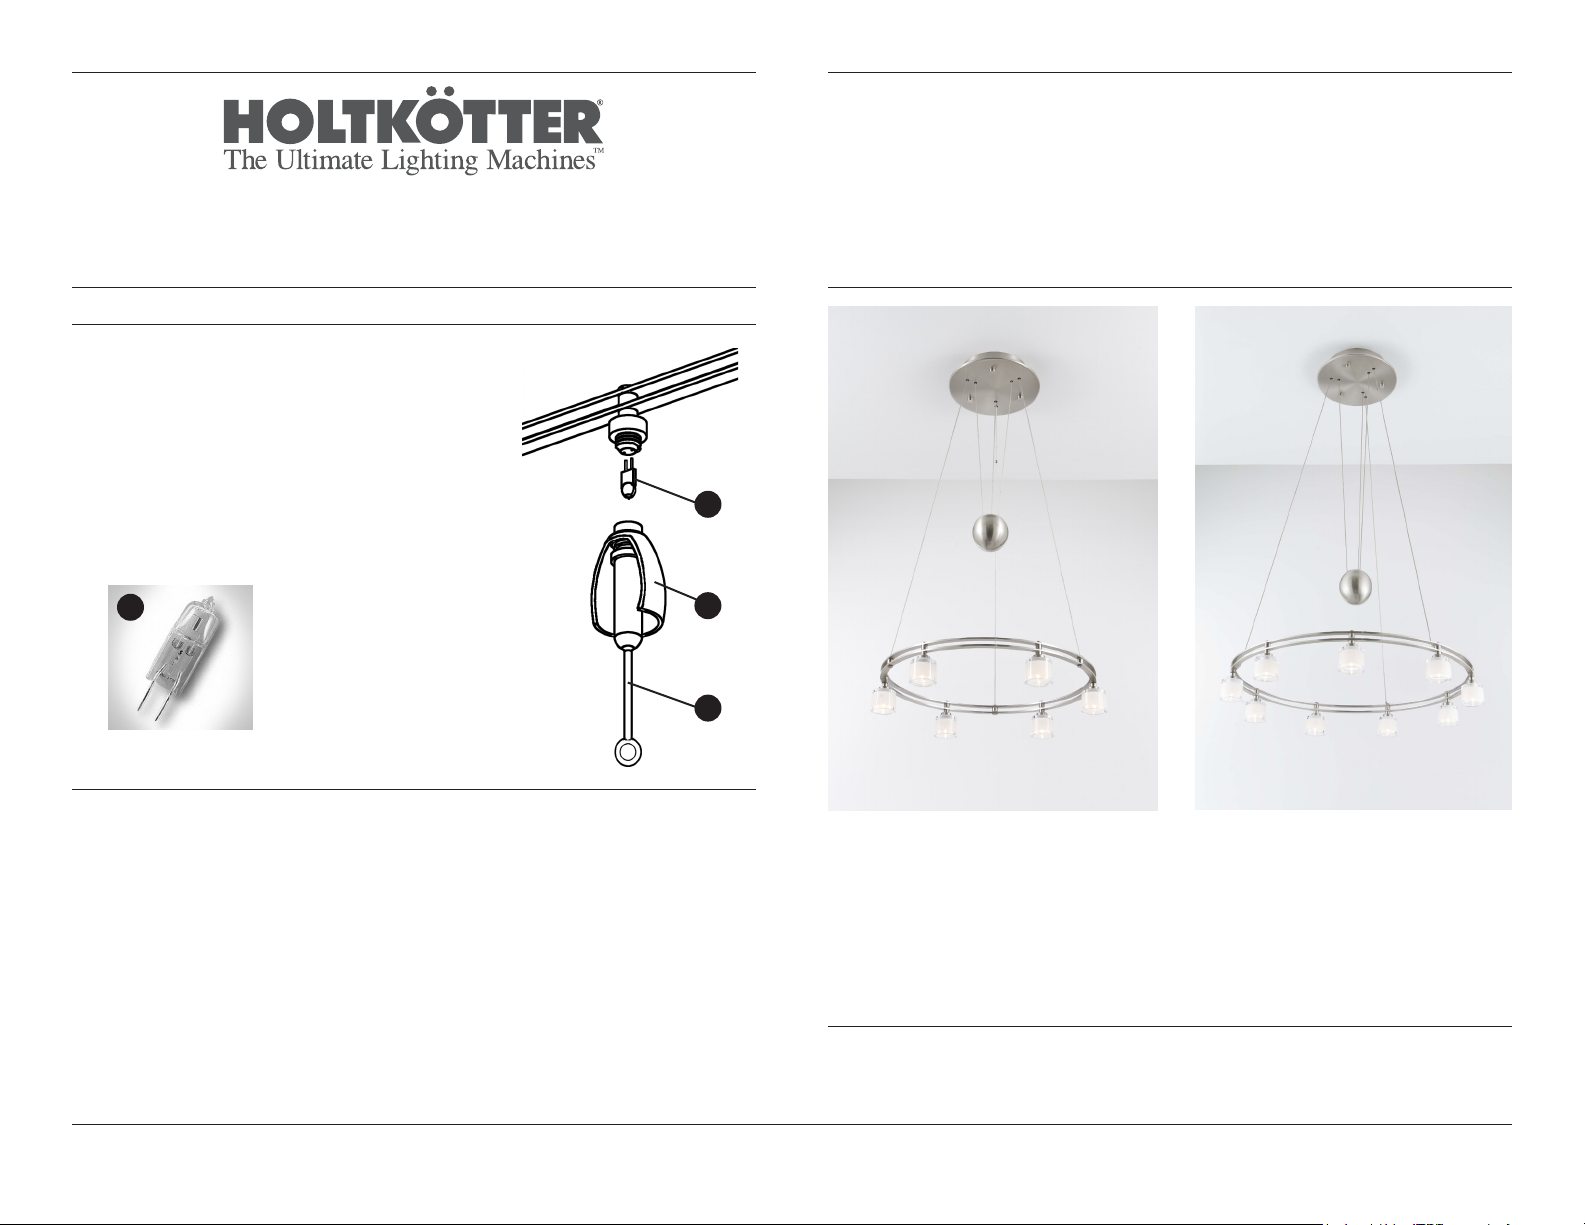
Install the Bulbs & Glass (Diagram 2)
1. The bulbs provided with this fixture are specialty low-
voltage bulbs by Osram, the Halostar Starlite. Insert the
bulbs (D) into the sockets. NOTE: BE CAREFUL NOT TO
TOUCH THE BULB WITH YOUR BARE HANDS.
CAUTION: Always remember to disconnect power
to the fixture before replacing bulbs to prevent
damage to the bulbs.
2. Using the plastic socket driver (F) provided, screw each
glass shade (E) onto the fixture until it is snug. Do not
overtighten.
D
Low-voltage Halogen Pendants
No. 5556 & No. 5559
Diagram 2
D
E
F
CSA/UL SAFETY REQUIREMENTS
CSA/UL requires that these IMPORTANT SAFETY INSTRUCTIONS be listed:
INSTRUCTIONS PERTAINING TO RISK OF FIRE OR INJURY
LIGHTED LAMP IS HOT!
WARNING: TO REDUCE THE RISK OF FIRE OR INJURY, PLEASE FOLLOW THESE SAFETY
INSTRUCTIONS:
1. Turn off power and allow to cool before replacing lamps.
2. Lamp gets HOT quickly! Contact only switch/plug when turning on.
3. Keep lamp away from materials that may burn.
4. Do not touch lamp at any time. Use a soft cloth. Oil from skin may damage lamp.
5. Do not operate luminaire with missing or damaged glass.
6. CAUTION: The recommended replacement bulbs for this fixture are 20 Watt Halostar
bulbs by Osram. Use of other brands of unknown quality may cause a risk of
overheating.
Major lamp parts manufactured in Germany by Holtkötter Leuchten GmbH.
Bulbs manufactured in Germany by Osram GmbH. Final assembly by Holtkötter in South Saint Paul, MN.
5556/6 5559/9
Care Instructions
Use only a soft, dry cloth to clean. If necessary, a slightly damp, soft cloth can be used to spot
clean. Do not use common household cleaners on lamps or fixtures, as the lacquer on the
outside of the brass may be damaged as a result. Enjoy your new Holtkötter lamp.
Holtkötter ® and Holtkötter Leuchten® are registered trademarks of Holtkötter. All Rights Reserved.
© Holtkötter
ASSEMBLY INSTRUCTIONS FOR
e-mail: customerservice@holtkoetter.com
www.holtkoetter.com
Please make sure that the following parts for your low-voltage pendant
are enclosed:
1. Fixture including ceiling canopy, frame and counterweight.
2. Glass shades
3. Bulbs for 5556/6 (5559/9): 6 ea (9 ea) x 20 Watt Halostar by Osram, GY6.35 base.
Order Code: 9250*020-HSTAR
This fixture utilizes an electronic, line-voltage (120 V input) to low-voltage (12 V output)
transformer by LIGHTECH, rated at 175 Watts for the 5556/6 and rated at 200 Watts for the
5559/9, allowing for a 20 Watt maximum per bulb.
If you are planning to use a dimmer with this fixture, we recommend using a Lutron ELV
(electronic low voltage) style dimmer.
NOTE: The electronic transformer by LIGHTECH is equipped with an automatic reset switch. If
the fixture is not working or has created a short, disconnect the power to the fixture and the
transformer will reset itself.
Be sure to turn off the circuit breaker before installing this fixture.
Dry location only.
THIS PRODUCT MUST BE INSTALLED IN ACCORDANCE WITH THE APPLICABLE
INSTALLATION CODE BY A PERSON FAMILIAR WITH CONSTRUCTION AND
OPERATION OF THE PRODUCT AND THE HAZARDS INVOLVED.
Low-voltage Halogen Pendants
No. 5556 & No. 5559
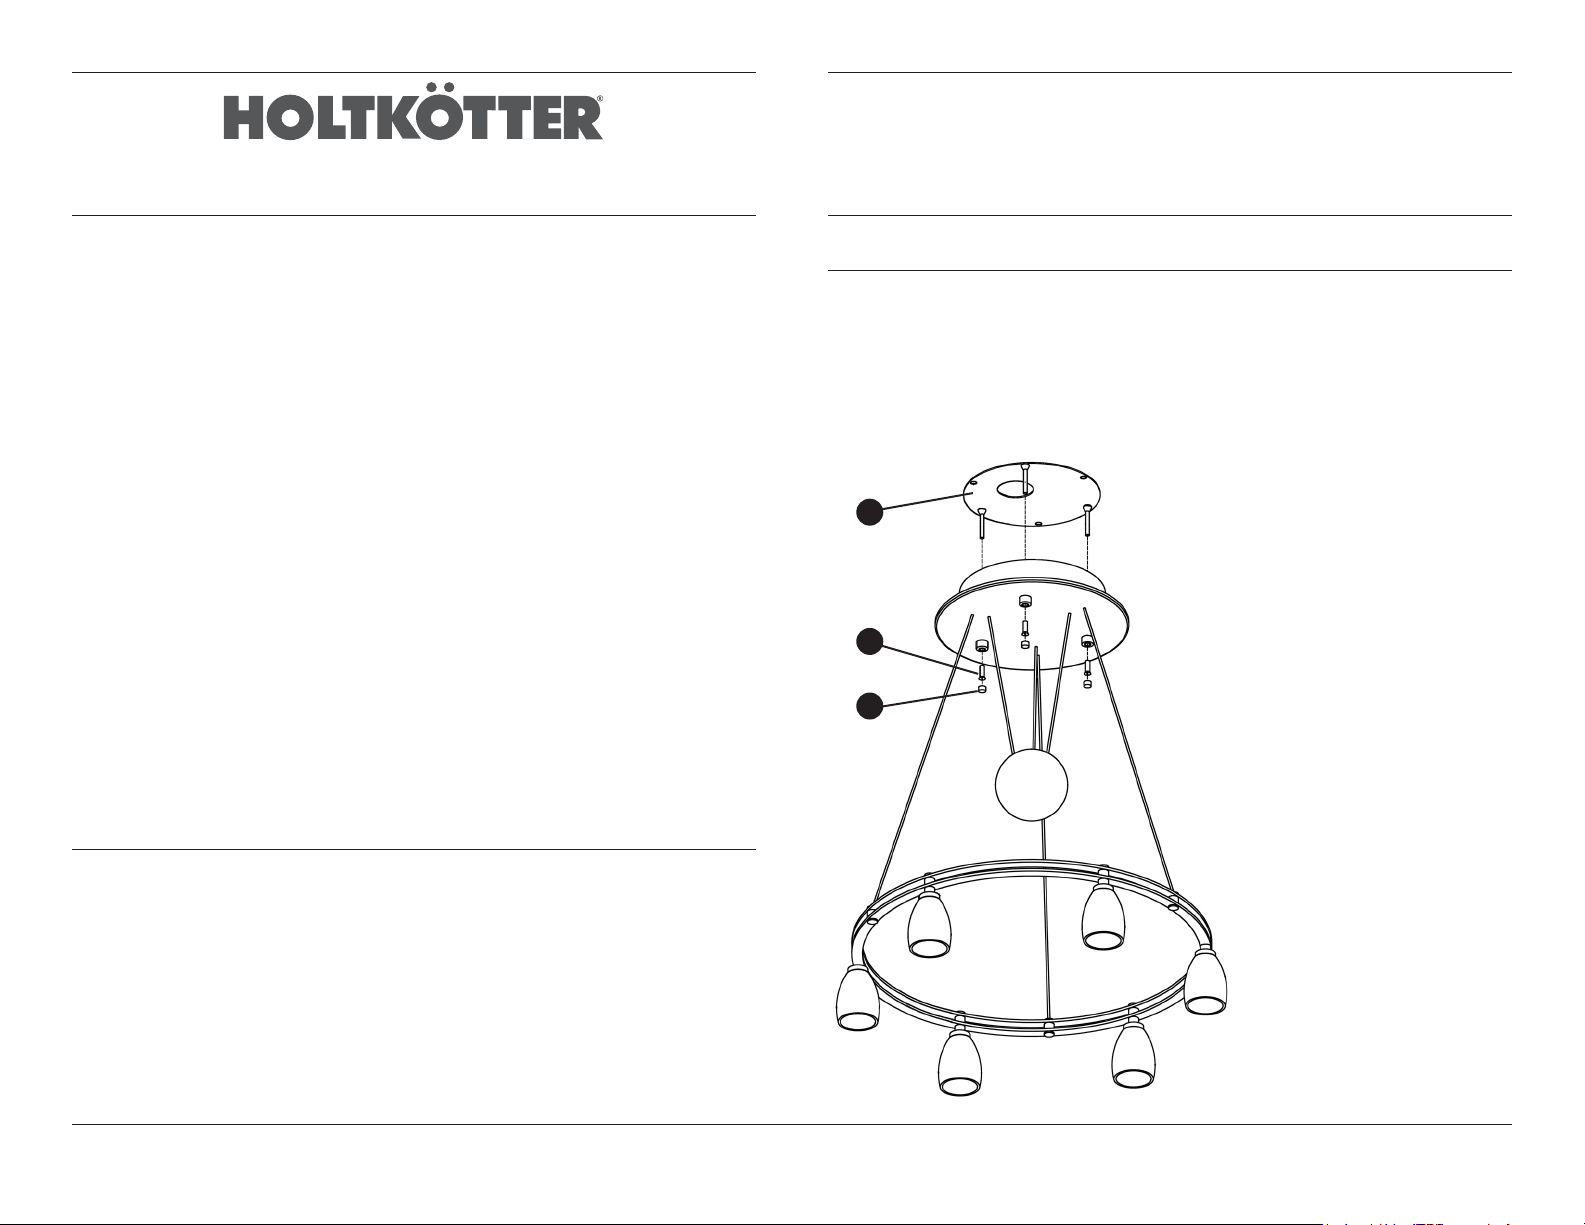
Mounting Instructions (continued)
1. Disconnect power to the box before installation.
2. Remove decorative knobs (C) and the brass tubular nuts (B) that are located under
the decorative knobs (C).
3. Remove the round ceiling plate (A) located on the top of canopy.
4. Mount the round ceiling plate (A) to the outlet box.
Diagram 1
A
B
C
5. Connect the wires from the
fixture with the wires in the outlet
box according to generally
accepted electrical standards.
Determine the polarity of the
cord by rubbing it with your
thumb. One side will feel smooth
(= hot/black) and the other side
will feel rough (= cold/white).
6. Slide the canopy over the
round ceiling plate (A) and
secure with brass tubular nuts (B).
7. Finally put decorative knobs
(C) on the bottom of the canopy.
Mounting Instructions (Diagram 1)
Parts used:
A) Round ceiling plate with three screws
B) Three brass tubular nuts
C) Three decorative knobs
Major lamp parts manufactured in Germany by Holtkötter Leuchten GmbH.
Bulbs manufactured in Germany by Osram GmbH. Final assembly by Holtkötter in South Saint Paul, MN.
Holtkötter ® and Holtkötter Leuchten® are registered trademarks of Holtkötter. All Rights Reserved.
© Holtkötter
 Loading...