

Holtkoetter 2545 User Manual
ASSEMBLY INSTRUCTIONS FOR
205 Hardman Avenue South, South Saint Paul, MN 55075
Voice: (800) 899-5444 • Fax: (888) 552-8661
e-mail: customerservice@holtkoetter.com
www.holtkoetter.com
Your floor lamp will come in two boxes, one for the shade and one for the base
(including the illuminator reflector).
Assemble the floor lamp.
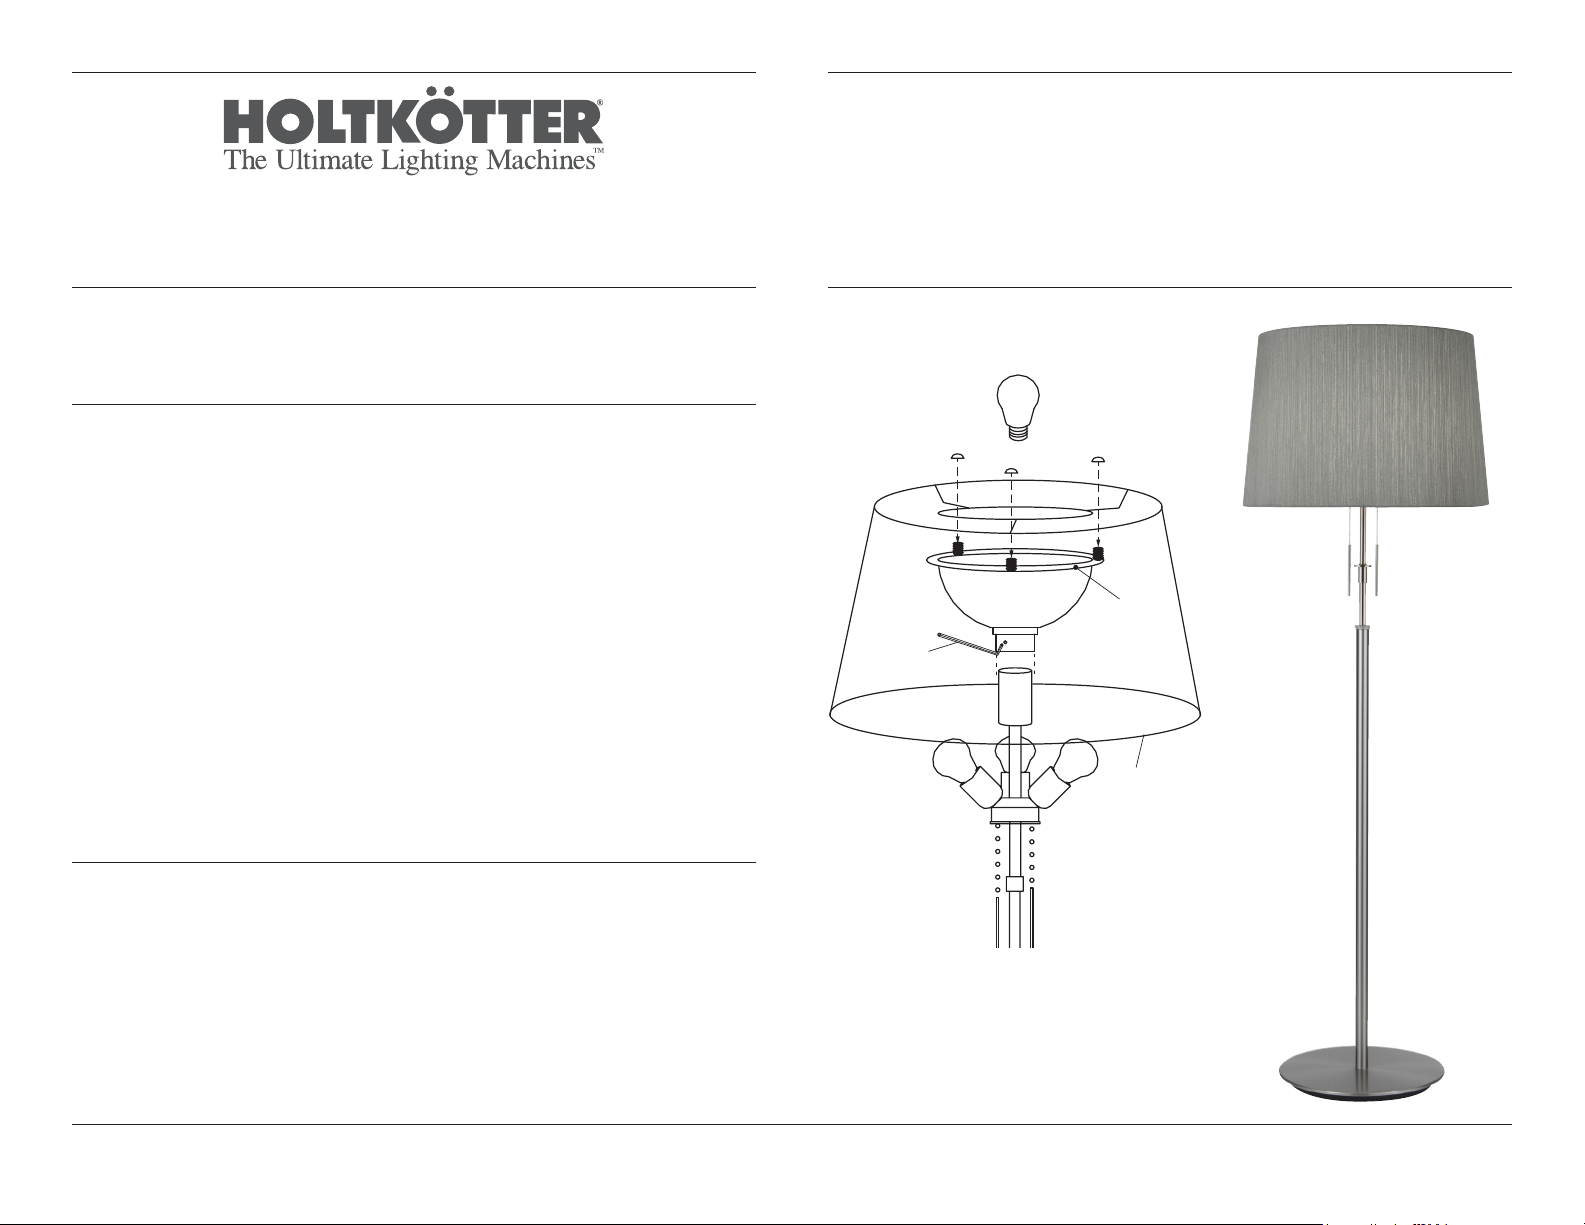
1. Remove the lamp, illuminator reflector and shade from the packaging.
2. Prepare the illuminator reflector by unscrewing the three knobs at the top of
the reflector. The stabilizing ring should be left in place on the illuminator.
3. Slide the illuminator reflector onto the center socket all the way. Secure the
reflector to the socket by tightening the set screw with the allen wrench
provided.
4. Place the arms of the fabric shade into the gaps revealed after removing
the knobs.
5. Tighten the knobs on the reflector to secure the fabric shade.
6. Install the bulbs of your choice (not included).
Side Bulbs (3 each): Medium Edison Base, max. 100 Watts ea.
Illuminator Bulb: 3-Way, Medium Edison Base, max. 150 Watts.
7. Your lamp is now operational.
Knobs
Allen Wrench
Shaded Floor Lamp
No. 2545
Illuminator Reector
Stabilizing
Ring
Fabric Shade
Care Instructions
Use only a soft, dry cloth to clean. If necessary, a slightly damp, soft cloth can be used
to spot clean. Do not use common household cleaners on lamps or fixtures, as the
lacquer on the outside of the brass may be damaged as a result.
Major lamp parts manufactured in Germany by Holtkötter Leuchten GmbH.
Final assembly by Holtkötter in South Saint Paul, MN.
Lamp
Shade Assembly Diagram
Holtkötter ® and Holtkötter Leuchten® are registered trademarks of Holtkötter. All Rights Reserved.
© Holtkötter
 Loading...