

Page 1

PT300 Weighing System
Users Manual
Intercomp Co.
3839 County Road 116
Medina, MN 55340 U.S.A.
763-476-2531
800-328-3336
Fax: 763-476-2613
www.intercompcompany.com
Manual #: 700028-G
Page 1 of 44
Page 2

Table of Contents
INTRODUCTION ............................................................................................................................................................................4
Weights and Measures............................................................................................................................................................... 4
SPECIFICATIONS ..........................................................................................................................................................................5
C
ONTROLS
E
LECTRICAL
P
ERFORMANCE
E
NVIRONMENTAL
P
HYSICAL
R
ADIO (OPTIONAL
O
PTIONAL EQUIPMENT
SCALE OPERATIONS .................................................................................................................................................................... 8
O
PERATIONAL OVERVIEW
D
ISPLAY DESCRIPTION
C
ONTROLS
ON / OFF .................................................................................................................................................................................. 9
PRINT / ACCUMULATE........................................................................................................................................................... 9
LOCAL / TOTAL .....................................................................................................................................................................10
ZERO.......................................................................................................................................................................................10
T
OTALIZING SETUP
S
ERIAL OUTPUT SETUP
On-Demand .............................................................................................................................................................................12
Continuous ..............................................................................................................................................................................12
Data Format ............................................................................................................................................................................13
Accumulating Print..................................................................................................................................................................13
U
SING ACCUMULATED TOTAL
Accumulating Print Axle .........................................................................................................................................................13
Accumulating Print Standard .................................................................................................................................................. 14
A
CCUMULATING PROCEDURE
W
EIGHING PROCEDURES
T
ABLE 1: WEIGHING COMBINATIONS
T
YPICAL SCALE LAYOUTS
......................................................................................................................................................................................5
.................................................................................................................................................................................... 5
................................................................................................................................................................................ 5
...........................................................................................................................................................................5
........................................................................................................................................................................................6
).......................................................................................................................................................................... 6
...................................................................................................................................................................7
.............................................................................................................................................................. 8
...................................................................................................................................................................8
......................................................................................................................................................................................9
.......................................................................................................................................................................11
.................................................................................................................................................................12
......................................................................................................................................................13
:...................................................................................................................................................... 15
............................................................................................................................................................... 17
........................................................................................................................................... 18
............................................................................................................................................................ 19
MODE MENU .................................................................................................................................................................................20
M
ODE MENU
S
ETTING THE MODE MENU PARAMETERS
CABLED SCALE USAGE ............................................................................................................................................................. 24
T
OTALIZING/PRINTING IN CURRENT LOOP MODE
Example of Master/Slave designations....................................................................................................................................24
T
OTALIZING
P
RINTING
D
ATA INTERFACE
CALIBRATION ..............................................................................................................................................................................27
P
ROCEDURE: CALIBRATION (VERIFICATION
Check front/back load cell balance ......................................................................................................................................... 27
Scale Span Calibration............................................................................................................................................................28
P
ROCEDURE: CALIBRATION (ADJUSTMENT
Calibration Enable Jumper .....................................................................................................................................................30
C
ALIBRATION MENU
S
ETTING THE CALIBRATION PARAMETERS
Multiple Graduation Break Points .......................................................................................................................................... 32
W
EIGHT CALIBRATION
Corner Calibration (Both load cells) ...................................................................................................................................34
Corner Calibration (Single load cell) ..................................................................................................................................35
................................................................................................................................................................................. 20
.....................................................................................................................................21
.........................................................................................................................24
.................................................................................................................................................................................. 25
......................................................................................................................................................................................25
..........................................................................................................................................................................26
) ................................................................................................................................27
) .................................................................................................................................29
.....................................................................................................................................................................31
....................................................................................................................................32
.................................................................................................................................................................34
Page 2 of 44
Page 3

Span Calibration ..................................................................................................................................................................... 36
TROUBLESHOOTING ................................................................................................................................................................. 38
P
ROBLEM TABLE
E
RROR MESSAGES
D
IAGNOSTIC TESTS AND VOLTAGE MEASUREMENTS
Charger voltage.......................................................................................................................................................................40
Lamp........................................................................................................................................................................................ 40
Keys .........................................................................................................................................................................................40
Power down shutoff ................................................................................................................................................................. 40
Load Cells ...............................................................................................................................................................................40
Step Entries .............................................................................................................................................................................42
CONNECTOR ................................................................................................................................................................................43
HOW TO REACH INTERCOMP SERVICE .............................................................................................................................. 44
...........................................................................................................................................................................38
........................................................................................................................................................................39
..................................................................................................................... 40
"This document is the property of Intercomp Co. It contains material and
information that is confidential and protected under federal and/or state trade
secret, unfair competition, and copyright law. Any reproduction, use or
disclosure without written permission from Intercomp Co. is prohibited".
Page 3 of 44
Page 4

Introduction
Weights and Measures
The PT300 meets or exceeds class IIII standards for 400 division accuracy
from 0 lb to 20,000 lb. The certification was completed by the National Type
Evaluation Program (NTEP); in accordance with the National Institute of
Standards and Technology (NIST) Handbook 44. A NTEP Certificate of
Conformance Number 90-106P was issued under the National Conference of
Weights and Measures.
This operations manual describes the Intercomp Model PT300 platform specifications,
detailed operating procedures, and calibration.
This manual is separated into several sections, each containing information on a different
aspects of the scale. The specifications outline the design parameters for the scale. The
detailed operation section outlines the correct use of the scale for most applications. The
calibration section explains how to set the platform's adjustments.
Caution: Your PT300 scale is covered by a one year warranty and should be referred to the
factory for maintenance within the warranty period. Attempts to make any extensive repairs
within the warranty period may invalidate the warranty. If repairs are needed after the
warranty period, only qualified technicians should attempt such repairs.
PT300 Users manual
Rev G, Feb 2011
Features
lb or kg programmable readout.
Ability to display total weight.
Accumulating total function.
Auto zero tracking automatically corrects zero-weight display shifts.
5½ digit, 1 inch LCD readout, with automatic back lighting.
5-15 VDC and 120 VAC 60 Hz power sources standard.
RFI/EMI protection.
Low battery detection with automatic shutoff to protect batteries.
Built-in self-diagnostics to check: Load cells, Memory, Display, AD converter, and Power
supply.
Weigh pads manufactured from high strength aluminum alloys.
Page 4 of 44
Page 5
PT300 Users manual
Specifications
Controls
General On/Off, Print/Accumulate, Local/Total, Zero
Display 5 1/2 digit, 1 inch liquid crystal display (LCD), with automatic back
lighting.
Indicators: local weight, total weight, accumulated total weight
Electrical
Rev G, Feb 2011
Power source required
Charging Voltage 10 - 15 V DC.
Batteries
Charging Current 50 mA.
Charging Time 16 hours if the batteries are discharged.
Battery endurance Radio off: 400 hours with alkaline or NiMH
Filtering Adjustable averaging up to 30 seconds.
Auto-Zero Satisfies all HB-44 requirements.
5 - 15 VDC at battery input, 100-240 VAC when
using charger
4-AA size NiCd, NiMH, or alkaline cells.
150 hours of continuous use with Ni-Cads
Radio on: 300 hours with alkaline or NiMH
125 hours of continuous use with Ni-Cads
NOTE: For special setups that require a scale wireless
‘host’, that scale’s battery life is 40 hours (alkaline).
Performance
Speed 4 display updates per second
Accuracy
Calibration
interval
± 1% of reading or ± display graduation, whichever is greater.
Twelve months recommended
Environmental
Humidity 10 to 95% Non-Condensing.
Temperature Operating: -28 C to +65 C. / -20 F to +150 F.
Storage: -40 C to +75 C. / -40 F to +170 F.
EMI/RFI Meets Mil Spec 461
Page 5 of 44
Page 6
Physical
WARNING:
where the equipment should be used at distances greater than 20cm from
!
PT300 Users manual
Rev G, Feb 2011
Dimensions (PT300):
Weight (PT300): 37 lb / 16.8 kg
Dimensions (PT300DW): Overall: 3 x 26 x 20 in. / 76 x 660 x 508 mm
Weight (PT300DW): 49 lb / 22 kg
Overall: 3 x 16 x 20 in. / 76 x 406 x 508 mm
Pad: 12 x 12 in. / 305 x 305 mm
Pad: 22 x 14 in. / 559 x 356 mm
Radio (optional)
Radio frequency ISM 2.4GHz, 802.15.4
License requirements None. Pre-approved US/FCC, CAN/IC,
Range 200’ / 60m indoor, 300’ / 90m line of sight
the human body (with the exception of hands, wrists, feet, and ankles.
Operation at distances less than 20cm is strictly prohibited.
This equipment has been approved for mobile applications
EUR/CE
Page 6 of 44
Page 7

PT300 Users manual
Rev G, Feb 2011
Optional Equipment
PDA with Vehicle Weigh Software and Wireless Node (140661)
Laptop computer with Vehicle Weigh Software and Wireless Node (140667)
PT20 CPU (100540)
PT20 CPU Wireless Node (140659)
Charger and Cable (100480)
120/220V plug in transformer with internationals plugs, cable and PT connection.
2 scale carrying case (100047)
4 scale carrying case (100048)
6 scale carrying case (100049)
Interconnecting cable for 2 scales, 15 ft (101029)
Interconnecting cable for 4 scales (101032)
15, 25, 15 ft. spacing.
Interconnecting cable for 6 scales (101035)
15, 25, 15, 25, 15 ft. spacing.
Interconnecting/Charging Cable for 2 scales, 120/220V, international plugs (101030)
Interconnecting/Charging Cable for 4 scales, 120/220V, international plugs (101033)
Interconnecting/Charging Cable for 6 scales, 120/220V, international plugs (101036)
PT300 Dummy pad (100088)
Cast aluminum replica.
PT300DW Ramp (100072)
Page 7 of 44
Page 8

PT300 Users manual
Rev G, Feb 2011
Scale Operations
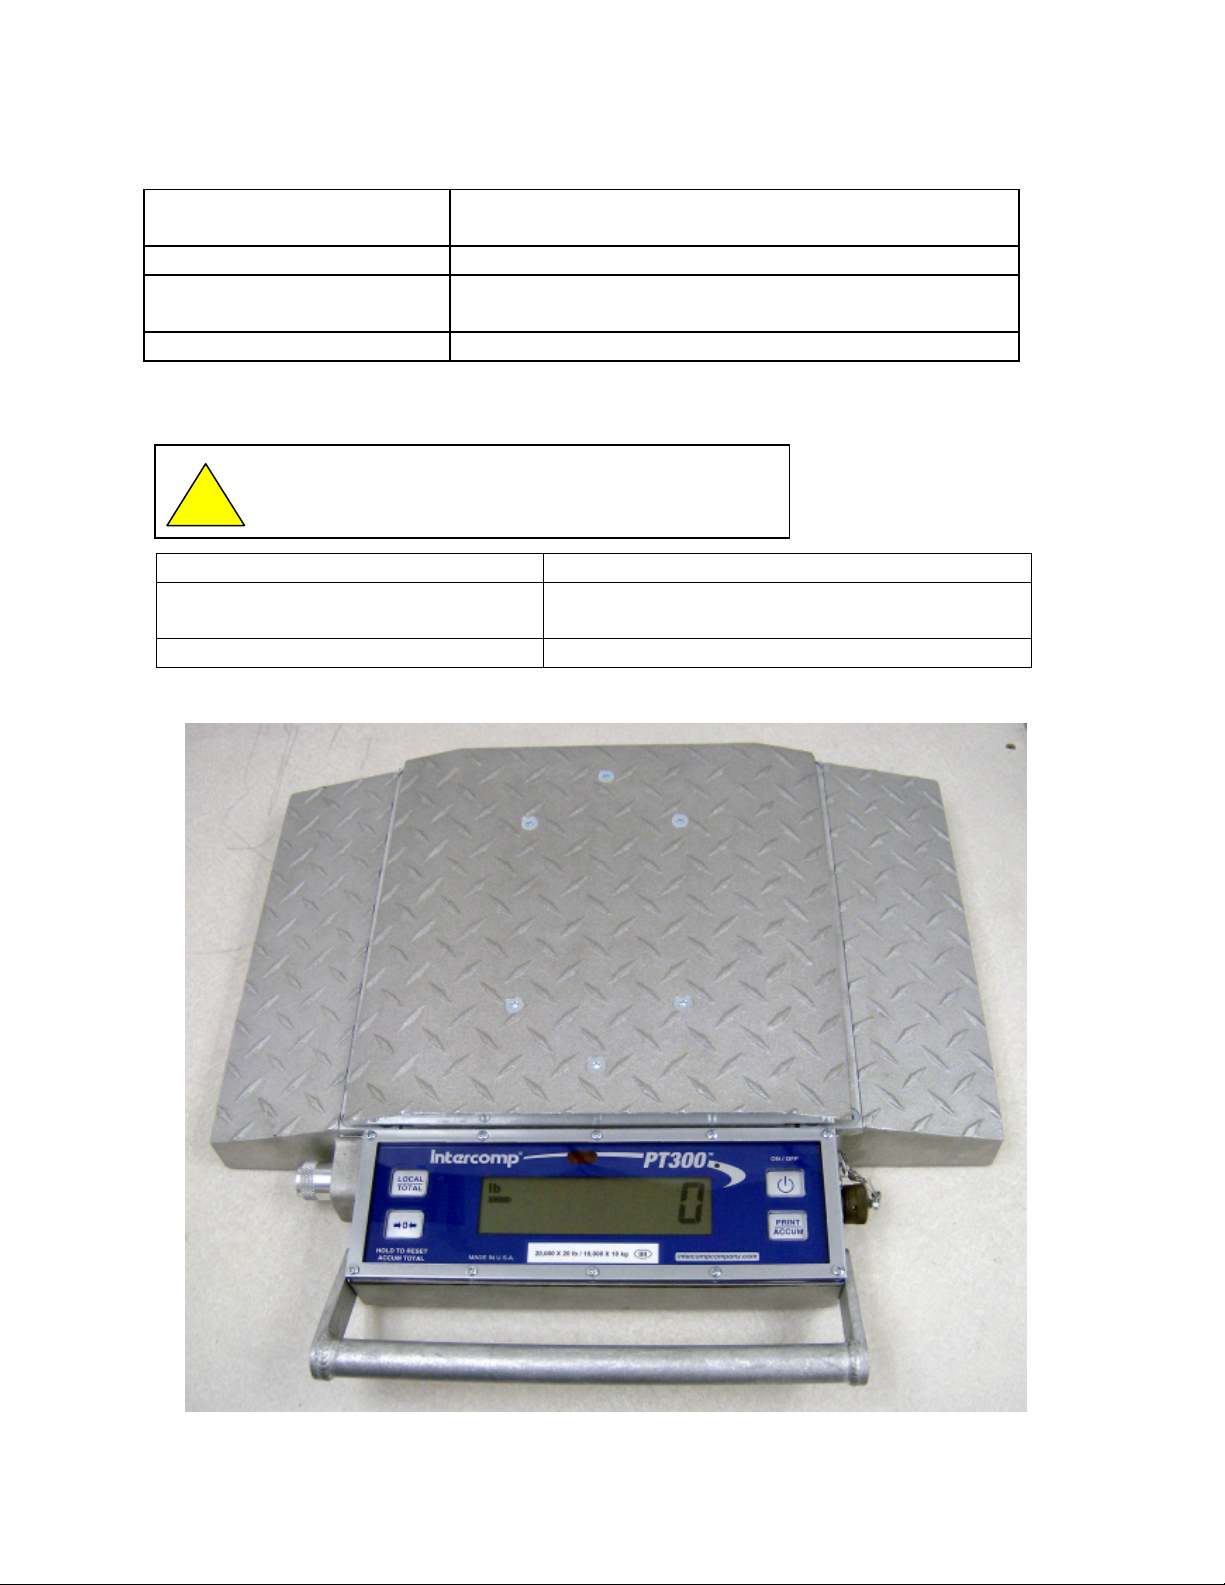
Operational Overview
The control panel for the weighing platform is in the front section of the pad, along with the
electronics of the system. The control panel has a liquid crystal display (LCD) screen and several
control switches.
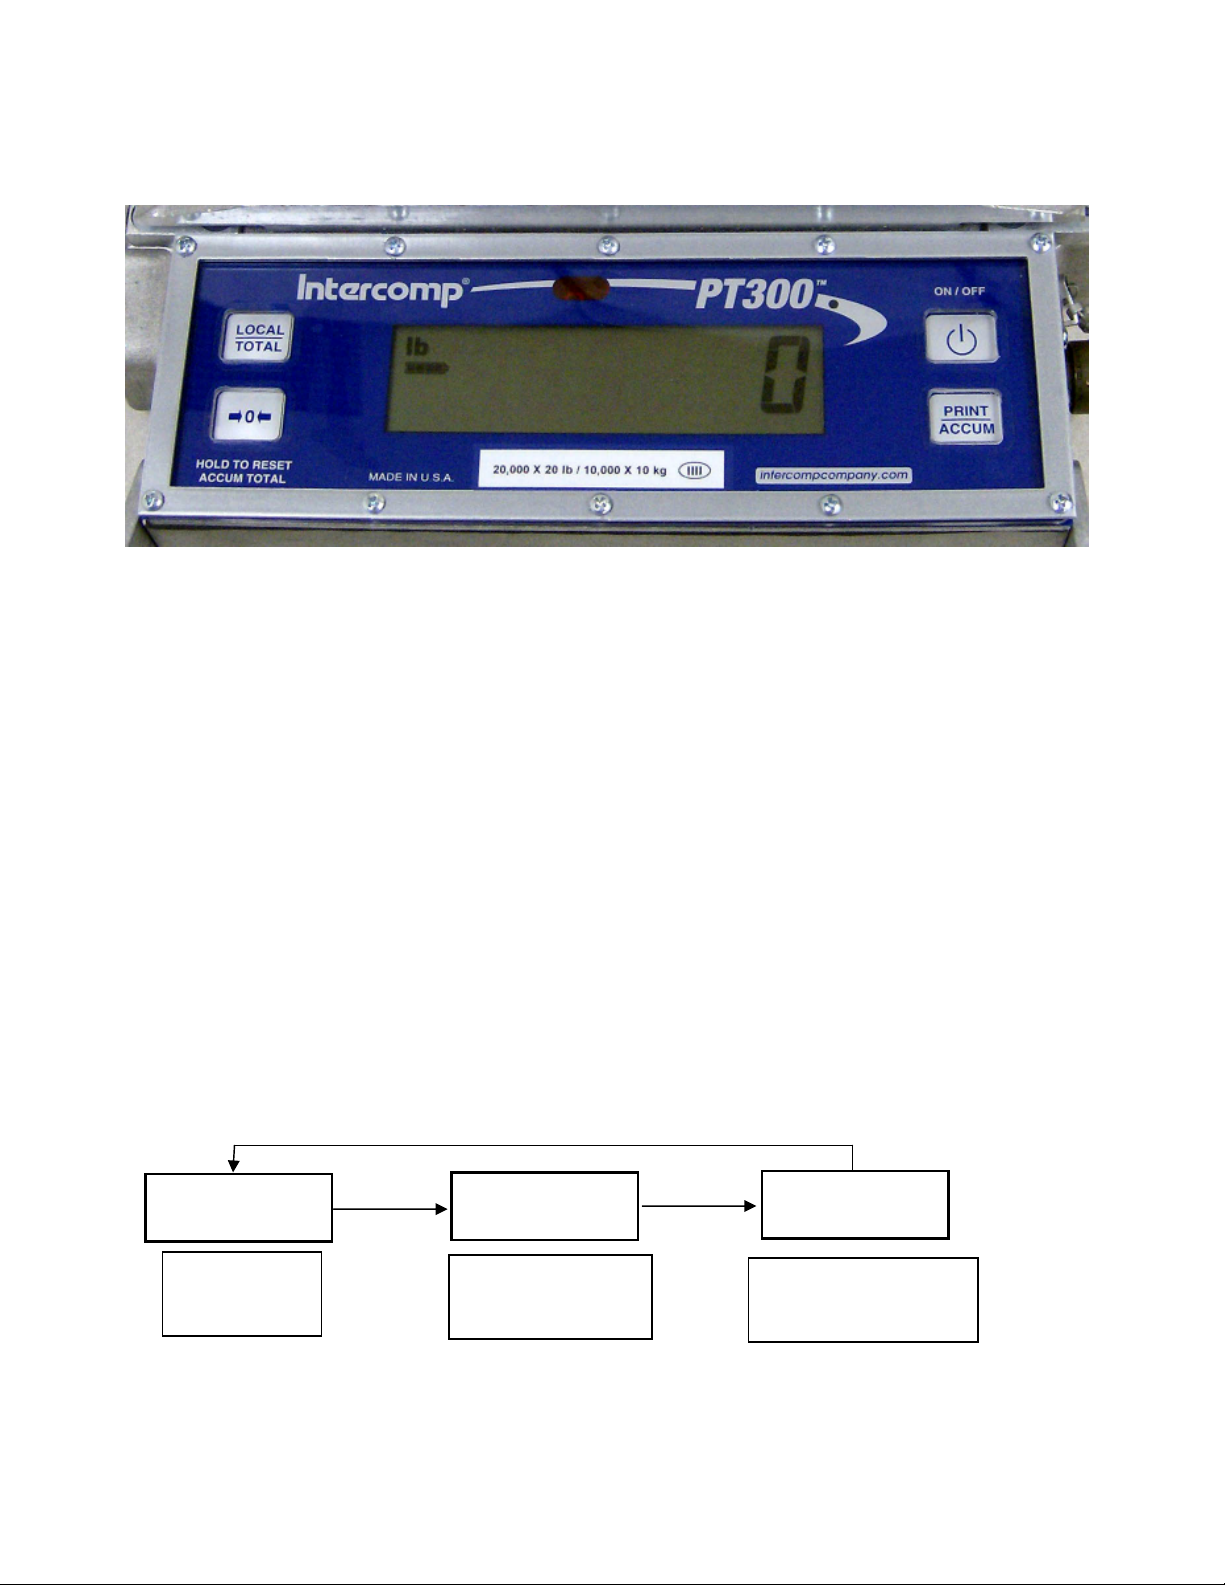
Display Description
The display is a Liquid Crystal Display unit, providing one line of 5 1/2 digits. The screen shows
the weights read from the pad. The TOTAL icon indicates measurement mode as in the table
below the PT300 display. Information displayed includes indicators for both “lb” and “kg”, a
segment bar to show battery charge level, error conditions and set-point indicators when set-point
thresholds are reached. The display contains an automatic backlight for use in low-light
conditions.
Mode status Setting
TOTAL not lit Local
TOTAL lit Total
TOTAL flashing Accumulated Total
Page 8 of 44
Page 9
Controls
2000
20002000
2000
5500
55005500
5500
P-03
P-03P-03
P-03
5 seconds
for 2 seconds
displayed for 1
ON / OFF
Press and hold this key to apply power to the weighing system electronics. Make sure to
hold this key until the display responds (up to 1 second). When power is first applied, the
weighing system rapidly performs self-tests of the pad and the internal electronics. When
the tests have completed successfully, the system begins weighing. If a problem is
detected, the screen displays an error message.
If the PT300 is powered up, press this button to turn the scale off. The PT300 retains the
setup information, and calibration in a special memory device (non-volatile memory) that is
not affected by power loss or battery condition.
PT300 Users manual
Rev G, Feb 2011
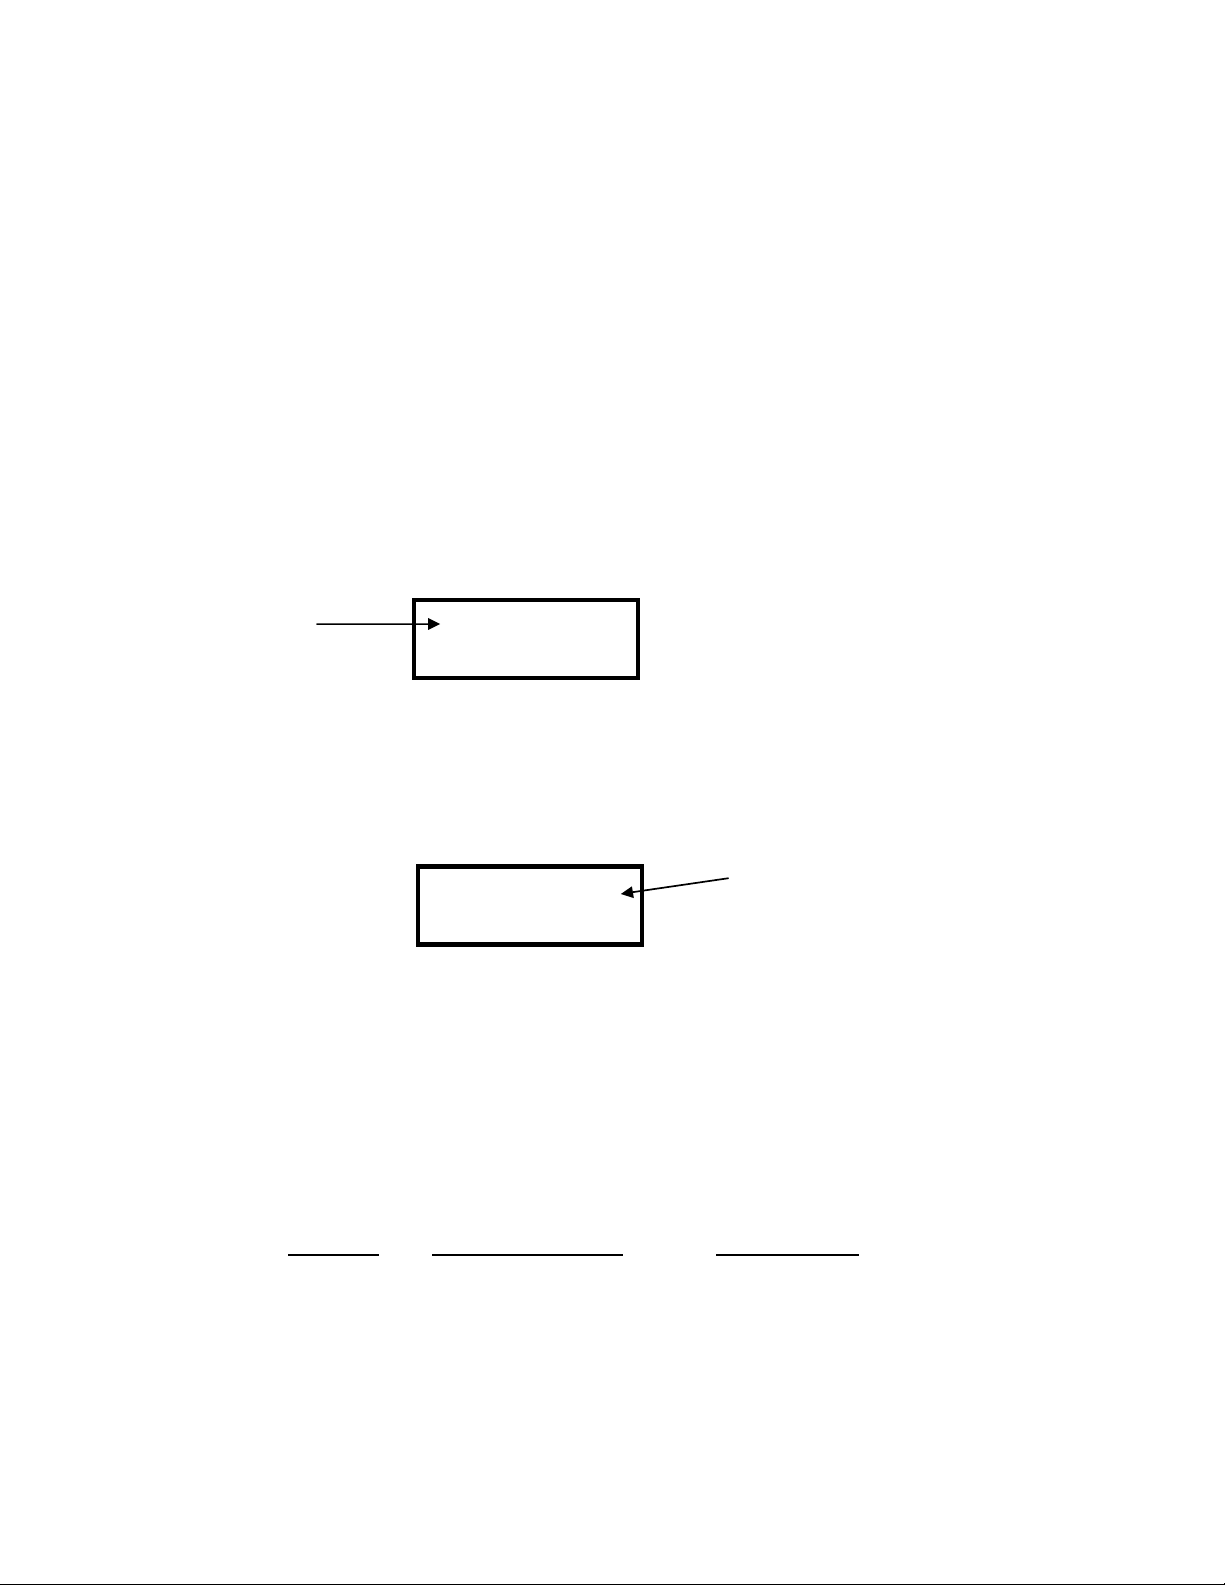
PRINT / ACCUMULATE
Press this button to print. When using the accumulated total function: press the PRINT /
ACCUMULATE button to add the total to the accumulated total. See section titled “Using
Accumulated Total”.
New accumulated total = total weight (all scales in system) + old accumulated total
Once a successful accumulation has a occurred, the scale will automatically toggle it’s display
to show the current weight, accumulated total, and number of accumulations.
current weight
displayed for
Note: The scale will not accumulate and will display the error message “Ac
current weight is negative, zero, or if the weight is in motion. These Protections are added
to ensure that only valid readings are accumulated into the total. Also, after a successful
accumulation, ALL scales in the system must return to zero before you accumulate the next
total accumulated
weight displayed
total number of
accumulations
Ac.Err
Err” if the
AcAc
ErrErr
Page 9 of 44
Page 10

PT300 Users manual
Rev G, Feb 2011
weight. If you attempt to accumulate the next weight before allowing the scale(s) to return
to zero, the error message “Ac
The accumulated total weight can be viewed only on the scale you are accumulating from.
After the PRINT/ACCUMULATE button is first pushed; the display will show “Ac. X” as the
system will accumulate the next reading and send it to print. (X will show the number of
accumulations this session) Once a successful accumulation has occurred, pressing the
LOCAL/TOTAL button will cycle the display to show number of accumulations, current local
weight, current total weight on all scales, and the accumulated total. When the local
weight, current total weight, or accumulated total is displayed, the total icon will be lit up,
flashing, or off. (as shown in the display description).
Ac.Err
Err” will be displayed.
AcAc
ErrErr
LOCAL / TOTAL
The local weight is the weight on that scale only. The total weight is the weight on all of the
scales in your system. Pressing the LOCAL / TOTAL button toggles between local weight
and total weight. The indicator bars (as shown in the display description) will show whether
the scale is displaying the local or total weight.
Note: If the system is not setup correctly, the “error” icon and message “t0t
displayed when trying to view the total weight. See section titled “Totalizing Setup”.
t0t” will be
t0tt0t
ZERO
Sets the weighing system to read zero pounds or kilograms. If pressed while a pad holds
weight, that weight becomes the zero condition for the pad. This can be useful to cancel
the weight of any weighing fixtures, such as tail cones or wheel chocks. When the weight
is removed, a negative weight displays until the system is re-zeroed. This switch is used
any time the scale shows a non-zero value with no weight on the pads.
Note: This system contains a feature called Auto Zero Tracking (AZT), which corrects for
slight zero changes during normal operation. An example of a zero change could be a
buildup of dirt on the pads.
Another function of the zero key is to clear the accumulated total. Press and hold the
ZERO key until the display reads “CLr
accumulated total and the accumulation number. All other scales you have connected will
also be zeroed through the interconnect cables. This allows you to zero your entire system
with one key press.
CLr.tttt“ and release the ZERO key. This will reset the
CLrCLr
Page 10 of 44
Page 11
PT300 Users manual
---04
---04---04
---04
01---
01---01---
01---
scale ID#
Rev G, Feb 2011
Totalizing Setup
This section covers configuring a scale set for either self-totalizing or connection to a PC/PDA
for advanced display features. For accumulating multiple weights on a scale or scale set, see
the “Using Accumulated Total” section. In ‘self-totalizing’ mode, the LOCAL/TOTAL button
works to switch between weight on that particular scale (LOCAL) and the total weight of
connected scales (TOTAL). If the system is not setup correctly, the “error icon” and message
“t0t
t0t “will be displayed when trying to view the total weight.
t0tt0t
1. To enter into totalizing setup: Simultaneously press the LOCAL/TOTAL and ZERO buttons.
2. Message “SCid
displayed with 3 dashes following it. This is the scale number (ID). Use the LOCAL/TOTAL
button to increment and the ZERO button decrement the number. When the desired
number is displayed, press the PRINT/ACCUMULATE.
3. Message “SCLS
will show three dashes and then a number. This number is the total number of scales in
the system. Use the LOCAL/TOTAL button to increment and the ZERO button decrement
the number. When the desired number is displayed, press the PRINT/ACCUMULATE
button. The maximum number of scales is 32.
4. If the scale# is ‘1’, the display will ask if the scale is the “HOSt
PRINT/ACCUMULATE button. Use the LOCAL/TOTAL or the ZERO button to toggle the
display “Yes
“yes” if the scale network consists of scales only. If your system uses an external device
such as a PDA or PC to view the weights, this setting should be set to “no” since the
external host controls the network. Press the PRINT/ACCUMULATE button to save the
setting.
Example 1 of correct scale settings: 4 pad system with PDA or PC:
Scale ID Number of Scales *Host setting
SCid” will be displayed. Press PRINT/ACCUMULATE button. A number will be
SCidSCid
SCLS” will be displayed. Press the PRINT/ACCUMULATE button. The display
SCLSSCLS
total # of scales
(only displayed on scale #1)
HOSt”. Press the
HOStHOSt
Yes” or “no
YesYes
no”. A ‘Host’ controls the scale network, and this setting should be set to
nono
Scale #1:
Scale #2:
Scale #3:
Scale #4:
[01---
01---] [---
01---01---
[00002222---
---] [---
------
[00003333---
---] [---
------
[00004444---
---] [---
------
---04
04] [ no
------
0404
---04
04]
------
0404
---04
04]
------
0404
---04
04]
------
0404
Page 11 of 44
no ]
nono
Page 12

PT300 Users manual
Example 2 of correct settings: 4 pad totalizing system using scales only:
Scale ID Number of Scales *Host setting
Rev G, Feb 2011
Scale #1:
Scale #2:
Scale #3:
Scale #4:
* Host setting is only available when scale ID is set to ‘01’
[01---
01---] [---
01---01---
[00002222---
---] [---
------
[00003333---
---] [---
------
[00004444---
---] [---
------
---04
04] [ yes
------
0404
---04
04]
------
0404
---04
04]
------
0404
---04
04]
0404
------
yes ]
yesyes
Serial Output Setup
There are three different serial output modes for the PT300, “on-demand”, “continuous”, and
“accumulating print”. The rest of this section provides more information on these modes.
To setup the serial output mode: Press the PRINT/ACCUMULATE and ZERO buttons
simultaneously until the display shows “bbbb.LitE
through the menu (12 times) until the display shows “Prt t
button once to display setting number. Set print mode to the number of the print mode wanted by
using the LOCAL/TOTAL button to increment and the ZERO button decrement the number. .
Communication Mode Setting
On-Demand 0
Continuous 1
Accumulating Print Axle 2
Accumulating Print Standard 3
Note: For best results, only set one scale to ‘1, ‘2 or ‘3. This should also be the scale you
are printing from. ‘0’ is the default setting.
Press the PRINT/ACCUMULATE button. Now the display will display “PbAUd
PRINT/ACCUMULATE button to change the baud rate set, press the LOCAL/ TOTAL or the
ZERO button to cycle through the baud rates available. The baud rates available are: 1200, 2400,
4800, 9600, 19200, 38400, 57600, and115200. When the desired baud rate is displayed, press
the PRINT/ACCUMULATE button. The baud rate only needs to be set on the scale doing the
printing. The settings are saved once PRINT/ACCUMLATE is pressed to advance the menu, and
the scale can then be turned off to exit the Mode Menu.
LitE”, Press the PRINT/ ACCUMULATE button to scroll
LitELitE
Prt t”. Press the PRINT/ACCUMULATE
Prt tPrt t
PbAUd”. Press the
PbAUdPbAUd
On-Demand
The weight is transmitted every time the PRINT/ACCUMULATE key is pressed. Press
PRINT/ACCUMULATE to print either the local or total weight (depending on the local/total
setting of the scale). This is the default print mode.
Continuous
The PT300 automatically and continuously outputs the weight at a rate of about once per
second.
Page 12 of 44
Page 13

PT300 Users manual
Rev G, Feb 2011
Data Format
When the serial output is set to either on-demand or continuous mode, the
transmitted data is in the format shown below:
AAAAAAA BB<cr><lf>
Item Meaning ASCII Hex ASCII Decimal
AAAAAAA weight
BB units “lb” or “kg”
<cr> carriage return 0D 13
<lf> linefeed 0A 10
The AAAAAAA field will vary in length depending on the length of the number and
could contain a decimal point and/or a minus sign. The weight will either be local
weight or total weight, depending on which mode you’re in.
Accumulating Print
See section titled “Using Accumulated Total” for both the Axle and the standard formats.
Using Accumulated Total
The PT300 platforms can be used separately, in pairs, or in groups to measure a support load or
the total weight in one measuring procedure.
To use the Accumulated Total feature, the scales need to be numbered correctly and the scale
you intend to print from or display the accumulated total must have it’s print mode set to one of
two ‘Accumulating Print’ modes. See the “Totalizing Setup” and “Serial Output Setup” sections for
details.
Accumulating Print Axle
Press the PRINT/ACCUMULATE button to add the current total weight to the accumulated
total weight. At the same time, a print ticket will be generated (assuming you have a printer
in the system). The print ticket format is in respect to a vehicle’s individual wheels and
axles or a standard weight accumulation mode.
For example wheel and axle, think of “WHL 1” as scale 1
and “AXL 1” as the total weight of scale 1 and scale 2.
The following print ticket example is a 4 scale system:
PRINT / ACCUMULATE
button has been pressed
PRINT / ACCUMULATE
button has been pressed
WHL 1: 7460 WHL 2:
7400
AXL 1: 14860
WHL 3: 10110 WHL 4:
10070
AXL 2: 20180
SUBTOTAL GRP 1: 35040
ACCUM TOTAL: 35040
WHL 1: 10110 WHL 2:
10070
AXL 1: 20180
WHL 3: 9800 WHL 4:
9500
AXL 2: 19300
SUBTOTAL GRP 2: 39480
ACCUM TOTAL: 74520
Page 13 of 44
Page 14
PT300 Users manual
scale
scales
this session
10110
1011010110
10110
this session
AC
ACAC
AC
.
2
2 2
2
39480
3948039480
39480
74520
7452074520
74520
Rev G, Feb 2011
Once a successful accumulation has occurred, press the LOCAL/TOTAL button to toggle
the display through the current local weight, current total weight, accumulated total, and the
number of accumulations that make up the total.
Current local
weight on this
Note: The scale will not accumulate and will display the error message “Ac
current weight is negative, zero, or if the weight is in motion. These Protections are added
to ensure that only valid readings are accumulated into the total. Also, after a successful
accumulation, ALL scales in the system must return to zero before you accumulate the next
weight. If you attempt to accumulate the next weight before allowing the scale(s) to return
to zero, the error message “Ac
The accumulated total weight can be viewed only on the scale you are accumulating from.
After the PRINT/ACCUMULATE button is first pushed; the display will show “Ac. X” as the
system will accumulate the next reading and send it to print. (X will show the number of
accumulations this session) Once a successful accumulation has occurred, pressing the
LOCAL/TOTAL button will cycle the display to show number of accumulations, current local
weight, current total weight on all scales, and the accumulated total. When the local
weight, current total weight, or accumulated total is displayed, the total icon will be lit up,
flashing, or off. (as shown on page)
Current total
weight on all
Ac.Err
AcAc
Err” will be displayed.
ErrErr
Total weight of
accumulations
Total number of
accumulations
Ac.Err
AcAc
Err” if the
ErrErr
Accumulating Print Standard
A standard accumulation shows total weight of multiple items weighed on 1 or more scales.
The following print ticket example is a 1 scale system after 3 items are weighed: (950lb,
1000lb, and 1500lb)
950 lb
ACCUM TOTAL: 950 lb
PRINT/ACCUMULATE
has been pressed
1000 lb
ACCUM TOTAL: 1950 lb
1500 lb
ACCUM TOTAL: 3450 lb
Page 14 of 44
Page 15

PT300 Users manual
scale
scales
this session
1500
15001500
1500
this session
AC
ACAC
AC
.
3
3 3
3
1500
15001500
1500
3450
34503450
3450
Rev G, Feb 2011
Once a successful accumulation has occurred, press the LOCAL/TOTAL button to toggle
the display through the current local weight, current total weight, accumulated total, and the
number of accumulations that make up the total.
Current local
weight on this
Note: The scale will not accumulate and will display the error message “Ac
current weight is negative, zero, or if the weight is in motion. These Protections are added
to ensure that only valid readings are accumulated into the total. Also, after a successful
accumulation, ALL scales in the system must return to zero before you accumulate the next
weight. If you attempt to accumulate the next weight before allowing the scale(s) to return
to zero, the error message “Ac
The accumulated total weight can be viewed only on the scale you are accumulating from.
After the PRINT/ACCUMULATE button is first pushed; the display will show “Ac
system will accumulate the next reading and send it to print. (X will show the number of
accumulations this session) Once a successful accumulation has occurred, pressing the
LOCAL/TOTAL button will cycle the display to show number of accumulations, current local
weight, current total weight on all scales, and the accumulated total. When the local
weight, current total weight, or accumulated total is displayed, the total icon will be lit up,
flashing, or off. (as shown in the display description).
Note: In print-mode 3 it can accumulate either in local or total weight, but not when viewing
the accumulated total.
To clear the accumulated total weight, press and hold the ZERO button until the display
shows “CLr
CLr.tttt“.
CLrCLr
Current total
weight on all
Ac.Err
AcAc
Err” will be displayed.
ErrErr
Total weight of
accumulations
Total number of
accumulations
Ac.Err
AcAc
Err” if the
ErrErr
Ac. X” as the
AcAc
Accumulating Procedure:
1. With your system setup correctly, decide which scale you will accumulate from. This can be
2. With the first group of items stable on the scales, press the PRINT/ACCUMULATE button. If
any scale, but once you choose, you must only accumulate with that scale until the weighing
is complete. This scale needs to be set to your desired accumulate mode, 2 or 3 (See “Serial
Output Setup”). If you are using a printer, select the scale directly connected to the printer.
you are using a printer, a print ticket with all weights will now be printed. The display will
return to the setting that the accumulation was taken from. This first group’s weight will
become the accumulated total, which can be seen on the display by pressing the
LOCAL/TOTAL button as described in the previous section with the TOTAL icon flashing.
Another accumulation can not be made in the standard mode if the scale is in the
Page 15 of 44
Page 16

PT300 Users manual
Rev G, Feb 2011
Accumulation Print mode. (TOTAL icon flashing). After accumulation, remove the first group
of items from the scale(s).
3. With the next group of items stable on the scale(s), press the PRINT/ACCUMULATE button.
This will add the total weight to the accumulated total. If you are using a printer, a print ticket
with all weights will now be printed.
4. Repeat step 3 as needed. If the accumulated total becomes too large to display, the “diSP
diSP”
diSPdiSP
message and error icon will be displayed.
5. When finished, you may clear the accumulated total weight by pressing and holding the ZERO
button until the display show “CLr
CLr.tttt“. The display will clear the accumulated total and the
CLrCLr
number of accumulations.
Note: The scale will not accumulate when the weight is negative, zero, or if the weight is in
motion. A display message “Ac
Ac.Err
Err” with error icon will be displayed if any of those
AcAc
ErrErr
conditions are present. After a successful accumulation the scale must return to zero
before you accumulate the next weight. If you attempt to accumulate the next weight
before allowing the scale to return to zero, a display message “Ac
Ac.Err
Err” with error icon will
AcAc
ErrErr
be displayed.
Page 16 of 44
Page 17

PT300 Users manual
Rev G, Feb 2011
Weighing procedures
The PT300 platforms can be used separately, in pairs, or in groups of 4, 6, or more to measure
a support load, wheel load, axle load, axle group load, or the total weight of a multi-axle truck
in one measuring procedure.
Ideally, all wheels of a vehicle should be measured at the same time in order to avoid
measuring errors due to the suspension system.
If you are not able to weigh the wheels of a tandem or triple axle simultaneously, the difference
in height must be compensated for by using dummy plates (grids, wood or rubber plates) of the
same height. The wheel load scales are put in front of the wheels of a vehicle, the driver then
drives on the scales/plates and stops within the active weighing area. To avoid improper
weighing which might be caused by wheel or axle load displacements, the vehicle brakes
should be released before reading the weight values.
NOTES:
1. It is recommended to weigh the wheels of one axle at the same time.
2. The dummy plates can be omitted if the scales are embedded in recesses in the road surface
at the same levels as the road surface.
Please see tables on the following page
Page 17 of 44
Page 18

Table 1: Weighing Combinations
PT300 Users manual
Rev G, Feb 2011
Page 18 of 44
Page 19

Typical Scale Layouts
PT300 Users manual
Rev G, Feb 2011
Page 19 of 44
Page 20

PT300 Users manual
Rev G, Feb 2011
Mode Menu
Mode Menu
To access the mode menu simultaneously press the PRINT/ACCUMULATE and ZERO buttons.
The display will show “bbbb.LitE
scale is in the RUN position. (shorting pins 2 and 3(RUN)
At times it will be necessary to enter up to a five digit number. When this is necessary the current
number will be displayed with the right most digit flashing. The flashing digit may be incremented
by pressing the LOCAL/TOTAL button. To move one digit to the left, press the ZERO key. When
you have finished entering a number press the PRINT/ ACCUMULATE button. The settings are
saved once PRINT/ACCUMLATE is pressed to advance the menu, and the scale can then be
turned off.
Step Function Note
bbbb.LitE
LitE
LitELitE
SEtP1
SEtP1
SEtP1SEtP1
SEtP2
SEtP2
SEtP2SEtP2
vEr
vEr.
vErvEr
AAAA. rt
rt
rtrt
AAAA.tHrS
tHrS
tHrStHrS
A off
A off
A offA off
Prt t
Prt t
Prt tPrt t
Pbaud
Pbaud
PbaudPbaud
Units
Units
UnitsUnits
Proto
Proto
ProtoProto
iiii.baud
baud
baudbaud
radio
radio
radioradio
Rf CH
Rf CH
Rf CHRf CH
Rf
Rf.pan
pan
RfRf
panpan
Rf
Rf.eCp
eCp
RfRf
eCpeCp
Rf
Rf.def
def
RfRf
defdef
LitE”. If it doesn’t, go to Calibration Enable Jumper section and verify the
LitELitE
Default
Backlight
Set Point 1 0 to 199999
Set Point 2 0 to 199999
Firmware Version View only XXXXX
Average rate 1 to 120
Average threshold 1 to 10000
Auto off 000 = off, 1 to 240
Print Mode 0 = On-demand, 1 = Continuous,
Printer baud rate 1200, 2400, 4800, 9600, 19200,
Measurement units lb or kg lb
Protocol
Interface baud rate 9600 or 115200
Radio Enable Yes or no
Radio Channel 01 to 12
Radio Network ID 0 to 65534
Radio encryption enable Yes or no
Radio Encryption Key 0 to 65534
Restore Radio Defaults 0 or 3
Auto
Auto, on
on, oFF
AutoAuto
2 = Accumulating Total Axle,
3 = Accumulating Total Standard
or 38400, 57600, 115200
StAnd
StAnd, Lo Pr
StAndStAnd
oFF
onon
oFFoFF
Lo Pr, CCCC.L00P
Lo PrLo Pr
L00P, or none
L00PL00P
none
nonenone
Auto
Auto
AutoAuto
199999
199999
199999199999
199999
199999
199999199999
008
008
008008
200
200
200200
060
060
060060
0000
9600
9600
96009600
Lo Pr
Lo Pr
Lo PrLo Pr
9600
9600
96009600
no
no
nono
1111
8000
8000
80008000
no
no
nono
00000
00000
0000000000
0000
Page 20 of 44
Page 21

PT300 Users manual
Rev G, Feb 2011
Setting the Mode Menu Parameters
1. Simultaneously press the PRINT/ACCUMULATE and ZERO buttons. The display will show
“bbbb.LitE
LitE”. Press the PRINT/ACCUMULATE button. The flashing display shows the current
LitELitE
setting. Press the ZERO or the LOCAL/TOTAL buttons to toggle between Auto, on, and
off. With ‘Auto’ selected (default), the backlight will automatically light up when low level
light conditions are detected. When the desired setting is displayed, press the PRINT/
ACCUMULATE button.
2. The display will show “SEtP1
shows the current setting. When the weight displayed is equal to or greater than the set
point, the corresponding icon is displayed on the LCD. During normal weighing mode, the
S1 icon on the display will light when the weight is greater than or equal to set point 1. Use
the LOCAL/TOTAL button the advance the number and the ZERO button to move the
number flashing to the left. When the display shows the desired number, press the
PRINT/ACCUMULATE button.
3. The display will show “SEtP2
shows the current setting. During normal weighing mode, the S2 icon on the display will
light when the weight is greater than or equal to set point 2. Use the LOCAL/TOTAL button
the advance the number and the ZERO button to move the number flashing to the left.
When the display shows the desired number, press the PRINT/ACCUMULATE button.
4. The display will show “vEr
show the current version of firmware loaded in the scale. Press the PRINT/ACCUMULATE
button.
5. The display will show “AAAA. rt
shows the current setting. This number is how many readings will be averaged together
before the reading is sent to the display. Higher values will result in a more stable reading,
but will take longer to settle to the final value. Note that the scale updates at 4Hz, so an
Average Rate of ‘8’ equates to 2 seconds of averaging. Enter a ‘1’ to effectively disable
averaging. Use the Lb/Kg button the advance the number and the ZERO button to move
the number flashing to the left. When the display shows the desired number, press the
PRINT/ACCUMULATE button.
6. The display will show “AAAA.tHrS
shows the current Average Threshold setting. This setting enables dynamic averaging,
which can improve the settling time of a large Average Rate. If the scale senses a large
weight change, it will temporarily suspend averaging, jump to the new weight, and resume
averaging. Enter a value of 1-10000 to set the threshold (in display divisions) at which the
dynamic averaging triggers. Enter ‘0’ to disable dynamic averaging. When disabled, the
averaging will never be suspended. When the display shows the desired number, press
the PRINT/ACCUMULATE button.
7. The display will show “AAAA. oFF
shows the current setting. The number displayed is the minutes that the scale can remain
idle before it automatically shuts down. Setting this number to “000
SEtP1”. Press the PRINT/ACCUMULATE button. The flashing digit
SEtP1SEtP1
SEtP2”. Press the PRINT/ACCUMULATE button. The flashing digit
SEtP2SEtP2
vEr”. Press the PRINT/ACCUMULATE button and the display will
vErvEr
rt”. Press the PRINT/ACCUMULATE button. The flashing digit
rt rt
tHrS”. Press the PRINT / ACCUMULATE button. The flashing digit
tHrStHrS
oFF”. Press the PRINT/ACCUMULATE button. The flashing digit
oFF oFF
000” will disable the
000000
Page 21 of 44
Page 22

function, meaning the scale will never shut itself off. Use the LOCAL/TOTAL button the
advance the number and the ZERO button to move the number flashing to the left. When
the display shows the desired number, press the PRINT/ACCUMULATE button.
8. The display will show “Prt t
Prt t”. Press the PRINT/ACCUMULATE button. The flashing digit
Prt tPrt t
shows the current setting. The number enables the scales different print modes. (0 for ondemand, 1 for continuous, 2 for accumulating total axle format, and 3 for accumulating total
standard format) Use the LOCAL/TOTAL button to increment and the ZERO button to
decrement the number. When the display shows the desired number, press the
PRINT/ACCUMULATE button.
9. The display will show “PbAUd
PbAUd”. Press the PRINT/ACCUMULATE button. The flashing
PbAUdPbAUd
display shows the current setting of the printer baud rate. The baud rates available are:
1200, 2400, 4800, 9600, 19200, 38400, 57600, and 115200. Use the LOCAL/TOTAL
button or the ZERO button to toggle through the available rates. When the display shows
the desired number, press the PRINT/ACCUMULATE button.
10. The display will show “UnitS
UnitS”. Press the PRINT/ACCUMULATE button. The lb or the kg
UnitSUnitS
icon will flash in the upper left of the display. This will set the scale to measure pounds (lb)
or kilograms (kg). Use the LOCAL/TOTAL button or the ZERO button to toggle between
the settings. When the desired icon is flashing, press the PRINT/ACCUMULATE button.
11. The display will show “Proto
Proto”. Press the PRINT/ACCUMULATE button. The flashing
ProtoProto
display shows the current setting. There are 4 protocol settings for the scale, Standard
(“StAnd
StAnd”), Low Power (“Lo Pr
StAndStAnd
Lo Pr”), Current Loop (“CCCC.L00P
Lo PrLo Pr
Standard is a setting for use in specific wireless and wired scale networks. Low Power
will significantly improve the wireless battery life for all non-‘host’ scales (maximum number
of scales in this mode is 32).
Current Loop is used when connecting to older legacy PT300 scales. The legacy cables
(part #’s 100488, 100489, or 100490) must be used when in this communication mode.
See section titled “Totalizing/Printing in Current Loop Mode” for more information.
When scales are not part of a totalizing network, battery life will be improved if “nonE
chosen. Use the LOCAL/TOTAL button or the ZERO button to cycle through the settings.
When the desired protocol is flashing, press the PRINT/ ACCUMULATE button.
12. The display will show “iiii.bAud
bAud”. Press the PRINT/ACCUMULATE button. The display will
bAudbAud
show the current setting flashing. This is the setting of the interface baud rate. There are
two settings available, 9600 and 115200. Use the LOCAL/TOTAL button or the ZERO
button to toggle between the settings. When the desired baud rate is flashing, press the
PRINT/ ACCUMULATE button.
13. The display will show “rAdio
rAdio”. Press the PRINT/ACCUMULATE button. The display will
rAdiorAdio
show the current setting flashing. This is the radio enable status and is either on or off.
Use the LOCAL/TOTAL button or the ZERO button to toggle between the settings. When
the desired status is flashing, press the PRINT/ ACCUMULATE button. If you select “no”
the scale will skip the rest of the settings and return to normal weighing.
L00P”), or “None
L00PL00P
None”.
NoneNone
PT300 Users manual
Rev G, Feb 2011
nonE” is
nonEnonE
Page 22 of 44
Page 23

14. The display will show “rF CH
rF CH”. Press the PRINT/ACCUMULATE button. The flashing digit
rF CHrF CH
shows the current setting. All scales in a system must be set to the same radio channel
setting in order to communicate with each other. Use the LOCAL/TOTAL button to
increment and the ZERO button to move the number flashing to the left. When the display
shows the desired number, press the PRINT/ACCUMULATE button.
15. The display will show “rF
rF.PAn
PAn”. Press the PRINT/ACCUMULATE button. The display will
rFrF
PAnPAn
show the current setting with the number on the right flashing. All scales in a system must
be set to the same Personal Area Network ID setting in order to communicate with each
other. Use the LOCAL/TOTAL button to increment and the ZERO button to move the
number flashing to the left. When the display shows the desired number, press the
PRINT/ACCUMULATE button.
16. The display will show “rF
rF.ECP
ECP”. Press the PRINT/ACCUMULATE button. The display will
rFrF
ECPECP
show the current setting flashing. This is the encryption enable status and is either on or
off. Use the LOCAL/TOTAL button or the ZERO button to toggle between the settings.
When the desired status is flashing, press the PRINT/ ACCUMULATE button. If “Yes
selected go to the next step. If “no
17. The display will show “00000
00000” with the number on the right flashing. Use the
0000000000
no” was selected got to step 17.
nono
LOCAL/TOTAL button to increment and the ZERO button to move the number flashing to
the left. Enter any number from 0 to 65534. This is the encryption key. For security
purposes, this setting is not accessible to view and will always show as “00000
don’t want to change the key enter “00000
00000” to leave it unchanged. All scales in a system
0000000000
must be set to the same encryption key setting in order to communicate with each other.
When the desired encryption key is displayed, press the PRINT/ ACCUMULATE button.
18. The display will show “rF
rF.dEF
dEF”. Press the PRINT/ACCUMULATE button. The display will
rFrF
dEFdEF
show “0000” with the number flashing. Use the LOCAL/TOTAL button to increment and the
ZERO button to decrement the number. Setting the number to 3 will restore the default
radio settings. All other numbers will have no affect on the radio set-up. When the desired
number is flashing, press the PRINT/ ACCUMULATE button. The scale will return to
normal weighing.
If the scale does not have the radio option installed, the “rF CH
rF CH”, “rF Pan
rF CHrF CH
Encryption key will be view only.
PT300 Users manual
00000”. If you
0000000000
rF Pan”, “rF ECP
rF PanrF Pan
rF ECP” and the
rF ECPrF ECP
Rev G, Feb 2011
Yes” was
YesYes
Page 23 of 44
Page 24

Cabled Scale Usage
Legacy PT300
PT300 Users manual
Rev G, Feb 2011
Totalizing/Printing in Current Loop Mode
To use your next generation PT300 scales with the older legacy PT300 scales, the scales need to
be set to Current Loop (“CCCC.L00P
Before you attempt to do either of these, a few terms and definitions must be understood. These
terms only apply to scales that are cabled together. Also, legacy cables (part #’s 100488,
100489, 100490) are wired differently than the next generation PT300 cables (part #’s 101029,
101032, 101035) and must be used in Current Loop communication mode.
Master Scale: If more than one scale is being used, the first scale in line is referred to as
the Master Scale. Normally these scales have continuous output, If you requested a
demand output use the print button on this scale when printing or totalizing.
Slave Scale: If more than one scale is being used, any scale that is not the master scale
is referred to as a Slave Scale.
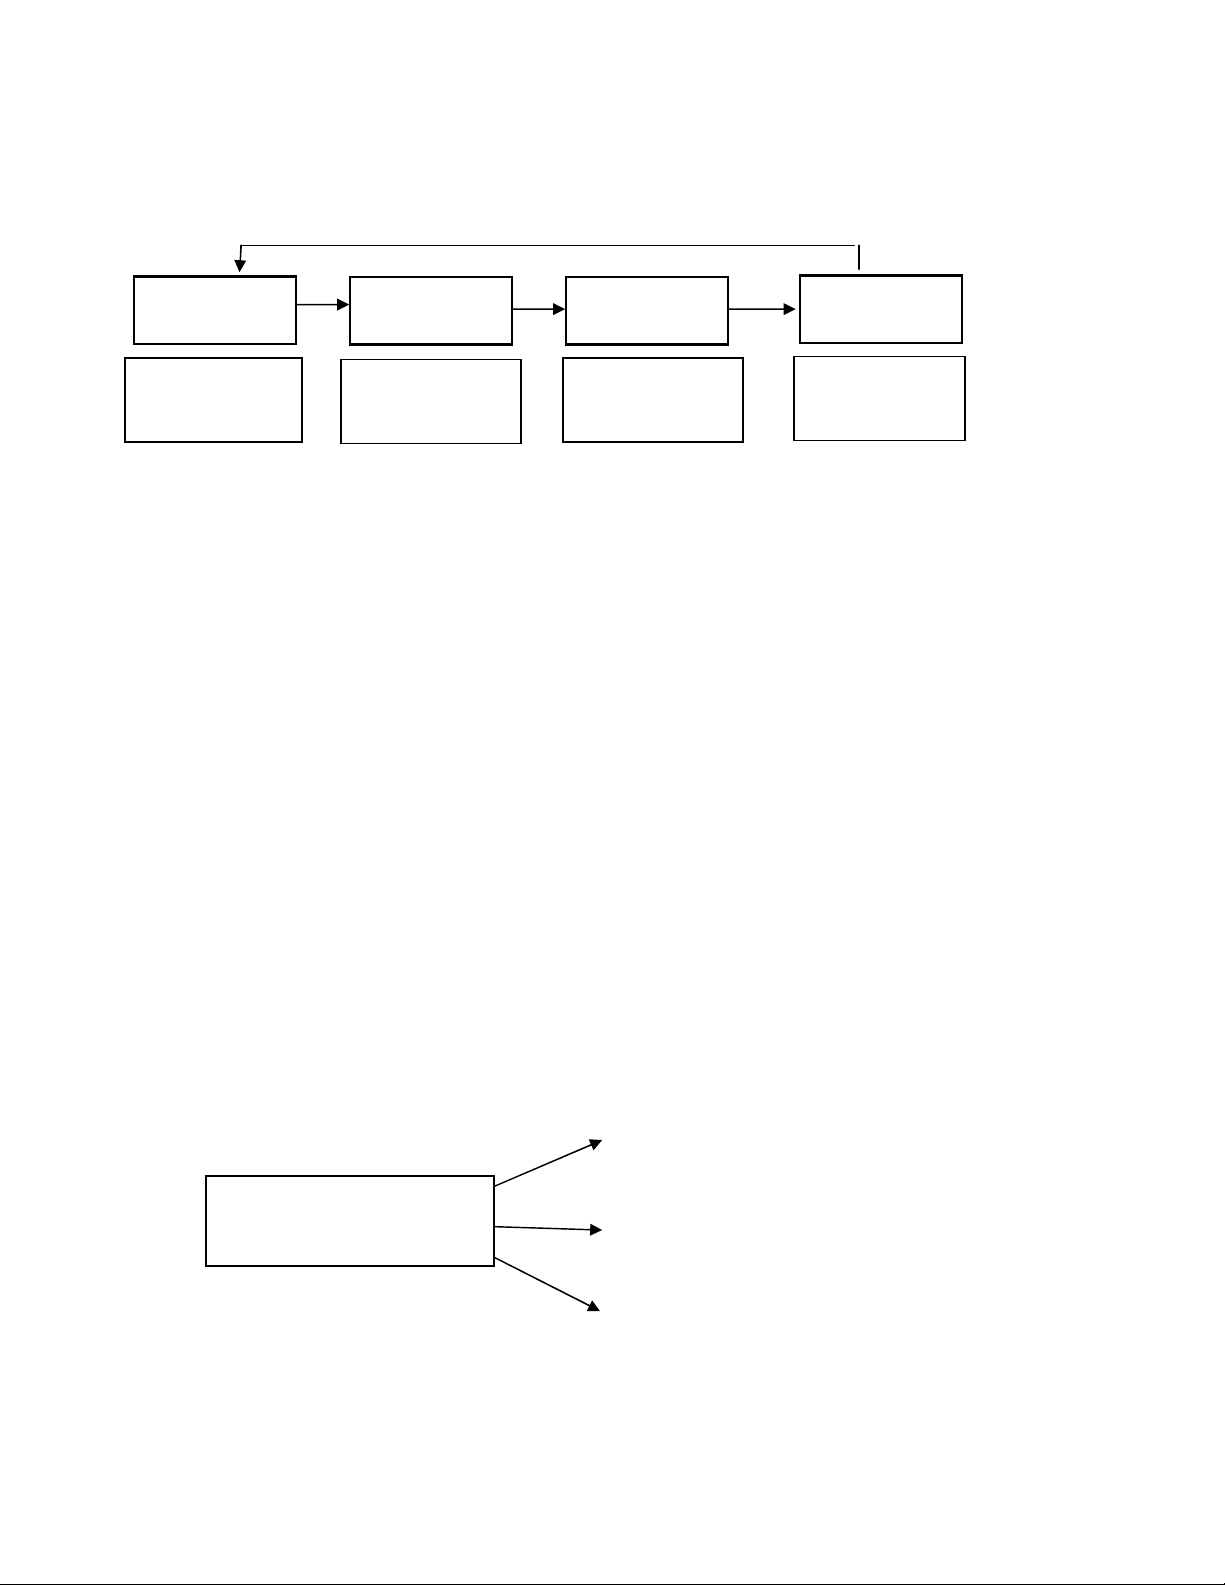
Master Slave Slave Slave
scale A scale B scale C scale D
L00P”) mode. Change the protocol (“Proto
L00PL00P
Proto”) option in the mode menu.
ProtoProto
Printer
Example of Master/Slave designations
The master and slave designations are determined by the cable and not the scale itself. The cable
also determines if the scale transmits data on demand (when the print button is pushed) or
continuously. If continuous, the print button doesn't have to be activated to totalize or print.
Please refer to the cabling diagrams
Page 24 of 44
Page 25

PT300 Users manual
Rev G, Feb 2011
Totalizing
When more than one scale is being used, the last one in line can be used to show the total
weight of all the scales added together. To totalize, turn on the scales in sequential order
starting with the master scale (“scale A") and make sure all of the slave scales are in the total
mode. The indicating bar on the upper left side of the display is on when in the total mode. This
does not mean that the scale is receiving; only that it is capable of receiving.
If transmitting on demand, press the print button on the master scale and the last scale in line
(slave scale D in the diagram) will show the total weight of all the scales.
Example: Scale A will display the total of A only.
Scale B will display the total of A + B.
Scale C will display the total of A + B + C.
Scale D will display the total of A + B + C + D.
Printing
Use the print button on the master scale when printing. If more than one scale is being used,
put the slave scale(s) in the total mode. This will allow the printer to print the total weight of all
the scales.
NOTE: The important thing to remember is that the printer will print whatever is displayed
on the last scale in line before the printer.
In addition to the weight, the printer will print a letter that signifies the number of scales that it
printed the weight from.
Example: The letter A signifies the weight is from one scale. The letter B signifies the weight is
from two scales etc..
Page 25 of 44
Page 26

PT300 Users manual
Rev G, Feb 2011
Data Interface
Serial ASCII
20 mA current loop, active or passive. (The PT300 supplies the current for active current loop,
and an external current is used for passive current loop. Passive is preferred for longer battery
use between charges.)
1200 Baud
8 data bits
1 start bit
2 stop bits
no parity
M Kg
Transmission Format: A_O_-XXXXXXX._Lb<CR><LF>
Z
Format explanation: A = Scale code (Signifies the scale, could be
A for scale A, B for scale B etc..)
Space
M,O,Z = Error code (M = motion, O = over-capacity,
Z = zero, space = no error)
Space
Minus sign if negative, space if positive.
8 data bits
Space
Pounds/Kilograms
Carriage return
Line feed
Page 26 of 44
Page 27

PT300 Users manual
1
2
Rev G, Feb 2011
Calibration
Note: The PT300 scale is calibrated by the factory prior to shipment.
Note: The calibration will achieve the best accuracy if calibration loads are applied to PT300
platform through a metal block, separated from the platform by a thick piece of firm rubber; this
setup best simulates the load applied by a tire. Loading without a block can damage the scale.
See Tool List below for complete specifications.
Procedure: Calibration (Verification)
Check front/back load cell balance
Tools required
Twenty thousand pound calibration press.
1.5" x 1.5" x 12" aluminum loading block.
Static dissipation station.
#2 Phillips screwdriver for bezel and board mounts.
Small slotted blade screwdriver.
Torque-seal potentiometer shaft sealer.
Caution:
The following procedure must be performed at a static controlled workstation.
Load cell locations used in the following procedure are shown below.
Load Cell Placement
Page 27 of 44
Page 28

PT300 Users manual
Rev G, Feb 2011
1. Position the corner fixture with rubber pad on the scale position #1. Apply 2500 lbs to the
loading block. Annotate the reading.
2. Repeat for the #2 position.
3. If all readings are within 5 pounds and the previous calibration passed all of the readings
continue with the rest of the calibration verification. If the corner check fails go to the corner
adjust calibration procedure.
Scale Span Calibration
Tools required:
•
Calibration force generator; press or deadweights. This calibration source must cover the
range of 10% to 100% of nominal capacity with an accuracy of 0.25% of reading or better.
PT300
•
100027 - 8" (± 0.25") x 8" (± 0.25") x 1.75" (minimum) aluminum loading block.
•
100028-A - 8" (± 0.25") x 8" (± 0.25") x 0.5" (± 0.125") rubber loading scale. (40 to 70 Shore A
rating)
PT300DW
•
100029
•
100030-A
A rating)
4. Bring the scales to the calibration site. If there is more than 5°F difference in temperature
between the scale temperature and the calibration site allow the scales to reach room
temperature.
5. Place scale on calibration fixture. Turn scale on. Wait 3 minutes for warm-up.
6. Apply test forces every 10% of the scales capacity and verify that the reading falls within 1% of
the applied force or 1 display division whichever is greater as shown in the sample table below.
7. If any value is out of acceptable limits proceed to the adjust calibration procedure.
8. If all values are within acceptable limits unit passes calibration verification.
- 12" (± 0.25") x 12" (± 0.25") x 1.75" (minimum) aluminum loading block.
- 12" (± 0.25") x 12" (± 0.25") x 0.5" (± 0.125") rubber loading scale. (40 to 70 Shore
20K Capacity
Test
force
(lb)
0 0 0
2000
4000
6000
8000
10000
12000
14000
16000
18000
20000
0 -20 20
Lower
limit
(lb)
1980
3960
5940
7920
9900
11880
13860
15840
17820
19800
Upper
Limit
(lb)
2020
4040
6060
8080
10100
12120
14140
16160
18180
20200
Page 28 of 44
Page 29

PT300 Users manual
Rev G, Feb 2011
Procedure: Calibration (Adjustment)
Tools required:
•
Calibration force generator; press or deadweights. This calibration source must cover the
range of 10% to 100% of nominal scale capacity with a certified accuracy of 0.25% of reading
or better.
PT300
•
100027 - 8" (± 0.25") x 8" (± 0.25") x 1.75" (minimum) aluminum loading block.
•
100028-A - 8" (± 0.25") x 8" (± 0.25") x 0.5" (± 0.125") rubber loading scale. (40 to 70 Shore A
rating)
PT300DW
•
100029
•
100030-A
A rating)
•
140208 - #2 Phillips screwdriver.
•
140210 - Static dissipation station.
- 12" (± 0.25") x 12" (± 0.25") x 1.75" (minimum) aluminum loading block.
- 12" (± 0.25") x 12" (± 0.25") x 0.5" (± 0.125") rubber loading scale. (40 to 70 Shore
Page 29 of 44
Page 30

PT300 Users manual
Rev G, Feb 2011
Calibration Enable Jumper
To access the calibration mode the shorting strap labeled “RUN/CAL”, located on the right-middle
of the circuit board (Intercomp, A/D 20 BIT rev E), it must be moved from shorting pins 2 and
3(RUN); to shorting pins 1 and 2(CAL). To access the shorting strap, remove the 10 screws on
the outside edges of the display assembly. Carefully lift the display assembly up and place the
assembly, display side down, on top of the weighing platform.
Following calibration, replace the strap to shorting pins 2 and 3 (RUN); replace the assembly and
reattach the assembly with the screws. This will ensure that the calibration information of the
scale is protected from being changed.
Note: Care must be taken to ensure the wire harness is seated properly to prevent it from
being pinched between the display assembly and the scale casing.
Page 30 of 44
Page 31

PT300 Users manual
Rev G, Feb 2011
Calibration menu
To initiate calibration simultaneously press the PRINT/ACCUMULATE and ZERO buttons. The
display will show “StEP
calibration. Return to ‘Calibration Enable Jumper’ section to verify correct setting. Press the
PRINT/ACCUMULATE button to access the parameter setting.
At times it will be necessary to enter up to a five digit number. When this is necessary the current
number will be displayed with the right most digit flashing. The flashing digit may be incremented
by pressing the LOCAL/TOTAL button. To move one digit to the left, press the ZERO key. When
you have finished entering a number press the PRINT/ ACCUMULATE button. The settings are
saved once PRINT/ACCUMLATE is pressed to advance the menu, and the scale can then be
turned off.
StEP
StEP
StEPStEP
UUUU. EnA
bP 1
bP 1
bP 1bP 1
bP 2
bP 2
bP 2bP 2
bP 3
bP 3
bP 3bP 3
AdC
AdC.rt
AdCAdC
2Er0
2Er0.rrrr
2Er02Er0
ggggrAd
LL-01
LL-01
LL-01LL-01
HH
HH-01
HHHH
LL
LL-01
LLLL
HH
HH-02
HHHH
LL
LL-02
LLLL
HH
HH-03
HHHH
LL-03
LL-03
LL-03LL-03
HH-04
HH-04
HH-04HH-04
LL-04
LL-04
LL-04LL-04
StEP”, if it does not, the calibration strap is incorrectly placed to allow
StEPStEP
Step Function Note
skip 000= no skip
001= skip to Weight Calibration
003= skip to cornering routine
EnA
EnA EnA
A2t
A2t
A2tA2t
rAd
rAdrAd
CAP
CAP
CAPCAP
Unit enable Yes or no
grad break point 1 Enter weight
grad break point 2 Enter weight
grad break point 3 Enter weight
ADC rate 0 or 1
rt
rtrt
AZT (auto zero tracking) 1 d, 3 d, .5 d, oFF, or.6 d
Zero range 0= off, 1= 1%, 2= 2%, 3= 5%,
4 = 1%
graduation size 0.02, 0.05, 0.1, 0.2, 0.5, 1, 2, 5,
10, 20, 50, or 100
SAVE
SAVE
SAVESAVE
capacity Enter scale capacity
No weight applied
First weight Enter first weight
01
0101
First weight Load first weight
01
0101
Second weight Enter second weight
02
0202
Second weight Load second weight
02
0202
Third weight Enter third weight
03
0303
Third weight Load third weight
Fourth weight Enter fourth weight
Fourth weight Load fourth weight
10 points available to enter 3 minimum recommended
Displays for 1 sec and advances
Default
000
000
000000
YES
YES
YESYES
00000
00000
0000000000
00000
00000
0000000000
00000
00000
0000000000
1111
1 d
1 d
1 d1 d
0000
d 1
d 1
d 1d 1
20000
20000
2000020000
Page 31 of 44
Page 32

PT300 Users manual
Rev G, Feb 2011
Setting the Calibration Parameters
1. At any point in the following steps, data will be retained by the scale at the step completed if
the power is cycled off. To initiate calibration simultaneously press the PRINT/ACCUMULATE
and the ZERO buttons. The scale shows “StEP
The scale shows “000
000” with the far right number flashing. To go through all of the calibration
000000
parameters, press PRINT/ ACCUMULATE with the display showing “000
calibration parameters and proceed to step 11 enter “001
additional codes available. Use the LOCAL/TOTAL button to increment and the ZERO button
to decrement the number. Press the PRINT/ ACCUMULATE button when the desired number
is displayed.
3. The display shows “UUUU. EnA
ACCUMULATE button. The display will read “YES
button will toggle the display to “no
PRINT/ACCUMULATE button.
4. The display now shows “bP 1
the current setting with the far right number flashing. Use the LOCAL/TOTAL button to
advance the number and the ZERO button to move the number flashing to the left. When the
desired graduation break point is displayed press the PRINT/ ACCUMULATE button.
5. The display shows “bP 2
step 3 for graduation break point 2. When the desired graduation break point is displayed
press the PRINT/ACCUMULATE button.
6. The display shows “bP 3
step 3 for graduation break point 3. When the desired graduation break point is displayed
press the PRINT/ACCUMULATE button.
EnA” if proceeding through all parameters. Press the PRINT/
EnAEnA
no”. With the display showing “YES
nono
bP 1”. Press the PRINT/ACCUMULATE button. The display will read
bP 1bP 1
bP 2”. Press the PRINT/ACCUMULATE button. Repeat the process in
bP 2bP 2
bP 3”. Press the PRINT/ACCUMULATE button. Repeat the process in
bP 3bP 3
StEP”. Press the PRINT/ACCUMULATE button.
StEPStEP
000”. To skip the first 8
000000
001”. See Diagnostics section for
001001
YES”. Pressing LOCAL/TOTAL or the ZERO
YESYES
YES”, press the
YESYES
Multiple Graduation Break Points
The PT300 has the ability to have multiple graduation values set. Following is an example
of setting graduation break points. Example:
Grad = Initial graduation equals by 0.1 lb
Cap = 10000 (Capacity equals 10,000 lb)
bP 1
bP 1 = 1000
bP 1bP 1
bP 2
bP 2 = 2000
bP 2bP 2
bP 3
bP 3 = 5000
bP 3bP 3
Page 32 of 44
Page 33

PT300 Users manual
Rev G, Feb 2011
The scale would then display the following:
up to 1000 lb by 0.1 lb; up to 453.55 kg by 0.05 kg
1000+ to 2000 lb by 0.2 lb; 453.55+ to 907.1 kg by 0.1 kg
2000+ to 5000 lb by 0.5 lb; 907.1+ to 2267.8 kg by 0.2 kg
5000+ lb by 1.0 lb; 2267.8+ kg by 0.5 kg
To disable the breakpoints the graduation break points should be set to 110% of the
capacity. The scale uses the same graduation from zero to capacity. This turns off the
breakpoint feature.
7. The display shows “AdC
AdC.rt
rt”. Press the PRINT/ACCUMULATE button. The display shows the
AdCAdC
rtrt
current setting flashing. This sets the internal A/D conversion time at one of two choices. An
entry of ‘0’ results in the full conversion time for the most stable results. An entry of ‘1’ results
in a reduced conversion time which extends battery life. For the PT300 it is recommended to
leave this set to ‘1’. Note that if this setting is changed, the scale must be recalibrated. Use
the LOCAL/TOTAL button to increment and the ZERO button to decrement the number.
When the desired ADC rate is displayed press the PRINT/ACCUMULATE button.
8. The display shows “AZt
AZt”. Press the PRINT/ACCUMULATE button. The display shows the
AZtAZt
current setting. Press the LOCAL/TOTAL or the Zero button to cycle through the auto zero
tracking options. (1 d
1 d, 3 d
3 d, .5 d
1 d1 d
3 d3 d
5 d. oFF
oFF, or 6 d
5 d5 d
oFFoFF
6 d) If the displayed weight is less than the number
6 d6 d
of grads shown for a given amount of time, the weight will be zeroed off. When the desired
auto zero tracking setting is displayed press the PRINT/ACCUMULATE button.
9. The display shows “ZEr0
ZEr0.rrrr”. Press the PRINT/ACCUMULATE button. The display shows the
ZEr0ZEr0
current setting flashing. Use the LOCAL/TOTAL button to increment and the ZERO button to
decrement the number. The zero range is the percentage the zero can move from the original
zero obtained at calibration. The zero button will not work if outside the zero range; and the
display will show “ZEr0
ZEr0.rrrr” with the error icon lit if the zero range is set to 1, 2, or 3. If 4-6 is
ZEr0ZEr0
selected, the zero button will simply not function when an attempt is made to zero the scale
outside the range. When the number for desired zero range number is displayed press the
PRINT/ACCUMULATE button. (0=off, 1=1%, 2=2%, and 3=5%, 4=1%, 5=2%, 6=5%)
10. The display shows “GGGGrAd
rAd”. Press the PRINT/ACCUMULATE button. The display shows the
rAdrAd
current setting with the number flashing. Press the LOCAL/TOTAL or the Zero button to cycle
through the graduation options. When the desired graduation setting is displayed press the
PRINT/ACCUMULATE button. (grad options 0.02, 0.05, 0.1, 0.2, 0.5, 1, 2, 5, 10, 20, 50, or
100)
Note: The numbering for the “setting the calibration parameters” continues at Span
Calibration.
At this point the display will show “SAvE
SAvE” for about 1 second and advance to show “CAP
SAvESAvE
CAP”.
CAPCAP
Page 33 of 44
Page 34

PT300 Users manual
1
2
Rev G, Feb 2011
Weight Calibration
One to ten load weights need to be applied to calibrate the scale. Using multiple point calibration
allows the unit to weigh more accurately; by removing undesirable characteristics of load cells. A
typical weight calibration is a three point calibration. This means three different and optimal loads
are applied and entered (not including the zero point). If you do not conveniently have the three
different weights available, you may also use one or two point calibration. To calibrate with one
point, simply turn off the scale after completing step 13 as listed below. To calibrate with two
points, turn off the scale after completing step 15 as listed below. The PT300 has the capability to
apply and load up to 10 calibration points.
Corner Calibration (Both load cells)
Caution: Avoid directly touching any exposed circuitry. Use cotton gloves or similar protection.
Oils from the fingers will cause unacceptable performance in high humidity conditions. This
degradation may not be obvious at the time of contamination. If the circuitry becomes
contaminated it must be cleaned using isopropanol or an equivalent cleaner.
Note: If the scale fails corner verification perform the following routine. If the span is the
only thing that need to be calibrated skip this section and go to span calibration.
1. Turn scale ON.
2. Press the PRINT / ACCUMULATE button. The display should show “StEP
Cal Enable Switch Access section and press the cal enable switch. Press the PRINT /
ACCUMULATE button.
3. The display shows “000
button until the display shows “003
the PRINT / ACCUMULATE button.
4. The display shows “LLLLCCCC.bAL
show one digit flashing. This is the number of load cells in the scale. Increase the number
000” with the most right digit flashing. Increase the number with the Lb/Kg
000000
003”. This will access the Load Cell Balance routine. Press
003003
bAL”. Press the PRINT / ACCUMULATE button and the display will
bALbAL
Page 34 of 44
StEP”. If not return to the
StEPStEP
Page 35

PT300 Users manual
Rev G, Feb 2011
with the Lb/Kg button or decrease the number with the Zero button until the display shows “2222”.
This is the number of load cells in the PT300. (Unless you have a 30K or 40K PT300DW,
which has 4 load cells, enter “4444” in this case) If the number was changed the scale will save
and restart. If this happens go back to step 2. If the number isn’t changed the display will
show “LC 00
5. Press PRINT / ACCUMULATE to read the zero load. For this step it doesn’t matter if there are
loading blocks on the scale or not.
6. The display will show “LC1-0
as per figure above. With no weight on the scale except the loading block fixture, press the
PRINT ACCUMULATE button.
7. The display will show “LC1-L
same loading fixture. Once the load is applied press the PRINT ACCUMULATE button.
8. The display will show “LC2-0
as per figures 1 and 2 above. With no weight on the scale except the loading block fixture,
press the PRINT ACCUMULATE button.
9. The display will show “LC2-L
same loading fixture. Once the load is applied press the PRINT ACCUMULATE button.
10. The display will show “SAvE
been internally compensated and saved. Perform corner calibration verification in normal
weighing mode. This concludes the corner calibration.
11. To access the Span calibration, simultaneously press the PRINT/ACCUMULATE and the
ZERO buttons. The scale shows “StEP
shows “000
press PRINT/ ACCUMULATE with the display showing “000
parameters and proceed to span calibration enter “001
LC 00”.
LC 00LC 00
LC1-0”. Prepare load cell 1 using the loading block and the rubber pad
LC1-0LC1-0
LC1-L”. Apply ¼ of the capacity of the scale to load cell 1 using the
LC1-LLC1-L
LC2-0”. Prepare load cell 2 using the loading block and the rubber pad
LC2-0LC2-0
LC2-L”. Apply ¼ of the capacity of the scale to load cell 2 using the
LC2-LLC2-L
SAvE” and then return to normal weighing mode. The cornering has now
SAvESAvE
StEP”. Press the PRINT/ACCUMULATE button. The scale
StEPStEP
000” with the far right number flashing. To go through all of the calibration parameters,
000000
000”. To skip the first 8 calibration
000000
001”.
001001
Corner Calibration (Single load cell)
1. Position the scale, loading block and pad to apply weight on the corner requiring
adjustment.
2. Enter Cal mode.
3. Enter “20
the code as ‘x’. (Example: Enter “202
4. The display will appear to return to normal mode, except that now the ‘S1’ and ‘S2’
segments are blinking to indicate you are now in corner adjust mode for your selected
corner.
5. Apply ¼ of the scales capacity to the loading pad over the corner to be adjusted.
6. Press LOCAL/TOTAL to increase or ZERO to decrease the corner’s weight. (Each press
adjusts the display approximately 0.01%)
7. When the desired weight is showing on the display, press PRINT / ACCUMULATE to save
the results and return to normal weighing. Return to calibration verification section and
ensure all calibration parameters are met.
20x” at “StEP
2020
StEP” choice to adjust a single corner. The cell number to adjust is entered in
StEPStEP
202” to enter mode to adjust cell #2).
202202
Page 35 of 44
Page 36

PT300 Users manual
Rev G, Feb 2011
Span Calibration
Note: The numbering from the “setting the calibration parameters” continues here.
11. The display will show “SAvE
PRINT/ ACCUMULATE button. The display will show the current capacity setting with the far
right number flashing. Use the LOCAL/TOTAL button the advance the number and the ZERO
button the move the number flashing to the left. Enter the capacity of the scale and press the
PRINT/ACCUMULATE button when the scale capacity is displayed.
12. The display shows “LL-00
ACCUMULATE button.
13. The display shows “HH-01
“00000
00000” with the far right number flashing. Use the LOCAL/TOTAL button to advance the
0000000000
number and the ZERO button to move the number flashing to the left. Enter the value of the
first load and press the PRINT/ACCUMULATE button when the value of the first load is
displayed.
14. The display shows “LL-01
scale press PRINT/ACCUMULATE button.
15. The display shows “HH-02
“00000
00000” with the far right number flashing. Use the LOCAL/TOTAL button to advance the
0000000000
number and the ZERO button to move the number flashing to the left. Enter the value of the
second load and press the PRINT/ACCUMULATE button when the value of the second load is
displayed.
16. The display shows “LL-02
to the scale press PRINT/ACCUMULATE button.
17. The display shows “HH-03
“00000
00000” with the far right number flashing. Use the LOCAL/TOTAL button to advance the
0000000000
number and the ZERO button to move the number flashing to the left. Enter the value of the
third load and press the PRINT/ACCUMULATE button when the value of the third load is
displayed.
18. The display shows “LL-03
the scale press PRINT/ACCUMULATE button.
19. The display shows “HH-04
“00000
00000” with the far right number flashing. Use the LOCAL/TOTAL button to advance the
0000000000
number and the ZERO button to move the number flashing to the left. Enter the value of the
forth load and press the PRINT/ACCUMULATE button when the value of the forth load is
displayed.
SAvE” for about 1 second and advance to show “CAP
SAvESAvE
LL-00”. With no weight applied to the scale press the PRINT/
LL-00LL-00
HH-01”. Press the PRINT/ACCUMULATE button. The display will show
HH-01HH-01
LL-01”. Apply the first load to the scale. With the first load applied to the
LL-01LL-01
HH-02”. Press the PRINT/ACCUMULATE button. The display will show
HH-02HH-02
LL-02”. Apply the second load to the scale. With the second load applied
LL-02LL-02
HH-03”. Press the PRINT/ACCUMULATE button. The display will show
HH-03HH-03
LL-03”. Apply the third load to the scale. With the third load applied to
LL-03LL-03
HH-04”. Press the PRINT/ACCUMULATE button. The display will show
HH-04HH-04
CAP”. Press the
CAPCAP
Page 36 of 44
Page 37

PT300 Users manual
Rev G, Feb 2011
20. The display shows “LL-04
LL-04”. Apply the forth load to the scale. With the forth load applied to
LL-04LL-04
the scale press PRINT/ACCUMULATE button.
Repeat step 12 and 13 for each additional “HH-05
HH-05” – “HH10
HH-05HH-05
HH10” and “LL-05
HH10HH10
LL-05”- “HH10
LL-05LL-05
HH10” combination. If
HH10HH10
the scale is turned off at any time the calibration data acquired to that point will be retained. After
the PRINT/ACCUMULATE button is pressed after “LL-10”, the display will return to normal
weighing.
Finished
Following calibration, replace the strap to shorting pins 2 and 3 (RUN); replace the assembly and
reattach the assembly with the screws. This will ensure that the calibration information of the
scale is protected from being changed.
Note: Care must be taken to ensure the wire harness is seated properly to prevent it
from being pinched between the display assembly and the scale casing.
Page 37 of 44
Page 38

PT300 Users manual
Rev G, Feb 2011
Troubleshooting
Problem Table
The following table describes some symptoms with possible causes and solutions.
Symptom No power up, nothing on display
If any power reaches the control panel, the display driver turns on some random segments. Since we are not seeing
this we will assume that no power is reaching the scale circuitry.
Some possible causes:
Defective wiring harness: Inspect for damaged wiring.
Defective battery pack: Measure battery voltage, charge or repair as needed.
Defective ON switch: Bridge switch to see if unit turns on.
Defective circuitry: Replace control panel.
The power supply may be delivering power, but it might be eaten up with a defective circuit board or cable. Unplug
the load cell cable. If the scale turns on at this point, a load cell lead is shorted. Turn the power off and try each cell
lead in turn. If it is the load cell cable, look for a crushed cable.
Symptom Power up to random display
We know that some power is reaching the display driver circuit, but the control panel is not working correctly. Test
for low battery voltage. Inspect for visible damage. If this fails replace the control panel.
Symptom Scale shuts off
If the scale turns off IMMEDIATELY after you take your finger off the off button, you may have very low batteries. If
this is not the cause replace the control panel.
Symptom "Locks up"
The scale may be mis-programmed. This can be corrected by restoring the correct control parameters. If the
Average Rate setting is very high, an active load may not update the display quickly which may be interpreted as a
lock up
Symptom No backlight
Cover the light sensor window. If the light does not turn on, replace the control panel. Please note that the light is
not visible in bright sunlight.
Symptom Slow operation
This may be caused by a programmed change in the filter setting. There is a tradeoff between speed and stability of
the display reading. This can be tuned by changing the “Average Rate” setting.
Symptom Low battery indicator won't turn off
It is possible that the output from the batteries is really low. Look at the cells and charger circuit for these problems.
If the battery voltage is correct then you will need to replace the control panel.
Symptom Jumpy or drifty weights
This can usually be traced to contamination on circuit boards or a bad load cell. This can also be caused by a rapid
change in temperature. The scales need at least one-hour acclimation time for each 10 degrees Fahrenheit of
temperature change. Another possibility is powerful radio interference.
Symptom No response to one or more keys
The switch may be defective. The control panel may be defective. The zero key does not function while the scale is
in motion, this is not a defect. Also, the scale may be programmed to ignore the zero key if there is more than a
certain amount of weight on the platform.
Symptom "Bad" weights
First, check weighing technique. Are there air currents around the vehicle being weighed? Are the operators using
dummy blocks on the un-weighed wheels? (NOT a recommended technique) Are the scales being used on level
ground? Is the scale set on the wrong units settings? Is a new operator using the scales? If on a calibration press,
are you using weight distribution blocks and rubber scales? Is the reference scale correct? Assuming all this, is the
scale spanned correctly? If the reading is exactly 3/4 of the expected value, one of the cells leads may not be
providing signal. This would probably be in the load cell or control circuit. The interconnecting wiring or cables may
be pinched, cut or crushed.
Symptom Batteries won't charge
Check for bad batteries. The charger circuit could be out. Check for bad connections or a defective charging cable.
Look at the power source, whether it's a plug-in transformer, transport cart, or automotive ignition. Remove the
battery cap with the scale plugged into the charger. If the scale turns on then the charger is working.
Caution: Changing any circuit board or load cell will affect the calibration. The calibration should
be verified after any repairs.
Page 38 of 44
Page 39

PT300 Users manual
clear the problem,
Rev G, Feb 2011
Error Messages
Error messages displayed can be a helpful diagnostic tool. The following table describes some
possible causes and solutions.
Message Meaning
'EEPE
EEPE'
EEPEEEPE
Calibration information is held in a special permanent memory area. A checksum code is generated and written to this
memory during the calibration process. Each time the power is turned on this code is regenerated and compared to the
stored value. If a change is found this error message is displayed. Recalibration may clear the error display, but if the
problem persists the control panel will have to be replaced.
'AD1
AD1'
AD1AD1
The A/D circuit board has indicated a fault and needs to be repaired or replaced.
'LCb
LCbxx'
LCbLCb
A load cell may have failed or there is a bad connection. The “xx” shows which cell or connection has failed: xx=1-8
(single digit) if there is a single load cell failure. A two-digit value for “xx” is a code to indicate multiple cells have failed
or are disconnected
'LC
LC xx'
LC LC
A load cell circuit may have failed or there is a bad connection. The “xx” shows which cell or connection has failed:
xx=1-8 (single digit) if there is a single load cell failure. A two-digit value for “xx” is a code to indicate multiple cells have
failed or are disconnected
‘Lo
Lo.bAt
bAt’
LoLo
bAtbAt
This message indicates that the control panel has measured the battery voltage and found it to be too low. The most
likely cause is that the batteries need to be charged. If the charge indicator fails to light up when the charger is plugged
in, then the charger or cable may be defective. If the batteries have been charged for the recommended time and fail to
run for the specified duration, then the batteries may need to be changed. If a new set of batteries fail to correct the
situation, then the control panel may need to be replaced. Also check the battery holder and wiring.
'CAP
CAP'
CAPCAP
The control panel has detected a weight reading that is larger than expected. This may be caused by the application of
too much weight to the platform. If this display is seen when there is no weight on the platform, then the most likely
causes are a defective load cell or defective control panel. To isolate the problem, measure the signal across pins two
and three on the load cell connector on the control panel. This should be between zero and one millivolt. If found to be
higher or lower, then the load cell system must be checked. See procedure elsewhere in this manual. If the signal is
within this range then the calibration data may be lost. Attempt to recalibrate the scale. If this does not
then replace the control panel.
‘ZErO
ZErO.RRRR’
ZErOZErO
Scale tried to zero off a load outside the range specified in the zero range setting. Remove any load and press zero.
'diSP
diSP'
diSPdiSP
The most common cause of this error is pressing the zero key with a full load on the scale. When the load is removed,
the full number with a minus sign will not fit on the display. Pressing the zero key again will clear this display.
‘COP
COP’ or
COPCOP
‘CLOC
CLOC’
CLOCCLOC
This won’t affect normal operations and can typically be ignored.
EEPROM FAILURE Calibration information lost or corrupted
A/D converter failure
Power-up Self Test has detected one or multiple load cell errors
Run-time checking has detected one or multiple load cell errors
Low battery voltage
Overload or calibration information lost or bad load cell
Zero Range Error
Number can't be displayed (such as -99999)
Diagnostic power-up message
Page 39 of 44
Page 40

PT300 Users manual
Excitation
-
Excitation +
Signal
-
Signal +
5 Ω
5 Ω
700 Ω
700 Ω
700 Ω
700 Ω
Rev G, Feb 2011
Diagnostic tests and voltage measurements
Charger voltage
Ensure the scale is off during the entire test. Remove the batteries and connect a meter across
the battery compartment observing correct polarity. Plug the battery charger in, the voltage
should measure 5.8V DC or more. Unplug the battery charger and reinstall the batteries.
Measure the voltage across the batteries. Depending on the state of charge on the batteries the
voltage should be between 3.6 to 5.8V DC. Plug the charger back in. The voltage across the
batteries should increase. If the correct voltage response is not observed, unplug the battery
charger. Remove one of the batteries and connect a meter, set to measure current to the battery
compartment connectors, observing correct polarity. Plug the battery charger in. The meter
should read between 25 and 75 mA DC.
Lamp
Cover the light sensor. The backlight should light up. Please note that it is difficult to see the
backlight in sunlight.
Keys
Press On/Off button, the scale should turn on. Press lb-kg, the scale should change units of
measure. Apply 50 lb to 250 lb to the scale. After you get a stable display, press the ZERO key.
The scale should go to a zero indication. Press the On/Off button and the scale should turn off.
Power down shutoff
Connect a variable supply to the input connector and remove the batteries. Connect the meter to
the positive battery lead. Set the supply to 6 V and turn the scale on. Reduce the input voltage
until the scale turns off. The voltage at shutoff should be between 3.2 and 3.5 Volts.
Load Cells
Each PT300 scale has two load cells. These load cells are the transducers that convert
mechanical energy (weight) to electrical energy.
Each load cell has 4 strain gages (700 Ω) and two temperature compensation thermistors. The
four strain gages are wired together to form a Whetstone bridge.
Schematic Diagram (typical values)
Page 40 of 44
Page 41

PT300 Users manual
Rev G, Feb 2011
The 5 Ω thermistors in series with the Excitation leads are for temperature compensation. They
are balco thermistors that change resistance with temperature to maintain a constant signal
voltage. These thermistors are specially manufactured for Intercomp load cell material and strain
gage types.
Load cell leads color coding
Red : + Excitation (3.3 Volts)
Green : + Signal
White : - Signal
Black : - Excitation (ground)
Check load cell zero output value
The signal at the main circuit board with the signal leads in place should be approximately 0.1
millivolts with no load applied to the cell. Larger values could indicate a defective load cell, wiring,
or circuit board. The load cell must be tested separately to determine the source of the zero shift.
Check zero output from the load cell
You can use a power supply set to 3.3 Volts to provide the excitation voltage for this
measurement. Connect plus 3.3 volts to the red lead and ground to the black lead or use the scale
to provide the excitation by connecting the two excitation leads only (Black and Red). Turn the
scale on to apply excitation voltage.
Connect a meter capable of monitoring millivolt readings between the plus and minus signal leads
(Green and White) The zero signal output (With excitation voltage applied) should measure
approximately -1.00 to 1.00 millivolts). Larger values would indicate a defective load cell. This is
most likely the result of an overload of the cell during use.
Check load cell resistance values
Load cell resistance can vary depending on the model and capacity. The load cells will be one of
the standard resistance values given in the table below.
Nominal Cell
Resistance
Black – Red =
Black – Green =
Black – White =
White - Green =
With the load cells disconnected, the resistance readings should be as specified. It is normal for
all of the readings to be higher or lower than the values given by several percent. If there is
several Ohm difference between the Black-Green and Black-White measurements the cell is
defective. This test is most useful to detect a catastrophic failure of the cell or lead; you are
typically looking for an open or a short when using this check.
350 ΩΩΩΩ 700 ΩΩΩΩ 1000 ΩΩΩΩ
385 Ω 770 Ω 1082 Ω
285 Ω 595 Ω 748 Ω
285 Ω 595 Ω 748 Ω
350 Ω 701 Ω 1000 Ω
Page 41 of 44
Page 42

PT300 Users manual
Rev G, Feb 2011
Step Entries
The ‘step’ choice that starts the calibration menu also allows special codes for technical diagnostic
work. Typically only scale technicians should use these features. Here is the list of possible
entries to the ‘step’ choice related to the PT300:
Message Meaning
000
000
000000
001
001
001001
003
003
003003
005
005
005005
121
121
121121
131
131
131131
201-208
201-208
201-208201-208
311
311
311311
711
711
711711
911
911
911911
Simply advance to the first Calibration Menu step.
Advance to weight calibration.
Enter corner calibration. (Also set the number of load cell inputs here.)
This brings you to the Mode Menu, just as if the cal strap had been left
in the RUN position.
Raw counts display diagnostic
Constant power to all cells diagnostic
Corner adjust cell 1-8. (Example: 202 will enter mode to adjust cell #2).
Restore all radio settings to defaults (CH = 1, Network ID = 8000, and
Encryption disabled). Display will then show ‘save’ if successful, or
“no rf
no rf” if there is no radio installed or some other radio failure.
no rfno rf
Restore all settings to defaults, but leave weight calibration untouched.
Restore all settings to default settings, including weight calibration. It is
recommended that this only be used as a last resort, as your previous
calibration and settings will be lost after running this.
Step Choice Table
Page 42 of 44
Page 43

PT300 Users manual
Connector
The diagram below shows the pin-out for the PT connector on the side of the PT300:
PT connector
A: RS-485 A
B: 20 mA (-I)
C: - Charging Voltage
D: 20 mA (-0)
E: +Charging Voltage
F: 20 mA (+I)
G: RS485 B
H: RS232 TXD
Rev G, Feb 2011
Page 43 of 44
Page 44

How to reach Intercomp Service
Things to know:
-Inform the Service Dept. that the product is a next generation PT300 scale system
(ADrevE version)
-When was the system purchased?
-Where was the system purchased?
For Intercomp Service call or fax:
FAX # (763)-476-2613
(763)-476-2531
1-800-328-3336
or fill out Service Support Form at :
www.intercompcompany.com
Copyright Intercomp Company 2009
ALL RIGHTS RESERVED
PT300 Users manual
Rev G, Feb 2011
Page 44 of 44
 Loading...