

ASSEMBLY INSTRUCTIONS for
12 Tub
e Plugs
T
ools required: adjustable or 9/16” wrench
Step 1: Starting with one side, align the
bike grid
to
the side rail
as
Fig. 1b
Fig. 1c
Fig. 1a
HOLLYWOOD RACKS
Heavy Duty Parking Stands
Models PS8 and PS10
List of Materials:
Assembly Procedure:
Qty Description
1 Bike Grid (either 49” or 61”)
2 Floor Brace (either 49” or 61”)
2 Side Rails
Poly-bag containing:
8 Carriage bolts 3/8-16 x 3.25”
8 Self locking nuts 3/8-16
8 Flat Washers
Check Contents of box prior to assembly
Determine if you are going to set up this parking stand
as either a “double sided” or single sided unit, then
refer to diagrams and instructions below.
Double sided PS8 parks 8 bikes, single sided PS8 parks 4 bikes
Double sided PS10 parks 10 bikes, single sided PS10 parks 5 bikes
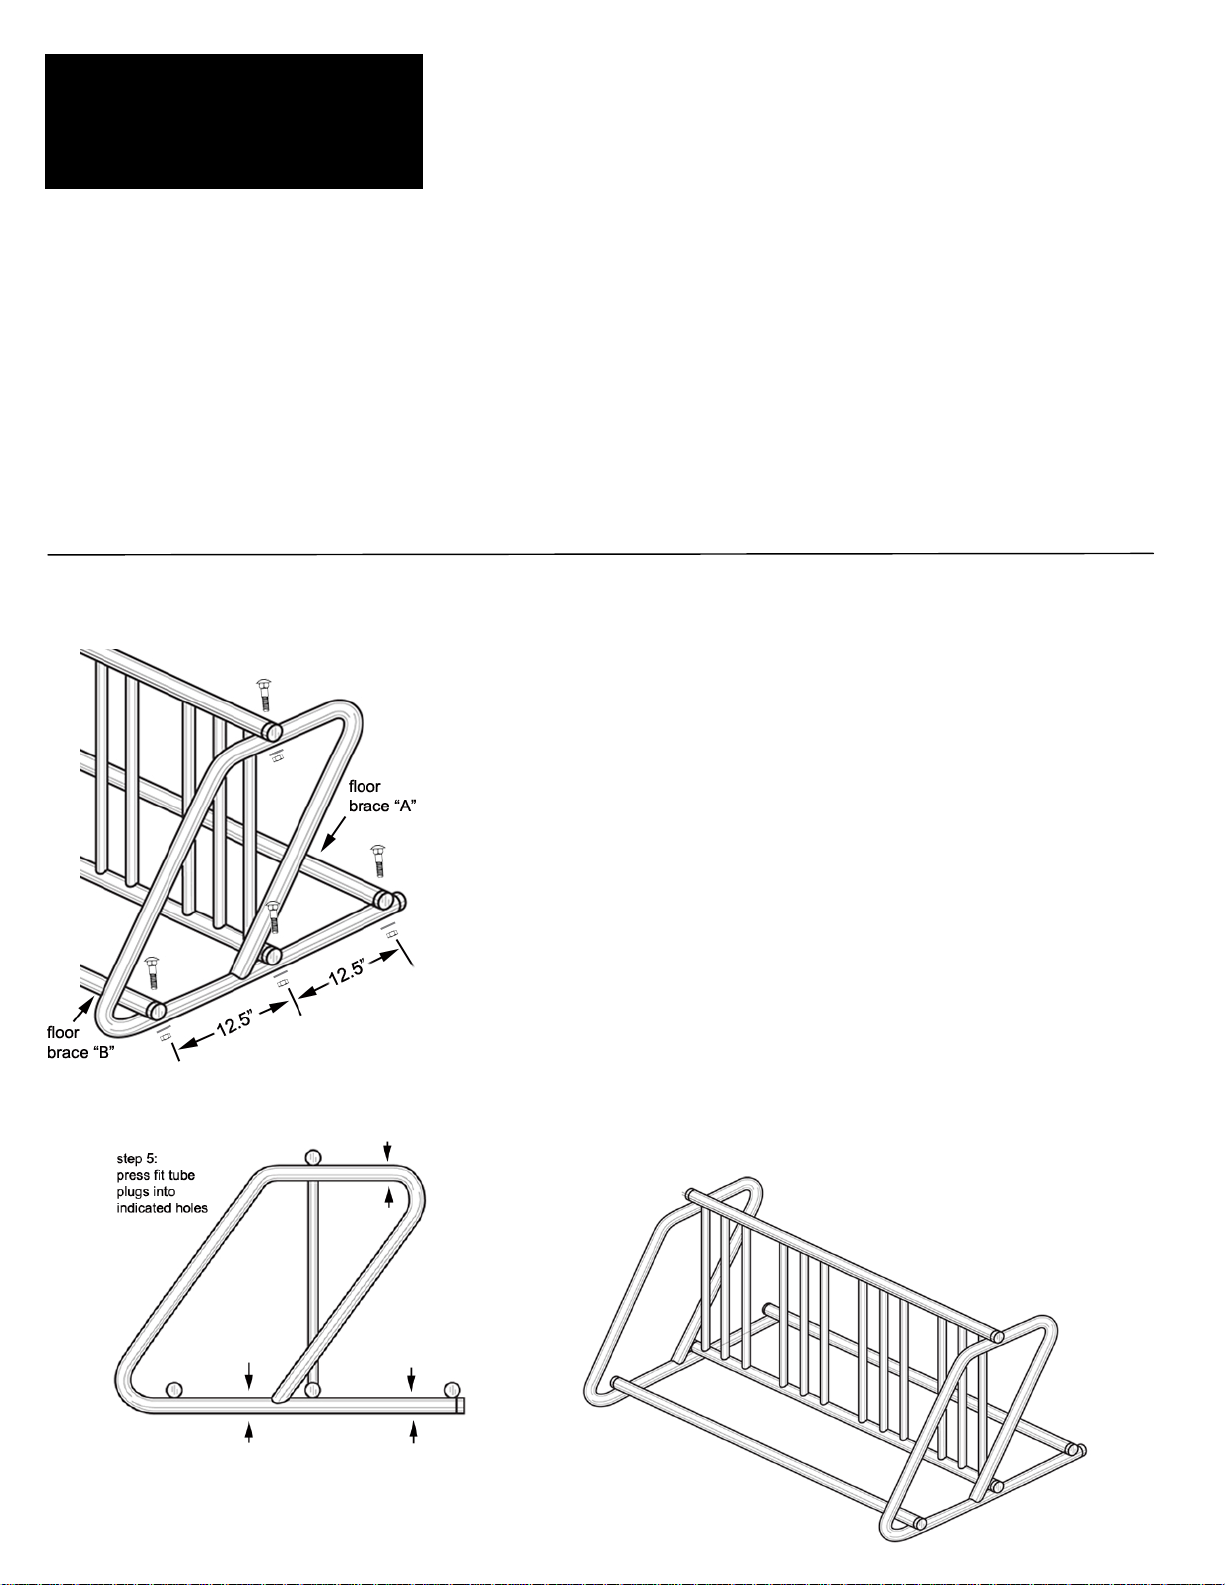
“Double Sided” parking stand assembly
shown in Fig. 1a. Be sure to use the correct holes. Insert bolts as
shown, then attach washers and nuts to bolt. Finger-tighten nuts.
Step 2: Align floor brace “A” to the rear hole of the side rail as
shown. Insert bolt as shown, then attach washer and nut to bolt.
Finger-tighten the nut. Repeat for floor brace “B” using the forward
hole of the side rail. Note there are 3 unused holes in the side rail.
Step 3: Attach the other side rail to the other end of the floor braces
and bike grid. Insert bolts and attach washers and nuts.
Be sure to use the correct holes!
Step 4. Check that the parking stand is straight, then tighten all nuts
securely using the wrench. The assembled parking stand should look
like Fig. 1c. (note: model PS8 is shown in Fig. 1c).
Step 5: Insert tube plugs into unused holes as indicated in Fig. 1b.
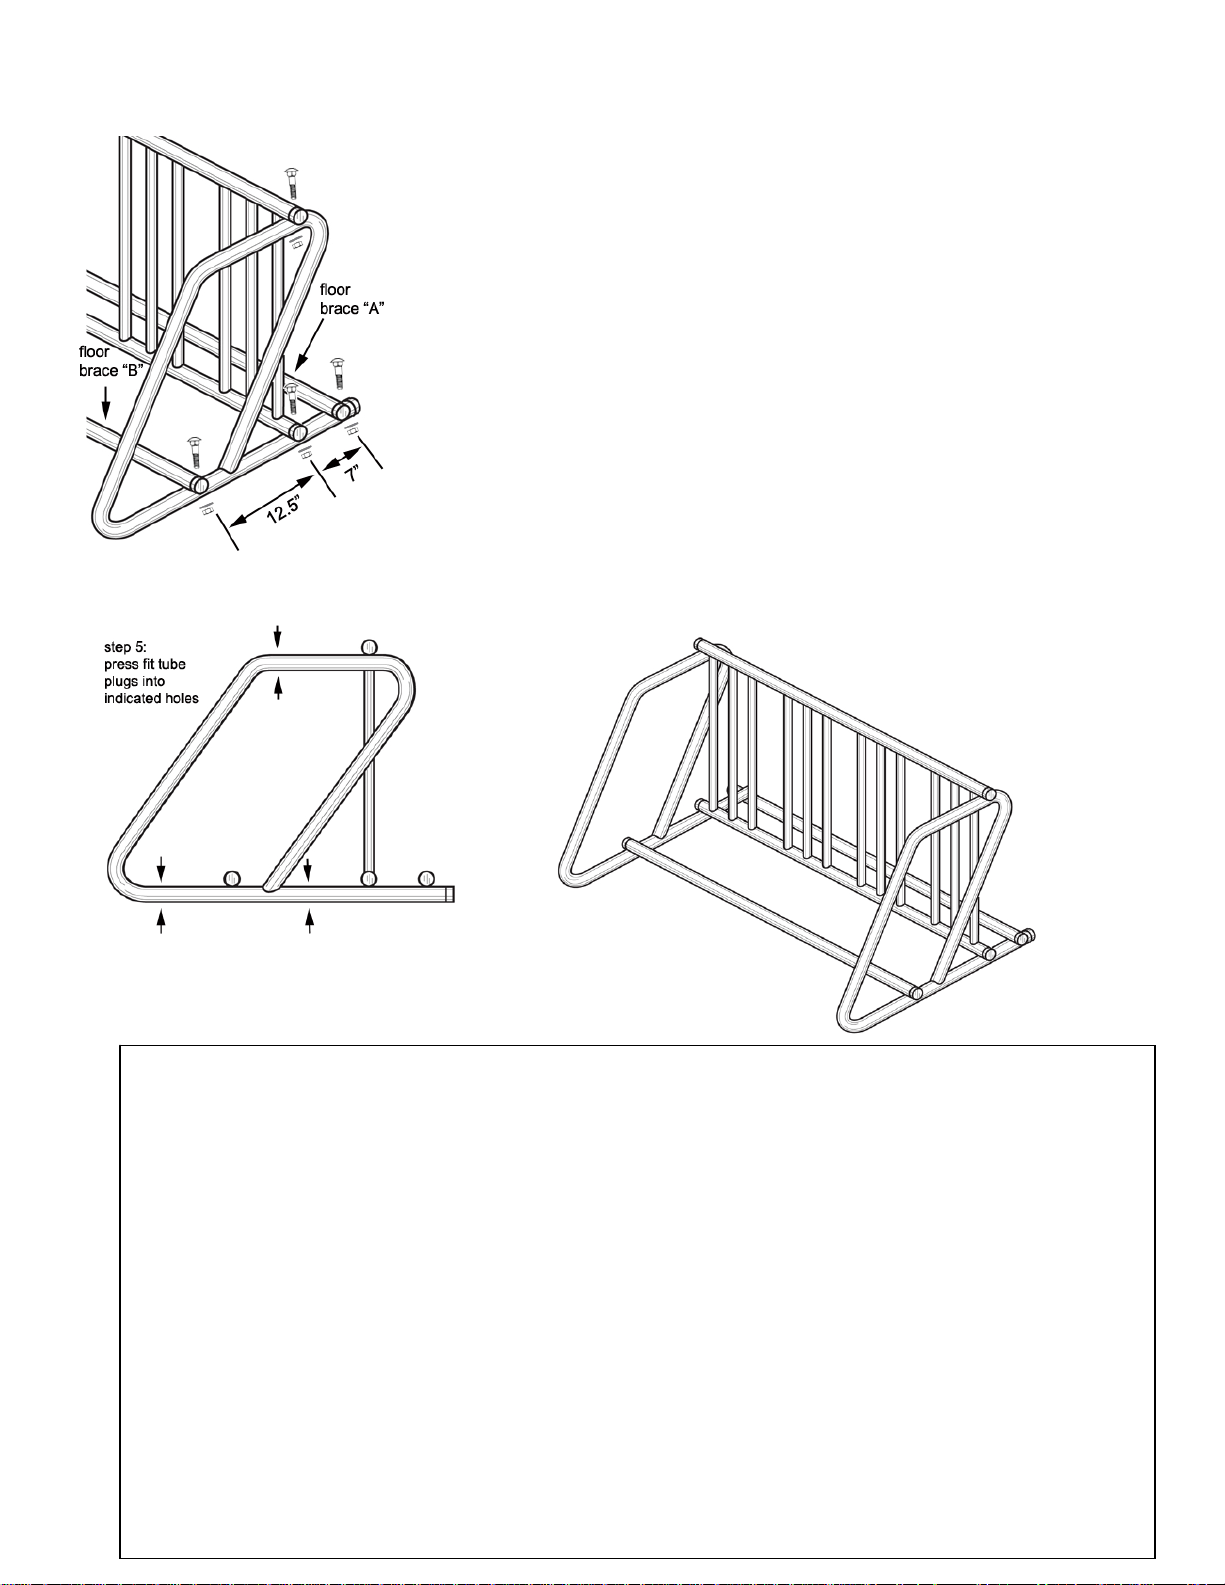
“Single Sided” parking stand assembly
Step 1: Starting with one side, align the bike grid to the side rail as
Limited One Year Warranty:
This
product
is warranted for a period of one year against
Fig. 2b
Fig. 2a
shown in Fig. 2a. Be sure to use the correct holes. Insert bolts as
shown, then attach washers and nuts to bolt. Finger-tighten nuts.
Step 2: Align floor brace “A” to the rear hole of the side rail as
shown. Insert bolts as shown, then attach washers and nuts to bolt.
Finger-tighten the nuts. Repeat for floor brace “B” using the correct
hole. Note there are 3 unused holes in the side rail.
Step 3: Attach the other side rail to the other end of the floor braces
and bike grid. Insert bolts and attach washers and nuts.
Be sure to use the correct holes!
Step 4.Check that the parking stand is straight, then tighten all nuts
securely using the wrench. Assembled parking stand should look like
Fig. 2c. (note: model PS8 is shown in Fig. 2c).
Step 5: Insert tube plugs into unused holes as indicated in Fig. 2b.
Fig. 2c
defects in materials and workmanship, effective from the date of purchase to the original
purchaser. The manufacturer will repair or replace any defective parts due to materials
or workmanship. The manufacturer of this product shall not extend the warranty to 1)
Any failure or malfunction of the product do to any modifications to the product; or 2.)
Damages not attributable to a defect in materials or workmanship; or 3.) Damages
resulting from improper assembly. Consequential or Incidental Damages: The
manufacturer shall not be liable for any consequential or incidental damages in
connection with the purchase, use or handling of this bike rack. Purchaser’s Rights:
Some states do not allow the exclusion or limitation of consequential or incidental
damages and the above limitation may not apply to you. This warranty gives you specific
legal rights and you have other rights, which vary from state to state.
Hollywood Racks
12812 S. Spring St. Los Angeles, CA 90061
800-747-4085 or 310-516-8600 www.hollywoodracks.com
Made in Taiwan Pat. Pending 123009
 Loading...