

Page 1
Instruction Sheet for Boomer Hitch Racks
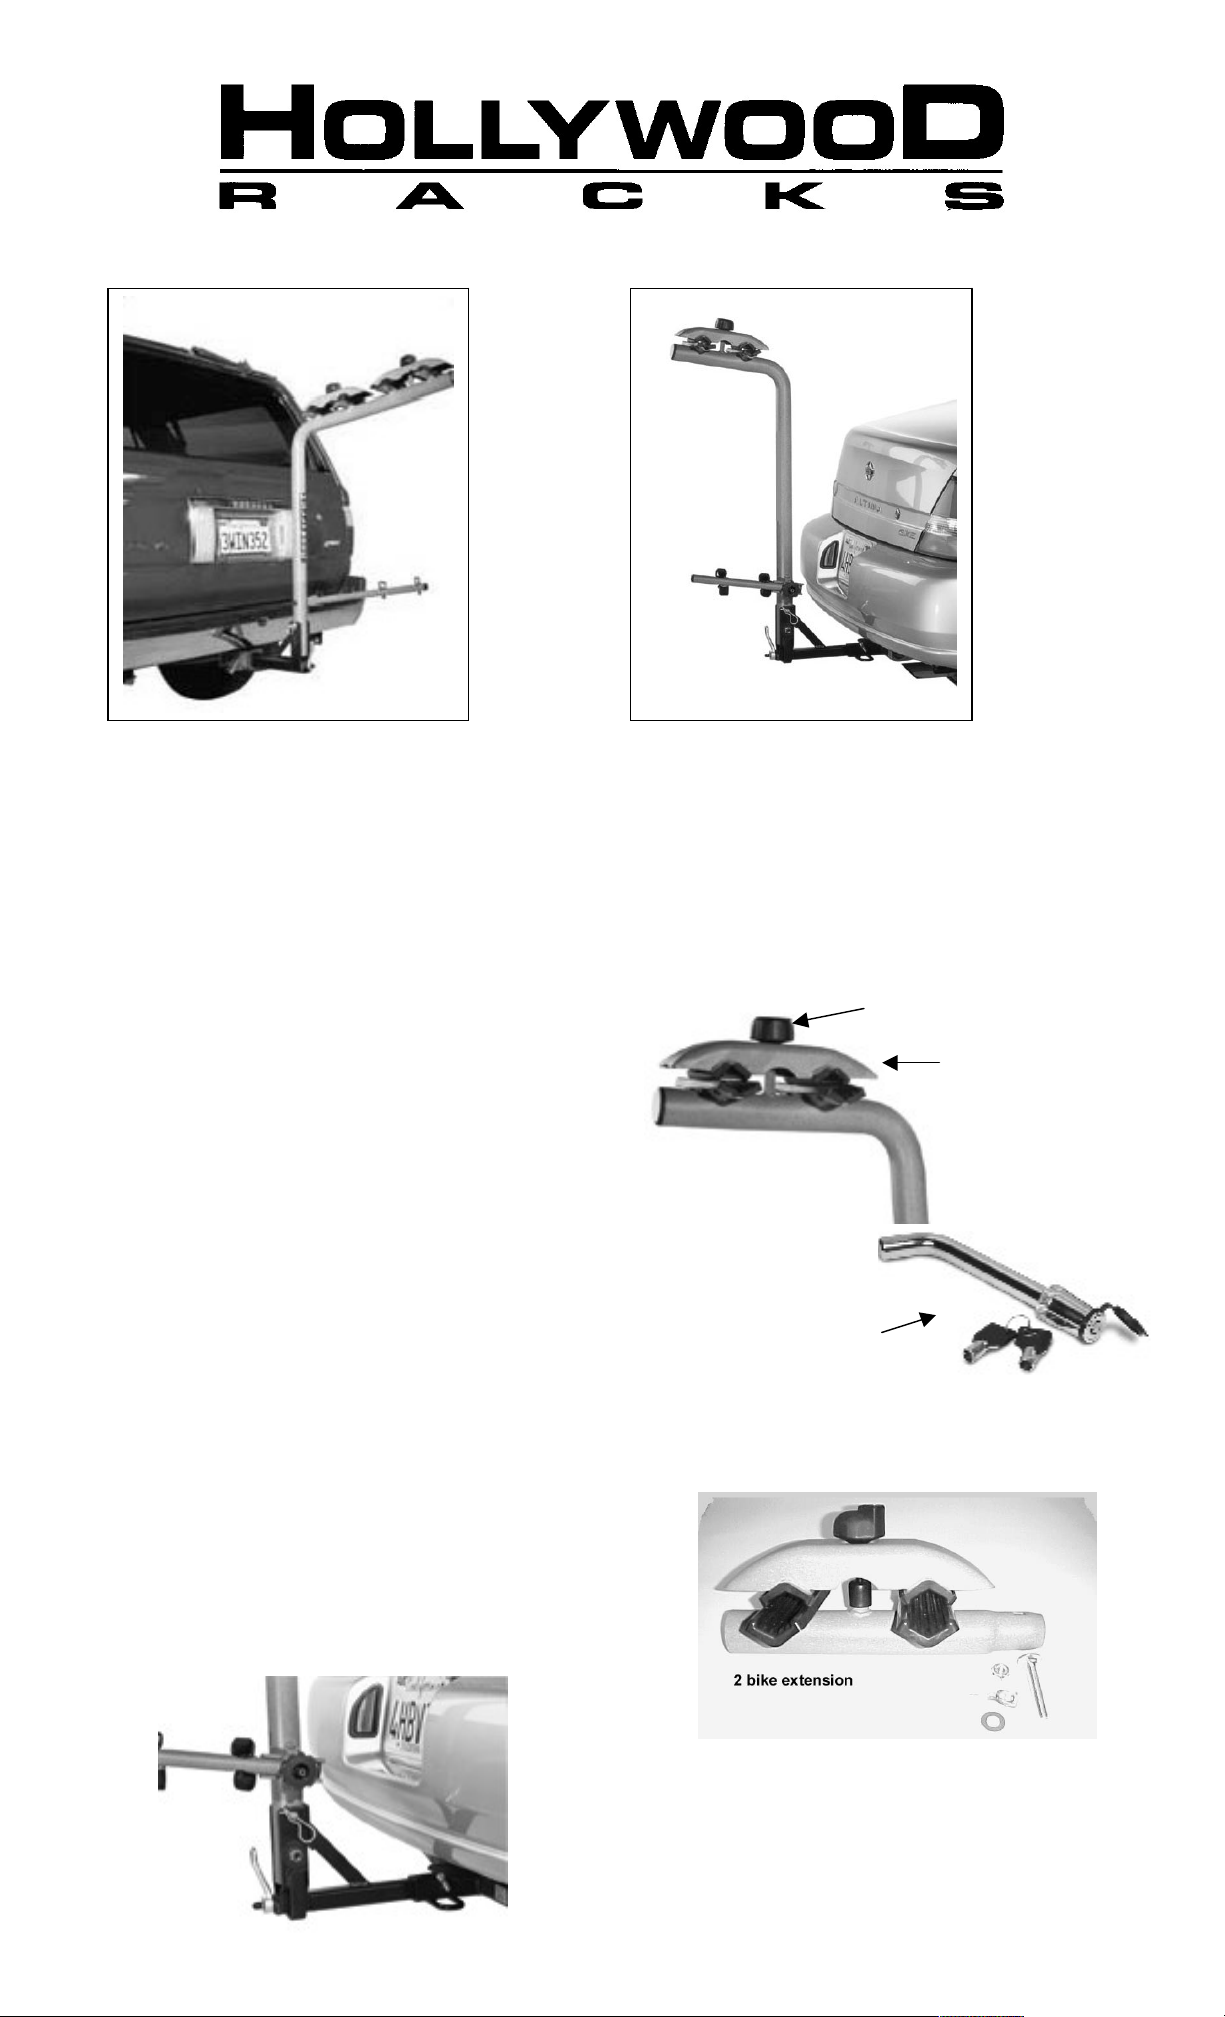
Main Beam with
ing Top Plate
(Boomer 2 shown)
Boomer 2 bike
hitch rack
Note: Do not use this rack on a trailer, or a vehicle being towed behind another vehicle.
Trailer use voids Warranty. Be sure to read the instructions carefully and completely
before assembling and using your new Boomer rack.
Congratulations on your purchase of the Boomer trailer hitch rack. This instruction sheet is applicable to
the Boomer 2 (for 1-1/4” or 2” receivers) and the Boomer 4 (for 2” receivers only). Before beginning
assembly, please check the parts list below against the parts included in the box. Please note the
differences between quantities of some parts for Boomer 2 and Boomer 4 applications. Please read the
instructions carefully for proper assembly installation and use of your new Boomer rack.
Boomer Parts List
A. Main Beam
A. Insert tube with “No Wobble”® feature
Locking knob
Locking
top plate
assembly
B. Locking Top Plate assembly: (one plate for
Boomer 2, two plates for Boomer 4) with keys
C. Lower support arm assembly
D. 86” straps for anti-sway bar (three straps
for Boomer 2, five straps for Boomer 4)
E. Locking Hitch Pin with two keys
Lock
Assembly
Installed.
F. Lynch Pin and clip
G. 1 - ½” x 3-1/4” bolt with self locking nut
H. 2 - ½” x 1-3/4” SAE washer
I. Black end cap with reflector
Locking Hitch
Pin with keys.
For 4 Bike Hitch Rack, the following is included:
J. 2 bike extension with locking top plate
K. Bolt, nut, washer
Assembly Instructions:
1. Place the main beam into insert tube, making sure
the two holes align. Slide the first washer on to the
3-1/4” bolt and place through the lower hole of the
main beam and insert tube. After inserting bolt
completely through, place the second washer on the
end of the bolt and tighten securely with the locking nut.
2. Insert the lynch pin in the upper hole of the insert tube
and the main beam. Install lynch pin clip in the hole in
the end of the lynch pin to prevent the lynch pin from
falling out while rack is in use.
3. Install black end cap (with reflector) on rack
Page 2

Installing the Boomer Rack on your vehicle.
Hollywood Racks
Remove the end cap from
on top) into the square hole, then install washer and
instructions. If carrying three bikes, be sure that the
third bike is mounted to the inside bike holder of the
and the main beam.
If carrying 3 bikes,
1. Install the Boomer insert tube into the receiver of your vehicle, lining up the holes in the receiver with
the holes in the insert tube of your vehicle.
4. Secure the insert tube to your vehicle using the locking hitch pin, which is passed through the
receiver tube of your vehicle and the insert tube of the Boomer, secure it with the key provided.
5. It is essential that you use the locking hitch pin, since the No Wobble® system only
eliminates wobble, but does not secure the rack onto the vehicle.
4. Tighten the No Wobble® lever to eliminate any movement between the insert tube of the rack and
the receiver tube of your vehicle.
Mounting Bicycles on your Boomer Rack
1. After assembly of the Boomer and installation on your vehicle, you are ready to carry bicycles.
Before attaching bicycles, be certain that the Boomer is secured on your vehicle correctly, and locked
into the receiver using the locking hitch pin.
2. Loosen the locking knob of the top plate, by inserting the key provided. Remove key. Rotate the
knob(s) in a counter-clockwise direction to remove. Remove locking top plate assembly. Mount the top
tube of the bicycle on the lower rubber pad provided. Balance the bike(s) as much as possible.
Important Note: When carrying one bike, place that bike closest to vehicle.
3. When installing more than one bike, face the bikes in opposite
directions to facilitate saddle & handlebar clearance. Whenever
possible, place bikes of similar top tube diameter on same pad
group to equalize clamping pressure on the top tubes.
6. Place top plate over bicycles, and replace locking knob in
vertical threaded coupling nut. Thread the locking knob(s)
into the coupling nut, and turn in a clockwise direction to
secure bike(s) to the rack. Tighten locking knob securely,
but do not over- tighten. Lock bikes onto rack using key.
Using the Anti-sway bar and straps
5. Loosen the black knob, and turn the lower support
arm 90 degrees in the channel, then retighten the
knob. Place the 86” straps through both front and rear
wheels, and through the eyelet on the anti-sway bar.
Thread end of strap through buckle and tighten
securely. Repeat for other bicycles.
6. Wrap extra 86” tie down strap around the main beam
and through the bicycle(s) for final attachment on rack.
Special instructions for the Boomer 4 bike rack:
Installing the extension:
the rack, then insert the extension into the end of
the rack. Install the carriage bolt (head of the bolt
nut. Tighten nut securely with wrench. Replace end
cap onto rack.
Securing bikes to rack: Please follow above
extension as indicated in the adjacent photo. Use
the outer eyebolt for the anti-sway straps., and be
sure to wrap the extra 86” strap around all the bikes
place third bike here
12812 S. Spring Street Los Angeles, CA 90061
www.hollywoodracks.com made in Taiwan 022008 rev A
For Customer Service, please contact Hollywood Racks at:
800-747-4085, or email us at info@hollywoodracks.com
Customer service hours: M-F 8:00 AM-3:00 PM Pacific Time
Page 3

Limited Lifetime Warranty (effective January 1, 2008):
Hollywood Racks will warrant its car racks and accessories during the time that an original retail purchaser
owns the product subject to the exclusions and limitations of this warranty. Hollywood Racks will remedy
defects in materials and workmanship by repairing or replacing (at its option) a defective part or the complete
rack without charge for labor or parts. Hollywood Racks may elect (at its option) to issue a refund equal to the
purchase price paid for the product.
This warranty does not cover problems caused by normal wear and tear including (but not limited to) weather,
scratches, dents, rust, accidents, unlawful vehicle operation, misuse, abuse, neglect, theft, unauthorized
modifications, or unauthorized repair. No warranty is given for defects resulting in incorrect assembly, incorrect
installation onto the vehicle, installation on a “no fit” vehicle, incorrect attachment of bicycles onto the rack, or
overloading of the rack’s weight restrictions. This warranty terminates if the original retail purchaser transfers
the product to any other person.
If a product is believed to be defective, the original retail purchaser should contact either the original retailer or
Hollywood Racks directly at 800-747-4085 or at info@hollywoodracks.com
Disclaimer of Liability: Repair or replacement of a defective product or the issuance of a refund or credit (as
determined by Hollywood Racks) is a purchaser’s exclusive remedy under this warranty. Damage to a
purchaser’s vehicle, cargo, bicycles and or to any other person is excluded. This warranty is expressly made
in lieu of any and all other express warranties, whether oral or written.
Hollywood Racks shall not be liable for any direct, indirect, consequential, incidental, special, punitive or any
other damages in connection with the purchase, use or handling of this product.
Some states do not allow the exclusion or limitation of consequential or incidental damages and the above
limitation may not apply to you. This warranty gives you specific legal rights and you have other rights,
which vary from state to state.
Page 4

 Loading...