

Page 1

AGILE UHF/CATV MINI-MOD TRIPLE INPUT
Model No.HMM-3
INSTALLATION INSTRUCTIONS
I. Frequency Band Selection (UHF or CATV ULTRA channel)
1. Set the UHF/ULTRA switch to UHF for UHF channel band or ULTRA for CATV channel band.
2. Plug in DC power plug to the HMM-3 Power jack.
The Band Indicator located at left of front panel, will be lit for UHF selection only.
The indicator will be off for ULTRA CATV selection.
II . Set-up Modulator Output of A, B, & C and Channel Selection
1. Press Mode key to select modulator A. The A indicator LED will be lit.
The current Channel number will be illuminated on the Channel display.
2. Use UP and DOWN key CH/CH to select the desired channel.
Note : The last channel selected will be stored in the memory, even when power goes out.
3. Repeat step 1.& 2. for input of B and C for channel selection.
III . How to use modulator
1. Connect a yellow color cable between HMM-3 AVA video input and your video device source and connect
2-wire stereo dubbing cable between HMM-3 AVA audio phone input and your video source, For
AVB/AVC connection, to follow same procedure as AVA .
Note : Three dubbing cables are included in the HMM-3 for audio connection along with three video cables
for video connection.
2. Connect RF OUT to the UHF/CATV input of the TV set or cable set-top converter.
3. Plug the provided Power Supply into the power line and HMM-3 power jack.
4. For channel selection, it is required that a channel be skipped between the channel A,B and C modulator
outputs. This is to avoid co-channel interference. For example, if the channel A output is chosen as
channel 23, then to avoid co-channel interference channels B and C should not be chosen as channel 22
or 24.
Page 2
IV. Picture Brightness
To adjust for proper brightness, turn the corresponding trimpot on the bottom of the HMM-3.
See picture below.
V . Video Looping
The HMM3 is capable of outputting a quality picture of adequate brightness even when the video input has
been looped to the baseband video inputs of a TV or VCR.
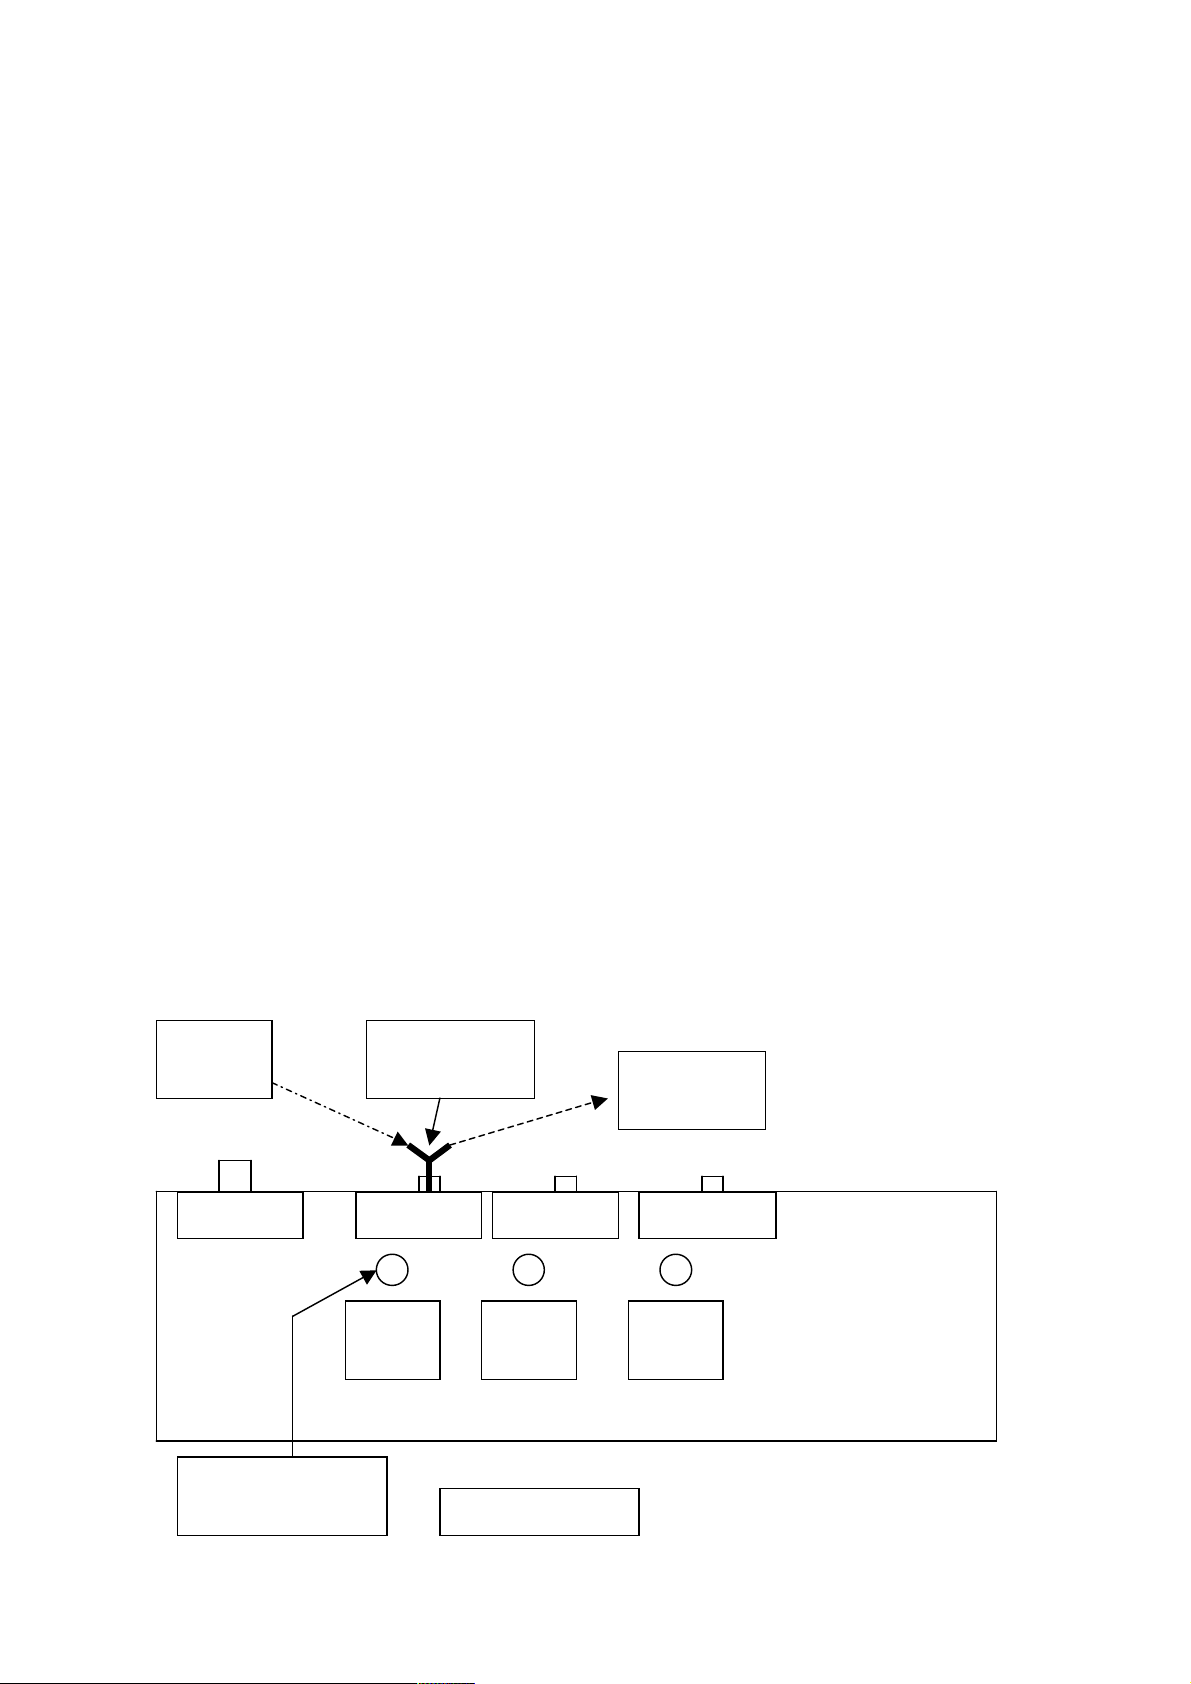
Steps for adding video looping to the HMM-3 video input
1. Connect a RCA-Y plug (not included) to the selected video input of HMM-3 (A,B,C)
2. Connect a RCA cable from the “Video Output” of the video source (TV, VCR, DVD player etc.) to the
RCA-Y that is connected to the HMM-3.
3. Connect another RCA cable from the RCA-Y plug on the HMM-3 to the “Video Input” of the unit being
looped to (TV or VCR).
4. Check the picture from the HMM-3 on the selected channel (A,B,C). If the picture is too dark, then
adjust the picture brightness by using the video adjustment trimpot on the bottom of the unit. Adjust
the video level to a comfortable brightness as compared to a typical off-air signal
VI . Audio Looping
Audio looping can be done in a similar manner as the video looping.
1. Connect a RCA Y-plug (not included) to the selected audio input on the HMM-3.
2. Connect a RCA cable from the “Audio Output” of the audio source (TV, VCR, DVD player etc.) to the
RCA-Y that is connected to the HMM-3.
3. Connect another RCA cable from the RCA-Y plug on the HMM-3 to the “Audio Input” of the unit being
looped to (TV or VCR).
NOTE: No audio adjustment is needed on the HMM-3.
Video C
Level
Video B
Level
Video A
Level
BOTTOM VIEW
RCA Y-Plug
(by others)
Video
Source
TV, VCR or
DVD
Video C In
Video B In
Video A In
Turn trimpot to adjust
brightness
RF Out
Page 3

Accept 12VDC/500mA
DC Adaptor
A.B or C A/V input
RF output level control
Connect to UHF input of a
TV set or cable converter
Use to select modulator
A/B/C for set-up
MOD. select key
Channel
UP/DOWN key
Modulator A/B/C
Channel display
Band indicator
ON-UHF band
OFF-ULTRA band
ULTRA:CH 65-139
UHF:CH 14-83
Band selector switch
AVC
OUT
RF
IN
IN
AUDIO
VIDEO
GAIN
ADJ
AVB AVA
IN
IN IN
VIDEO
AUDIO
IN
AUDIO
IN
POWER
VIDEO
B
C
SELECT
CH.
A
MOD.
UHF
ULTRAUHF
1. Front panel and led displays:
2. Rear panel:
Page 4

IMPORTANT!!
WARNING: Holland Electronics does NOT represent this product to be WATERPROOFED. To reduce risk of electrical shock, fire hazard,
or damage to the unit, do not expose to rain or moisture.
CAUTION: To prevent electric shock, do not use this plug with an extension cord, receptacle or other outlet unless the blades can be
fully inserted to prevent blade exposure.
NOTE TO INSTALLER: This reminder calls the system installer’s attention to Article 820-22 of the NEC that provides guidelines for
proper grounding and, in particular, specifies that the cable ground shall be connected to the grounding system of the building, as close to
the point of cable entry as practical.
WARNING:
TO PREVENT FIRE OR ELECTRICAL SHOCK, DO NOT EXPOSE THIS UNIT TO RAIN OR MOISTURE
HOLLAND ELECTRONICS LLC
LIMITED WARRANTY
Holland ELECTRONICS LLC, warrants that the product enclosed with this Limited Warranty statement will conform to the manufacturer’s
specifications and be free of defects in the workmanship and material for a period of 90days from the date of original purchase.
WARRANTY PROCEDURE:
If the product appears to be defective contact Holland Electronics LLC at (805) 339-9060. We will analyze the problem and offer solutions
to prevent removing the unit from service. If the unit is to be returned for evaluation, you will be issued a Return Material Authorization
(RMA) number.
Holland Electronics LLC will, at its option, repair or replace the defective unit, under warranty, without charge for parts or labor. This repair
will be subject to charges if signs of tampering or misuse are detected. Incoming shipping costs will be the customer’s responsibility.
Returns will not be accepted without an RMA number.
The warranty and remedy provided above are exclusive and in lieu of all other express warranties and unless stated herein, any
statements or representations made by any other person or firm are void. The duration of any implied warranties of merchantability or
fitness for a particular purpose on this product shall be limited to the duration of the express warranty set fourth above. Except as provided
in this written warranty, Holland Electronics LLC shall not be liable for any loss, inconvenience, or damage, including direct, special,
incidental, or consequential damages, resulting from the use or inability to use this product, whether resulting from breach of warranty or
any other legal theory.
Some states do not allow limitations on how long an implied warranty lasts and some states do not allow the exclusion or limitation of
incidental or consequential damages, so the above limitation and exclusion may not apply to you.
This warranty gives you specific legal rights, and you may also have other rights which vary from state to state.
To arrange for Warranty Service: Call Holland Electronics LLC (805) 339-9060
 Loading...