

Page 1
INSTALLATION MANUAL
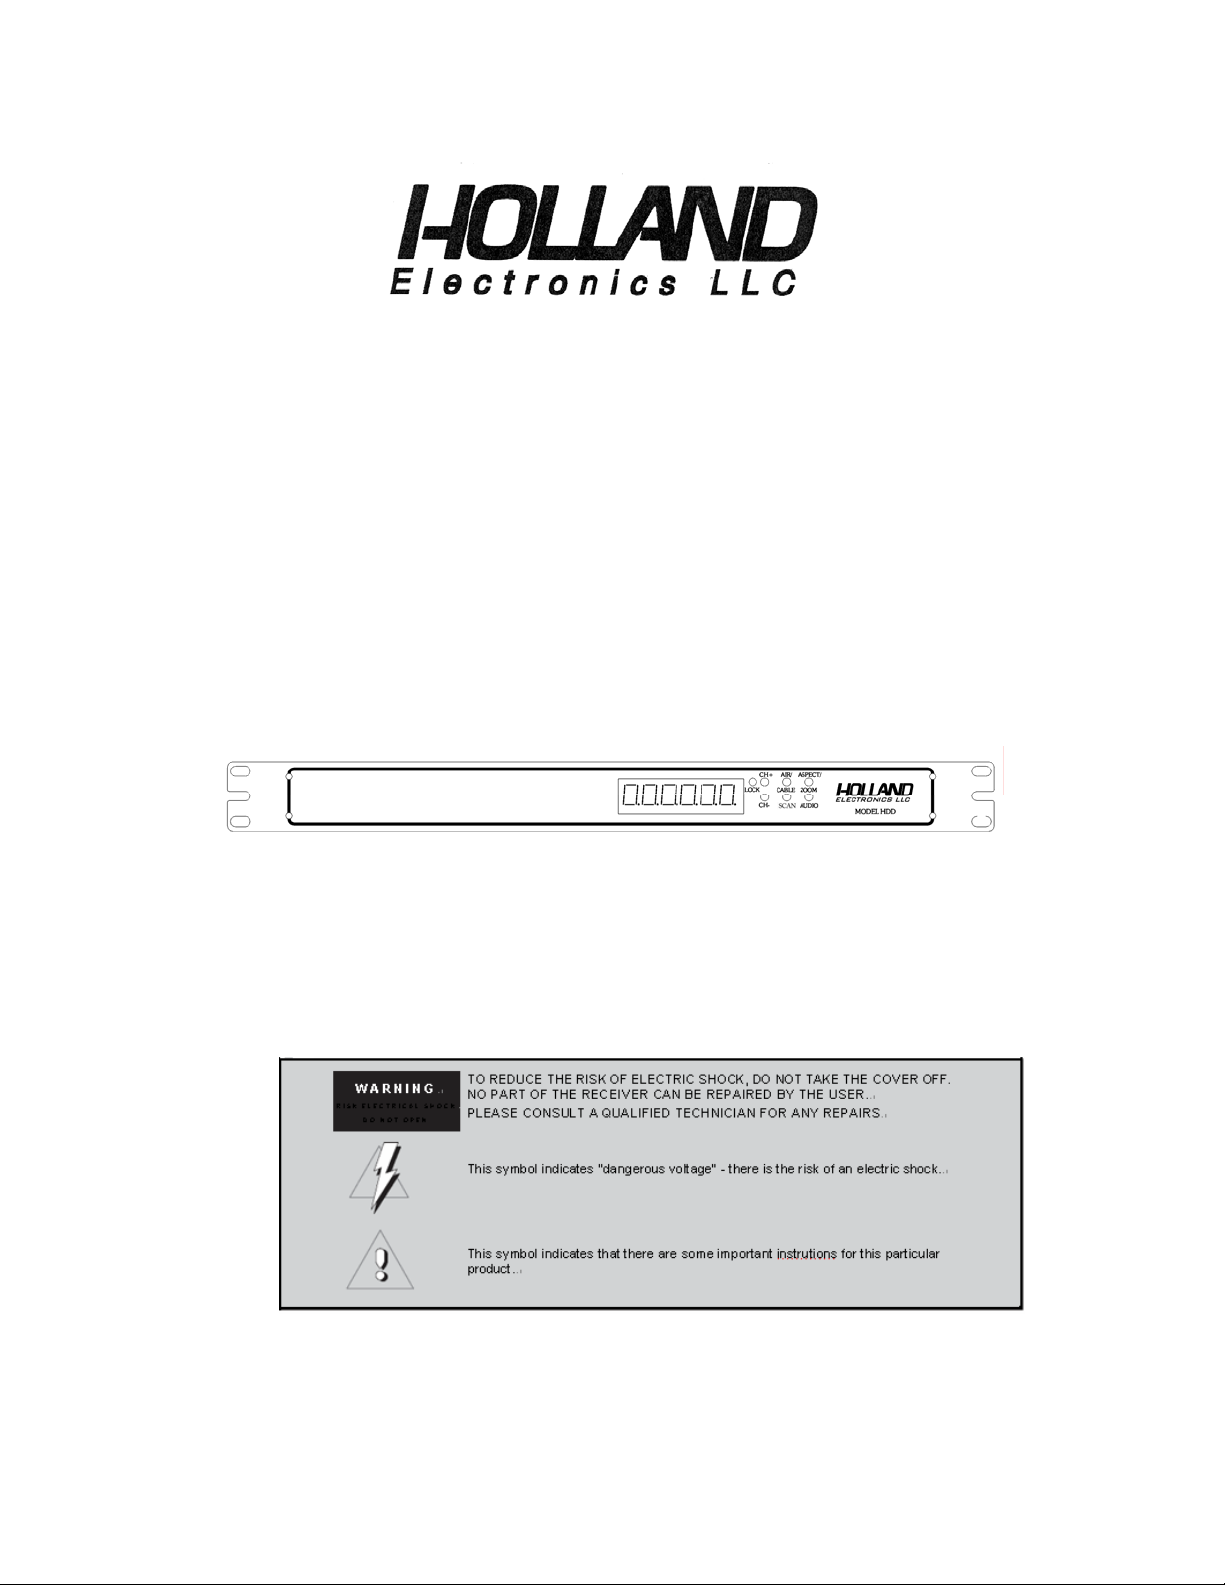
Model: HDD
ATSC/QAM Digital to Analog Demodulator
Caution: These servicing instructions are for use by qualified service personnel only.
To reduce the risks of electric shock, do not perform any servicing other than that
contained in the operating instructions unless you are qualified to do so.
1
Page 2

1. PACKAGE CONTENTS
This packa ge contains:
One HDD ATSC/QAM Rack Demodulator
One HDD Installation Manual
2. PRODUCT DESCRIPTION
The HDD is an ATSC/QAM professional grade rack demodulator designed for cost effective
digital-to-analog conversion of an unencrypted 8VSB (Off-Air SD/HD TV signal) or QAM
unencrypted (digital CATV) RF signal to baseband NTSC video and left and right stereo
audio outputs. All of the 18 ATSC video formats including HD format can be received by the
HDD and converted to display on non-digital TV sets over analog channels with the use of a
modulator
3. SPECIFICATIONS
All specific at io ns ar e t y p ic a l
RF
1. Input frequency range 54– 806MHz (UHF)
54 – 860MHz (Cable)
2. Off-Air input channels 2-13 (VHF) 14-69 (UHF)
3. 8VSB input channel bandwidth 6 MHz
4. Data rate 19.392 Mbps.
5. Noise figure < 8dB
6. QAM input frequency range 2-135 (CATV)
7. QAM data rate 27 Mbps
8. QAM 256 data rate 38 Mbps
9. Input level range -7 dBm to -80 dBm
10. Adjacent channel rejection 60dB
11. Image rejection 40dB
12. Demodulation mode 8VSB, 8VSB MP @ ML/ 64QAM/256QAM
13. Symbol clock frequency 10.762 MHz
14. Input connector 75 ohm F-female
GENERAL
1. Video output (analog)
Frequency response 30Hz to 4.2MHz, +/-1.5dB
Video output level 1Vp-p +/- 0.2V
Impedance 75ohms
Connector type RCA
2. Audio L/R outputs
Impedance 10k ohms.
Level 1.4Vp-p +/- 0.2Vp-p
Frequency response 30Hz to 20kHz, +/-2dB
Distortion 1% max
Connector RCA
3. Power consumption
Power 6.5W / AC120V / 60Hz
Voltage Range AC110V ~ AC120V /57Hz ~ 63Hz
Dimensions: 483 x 86 x 44mm
2
Page 3
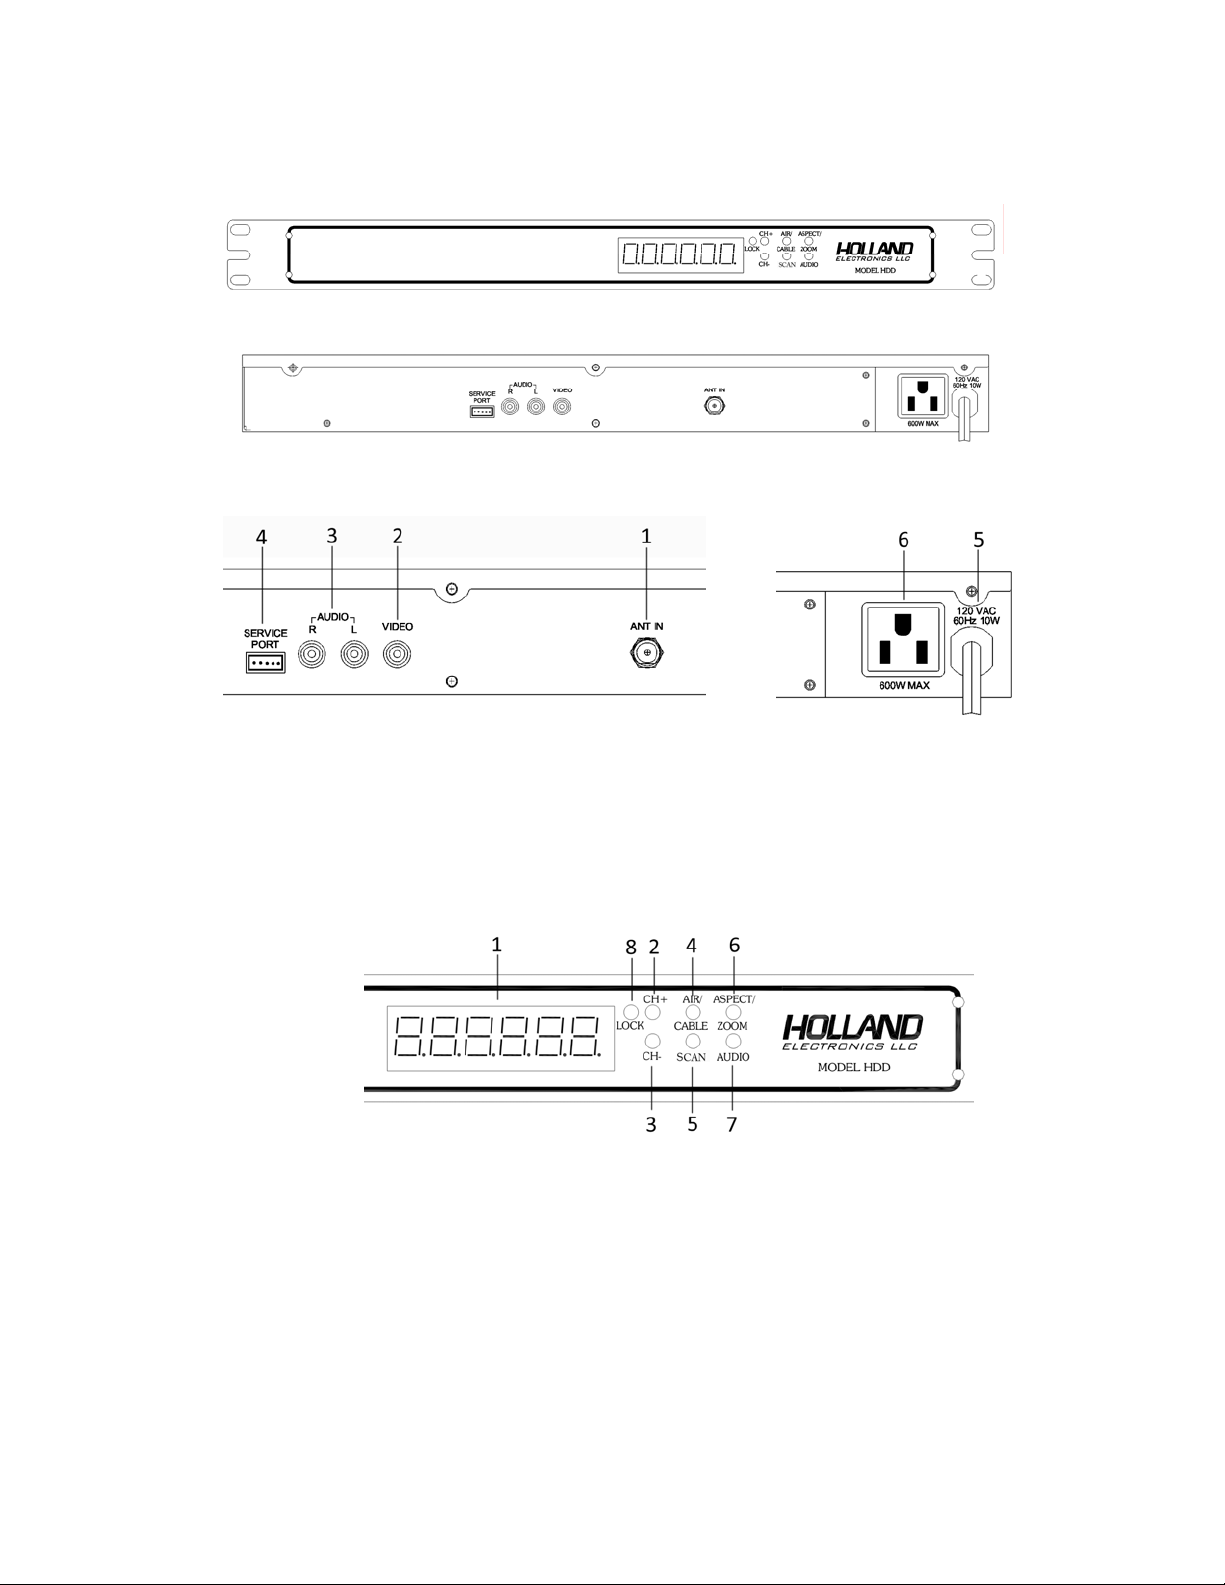
4. PRODUCT CONTROLS AND CONNECTIONS
Rear Panel
1. Antenna Input for Off-Air or CATV, F connector 5. AC Power Cord AC120V / 60Hz
2. Video Output, RCA connector 6. AC Power Socket for Extension
3. Audio Left / Right Output, RCA connector
4. Service Port
Front Panel
1. Message and Channel Display
2. CH+ button selects channel up
3. CH- button selects channel down
4. AIR/CABLE button selects OFF-AIR(8VSB)or CABLE(QAM)
5. SCAN button searches for incoming 8VSB or QAM signals.
6. ZOOM button selects a screen format of 4:3/16:9 letterbox, full, zoom or center.
7. AUDIO button selects Secondary Audio Programming, if available.(SAP)
8. LOCK LED indicates that a channel signal is locked
3
Page 4

5. INSTALLATION AND HARDWARE CONNECTIONS
A. Un-box the HDD and ensure that all accesso ries (including screws) are removed from the
box before discarding the packing mat erial.
B. Mount the HDD into a standard 19” EIA rack keeping in mind to use adequate spacing for
proper ventilation. Follow the instructions below for connections.
C. Connect a 75-ohm coaxial cable with proper connectors from the HDD Antenna Input Port
to the Off-Air antenna or cable source.
D. For mono audio output connect an audio cable from the HDD “Audio LEFT” (White) output
port to the modulator’s audio input. For output to a stereo modulator connect audio cables
from the HDD’s “Audio LEFT” (White) and “Audio RIGHT” (RED) Output ports to the
modulators Left and Right audio ports.
E. Connect a video cable from “Video Output” of the HDD to the Video Input of the modulator,
use of F to RCA adaptors may be necessary to make the connection.
G The HDD is designed to be powered by AC 110V/60Hz power. Using the wrong power
source and/or power voltage can damage the HDD. The use of a surge protector and a UPS
is highly recommended. Product warranty does not cover surge or spike damages.
H. Connect the HDD to the AC power source.
Note: 1 HDD is required for each channel to be converted and demodulated. Also, 1
modulator is required for each channel to be re-modulated.
6. OPERATIONS AND SETTINGS
A. Press the “Air /Cable” button to select Off-Air (8VSB), Cable (QAM), Cable inverted (QAM
inverted) or Cable normal (QAM normal) for the input signal type.
B. Press the HDD SCAN button. The HDD will initiate a channel scan for available
signals/channels in the given area. The word “SEARCH” will flash on the HDD display. The
scan process can take several minutes. You should know what channels are available, so
you can determine which of those signals needs to be converted and demodulated.
C. When the channel scan is complete, the first found channel number will be shown on the
HDD Display. The HDD may find multiple channels, use the CH+ and CH- Buttons to scroll
through the available channels until you find the one to be converted and demodulated. The
HDD LOCK LED will light up indicating a channel has been found and selected.
D. By pressi ng the ZOOM butt on the user can s elect up to seve n screen types: 4: 3/Center,
4:3/Full, 4:3/Letter, 4: 3/Zoom, 16:9/C enter, 16:9/L etter, 16:9/ Zoom. 4:3 is for s tandard TV
display, and 16:9 is for widescreen display. The Zoom feature allows the selected channel
image to be displayed as FULL (full screen display), LETTER (letter box with smaller image
surrounded by a black border), and Center.
4
Page 5

4:3 TV
16:9 TV
E. The HDD prov ides a Secondary A udio Programming sel ection feature. To select English
press the AUDIO button until the display reads LANG1. To select SAP press the AUDIO
button until the display reads LANG2. The available language depends on what the stream
contains. Not every stream has multi-language selections. Some have 2 or more language
selections, but most streams have just 1 language.
Note: Some broadcasters do not default the SAP audio ba ck to English if the program does
not have SAP. When a program does not have SAP, and the HDD is set to LANG2, there
may be no audio outputted from the HDD. Simply select LANG1 if this problem exists.
F. To adjust the volume of the HDD, press and hold the AUDIO button, then press the CH+ or
CH- button to increase or decrease the volume .The HDD has a factory set volume of 75%.
(Sample 12)
G. To view the selected channels signal strength, press and hold the ZOOM button, then
press the CH+ button. (Sample 13)
H. To view the signal quality of the selected channel, press and hold the ZOOM button, then
press the CH- button. (Sample 14)
I. To reset to the unit to the factory default settings press and hold the SCAN button for 10
seconds.
J. There are twenty-one samples of “8” segment display shown on page 6.
5
Page 6

1
2
3
[ Air ]
4
[ Nosig ]
7
[ Cable inverted(QAM)]
10
[ Default ]
[ Cable ]
5
[ A69.1 ]
8
[ Cable normal(QAM)]
11
[ Default Ok ]
[ Search ]
6
[ 130.556 ]
9
[ Language1 ]
12
[ Volume 75% ]
13
[ Strength 96 % ]
16
[ 4:3 / Zoom]
19
[ 16:9 / Zoom]
14
[ Quality 100 % ]
17
[ 4:3 / Center]
20
[ 16:9 /Center]
15
[ 4:3 / Letterbox]
18
[ 4:3 /Full]
21
[ 16:9 / Letter Box]
6
Page 7

HOLLAND ELECTRONICS LLC
LIMITED WARRANTY
Holland ELECTRONICS LLC, warrants that the product enclosed with this Limited Warranty
Statement will conform t o the manufacturer’s specifications and be free of defects in
workmanship and material for a period of five years (5) from the date of original purchase.
WARRANTY PROCEDURE:
If the product appears to be defective, contact Holland Electronics LLC at (805) 339-9060.
Holland Electronics will analyze the problem and offer solutions to prevent removing the unit
from service. If the unit is to be returned for evaluation, you will be issued a Return Material
Authorization (RMA) number.
Holland Electronics LLC will, at its option, repair or replace the defective unit, under warranty,
without charge for parts or labor. This repair will be subject to charges if signs of tampering or
misuses are detected. Incoming shipping costs will be the customer’s responsibility. Returns
will not be accepted without an RMA number.
The warranty and remedy provided above are exclusive and in lieu of all other express
warranties and unless stated herein, any statements or representations made by any other
person or firm are void. The duration of any implied warranties of merchantability or fitness for
a particular purpose on this product shall be limited to the duration of the express warranty set
fourth above. Except as provided in this written warranty, Holland Electronics LLC shall not be
liable for any loss, inconvenience, or damage, including direct, special, incidental, or
consequential damages, resulting from the use or inability to use this product, whether
resulting from breach of warranty or any other legal theory.
Some states do not allow limitations on how long an implied warranty lasts and some states do
not allow the exclusion or limitation of incidental or consequential damages, so the above
limitation and exclusion may not apply to you.
This warranty gives you specific legal rights, and you may also have other rights which vary
from state to state.
To arrange for Warranty Service: Call Holland Electronics LLC (805) 339-9060
7
 Loading...