

Holland Maverick BH421AG6, Wrangler BH421AG7 Instruction Manual

READ THIS BOOK FIRST
nstruction Manual
I
The Holland
Maverick
Maverick
to register your new
Holland grill, visit us at:
www.hollandgrill.com
For support and
BH421AG6
Gas Grill
The Holland
Wrangler
Wrangler
Gas Grill
BH421AG7
L.P. Tank not included.
L.P. NOTICE:
connected only to a 20 lb. L.P. cylinder that is
equipped with a Sherwood Valve #PV3349 and
an overfill protection device (OPD).
www.hollandgrill.com
ANSI Z21.58b - CSA 1.6b - 2010
©The Holland Grill Co., Inc. PN AG6-MAN V2011A
This grill shall be
3RR4
BARBECUE INDUSTR
ASSOCIATION MEMBER
The only Grill
Y
not to flare up!
!
DANGER
IF YOU SMELL GAS:
GRILL INSTALLER - LEAVE THIS INSTRUCTION
BOOKLET FOR THE GRILL OWNER.
1. SHUT OFF GAS TO APPLIANCE.
2. EXTINGUISH ANY OPEN FLAME.
3. OPEN LID.
4. IF ODOR CONTINUES, KEEP AWAY FROM
THE APPLIANCE AND IMMEDIATELY CALL
YOUR GAS SUPPLIER OR YOUR FIRE
DEPARTMENT.
!
WARNING
1. DO NOT STORE OR USE GASOLINE OR
OTHER FLAMMABLE LIQUIDS OR VAPORS IN
THE VICINITY OF THIS OR ANY OTHER
APPLIANCE.
2. AN LP CYLINDER NOT CONNECTED FOR
USE SHALL NOT BE STORED IN THE VICINITY
OF THIS OR ANY OTHER APPLIANCE.
GRILL OWNER - SAVE THIS INSTRUCTION
BOOKLET FOR FUTURE REFERENCE.
!
WARNING
DO NOT LET CHILDREN OPERATE OR PLAY
NEAR GRILL.
KEEP GRILL AREA CLEAR AND FREE FROM
MATERIALS THAT BURN
DO NOT BLOCK AIR VENTS IN GRILL
CHECK BURNER FLAMES REGULARLY
USE GRILL IN WELL VENTILATED SPACE.
NEVER USE GRILL IN ENCLOSED SPACE SUCH
AS GARAGE, PORCH OR COVERED PATIO.
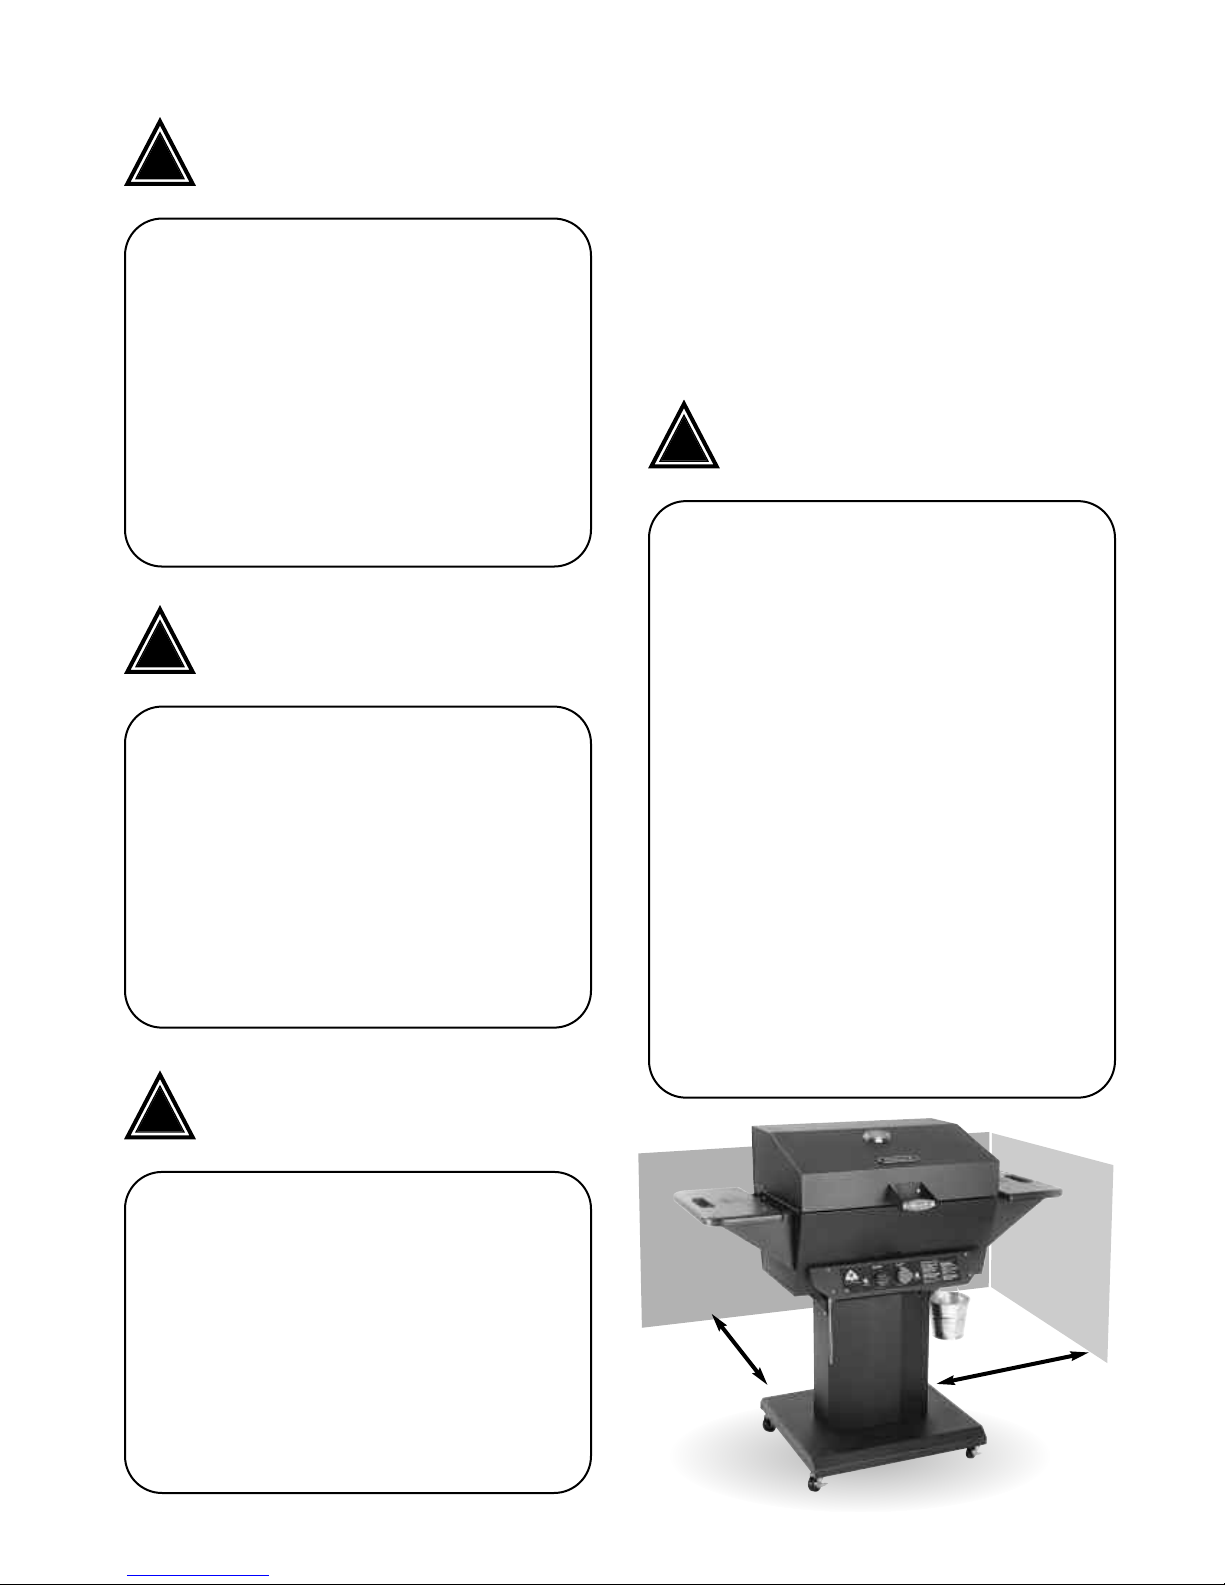
USE GRILL AT LEAST 3 FT. FROM ANY WALL
OR SURFACE. MAINTAIN 10 FT. CLEARANCE
TO OBJECTS THAT CAN CATCH FIRE
!
IMPORTANT
FIRST TIME USE: It is important that the grill be
lit and allowed to operate at least 30 minutes
before any food is placed on the grill grid.
Some smoke may appear during this period.
This is the preservative used during manufac
After initial heating, the grill is ready for
turing.
After burning of
use.
grid, drip pan and the inside of the lid with PAM
or similar spray, so food does not stick to the
grid and the inside is easier to clean.
f the grill, spray the food
-
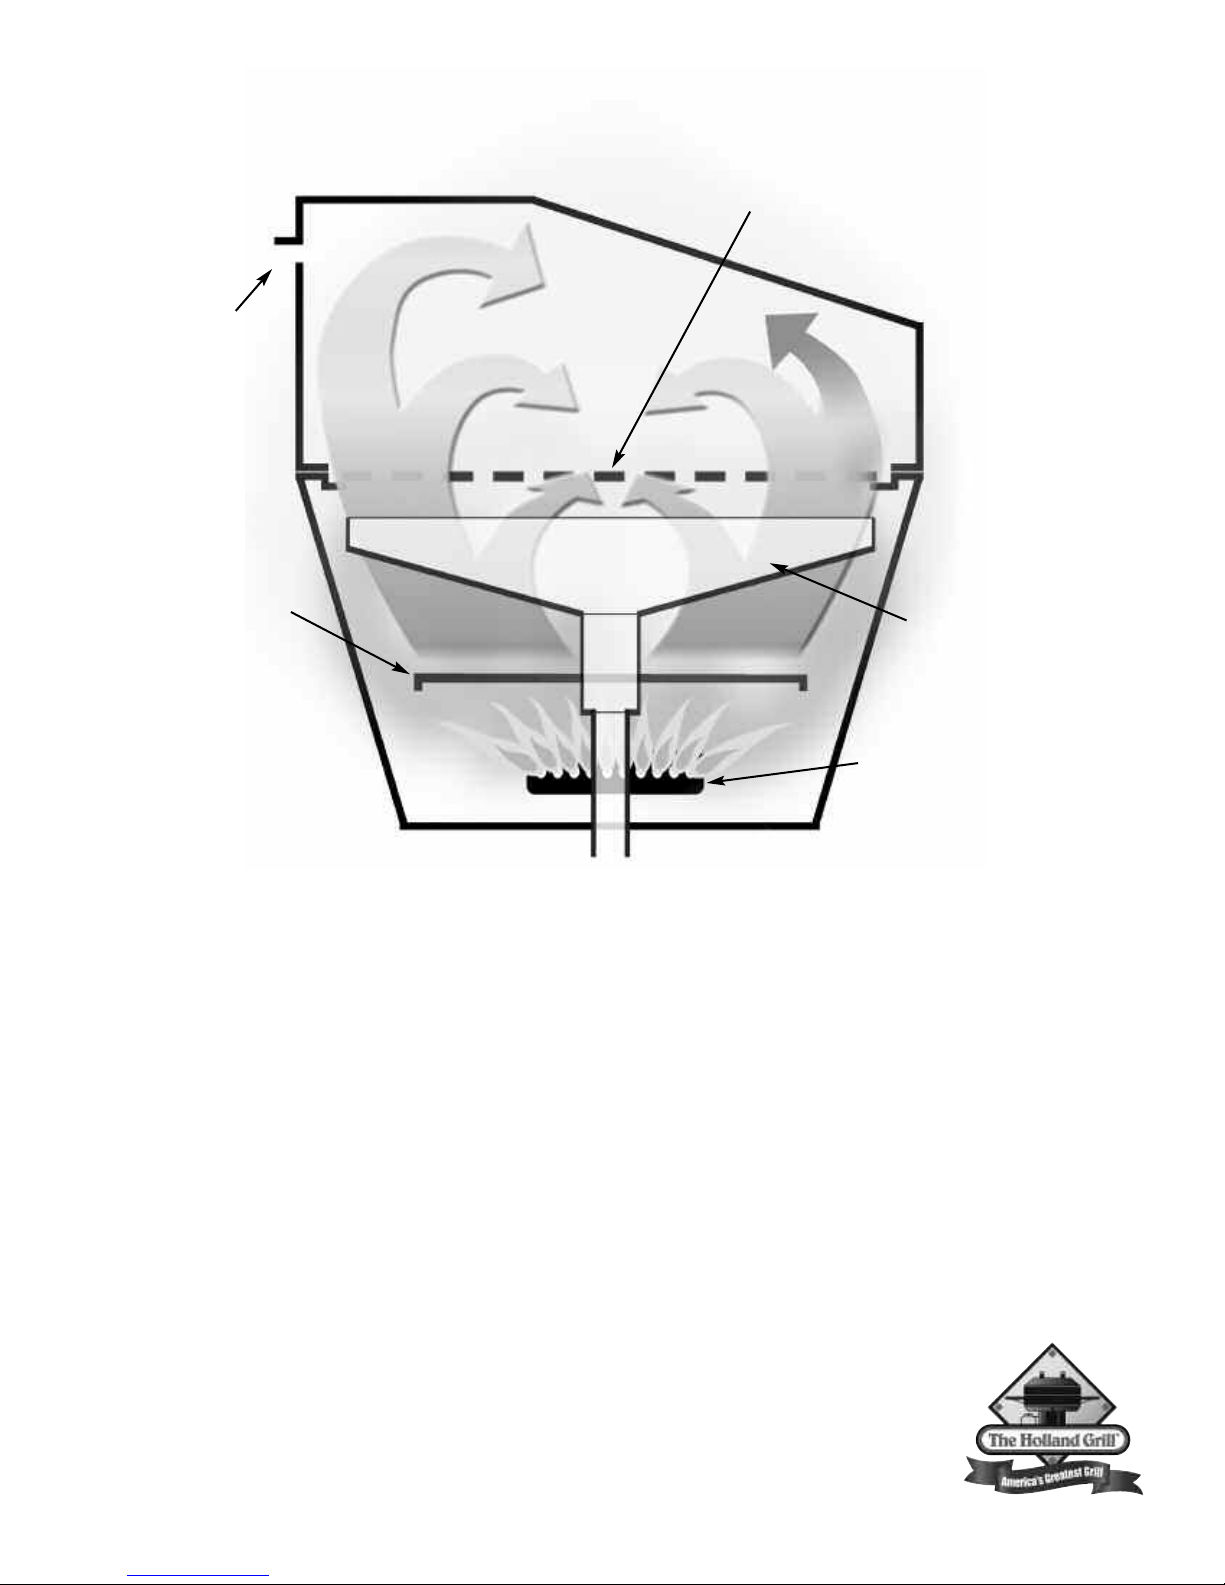
Cutaway Side View
of your patented Holland Grill
No Flare-up System
Vents
They provide just
the right amount of
ventilation to circulate
the heat. Your foods
cook evenly on
all sides.
Flame Deflector
Stainless Steel shield
distributes the heat evenly.
Stainless Steel
Cooking Grid
Stainless steel grid cleans easily and prevents
small foods from falling through.
Aluminum Drip Pan
Catches all the drippings
and prevents them from
catching fire.
Cast Iron Burner
Guaranteed for life of the grill!
Simply close the lid and cook by time.
It’s guaranteed not to flare-up.
Thank you for purchasing a Holland Grill. This is truly a grill that you, your family and friends
will use and enjoy for many years to come.
Many years of research and new technology have gone into the entire line of Holland grills,
ensuring they are safe, easy to use and grill to perfection. It’s important that you are aware
that
the Holland Grill is unlike any other grill on the market today. By design, it
allows you to grill, steam, smoke or bake without the worry of flare-ups associated with
ordinary grills.* Now you can relax while preparing food without the worry and nuisance of
trying to control flames that will ruin your food.
Not only will you be able to enjoy time with friends and family while you grill worry-free, you’ll
be able to do so for years to come. All Holland grills are made of top quality materials
which give them a sturdiness that will last for years. We use only the best materials
to ensure your new grill will look like new and cook like new well into the future.
This grill was designed and made for hassle-free outdoor cooking.
Please read and follow all the instructions in this manual.
*The Holland Maverick Grill does not have the steaming feature.
HOLLAND GRILL OWNERS MANUAL
M&W-1
Safety Information
Please read carefully.
FOR YOUR SAFETY
•
IF YOU SMELL GAS:
1
. SHUT OFF GAS TO THE APPLIANCE.
2
. EXTINGUISH ANY OPEN FLAME.
3
. OPEN LID.
4
. IF ODOR CONTINUES, IMMEDIATELY CALL YOUR GAS SUPPLIER
O
R FIRE DEPARTMENT.
FOR YOUR SAFETY
1. DO NOT STORE OR USE GASOLINE OR OTHER FLAMMABLE VAPORS
AND LIQUIDS IN THE VICINITY OF THIS OR ANY OTHER APPLIANCE.
2. AN LP CYLINDER NOT CONNECTED FOR USE SHALL NOT BE
STORED IN THE VICINITY OF THIS OR ANY OTHER APPLIANCE.
DO NOT STORE A SP
(A)
THIS APPLIANCE;
(B) NEVER FILL THE CYLINDER BEYOND 80 PERCENT FULL; AND
IF THE INFORMA
(C)
FOLLOWED EXACTLY, A FIRE CAUSING DEATH OR SERIOUS
INJURY MAY OCCUR.
• THIS GRILL IS NOT INTENDED TO BE INSTALLED IN OR ON RECREATIONAL
VEHICLES AND/OR BOATS.
• KEEP OUTDOOR COOKING GAS APPLIANCE AREA CLEAR AND FREE FROM
COMBUSTIBLE MATERIALS, GASOLINE AND OTHER FLAMMABLE VAPORS
AND LIQUIDS
• THIS GRILL SHALL ONLY BE CONNECTED TO AN LP CYLINDER WITH AN OVERFILL
PROTECTION DEVICE (OPD).
• THE GRILL SHOULD BE LIT AND ALLOWED TO OPERATE FOR AT LEAST 30
MINUTES BEFORE USING FOR THE FIRST TIME TO ALLOW PRESERVATIVE TO
BURN OFF. AFTER SMOKE STOPS COMING OUT OF STACKS, GRILL IS READY
FOR YOUR USE AND ENJOYMENT.
• THIS GRILL IS NOT FOR COMMERCIAL USE
• THIS COOKING APPLIANCE IS FOR OUTDOOR USE ONLY AND SHALL NOT BE USED
IN A BUILDING, GARAGE OR ANY OTHER ENCLOSED AREA.
• EXCESSIVELY WINDY OR COLD CONDITIONS MAY AFFECT GRILL COOKING
PERFORMANCE.
• CHOOSE ONLY A LEVEL LOCATION FOR GRILL OPERATION. THE HOLLAND GRILL
MUST BE SITTING SECURELY ON A LEVEL SURFACE FOR PROPER OPERATION
AND EVEN HEAT DISTRIBUTION.
• YOUR GRILL IS MADE FOR OUTDOOR USE ONLY
• THE VENT STACKS AND THE AIR INTAKE OPENINGS SHOULD NEVER BE
BLOCKED OR CLOSED DURING GRILL OPERATION.
• MINIMUM CLEARANCE FROM SIDES AND BACK TO COMBUSTIBLE
CONSTRUCTION, 36 INCHES (94CM) FROM SIDES AND 36 INCHES (94CM) FROM
BACK. IT IS VERY IMPORTANT TO OBSERVE AND MAINTAIN THE PROPER
CLEARANCES FROM COMBUSTIBLE CONSTRUCTION.
• DO NOT USE THIS OUTDOOR APPLIANCE UNDER OVERHEAD COMBUSTIBLE
SURFACES.
• DO NOT STORE A SPARE LP GAS CYLINDER UNDER OR NEAR THIS APPLIANCE.
WARNING: FOLLOW LOCAL CODES
• THE INSTALLATION OF THIS APPLIANCE MUST CONFORM WITH EITHER
TIONAL FUEL GAS CODE ANSI ST
THE NA
THE FOLLOWING: ANSI Z223.1/ NFP
TION CODE; CSA B149.1, OR PROP
ALLA
INST
HANDLING CODE, B149.2, OR THE ST
VEHICLES, ANSI A 119.2/NFP
TIONAL VEHICLE CODE, AS APPLICABLE”.
RECREA
ALLATION SHALL BE IN ACCORDANCE WITH CAN/CGAB149.1
INST
•
TURAL GAS AND PROP
NA
CODES WHERE APPLICABLE.
ARE LP-GAS CYLINDER UNDER OR NEAR
TION IN “(A)” AND “(B)” IS NOT
ANDARD REFERENCED WITH
TURAL GAS AND PROP
A 54, NA
ANE STORAGE AND
ANDARD FOR RECREA
A 1192, AND CSA Z240 RV SERIES,
ANE INSTALLATION CODE AND LOCAL
TIONAL
ANE
The Fuel System
Gas grills are used SAFELY by millions of people when following simple SAFETY precautions.
The items in the fuel system are designed for operation with the
Holland Grill. They must not be replaced with any other brand.
(See parts list for replacement items.)
GAS BURNER: The gas burner is constructed of heavy cast iron and
should not require maintenance other than inspection for insect nests
inside the venturi. If you remove the burner for
cleaning, it must be reinstalled exactly as removed.
AIR SHUTTER: See item 11 in lighting instructions (see figure 6 for
details.)
BURNER VALVE: The burner valve is operated in only two
positions. The Off position is when the handle is across (perpendicular
to) the burner, which stops the flow of gas. When the valve has been
set in the Off position, it is important to close the valve at the LP gas
cylinder. The LP gas cylinder is the primary valve and must be closed
when the grill is not in use. The On position is when the handle is in
line with the burner (see figure 6 for details. See lighting instructions
for more information.) The burner valve controls the heat allowed in
the grill by means of a plug orifice. This device is set at the factory
and must not be tampered with or replaced. Turn off LP supply at
cylinder when appliance is not in use.
ONLYA FACTORY SUPPLIED VALVE SHOULD BE USED. (See the
parts list for replacement items.)
LP GAS HOSE: The LP gas hose is designed for use with LP gas
only. Use with any other gas is dangerous. The hose is made of a
flexible material to make it easy to install. This material is subject to
considerable twisting and turning during installation. It is very important that the hose be inspected for cracks, cuts, abrasions, wear and
loose fittings before each use of the outdoor cooking gas appliance.
The visual inspection should include leak testing the entire length of
hose and fittings. (See final assembly instructions for more informa
tion.)
If the hose shows signs of damage or leakage, it must be replaced
prior to the operation of the grill. Only a factory authorized replacement part can be used. (See the parts list for replacement items.)
Failure to properly inspect or replace hose with an authorized replacement may result in accident or injury.
LP GAS REGULATOR: CAUTION: Use only the gas pressure regulator and hose supplied with this appliance. This regulator and hose is
set for an outlet pressure of
1
water column. Substitution of
1 inches
regulator and hose by any other device or any other manufacturer's
regulator and hose is dangerous and could result in serious injury.
(See the parts list for replacement items.)
IMPORTANT LP CYLINDER INFORMATION: Failure to follow these
DANGER statements exactly may result in a fire causing death or
serious injury.
The Holland Co. Inc. recommends the use of cylinder manufacturers
Manchester and Worthington, Wolfdale with a 47.6 lb water capacity.
-

Other cylinders may be acceptable for use with the appliance provided
they are compatible with the appliance retention means (see figure 9 on
page E6 for retention means point of contact).
PROPANE FUEL: Warning – propane is a flammable gas. Improper
handling may result in an explosion and/or fire and serious accident or
injury. Your grill is set to operate on Propane (LP) gas and is equipped
with the proper orifice for this gas. Caution: Do not connect this grill to
any gas supply except propane or natural gas. Propane gas is heavier
than air and will settle in low areas. Make certain adequate ventilation is
available when using your grill and that the gas cylinder is stored outside
in a well ventilated area out of the reach of children when the grill is not
in use.
LP GAS CYLINDER: This grill is designed and intended to be used with
an LP gas cylinder with a nominal LP gas capacity of 20 pounds. Such a
cylinder is approximately 12-3/8" in diameter with an overall height of 181/16". The Holland Grill does not come with an LP gas cylinder. This
must be purchased separately and is available at most hardware stores.
The cylinder used must be constructed and marked in accordance with
the specifications for LP gas cylinders of the U.S. Department of
Transportation (DOT) (4BA-240) and the National Standard of Canada
CAN/CSA-B339, Cylinders, Spheres, and Tubes for the transportation of
dangerous goods. Only a cylinder equipped with an overfill protection
device (OPD) should be used.
The LP gas cylinder shall be used only outdoors in a well ventilated
space and not in a building, garage, or any other enclosed area. The LP
gas cylinder is designed to be used, stored, and transported in the
upright position. The Holland Grill may be stored indoors if the LP gas
cylinder is removed and stored outdoors. NEVER turn the cylinder
upside down or on its side. Always transport, store and use your cylinder
in the upright position. Cylinders must be stored outdoors out of the
reach of children and must not be stored in a building, garage or any
other enclosed area.
The cylinder must be provided with a Sherwood valve, part #PV3349,
which will connect with (quick connect) the QCC-1 Fitting provided on
each of our LP (propane) grills. Must also have a safety relief device
having a direct communication with the vapor space of the cylinder. The
cylinder supply system must be mounted vertically for proper vapor withdrawal. The cylinder shall include a collar to protect the cylinder valve.
The grill must be connected to the gas supply by a hose. Turn off LP
supply at cylinder when appliance is not in use.
transport a full or empty gas cylinder in a closed automobile
NOT
DO
trunk or in a closed passenger area.
Filling the gas cylinder requires removing it from the grill.
The cylinder is
attached to the grill by connecting the regulator assembly to the outlet
portion of the gas cylinder valve. This connection is made by the QCC-1
fitting pictured in Figure 1. The large plastic nut fits on the outside of the
threads and turns right, or clockwise to tighten. No tools are necessary.
Hand tight is sufficient. If a good connection is not achieved, the safety
valve inside will not permit the proper amount of gas to flow
. When con
necting the regulator to the cylinder valve, be sure the pressure relief
valve is directed away from the front and away from the grill. If the relief
valve should open, the propane will be directed where it is likely to do
the least harm. To disconnect regulator assembly turn large plastic
nut left or counter-clockwise. When disconnecting and connecting
the gas cylinder, be careful that the regulator assembly does not
strike the grill, the ground, or any other surface. If any difficulty at all
is had in connecting or disconnecting the regulator assembly to the
cylinder valve, contact your local gas supplier for assistance.
When disconnected from the cylinder, a valve cap must be installed.
(See figure 1.) Place dust cap on cylinder valve outlet whenever the
cylinder is not in use. Only install the type of dust cap on the cylinder valve outlet that is provided with the cylinder valve. Other types
of caps or plugs may result in leakage of propane. Failure to install
a valve cap when the cylinder is disconnected from the fuel system
is dangerous and may result in accident or injury.
When re-connecting the LP gas cylinder, be sure to tighten the fitting until snug. This connection, as well as all other fittings and connections between the cylinder and burner valve, should be inspected for damage and leak tested after every filling or re-connection.
Keep any electrical supply cord and fuel supply hose away from
any heated surface.
NATURALGAS: If natural gas is used, contact your local supplier
to set it up properly. The N.G. Holland Grill is set to operate at 7
inches water column pressure, using an orifice with a #48 drill size.
If your grill seems too hot, first call your local gas company to
determine what pressure you have.
Never allow anyone to change orifice size without
authorization from factory
.
SPARK IGNITER: This grill is equipped with a rotary Piezo igniter
system. Asimple Clockwise rotation of the igniter knob produces a
spark at the burner head, lighting the burner. To check that the
spark igniter is working properly, leave gas supply turned OFF and
observe the spark by looking through the peep hole above the con
trol panel or from below the control panel to the left side of the burn
-
er in the burner opening. Asmall blue spark should be visible at the
left side of the burner head every time the igniter “fires”. Aloud
“hammer” like sound is produced by the mechanism when sparking.
FIGURE 1
CONNECT
Clockwise
DISCONNECT,
Counter Clockwise
COUPLING
NUT
REGULATOR
HANDWHEEL
CYLINDER
VALVE
CAP &
STRAP
20 LBS
LP GAS CYLINDER
.hollandgrill.com
www
M&W-2
HOLLAND GRILL ASSEMBLY INSTRUCTIONS
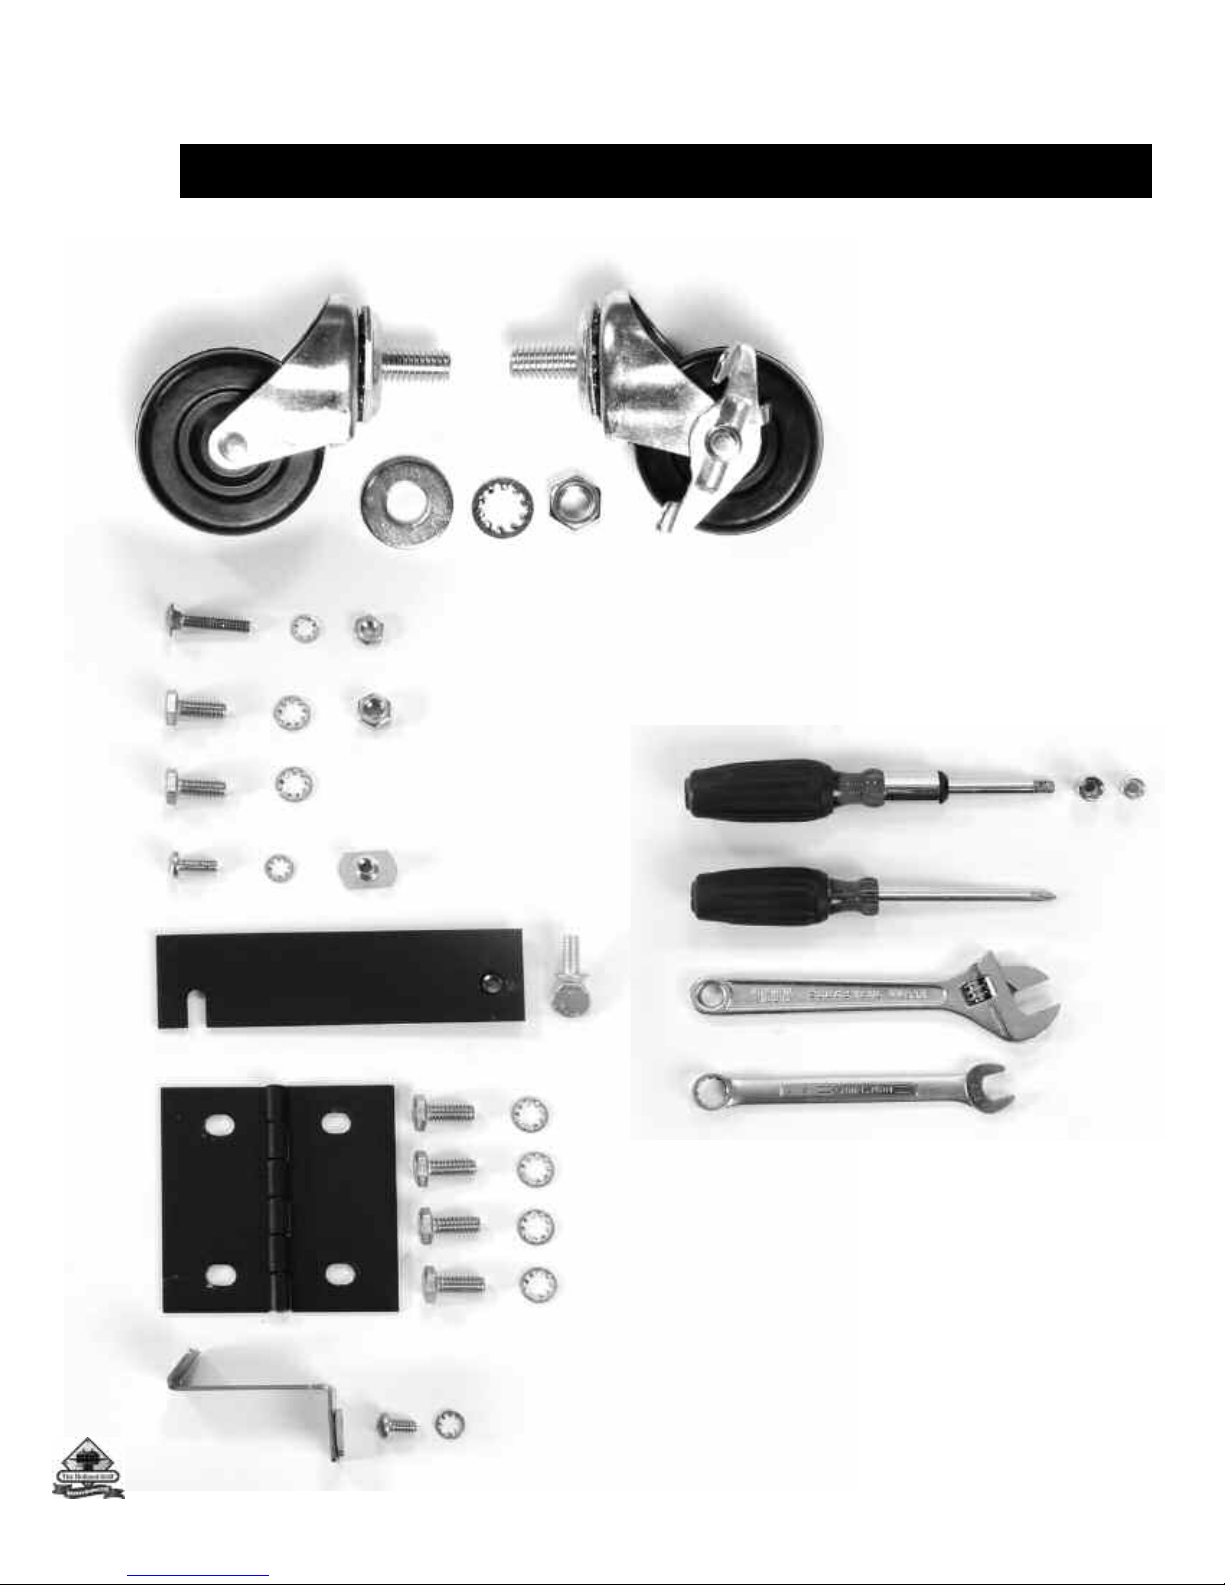
Fasteners Guide
4 Caster Wheels
#10 - 24 x 1” Carriage Bolt, Lockwasher & Locknut, Side shelves
1/4 - 20 x 1/2”
1/4 - 20 x 1/2”
#10-24 x 1/2” Pan Head Phillips, lockwasher & T
LP Tank bracket, 1/4 - 20 x 5/8”
, locking wheels go in front,
Hex Head Bolt, Nut and lockwasher,
Hex Head Bolt and lockwasher, Attach most parts of the grill
Thumbscrew,
3/8” washer, lock washer and nut
Angle brackets
-nut,
Attach Lid stops.
Attach tank hold down bracket
Tools Needed:
1. Phillips screwdriver
2. 3/8” & 7/16” nut driver
3. adjustable and 9/16” wrench for the wheel casters
2 Lid hinges, Attach grill bottom to grill lid
Bucket bracket, Provides hook to hang grease bucket
M&W-3
 Loading...