

Hohem iSteadyMobile Mobile Manual
3-Axis Handheld Stabilizing Gimbal
for Smartphone
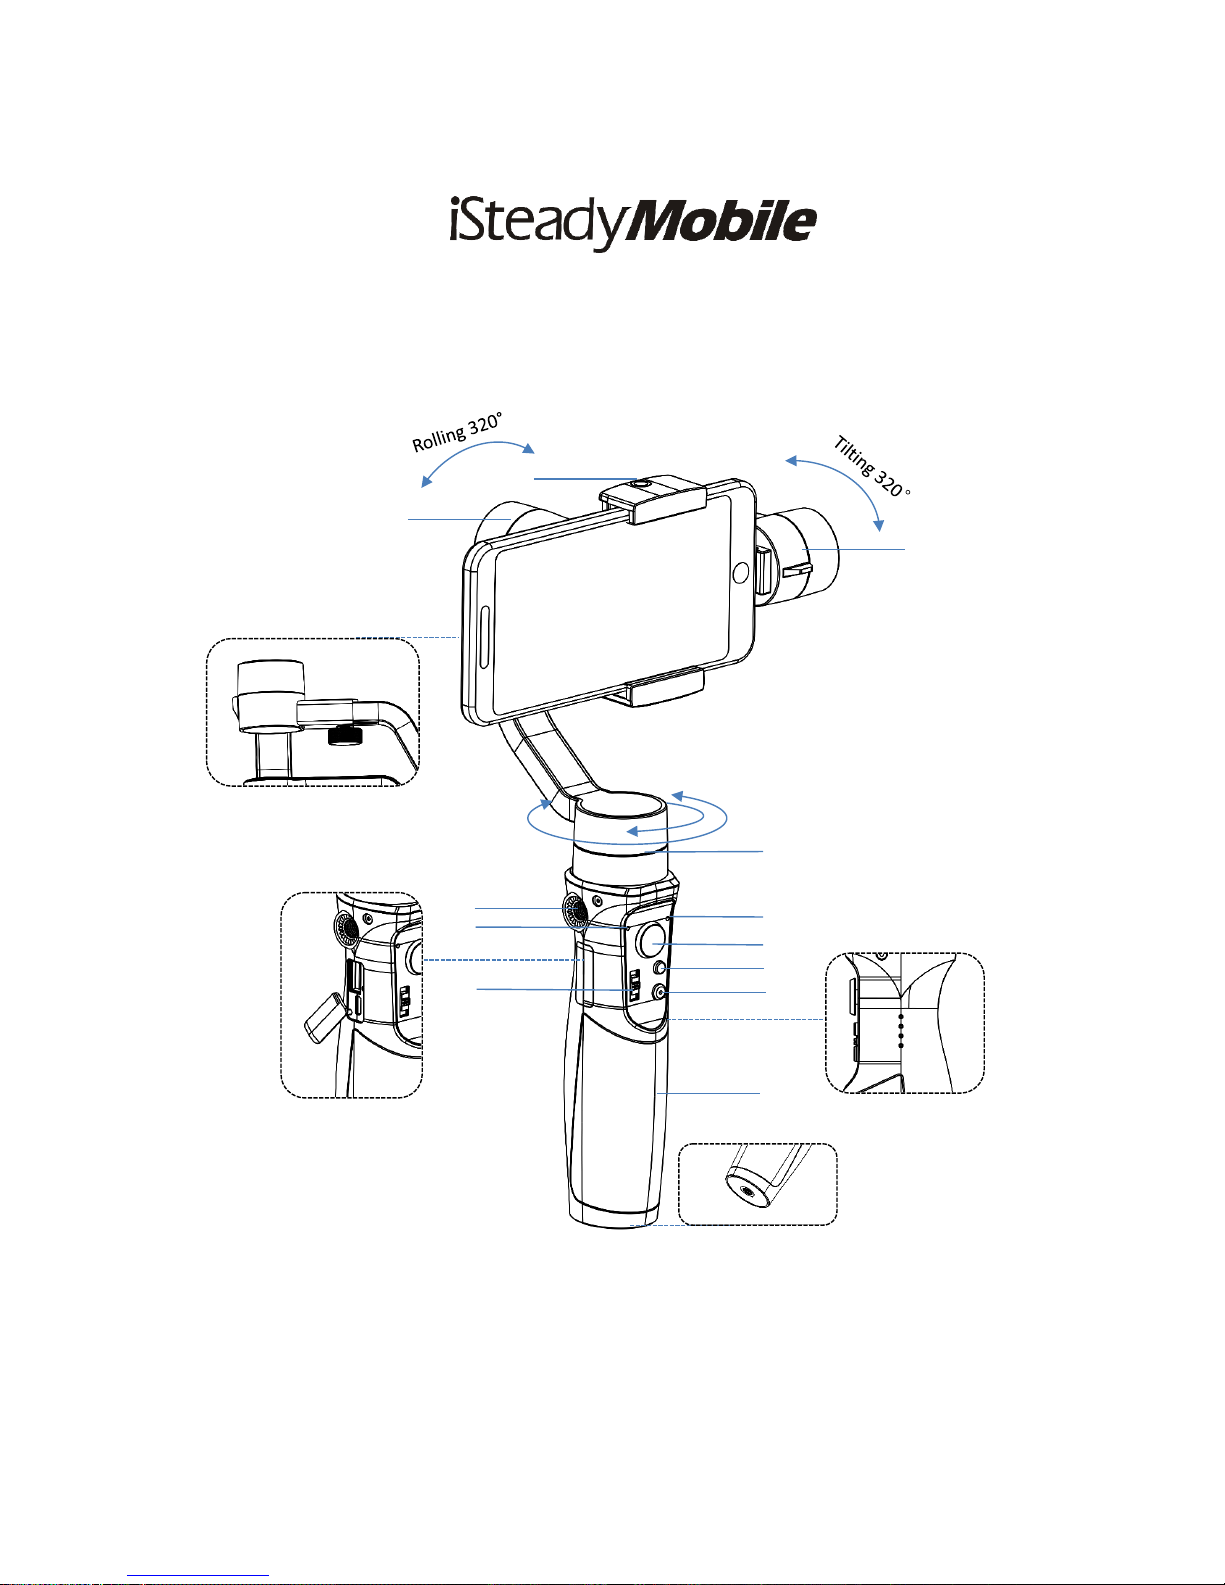
Product Overview
1
6
7
3
5
4
2
9
8
12
7. Pan Motor
8. Mode Light
9. Joystick
10. Mode Button
11. ON/OFF (Shutter Button)
12. Handle ( Battery inside)
10
11
1. Roll Motor
2. 1/4 Inch Extension Screw Hole
3. Bluetooth Light
4. Zoom In/ Zoom Out
5. 1/4 Inch Extension Screw Hole
6. Tilt Motor
Panning 640°
Slide arm
Charging Port
Power Indicator Light
1/4 Inch Extension
Screw Hole
⚫ Accessories List
Micro USB Cable*1
Tripod*1
Carry Case*1
User Manual (Includes warranty card)*1
1、 Installation Instruction
Install the ‘Hohem Studio’ App
Search for ‘Hohem Studio’ in the App Store or Google Play,
and install the app on your mobile phone.
*‘Hohem Studio’ supports iOS 9.0 and Android 8.0 or above
2.Stabilizer Charging& Smartphone Charging
Fully charge the stabilizer before using it for the first time.
Using the standard USB cable connecting to the stabilizer charging port (or other power
sources)
a. 4 Led lights indicators
4 Led lights on means power is 100%
3 Led lights on means power is 75%
2 Led lights on means power is 50%
b.Indicator Light Fast Flashing: Charging status
c.Indicator Light Solid: Fully charged status
a. USB Port: Charging the stabilizer
b. Micro USB Port: Charging the smartphone
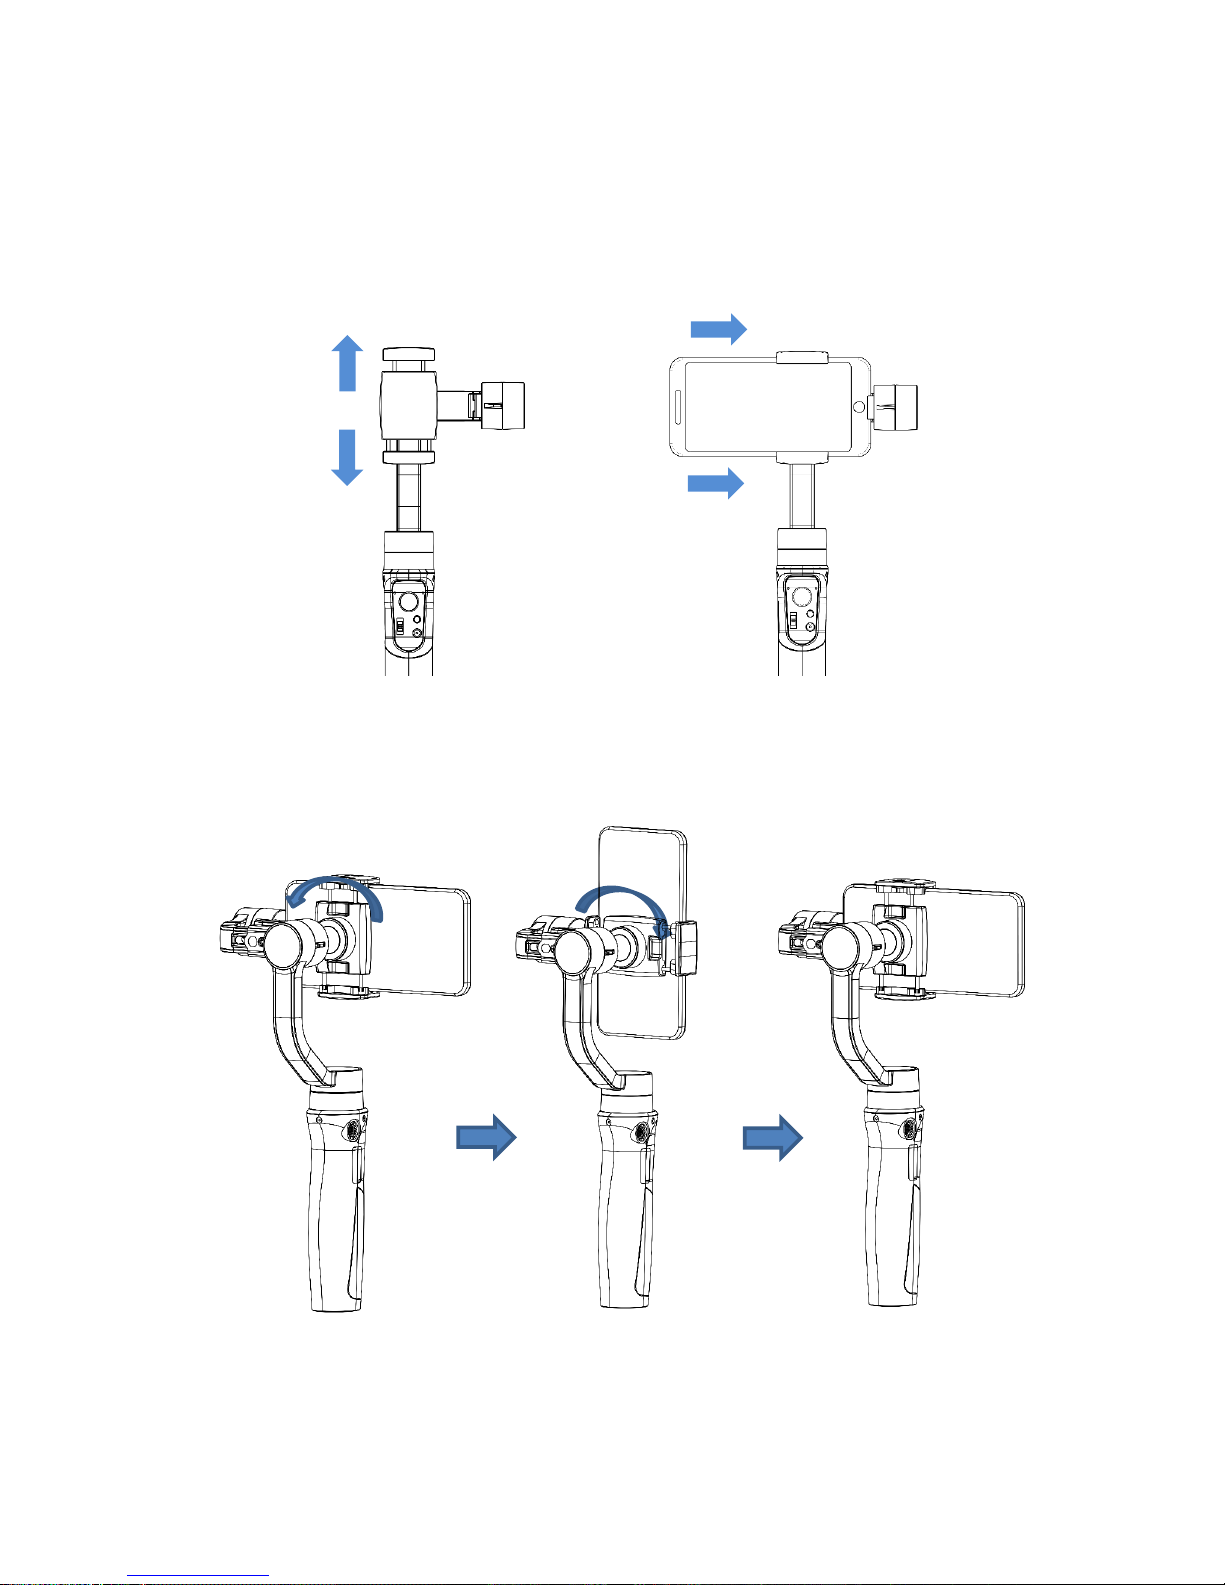
3. Mount the Smartphone
Please make sure the gimbal is turned off before mount the phone, and we suggest remove
the phone case.
(1) Push and open the phone clamp, insert the smartphone until the home button
side as close as possible against to the tilt motor.
NOTE: The phone Home button side must be placed closed to the tilt motor and ensure
it is fixed tightly in order to avoid the gimbal shaking.
(2)Manually rotate the phone clamp to make the phone in vertical shooting.
 Loading...