

Hoggi SWINGBO User Manual

SWINGBO
System-Wheelchair for kids
user manual
GB/US
- partnering together to mobilise kids


1
User Manual for SWINGBO System-Wheelchair for kids, model S, V, STi und VTi
Contents Page
1 Common Information
1.1 Preface ___________________________________________________________________ 2
1.2 Application _________________________________________________________________ 2
1.3 Declaration of conformity ______________________________________________________ 2
1.4 Terms of warranty ___________________________________________________________ 2
1.5 Servicing and repairs _________________________________________________________ 2
2 Safety Instructions ______________________________________________________________ 3
2.1 Meaning of symbols _________________________________________________________ 3
2.2 Common safety instructions ___________________________________________________ 3
3 Delivery and Preparing for Use ____________________________________________________ 6
4 Adjusting and Adaptation Possibilities ____________________________________________ 10
4.1 Wheel lock ________________________________________________________________ 10
4.2 Seat width / Seat height / Wheel base / Camber ___________________________________ 10
4.3 Seat depth ________________________________________________________________ 11
4.4 Backrest height ____________________________________________________________ 12
4.5 Backrest angle _____________________________________________________________ 12
4.6 Seat position and the centre of gravity (Active degree) ______________________________ 12
4.7 Foot rest hanger 90° (knee angle) ______________________________________________ 12
4.8 Lower leg length ___________________________________________________________ 12
4.9 Footrest angle adjustment ____________________________________________________ 12
4.10 Footrest lock (optional) ______________________________________________________ 13
4.11 Seat angle adjustment _______________________________________________________ 13
4.12 Height adjustment of push handle unit / push bar __________________________________ 14
4.13 Anti tip ___________________________________________________________________ 14
4.14 Detaching wheels with quickrelease ____________________________________________ 14
4.15 Pneumatic tyres / PU-tyres ___________________________________________________ 15
4.16 Hand rims ________________________________________________________________ 15
4.17 Drum brakes ______________________________________________________________ 16
5 Accessories ___________________________________________________________________ 17
5.1 Seat cushion ______________________________________________________________´17
5.2 Back cushion ______________________________________________________________ 17
5.3 Spoke guards _____________________________________________________________ 17
5.4 Push handle unit ___________________________________________________________ 17
5.5 Push bar _________________________________________________________________ 19
5.6 Single push handle _________________________________________________________ 19
5.7 Anti tip ___________________________________________________________________ 19
5.8 Headrest standard with cushion _______________________________________________ 20
5.9 Universal headrest bracket ___________________________________________________ 20
5.10 Headrest with occiput upholstery ______________________________________________ 20
5.11 Lap belt __________________________________________________________________ 20
5.12 Ankle hugger ______________________________________________________________ 21
6 Transportation _________________________________________________________________ 21
6.1 In the Trunk (luggage space) of a Car __________________________________________ 21
6.2 Using SWINGBO System-Wheelchair for kids for Bus Transport ______________________ 22
6.3 Transfer - getting into or out of the wheelchair ____________________________________ 22
7 Maintenance __________________________________________________________________ 23
8 Technical Data _________________________________________________________________ 24

2
1 Common Information
1.1 Preface
Thank you for selecting the SWINGBO wheelchair. We have designed this high-quality product to make your
life safer and easier, and we’ve included this manual to help you use and care for it. Please read the following
instructions to make sure you use this product as recommended. If you have any further questions, or if you
have any problems, please contact your healthcare provider.
We hope that SWINGBO meets your expectations.
The design, as described in these Instructions for use, are subject to technical alterations without notice.
1.2 Application
The SWINGBO wheelchair is designed solely for individual indoor and outdoor use by persons who are
unable to walk or who have a walking impediment, and can be operated by the patient or by another person.
Assistance may be required due to:
• Paralysis (paraplegia / tetraplegia or tetraparesis) • Muscle and nerve disorders
• Loss of limbs (dysmelia/lower limb amputation) • Imperfect osteogenesis
• Infantile/spastic cerebral palsy • Poliomyelitis
• Spina bifida
1.3 Declaration of Conformity
HOGGI® GmbH as manufacturer with sole responsibility declares that the SWINGBO System-Wheelchair
conforms to the requirements of the 93/42/EEC Guidelines.
1.4 Terms of Warranty
Warranty applies only when the product is used according to the specified conditions and for the
intended purposes, following all manufacturer’s recommendations.
The manufacturer is not responsible for damages caused by components and spare parts not approved by
the manufacturer.
1.5 Service and Repairs
Service and repairs on the SWINGBO wheelchair should only be carried out by authorized HOGGI dealers.
Should any problems arise, please contact the dealer who supplied your SWINGBO.
Authorized dealers only fit original HOGGI spare parts.
For Preparing, repair and service, the following tools are required:
Allen wrench size: 3 mm, 4 mm, 5 mm and 6 mm
Wrench, sizes: 8 mm,10 mm, 13 mm, 17 mm, 19 mm and 24 mm
Your authorized HOGGI dealer:
3
2 Safety instructions
2.1 Meaning of symbols
Caution!
Warning of possible danger of accident and injury. Warning of possible technical damage.
Information!
about use of product.
Information!
for service-personnel.
Attention!
Read manual before use!
2.2 Common safety instructions
Read manual completely before use!
Familiarize yourself with handling and functions of the wheelchair before use and practice
the handling.
You are responsible for the safety of your child. The safety of your child could be
affected if you do not follow the instructions of this manual. Nevertheless not all possible
circumstances and unpredictable situations can be covered by this manual. Reason, care
and circumspection are not features of the product, they are required of persons, who use
the wheelchair or attend it. The person, who is using the wheelchair and its accessories
should understand all instructions. It must explained to every other person using the
wheelchair and its accessories.
If instructions are not clear and further explanations become necessary, or if you have
further questions please contact your HOGGI dealer.
Practise with the new wheelchair on even, straightforward terrain first, together with the
child. Together with the child, learn how the wheelchair reacts when the centre of gravity
shifts; for example on slopes or inclines or when clearing obstacles such as steps and
curbs. This should be done only with assistance from another person.
Using an anti-tipper is strongly recommended for inexperienced wheelchair users.
Strap in your child at all times, when in the wheelchair.
HOGGI points out, that any use beside the typical use can be dangerous. The wheelchair
is not suitable for jogging, running, skating or similar activities. Swivelling front wheels tend
to wobble at higher speed, which can cause a sudden stop and tip over of the wheelchair.
Use the wheelchair only at regular walking speed. Under no circumstances leave the
handle bar while pushing and never push the wheelchair away.
The wheel chair should only be used on solid level ground.
Use your wheelchair as intended by the manufacturer. For instance, do not drive into
obstacles (including steps, curbs) without braking. Do not „jump” the chair down from
higher surfaces.
4
To clear obstacles such as steps and curbs, tilt the wheelchair onto the rear wheels (pull it
backwards to go up; to descend, slowly lower it forward).
If only one attendant is available when ascending or descending stairs, an incorrectly set
anti-tipper (if mounted at all) can lead to severe falls. Adjust the anti-tipper so that it does
not come in the way of the steps during transport. Afterwards, swing the anti-tipper back to
its operational position.
Do not go up or down stairs without the assistance of another person. If devices such
as ramps or elevators are available, please use them. Ensure that the anti-tipper
(if mounted) is outside the danger-area. If wheelchairfriendly access is missing, two
attendants must carry the wheelchair over the obstacle.
When ascending slopes or ramps and when crossing obstacles on upward slopes, always
lean the wheelchair user‘s upper body far forward.
When descending slopes, do not drive without braking and reduce your speed. Reduced
load on the casters due to centre of gravity shifting can cause the casters to flutter.
If you have to park on a slope, face the wheelchair uphill with the brakes engaged and
ensure that the seat is in the upright position. There is a risk that the pushchair might tip
over backwards if the seat is the reclined position.
Before leaving the wheelchair and before getting into and out of it, always lock the wheel
locks.
It is only allowed for children with a body weight less than 20 kg to stand on the footplate
getting into the wheelchair.
For children above 20 kg fold up the footplate before getting into or out of the wheelchair.
Depending on footplate settings and wheelchair geometry, the wheelchair may tip over if
the user boards the chair using the footplate. First practise boarding the chair with the child
and an attendant who can secure the wheelchair, and modify footplate and seat height
settings if the chair has a tendency to tip over. In addition, turn the caster fork to the front
prior to using the footplate for getting into the wheelchair; this increases the wheelbase
and thereby the wheelchair‘s stability against tipping.
Please be aware that with certain footrest settings the footrest can collide with the caster
wheels. Then select a different seat height or frame length.
The effectiveness of the wheel lock and the overall driving quality are dependent on
adequate air pressure. With properly inflated rear wheels and even tyre pressure on both
sides, your wheelchair is much easier to operate and manoeuvre. Before starting to use
your wheelchair, check that the tyres are inflated correctly. The required air pressure is
printed on the side of the tyre. For rear wheels, it should be at least 6 bar.
All brakes acting on the tyres do not serve as service brake but are only designed as
parking brake (wheel lock). The wheel locks must not be used as driving brakes for slowing
down the wheelchair, as in extreme cases, the abrupt stopping of the wheelchair can lead
to falls.
Please keep packaging material away from children. Plastic packaging presents the
danger of suffocation.
Never leave your child unattended in the wheelchair even when they are strapped in and
the brakes engaged.
5
In the dark, the user should wear light clothing or clothing with reflectors in order to improve
visibility. Ensure that the reflectors installed on the sides and rear of the wheelchair are
easily visible. We also recommend installing active illumination.
Static stability is at xx° inclination.
Attaching heavy bags or other weight to the push handles can adversely affect stability.
Extreme settings (e.g. shortest wheelbase and seat in the backmost position) combined
with an unfavourable body posture can cause the wheelchair to tip even on level ground.
Under no conditions should the anti-tipper assume the function of transport wheels, for
example to transport a person in the wheelchair with the rear wheels removed. The antitipper must audibly lock in place, before it is able to bear loads.
Firm seating must be verified by the user or by an attendant.
The SWINGBO wheelchair is only intended to carry one child at a time.
The maximum load for the SWINGBO wheelchair is 50 kg.
Accessories and add-ons reduce the maximum load proportionately.
Caution!
We recommend that, wherever and whenever possible, users transfer to the seats installed
in the motor vehicle and use the corresponding vehicle restraint systems, because this is
the only way to ensure optimum protection of the passengers in case of an accident.
Your SWINGBO wheelchair is not admitted for use as a seat in a motor vehicle.
Be careful in case of extreme temperatures. The wheelchair can heat up significantly when
in the sun or in the sauna. In extreme cold, there is a risk of hypothermia.
Slowing down from high speeds or when descending longer slopes tends to heat up the
hands and fingers, especially if using aluminium push rings. When using the wheelchair
outdoors, leather gloves should be worn. Gloves provide the wheelchair user with a better
grip and protect his or her fingers from dirt and hot metal.
Always make sure that the quick-release axles are correctly set on the rear wheel. It must
not be possible to remove the rear wheel unless the button on the quick-release axle is
pushed.
Whenever you change any settings on the wheelchair, make sure that you firmly tighten
any screws that have been loosened.

6
3 Delivery and Preparing for Use
Your SWINGBO childrens’ wheelchair will normally be supplied with
the backrest folded and with front castors and rear wheels removed.
For transportation the seat angle has been set. Adjust the seat to the
required angle (see section 4.11).
The original package contains the following parts:
• Chassis and seating unit with folded backrest
• Rear wheels and quick-release axles unmounted
• Front castors already mounted in the front castor forks. These are
for the dealer to attach to the wheelchair
• Seat, back and optional side upholstery
• Additional accessories as ordered
• Instructions and list of tools required
Carefully remove the transport packaging.
To prepare the wheelchair for use please proceed as follows:
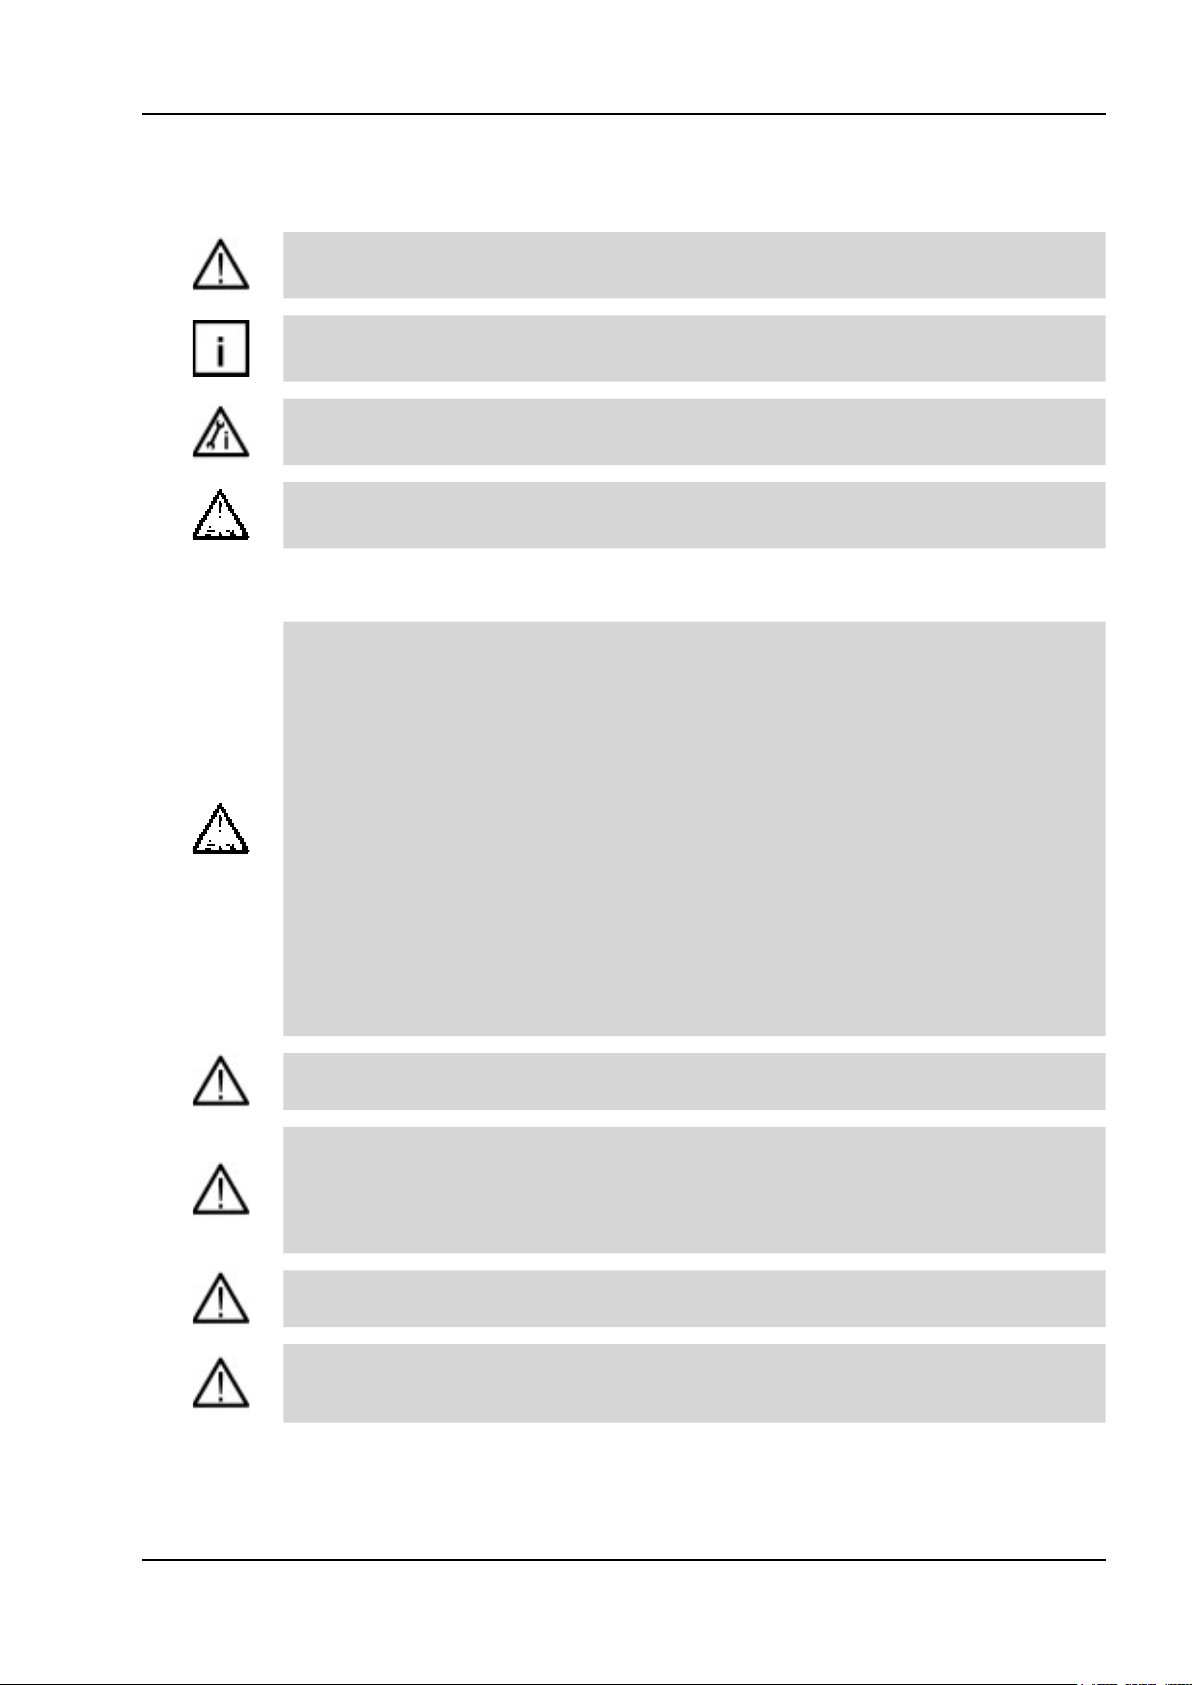
• Grip the head of the quick-release axle as illustrated (2) and press
the release knob.
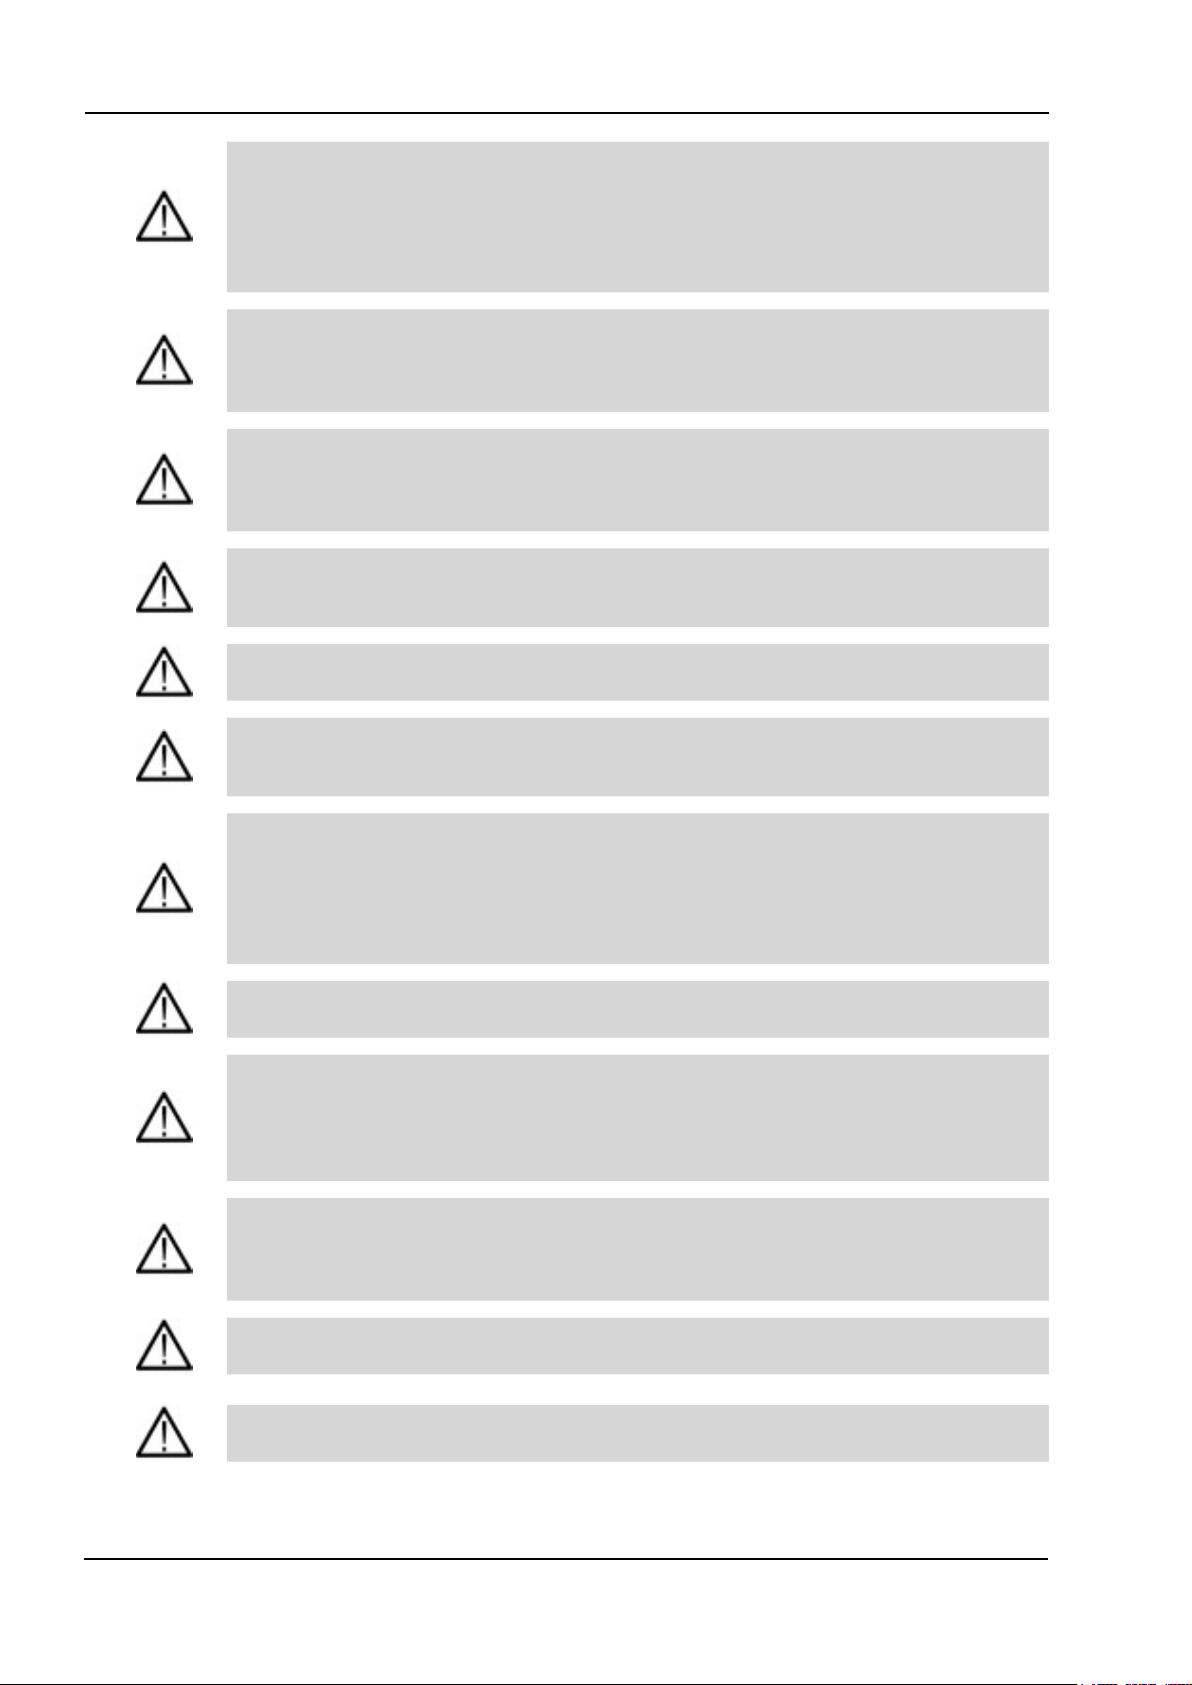
• Whilst pressing the release knob, position the quick-release axle
into the rear wheel bearing (3).
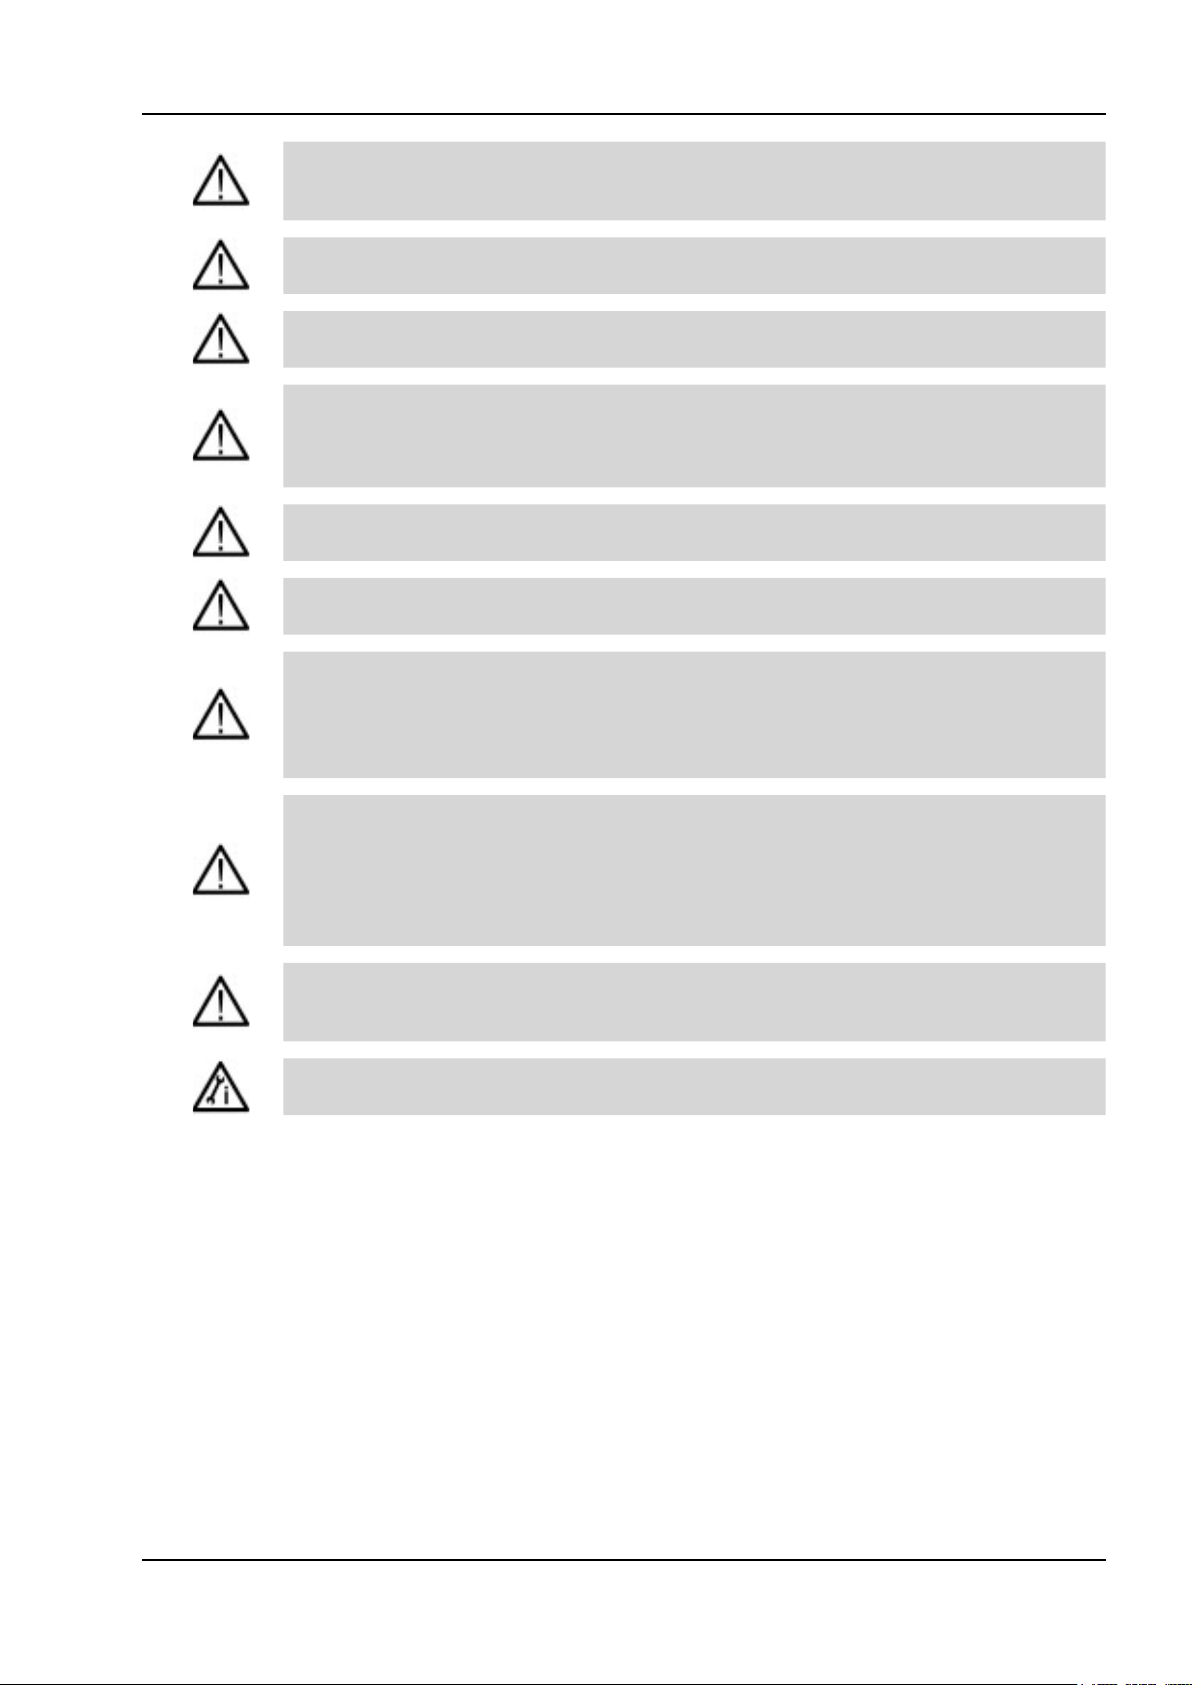
• Tilt the wheelchair onto the front castors and lift the wheelchair by
holding the rear of the seat (4).
• Insert the rear wheel and the quick-release axle into the axle
housing. Hold the spokes (4) close to the wheel hub and press the
release knob with your thumb. The rear wheel can then be easily
slid into position
• Ensure that the quick-release axle is securely fixed in the axle
housing.
CAUTION!
Push each rear wheel to check that each quick-release
axle is safely located.
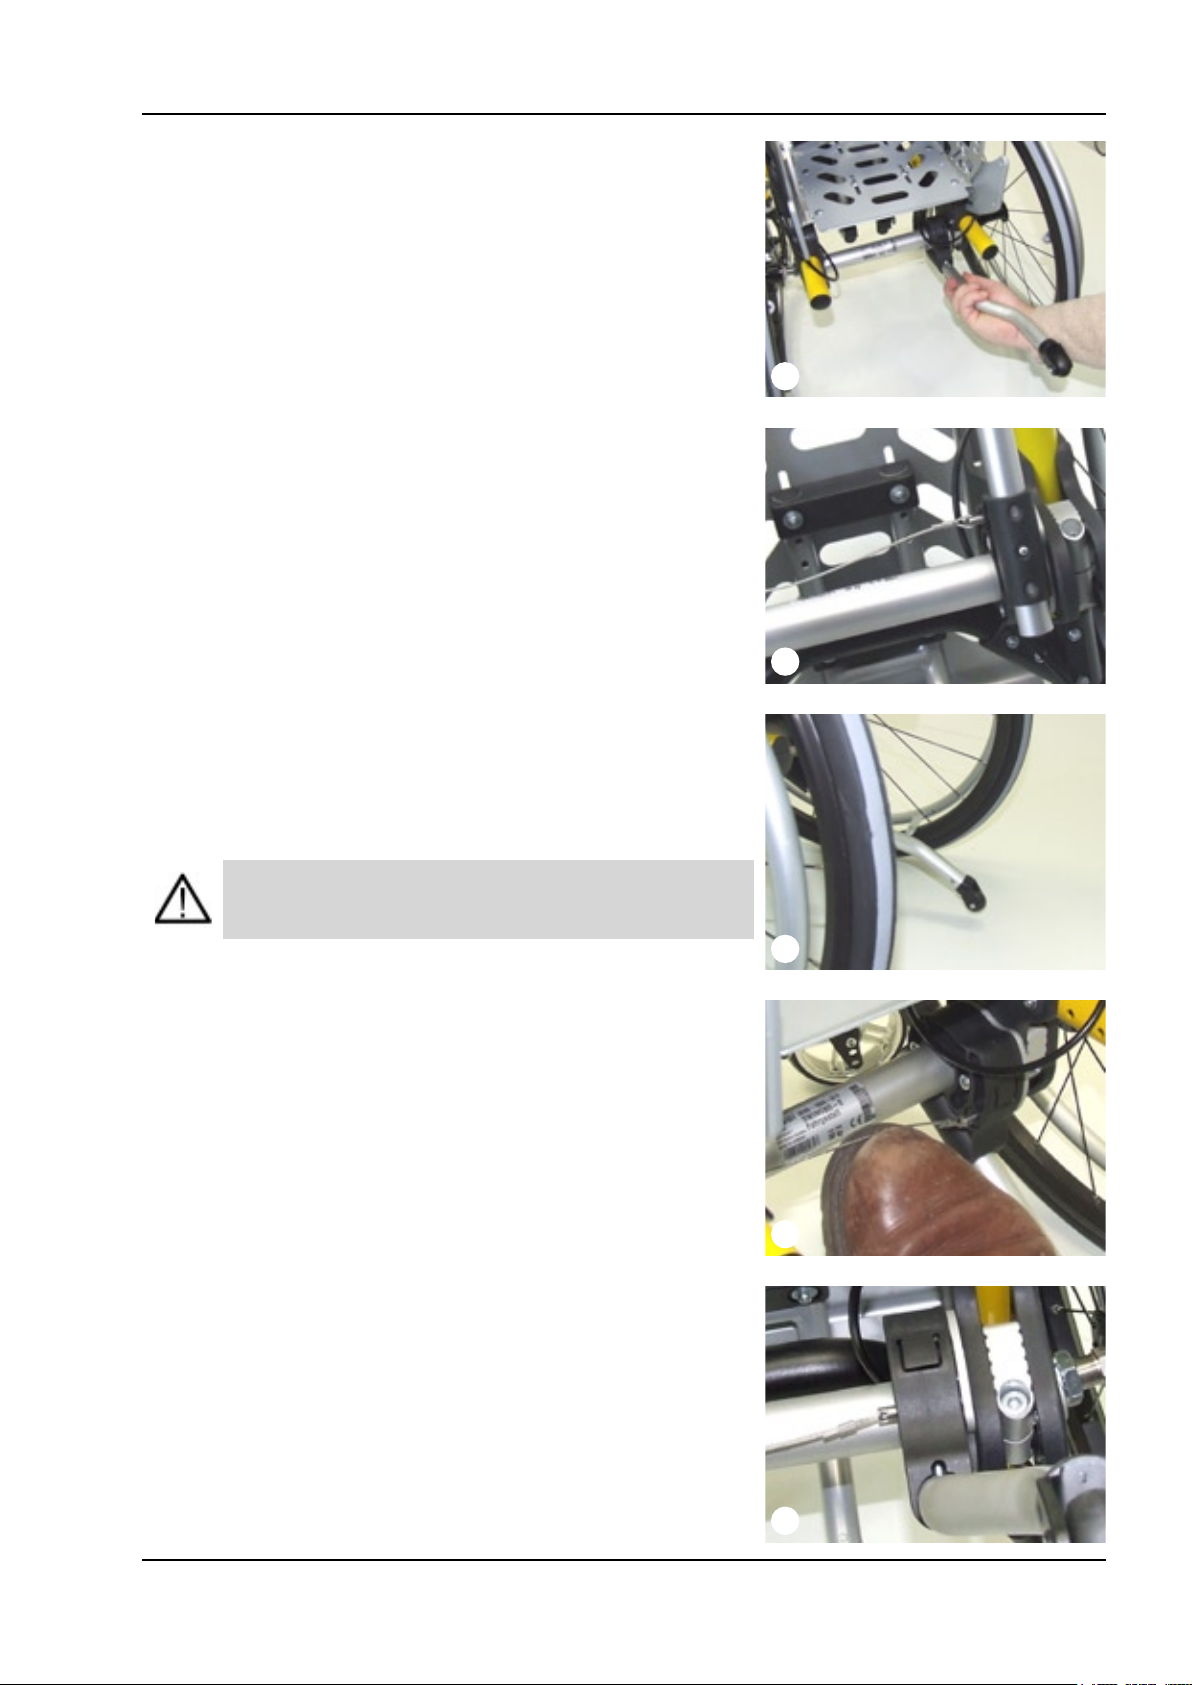
• Fold up the backrest.
• Turn the toggle lever (5) until the locking mechanism is fully
disengaged.
• The backrest angle can now be adjusted into one of its five
positions.
• Let the bolt lock into the required position.
CAUTION!
Check with a sharp push on the backrest that the bolt is
securely located.
1
2
3
4
5
7
The SWINGBO wheelchair can be supplied with one or with two
anti-tippers.
• With the spring button pressed in, slide the anti-tipper (6) into the
locating tube at the rear of the chassis
• The anti-tipper should be positioned with the joggle in the tube
facing outwards towards the drive wheel.
• The small wheel on the end of the anti-tipper must face towards
the ground.
• Fold the anti-tipper downwards until the locking mechanism audibly
engages.
• The length of the anti-tipper can be adjusted by using the three
positions on its locating tube.
• The anti-tipper should be positioned so that the small wheel at
the end of anti-tipper tube projects beyond the radius of the rear
wheels and approximately 2-3cm above the ground.
CAUTION!
By tipping the wheelchair carefully backwards onto the
anti-tippers, check that they are securely located.
• The locking mechanism can be released by pulling on the cable
(9). The anti-tipper can then be folded upwards by hand, or with
your toe, to its maximum position.
• The anti-tipper is secured (10) in this upper position.
6
7
8
9
10
 Loading...