

Page 1
Assembling the new Mirage Drive drums and cables
Caution: The new cables and drums are slotted for easier maintenance and
tune ups. They are not interchangeable with the older parts.
Warning: If cables are installed incorrectly, they may twist off the drums,
causing the Drive to fail.
Tip: DO NOT REUSE Nyloc nuts when installing new cables. The slotted cable
threads have 40% less area -- worn Nylocs may back out causing Drive failure or
adjustment problems.
Tools and materials required:
7/16 inch wrench
needle nose pliers
Marine grade axle grease
Preparation:
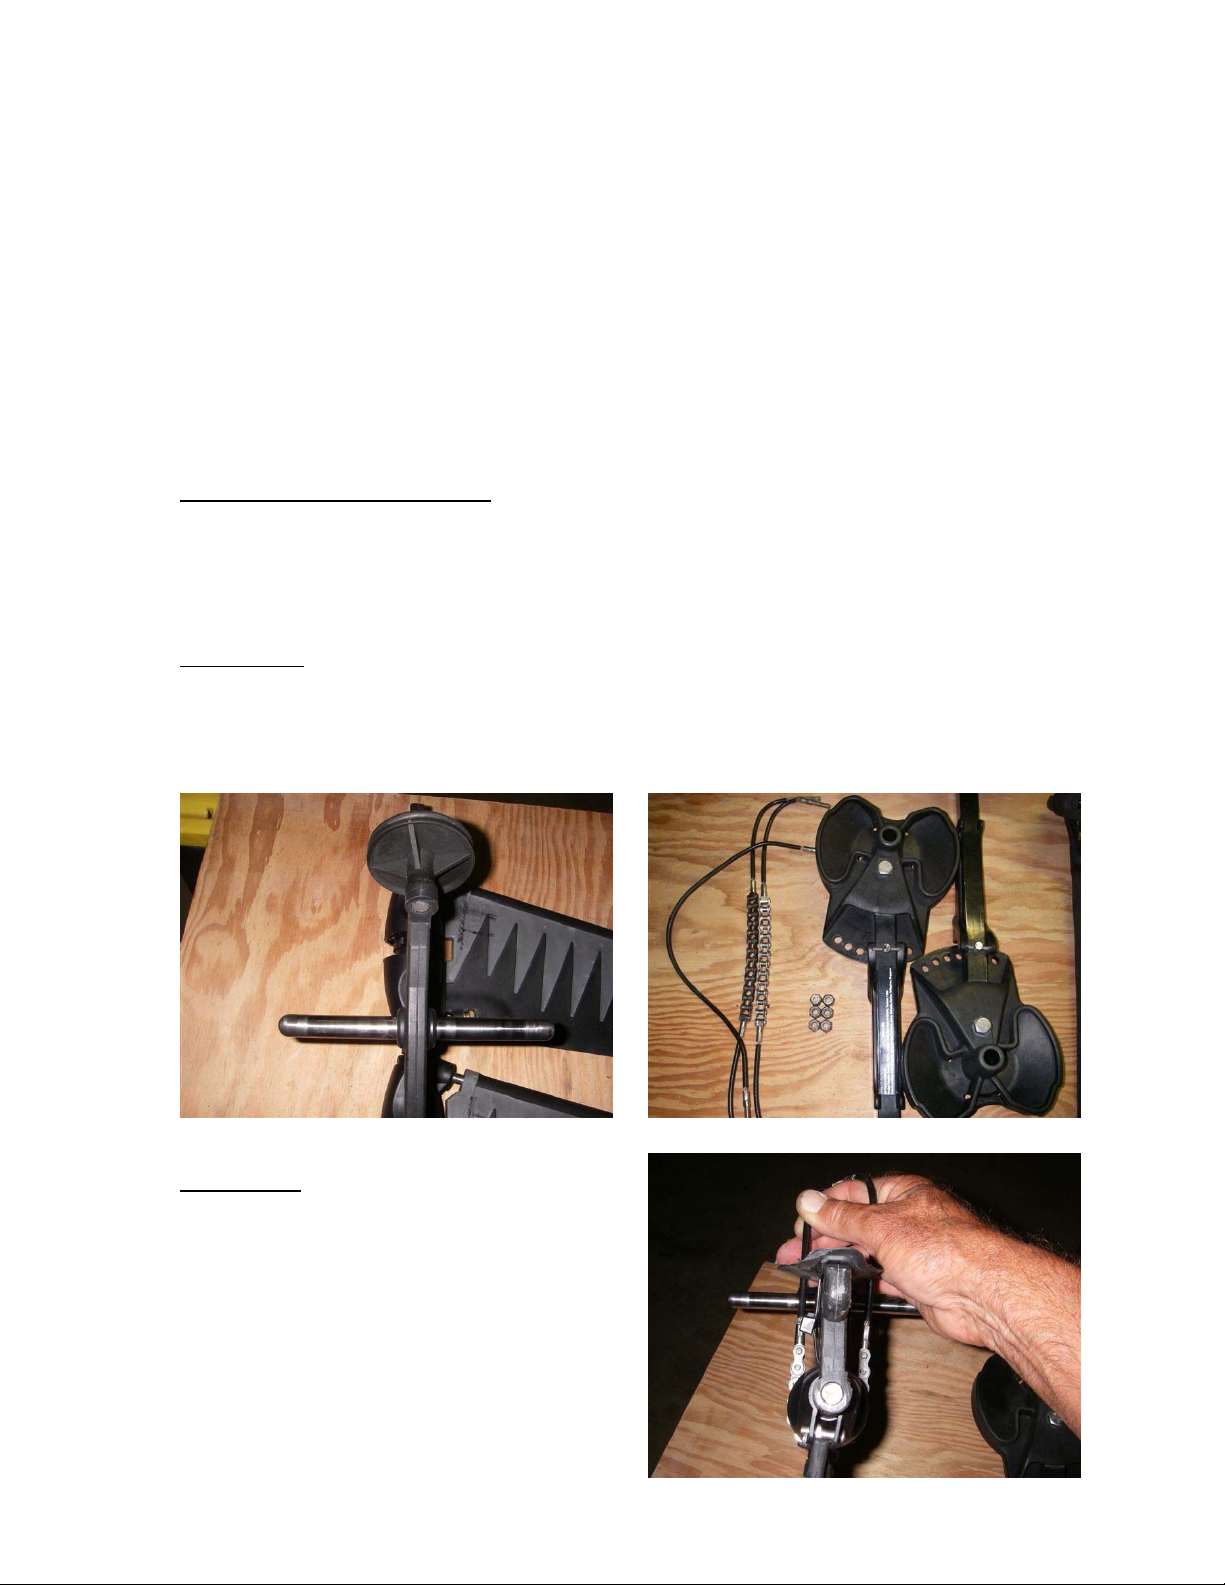
1. Remove old drums, cables and chains
2. Wipe drum axle clean
3. Pre-install crank arms to the drums, noting left and right crank arms
1
Installation:
1. Install new chains / cables on
sprockets, taking care to press chain
solidly into master cog (Plastic sprockets
only). This may be accomplished with the
masts and fins on or off. Verify that chain
is properly centered. (Tip: mark center
Page 2
link of chain with marking pen for easy placement).
2. Lightly grease drum axle
Note: there are two methods of assembling the cables to the new drums -- on the
bench (3 through 7 "A" below) or with the drive properly mounted in a bench vise
(3 through 7 "B" below). Each is described separately. Use which ever is
easiest for you.
Bench method:
3 A. Mount left or right drum / crank arm assembly (noting correct side) onto
drum shaft
4 A. Install front and rear cable into upper drum slots as shown. It is easiest to
angle cable in from the side (below and right).
2
5A. Slip cables over top lip and hand
tighten new Nyloc nuts to keep cable
from slipping out (right).
6A. Insert idler cable into rear slot as
shown. Note -- this slot is divided -- use
outboard portion of slot (left).
7A. Flip drive over and repeat on other side.
Page 3

Vise method:
3 B. Secure Drive to vise by rear
portion as shown. Use a rag in
vise to prevent marks (rag
removed for illustration purposes,
right).
4 B. Mount both drum / crank arm
assemblies to drum shaft, noting
correct left and right side.
5 B. Mount the rear sprocket cable. Note, the cable is first inserted from the
side, with the help of needle nose pliers if necessary, then re-routed over the top
lip of the drum. Hand thread Nyloc nuts enough to keep the cable from slipping
out (below).
3
6
B. Repeat procedure with the front sprocket cable.
7 B. Insert idler cable into lower rear
drum hole as shown. Note, the idler
slot is divided -- use the outboard
portion only (right).
Page 4

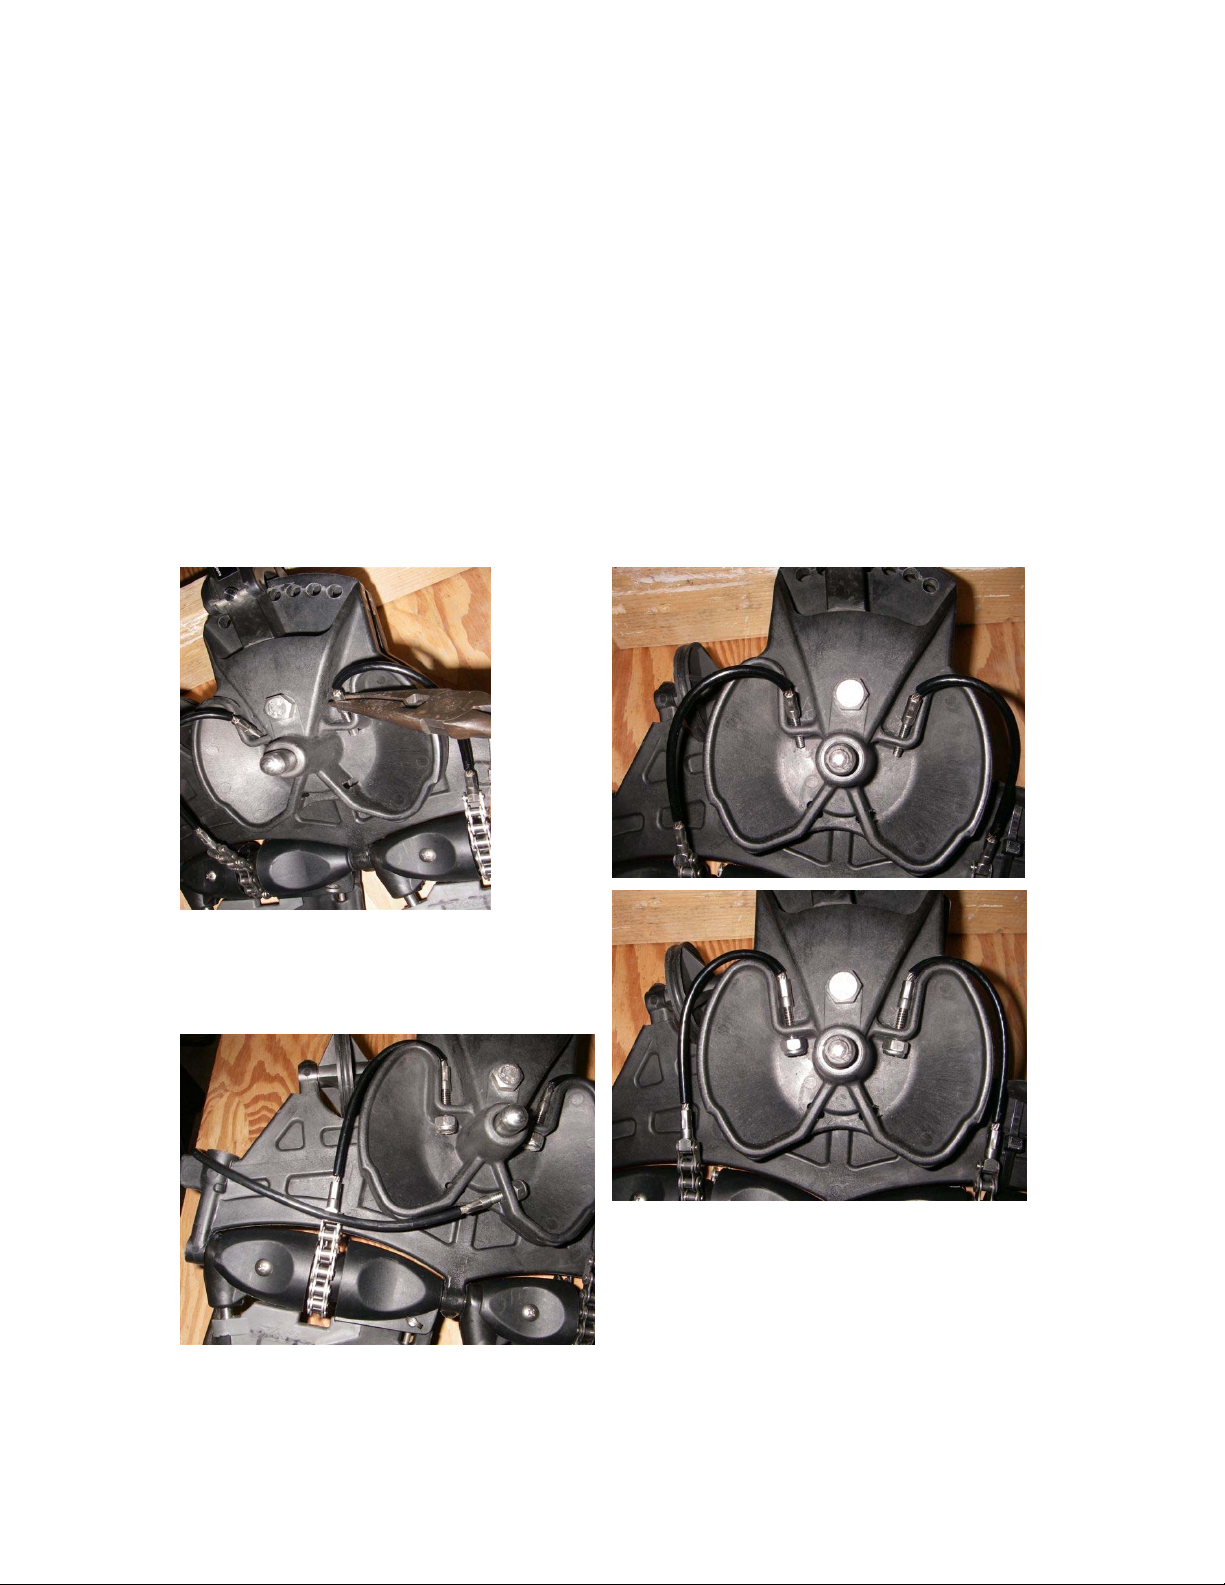
8. (both methods) Tighten and tune all cables. Make sure they are running
properly on the drums (below). Align and center fins as necessary.
4
Troubleshooting:
1. Cable wanders off drum. Cable is twisted. Remount, removing twist or
warping cable toward inboard side of drum.
2. Cable appears to be uneven. Recheck center link of chain is mounted on
center cog. Make sure chain is fully pressed in, particularly the center cog.
 Loading...