

Page 1

Ref : MM_GENTATOO_FR Issued by : SD Date : 10/07/2013 Up-date : 1 Page : 1/6
HOBIE TATOO
GENNAKER ASSEMBLY MANUAL
E
U
R
O
P
E
Hobie Cat® Europe
Assembly manual
Hobie Cat Europe, ZI Toulon Est, BP 250, 83078 Toulon cedex 9 | T +33 (0)494 087 878 | F +33 (0)494 081 399 www. hobie-cat.net
Page 2
Ref : MM_GENTATOO_FR Issued by : SD Date : 10/07/2013 Up-date : 1 Page : 2/6
HOBIE TATOO
GENNAKER ASSEMBLY MANUAL
E
U
R
O
P
E
Hobie Cat® Europe
Assembly manual
Hobie Cat Europe, ZI Toulon Est, BP 250, 83078 Toulon cedex 9 | T +33 (0)494 087 878 | F +33 (0)494 081 399 www. hobie-cat.net
Illustration Steps Description
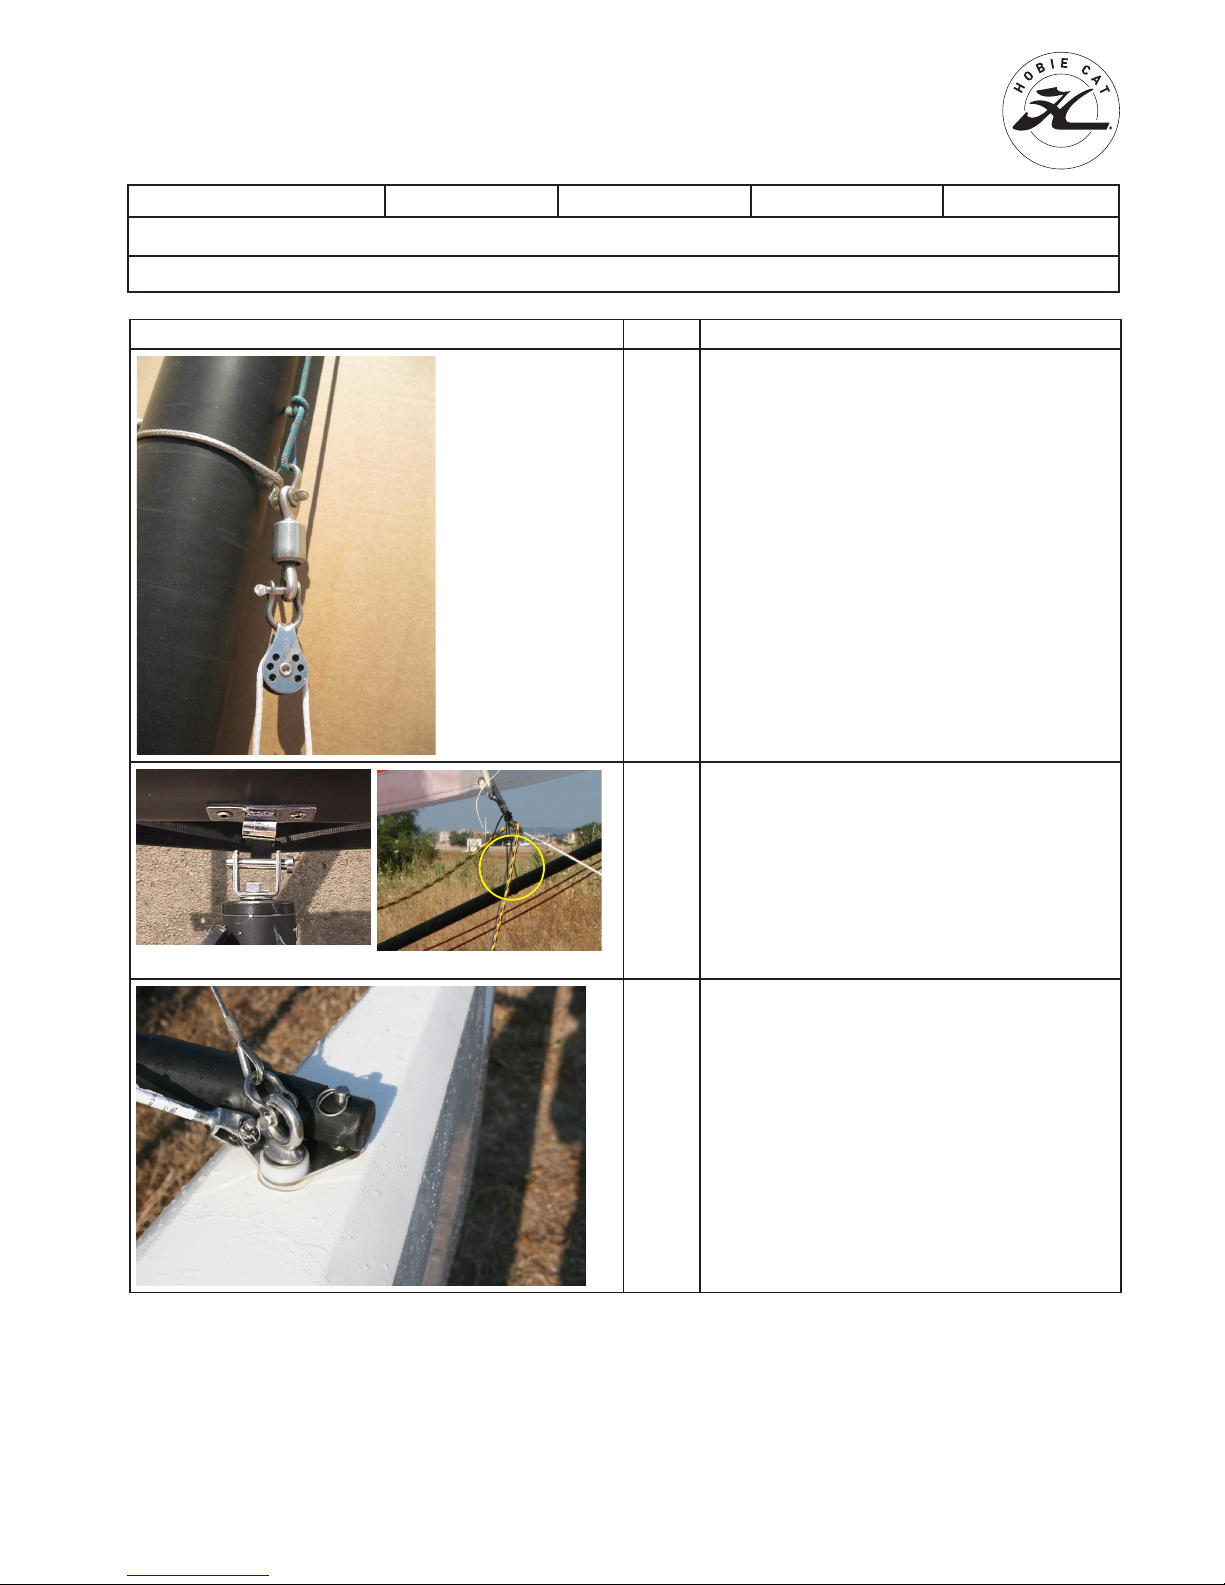
1
Take the gennaker halyard and lead it through
the pulley at the top of the mast.
US made boats with CompTip masts require reacher
tang installed 35" above main tang hole. See parts
packet and addendum instruction.
2
Connect the gennaker pole in the middle of the
front crossbar.
Put tension on the pole.
3
Fix the gennaker pole bridles to the 4 mm shackle
that is on eye bolt at the bow of each hull.
Page 3
Ref : MM_GENTATOO_FR Issued by : SD Date : 10/07/2013 Up-date : 1 Page : 3/6
HOBIE TATOO
GENNAKER ASSEMBLY MANUAL
E
U
R
O
P
E
Hobie Cat® Europe
Assembly manual
Hobie Cat Europe, ZI Toulon Est, BP 250, 83078 Toulon cedex 9 | T +33 (0)494 087 878 | F +33 (0)494 081 399 www. hobie-cat.net
Illustration Steps Description
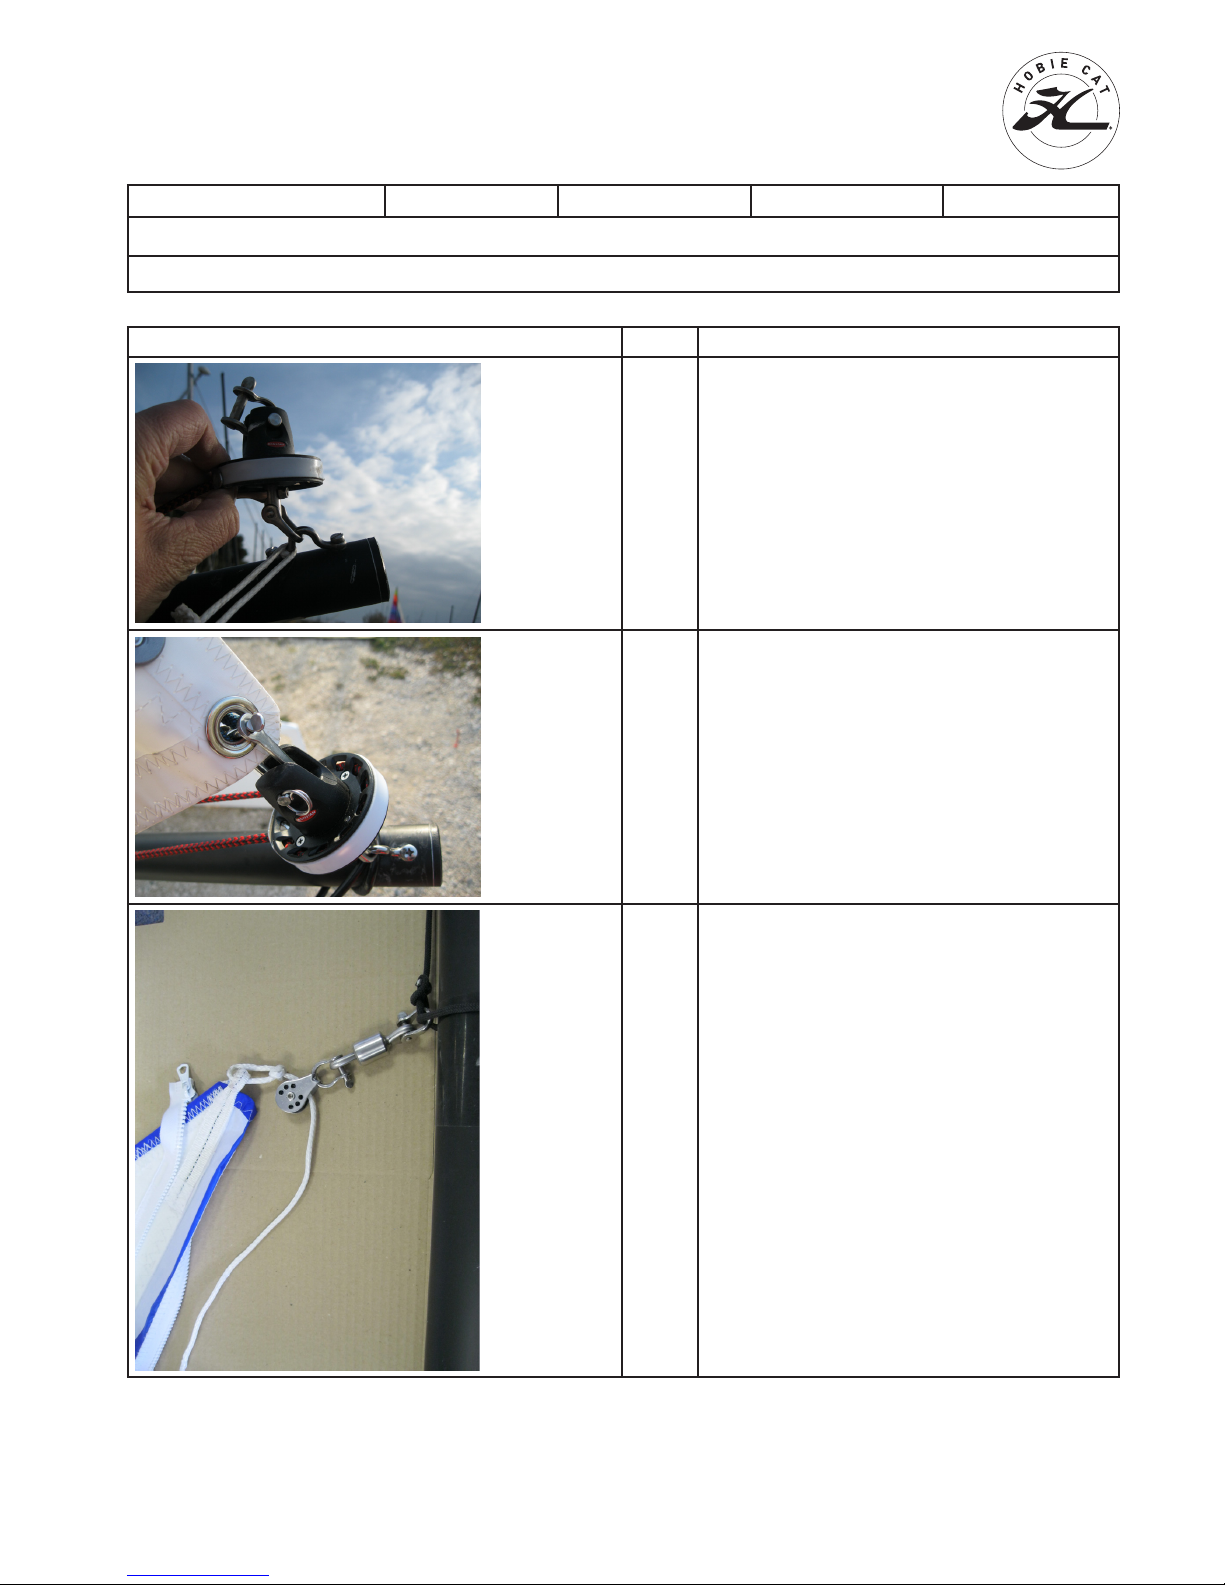
4
Attach the furler onto the pad-eye that is at the
end of the pole.
5
Insert the red line into the furler as shown on
the photograph and attach the tack point of the
gennaker onto the shackle that is at the top of the
furler, as shown on the photograph.
6
Attach the white halyard at the head of the
gennaker using a bowline knot.
Page 4

Ref : MM_GENTATOO_FR Issued by : SD Date : 10/07/2013 Up-date : 1 Page : 4/6
HOBIE TATOO
GENNAKER ASSEMBLY MANUAL
E
U
R
O
P
E
Hobie Cat® Europe
Assembly manual
Hobie Cat Europe, ZI Toulon Est, BP 250, 83078 Toulon cedex 9 | T +33 (0)494 087 878 | F +33 (0)494 081 399 www. hobie-cat.net
Illustration Etapes Description
7
Insert the white halyard in the pocket as shown on
the photograph and close it using the zip. Attach
the black halyard to the pulley that is at the end of
the white halyard using a bowline knot.
8
Hoist the gennaker by pulling the black halyard.
Once the gennaker is up, replace the black line by
the small grey and yellow line.
In order that the gennaker furls correctly, a very
hard tension must be applied on the grey and
yellow line.
9
Attach one end of this line to the shackle that is
on the top of the furler, and lead the other end
through the cleat that is at the tack point of the
gennaker. Once the tension is adjusted, stop the
line with knots on the cleat.
Page 5

Ref : MM_GENTATOO_FR Issued by : SD Date : 10/07/2013 Up-date : 1 Page : 5/6
HOBIE TATOO
GENNAKER ASSEMBLY MANUAL
E
U
R
O
P
E
Hobie Cat® Europe
Assembly manual
Hobie Cat Europe, ZI Toulon Est, BP 250, 83078 Toulon cedex 9 | T +33 (0)494 087 878 | F +33 (0)494 081 399 www. hobie-cat.net
Illustration Steps Description
10
The furler line must be tensioned using the small
sandows that goes through the rings (A & B)
around the line and that are fixed in the eyelets of
the trampoline using nylon washers.
11 Red furler line in tension.
12
Lead the furler through the cleat that is on the
front crossbar in order to block it.
A
B
Page 6
Ref : MM_GENTATOO_FR Issued by : SD Date : 10/07/2013 Up-date : 1 Page : 6/6
HOBIE TATOO
GENNAKER ASSEMBLY MANUAL
E
U
R
O
P
E
Hobie Cat® Europe
Assembly manual
Hobie Cat Europe, ZI Toulon Est, BP 250, 83078 Toulon cedex 9 | T +33 (0)494 087 878 | F +33 (0)494 081 399 www. hobie-cat.net
Illustration Steps Description
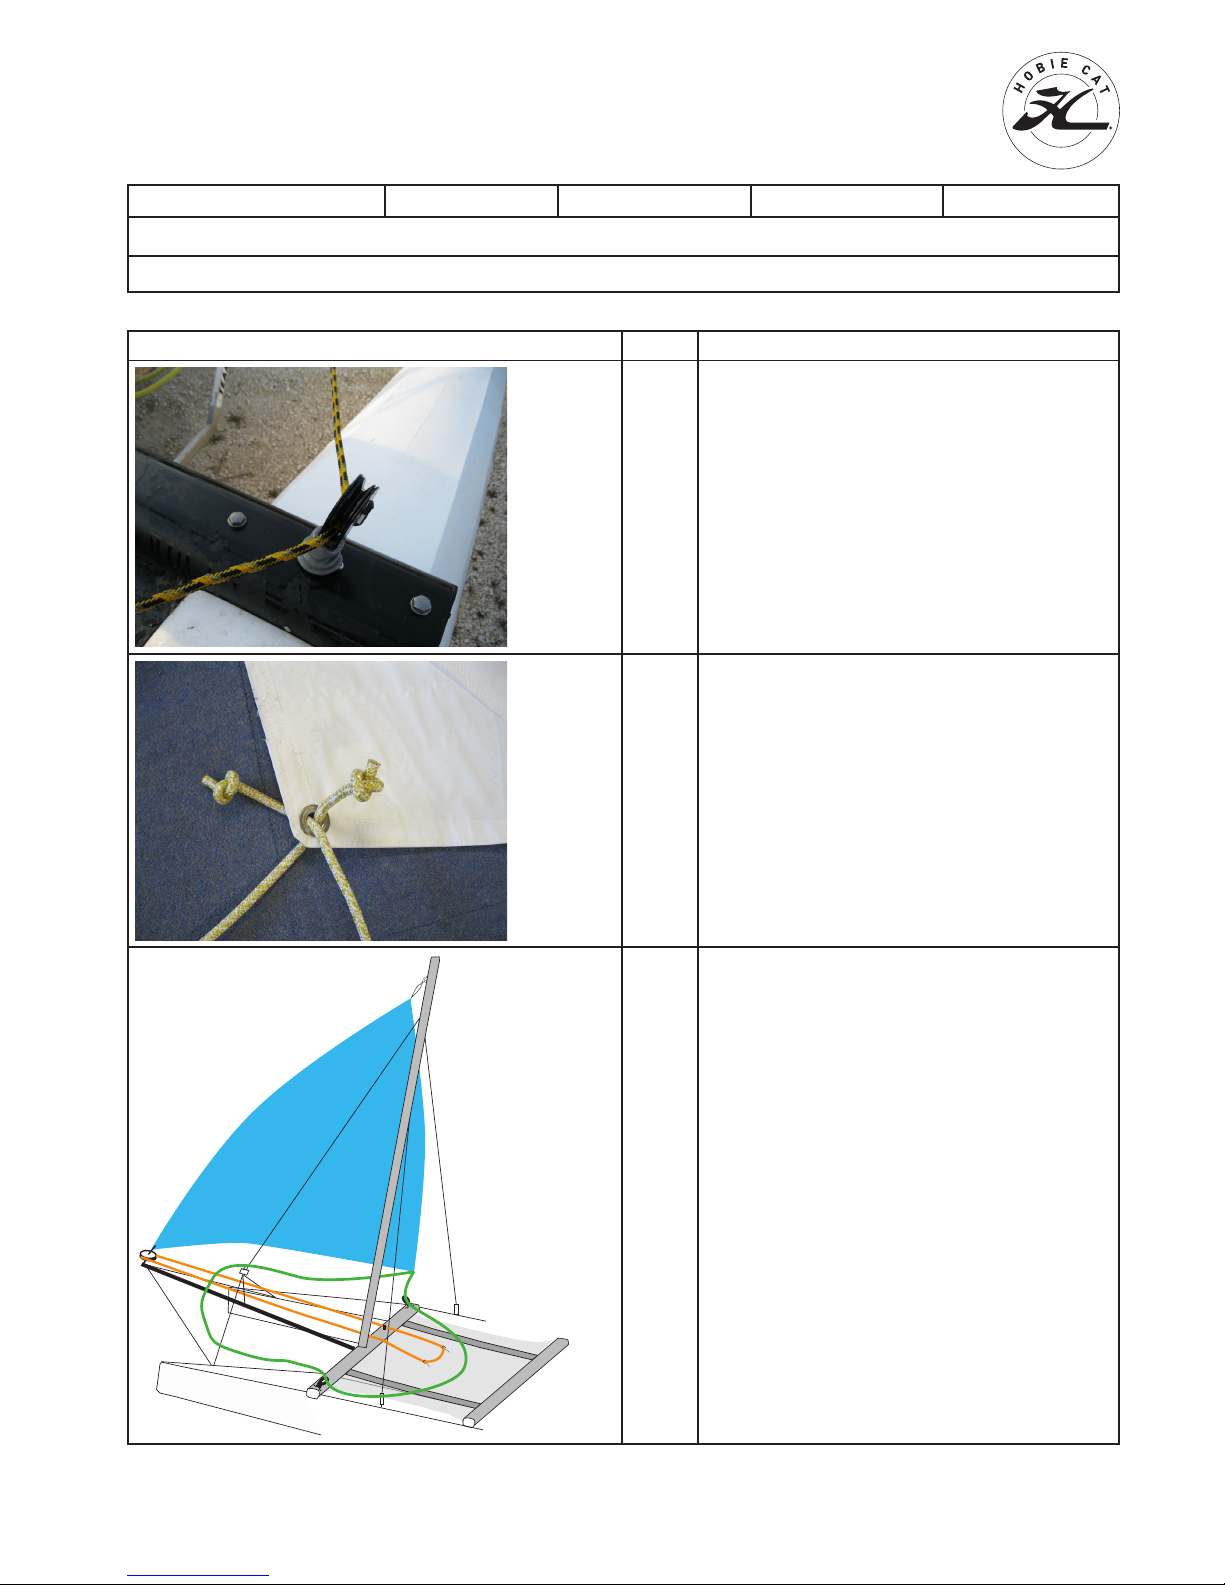
13
Gennaker sheet lines :
Start from the trampoline, lead the two ends of
the sheet line through each of the ratchet blocks
on the front crossbar.
14
Then, lead the two ends of the gennaker sheet line
into the gennaker clew point and stop with two
simple knots.
15
Line circuit :
1- gennaker sheet line
2- furler line
3- gennaker halyard
21
3
 Loading...