

Page 1
Hobie H-Crate Assembly and Installation Instructions
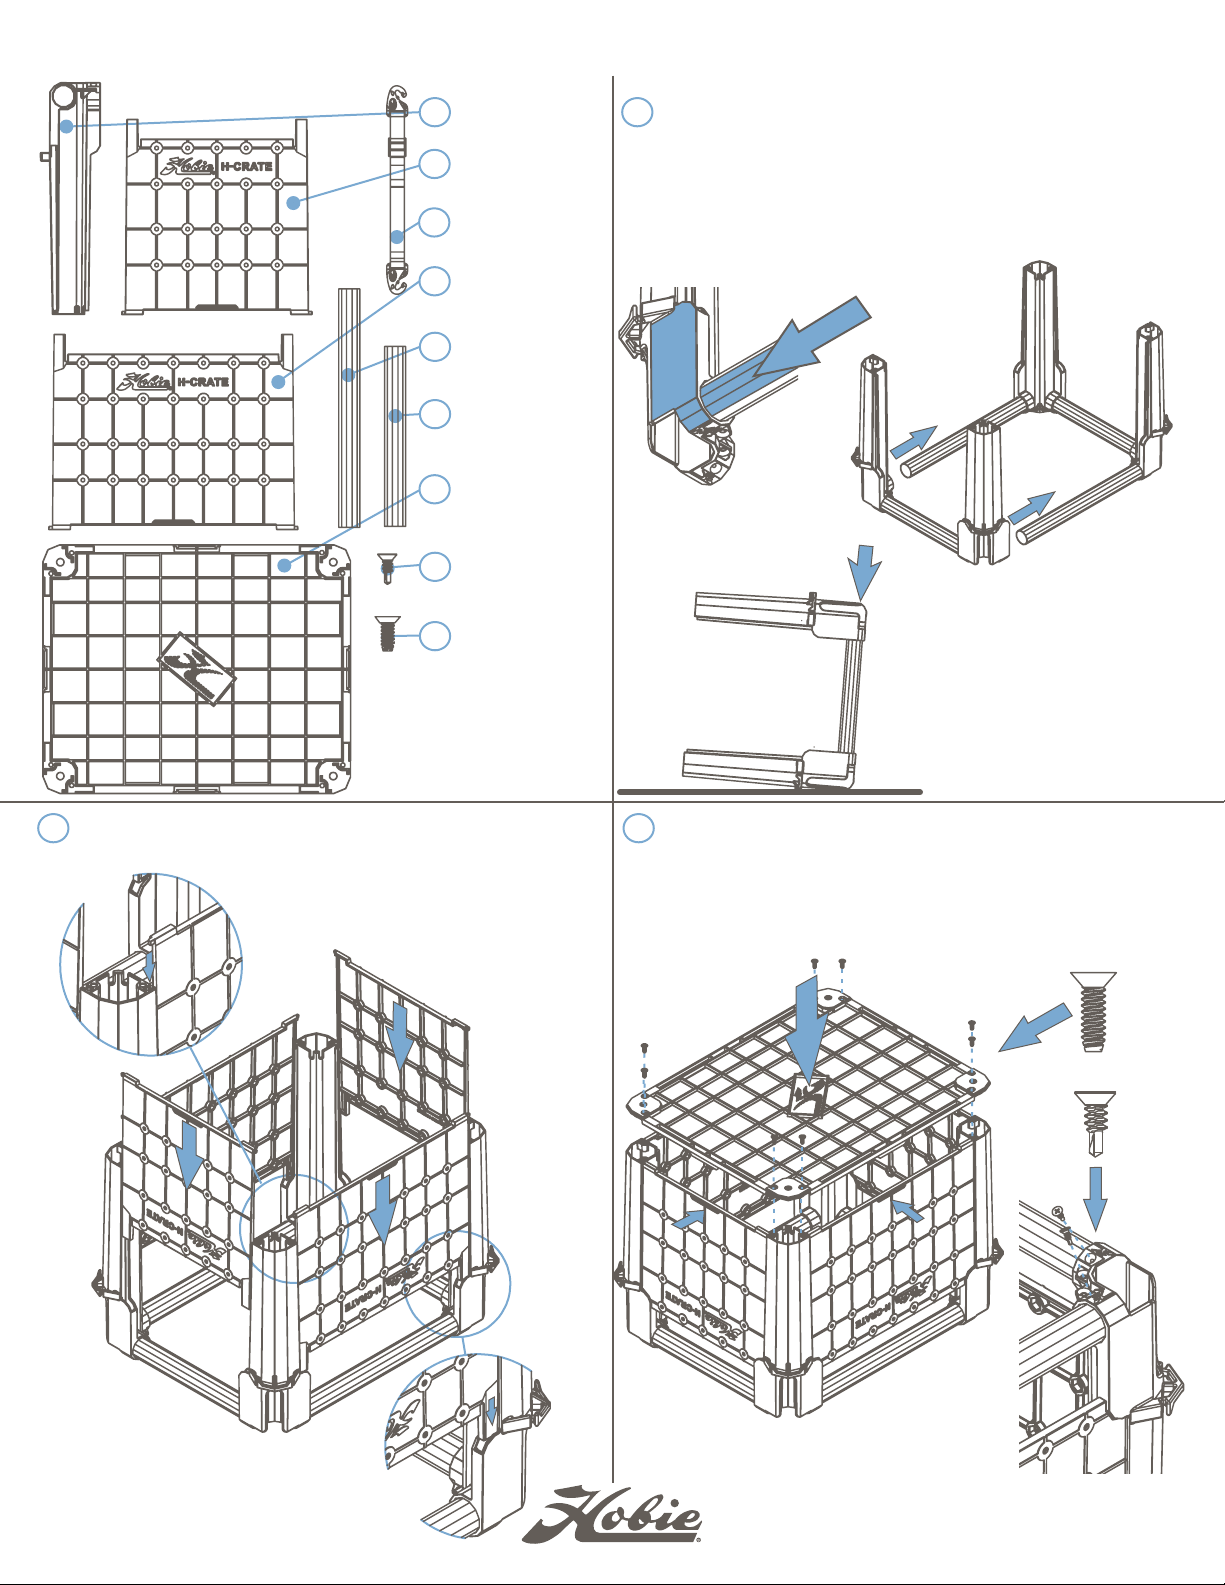
Parts List
1 4 x Corner With the flat surfaces aligned, insert 2 long and 1
2
2 x Short Wall
4 x Strap
3
4
2 x Long Wall
2 x Long H-Rail
5
2 x Short H-Rail
6
1 x Bottom
7
8 x Self Drilling
8
Screws
8 x Thread
9
Forming Screws
1
short H-Rail section into two upside down corner
pieces. Then connect the remaining corners using
the short H-Rail segment sliding both assemblies
together. Ensure the rails go all the way into the
corners. You may need to push them together using
a flat surface for leverage.
Tools needed:
Phillips Screwdriver
(optional) Drill and
Driver Bit
Slide the wall sections into the corners using the
2 Align the bottom of the crate. To secure it, first push
tabs at the top and bottom to align.
3
in the centers of the walls to clear the center snaps
and install the thread forming screws in the corners.
(optional) To add extra ridgitiy, you may install the self
tapping screws into the holes on top of the corners
using a drill.
thread
forming
self
tapping
REV 141203
Page 2
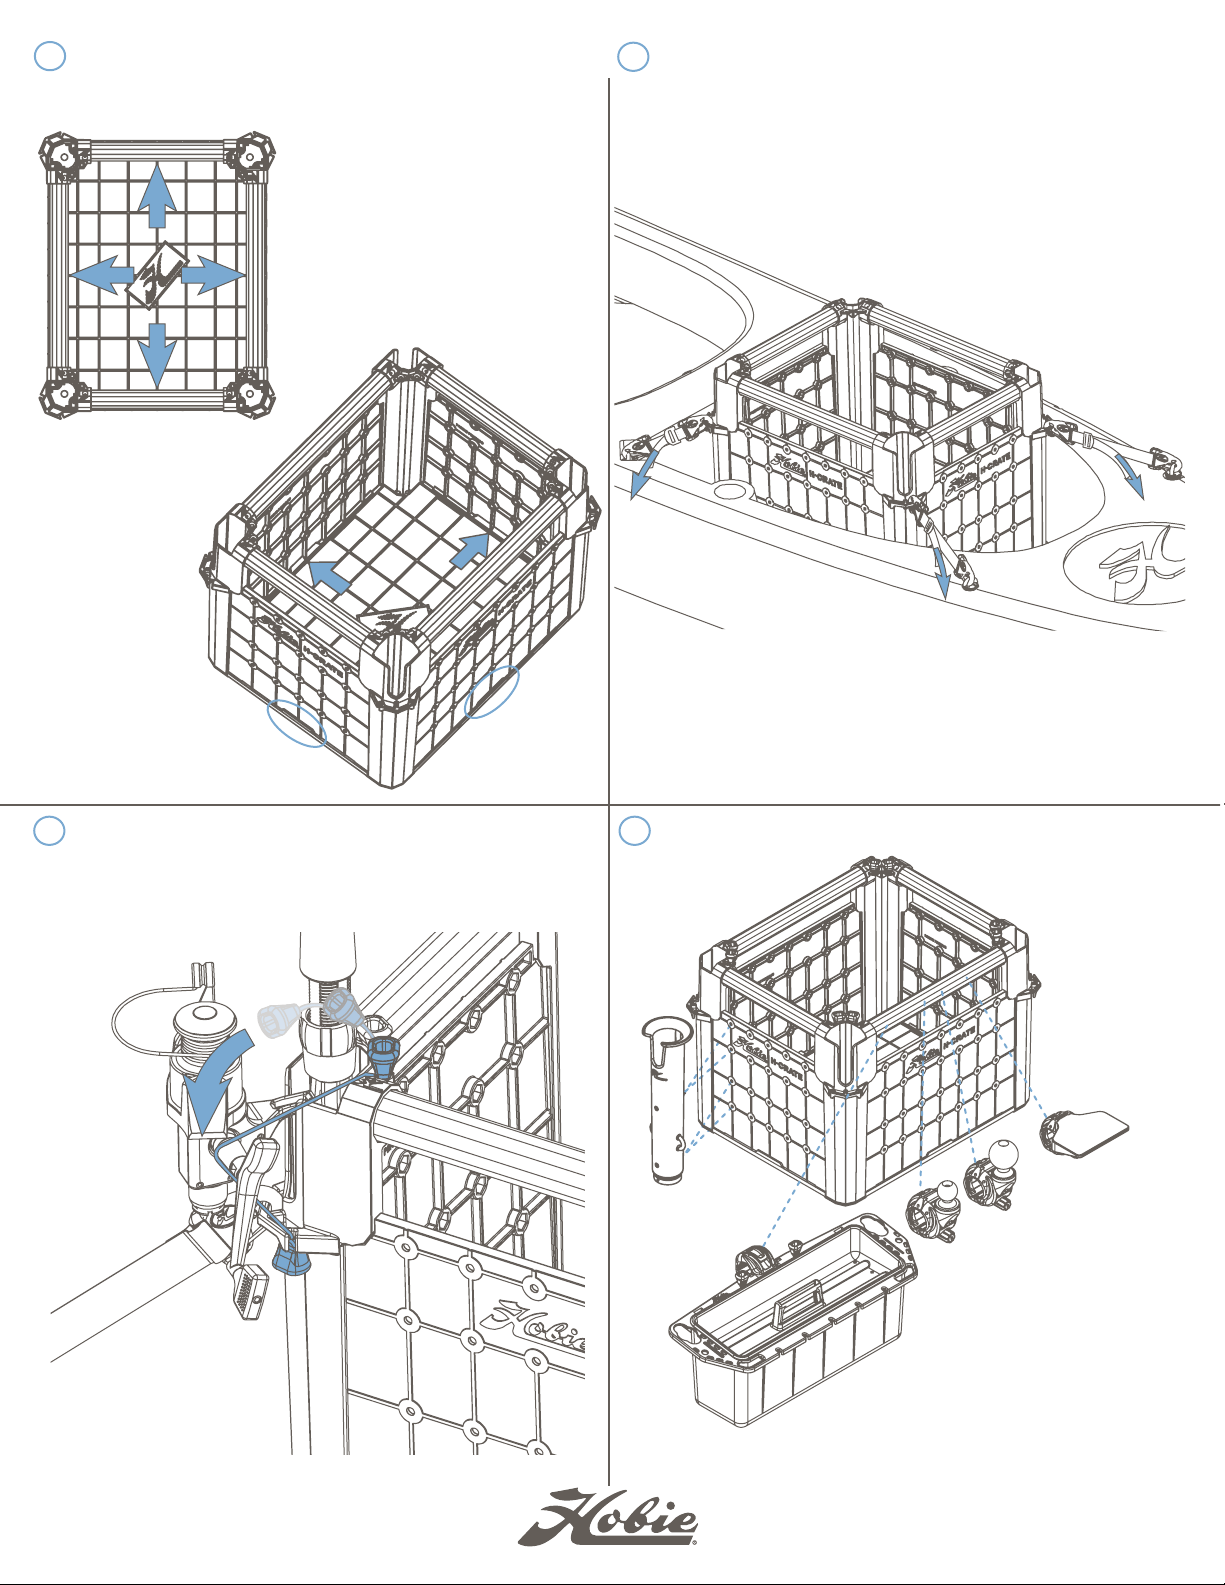
4
To interlock the tabs in the bottom, turn crate right
side up and push the bottoms of the walls outward
until the tabs are interlocked.
Attach the straps to the pad eyes on each corner of
5
the crate. Install H-Crate in tankwell of kayak and
attach clips to available pad eyes. Tighten straps by
pulling the loose end of the strap.
To secure rods, pull bungie handle over reel handle
6 Customize your H-Crate! Here are a few ideas:
and secure in slot next to pad eye.
7
Vertical Rod
Holder
H-Rail Mounting
Plate
H-Rail Ram Mounts
1” and 1.5” Ball
H-Rail Tackle Bin
For more tips, tricks and videos go to:
HobieFishing.com
 Loading...