

Page 1
HOBIE CAT
H
O
B
I
E
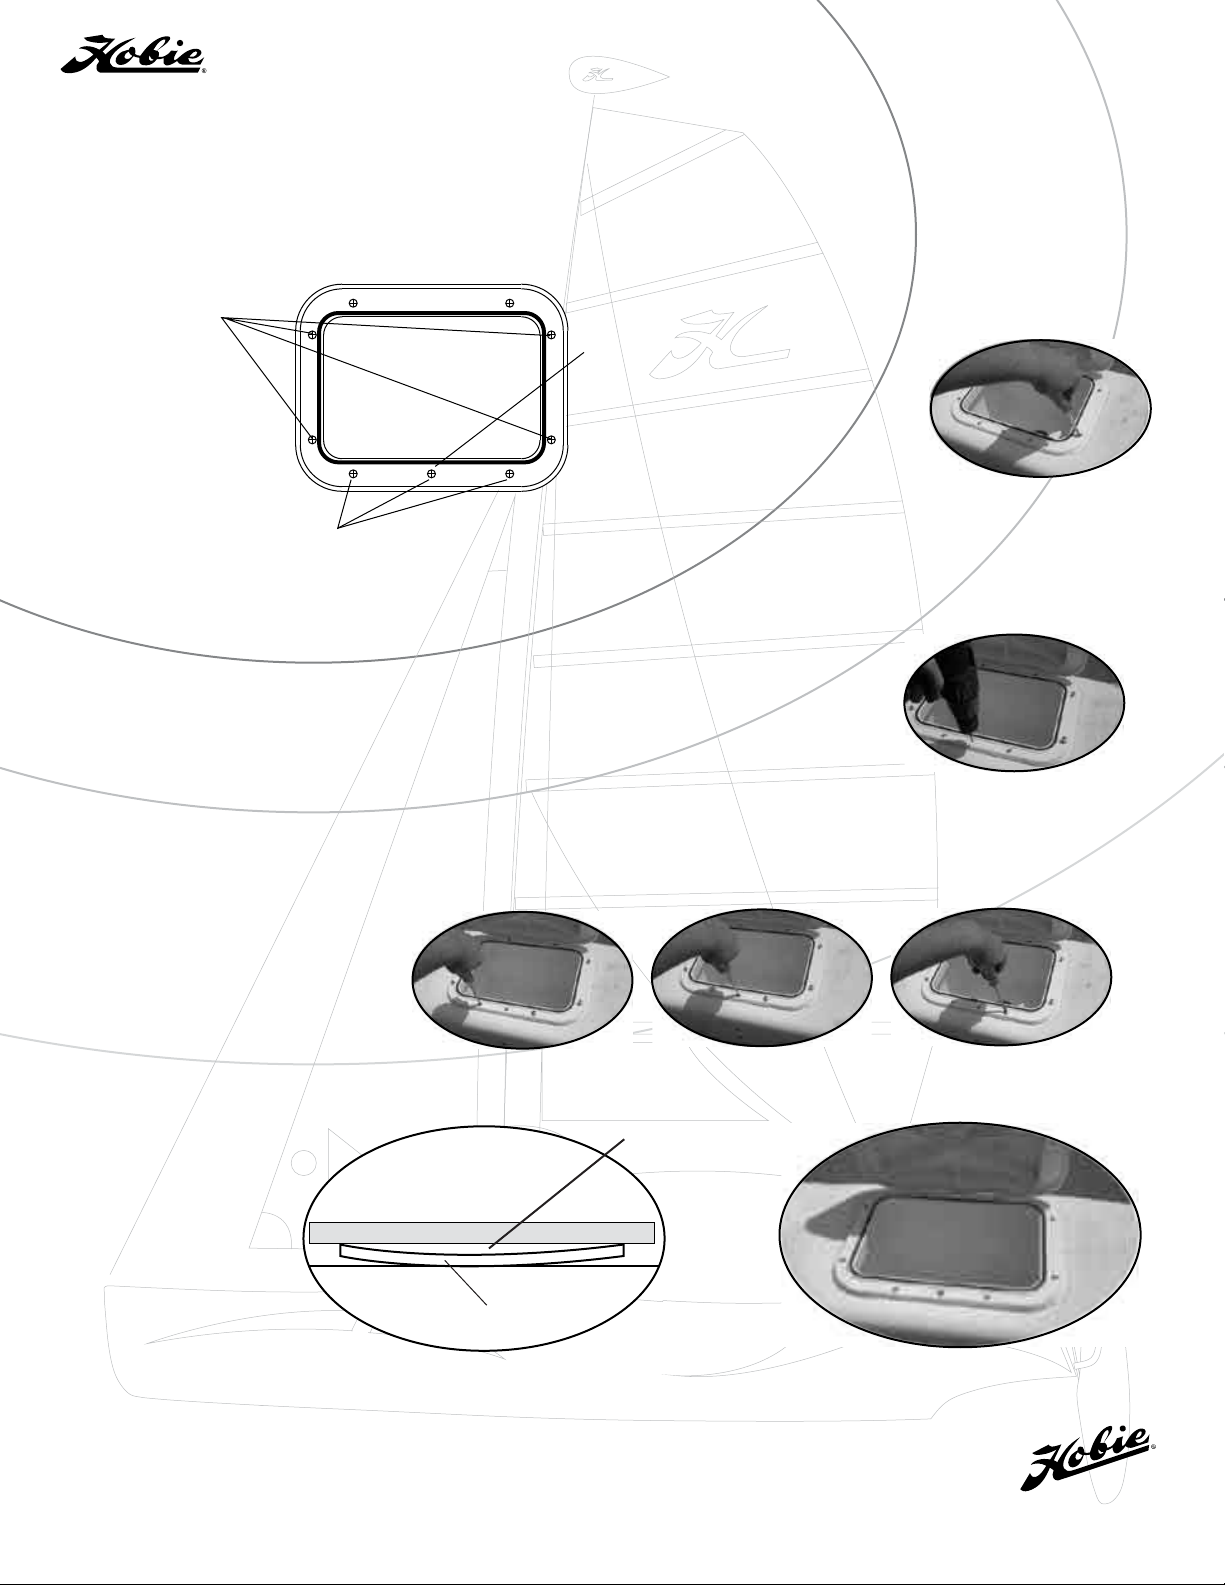
Getaway Hatch Leak Repair Instructions
The objective is to bend the frame of the hatch so that the black o-ring
type seal is higher in the corners and lower in the front center. The latch catches
under the front center so this will ensure better sealing of the black o-ring seal.
The key to bending the frame is compressing the yellow foam gasket as
much as possible in the front middle and as little as possible in the sides by;
1) Making 4
side screws
as loose as
possible
2) Installing a
new screw
Step 1: Back off all four
side screws (Figure 1) until
they start to become
slightly loose.
3) Get front 3
screws as tight
as possible
Step 3: To properly tighten the 3
front screws, take turns between
each screw (only taking a quarter
turn for each screw) (Figure 3-5).
Be careful not to over tighten
and strip out the screws (using
a hand screwdriver is
recommended).
Fig. 3
Step 2: Using a 5/32 drill bit,
make a hole between the front
screws (Figure 2), then insert
screw until it starts to snug up.
(If you have a power screwdriver,
the screw can self-tap, so drilling
a hole isn't necessary.)
Fig. 4
Fig. 1
Fig. 2
Fig. 5
Figure 6 shows the desired
shape of the hatch after
the adjustment. Place
a straight edge
across the hatch,
and there should
be a 1/16" gap
between the straight
edge and the middle of
the hatch.
Straight Edge
Thank your for taking the time to improve your
Hobie Getaway. Fair winds and good sailing.
Hatch
Fig. 6
1/16" gap
Finish Product
 Loading...