

Page 1
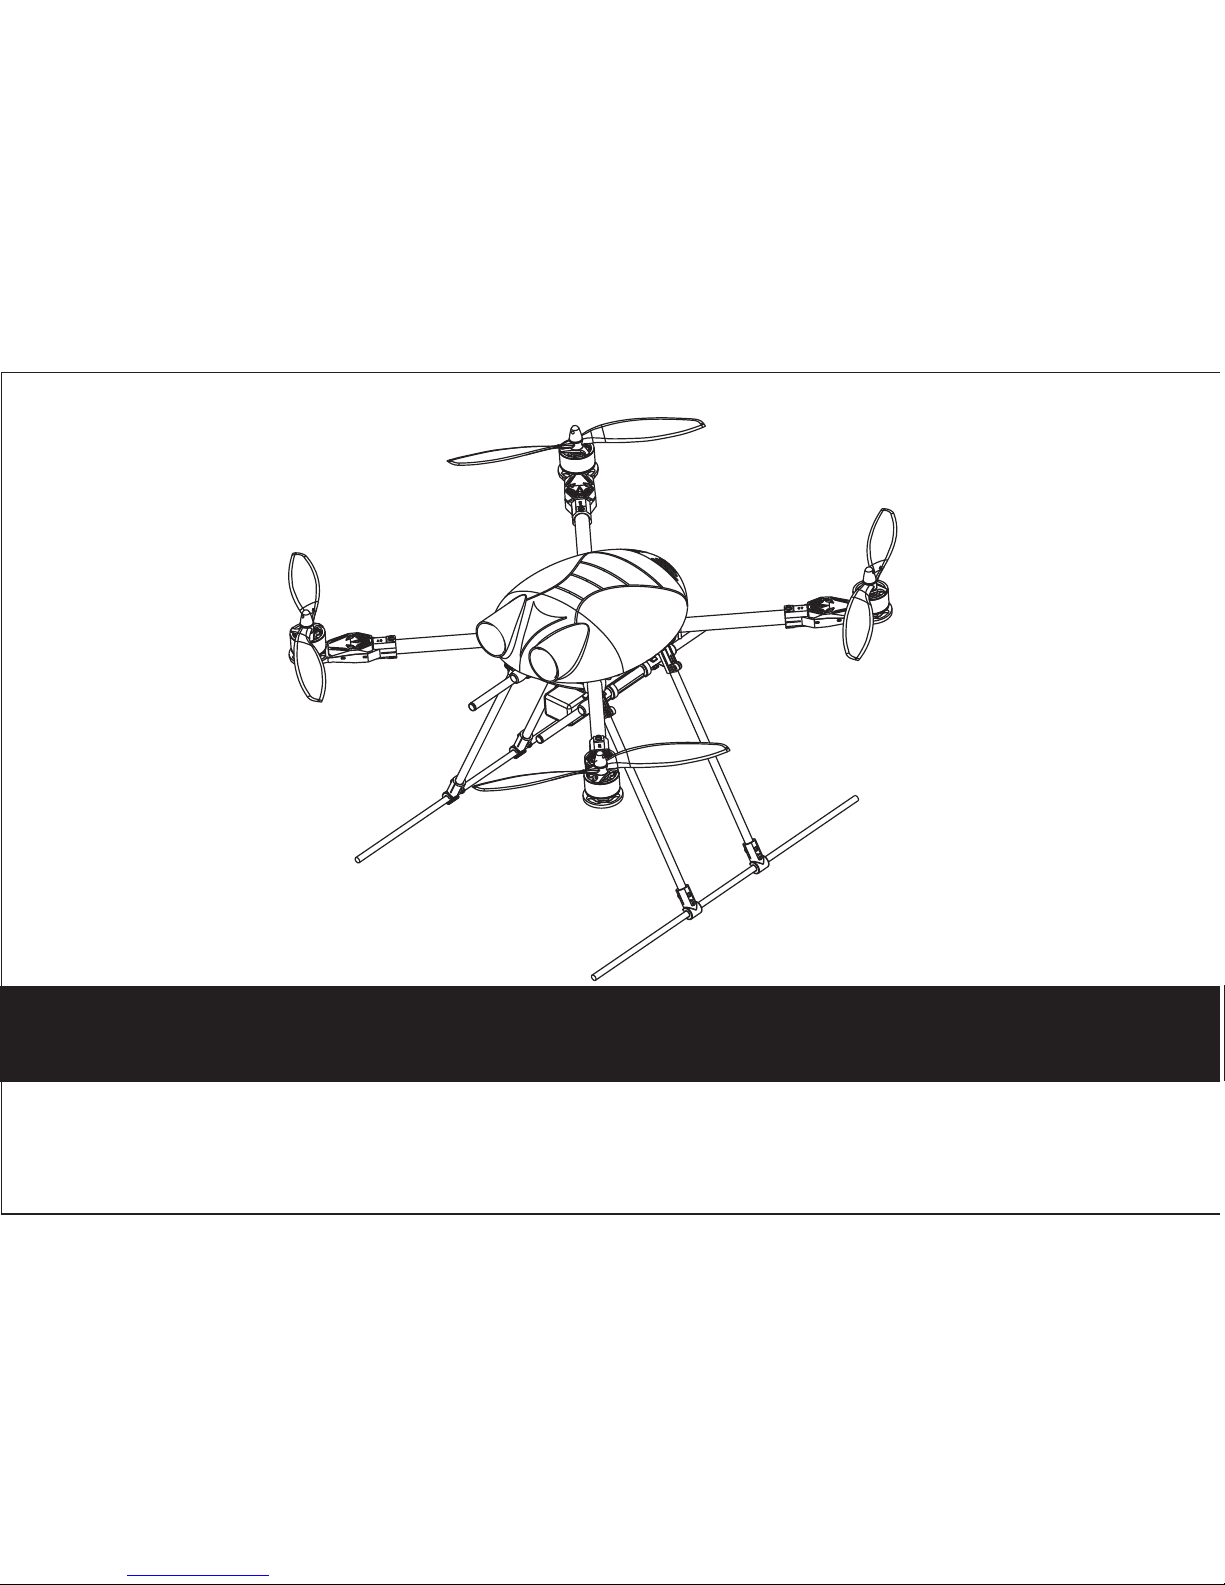
B u m b l e b e e - C M a n u a l
使用前请仔细阅读此说明书。
Read the manual carefully before using it.
Page 2
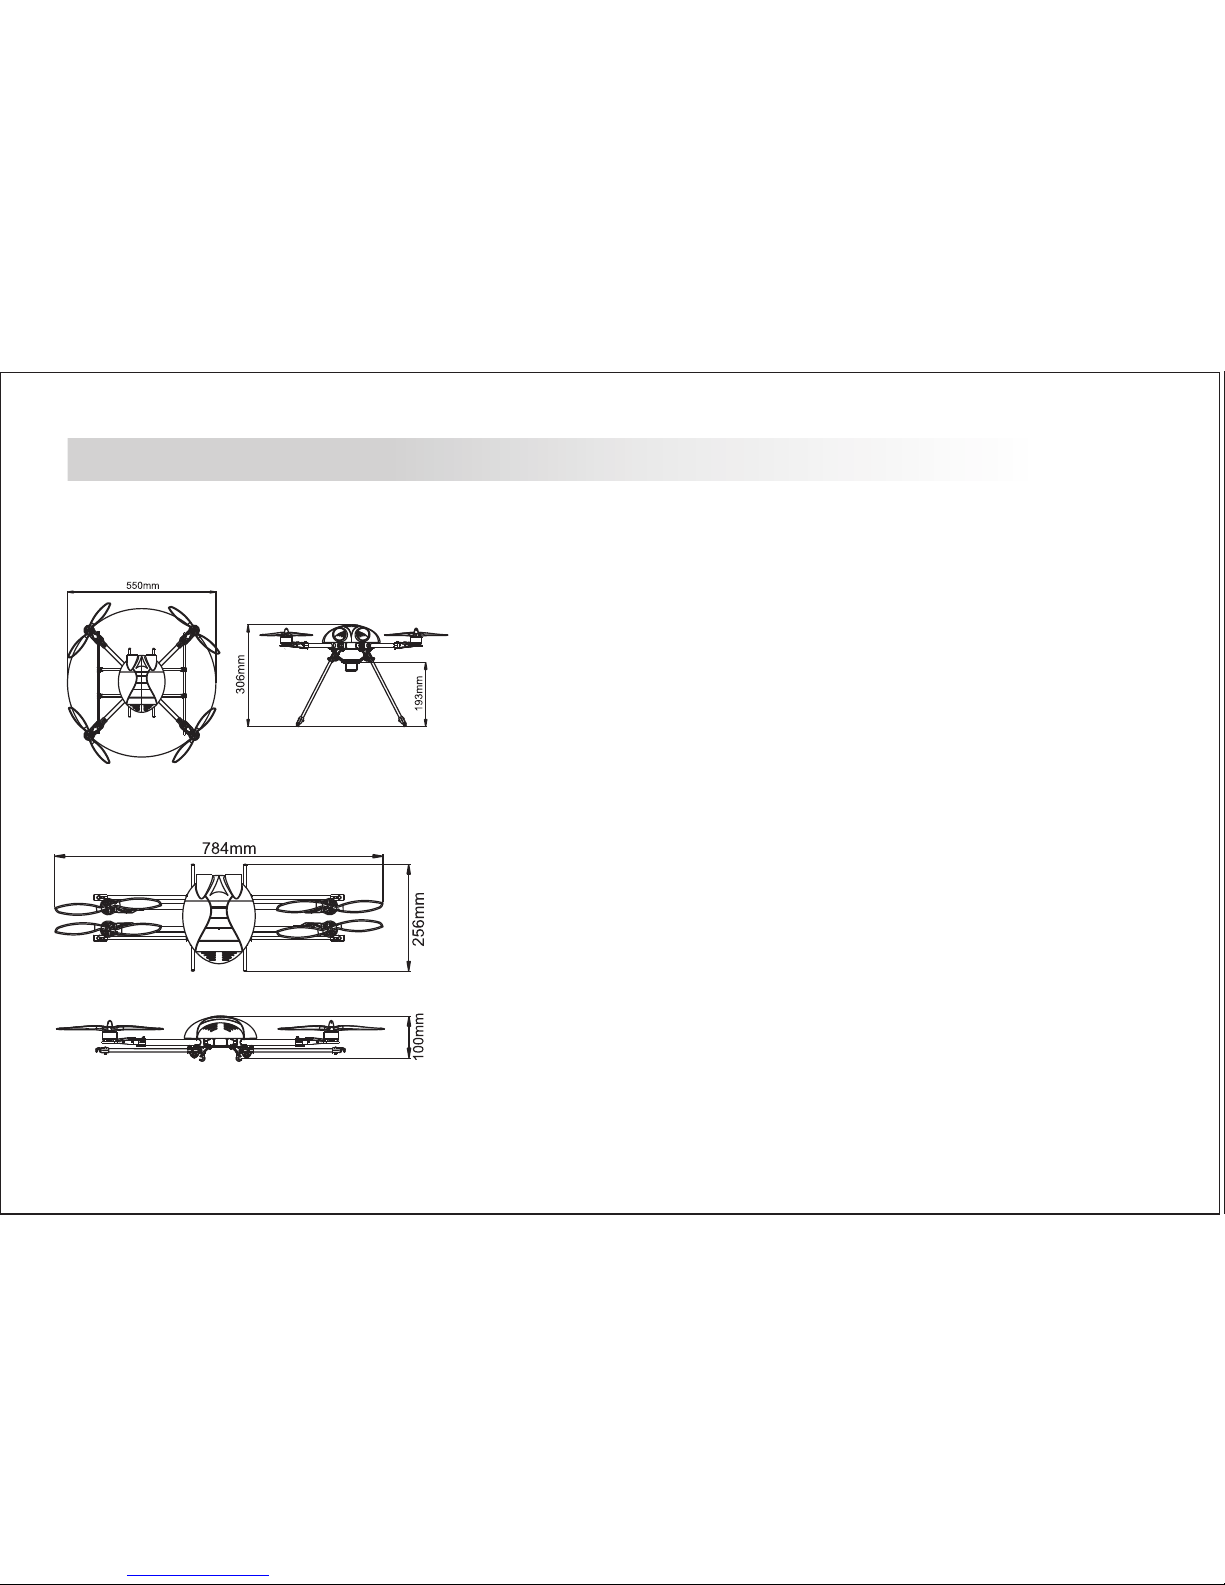
展开状 态 :
空机重量( : g
起飞重量(All Weight):1200g
建议飞行载重量(Payload Capability):200~500g
最大安全起飞重量( ):1700g
电池要求 (Cell Chemistry):11.1V 3S 2200uma/h~5500uma/h
Li_poly 电 池 放 电 能 力 (Instant Discharg e Capacity)>20C
飞行时间(Flight Time):>10分钟
轴距(wheelbase):550mm
整机高度 (height):306mm
折叠后长度(Length Of After Fold):784mm
折叠后高度(Height Of After Fold):100mm
桨Propeller:1038*2pcs,1038P*2pcs
3512无刷电机(Brushless Motor):
重量(Weight):75g
KV:930rpm/ V
空载电流(No_load Current):0. 7A/11.1V
无刷电子调速器 (Brushless ESC):20A * 4pcs
Empty Frame Weight) 450
Max i m um Gr o s s Tak e - Off W e i ght
兼容所有模 型 遥 控 器和接收机,建 议 使 用6通 道以上的遥控器 和 接 收 机。
可折叠设计 , 方 便 携带和运输。
Compa t i b le with all t h e R C d evices, w e r e c ommend yo u t o u s e
RC devi c e w i th 6 channe l s o r m ore for exp a n s ion.
参数 特 点 Feath u rs:
-1-
折叠状 态 :
Page 3
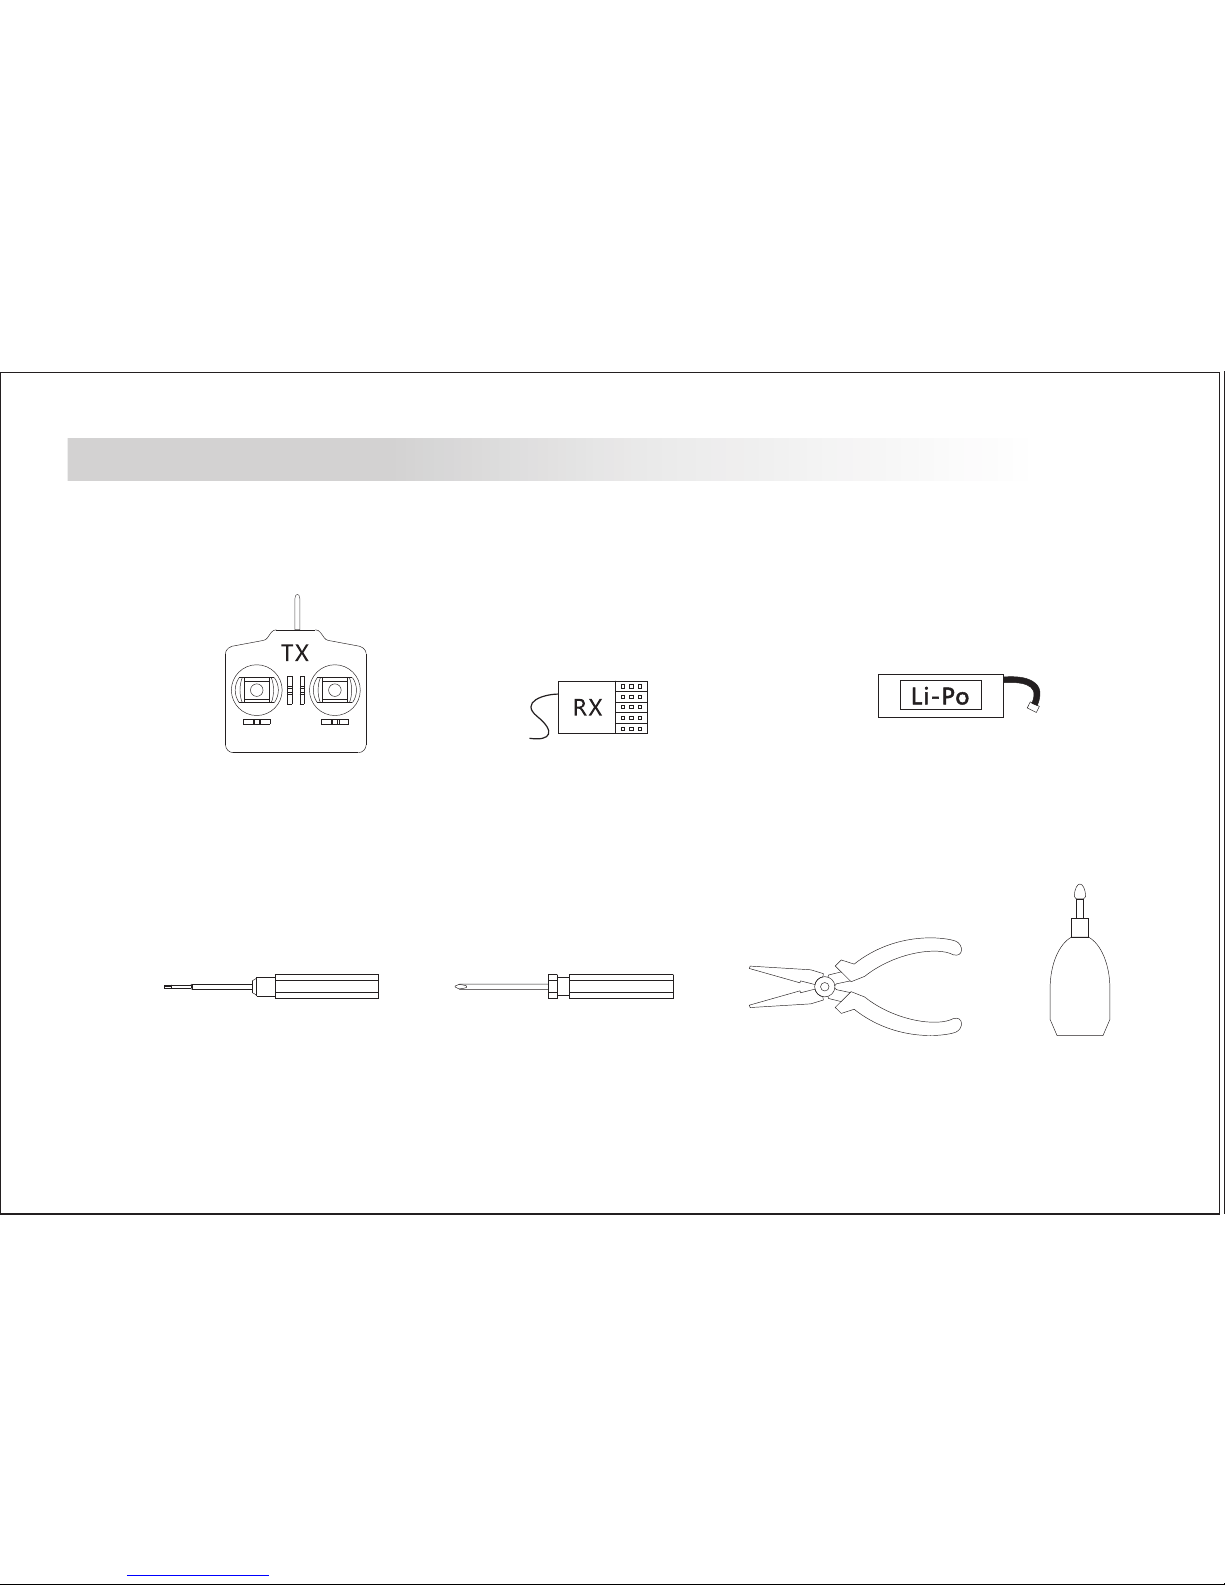
遥控器 (6通以上)
Transmitter (6-channel or more)
接收机 (6通以上)
Receiver (6-channel or more)
11.1V 3S 2200~5500umA/h 锂电池(瞬时放电能力>20C)
11.1V 3S 2200~5500umA/h
Li-Po Battery (Instant discharge capacity>20C)
自备遥控及电子设备 :Radio transmitter and electronic equipment required for assembly
六角螺丝刀
Hexagon Screw Driver
1.5mm/2mm/2.5mm
十字螺丝刀
Cross Screw Driver
尖嘴钳
Sharp nose pliers
螺丝胶
Screw Glue
自备工具 :Additional tools required for assembly
产品安装须知 Notice For Assembly
-2-
Page 4

免责声 明
1.请 在 当地法律 允 许的范围 内 使用本产 品 ,本公司 将 不承担任 何 非法使用 本 产品导致 的 法责任。
2.本 产 品属于遥 控 航模,严格遵 守 航模产品 的 操作规范 , 本公司不 承 担任何因 不 当操作引 起 的安全与 法 律责任。
3.航 模 不是玩具 , 请在专业 人 员指导下 飞 行,并按 本 说明书安 装 和使用本 产 品。本公 司 不对因用 户 不当的安 装 、配置、 操 作而产
生的航 模 事 故负责 。
安全注 意 事项
1.熟 悉 飞行环境 , 远离障碍 物 和人群, 并 确认是否 存 在不安全 因 素,例如 高 压线、汽 车 和人群。
2.请 勿 疲劳、酒 后 或精神状 态 不佳时飞 行 ,以免发 生 意外。
3.远 离 潮湿环境 , 请勿在大 风 或雨天飞 行 ,否则将 造 成电子设 备 故障发生 危 险。
4.远 离 热源,以 免 造成电子 设 计或其他 部 件损坏。
5.初 学 阶段请不 要 独自飞行 , 建议飞行 前 获取有飞 行 经验的飞 行 员的帮助 。
6.请 准 备救援工 具 ,如手机 、 对讲机。
7.请 在 安全起飞 重 量下飞行 , 勿过载以 免 发生危险 。
8.飞 行 前必须检 查 设备是否 正 常,是否 存 在同频干 扰 。
9.
12.
远离运 转 中 的机器 , 切 勿用身 体 接 触旋转 中 的 电机或 螺 旋 桨,更 不 要 用手抓 。 飞 行时切 勿 穿 宽松衣 服 以 免与遥 控 器 或螺旋 桨 发
生牵扯 造 成 意外。
10.在飞行 前 始终把遥 控 器油门杆 保 持在最低 点 。
11.建 议在无桨 状 态下试运 行 以检查遥 控 设备和电 机 的工作是 否 正常,一 切 正常之后 再 安装螺旋 桨 ,以免造 成 安全事故 。
用户改 装 或 使用其 它 来 源的零 件,需 独 立承担 相 应 的飞行 责 任 。
飞行须 知 :
-3-
Page 5

飞行须 知 :
飞行前 检 查
在飞行 前 务 必检查 各 零 部件是 否 完 好,如发现 部 件 老化或 磨 损,请 更换配 件 后 再飞行;检 查 零 部件的 安 装 情况,特别 是 以 下部件:
1.检 量 螺旋桨是 否 安装正确 和 稳固. 2.检 查 接收连线 是 否稳固
3.检 查 电池扎带 是 否扎紧,检查 电 池电量是 否 充足 4.检 查 无刷电机 与 无刷电调 连 接是否稳 固
5.检 查 遥控器的 各 个通道的 操 作和电机 是 否一致
飞行控制说明
1.启 动:把 遥控器油 门 杆拉到最 低 后打开遥 控 器电源开 关,然 后接通四 轴 飞行器电 源,轻 微推杆以 启 动所有电 机,观 察电机的 旋 转方
向.如果不 对 请 及时调 整.
2.停 止:油 门拉到最 低 点,电机停止 工 作后,先断开 飞 行器电源,再 关 闭遥控器 电 源.(注意断 开 电源和关 闭 遥控器的 先 后顺序,以免 发
生失控 的 危 险)
3.起 飞 或降 落 时一旦 发生紧 急 情况 , 请立即 把遥控 器 油门 杆 拉到最 低,确 保 安全 。
4.前 后 左右 与 旋转等 飞行控 制 与常 规 直升机 等航模 控 制类 似 ,但这 些飞行 动 作是 由 各个相 应通道 独 立控 制 的,请 勿将遥 控 器设 置 为混控 模式。
开始飞 行
开关机 程 序:开 机时必 须 先 打开遥 控 器 电源开 关 并 将油门 杆 拉 到最低 点,再 接 通飞行 器 电 源;关机时 必 须 先断开 飞 行
器电源,再 关 闭 遥控器 电 源. (不正确 的 开 关机顺 序 可 能造成 飞 行 器失控 而 发 生危险 。)
1.将 油 门杆拉到 最 低,打开 遥 控器电源 开 关。
2.接 通 飞行器电 源
3.轻 推 油门(切 忌 油门杆瞬 间 推动很大 ) ,当所有 电 机正常低 速 运转后, 检 查遥控器 各 通道的工 作 状态,并 进 行调整。
如果飞 行 器 在飞行 过 程 中发生 倾 侧 无法纠 正 , 请使用 附 带 的软件 或 编 程卡进 行 校 正。
飞行须 知 B efor e F lying :
-4-
Page 6

-5-
Bef o re Fli g ht:
DISCLAIMER OF LIABILITY
1.Using the company products within the limits permitted by local laws and
regulations. the company is not responsible for any illegal activities.
2.The Bumblebee is an aeromodelling product only. Please strictly follow the
aeromodelling safe function rules, the company does not hold responsible for
any control over its operation or usage.
3.Model aircraft are not toys! Fly under professional guidance and strictly
follow instruction rules in this document. the company is not responsible for
consequences caused by improper install, wrong setting or operation.
SAFETY CAUTIONS
1. Familiarize yourself with fly environment and any obstacles. Identify any
potential hazards such as power lines, cars, people, etc.
2.Do not fly the aircraft when fatigued, drunk or your mental state has been
compromised which may cause an accident.
3.Stay away from wet areas. Do not fly in the rain or wet environments which
can cause device failure and probably lead to danger. Do not fly at night or
in windy conditions.
5. Do not fly alone during your preliminary flights. If you need help, please
enlist the aid of an experienced pilot before flying for the first time.
6. Prepare rescue tools such as cell phones or other communication devices
which should you need to call for help.
7. Please fly under safe take-off weight, do not overload the aircraft which can
lead to danger.
8. Ensure all the equipment operates correctly before flight and that there is
no transmitter interference or conflicts.
9. Do not touch any moving or powered parts. Do not try to catch the
quadcopter which has rotating motors or blades for example. Keep loose
clothing away from moving parts as they may get caught and could cause
physical harm.
10. Always throttle down to minimum before fly.
11. Remove the propellers when testing the remote device or motors operation.
Attach the propellers after you have tested that everything is working good
to prevent an accident.
12. Assemble the aircraft with accessories the company provides. the company is not
responsible for any consequence resulted from assembly with other
accessories or modifications.
4. Stay away from any fire resulting in damage of the electronic parts or others
such as the flight battery.
Page 7

INSPECTIONS BEFORE FLIGHT
PLEASE PAY ATTENTION TO THE AGING AND WORN PARTS, AND FLY WHEN THEY ALL
WORK WELL. PLEASE DO CHECK EVERY ASSEMBLY CAREFULLY BEFORE FLIGHT,
especially lapses in these parts will easily cause DANGER.
1. Check that the propellers are secured properly.
2. Check that the receiver is receiving a stable signal.
3. Check that the battery is secured tightly and the battery is fully charged.
4. Check that the receiver is attached correctly.
5. Check the antenna is assembled tightly enough.
6. Check that the brushless motor and brushless ESC are secured to the
airframe.
Before flight, please assemble receiver or connect ESC to FC as the company factory
defaults, if not, please DO CHECK the operations of Remote Control channels and
consistence of motor reactions.
FLIGHT CONTROL INSTRUCTION
1. Start: Set the throttle stick to the lowest then turn on the transmitter.
Connect the flight battery then slowly apply the throttle until all motors
begin to run.
2. Stop: Move the throttle stick to the minimum. All motors should stop to
work in about one second. First cut off the Bumblebee then the RC powers
off.
3. Any emergency occurs when taking off or landing, please move the throttle
stick to the lowest position immediately to keep safe.
4. Flight control to the front, back, left and right is similar to the traditional RC
helicopters but each motion is controlled by a separate channel. Do not use
any channel mixing in your RC transmitter such as v-tail or swashplate
mixing etc.
START TO FLY
Power ON/OFF Operations: Before plugging in the quad you have to turn on the RC
and set the throttle stick to the lowest position. When powering off, you have to cut
off the aircraft first then the RC powers off. Disorder in the on and off procedure will
cause an accident.
1. Place the aircraft on the ground. Put the throttle stick to the lowest position
then turn on the transmitter.
2. Connect the battery to the ESC board.
3. Start the Quad by applying power slowly with the throttle stick. When all the
motors rotate at a slow speed you can move the stick to check the X650
Value actions according to your operation.
4. If you can not calibrate the tilt on one side during your flight, please
connect Bumblebee to the PC and use the company configuration software to do
the calibration.
-6-
Bef o re Fli g ht:
Page 8

Notice the hole distance of
motor and motor mounting
plate. Assembled style as
shown in right figure.
MOS管朝上
MOSFET Side Up
Motor and ESC connections:
As for all the ESC of the machine without self-sound testing, in
order to avoid dangers happenin g ple ase k ind ly ch eck w iri ng in
accordance with the color without wrong picking.
(P lea se be s ure t o pul l the m ost l ow le vel o n thrott le le ver of
remote control when you are wiring)
杯头内 六角螺 丝
Scr ew M3 * 6
无刷电 机 Bru s hl e ss Mo tor
电调盖E SC L id
无刷电 子调速 器
Bru shl e ss E S C
电机固 定座
Mot or Mo u nt
M2. 5防松螺 母L oc k N ut
杯头内 六角螺 丝 S cr e w
M2. 5*2 4
垫片 wa she r
M2. 5防松螺 母
Loc k N ut M 2 .5
杯头内 六角螺 丝S cr e w
M2. 5*2 2
机身管 固定座
Arm M oun t
碳 管
Ca rb on t ub e
安装时,注意电机固定板与无刷电机的安装孔
距,通过调整固定板的安装位置,使安装样式如
左图。
16m m
19m m
16m m
19m m
电机安 装尺寸
Mot or Si z e
电机与 电调的 连 接:
由于本 机所用 电 调无 自 检声, 请仔细 检 查按 照 颜色接 线,
以免接 错,发 生 危险 。 (接线 时请勿 必 将遥 控 器的油 门
摇杆拉 到最低 点 。)
自攻螺 丝 Scr e w
M1. 5*4
机身臂 安 装 Fram e A rm asse m bly:
-7-
Page 9

起落架 固定块A
Landi ng Gear F ixed bl ock-A
注意安 装方向
Not ice f a ce .
起落架 固定块B
Landi ng Gear F ixed bl ock-B
Ident ify the p arts ca ref ully
befor e insta lling
机身下 板
Fuselag e Lower r Plate
杯头内 六角螺 丝
Soc ket S c re w M 2.5 *10
杯头内 六角螺 丝
Soc ket S c re w
M2. 5*1 0
M2. 5防松螺 母
Loc k Nut
M2. 5防松螺 母
Loc k N ut
M2.5防 松 螺母
Lock Nu t
半圆
Soc ket S c re w M2. 5*6
头内六 角螺丝
半圆
Soc ket S c re w M2. 5*6
头内六 角螺丝
半圆
Soc ket S c re w M2. 5*6
头内六 角螺丝
半圆
Soc ket S c re w M 2.5 *6
头内六 角螺丝
杯头内 六角螺 丝
Soc ket S c re w
M2. 5*1 0
支撑管 卡扣
The s u ppo r t
pip e b uck l e
起落架 固定块A
Landi ng Gear F ixed bl ock-A
起落架 固定块B
Landi ng Gear
Fixed b lock- B
机身装 配 M ain Fr a me Asse s bly(1 ):
-8-
机身上 板
Fus e lag e u ppe r P lat e
机身下 板
Fuselag e Lower P late
安装前 请仔细 辨 认
Page 10

M3
M3 Nu t
防松螺 母
垫片wa she r
机身上 板
Fus ela g e Up p er Pl ate
直形卡 扣
Str aig h t bu c kle
弧形卡 扣
Cur ved b u ck l e
半圆
Soc ket S c re w M 2.5 *6
头内六 角螺丝
半圆
Soc ket S c re w M 2.5 *6
头内六 角螺丝
半圆
Soc ket S c re w M2. 5*6
头内六 角螺丝
半圆
Soc ket S c re w M 2.5 *6
头内六 角螺丝
半圆
Soc ket S c re w M 2.5 *6
头内六 角螺丝半圆
Soc ket S c re w M 2.5 *6
头内六 角螺丝
杯头内 六角螺 丝
Soc ket S c re w M 3*2 8
垫片
was her
杯头内 六角螺 丝
Soc ket S c re w M 3*2 8
M3
M3 Nu t
防松螺 母
机身装 配 M ain Fr a me Asse s bly(2 ):
-9-
Page 11

脚架碳 管固定 座
Loa ding ge ar tube m ount
防松螺 母
Lock Nu t M3
半圆头 内六角 螺 丝
Soc ket S c re w M 2.5 *16
防松螺 母M2. 5
Loc k Nut
杯头内 六角螺 丝
Socke t Screw M 3* 12
-10-
92mm
硅胶 套
sil icon ge l- Slip cover
支撑管
Sup porti ng Tube
脚架管
foo t-sta nd tube
起落架 横管卡 扣
Lan d in g G ea r -Cr o ss T u be B u ckl e
杯头内 六角轴 套 螺丝
Scr e w M3 * 12
硅胶套
silic on gel- S lipco ver
脚架管
foo t-sta nd tube
起落架 横管卡 扣
Lan d in g G ea r -Cr o ss T u be B u ckl e
起落架 安 装 La n ding G e a r Asse m bly:
Page 12

扎带
ri b bo n ti e d
用扎 带 固定 在电 池 板上
fixing upon the battery
board with a ribbon tied
电池b att ery
1.先 将单 边 起落 架向 侧 面分 开 Fir st pl eas e sep ara te la ndi ng ge ar to a nother side
2.把 电池 板 组件 卡在 另 一边 的支 撑 杆上 Fixing component of the battery board on another support rod
3.分 开的 起 落架 复位 R ese tti ng th e sep ara ted l and ing g ear f ram e
4.电 池板 组 件另 一边 卡 扣卡 在另 一 支撑 杆上 F ixi ng an oth er co mpo nen t of th e bat ter y boa rd on a not her
support rod
1
3
4
2
电池板 组 件Batt ery :Assembly
硅胶 套
silicon gel- Slipcover
硅胶 套
silicon gel- Slipcover
Battery Board
电池 板
半圆头 内六角 螺 丝
Screw M 2. 5* 12
半圆头 内六角 螺 丝
Screw M 2. 5* 12
M2. 5防松螺 母
Loc k Nut
起落 架 横管
landing gear cross tube
电池板 卡扣
Bat ter y b uc k le
电池板 组 件安装 Battery Mounting Assembly:
-11-
起落架 横 管 安装 :The installation of landing gear cross tube
Page 13

桨的安 装 Propeller Installation:
-12-
ST1038
正桨2pcs
ST1038P
反桨2pcs
螺旋桨 有正反 之 分, 安 装前请 仔细辨 认 !
M1、M3相同 ,M2、M 4相同。
There a re differe nce of pr os and co ns in the prop eller, p lease
ident ify it ca reful ly be fore in stall ation ! M 1、M3 is the same ,
M2、M4 is th e same to o.
螺旋桨必须贴紧电机,以保证四个螺旋桨的
高度一致性。
Close to motor to make
sure 4 blades in the same height.
Motor Blade
用螺丝刀穿过桨夹上的孔来拧紧桨夹。
We recommend you use the driver to poke through the hole on
the locker for better tighten in case of any loose of the screw
during your flight.
桨夹必须拧紧,以免飞行时脱桨造成危险。建议
螺丝刀
Screw Driver
桨 Prope ller
桨夹 Locke rPrope ller
M2
M4
M3
M1
前
Fornt
Page 14

飞行控 制 器和机头 罩 F light C o ntrol ler And C a nopy:
双面胶
Doub le- S id e d Tap es
飞行控 制器
Fligh t Contr oller
安装飞 控时, 将 飞控 贴 在机架 上板的 正 中间,贴
纸上的 箭头指 向 机头 方 向
将头罩 沿 箭 头方向 卡 在 飞行器 的 支 臂上
Canopy alon g the directi on of the arrow s up port arm stuc k in the aircra ft
A
A A
A
B
B
A:四 个支 臂 展开 时使 用
Four rotor wings is use for expending
B 四 个支 臂折叠 时使 用
Four rotor wings is use for folding
:
-13-
Cauti on: Whe n insta lling flig ht cont rol, fl ight co ntr ol will b e
attac hed to th e rack on t he mi ddle pl ate,A rrow on
the sti cker wh ich poi nt to direct ion of th e nose.
头罩
Canopy
Page 15

折叠方式 Folding Method:
-14-
支臂的折叠 Folding Arm:
1.先取下电池板组件
First pletake of component
as battery board
电池板组件
battery board
co m po ne n t
2.沿箭头方向将起落架拉平
Along the arrow direction to
even the landing gear out
3.起落架和支臂折叠后
After folding of landing
gear and rotor w i n g s
起落架的折叠 The folding of landing gear:
 Loading...