

Page 1
MINI DLG 2017
SPECIFICATIONS:
ASSEMBLY MANUAL
80mm
CG.
ca. 990 mm ca. 730 mm
ca. 11.17dm
2
ca. 14.3 g/dm
kg
kg
2
g
ca. 160 g
FEATURES:
Construction : Fuselage pod is made of light weight plastic features with carbon fiber boom attached and
ultra light weight balsa tail and wing with carbon fiber reinforced
Wing : One-piece bolt-on balsa wood sheeted reinforced with carbon fiber, full span ailerons with strategic
lightening holes and carbon throwing peg
Empennage : Full balsa sheet with carbon fiber reinforcement and strategic lightening holes
Aileron Control : Dual servo
Elevator Control : By using a single pulling cable to control the elevator with a spring mechanism design
Building Time : Ready for launch in only 30 mins
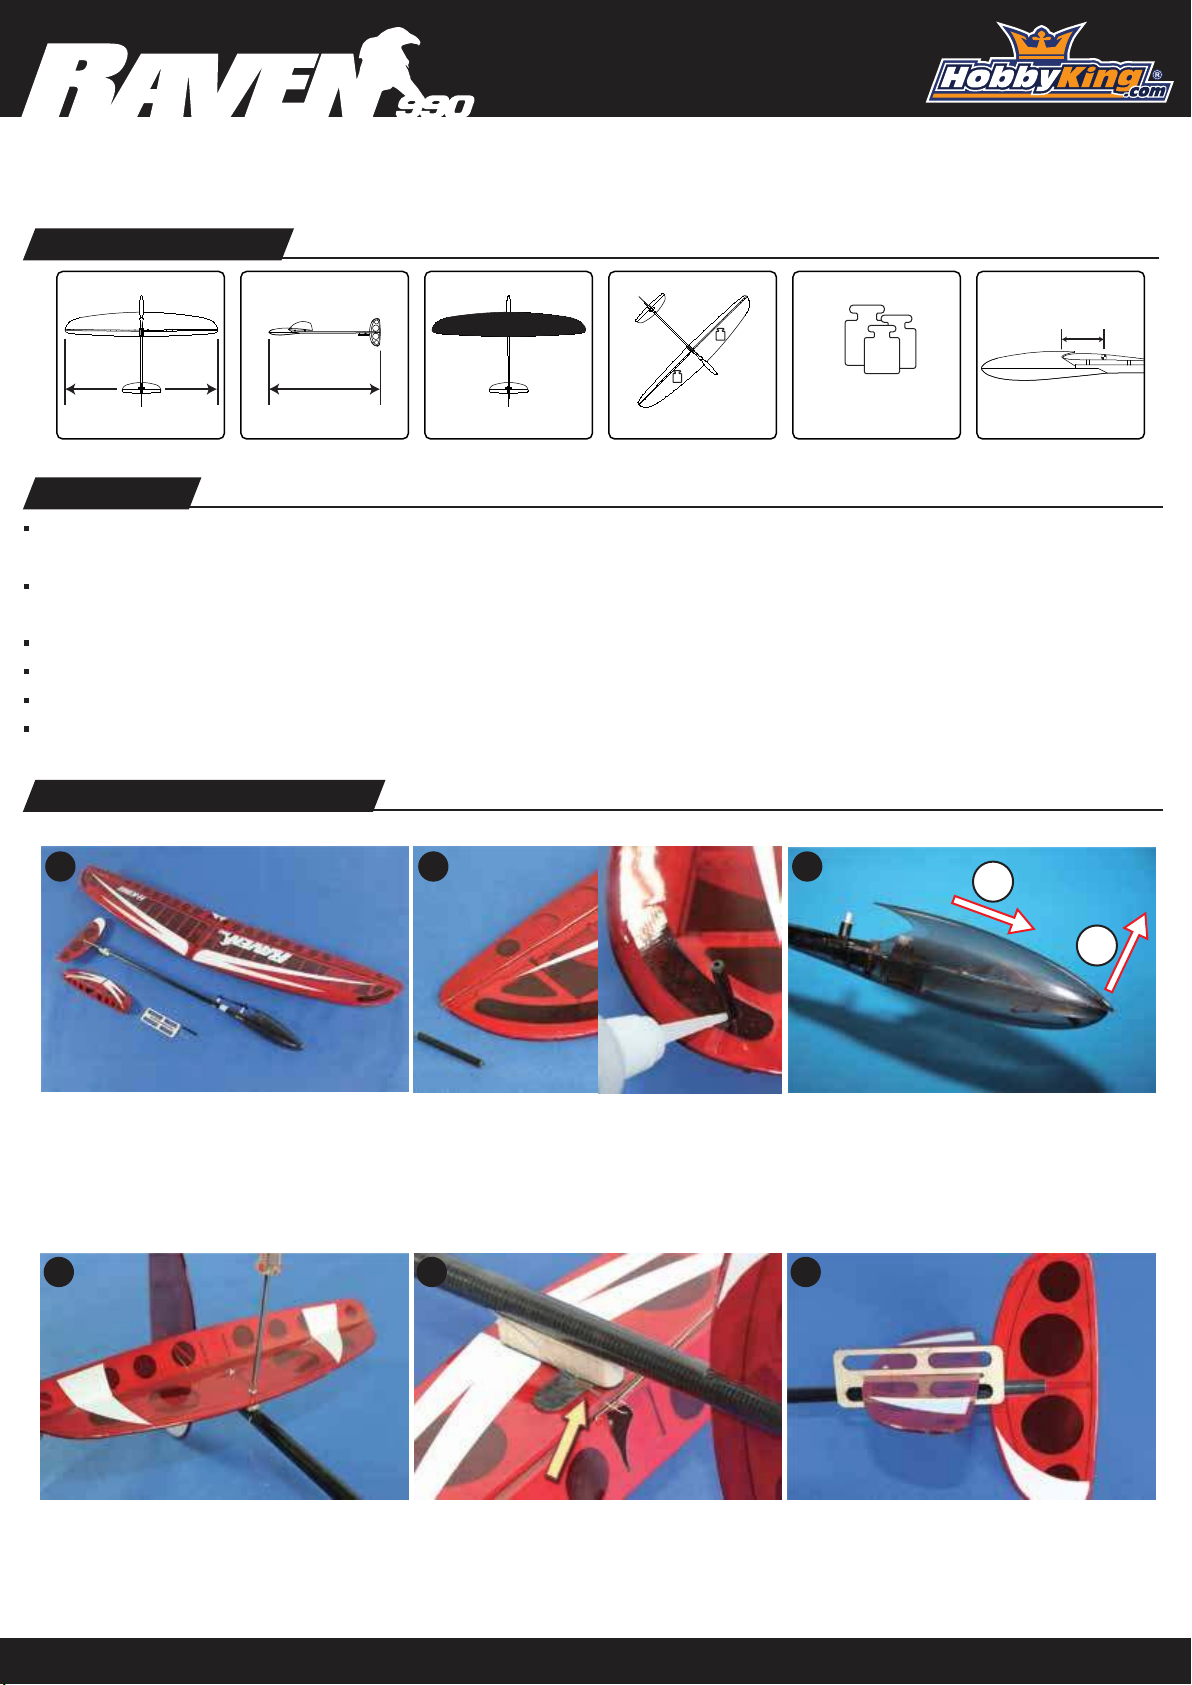
Assembly procedures:
1 2 3
1
Package of contents.
4 5 6
Install the elevator to the elevator
mount on the tail boom by using
the tapping screws provided in
the kit.
Install the carbon tube launcher to
either right or left wing tip according
to your own requirement.
Hook up the prepared cable to
the elevator horn as shown.
2
We feature a simple but effective
locking mechanism design to
secure the canopy in place. First,
pull the canopy forward, then lift up
the canopy as shown in the picture.
Slide on the provided wooden jig
to hold the elevator in straight and
level for servo linkage setup.
1
Page 2
MINI DLG 2017
7 8 9
2
1
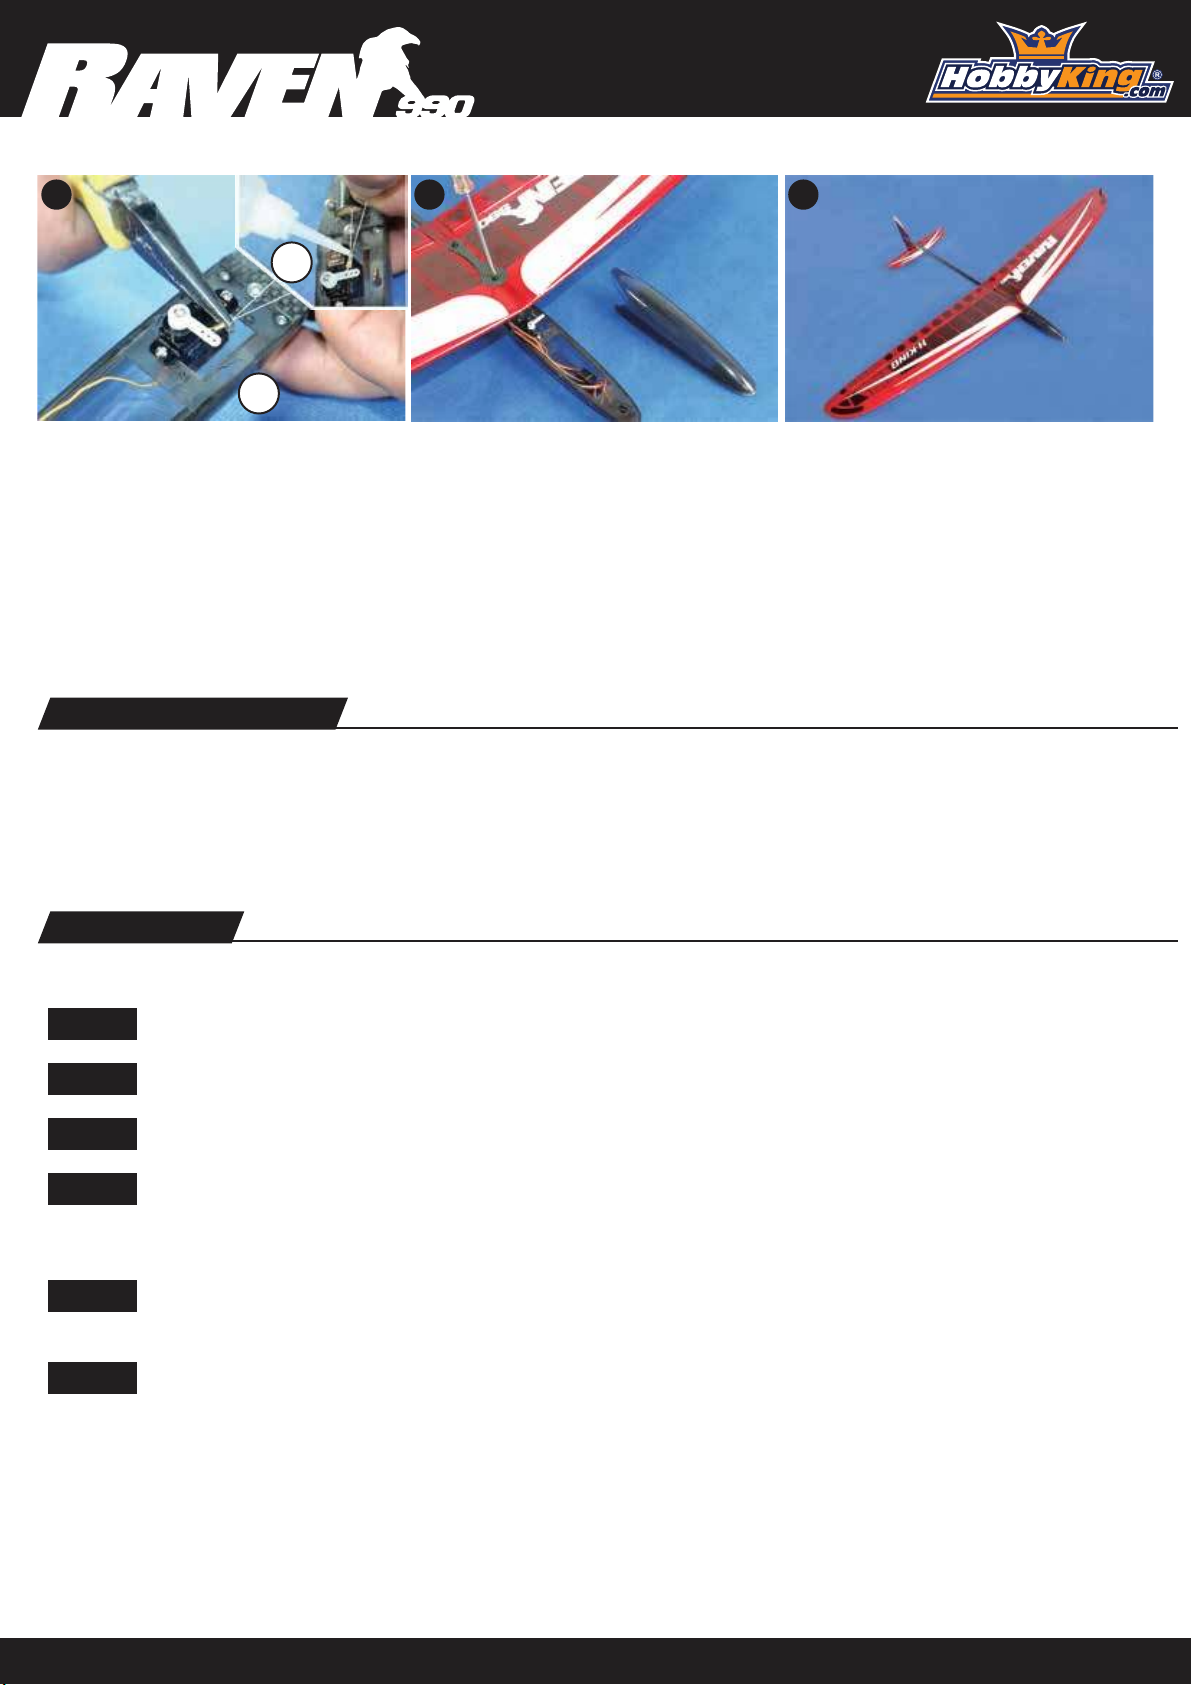
Loop the cable to a brass tube and
the servo horn as shown. Tighten
the cable by slightly pulling it on
one hand and lock the cable in
place by using a plier to crimp the
brass tube which supplied with the
kit. In addition, Put some CA glue
on the cable and crimped brass
tube to prevent from loosening.
Install the main wing with the
screws provided. Install receivers
and battery inside the canopy.
All installations are completed.
Radio Installation:
Add your receiver and battery to the nose. We suggest using a 3.7-6v (10-15grams) receiver
battery and a micro receiver for the lightest RC setup. Remember the lighter the model, the
better it flies and performs!
Ensure the elevator and aileron are trimmed neutral prior to test flying. We suggest 5mm travel
on both direction on the elevator and 10mm travel on both direction for the aileron.
First Flight:
You need to stand parallel to the wing direction
Step 1.
Step 2. Stand with you left shoulder into the wind and the right wing tip on the ground.
Step 3. Start rotating to the left keeping the plane flat and your arm extended.
Step 4. On the second half of the rotation, this is the section which is most responsible for a good high
launch. Don’t use your arm to swing it too hard in this section. Remember, just let the rotation of your
torso to speed the plane up.
Step 5. By this time in the launch, the plane will be trying to climb on its own, Just release your fingers and
let the plane fly out of your hand. Remember, just release it directly into wind direction.
Step 6. Catch your balance after the moment you have released the plane. Hold the radio firmly in your
hands and then start to enjoy your DLG flying for the day.
Your right index finger and middle finger should be wrapped around the peg.
Practice makes perfect!
Enjoy!
*Due to continuous improvement of our products, the actual product may vary slightly from the images above.
2
 Loading...