

Page 1
Page 2

Manual Contents
Preface/Features/Specifications: -------------------------------------
Warnings and Safety notes: --------------------------------------------
Contents of Kit: ------------------------------------------------------------
General Assembly: ---------------------------------------------------
Radio setup: --------------------------------------------------------------
Safety Precautions: -----------------------------------------------------
Recommended Accessories: -------------------------------------
5-17
21-22
2
3
4
18
20
Page 3

The HobbyKing™ Paramotor is extremely easy to fly due to its very gentle and stable flight
characteristics yet once you are used to it, it will perform loops and rolls with ease. Due to the
design, the huge high performance 2250mm wing opens quickly for easy launching and it will
retain its shape even in turbulence. The single skin durable wing is made from 100% ripstop
fabric and comes pre-rigged wiith tough nylon chords and ready to attach to the durable
aluminum gondola.
There is a high level of prefabrication so assembly time is minimal and it is Plug-N-Fly so all
you require is your own transmitter, receiver and battery. The Paramotor is fitted with a
powerful 3530-1400KV brushless motor swinging a 10 x 4.7 propellor, it also has a 50 amp
electronic speed controller with 5 amp BEC and 2 powerful 15kg high torque metal geared
servos. A 3S lipoly battery is recommended and it can vary in capacity to suit different flying
conditions. The
recommended flying weight is 1.6~2.0kg, in light wind conditions it is best to put a lighter
battery in to keep near the 1.6kg weight. In windy conditions it is better to put a heavier battery
in to fly around the 2kg mark. The undercarriage is easily removed for hand launching and
catching and also for slope soaring.
If you fancy trying something a little different then the HobbyKing™ Paramotor is for you. Great
fun to fly without being too challenging and it looks great in the air. Pre-assembled and Plug N
Fly also means you can be airborne very quickly after taking delivery.
Features:
• High performance parawing
• Plug and Fly format ( you only require a Tx, Rx and battery)
• High level of prefabrication for quick assembly
• Gentle flight characteristics, however it can perform loops and rolls
• Removable undercarriage for slope soaring etc
• Durable aluminum airframe
• Wide flying weight range (1.6~2kg)
Specs:
Type: Plug-N-Fly Paramotor
Parawing Span: 2250mm
Motor: 3530-1400KV brushless
Propeller: 10x4.7
ESC: 50amp
BEC: 5amp
Servos: 2 x 15kg high torque metal geared Flying Weight: 1.6~2kg
Recommended Battery: 3S lipoly (not supplied)
Required:
1 x 3ch or more computer transmitter with the ability to mix channels
and set control curves
1 x 3ch or more receiver
1 x 3S (11.1v) lipoly battery and charger
2
Page 4
Warnings and Safety notes
3
Page 5
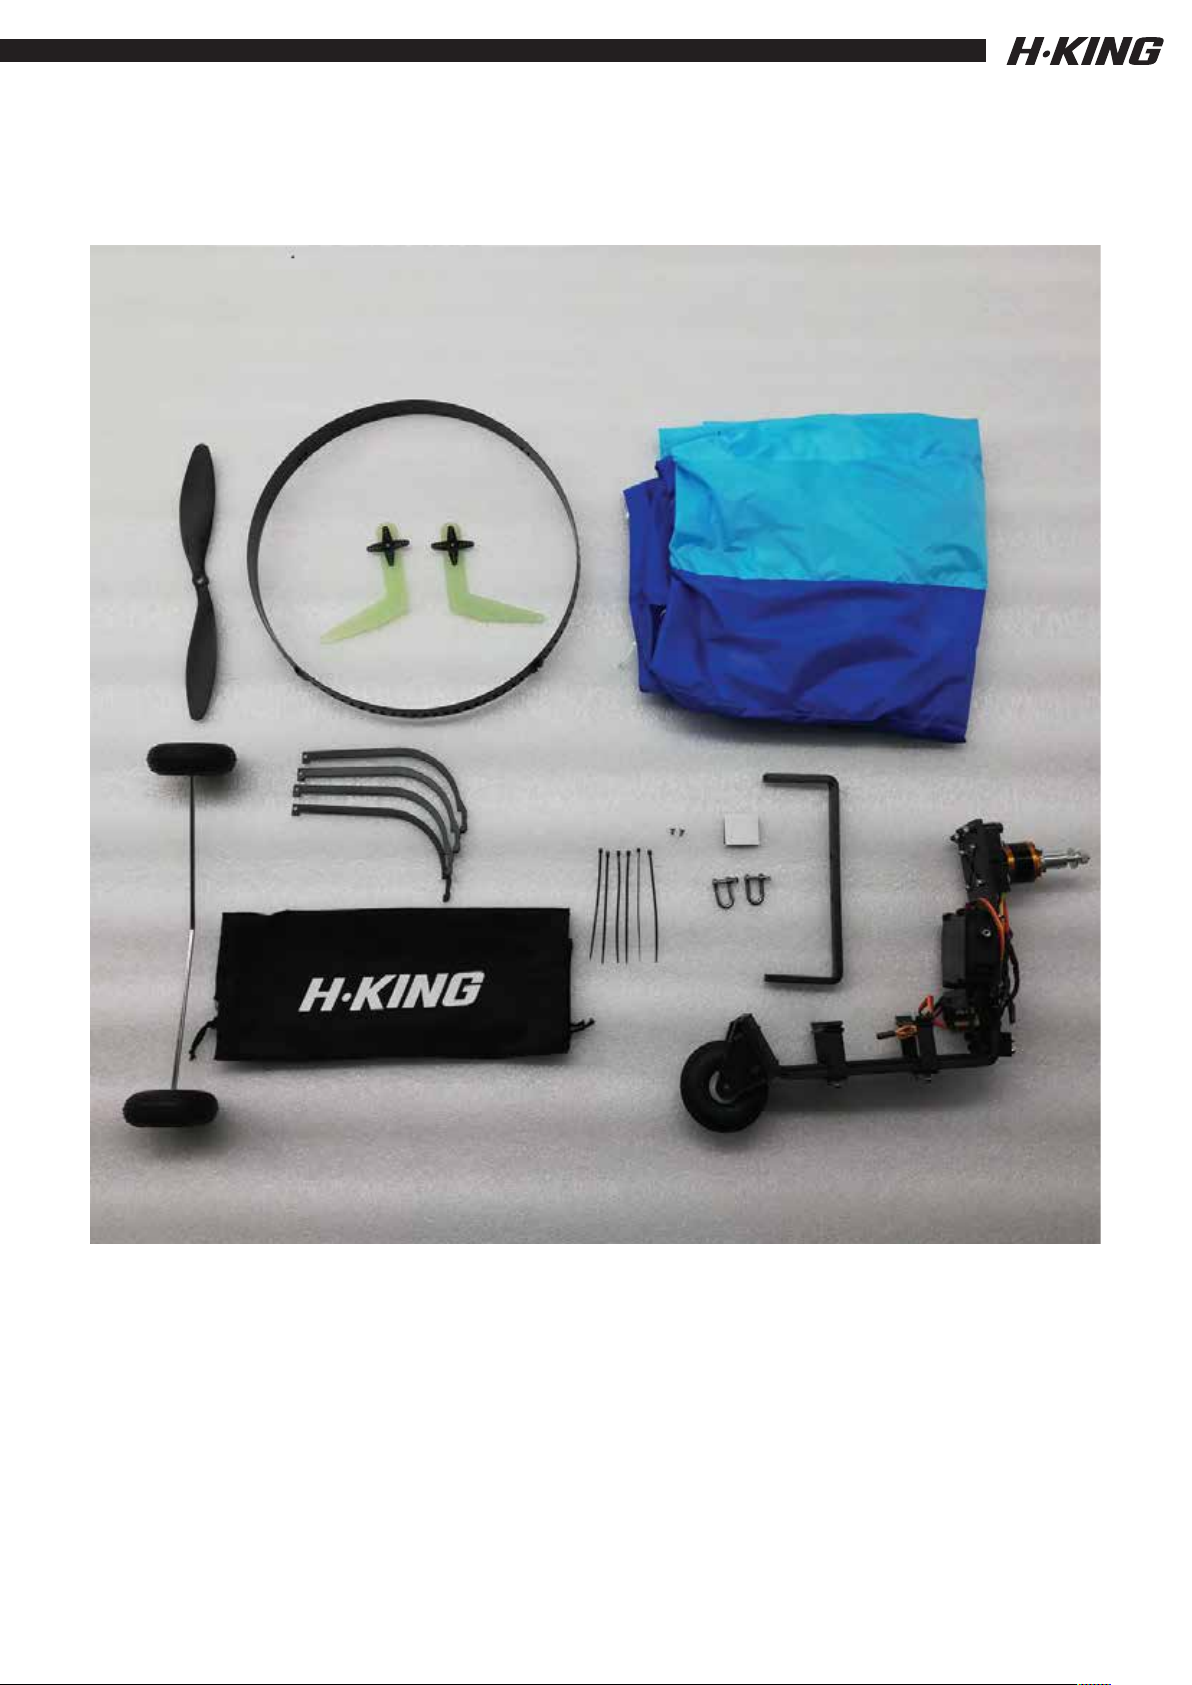
Contents of Kit
4
Page 6
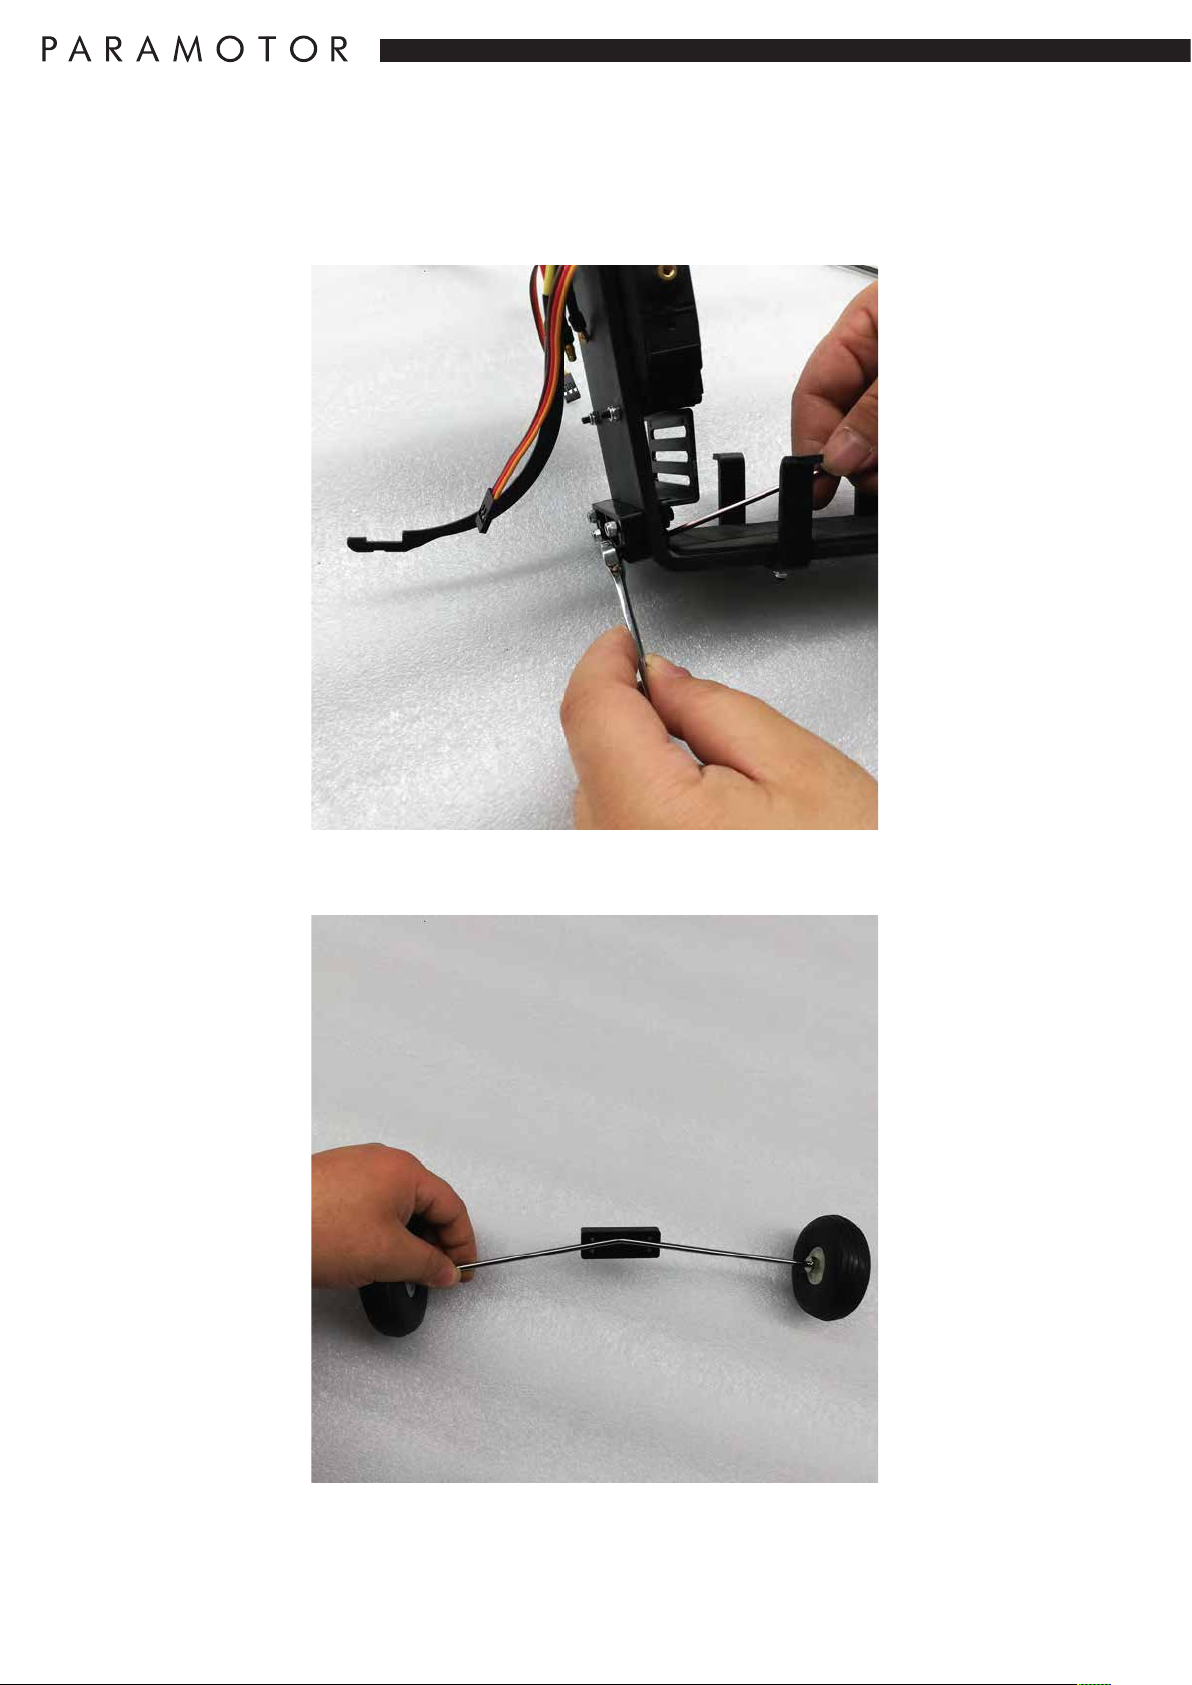
General Assembly
Step 1:
Remove the undercarriage retaining bracket.
Step 2: Fit the retaining bracket over the undercarriage wire.
5
Page 7
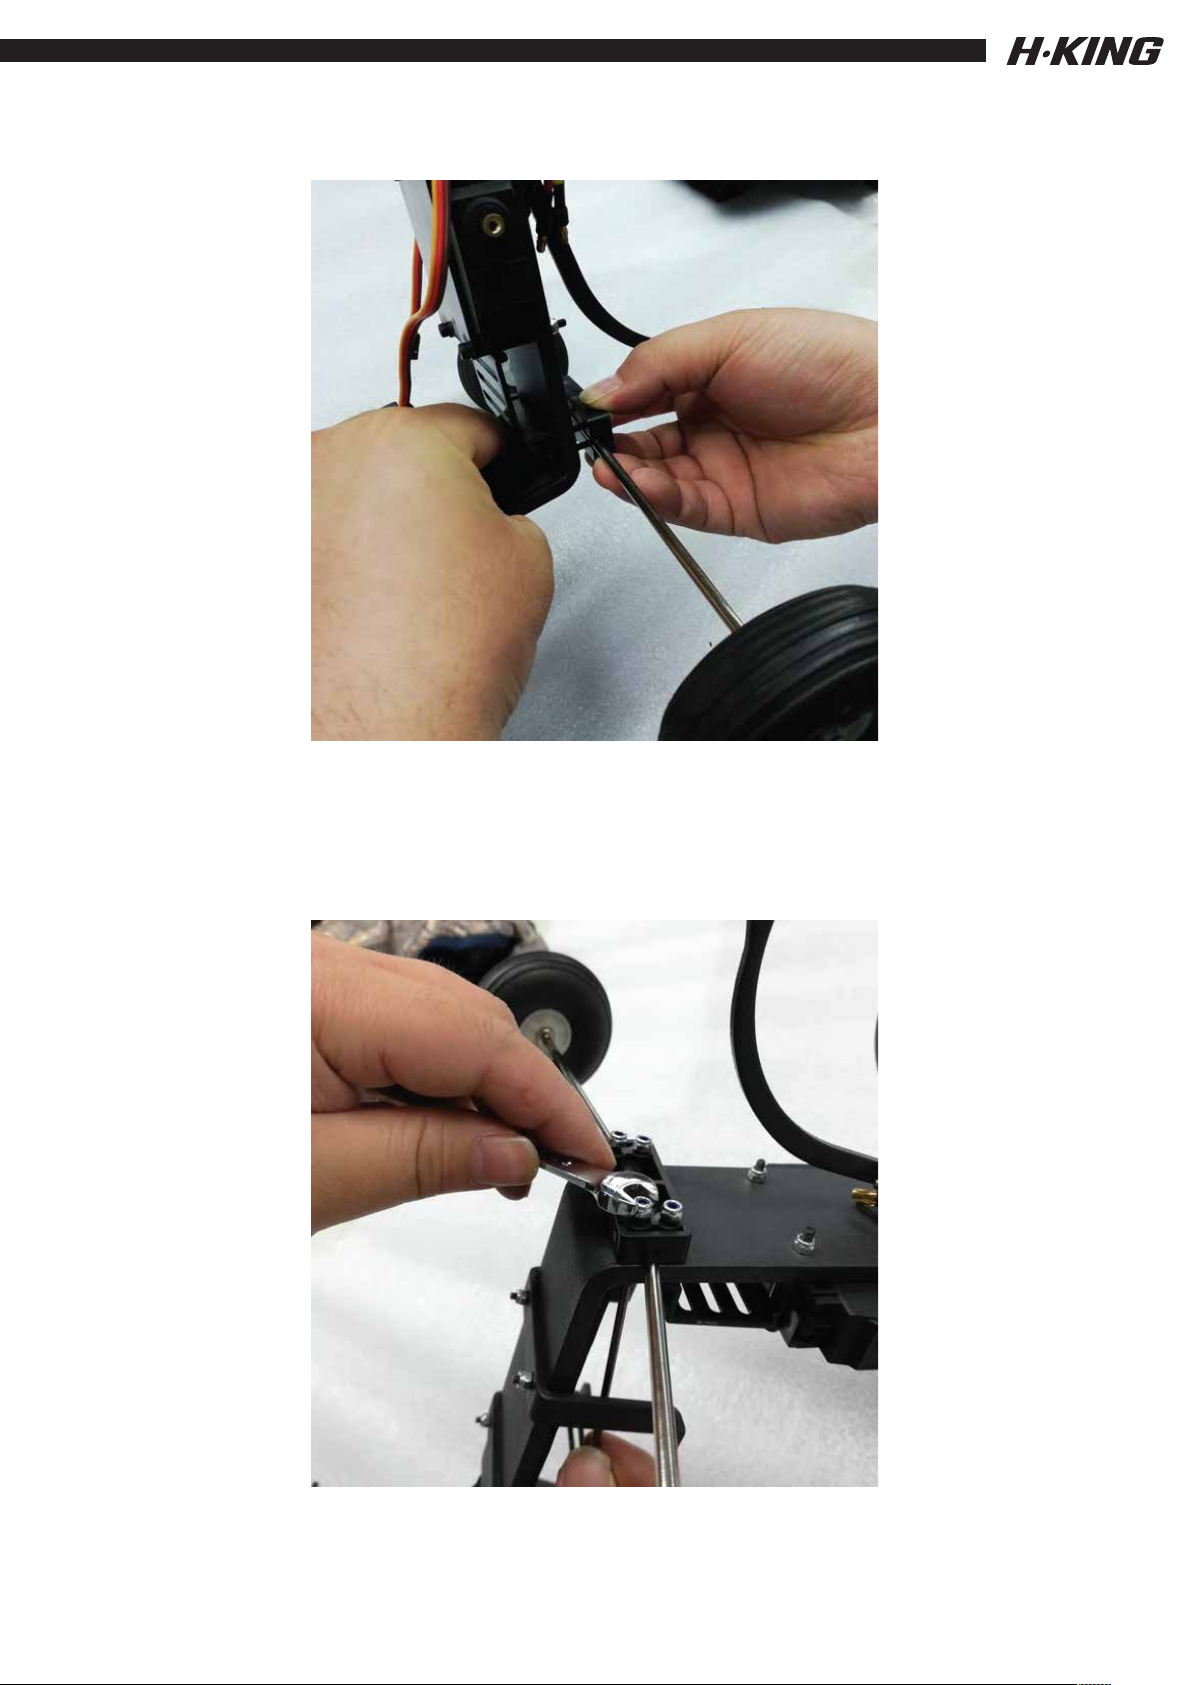
Step 3: Using the hex head screws refit the undercarriage bracket
with the undercarriage wire positioned between the bracket and
the base of the airframe.
Step 4:
Refit the nyloc nuts and tighten the assembly.
6
Page 8
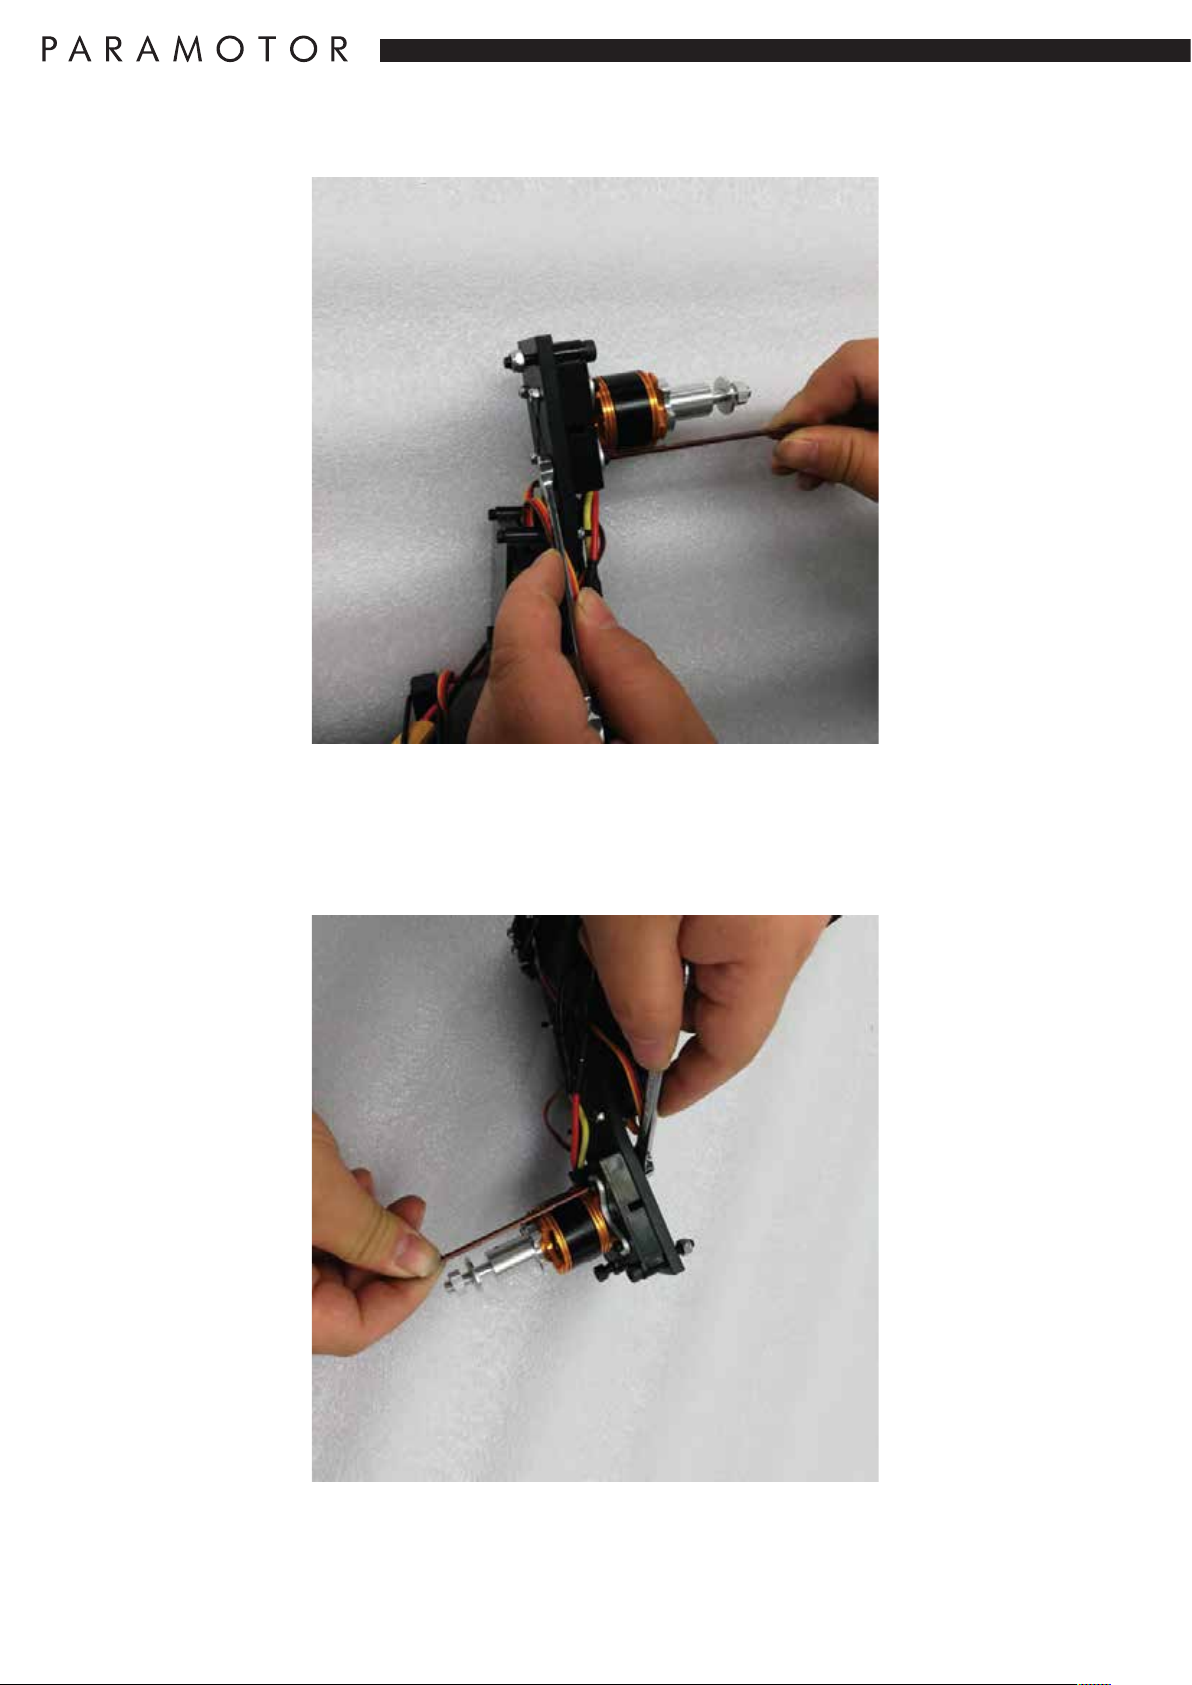
Step 5: At this point we need to remove the motor
and motor mount. The reason for this is that the the
aluminum propguard supporting arms have to be
installed behind the mount.
7
Page 9
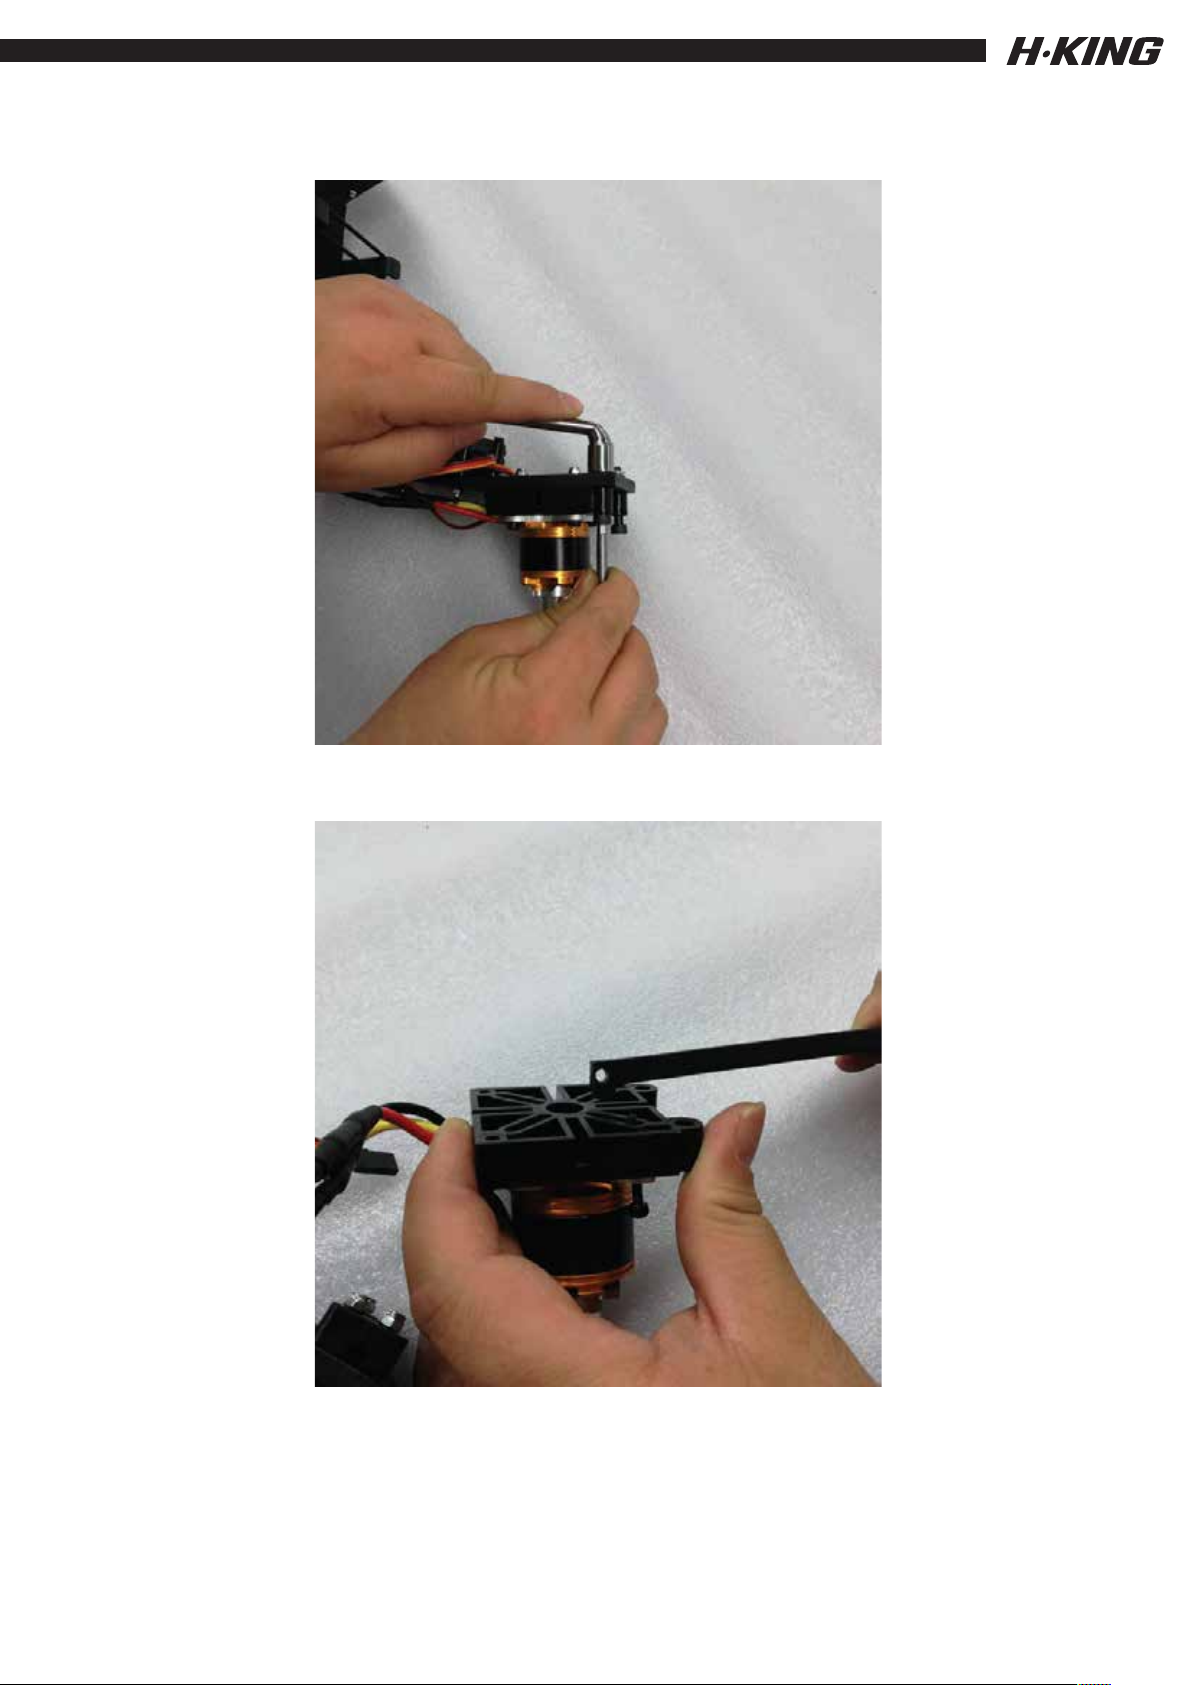
Step 6: Push the hex screws through and remove motor and
motor mount completely, this makes fitting the supports easier.
8
Page 10
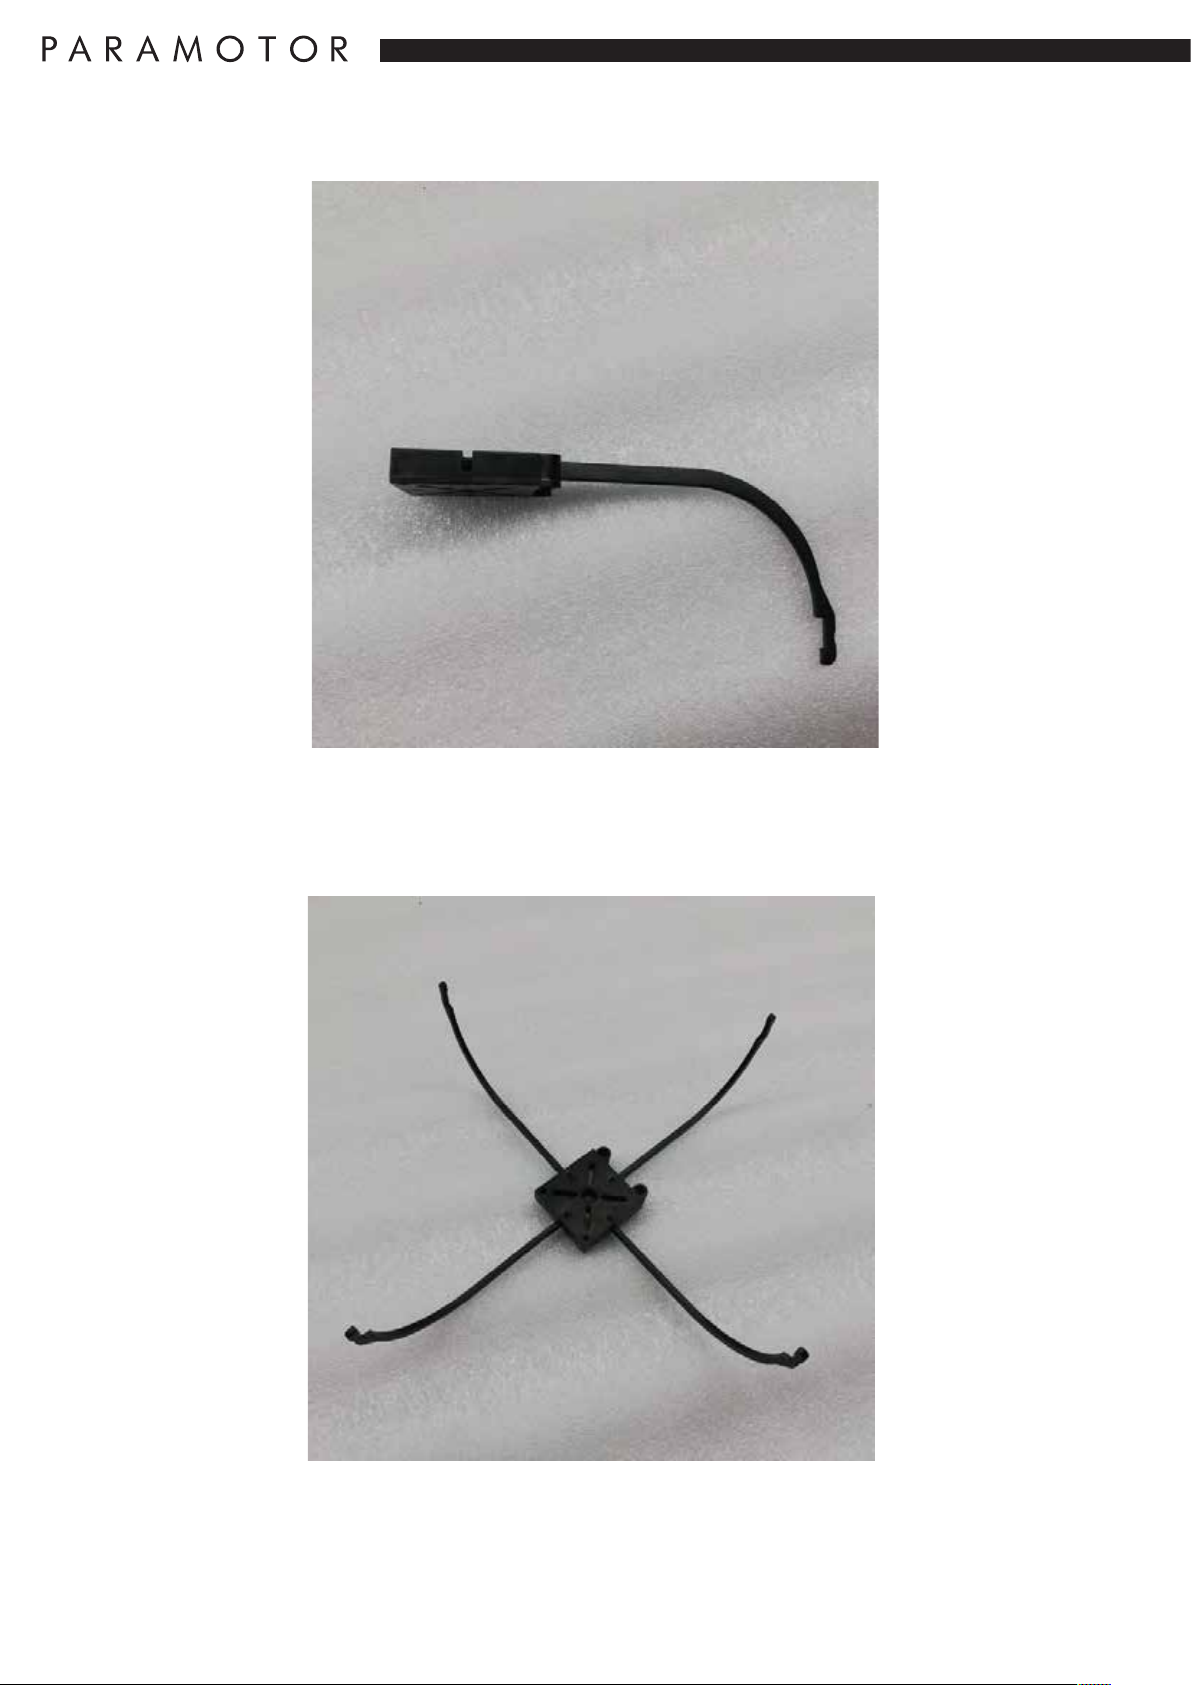
Step 7: Clip the 4 prop guard support arms into the slots
in the rear of the motor mount. These can be quite a
tight fit so you may need to squeeze them fully home
with a pair of pliers or similar tool.
Assembly should look like this when all 4 are clipped into position.
9
Page 11
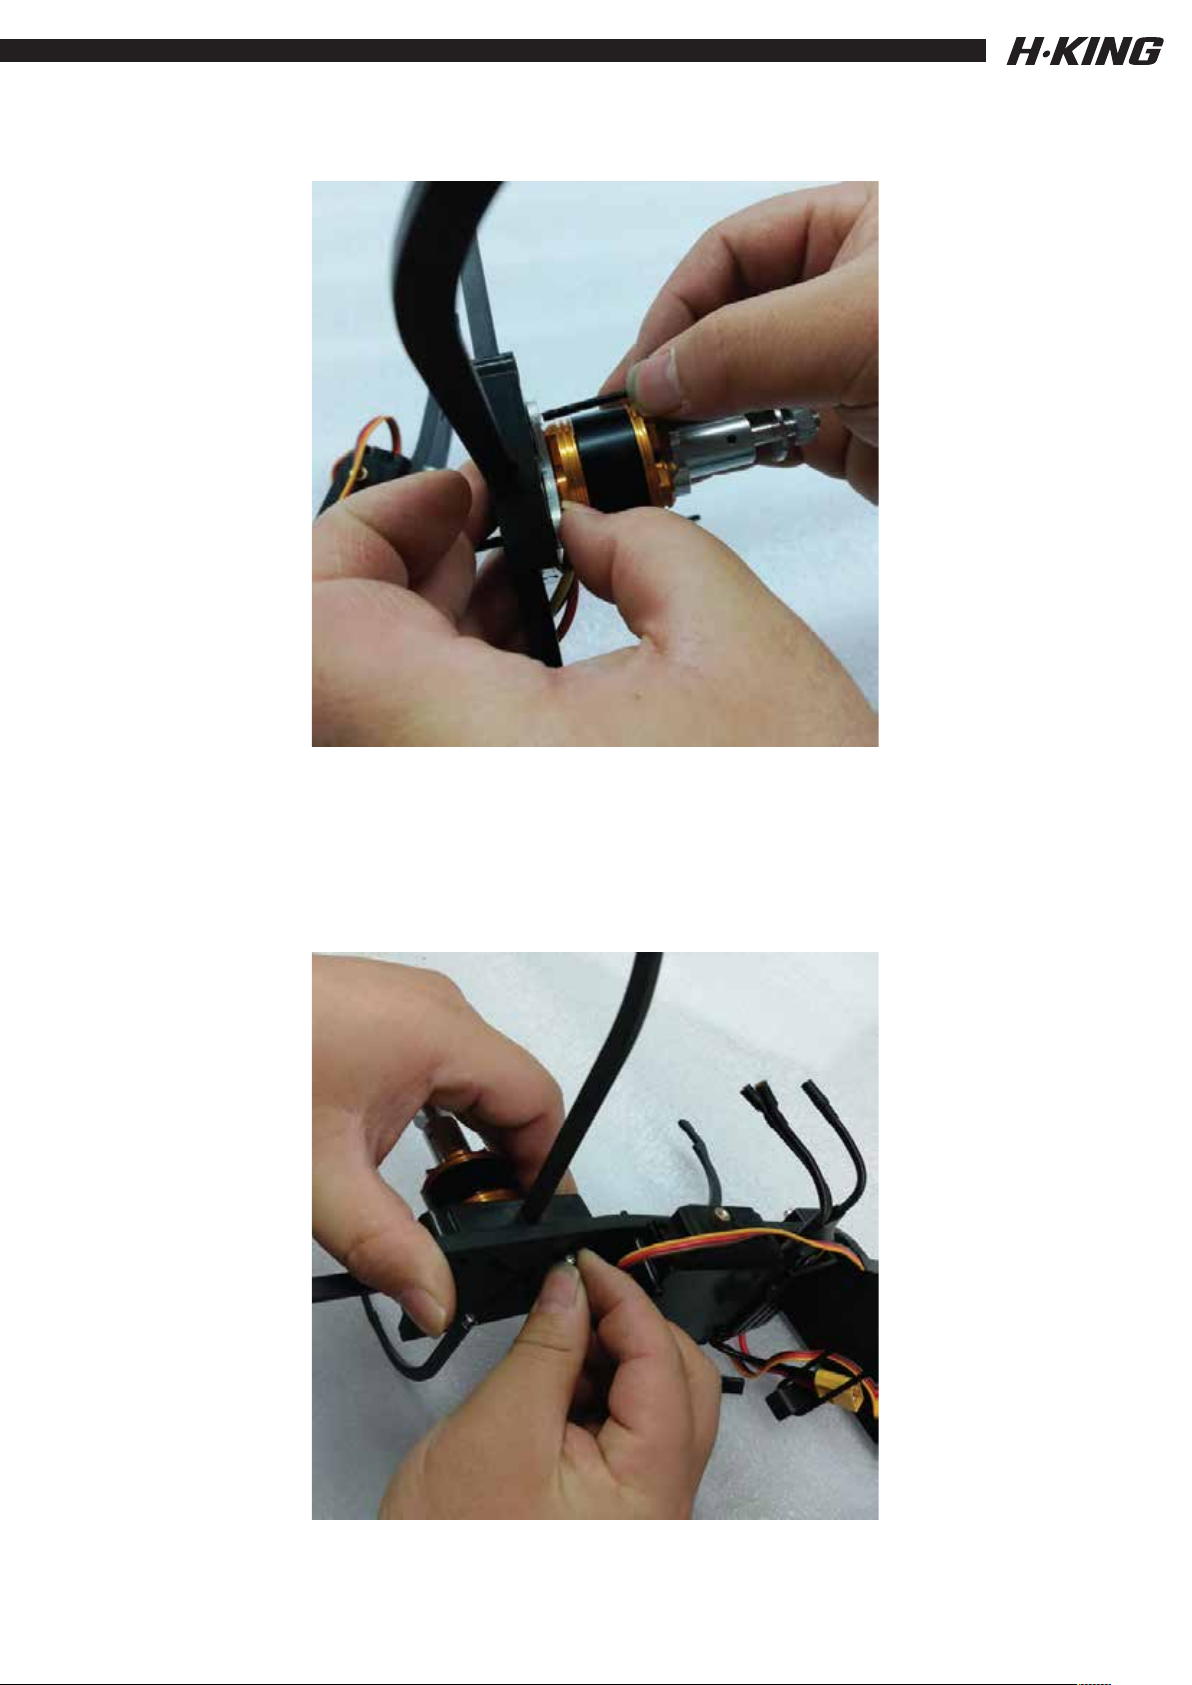
Step 8: As the following pictures show refit the motor and
motor mount clamping the prop guard supports between
the airframe and the motor mount.
10
Page 12
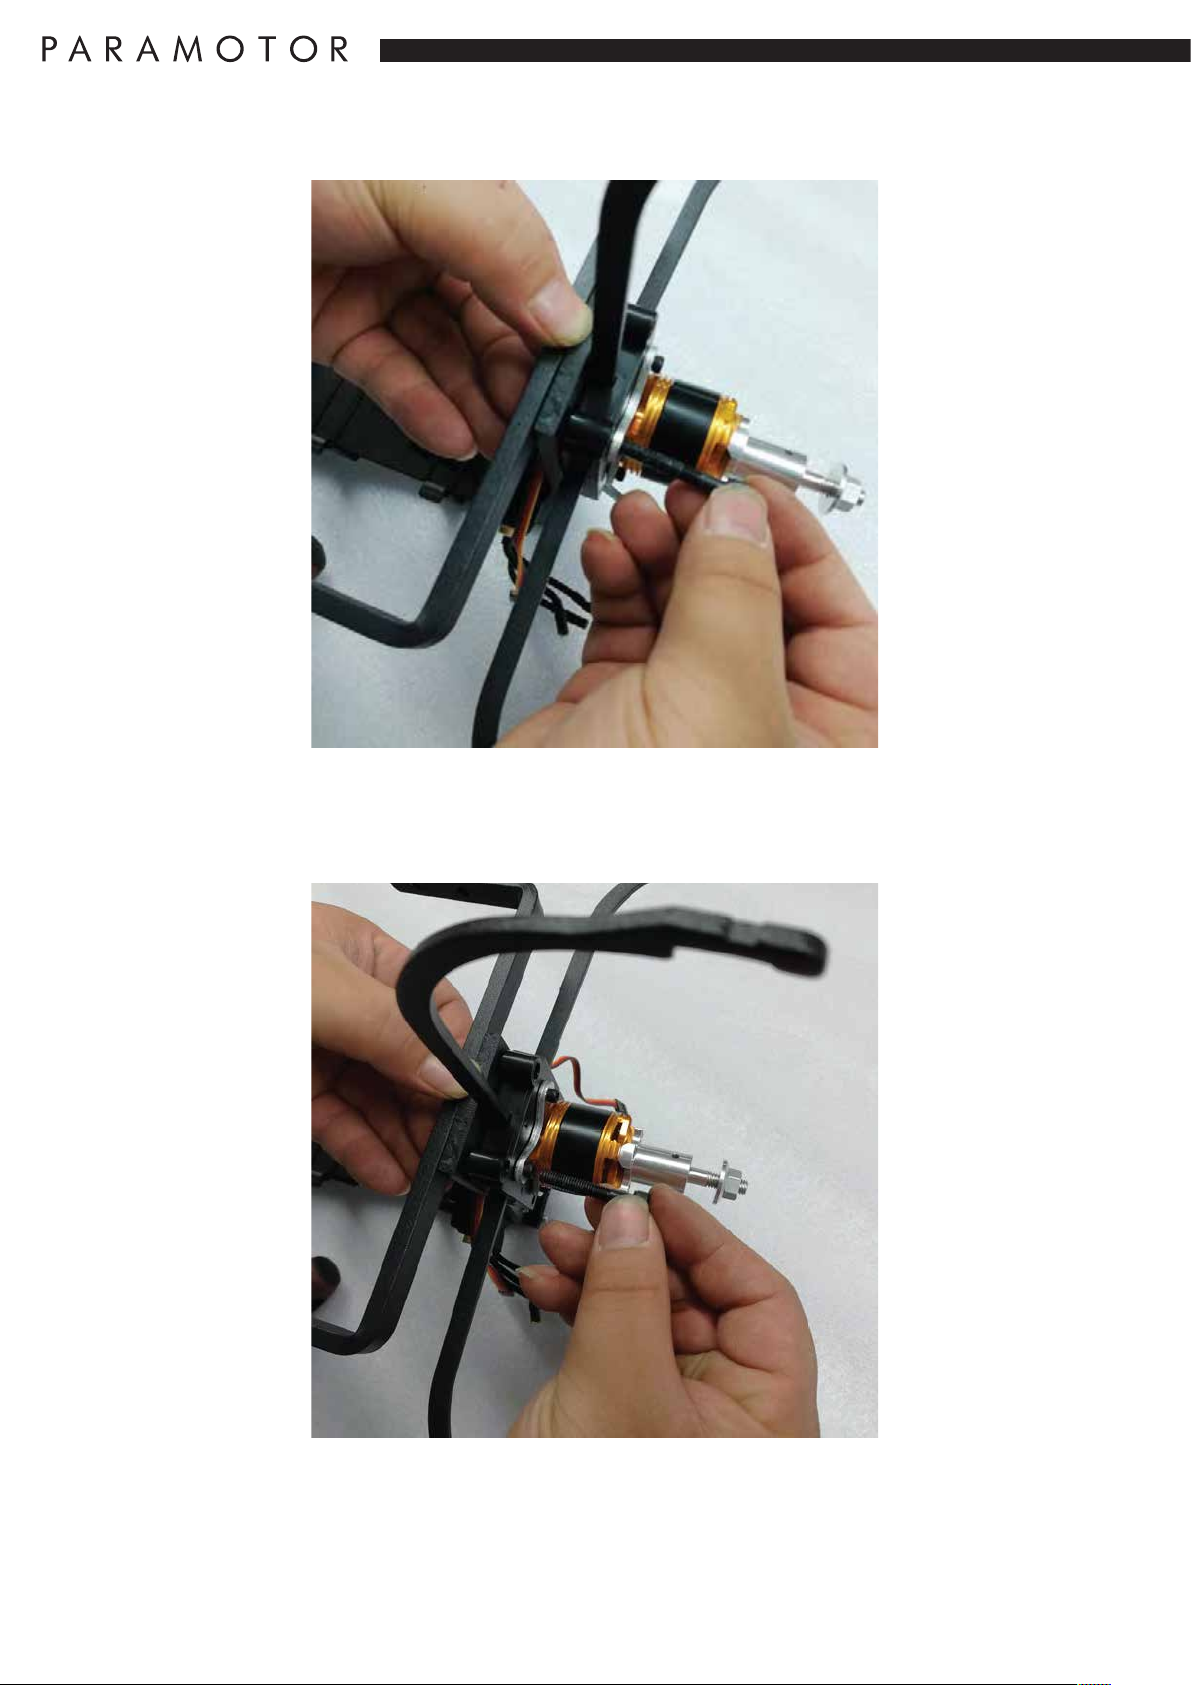
Step 9:
Fit the flybar to the front of the airframe using the longer
bolts through the top holes of the motor mount.
Note: Do not tighten the nuts until you have all 8 bolts
through the mount and frame.
11
Page 13
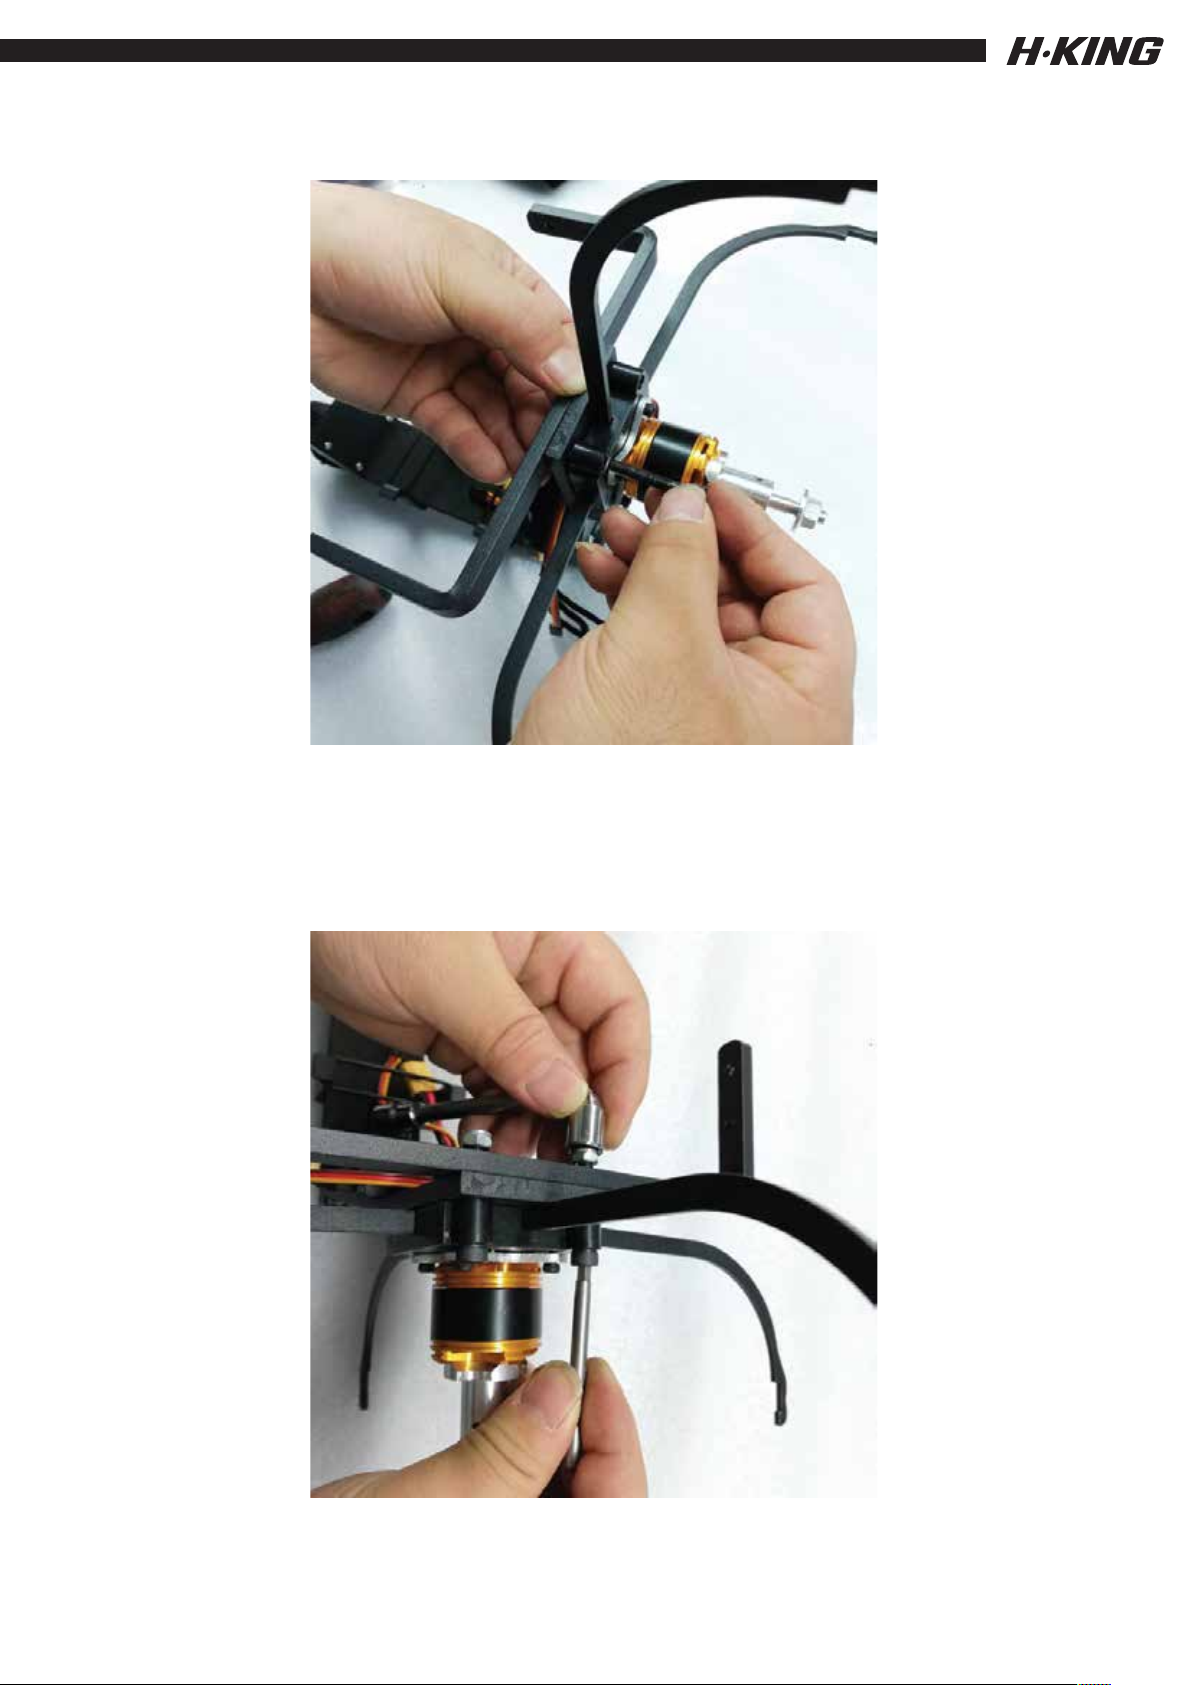
Note: The prop guard is aerofoiled, please ensure you fit it the
correct way around, see picture above.
12
Page 14
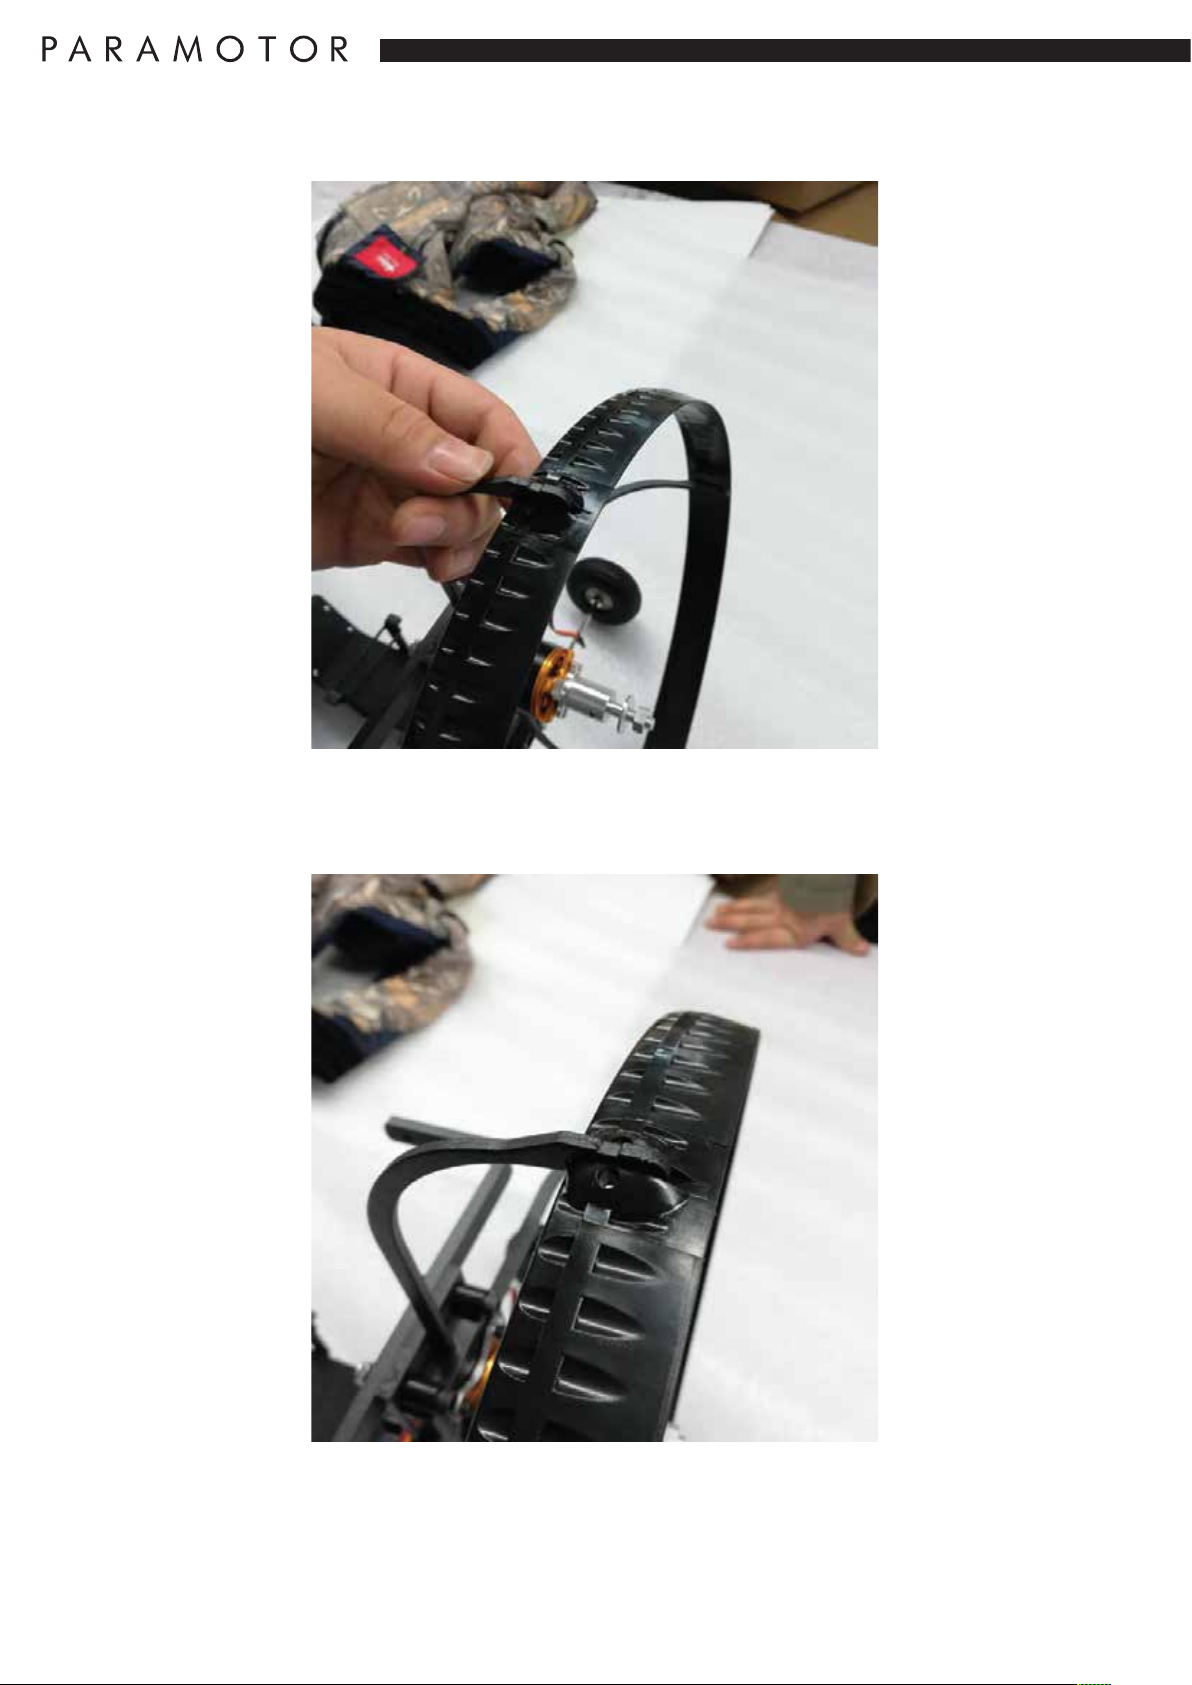
Step 10: Clip all 4 of the prop guard supports into the slots on
the prop guard.
13
Page 15
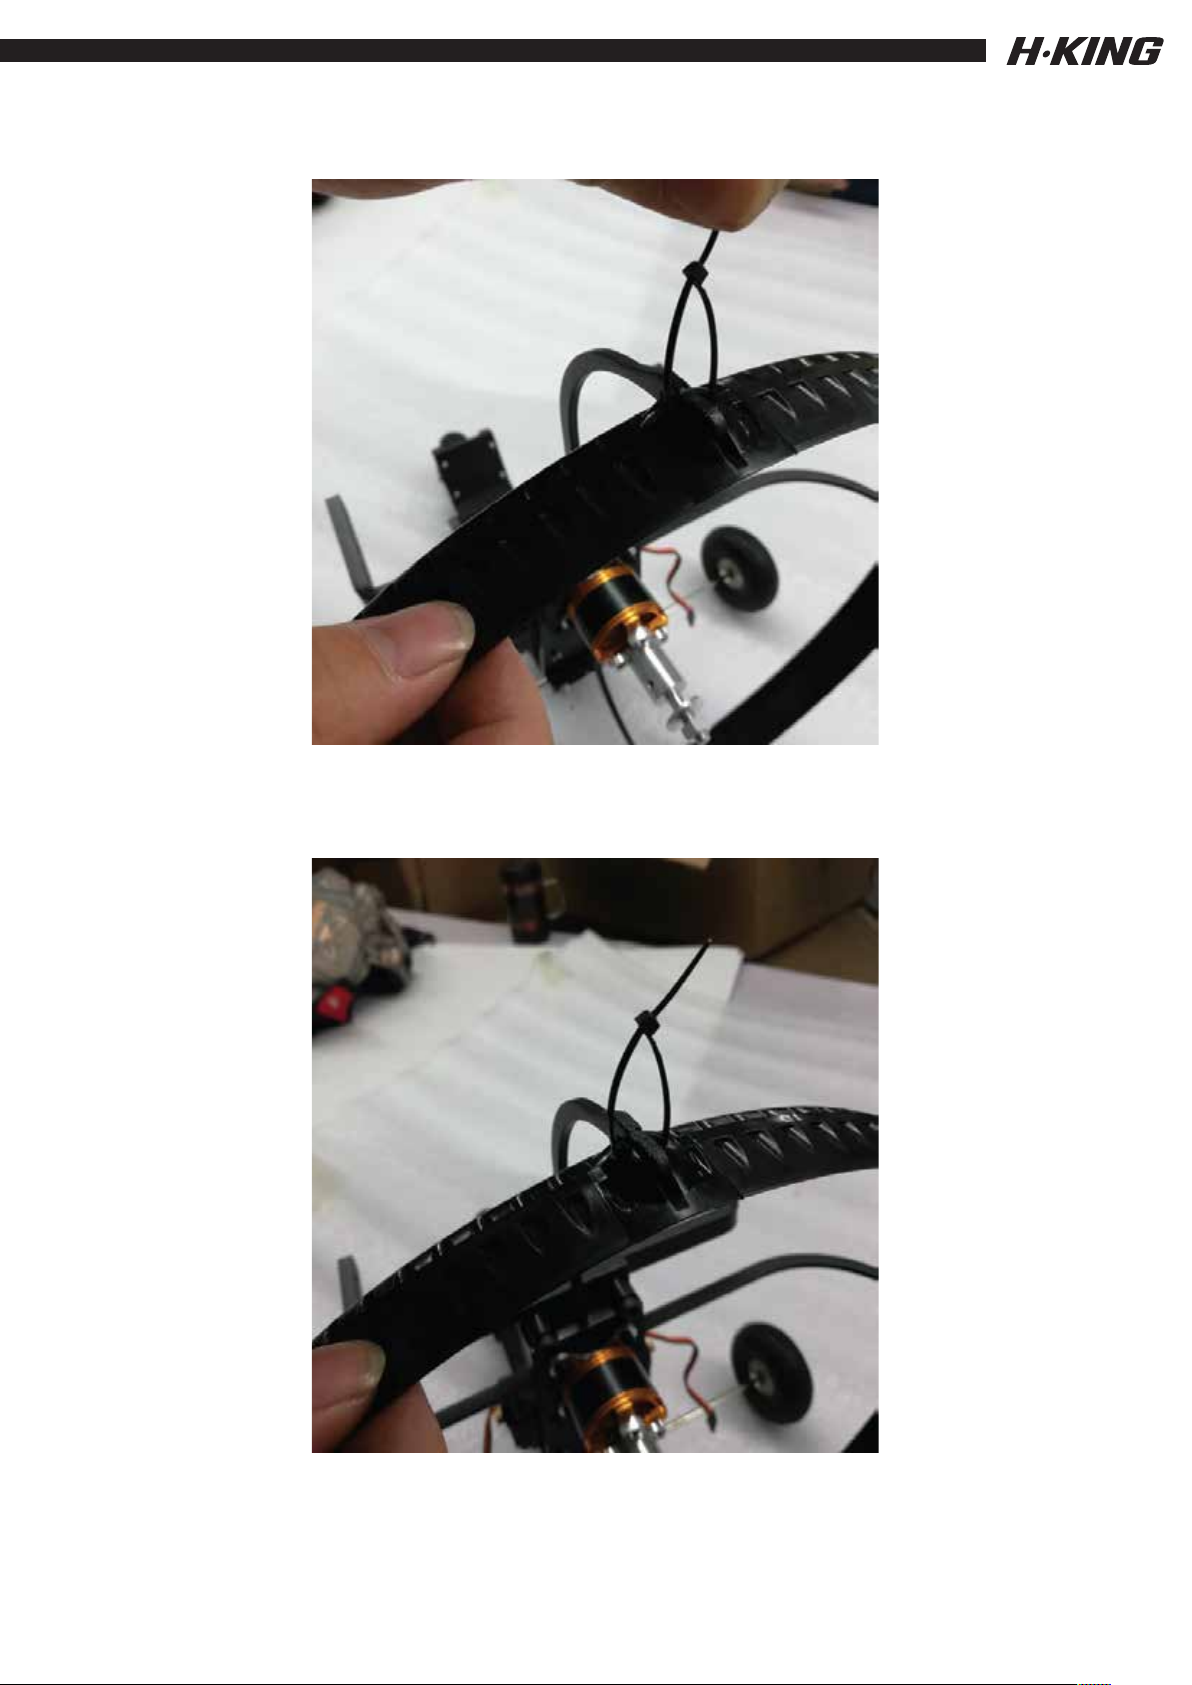
Step 11: Feed a cable tie through the hole in the prop
guard where the support clips to the guard.
Do this to all 4 supports and tighten the cable ties to
secure the prop guard. Make sure you remove the
excess length of cable tie once tightened.
14
Page 16
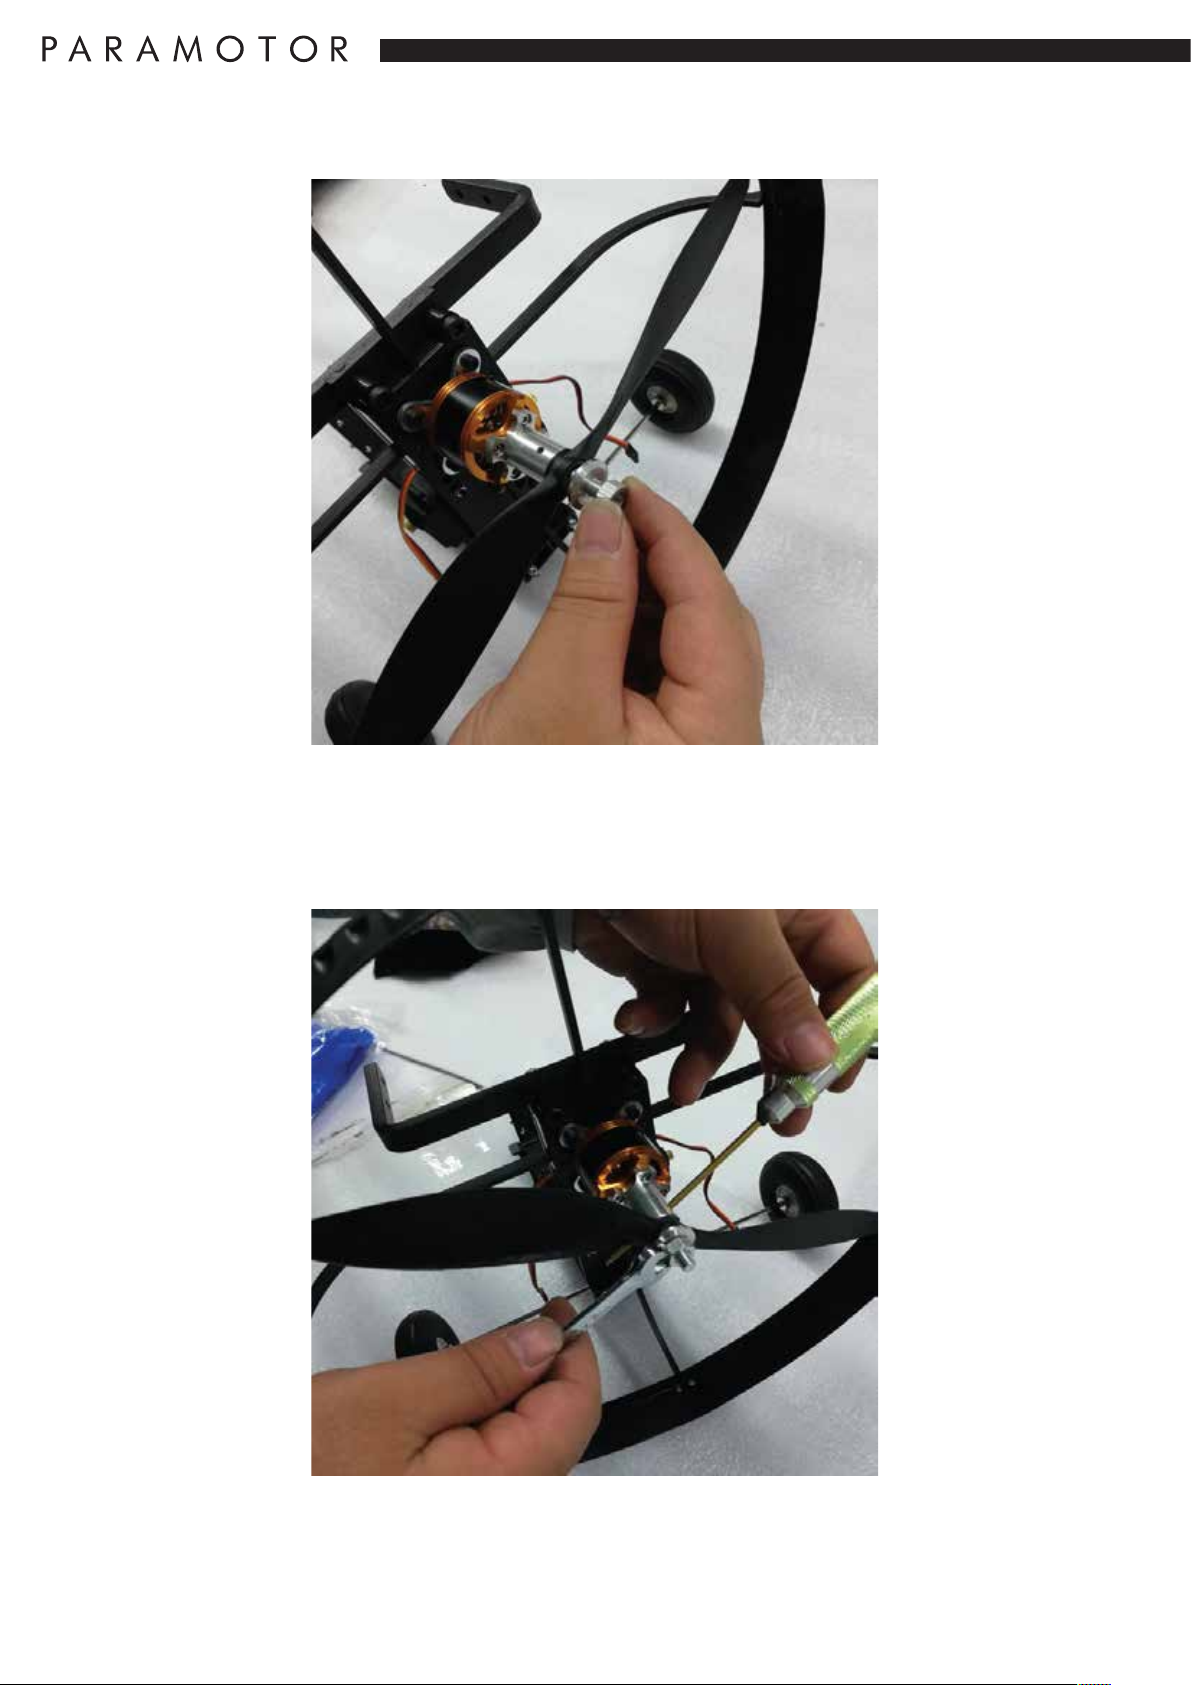
Step 12: Fit the propeller assembly, please ensure you fit
the prop the correct way round as shown above. It is a
standard tractor prop so must face forward in the direction of
flight.
Step13: Tighten the prop nut using the method shown in the
picture above.
15
Page 17
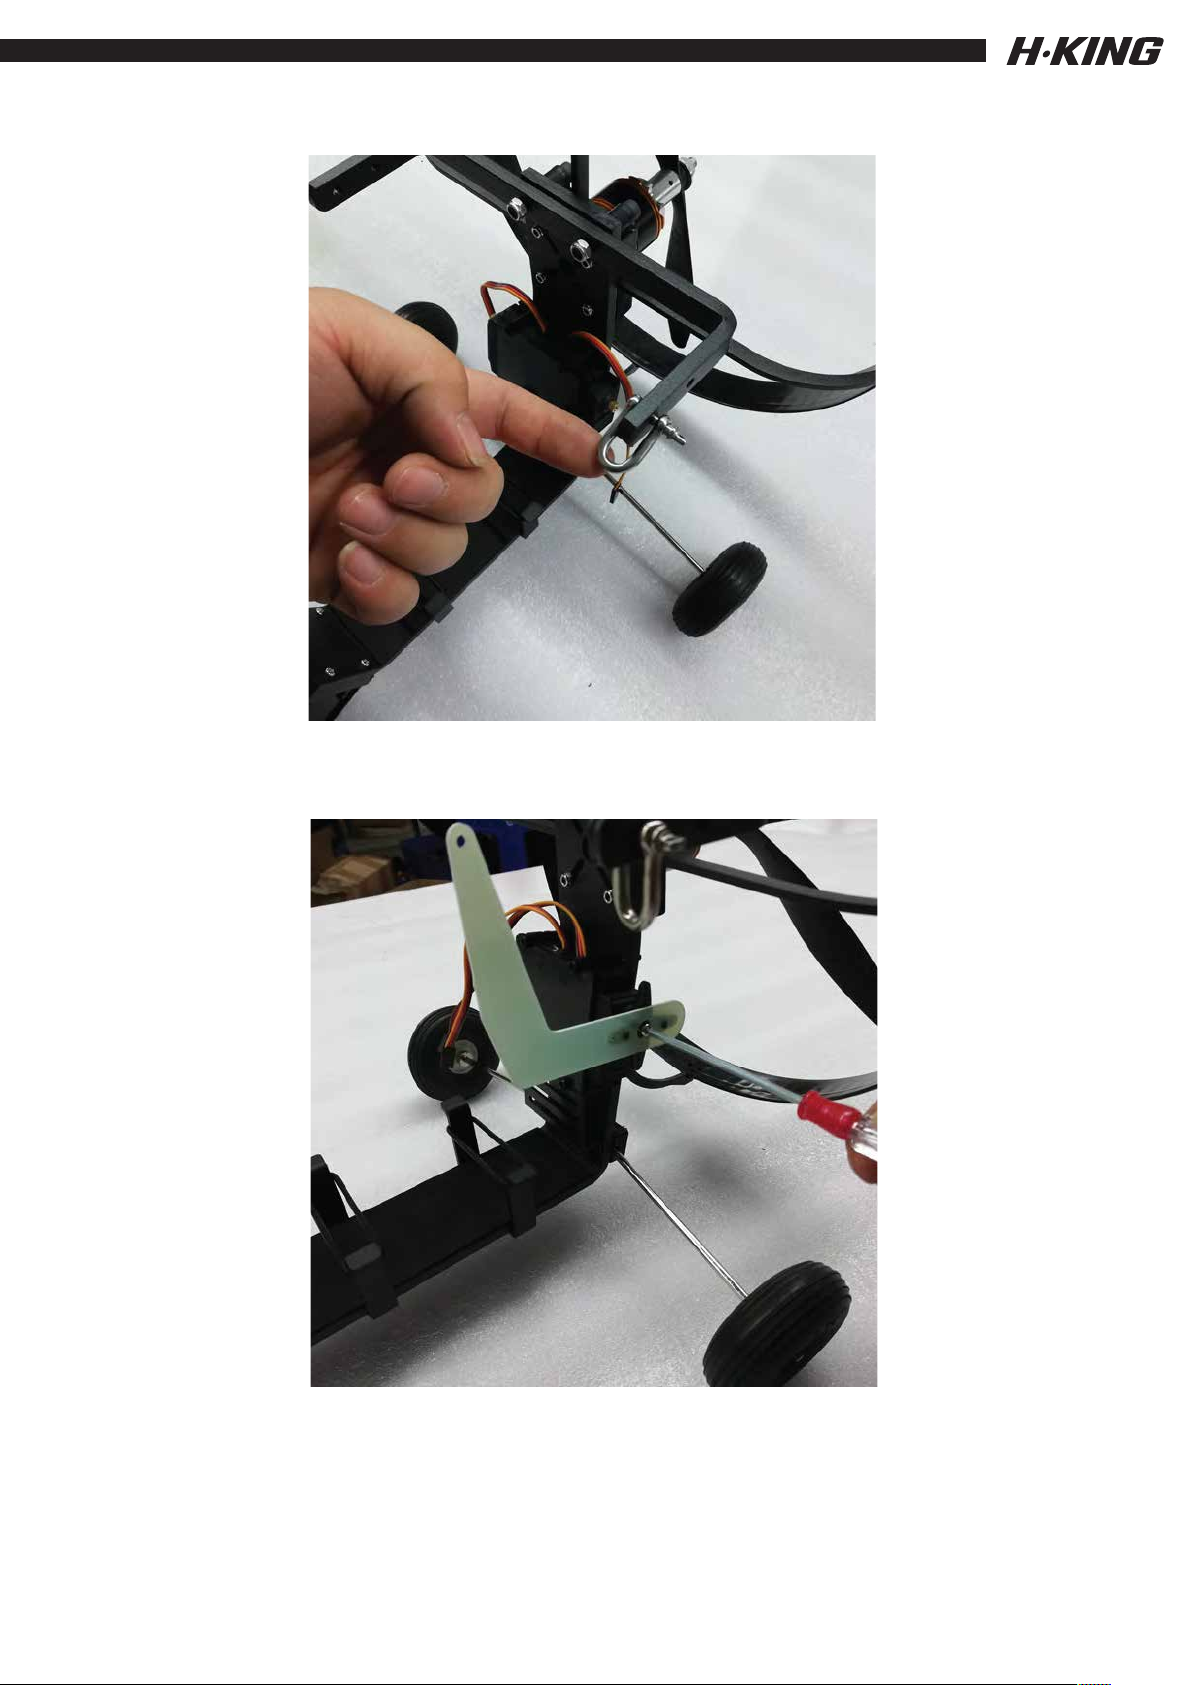
Step 14:
Fit the shackles through the outer holes either
side of the flybar.
Step 15: Set up your radio and connect the servos to the receiver. Power up
the receiver and center the roll and pitch servos (watch the set up video before
you do this part). Fit the servo arms with the pre-fitted cranks onto the splines
of the servos. The top hole of the crank wants to be in line with the top
of the flybar or just above. Secure the arms with the supplied servoscrews.
16
Page 18
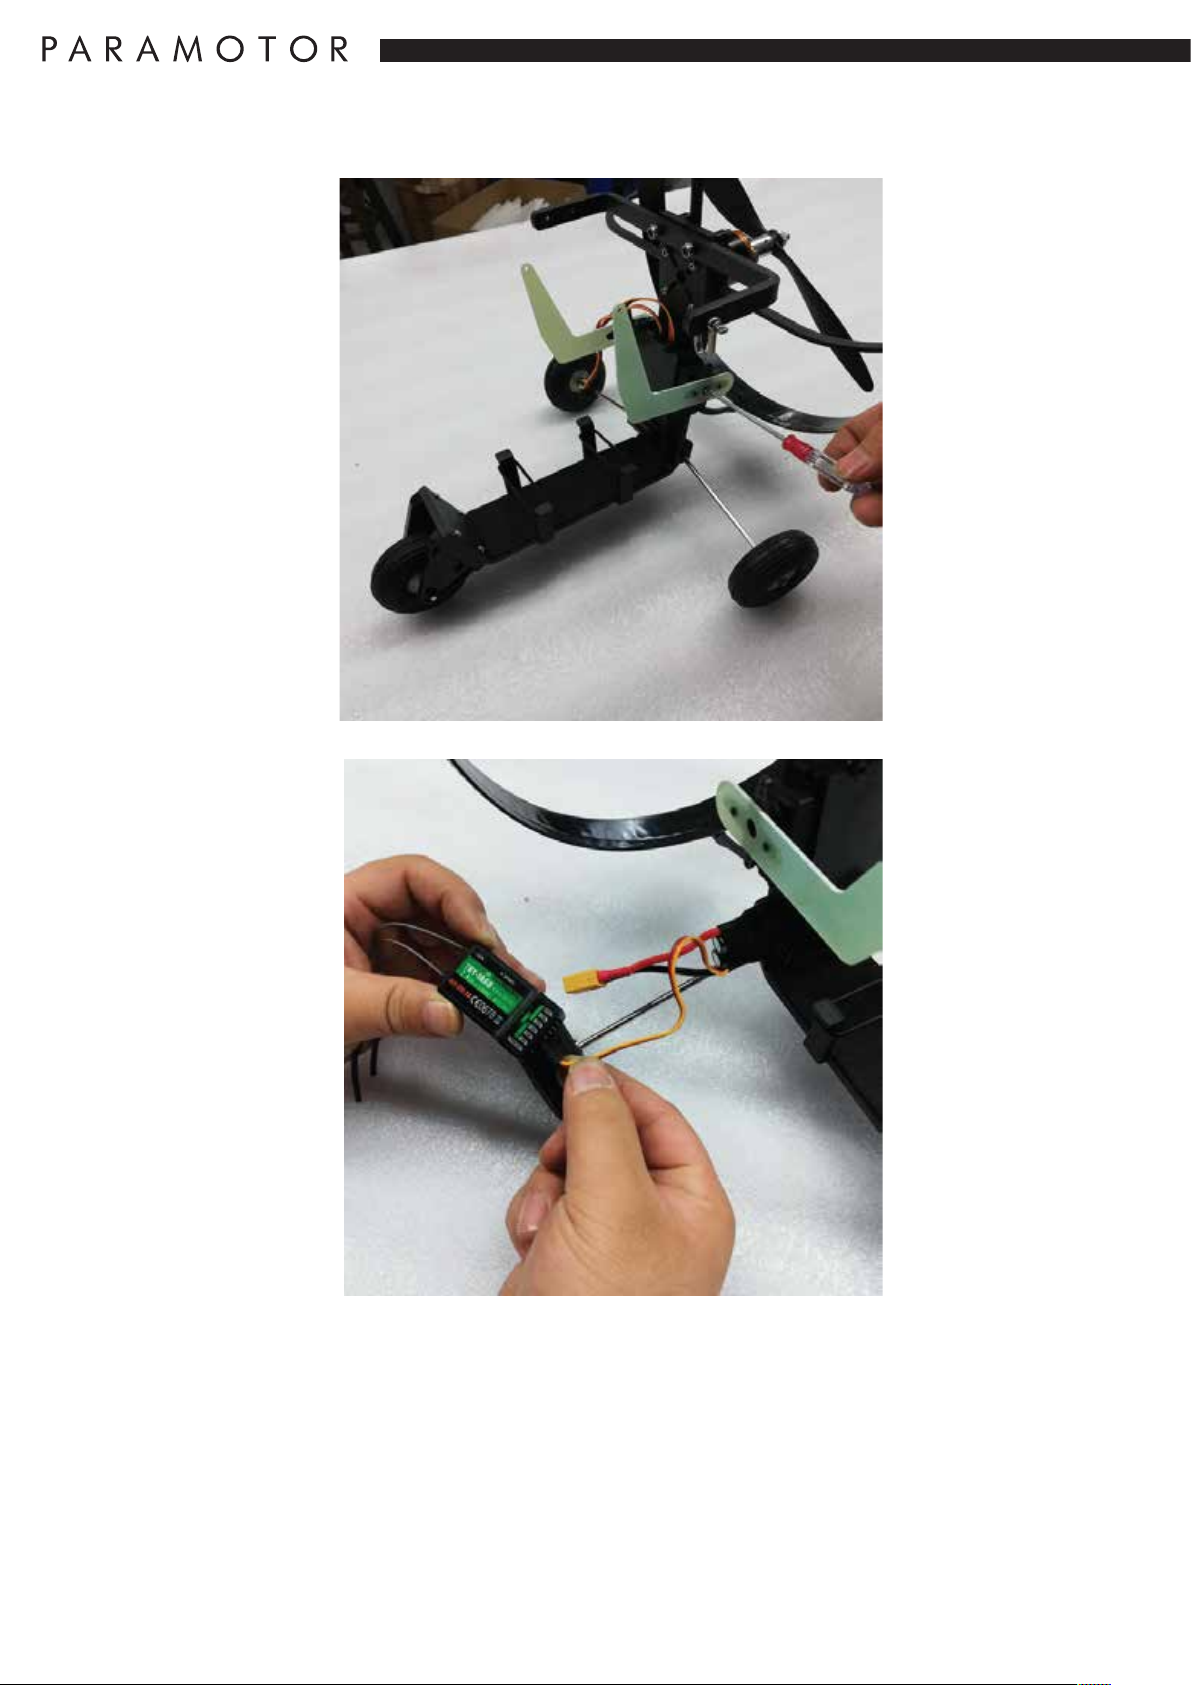
Step 16: Secure your receiver to the servo housing with the
sticky back hook and loop tape. Secure and tidy the servo
leads and receiver antenna using cable ties.
17
Page 19
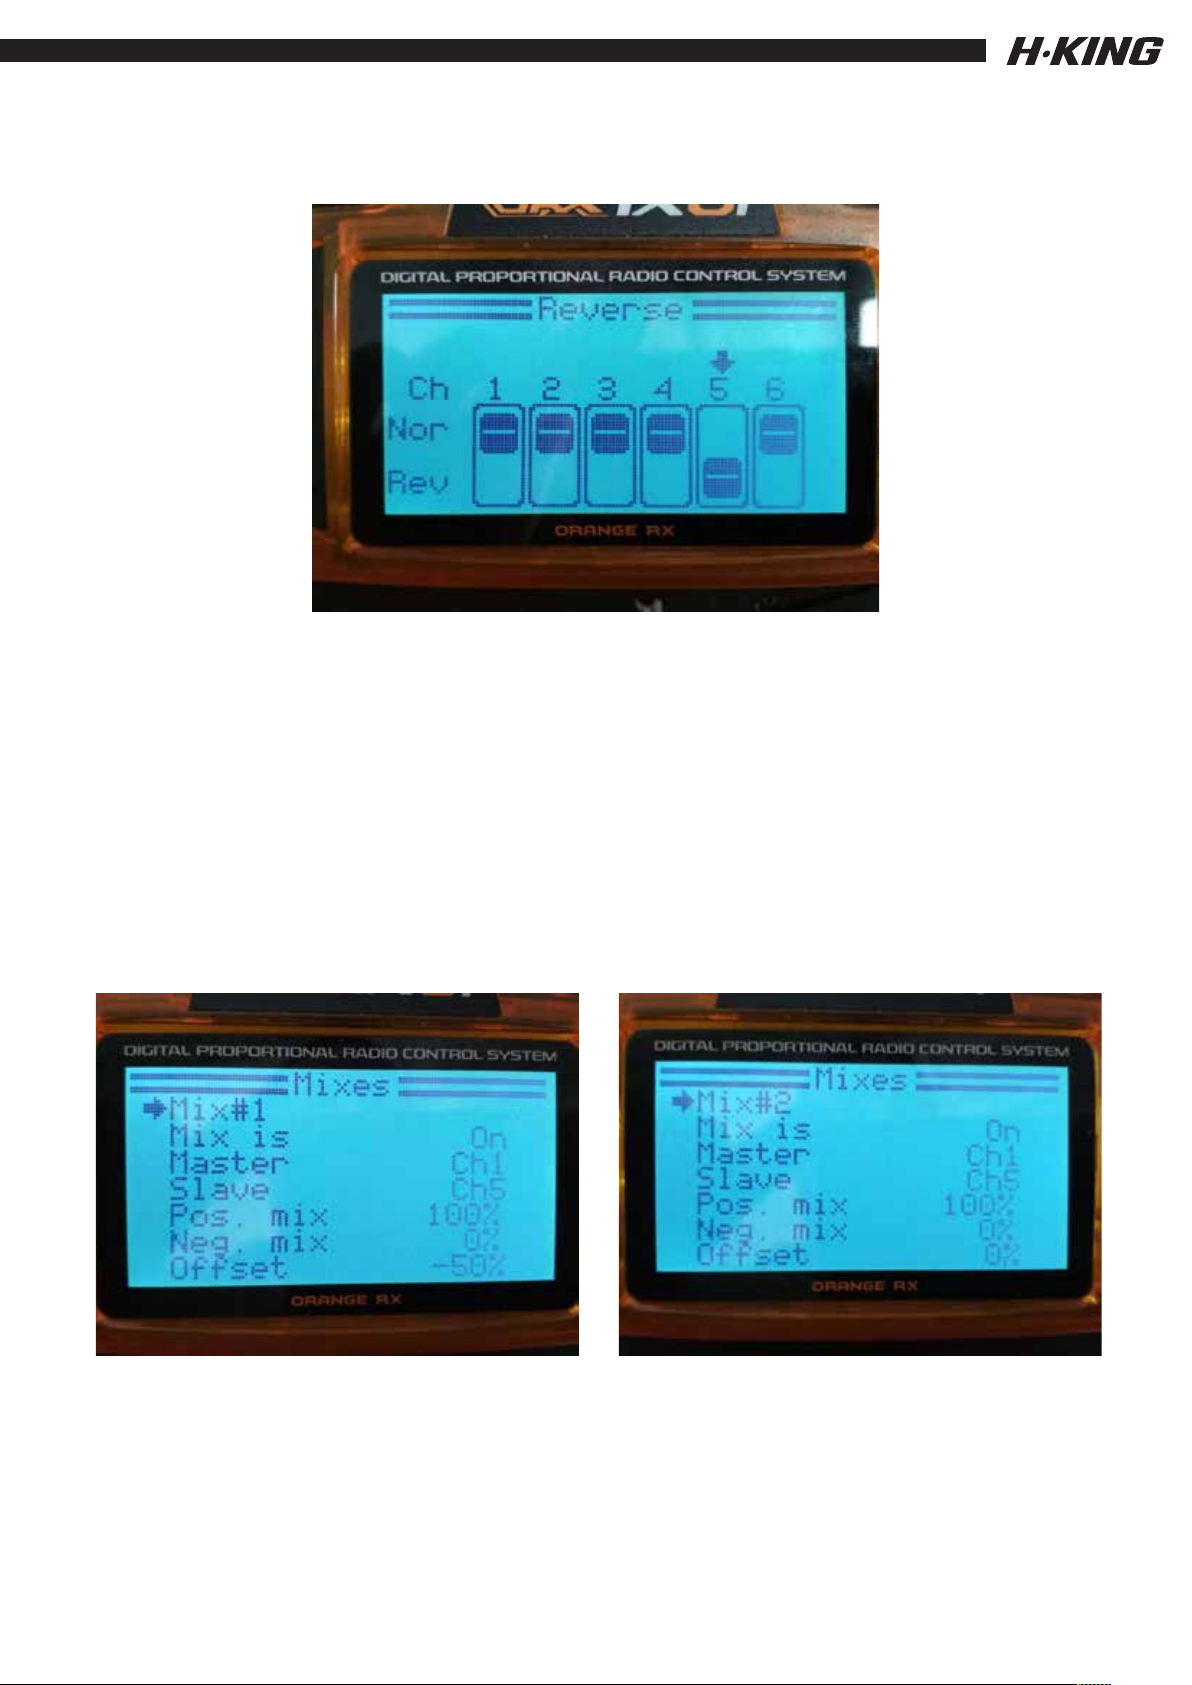
Radio setup
Ensure the servo travel direction is set
according to the picture above
1. Ensure the servo travel direction is set
according to the picture above
2. Please setup a new model and bind to the receiver
3. Ensure the propeller is removed
4. Copy of the mixing of the photos below.
5. Connect Throttle to the throttle channel and the left
servo to channel 6 and right servo to Ch5
18
Page 20
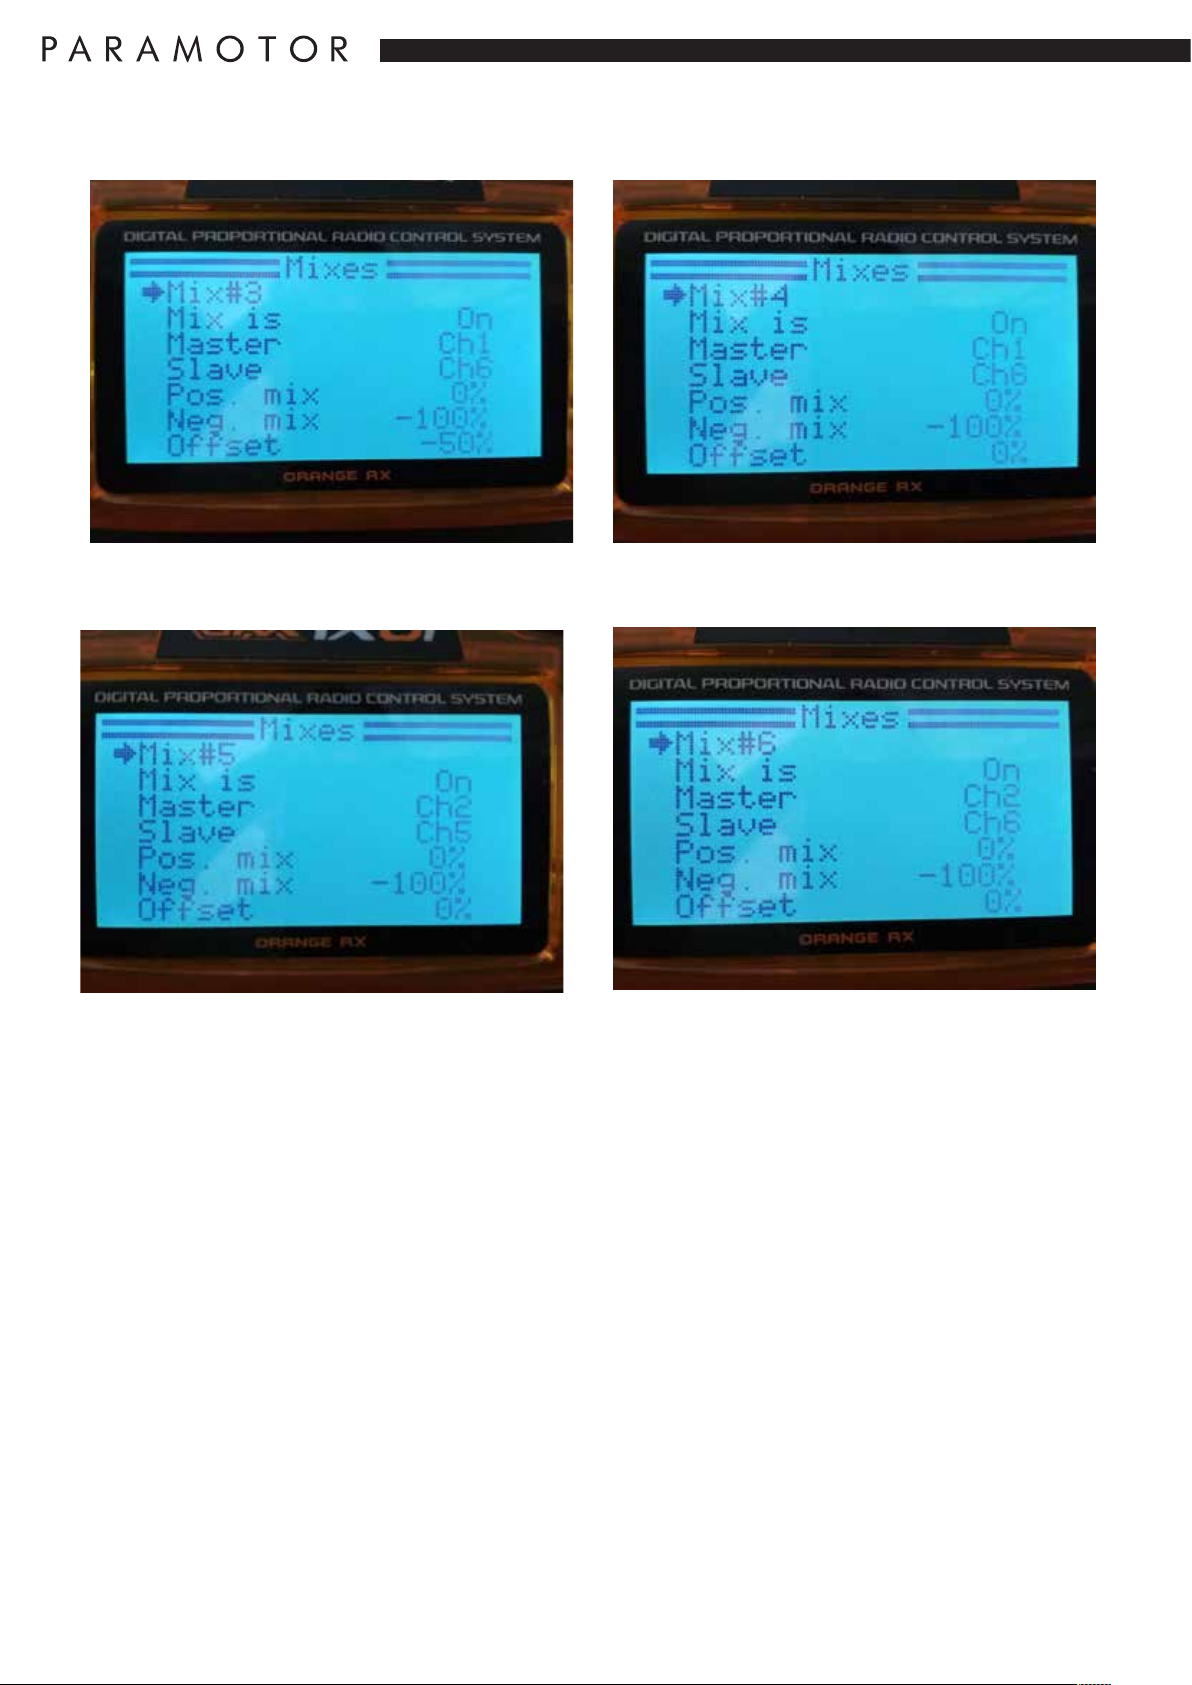
This is the basic airframe finished, the fitting of the Parawing and the setting up of your
computer radio is quite involved. We recommend you watch these 2 videos on YouTube
to achieve the best results for this part of the assembly and for setting the radio up.
https://www.youtube.com/watch?v=GqNa3J8IucI&feature=youtu.be
https://www.youtube.com/watch?v=d1xYHHhl_tE&feature=youtu.be
Note: A flying video will be available shortly, check under the video section of this
product.
19
Page 21

SAFETY INSTRUCTIONS
1. Please read this manual carefully and follow the instructions before you use
this product.
2. This Paramotor is not a toy, set up correctly it is suitable for novice pilots.
However, if you are a complete novice it is best to try and enlist the assistance
of an experienced pilot.
3. Not recommended for children under 14 years old.
4. Please set up this Paramotor according to the instruction videos and make
sure you keep your hands and other parts of your body out of the way of the
rotating propeller at all times. Failure to do so will result in damage to yourself
and to the Paramotor.
5. Do not fly in thunderstorms, strong winds or wet weather.
6. Never fly R/C models where there are overhead power lines, automobiles,
airports, railway lines or near a highway.
7. Never fly R/C models where there are crowds of people or over organised
games. This Paramotor requires an open field that is clear of trees and other
obstacles. Remember safety is the responsibility of the pilot.
8. Do not attempt to catch this model when you are flying it unless you have
a lot of experience doing this.
9. The operator will bear the full responsibility of flying and the proper
operation and usage of this model. We at Hobbyking will not be responsible for
any liability or loss due to improper use of this model.
20
Page 22
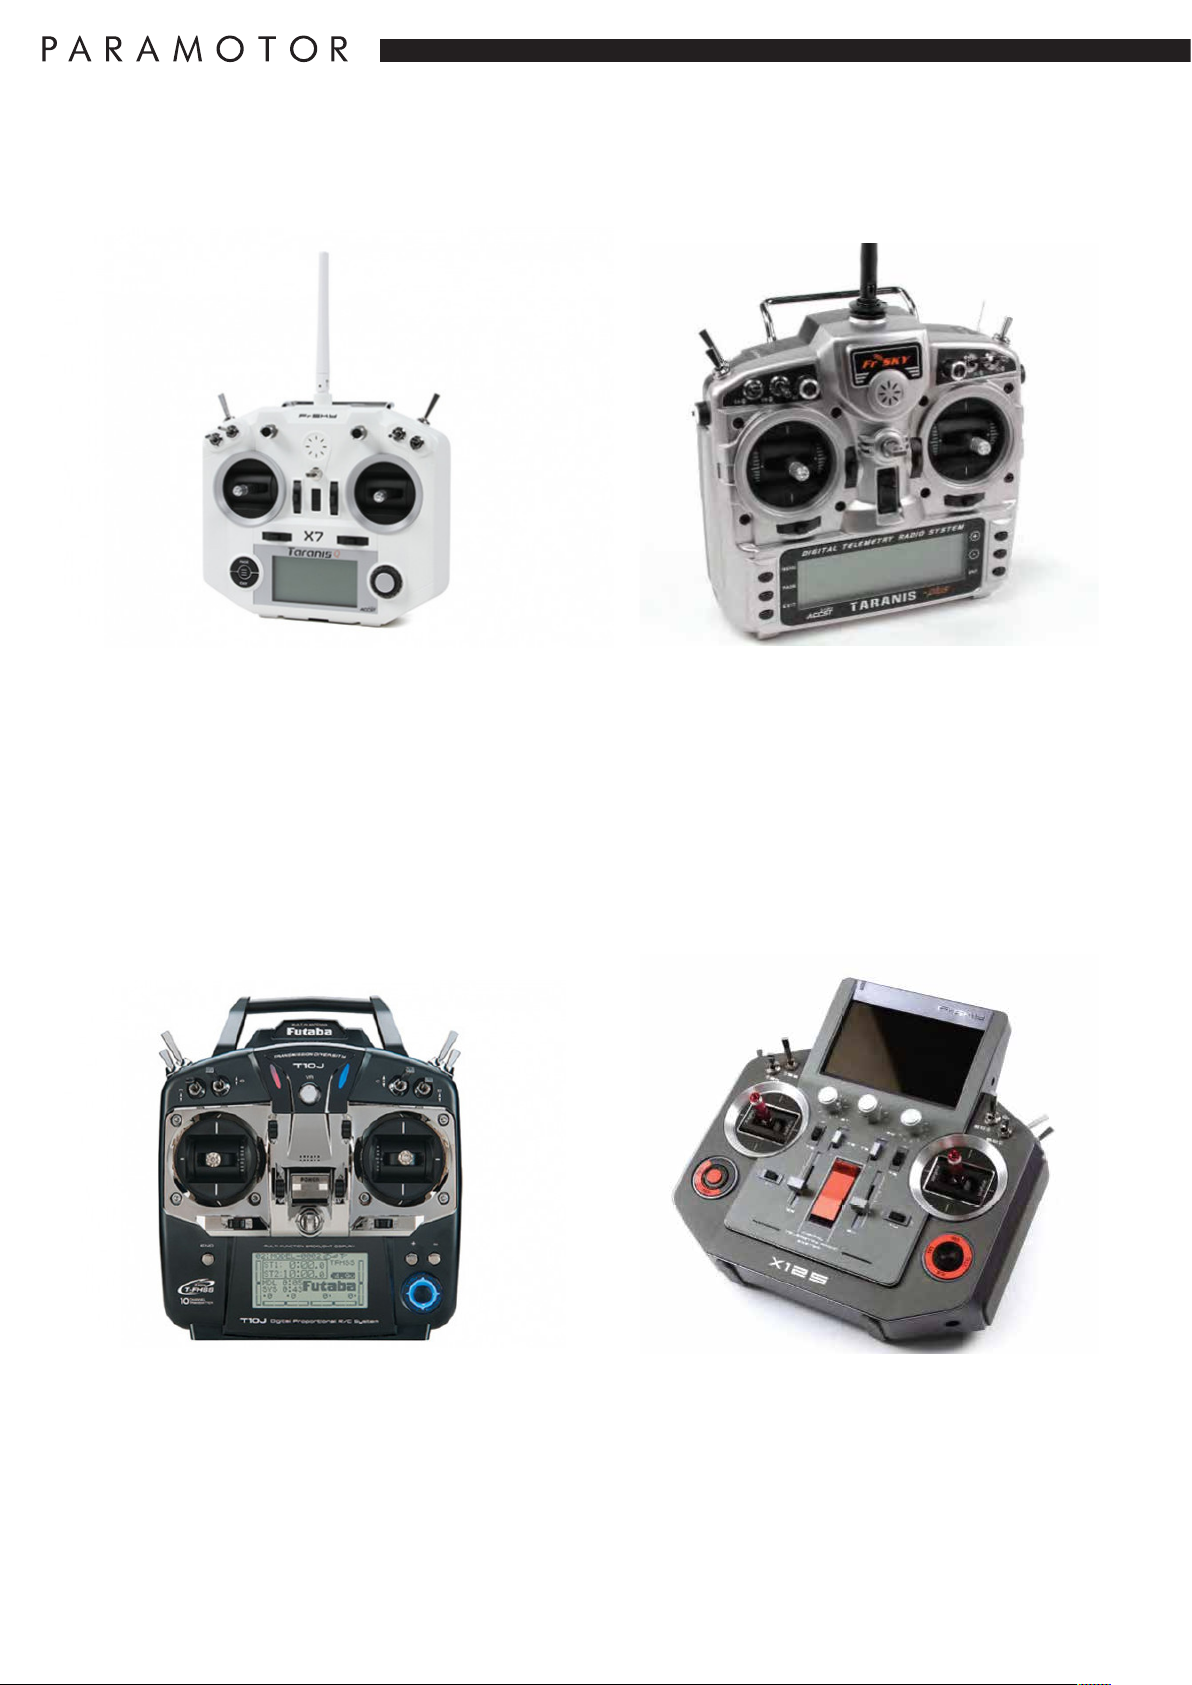
Recommended Accessories
FrSky Taranis Q X7 Digital Telemetry
Radio System 2.4GHz ACCST (White-
no plugs)
SKU: 236000106-3
FrSky 2.4GHz ACCST TARANIS X9D
PLUS Digital Telemetry Transmitter
(Mode 2) (EU)
SKU: 236000062-0
Futaba 10J 10-Channel 2.4GHz Computer
Radio System w/R3008SB Receiver
(Mode 2)
SKU: 563000059-0
FrSky Horus X12S Accst 2.4GHz
Digital Telemetry Radio System
(Mode 2) (Texture)
SKU: 236000084-3
21
Page 23
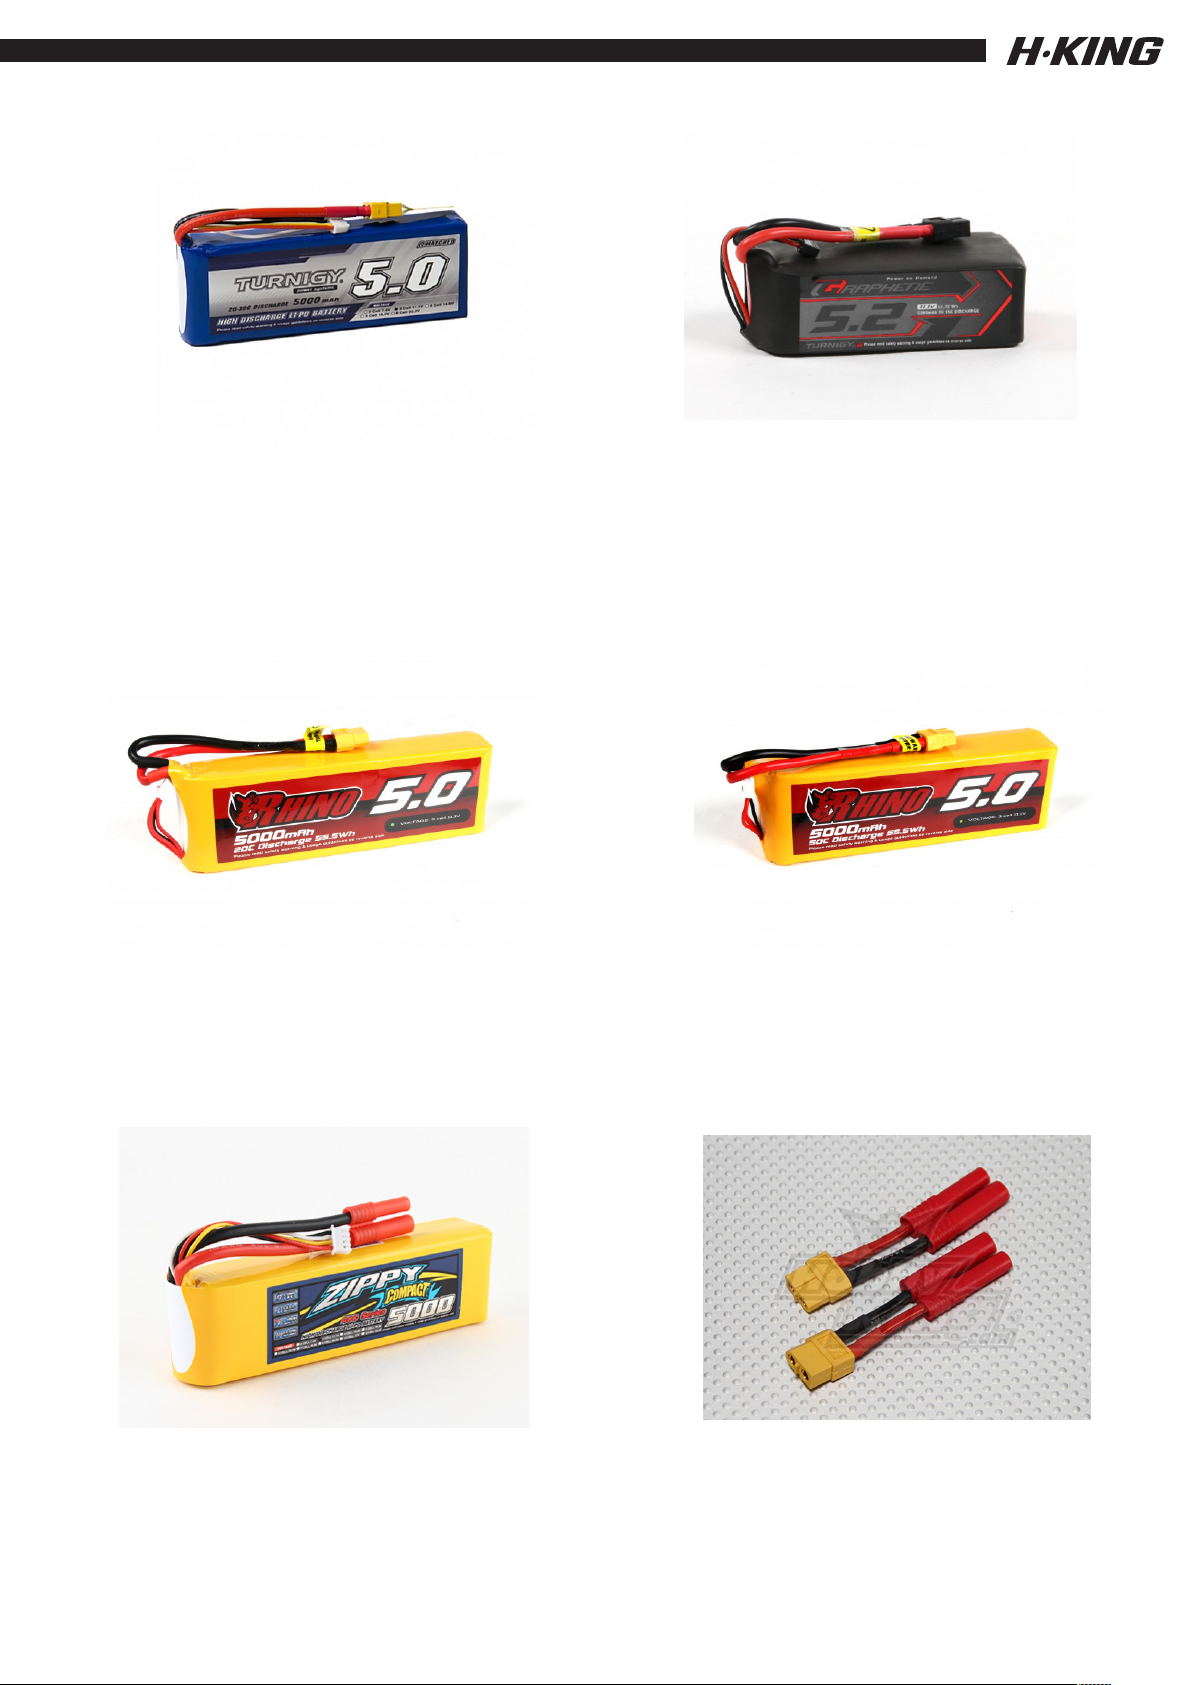
Turnigy 5000mAh 3S 20C Lipo
Pack w/XT-60
Turnigy Graphene Professional
5200mAh 3S 15C LiPo Pack w/XT60
SKU: 9067000276-0
Rhino 5000mAh 3S 20C Lipo
Pack w/XT60
SKU: 9952000006-0
SKU: 9067000105-0
Rhino 5000mAh 3S 50C Lipo Pack w/
XT60
SKU: 9952000016-0
ZIPPY Compact 5000mAh 3s
40c Lipo Pack
SKU: 9067000057-0
HXT 4mm to XT-60 Battery Adapter
(2pcs/bag)
SKU: XT60-HXT4MM
22
Page 24
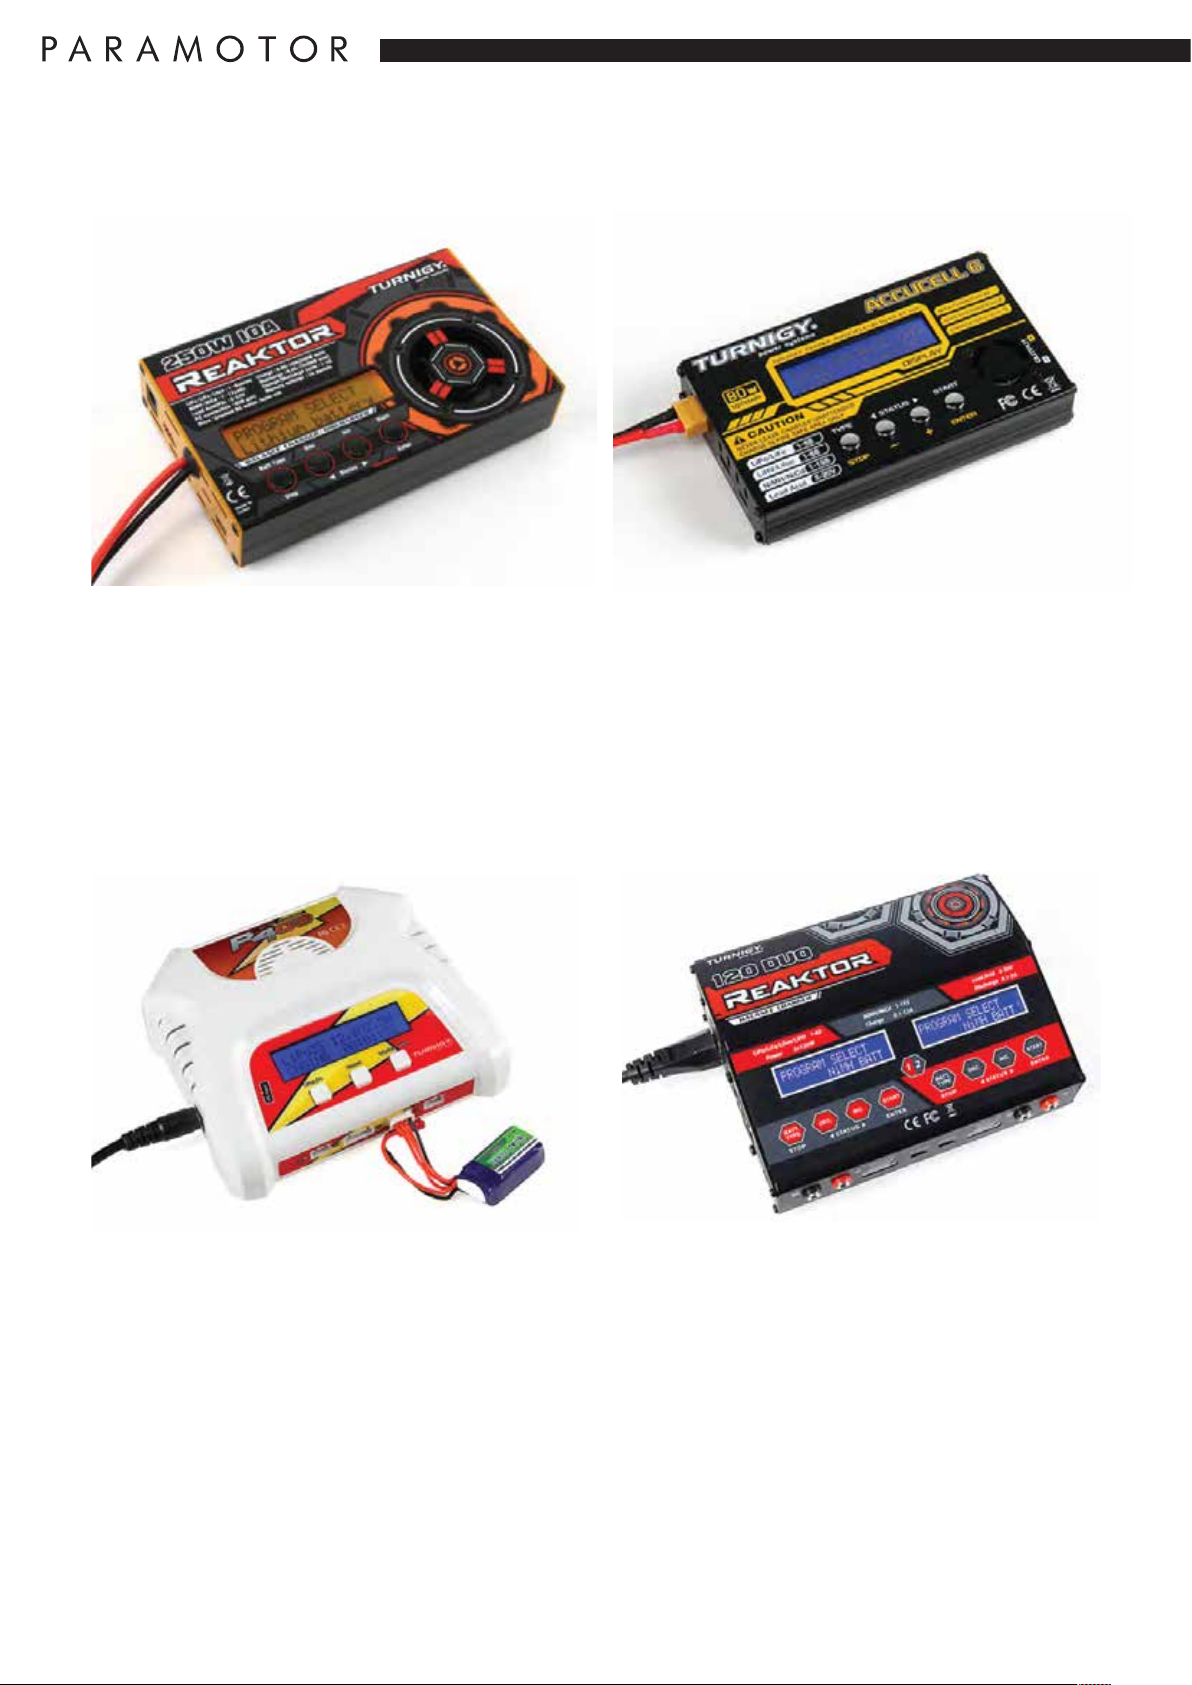
Turnigy Reaktor 250W 10A 1-6S Balance
Charger
Turnigy Accucel-6 80W 10A Balancer/
Charger LiHV Capable
SKU: 9466000004-0
Turnigy P403 LiPoly / LiFe AC/DC
Battery Charger
SKU: 9052000071-0
Turnigy Reaktor 120 DUO 2x120W
(240W) Balance Charger AC/DC
SKU: 9070000039-1 (EU Plug)
SKU: 9070000039-2 (UK Plug)
SKU: 9070000039-3 (US Plug)
SKU: 9070000039-4 (AU Plug)
SKU: 9910000003-1 (EU Plug)
SKU: 9910000003-2 (UK Plug)
SKU: 9910000003-3 (US Plug)
SKU: 9910000003-4 (AU Plug)
23
Page 25

 Loading...