

Page 1
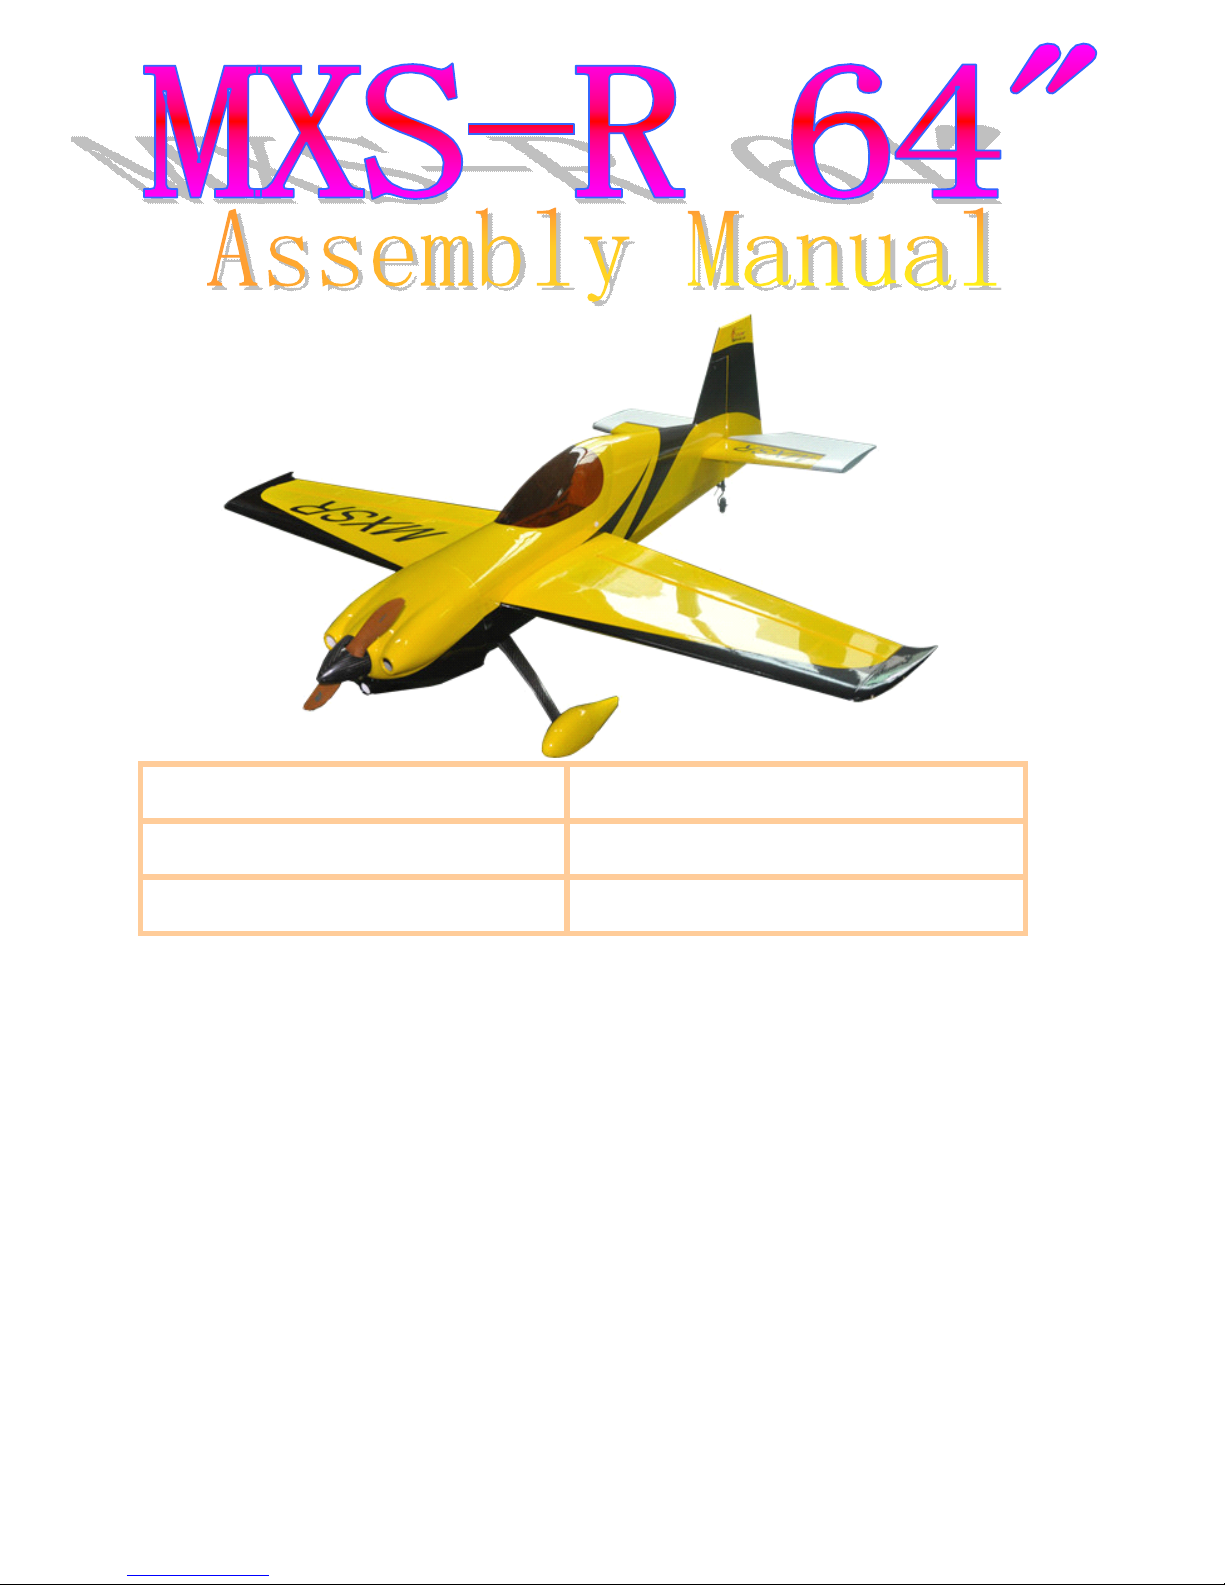
Wing Span:64in/1625mm;Flying Weight:2700g;
Wing Area:50.1sq.dm;Radio:4Channel 6Servos;
Length:59 in/1500mm;Engine:20CC Gas
CAUTION
CAUTION
CAUTION
CAUTION
:
:
:
:
this
this
this
this
plane
plane
plane
plane
is
is
is
is
not
not
not
not
a
a
a
a
toy
toy
toy
toy
and
and
and
and
should
should
should
should
be
be
be
be
kept
kept
kept
kept
away
away
away
away
children
children
children
children
under
under
under
under
16
16
16
16
years
years
years
years
of
of
of
of
age!
age!
age!
age!
Before
Before
Before
Before
use
use
use
use
,
,
,
,
please
please
please
please
carefully
carefully
carefully
carefully
read
read
read
read
this
this
this
this
manual.
manual.
manual.
manual.
●First-time builders should seek advice from people having building
experience in order to assemble the model correctly and to produce its
performance to full extent .
●Assemble this kit only in places out of children’s reach!
●Take enough safety percautions prior to operating this model.
You are responsible for this model’s assembly and safe operation!
●Always keep this instruction manual ready at hand for quick
reference,even after completing the assembly.
P.1
Page 2
MAIN
MAIN
MAIN
MAIN
WING
WING
WING
WING
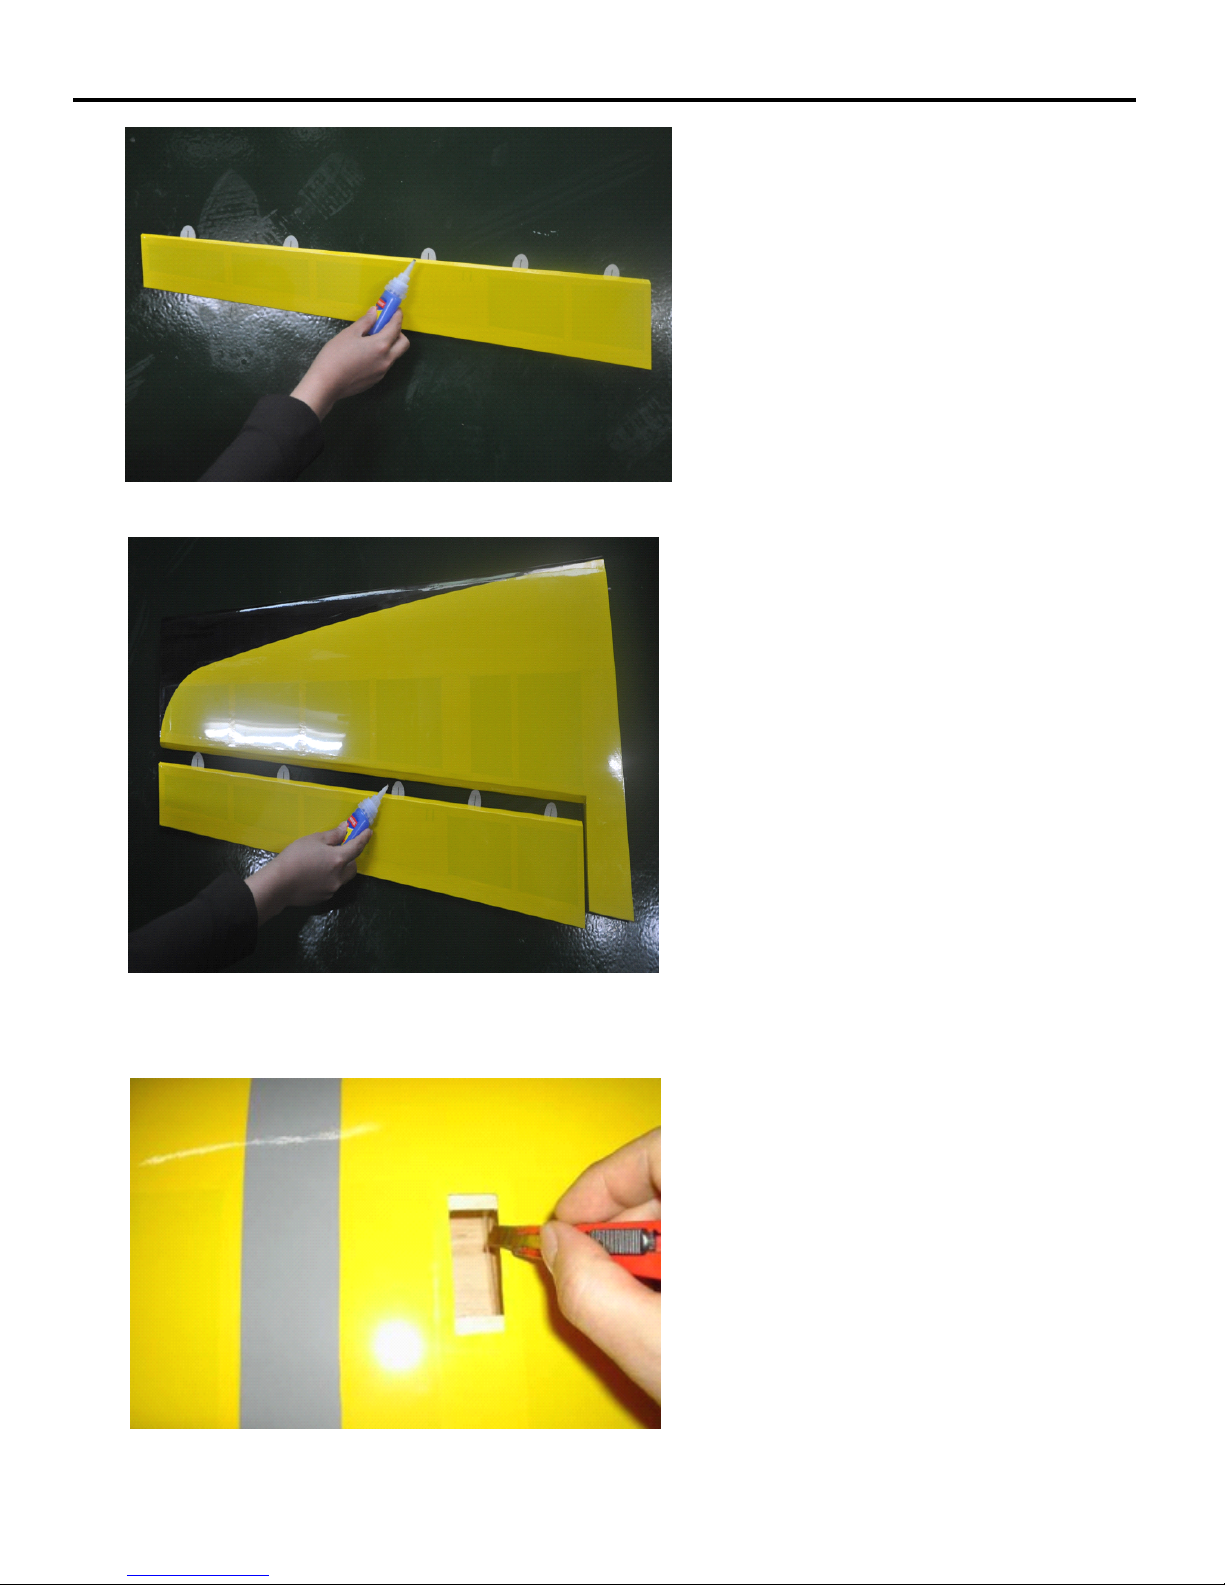
Apply epoxy into
hinge hole of the wing
Connect the aileron and
the main wing by hinges.
Be sure to apply instant
type glue to both sides
of each hinges.
Cut the servo holes on the
bottom of the main wings
P.2
Page 3
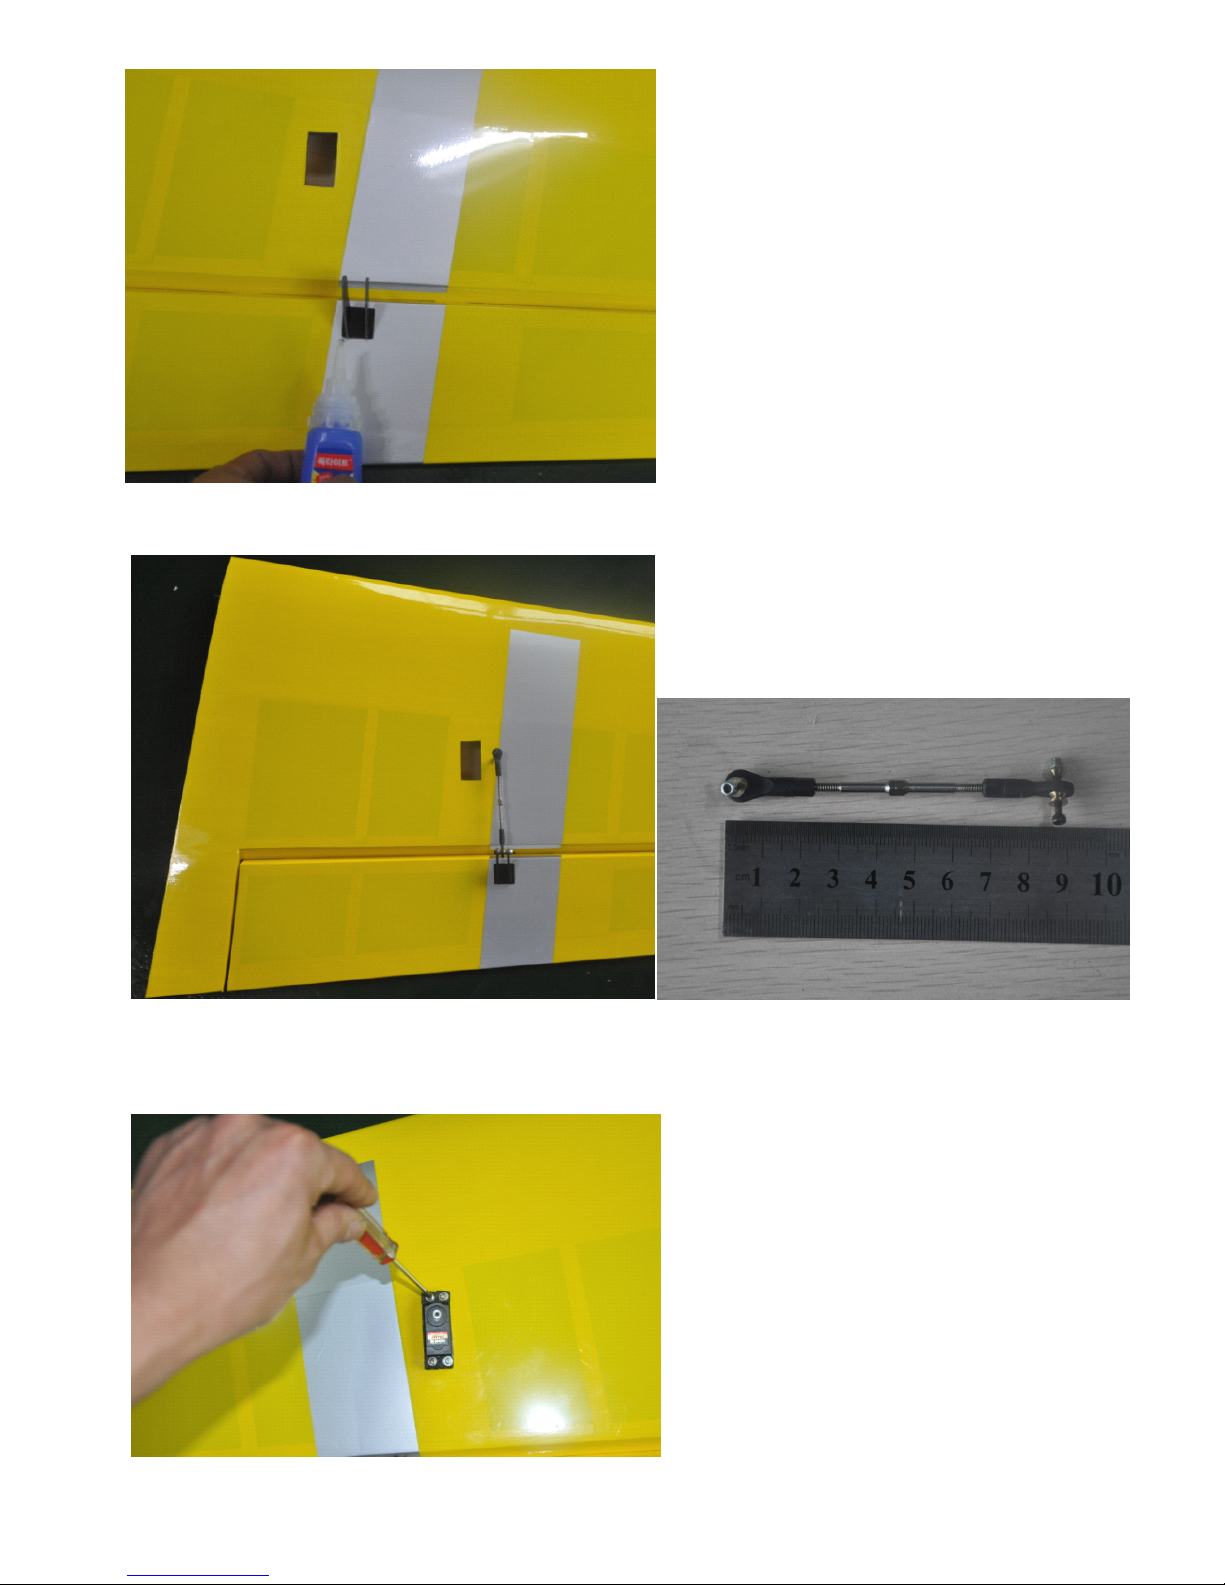
Use glue to fix up the
horns
Install push-rod,used ruler
to measure the length
Put the servo into the
hole and fix it with screws.
P.3
Page 4
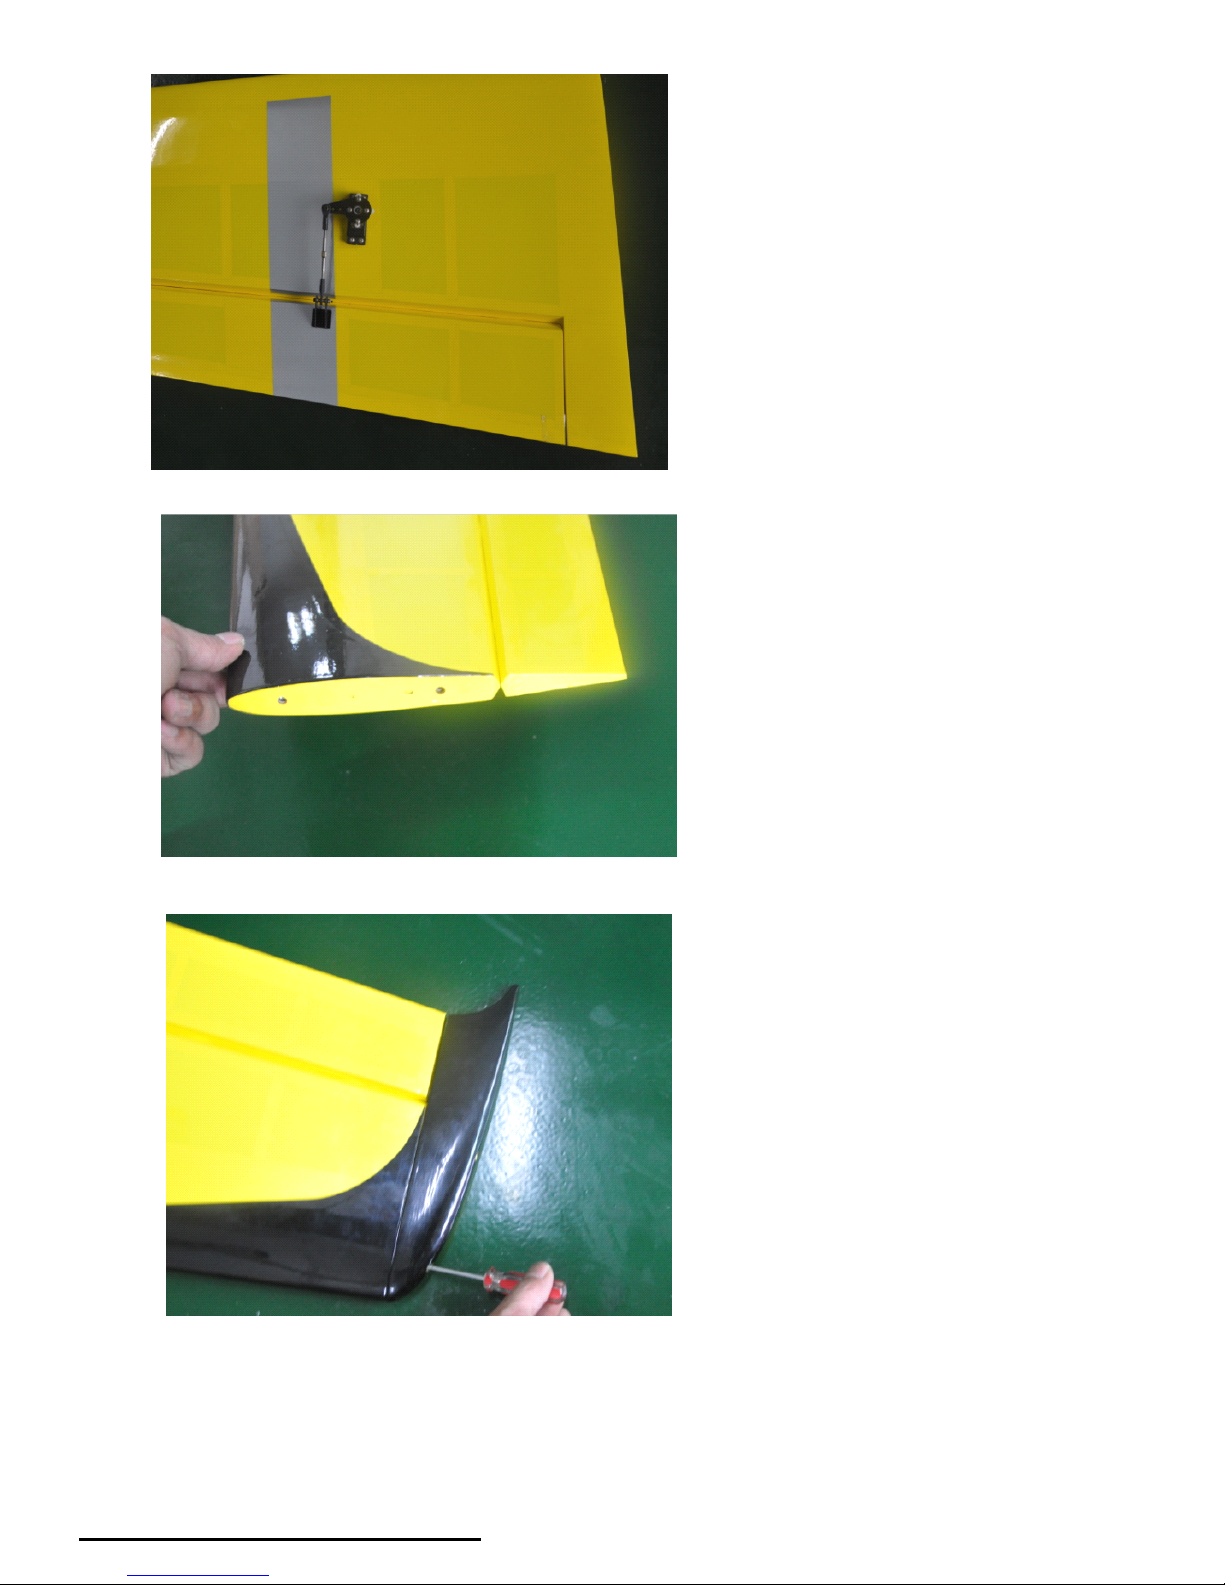
Link the servo arms and
tri-horns with pushrod
Drill the holes
on the wing tips
Be assured that the screw
is fixed up
INSTALL WINGTIP WINGLET
P.4
Page 5
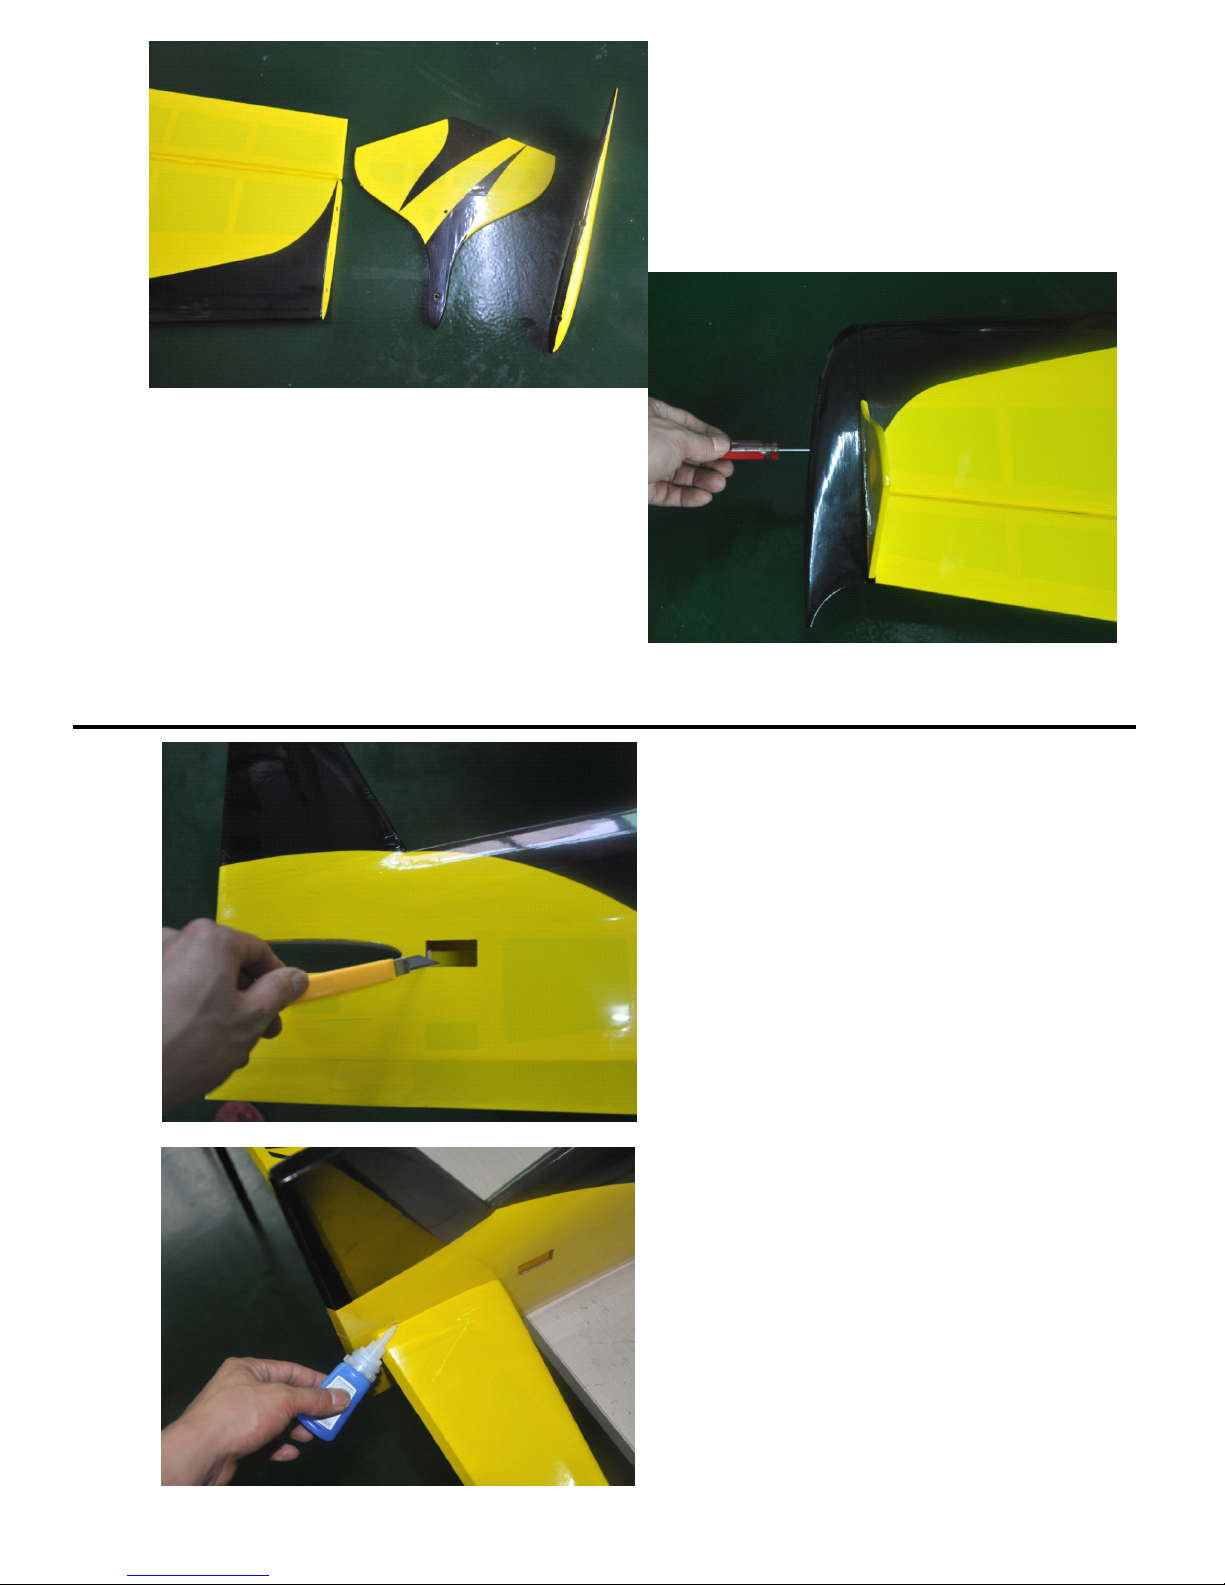
You can also install wingtip
winglet,as shown.
STABILIZER
STABILIZER
STABILIZER
STABILIZER
AND
AND
AND
AND
ELEVATOR
ELEVATOR
ELEVATOR
ELEVATOR
Cut the servo holes on the
profile of the fuselage
Fix up the stabilizer
of the fuselage
P.5
Page 6
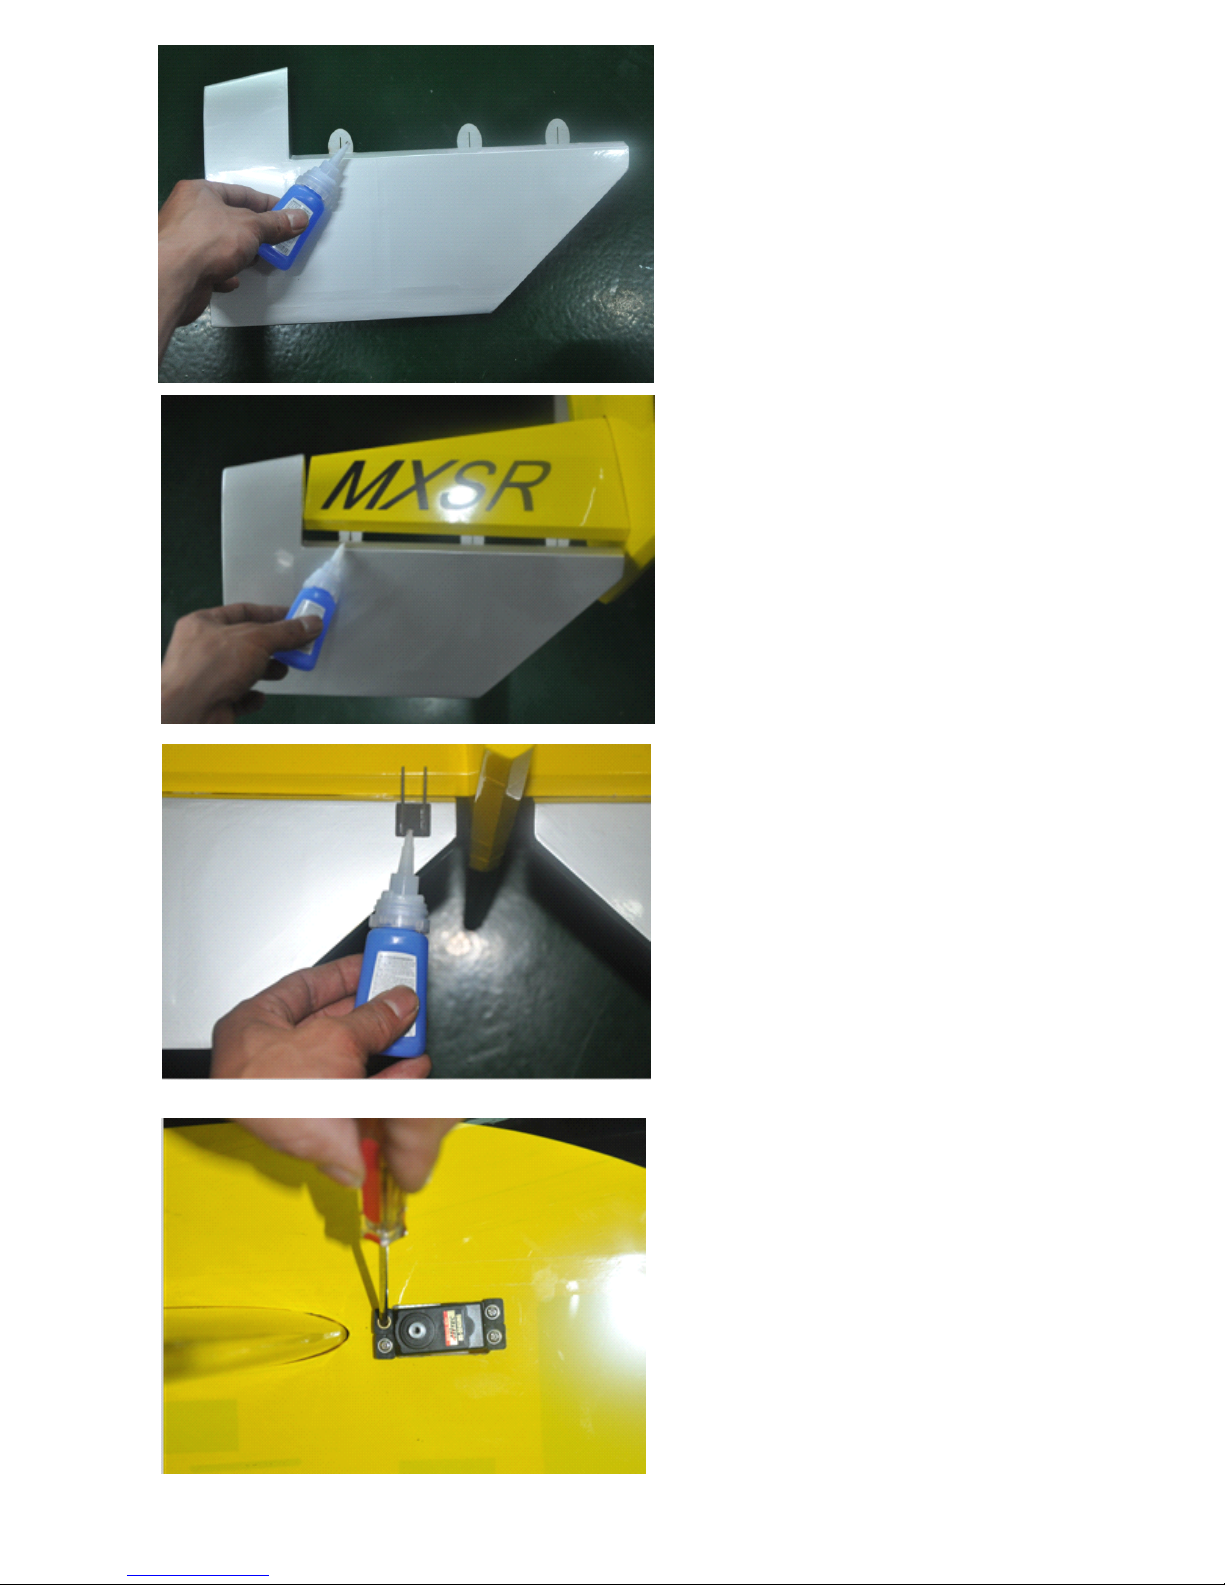
Apply epoxy into
hinge hole of the elevator
Fix up the stabilizer and
elevator with hinges and AB
glue.
Use glue to fix up elevator
horns
Install the servo in the hole
as shown
Be assured that the screw
is fixed up
P.6
Page 7
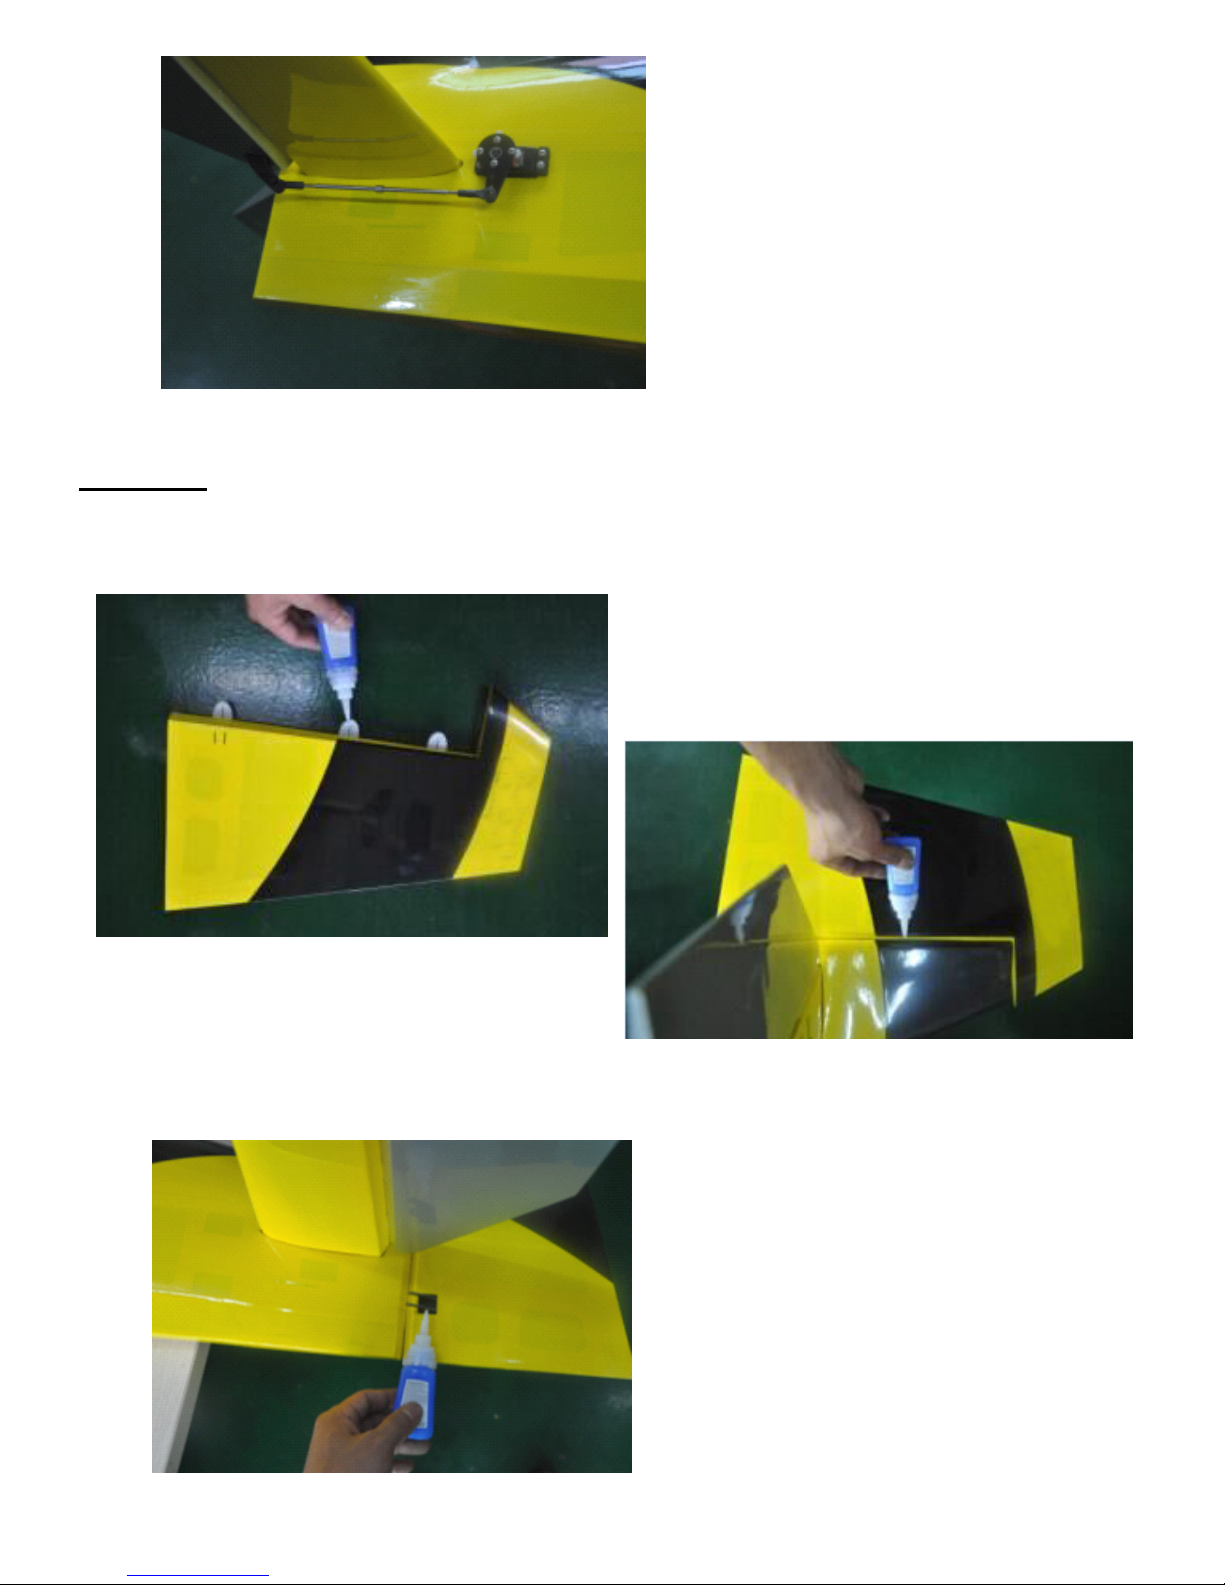
Link the servo to
the elevator with pushrod.
RUDDER
RUDDER
RUDDER
RUDDER
Apply epoxy into
hinge hole of the rudder
Use glue to fix up rudder
horns
P.7
Page 8
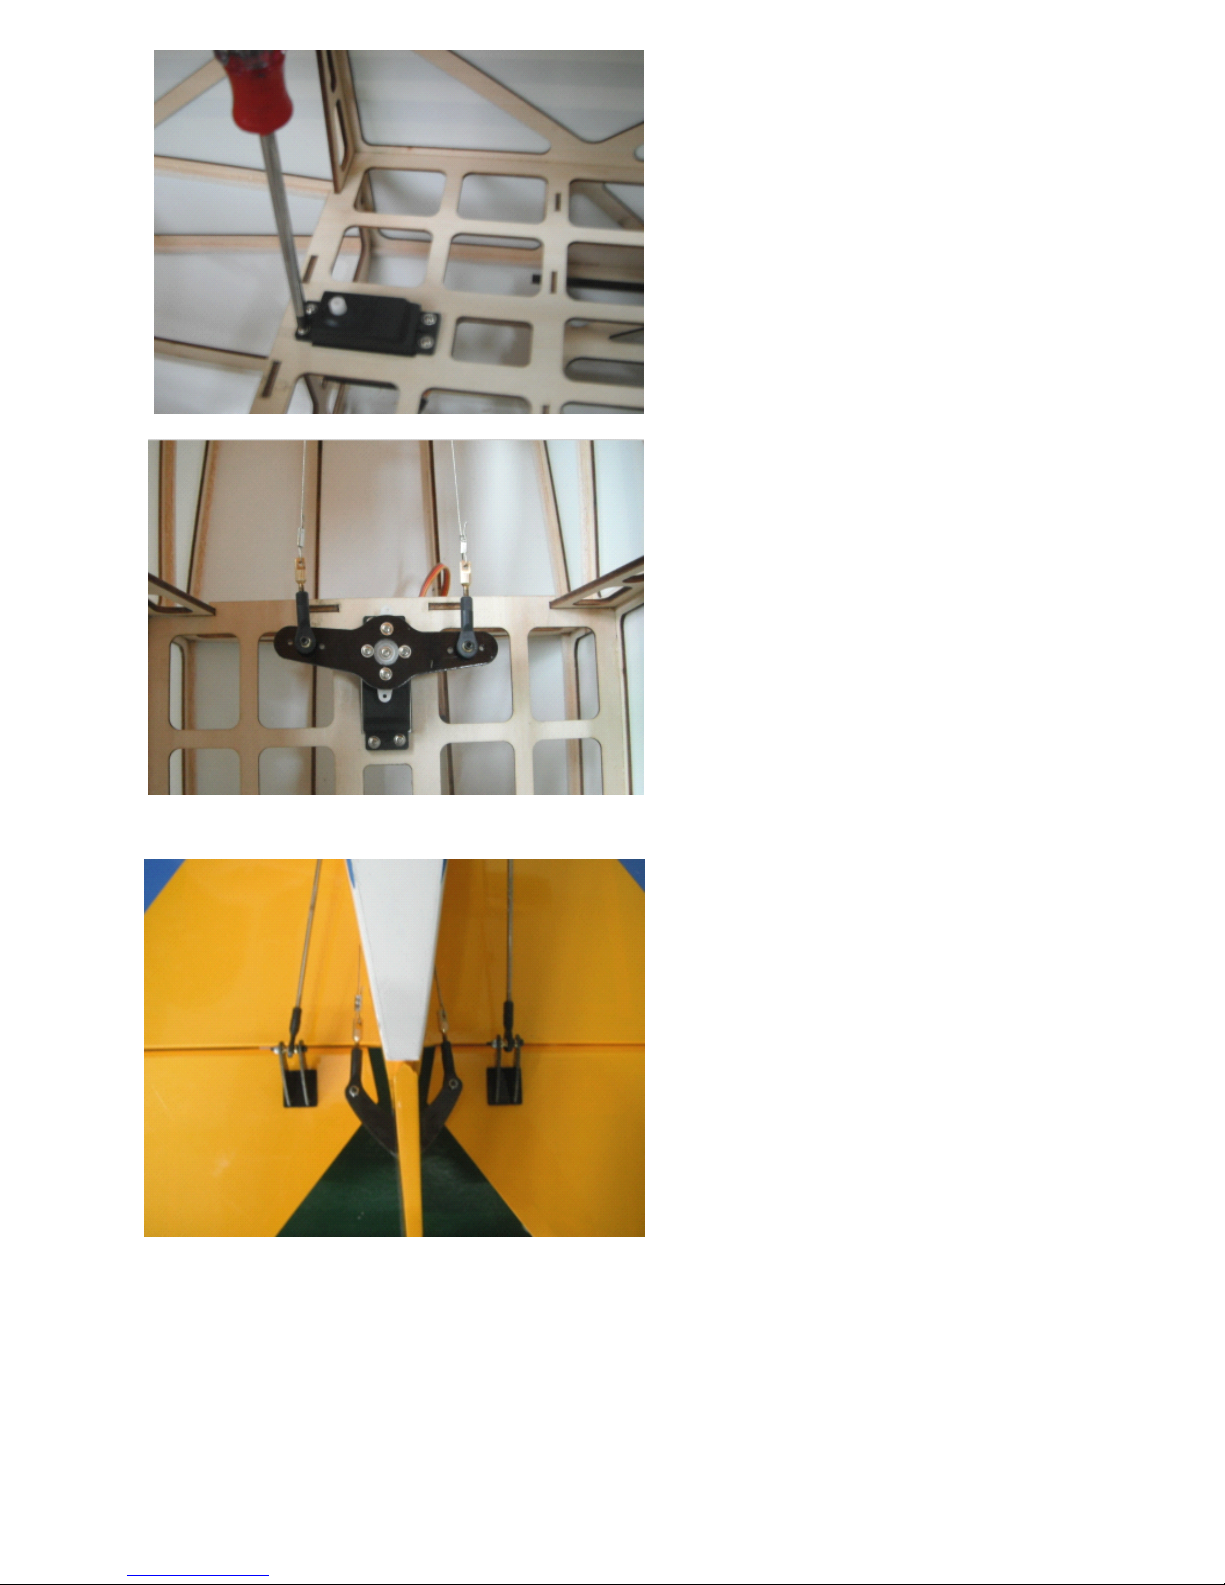
Install the rudder servo
Be assured that the screw
is fixed up
attach the servo arm to the
ruddert servo as shown
As shown in picture, This is
finished for the rudder servo
P.8
Page 9
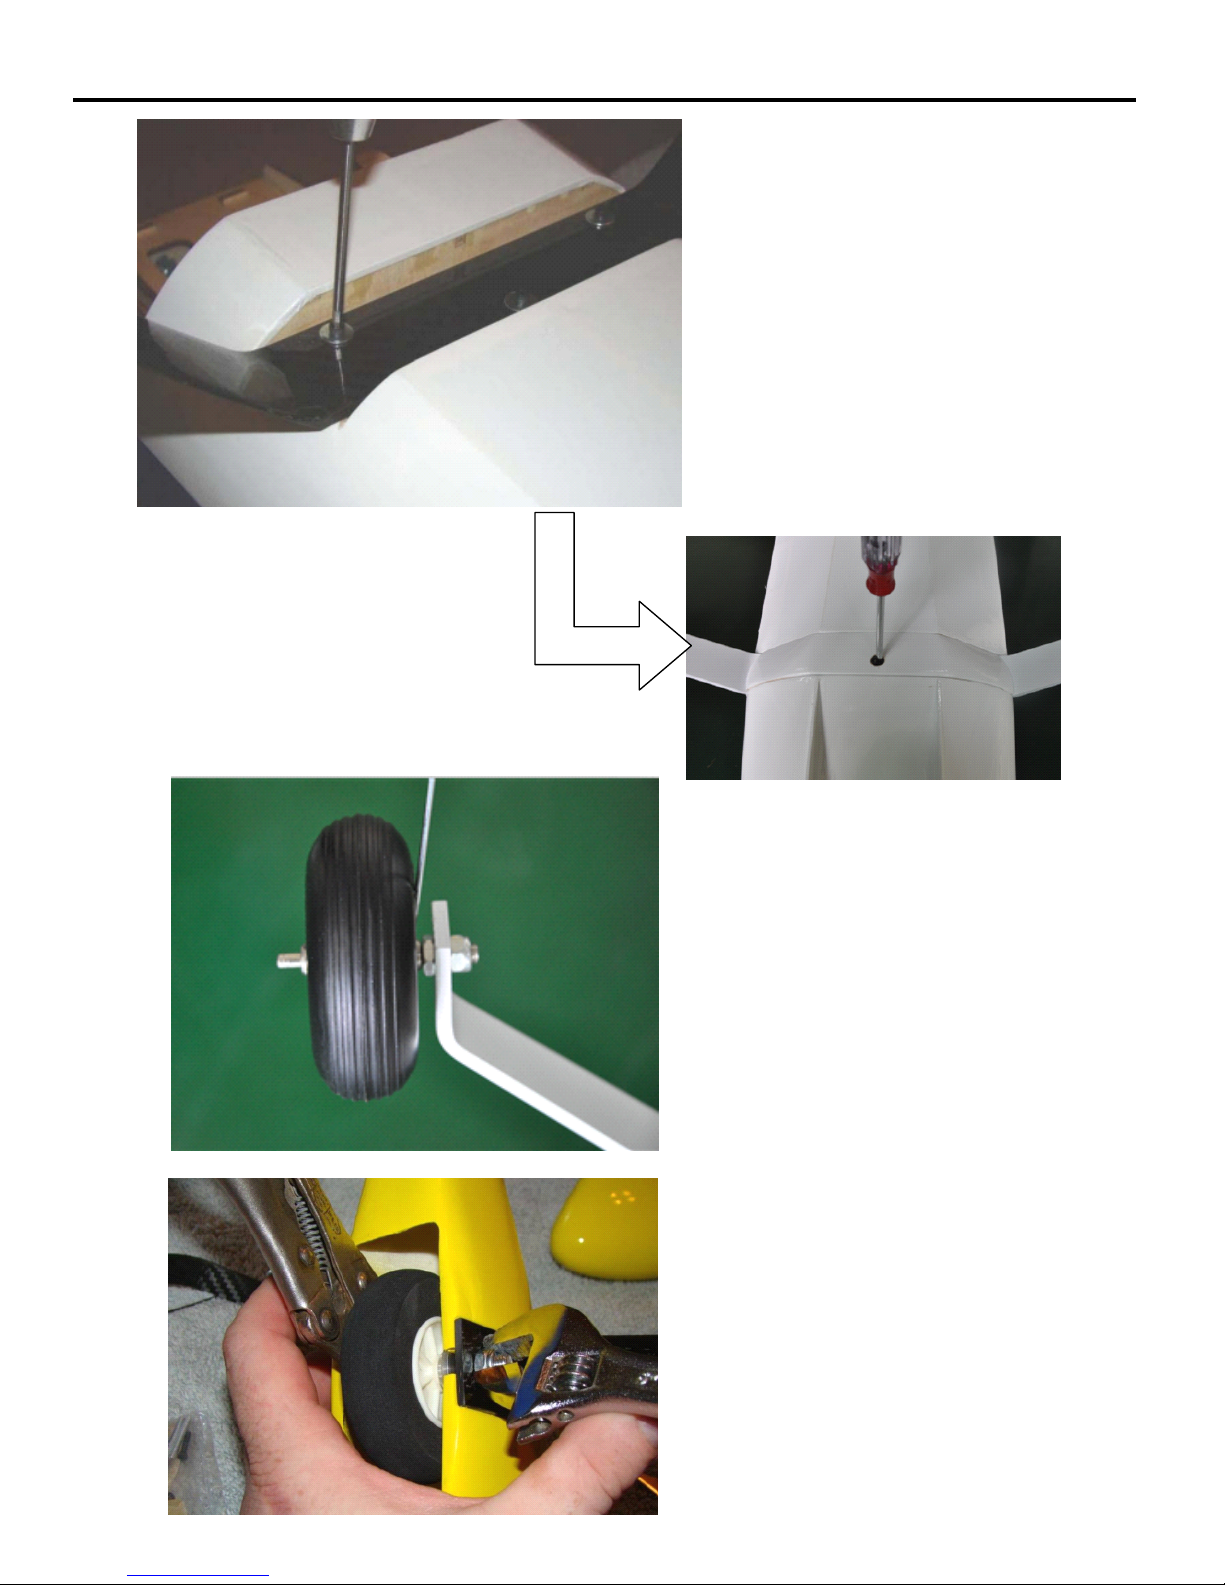
MAIN
MAIN
MAIN
MAIN
LANDING
LANDING
LANDING
LANDING
GEAR
GEAR
GEAR
GEAR
Fix up the landing gear
on the fuselage bottom with
screws.
●
Bottom View
Put the cover board in the
right position,then fix up it.
Install the wheel as shown.
Install the wheel cover,
and fix it up to landing
gear with screw.
P.9
Page 10
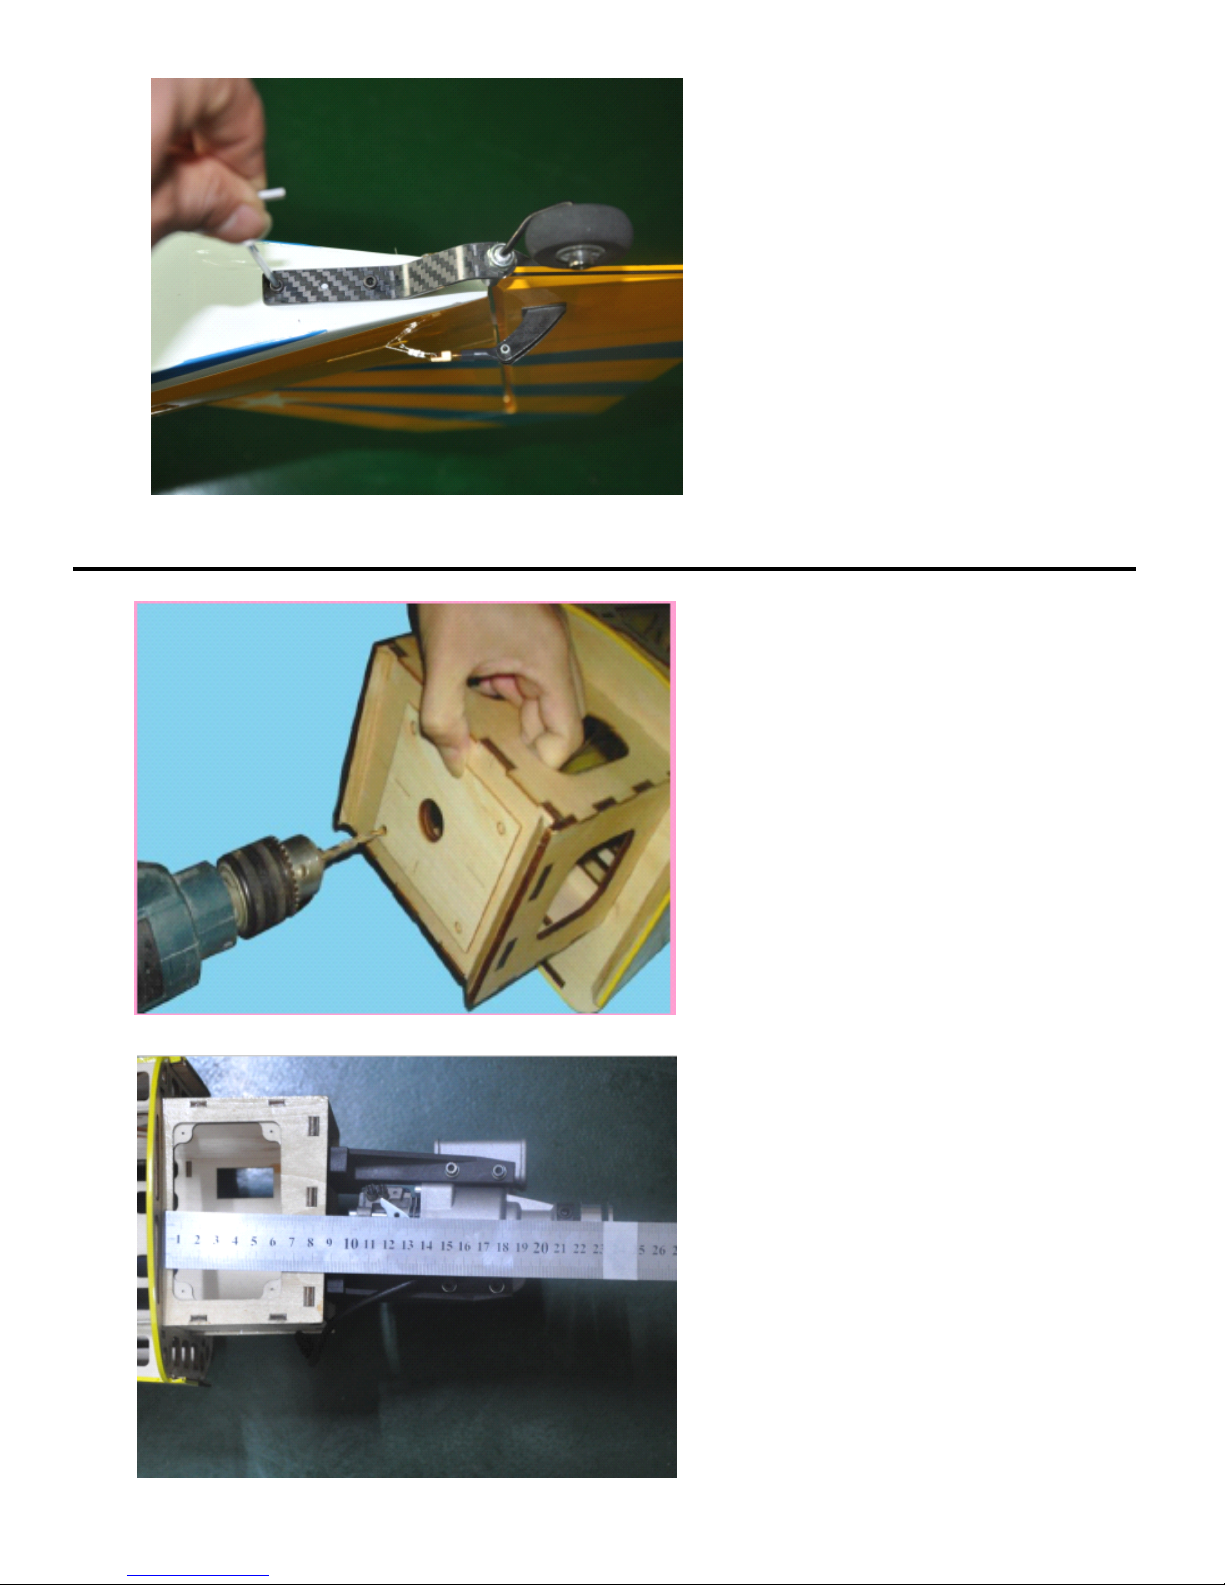
Install the tail landing gear
use screws to fix up the
fuselage bottom.
ENGINE
ENGINE
ENGINE
ENGINE
Drill the engine mounting
holes as the board provided
Use the ruler to measure
the length from firewall
to airscrew
P.10
Page 11
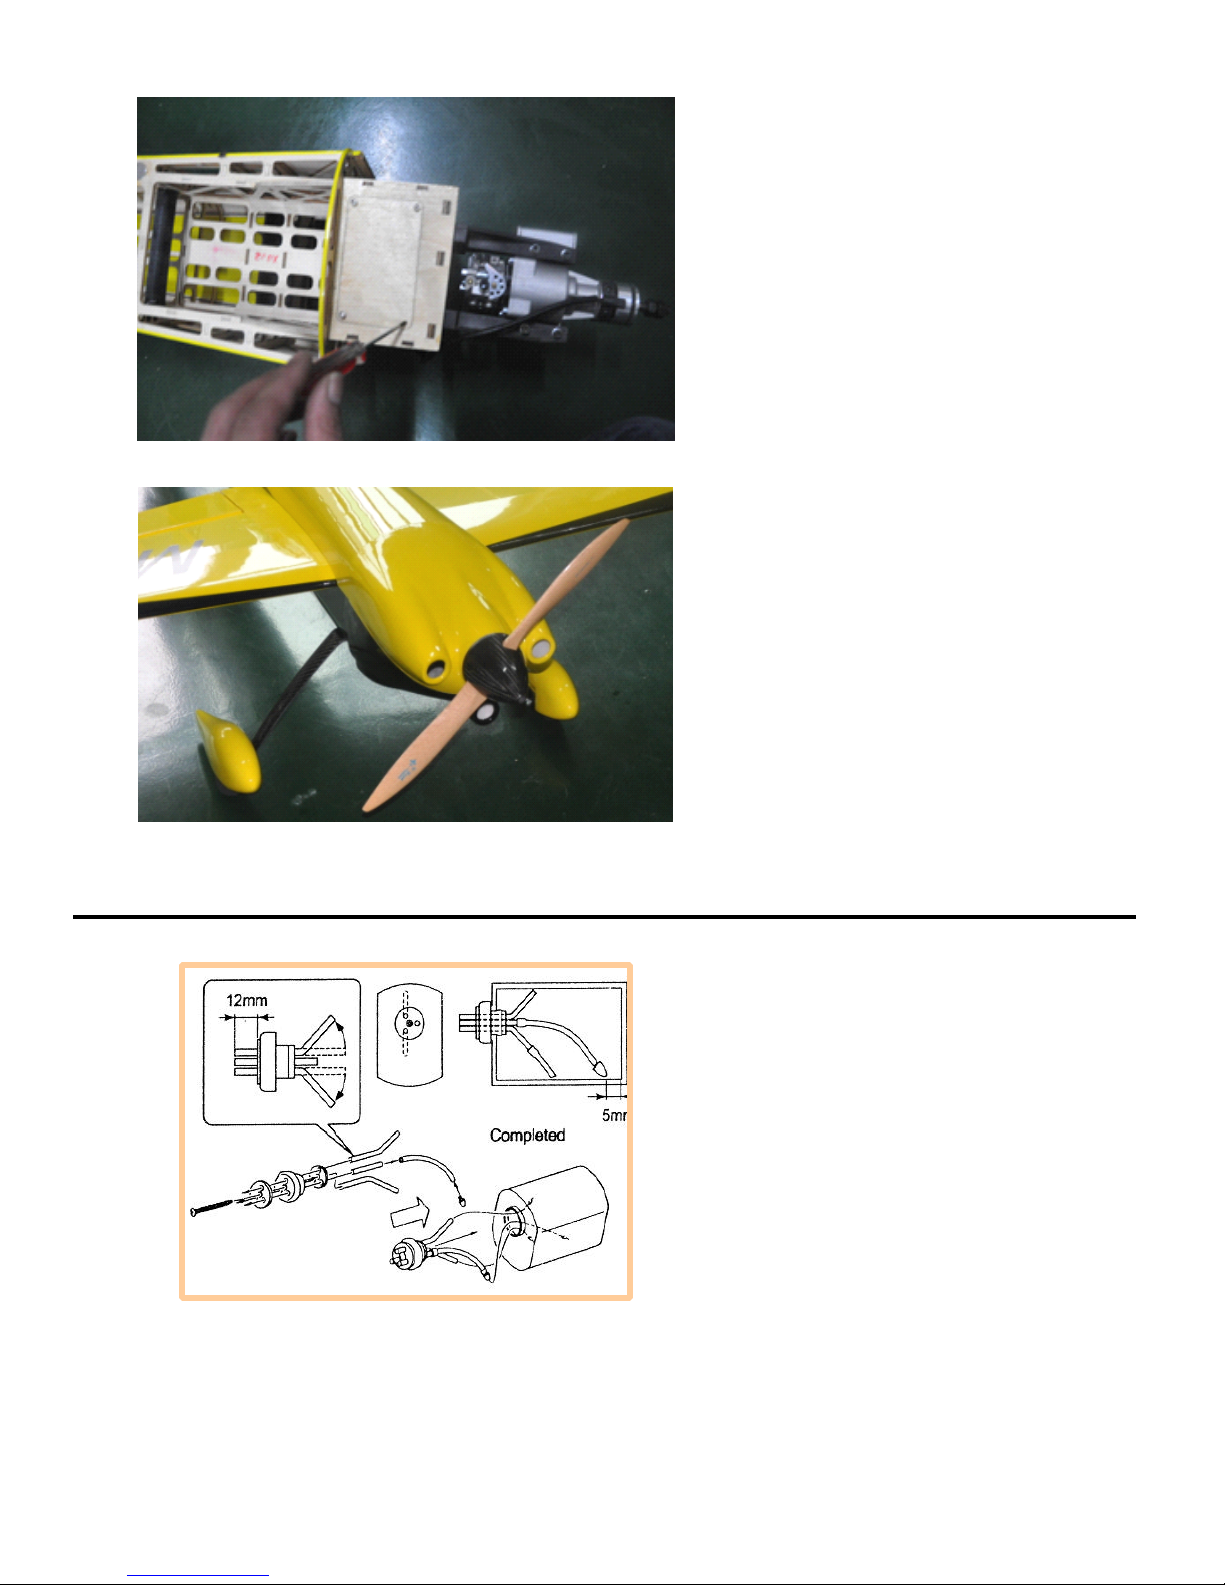
Put the cover board in the
hole,then fix up it.
Install the propeller and
spinner as shown
FUEL
FUEL
FUEL
FUEL
TANK
TANK
TANK
TANK
Install the fuel tank into
the fuselage, and fix up it
with belt.
P.11
Page 12
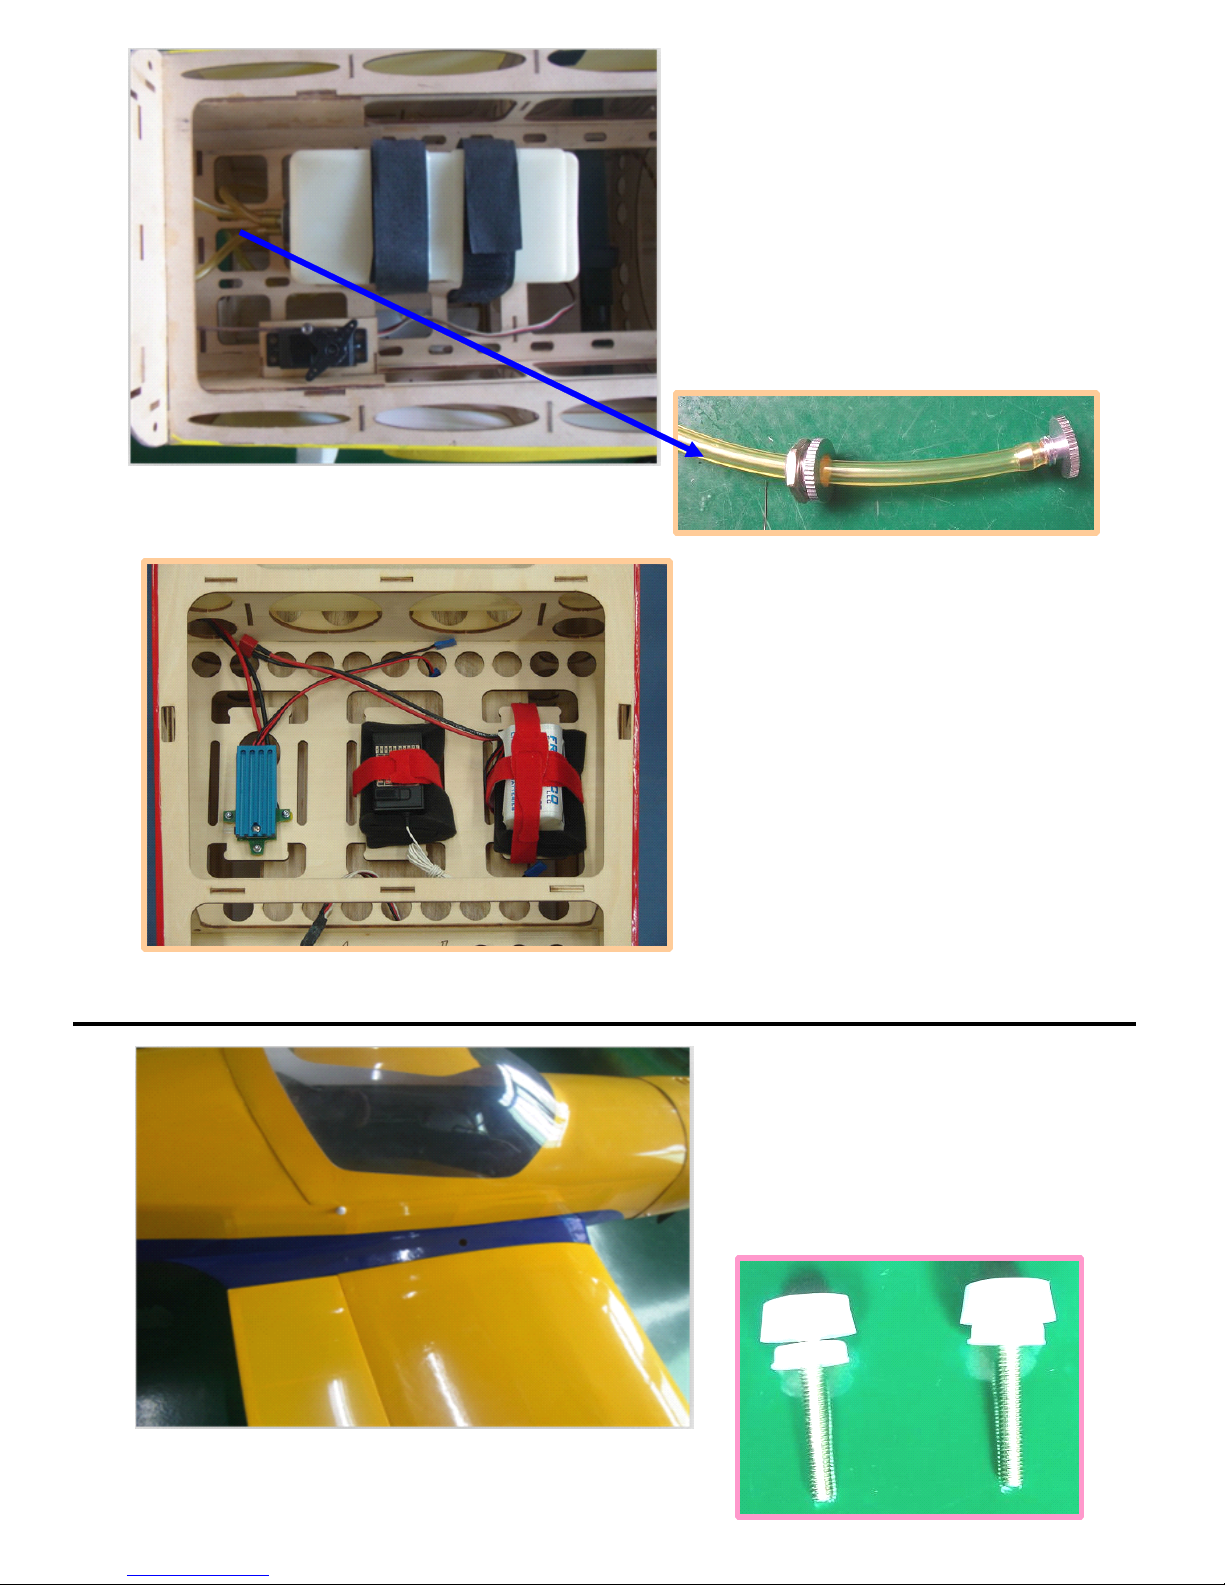
Install the fuel tank mounting
ties under the fuel tank floor.
Install the battery,receiver and
switch in place as shown.
CANOPY
CANOPY
CANOPY
CANOPY
AND
AND
AND
AND
COWL
COWL
COWL
COWL
Install the canopy into
the fuselage as shown
P.12
Page 13
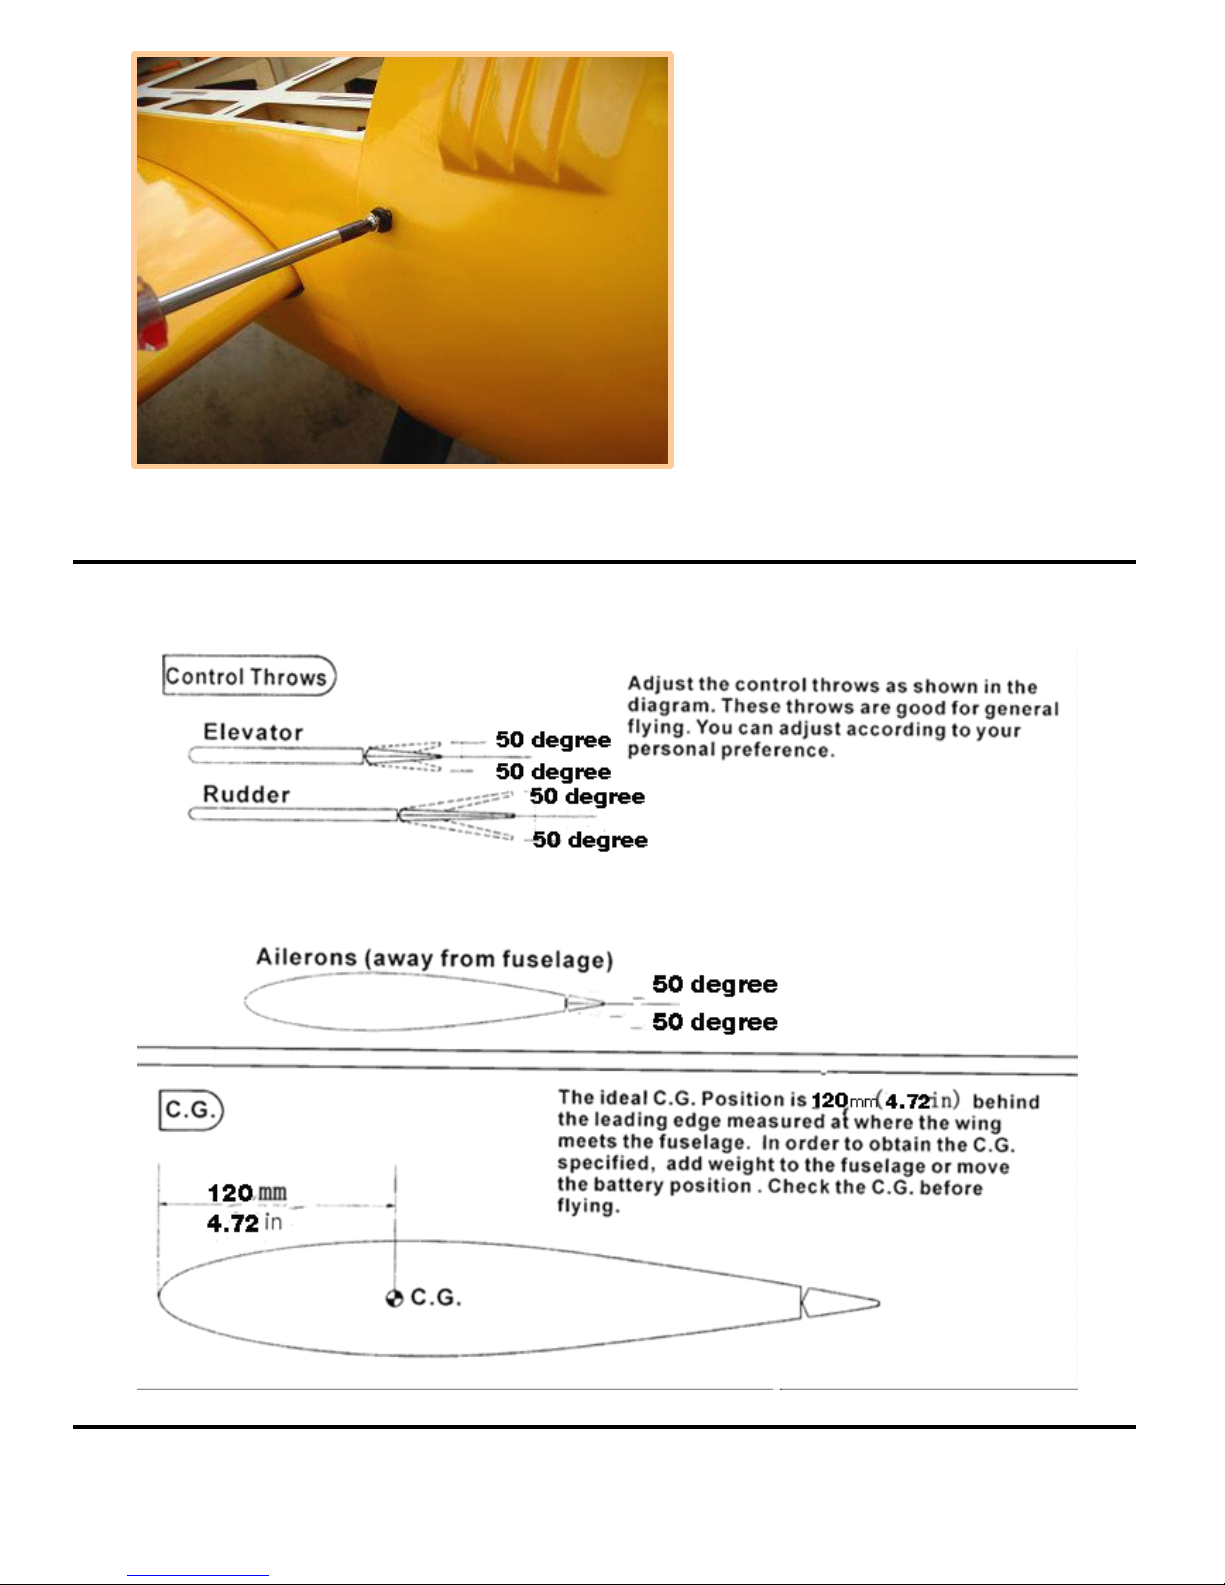
Mount the cowl using the cowl
mounting screws.
CG
CG
CG
CG
POSITION
POSITION
POSITION
POSITION
&
&
&
&
CONTROL
CONTROL
CONTROL
CONTROL
THROWS
THROWS
THROWS
THROWS
P.13
Page 14
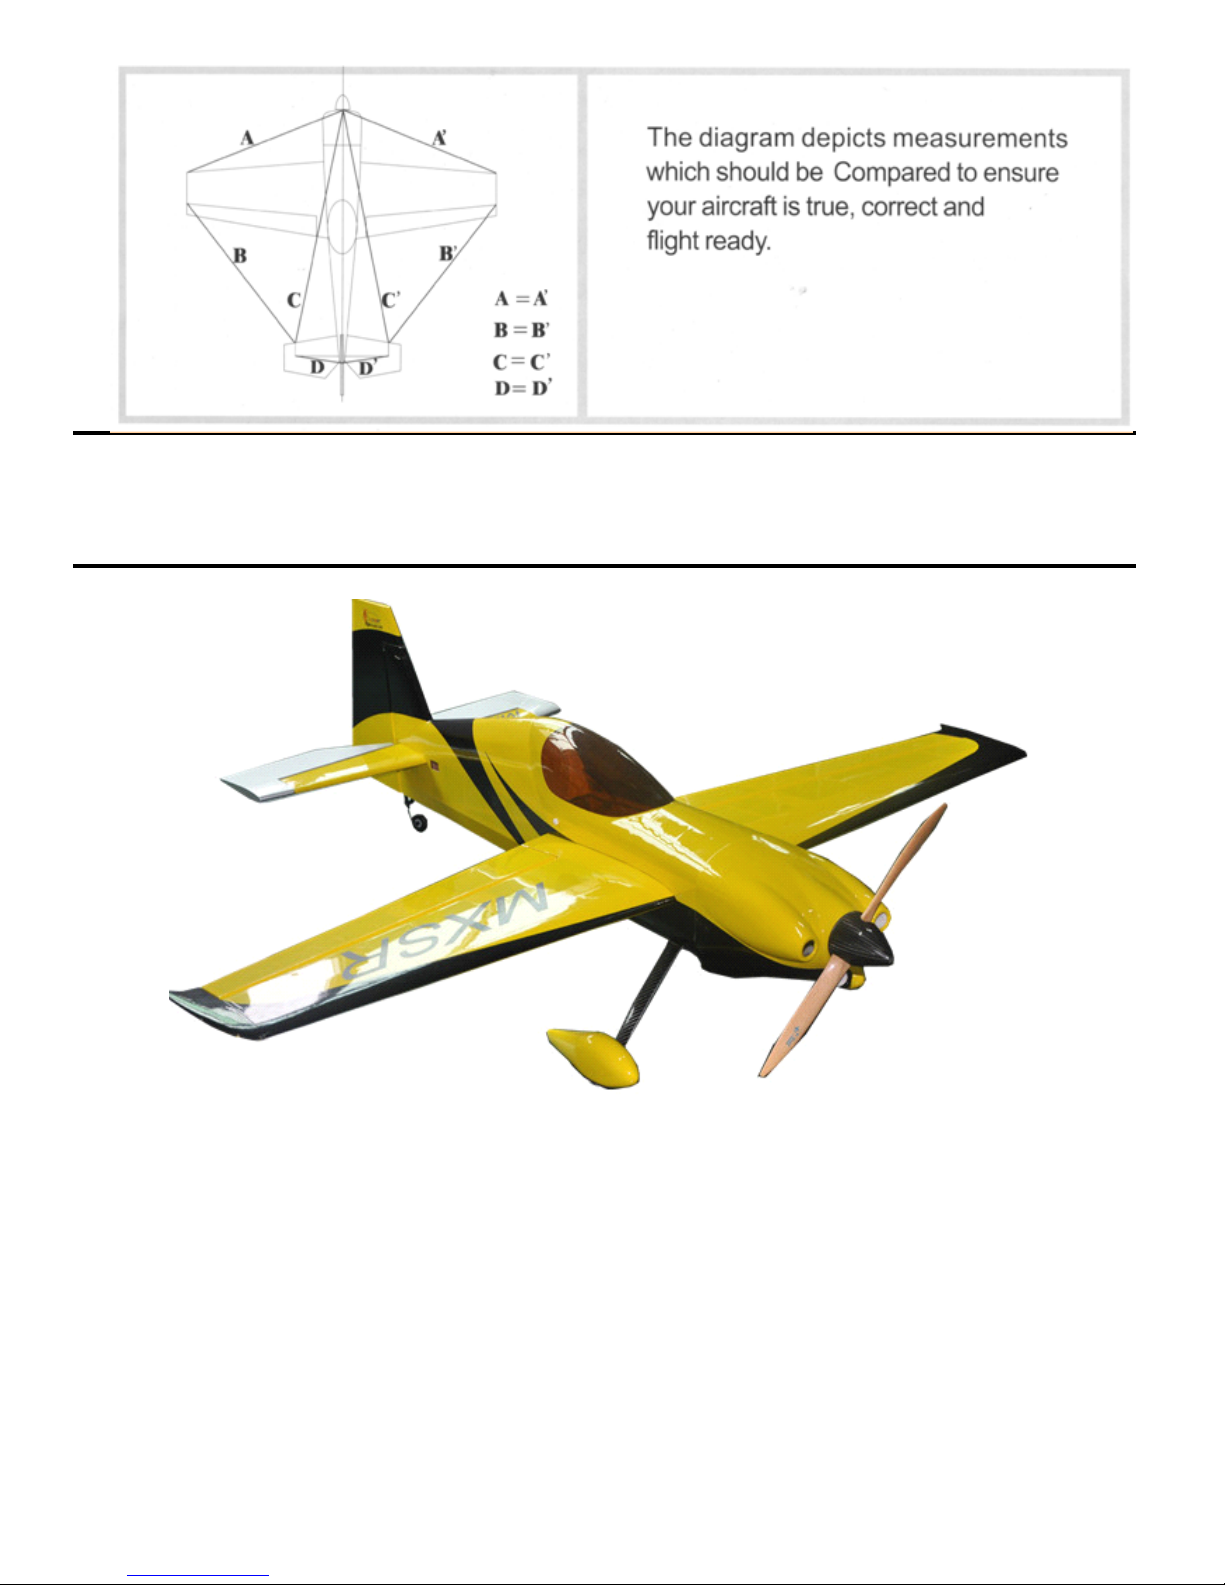
THE
THE
THE
THE
FINISHED
FINISHED
FINISHED
FINISHED
PHOTO
PHOTO
PHOTO
PHOTO
THE
THE
THE
THE
FINISHED
FINISHED
FINISHED
FINISHED
PHOTO
PHOTO
PHOTO
PHOTO
P.14
 Loading...