

Page 1
SkyWing 39-in Series Page 1
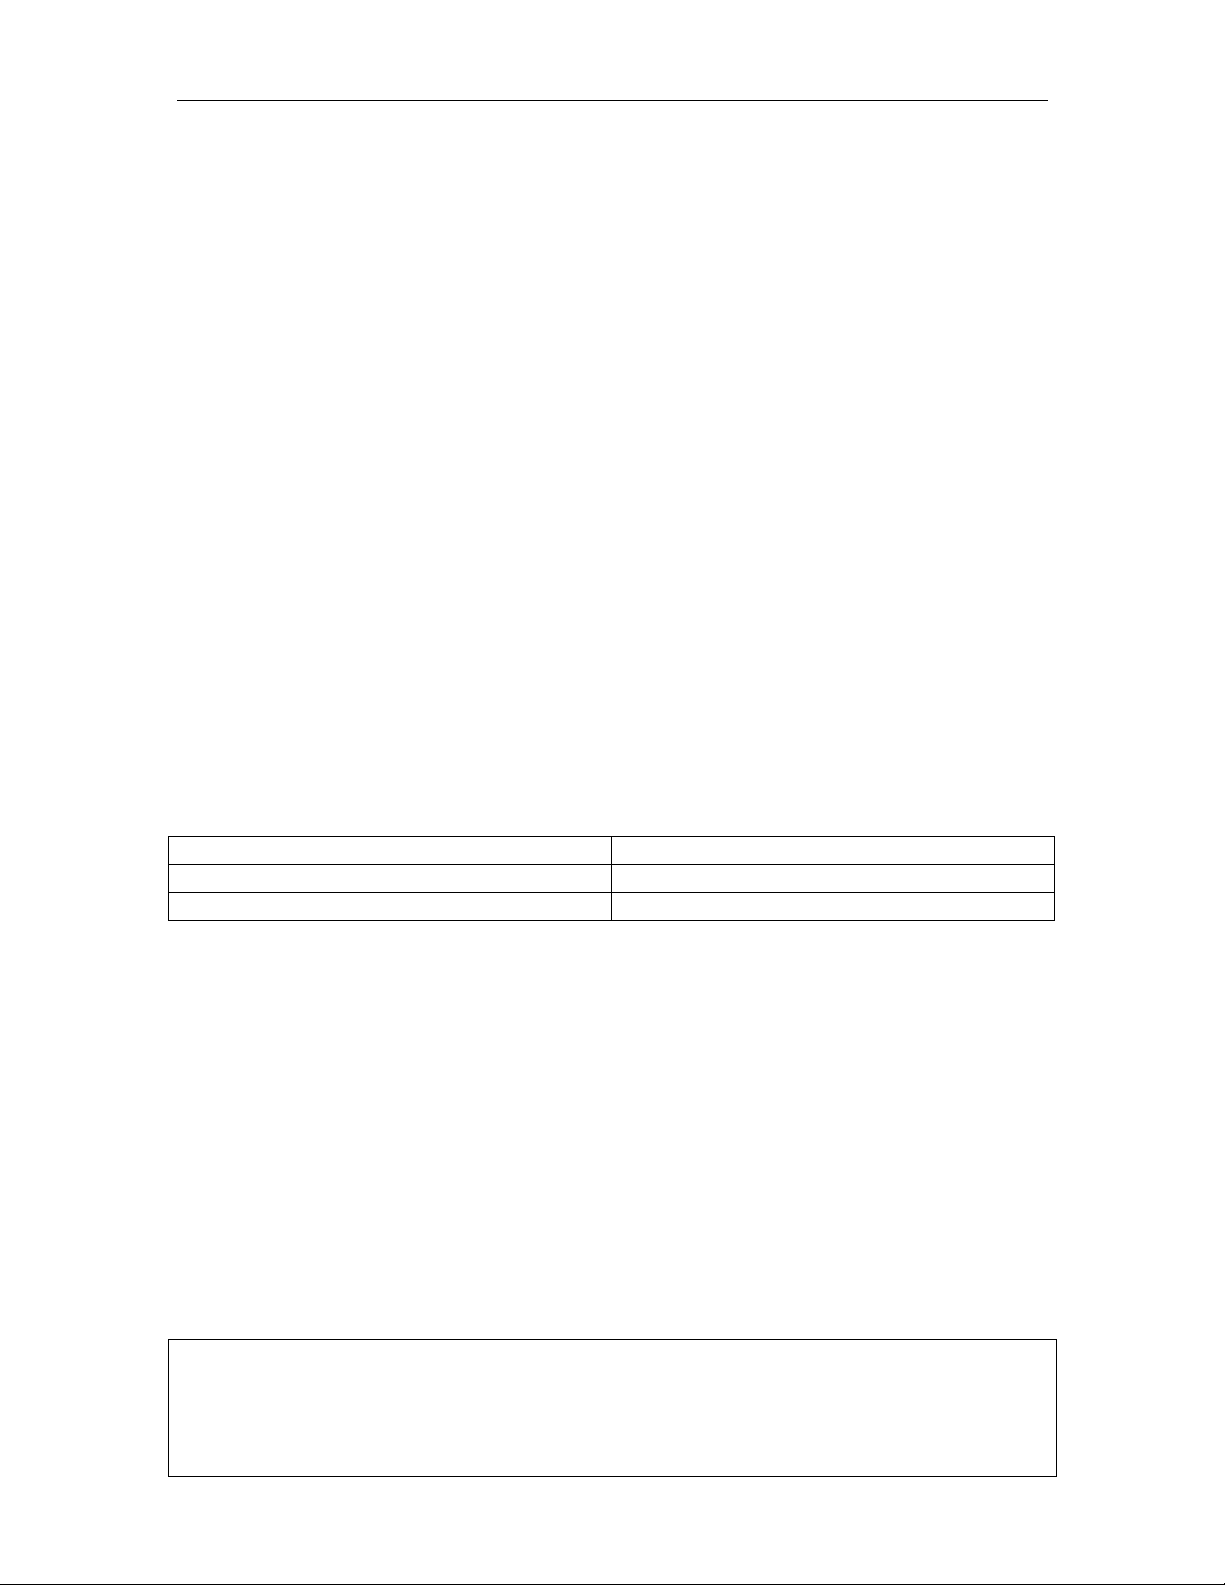
Wire-cutting Pliers
Soldering Iron
Hobby Knife
Phillips Head Screwdriver
Ruler
Hex Socket Head Screwdriver
SkyWing Product Manual
Thank you for purchasing SkyWing products. We hope they can bring you many hours of
enjoyment.
Recommended Set-up:
30A Electronic Speed Control (not included)
1000-1300 mAh 3-cell LiPo battery (not included)
2215, 2216, 2217, or 2834 KV920-1100 Brushless Motor (not included)
1060 or 1147 Slow-fly Propeller (not included)
9-gram Servo x 4 (not included)
250-300 mm Servo Extension x 2 (not included)
Besides general purpose CA, you will also need:
Assembly Notes:
If you are unfamiliar with EPP 3D planes, please read this manual;
Please do not apply too much CA;
Care must be taken when you use your soldering iron near your EPP airframe;
EPP can deform in an environment of certain temperature and humidity. You may
need to adjust the shape of your EPP airframe when building your plane and installing
the electronics.
Warning: This product is not a toy. Children under 12 years of age or people of no relevant
experience should seek guidance from experienced hobbyists when building and flying this
product. Model planes can be dangerous if operated inappropriately. Please always put safety
first when enjoying your model plane.
Page 2
SkyWing 39-in Series Page 2
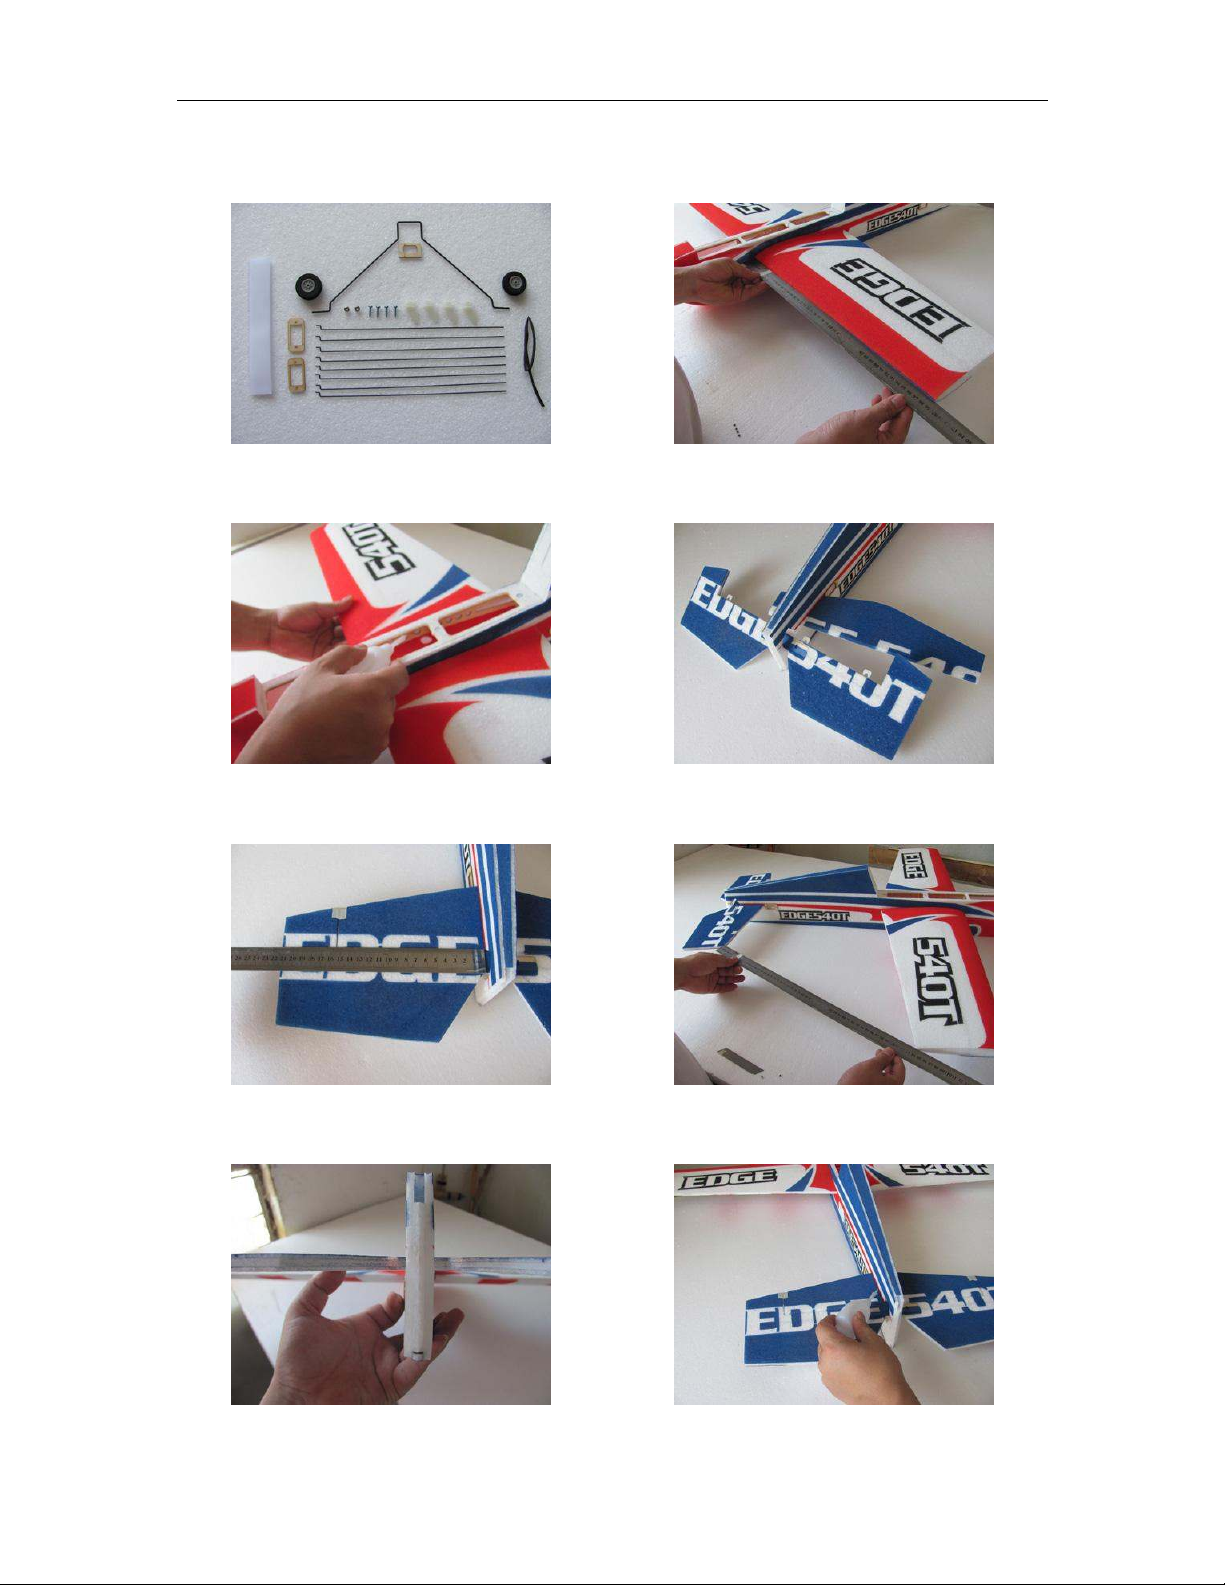
1. Before you start your build, make sure you
have all the accessories.
2. Insert the wing and make sure it is
symmetrical about the fuselage axis.
3. Apply CA (not too much) to glue the wing
and the fuselage together.
4. Install the horizontal tail (insert the
elevator first, and then the stabilizer)
5. Make sure the horizontal tail is
symmetrical about the fuselage axis.
6. The distances from the elevator tip to the
wing tip should equal on both sides.
7. Make sure that the horizontal tail is
parallel with the wing.
8. Then apply CA.
(Your kit content may look different from the parts shown in this manual. However, the steps
and explanations should apply to your build.)
Page 3
SkyWing 39-in Series Page 3
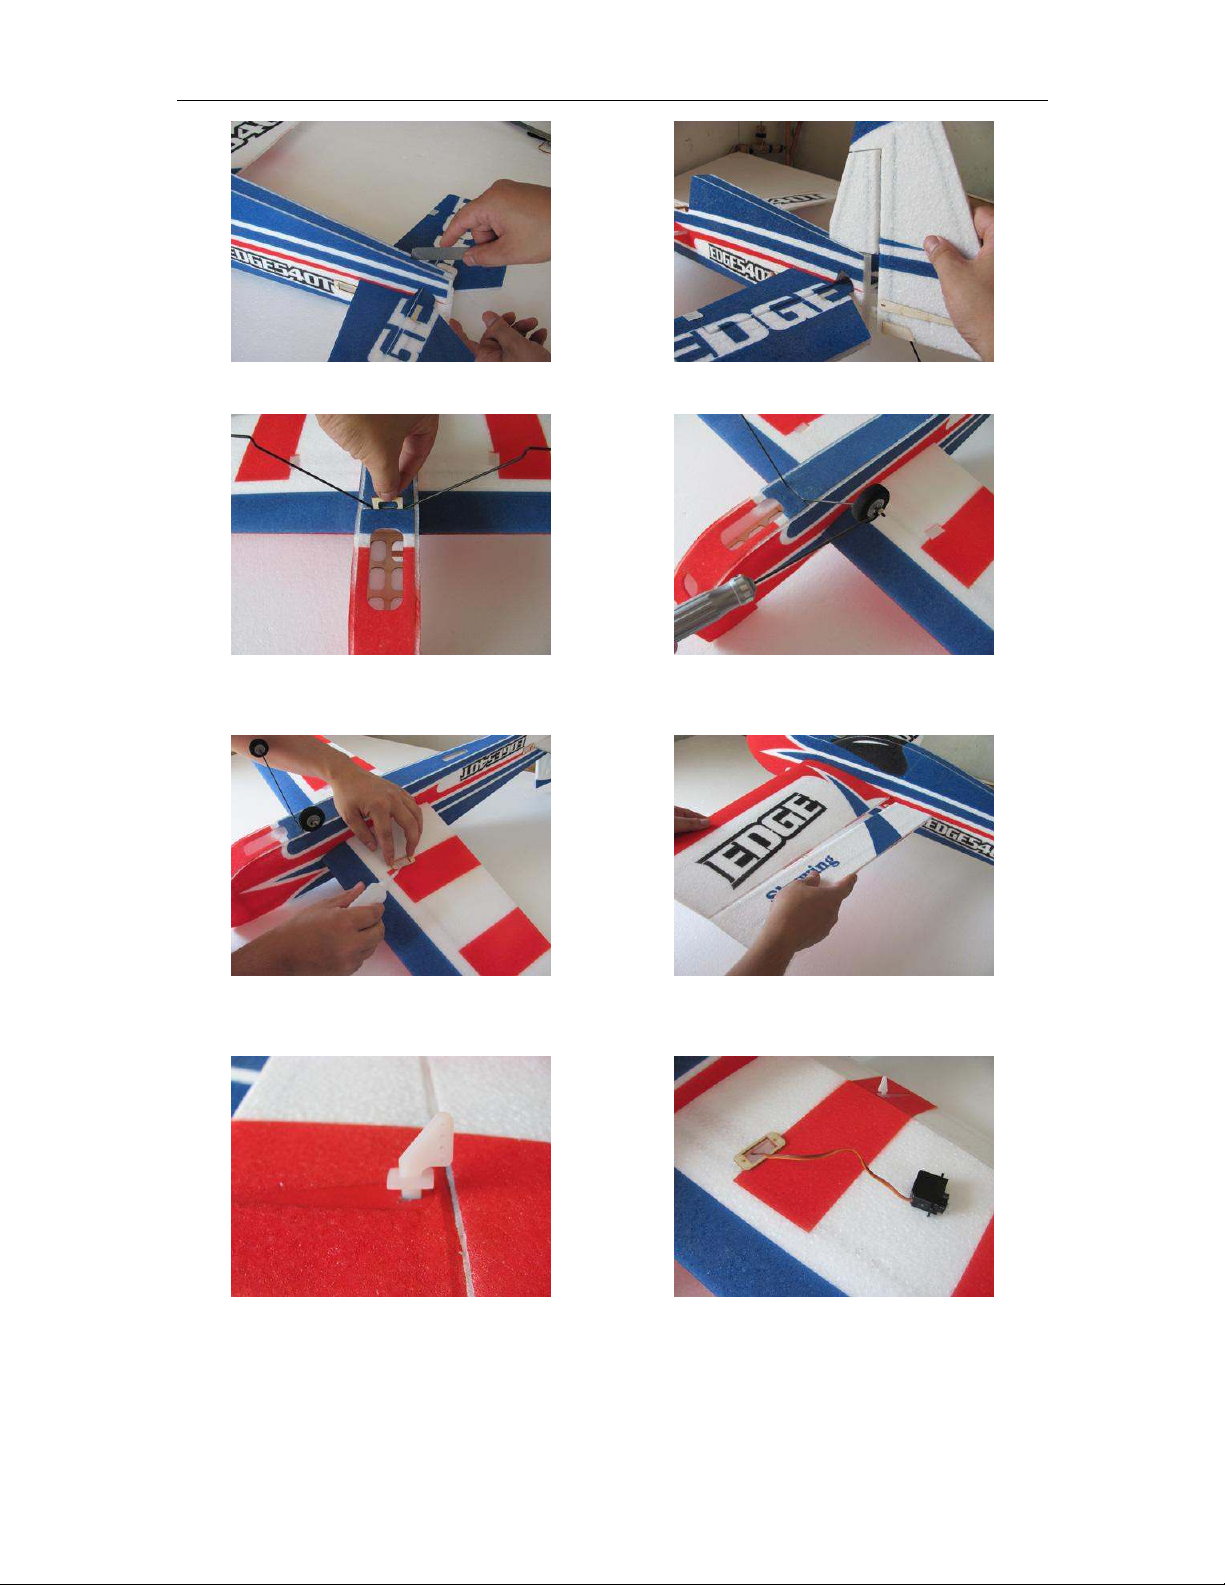
9. Cut a slot for the vertical stabilizer.
10. Glue the vertical tail with CA.
11. Glue the landing gear into position with
CA.
12. Install the landing gear wheels with a hex-
socket-head screwdriver.
13. Glue the servo frame to the wing. Do this
on both sides. Easy on using CA here.
14. Put on ailerons with CA.
15. Insert the control surface horn and apply a
bit CA. Do this for all 4 control surfaces.
16. Install servos with screws.
Page 4

SkyWing 39-in Series Page 4
Set-ups for Flying:
Aileron Throws: 35-40 Degrees
Elevator Throw: 40-45 Degrees
Rudder Throw: 40- 45 Degrees
Center of Gravity: It should be 100-105 mm from the center of the leading edge of the
wing on the fuselage’s centerline.
Advice on Flying
1) Do not fly in gusty, low-visibility, or rainy weather;
2) Do not fly close to people, buildings, or high-voltage power lines;
3) Make sure that your radio equipment works as intended, your control surfaces turn in
the right directions, and your batteries are properly charged;
4) If you are inexperienced in RC flying, have someone experienced to help you;
5) Please remember that you are the one who is responsible for all aspects of your model
plane flying. Your flying enjoyment relies on safe flying.
EPP Plane Maintenance
1) Please do not leave your EPP plane in your vehicle for a long time. Extreme
temperature in your vehicle can damage your EPP plane.
2) Do not expose your EPP plane to the sun for a long time on sunny days.
3) The best way to store your EPP plane is to hang it vertically in room temperature.
 Loading...