

Page 1
Instruction Manual
Page 2
CONTENTS
ST
ATEM
ENT
.
FEATURES.
SPEC
A
SET UP AND
SSE
IFICATI
MBLY I
ONS
NST
RUCTI
FLYING I
ONS
NST
.
RUCTI
ONS
.
Statement:
C
H
Page 3
Features:
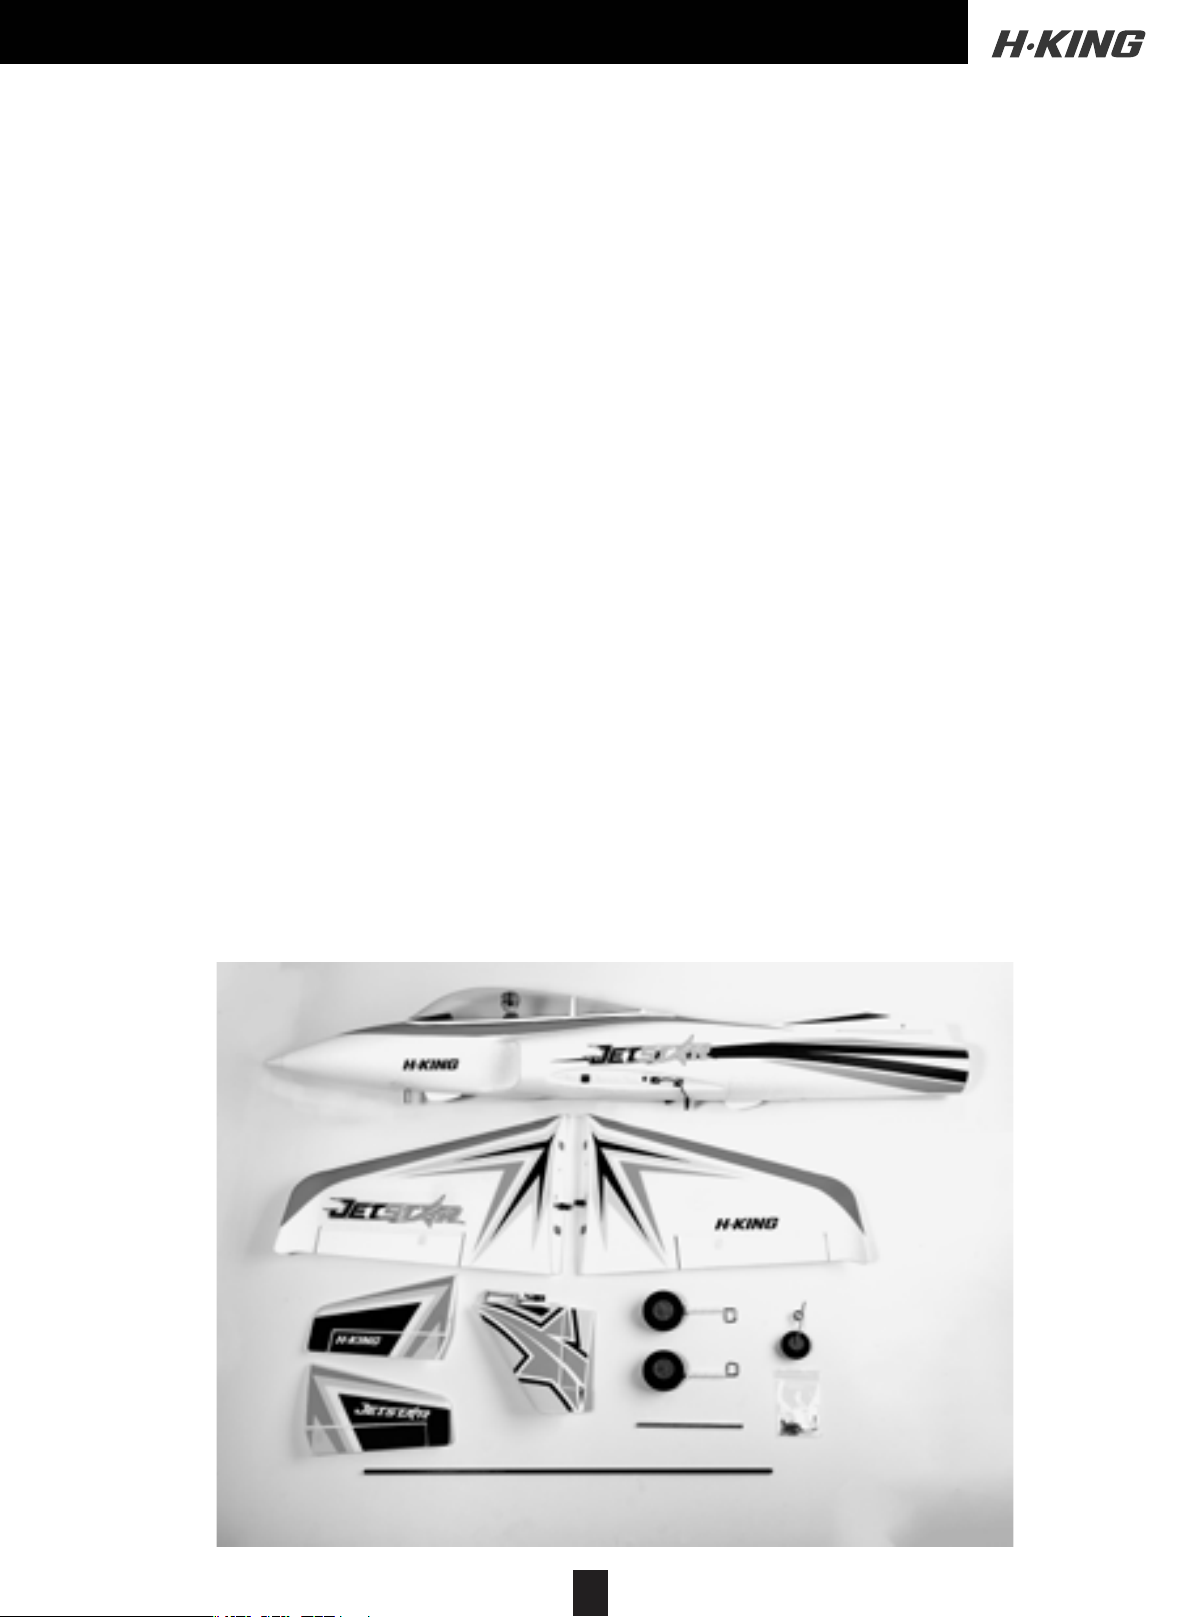
Thankyou for purchasing this RC airplane from H-King, we hope this high speed "PNF" ducted fan model
will bring you endless pleasure and fun whilst flying it.
• Made of strong EPO
• Plug in wings with strong magnets for fast assembly
• Pre-installed EDF, motor, ESC and servos
• Scale appearance and great flying characteristics
• Wide undercarriage and steerable nosewheel for great ground handling
• Large canopy for easy battery access and RC installation
• Lots of power from the highly efficient ducted fan and high KV motor with realistic "Whooshing" gas
turbine sound
• Wide speed range from high speed to slow flight
• Performs beautiful smooth scale looking aerobatics
Specifications:
• Wingspan: 800mm
• Length: 940mm
• EDF: 64mm 11 blade
• Motor: D2839-3300KV brushless
• ESC: 60amp brushless
• 4 x 9g plastic gear, 1 x 9g metal gear on elevator
• Weight: 900~1000g
• Thrust Ratio: 1:1.2
• Duration: 5mins (approx)
1
Page 4
ASSEMBLY INSTRUCTIONS
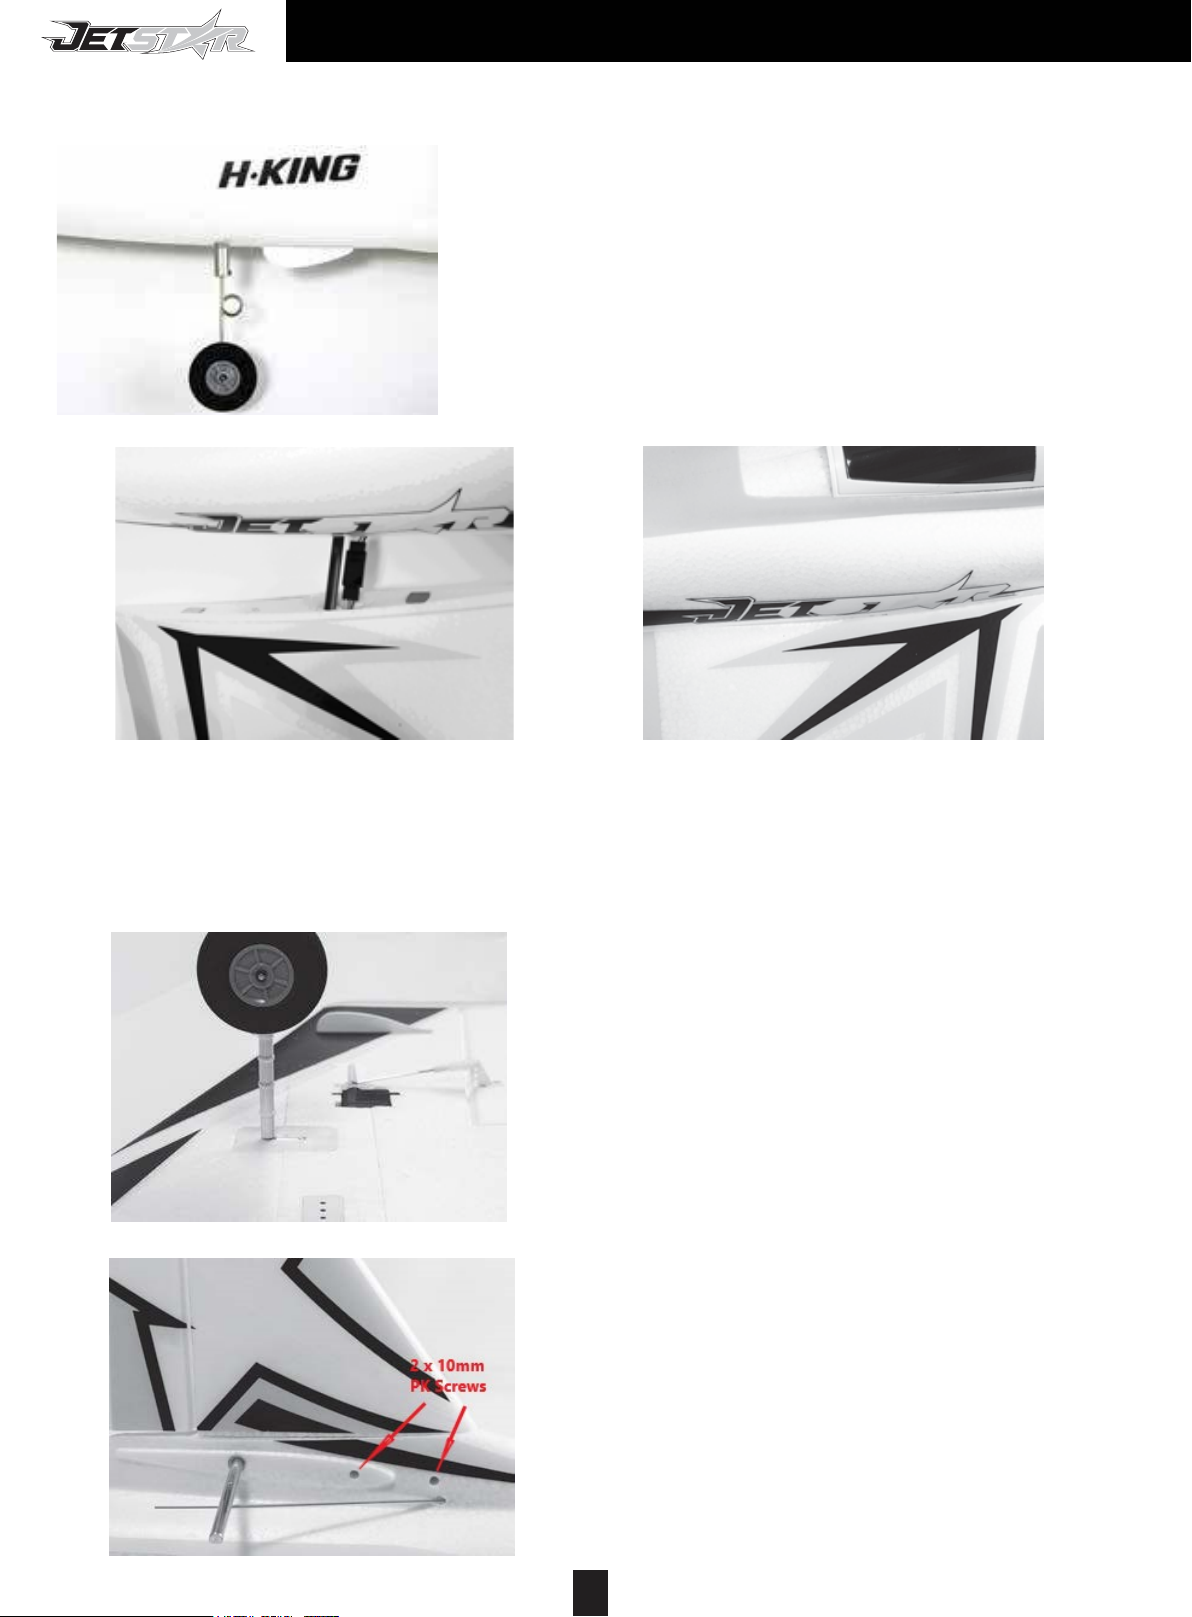
Step 1: Assembly of the nosewheel. Fit the nosewheel into
the nosewheel steering collet with the spring at the back.
Ensure the flat on the wire lines up with the M3 x 3mm
grub screw in the steering collet. Use a hex wrench to
tighten the grub screw.
Step 2: Assembly of the main wing. Insert the carbon wing joining rod through the fuselage,
ensure it remains central. Slide on the wings just far enough so that you can connect the
aileron servo leads. Slide the wings the rest of the way making sure you feed the wires and
connectors back into the fuselage. The wings should slot into the grooves in the fuselage
wing roots and the strong magnets will hold them in place.
Step 3: Main landing gear. Install the main landing
gear into the grooves on the main wings using the
2 x 8mm self tapping screws provided.
Step 4: Assembly of the vertical stabilizer. Connect
the rudder servo to the rudder extension lead. Fit
the vertical stabilizer into the slot at the rear of the
fuselage, carefully feed the servo connector down
inside the fuselage. Ensure the rear plywood
tongue engages securely with the flat on the
horizontal stabilizer joining rod, this stops the rod
twisting. Secure into place using the 2 x 10mm self
tapping screws provided.
2
Page 5
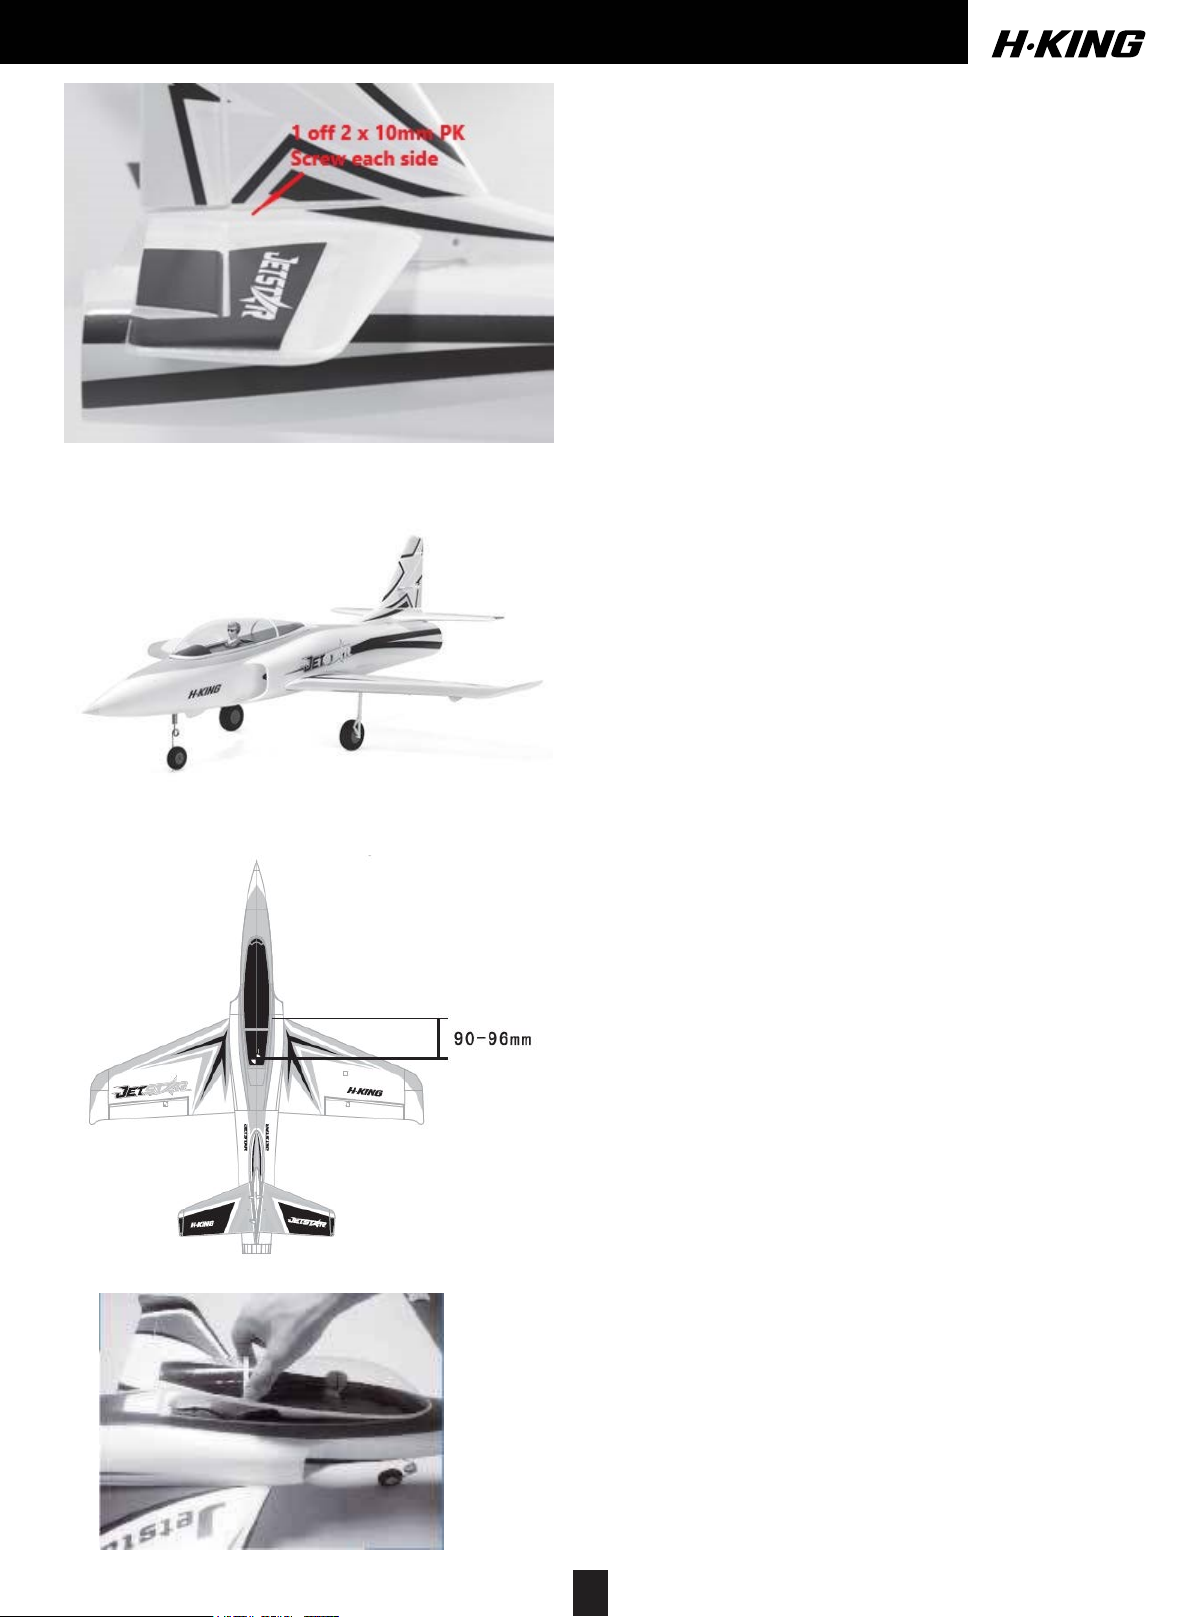
Step 5. Assembly of the horizontal stabilizers. Slide
the horizontal stabilizers onto the joining rod which
now has the flat at the top, slide them right up to the
fuselage. The stabilizers are held in place with a 2 x
10mm self tapping screw, this screw is screwed in
from the top and goes through the joining rod into
the plastic plate underneath. Feed the pushrods
through the connectors on the elevator horns,
centralize the elevator servo then lock the grub
screws with the elevators in the neutral position.
Step 6: Jet Star assembly is finished.
Step 7: Once you have installed your receiver
and flight battery please check the center of
gravity. This should be between the dimensions
shown in the drawing. Aim to be nearer the front
mark for the first flights as this will increase the
stability of the model. Once you are used to it
you can move it back which will make the model
more agile.
Caution: When opening the canopy carefully
grip it close to the rear and gently ease it
upwards. It is held down at the rear by a strong
magnet and the front has a locating tongue.
3
Page 6

Setting Up and Flying the H-King Jetstar
The Jetstar being an EDF model is not aimed at beginners, having said that it is a very stable and forgiving
flyer that will bring a smile to the face of every pilot who flies it. It does very smooth jet style manouvres and
aerobatics and looks fantastic when doing fast low passes over the take-off strip.
Before flying please double check that the model balances at the correct center of gravity point. To achieve
the correct balance point move the position of the battery pack fore or aft in the battery compartment.
Recommended Control Throws
Ailerons: 10mm each way (Expo 30%)
Elevator: 8mm each way (Expo 30%)
Rudder: 15mm each way (Expo 45%)
We recommend that you use either a smooth hard surface for take-off and landing or very short smooth
grass. Switch on your transmitter and check the meter to ensure the Tx battery is fully charged and then
plug in the flight battery, wait for the motor/ESC to go through its arming sequence. If this is its first flight or
the first flight of the day carry out a range check. Then do a control check, check that the control surfaces
are moving in the correct direction and with the full movement you have set on your transmitter, check all
switches including rate switches are in the correct position. Once you are satisfied that everything is working
correctly then and only then line the Jetstar up into wind on the take-off area.
When you are ready to take-off hold a small amount of up elevator then smoothly open the throttle to full
power. The Jetstar will accelerate quite quickly and due to no propeller torque it should track nice and
straight, just correct any tendency to yaw with the rudder. As this is a EDF model without a propeller at the
front you will not get any blown effect over the wing and control surfaces, it relies solely on forward speed.
For this reason the take-off run will be longer than with a propeller driven craft and the control surfaces will
be ineffective until airspeed is reached. Once take-off speed is reached the Jetstar will smoothly rotate,
once airborne climb out at a shallow angle straight ahead and allow the speed to increase up to a safe
height.
As mentioned before this is not a model aimed at beginners so we will not go into flying in great detail as
you should be an experienced pilot in flying the more advanced type of models. To start with just get used to
the sweet handling characteristics of the Jetstar and note how stable and smooth it is. Try the stall, it is very
benign then go and explore the aerobatic capabilities.
Once you have had your fun and before your battery goes flat think about the circuit, approach and landing.
Fly a nice reasonable large square circuit and once on approach reduce power and set the model up for a
nice steady descent towards the landing area. Remember, unlike a prop driven plane there is no prop wash
over the wing or control surfaces, also the power is slower to respond. A prop plane when you open the
throttle you get almost instant power and acceleration, with a fan model this is much slower. If you are
undershooting the landing area you will need to put power on sooner than you would with a prop plane.
Keep the speed up a bit on the approach as remember you need airspeed for the flying controls to remain
effective (no prop wash). Round out, reduce power to idle and then flare and the Jetstar will almost land
itself on the rear wheels with the nosewheel just off the ground.
We hope you enjoy your H-King Jetstar and if you haven't already tried our other models in the H-King
range then we recommend that you take a look at them at www.hobbyking.com.
Page 7

H-KING
�CEl,
 Loading...