

Page 1
H-KING
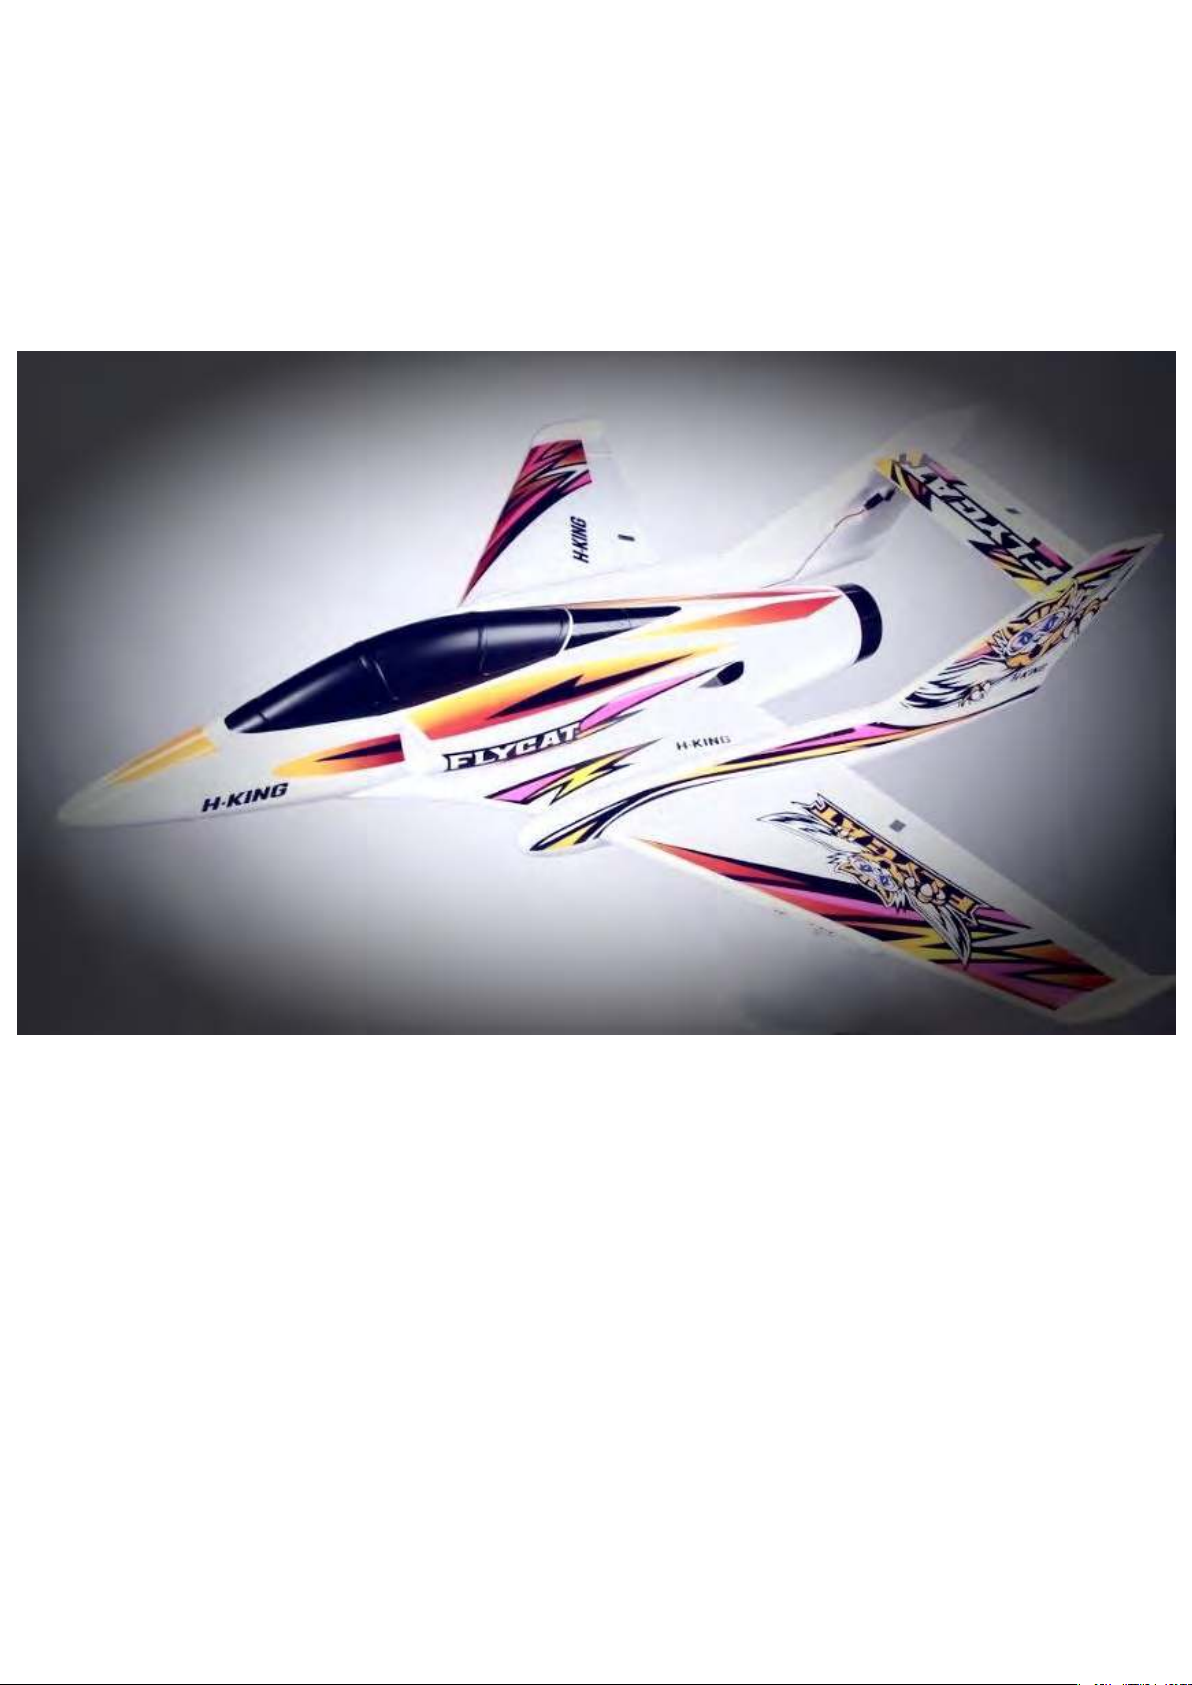
FLYCAT
1042mm PARKJET with pre-installed 70mm fan,
motor, ESC and servos
Page 2

FLYCAT
MANUAL CONTENTS
Description and Specifications -------------------- 2
Using and charging Lipoly batteries ----------- 3
Safety Notes ------------------------------------------------ 4
Assembly ----------------------------------------------- 5 to 16
Center of Gravity ------------------------------------------- 17
Set-Up ---------------------------------------------------------- 18
Flying Tips ---------------------------------------------------- 19
Recommended Accessories -------------------- 20 to 22
Optional Retract Fitting --------------------------- 23 to 24
1
Page 3

The brief was to design a low cost 70mm Parkjet to replace
the popular Flycat, it was to have no frills, look similar and
to have no landing gear. The result is a similar outline to
the original Flycat but it is bigger 1042mm as opposed to
640mm and it has an internal 70mm fan unit rather than an
EDF unit sitting on top. With the addition of fan inlet ducts
and all round streamlining and updated color scheme the
new Flycat looks stunning and it flies as good as it looks.
This version of the Flycat is PNF and comes with a 12
blade 70mm fan unit, high power 3040/2000Kv brushless
motor, 80amp ESC with BEC and 3 9g metal geared
servos. All these items are pre-installed at the factory as
are the colorful decals so time from starting the build to
having it ready to fly is minimal. All you will require is a 4ch
or greater transmitter and receiver and a 6S 30~60C
4000mah lipoly battery with suitable charger.
Specs:
:
Wingspan: 1042mm
Fuselage Length: 1115mm
EDF: 70mm 12 blade unit
Motor: 3040/2000Kv brushless
ESC: 80amp with BEC
Servos: 3 x 9g metal geared
Battery: 6S 30~60C 3000mah lipoly (not supplied)
Radio: 4 channels or more (not supplied)
Option:
are removable panels to allow for the fitting of these. Please see
notes at the end of the manual.
A set of electric retracts can be installed in the Flycat, there
2
Page 4
FLYCAT
Warning on the use of lipoly batteries and
their chargers.
Warnings and Safety notes
3
Page 5

SAFETY INSTRUCTIONS
1. Please read this manual carefully and follow the
instructions before you use this product.
2. This airplane is not a toy, due to it's advanced flying
qualities it is only suitable for pilots with intermediate or
higher experience. If you are a novice then please only
operate with the assistance of an experienced pilot.
3. Not recommended for children under 14 years old.
4. Please set up this plane according to the instructions
and make sure you keep your hands and other parts of
your body out of the way of the rotating propellers at all
times. Failure to do so will result in damage to yourself
and to the airplane.
5. Do not fly in thunderstorms, strong winds or wet
weather.
6. Never fly R/C planes where there are overhead power
lines, automobiles, airports, railway lines or near a
highway.
7. Never fly R/C planes where there are crowds of people
or over organised games. This airplane requires a very flat
landing and take-off area or lake that is clear of tree's and
other obstacles. Remember safety is the responsibility of
the pilot.
8. Do not attempt to catch the plane when you are flying
it.
9. The operator will bear the full responsibility of flying
and the proper operation and usage of this model. We at
Hobbyking will not be responsible for any liability or loss
due to improper use of this model.
4
Page 6
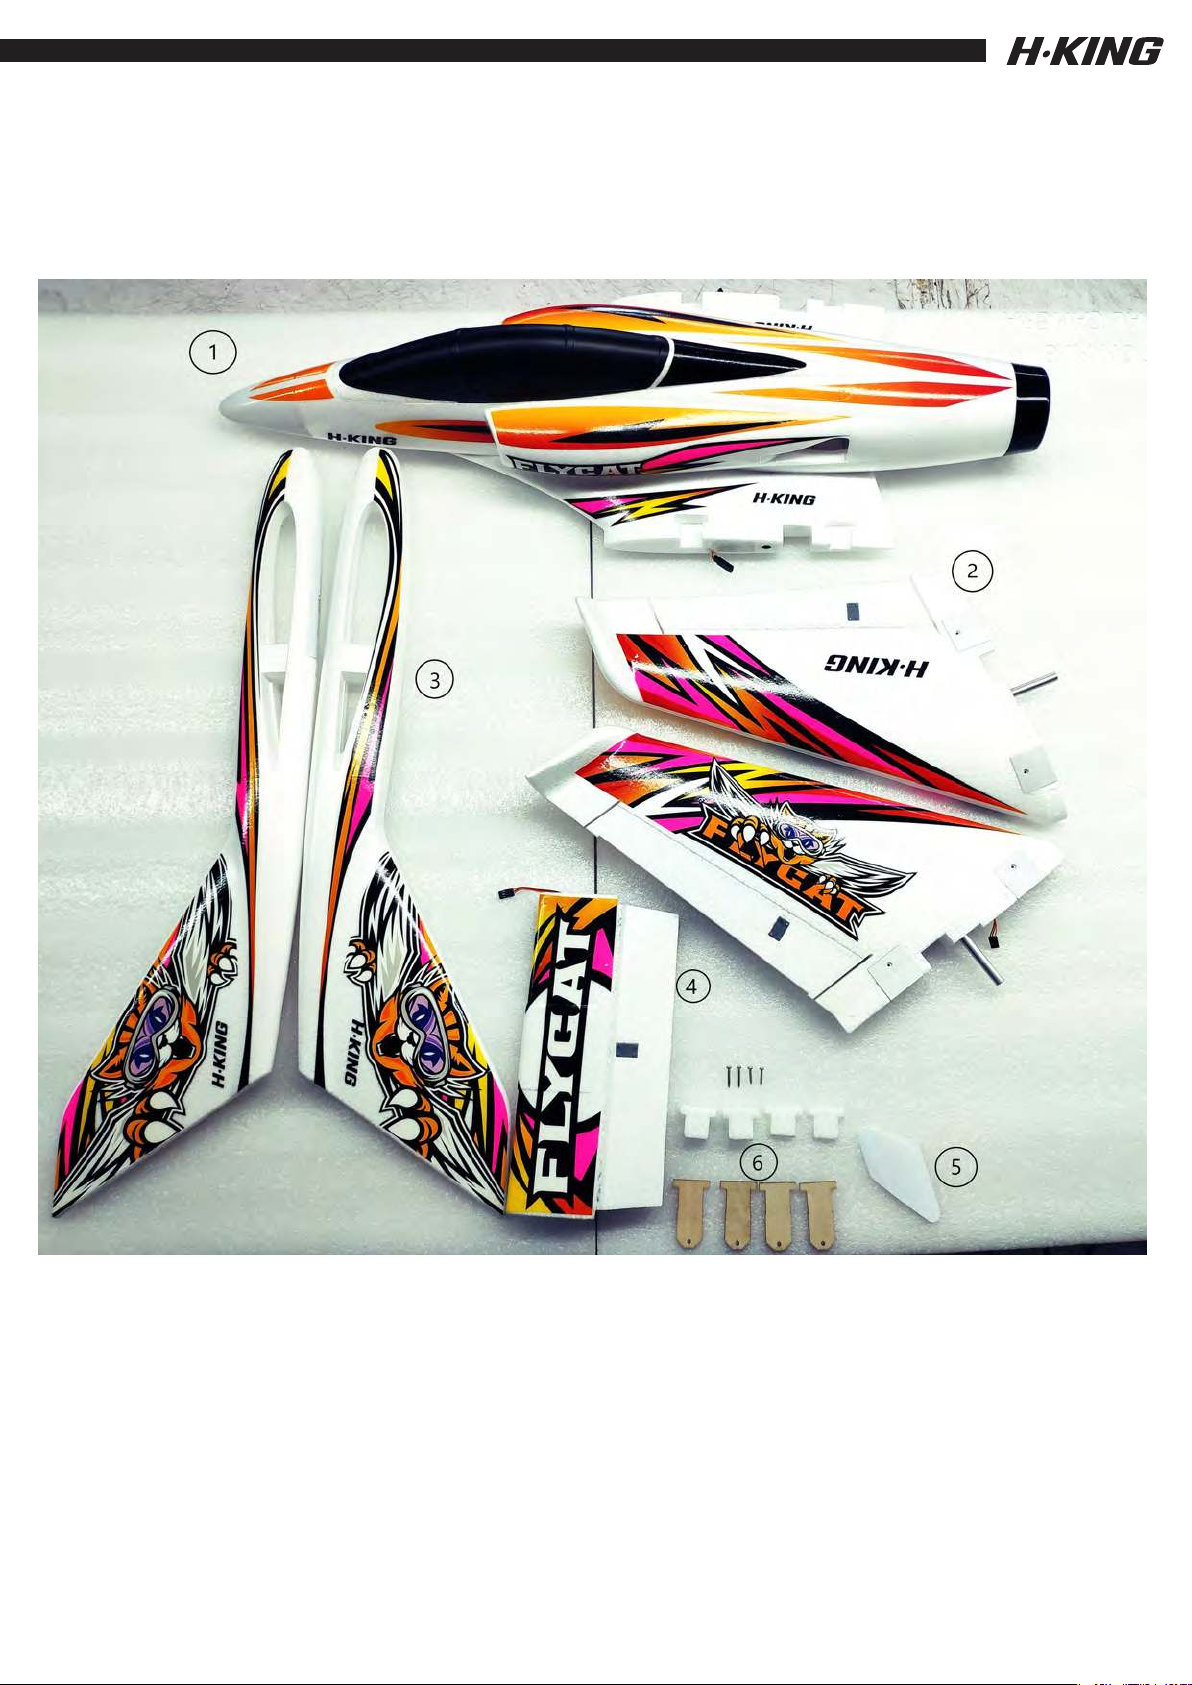
FLYCAT Kit Components
1. Fuselage
2. Wings
3. Tail Booms
4. Tailplane
5. Fin Servo Connector Cover
6. Wing Retaining Parts and Screws
5
Page 7
FLYCAT
General Assembly
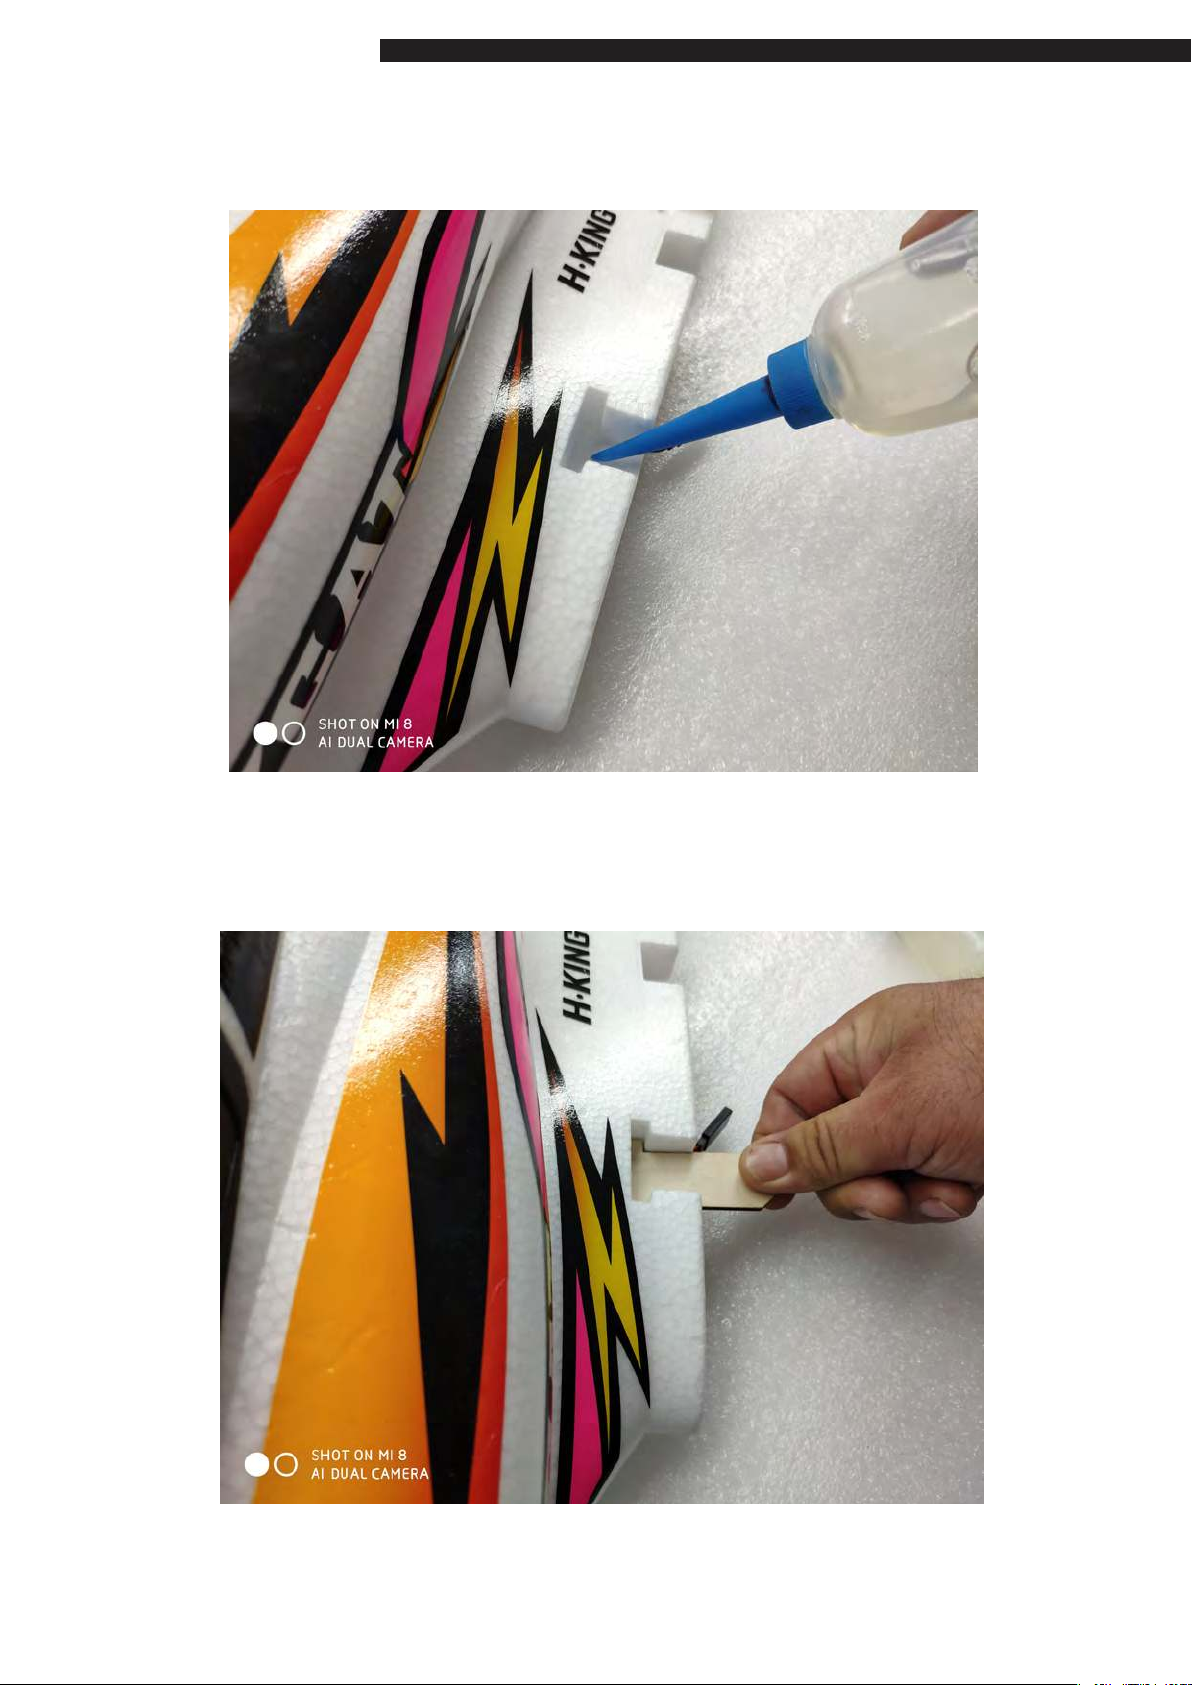
1. Using slow cure CA or a similar glue apply the glue to the area
of the fuselage where one of the plywood wing retaining tongues
is located.
2. Glue into place the plywood tongue as shown.
5
Page 8
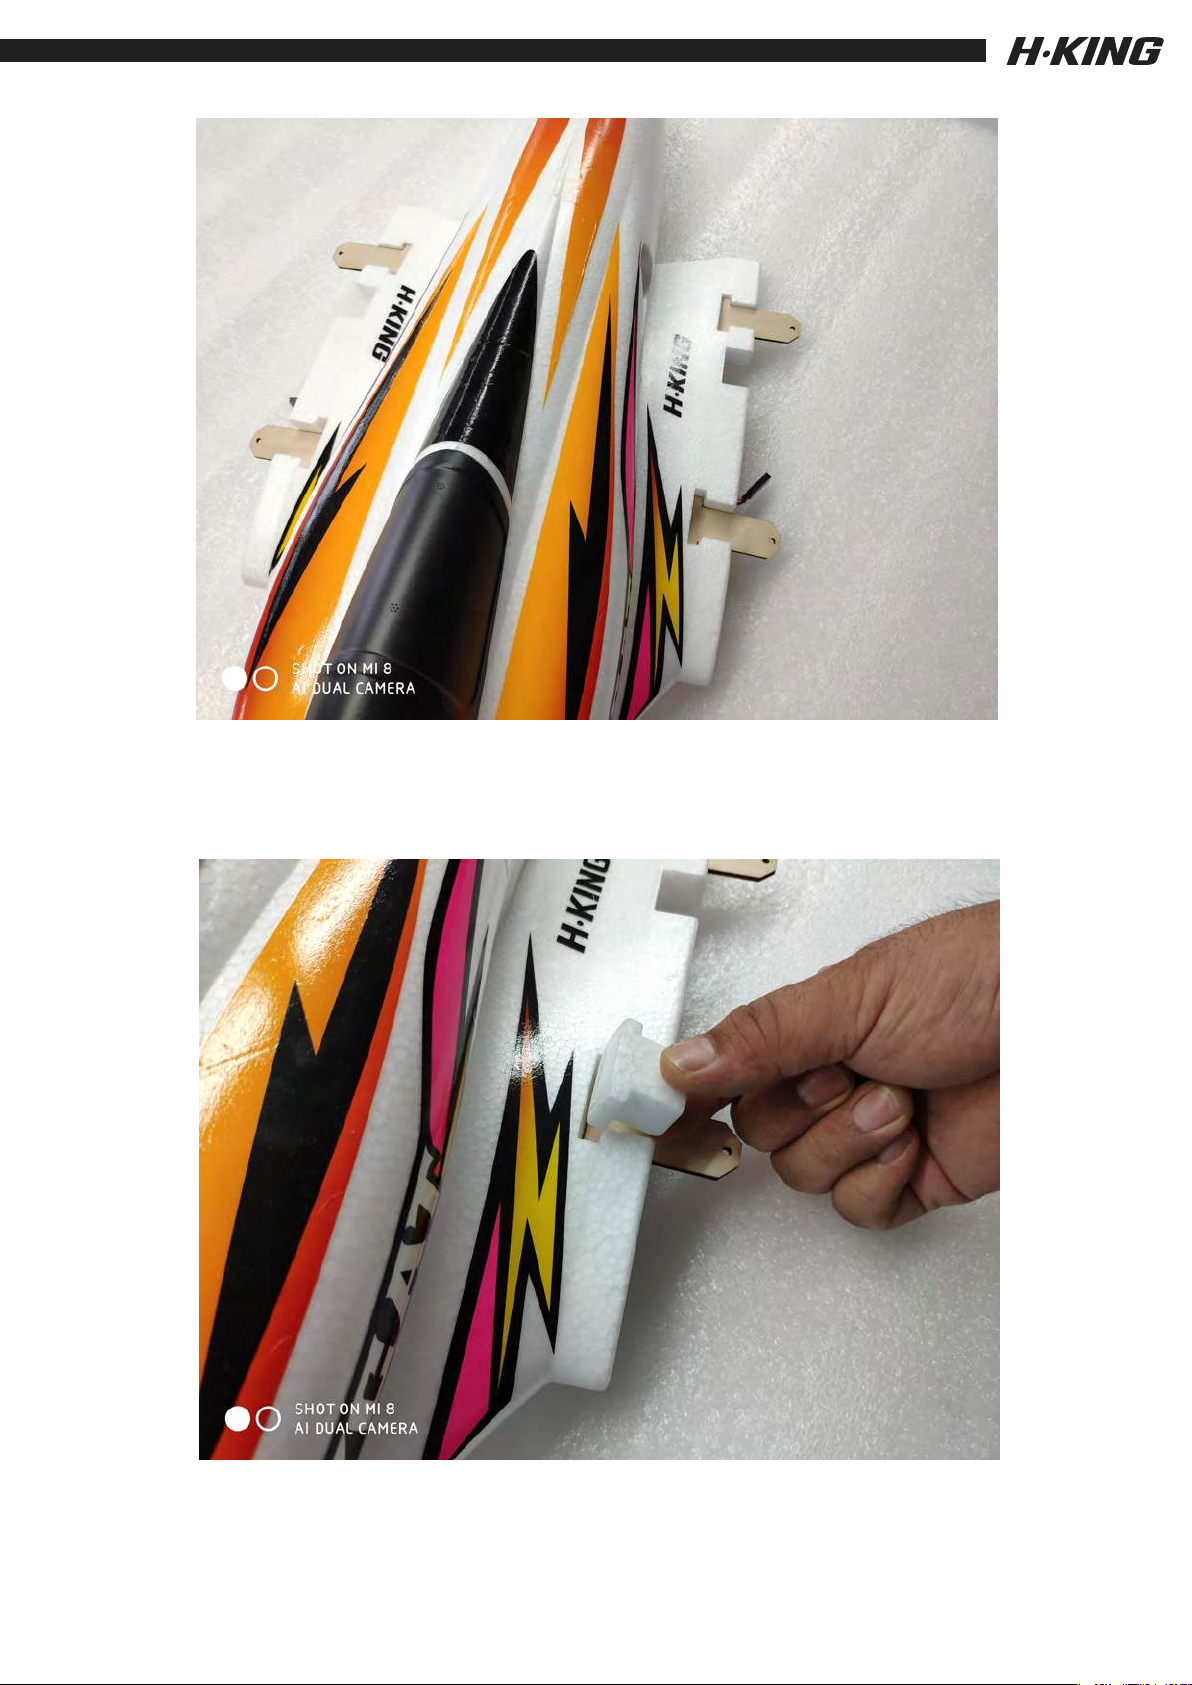
3. Repeat this process with the other 3 plywood tongues.
,
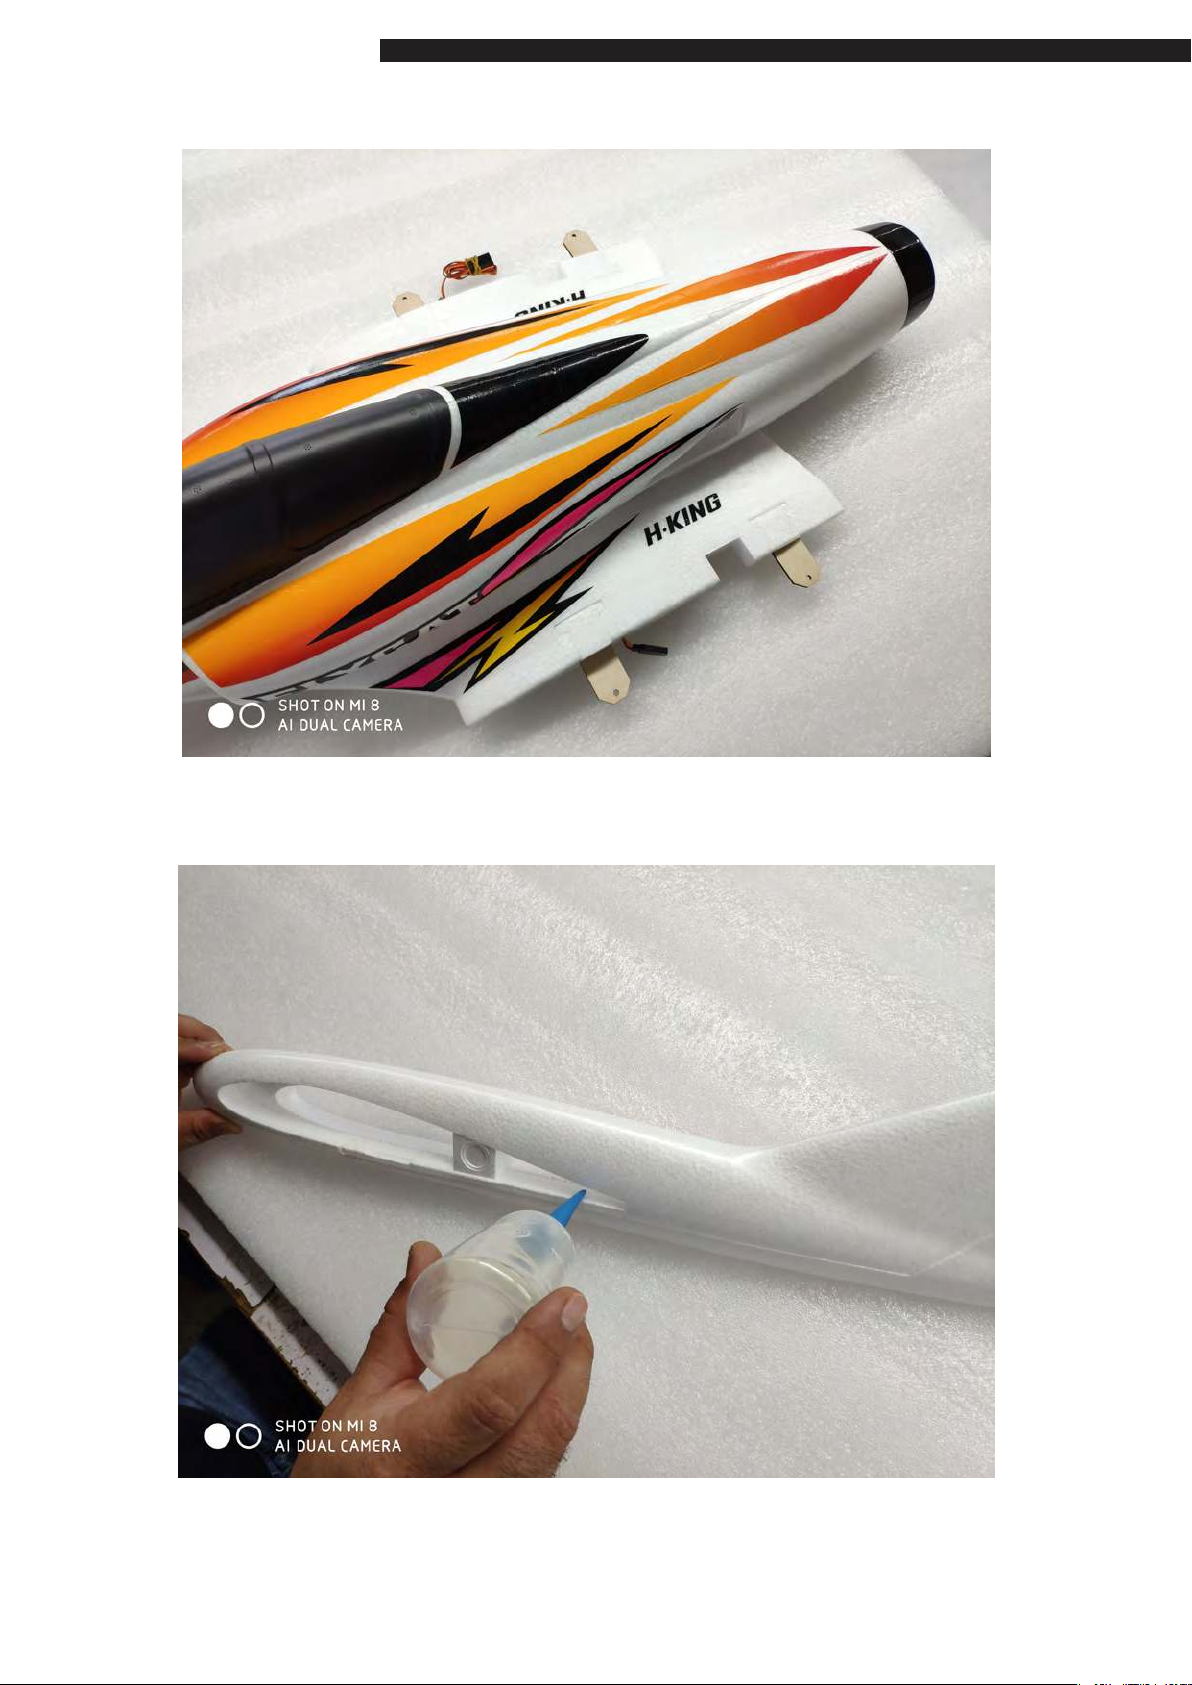
4. Glue into place the 4 foam in fills on top of the plywood
tongues.
6
Page 9
FLYCAT
5. This picture shows all 4 foam in fills in place.
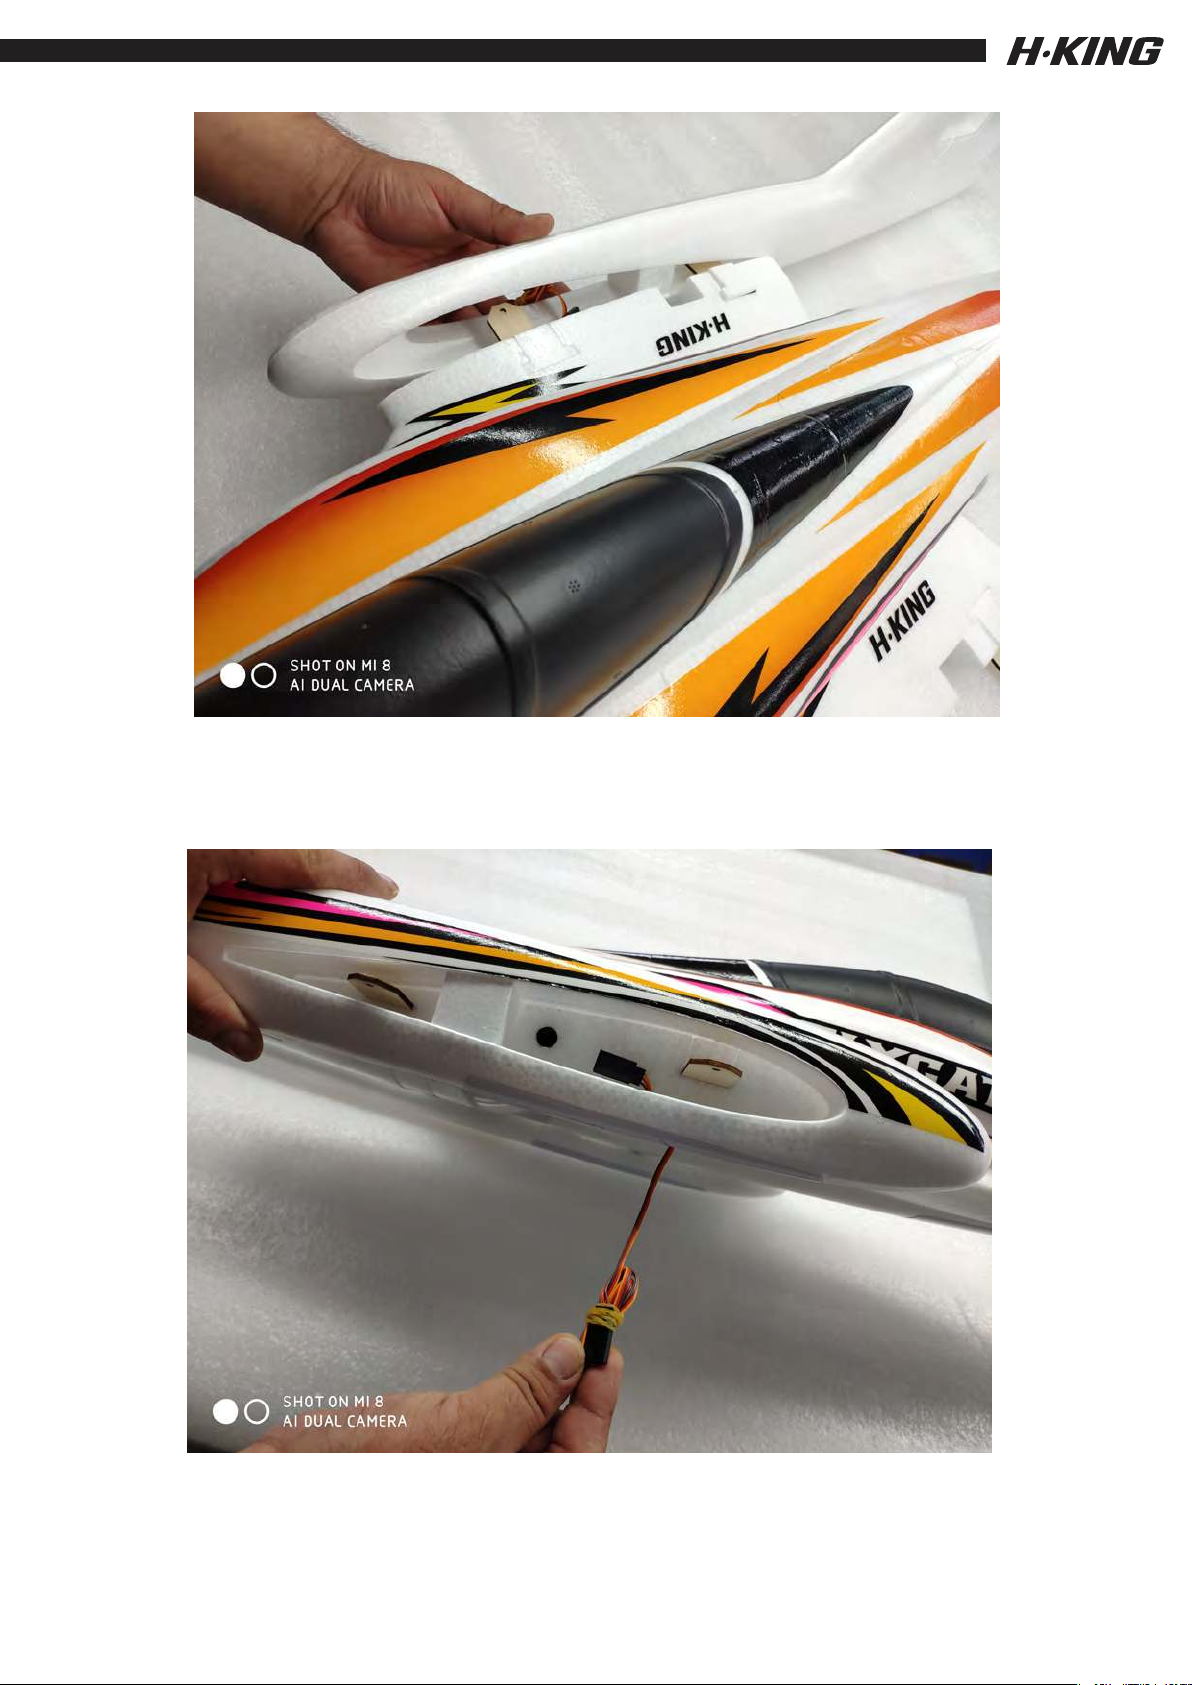
6. Apply some slow setting CA or similar glue into the recess on
fuselage side of the tail boom that does not have the cut out in the fin.
7
Page 10
,
7. Slide the tail boom over the wing root of the fuselage as shown and
glue into place.
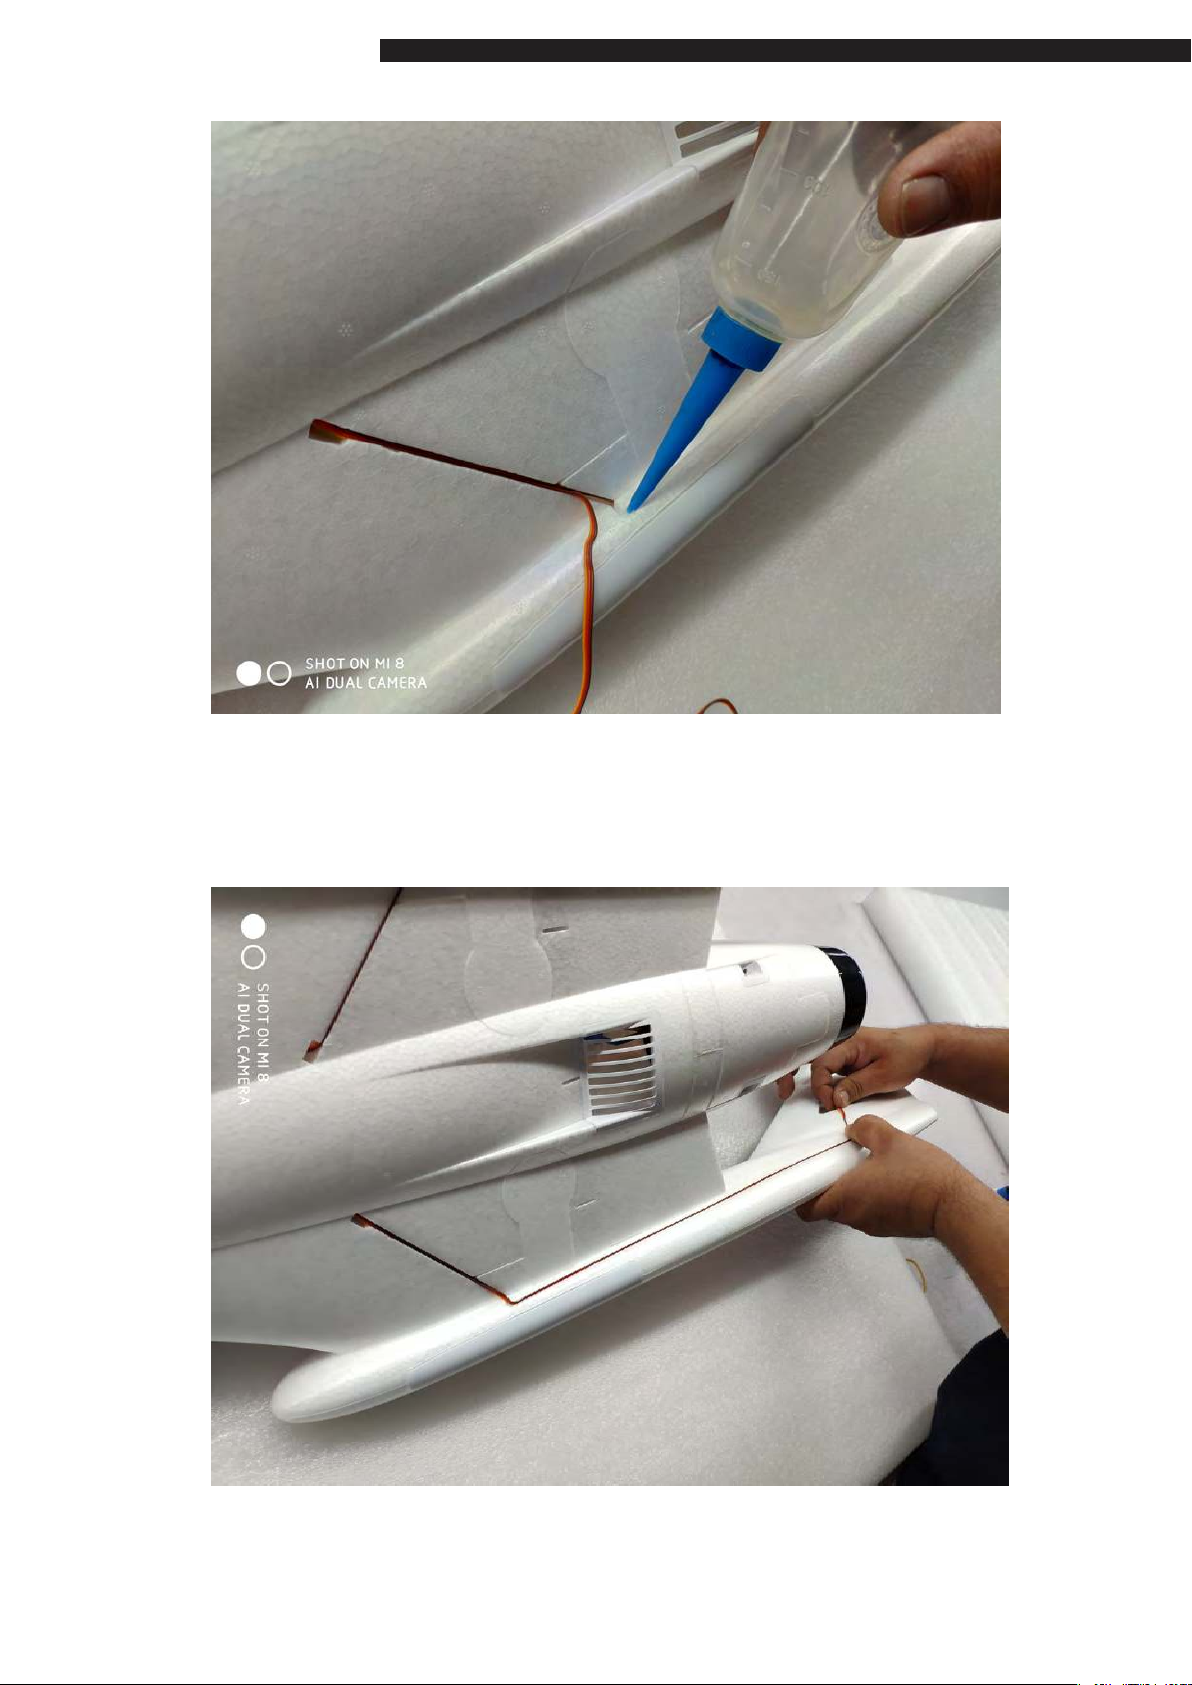
8. Prior to gluing the 2nd tail boom into place ensure you
feed the elevator servo extension lead into the cut out slot
in the boom (see following pictures).
8
Page 11
FLYCAT
9. Apply a small amount of glue into the slot in the wing
root and press the lead into the slot.
10. Do the same along the boom and up to the cut out in the fin.
9
Page 12
FLYCAT
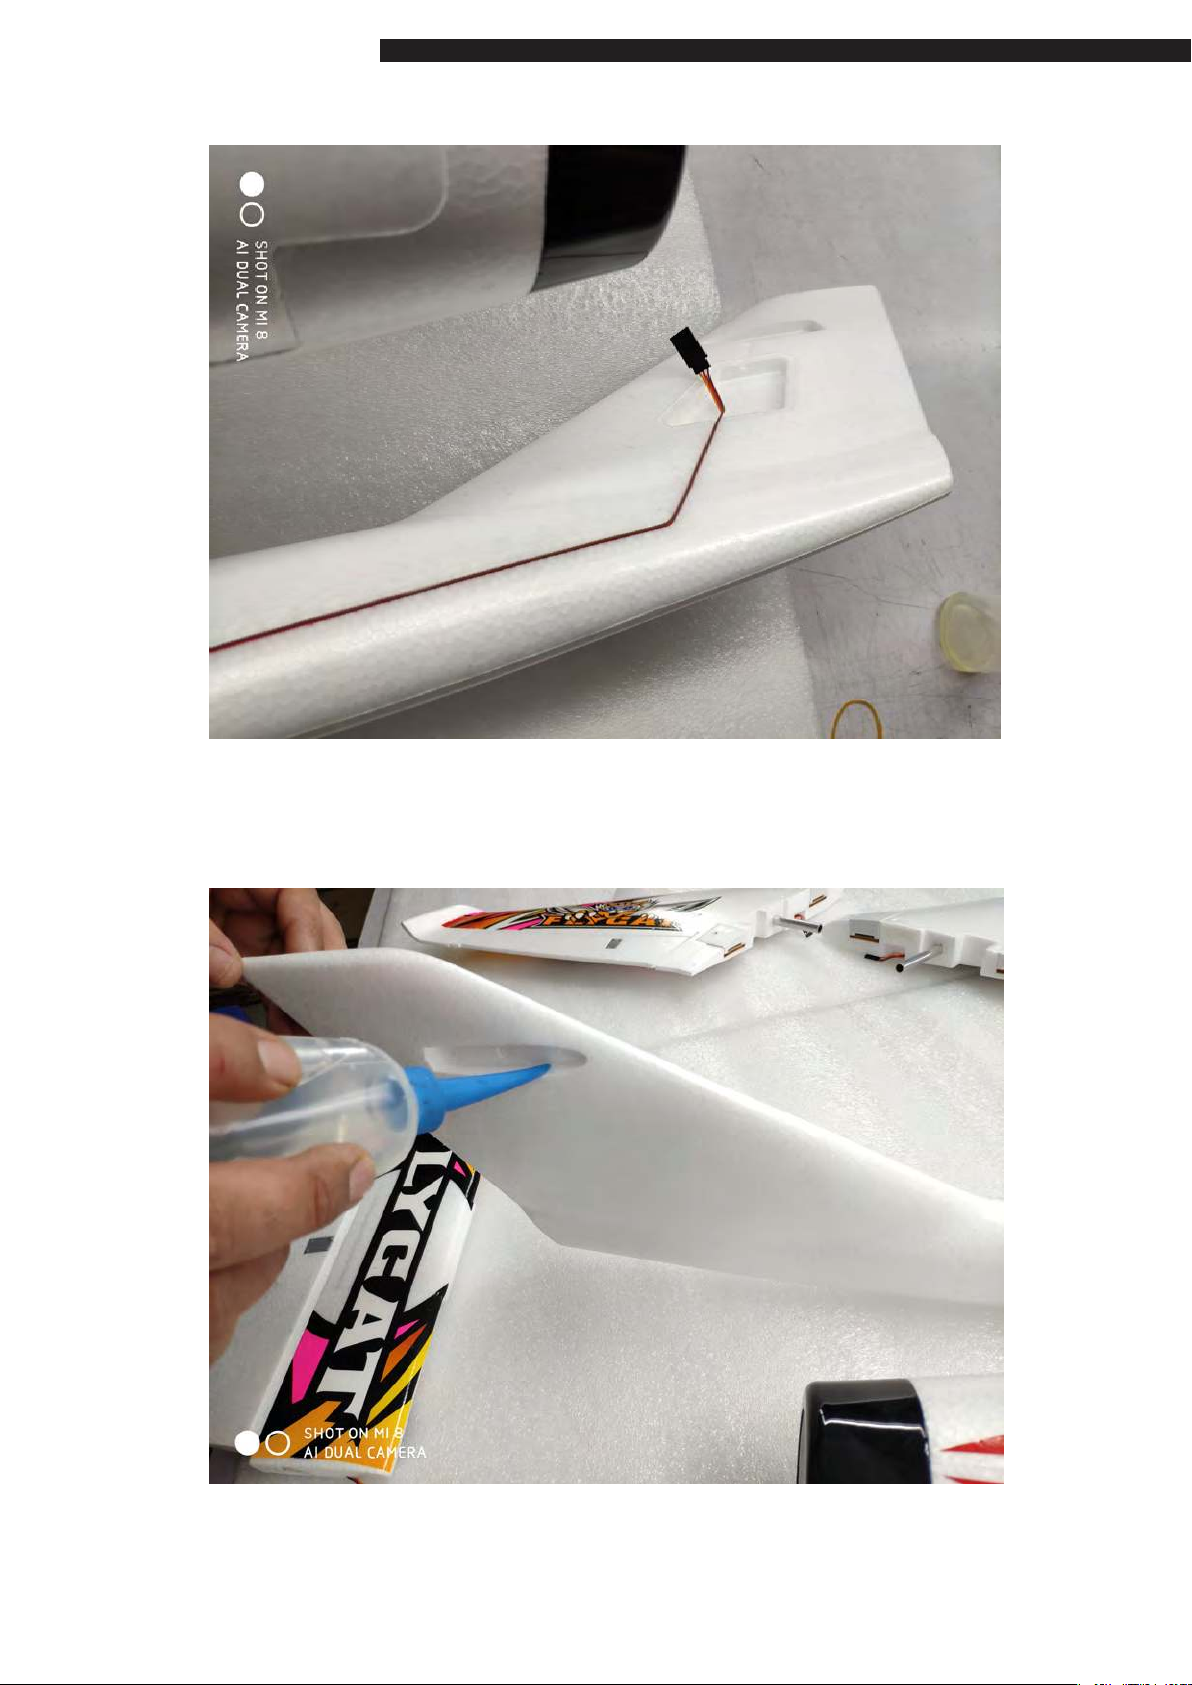
10. Ensure the elevator servo extension lead connector is
positioned in the area of the cut out in the vertical stabilizer.
11. Apply some slow setting CA or similar glue into the recesses
on both vertical stabilizers where the tailplane slots into as shown.
10
Page 13
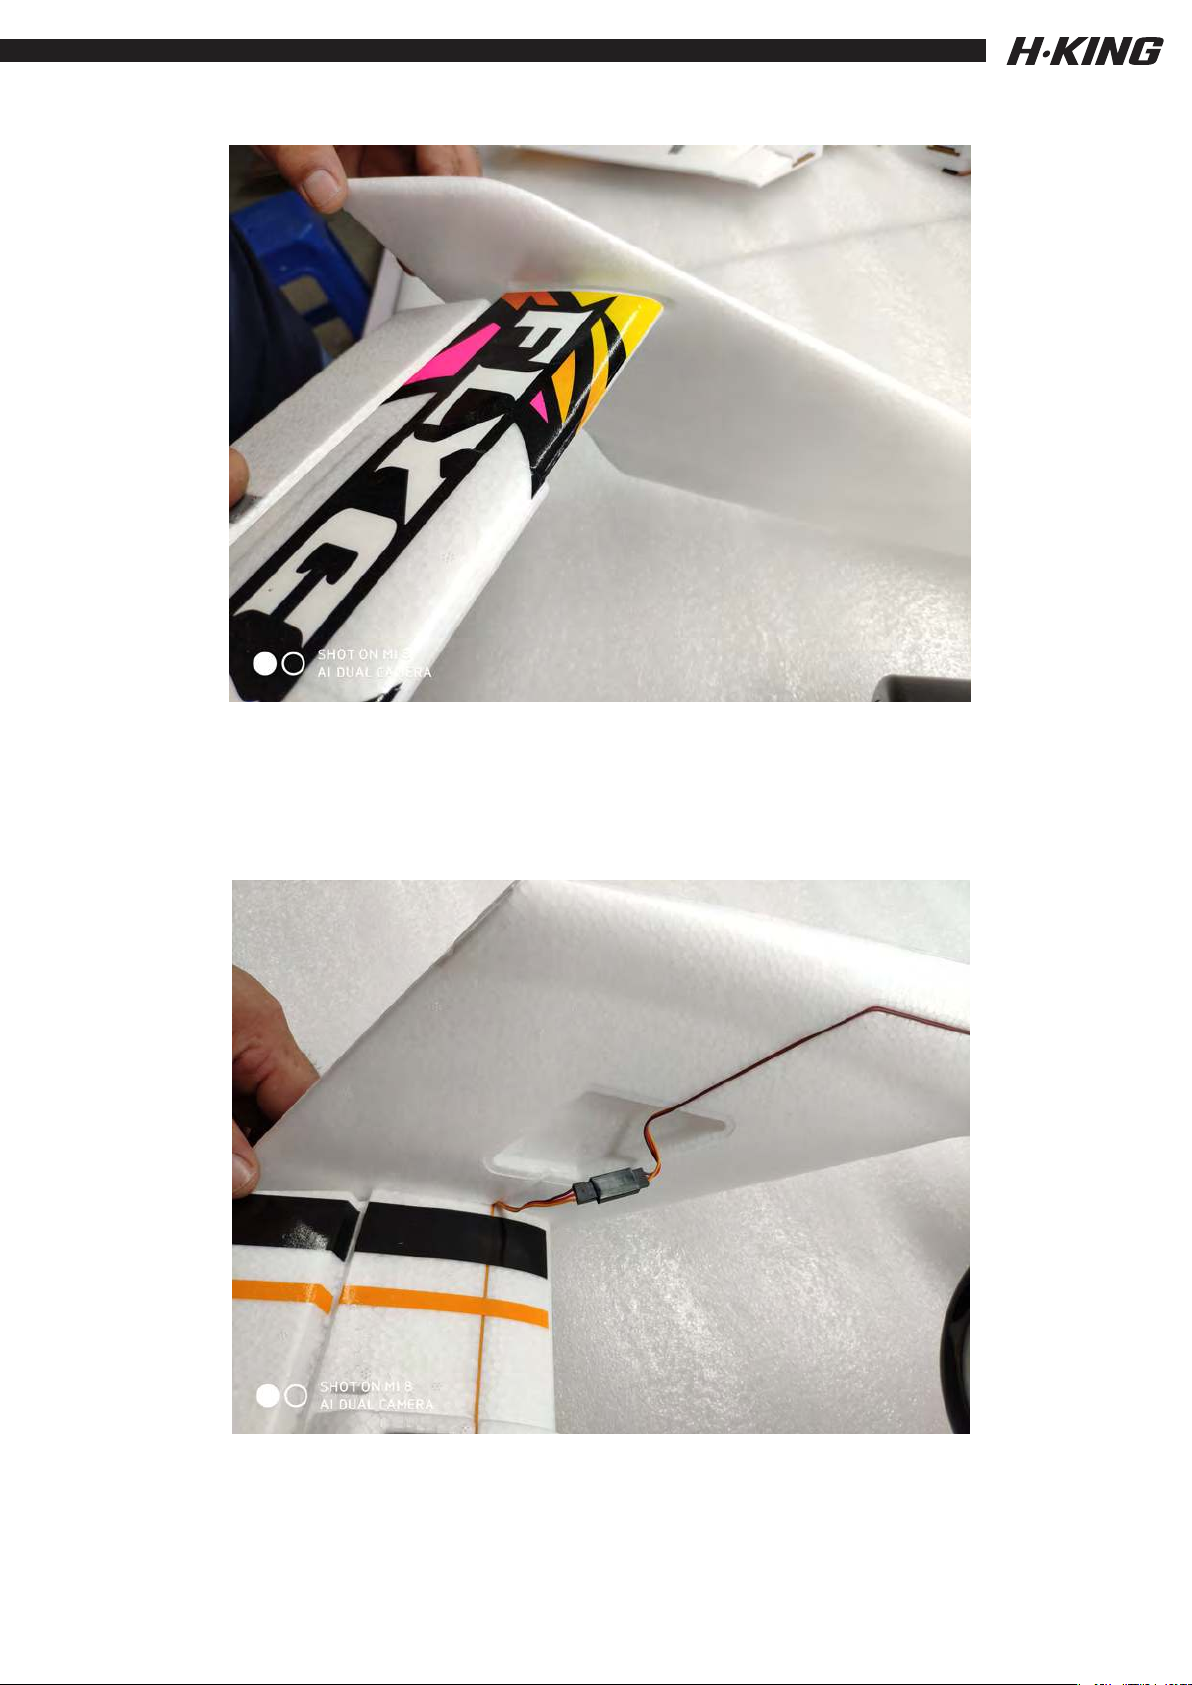
,
12. Slot the tailplane into position and leave for the glue to set.
ensuring the elevator servo lead is positioned correctly as shown
below.
13. Connect the elevator servo lead to the elevator
extension lead.
11
Page 14
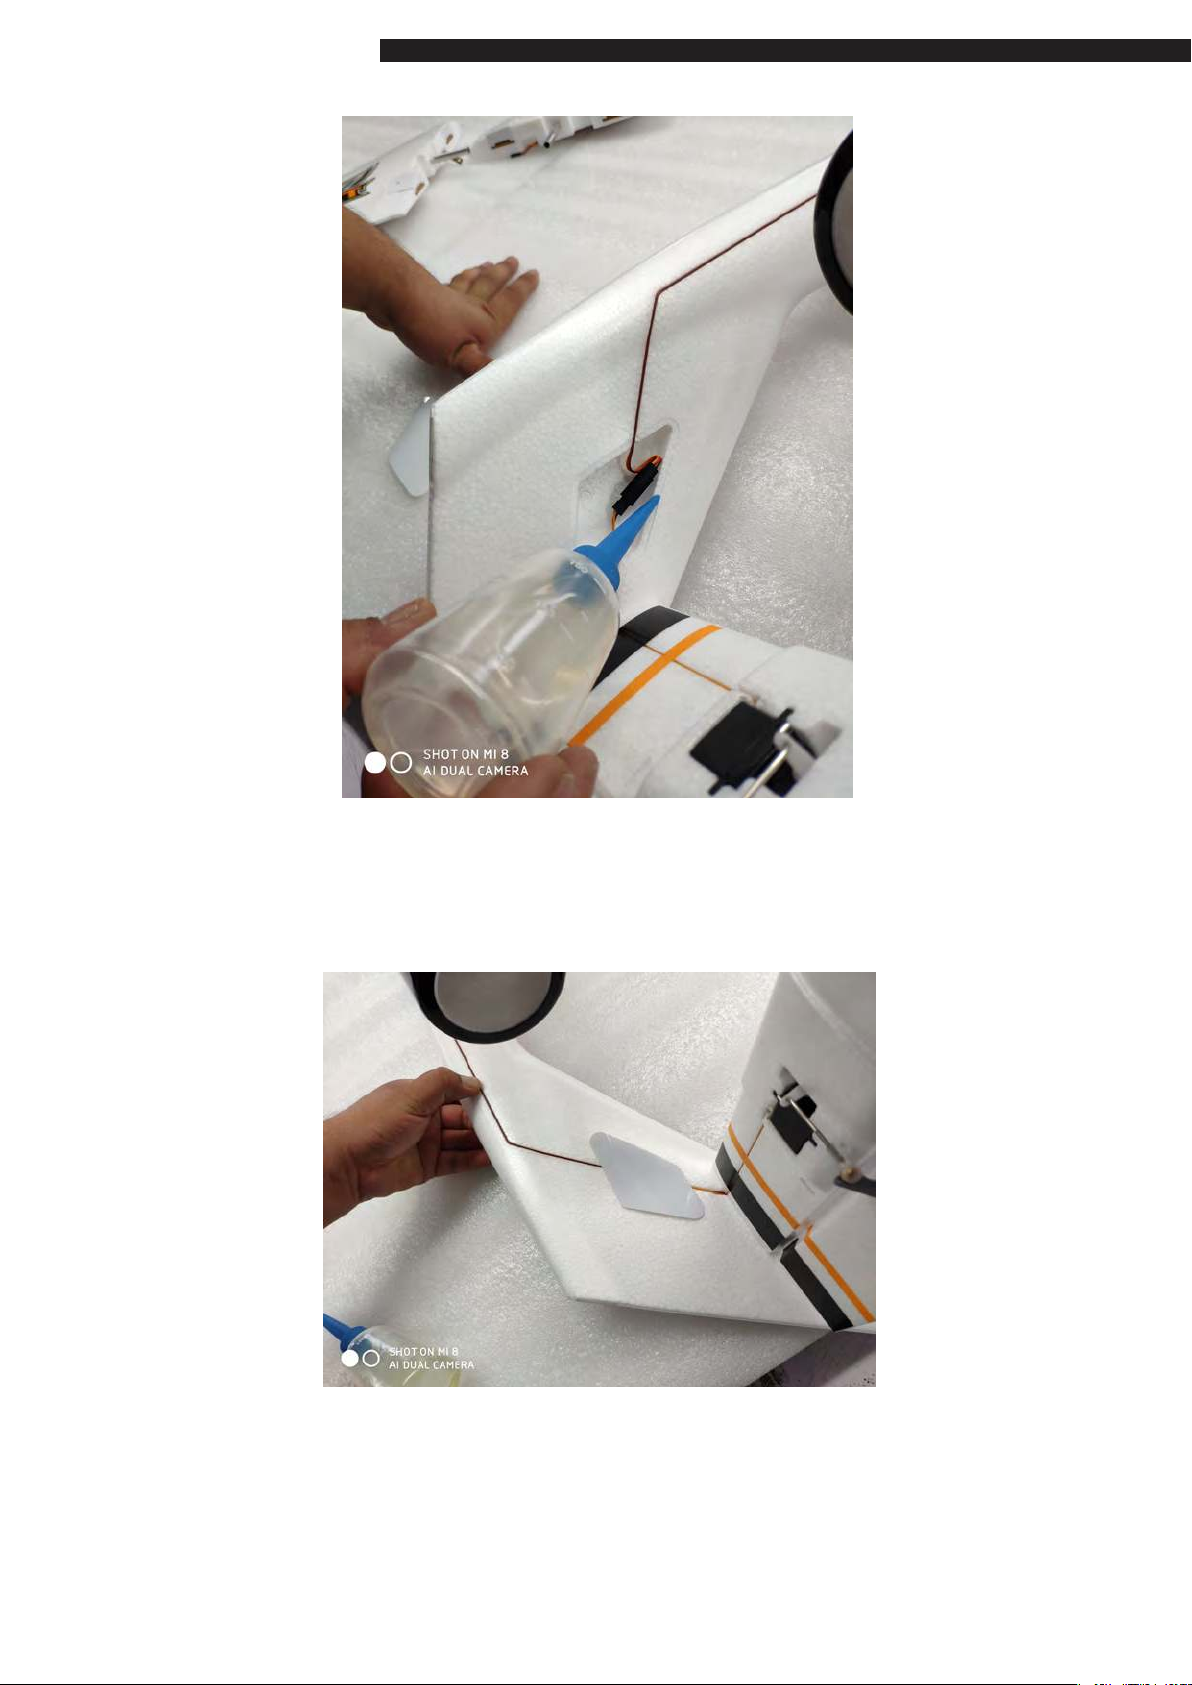
FLYCAT
14. Apply some glue to the recess in the fin for the
servo connector cover.
15. Press the servo connector cover into the recess
and leave for the glue to set.
12
Page 15
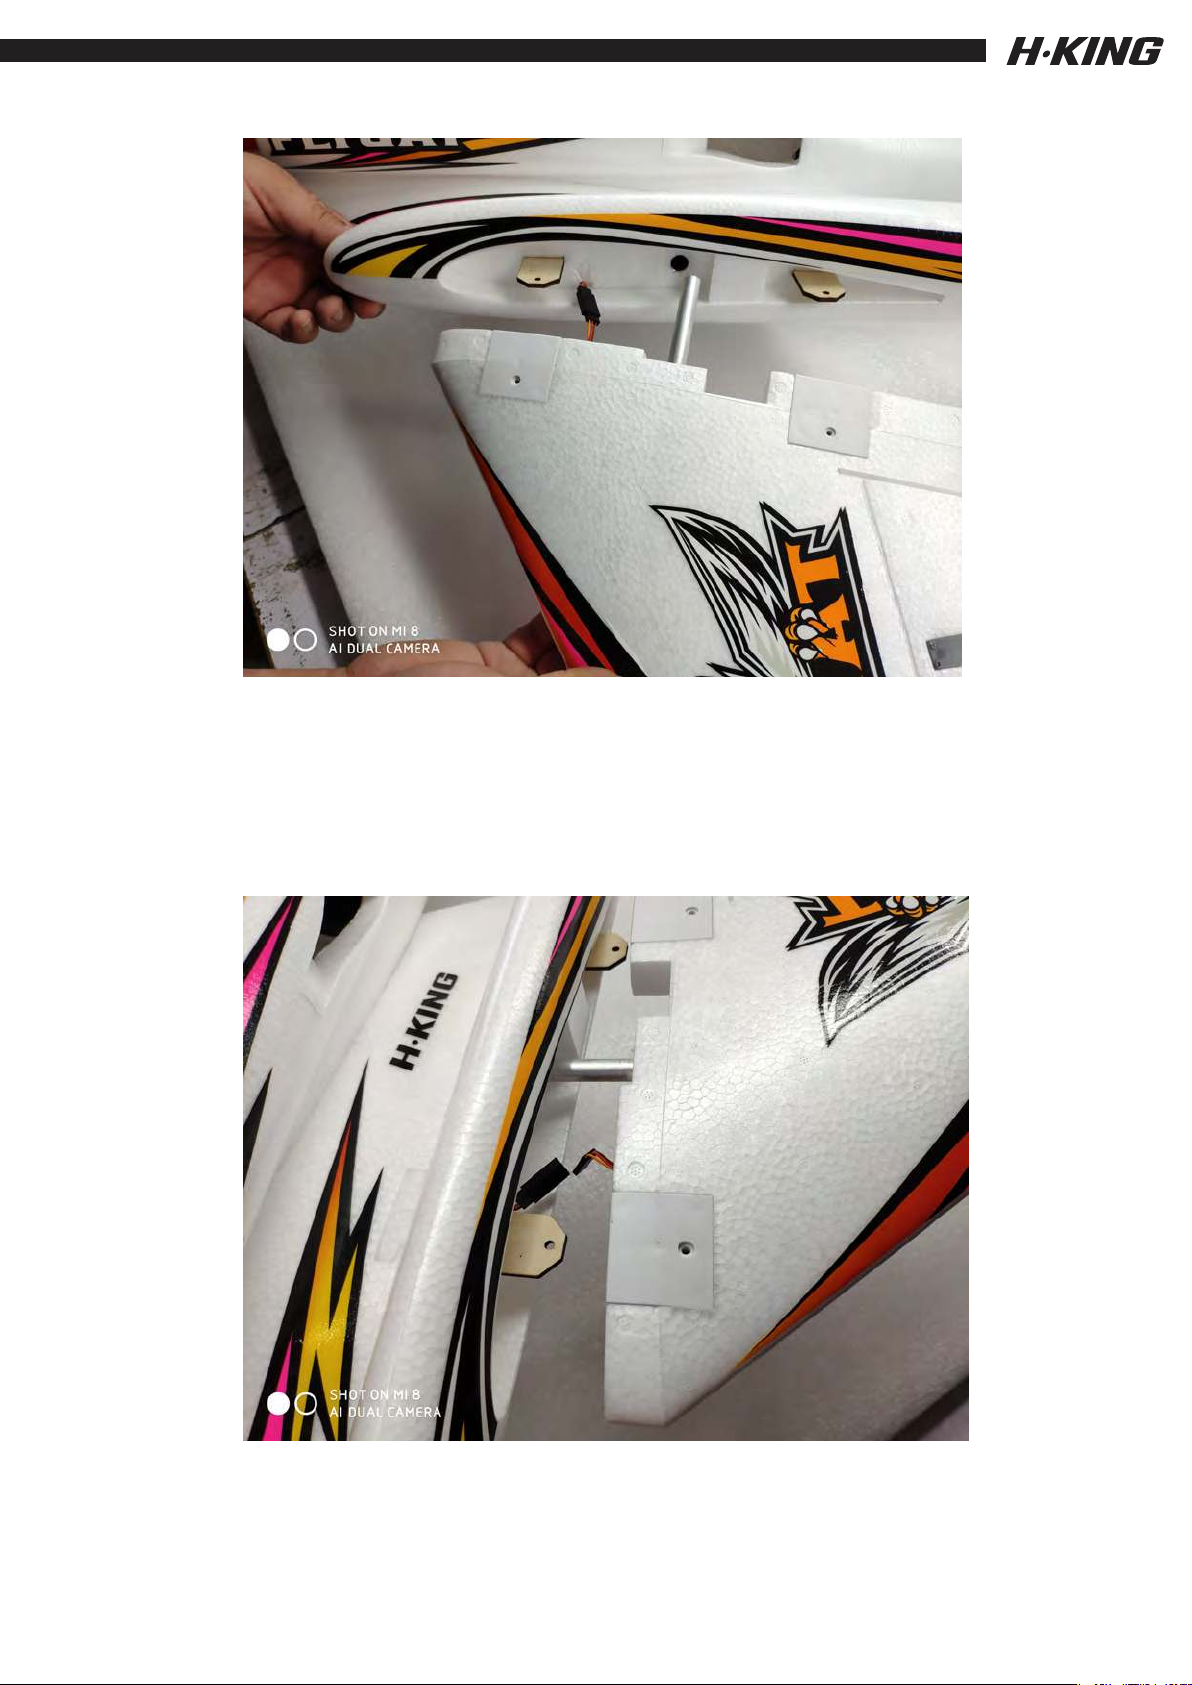
16. Connect the aileron servo extension lead from one
wing panel to the corresponding connector that exits the
wing root in the fuselage/tailboom.
17. Slide the wing tube into the pre-installed tube in
the fuselage/tailboom wing root.
13
Page 16
FLYCAT
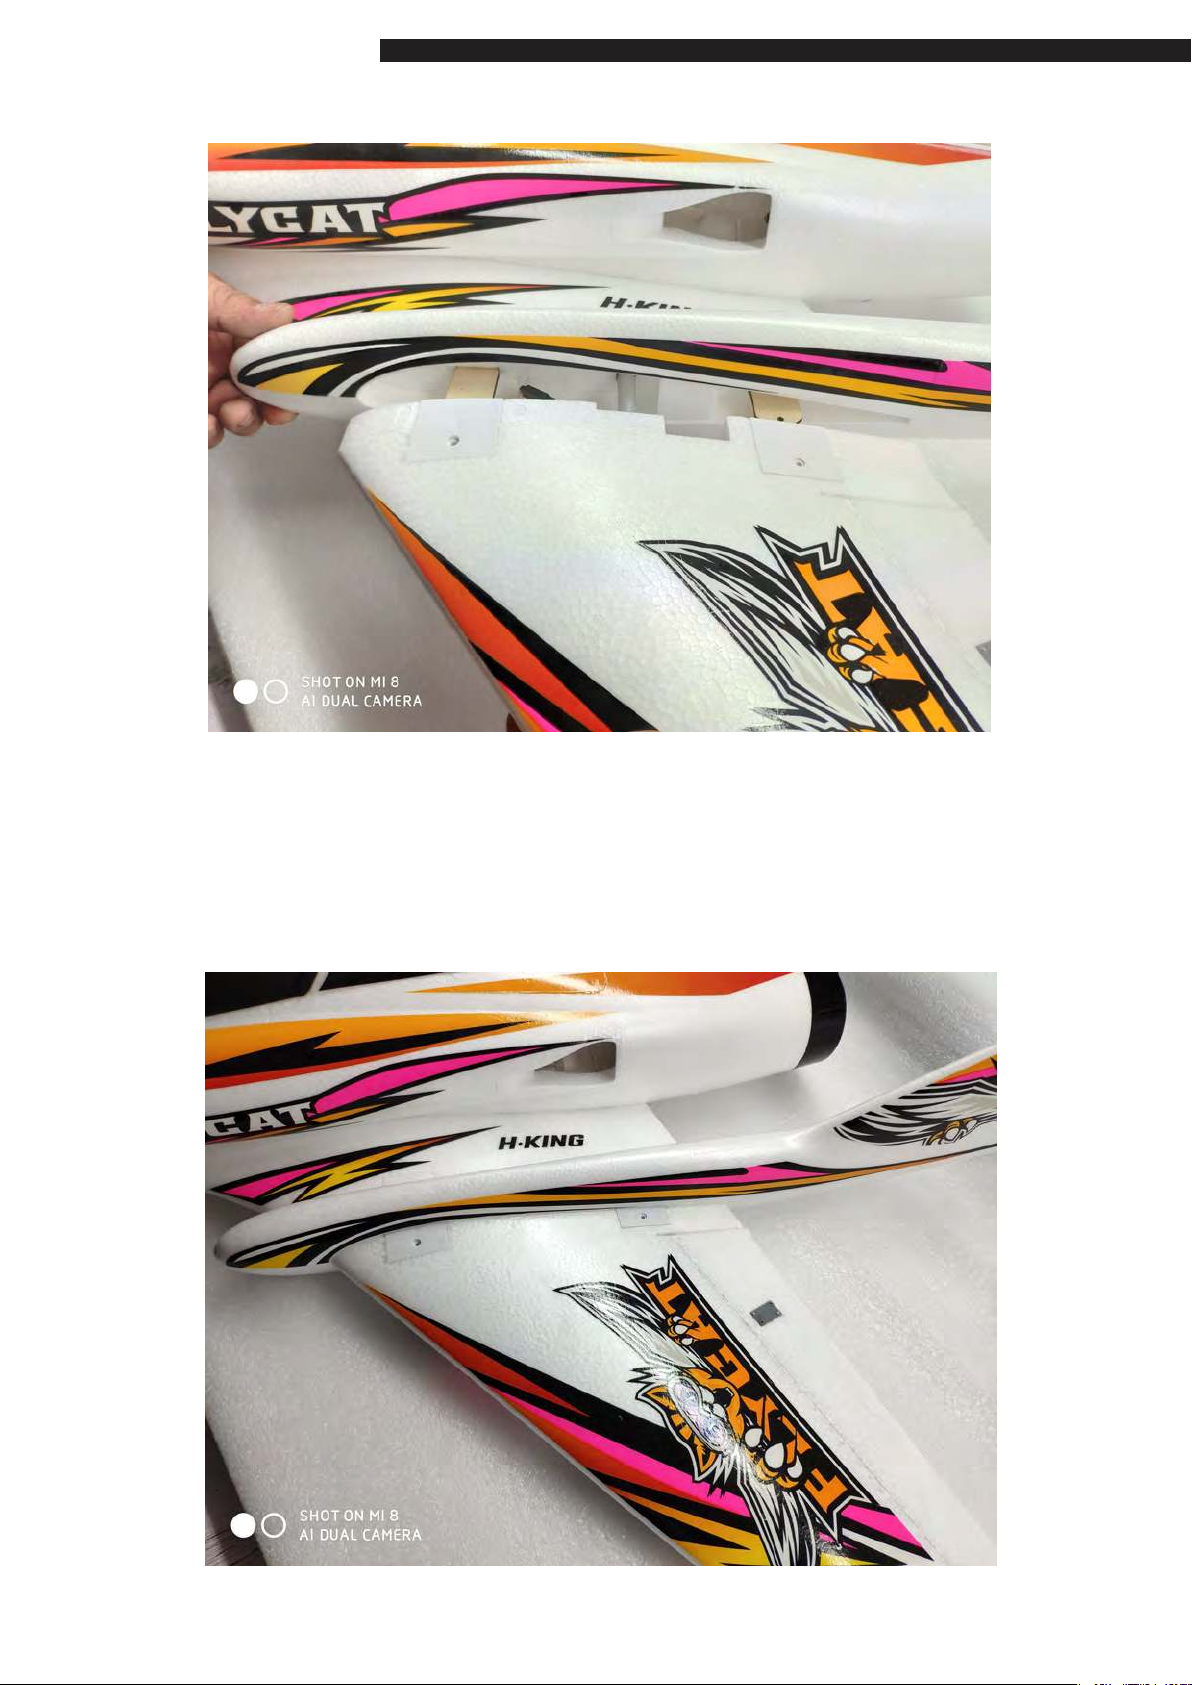
18. Slide the wing assembly fully home onto the plywood
tongues until the fixing screw holes align (see below picture).
14
Page 17
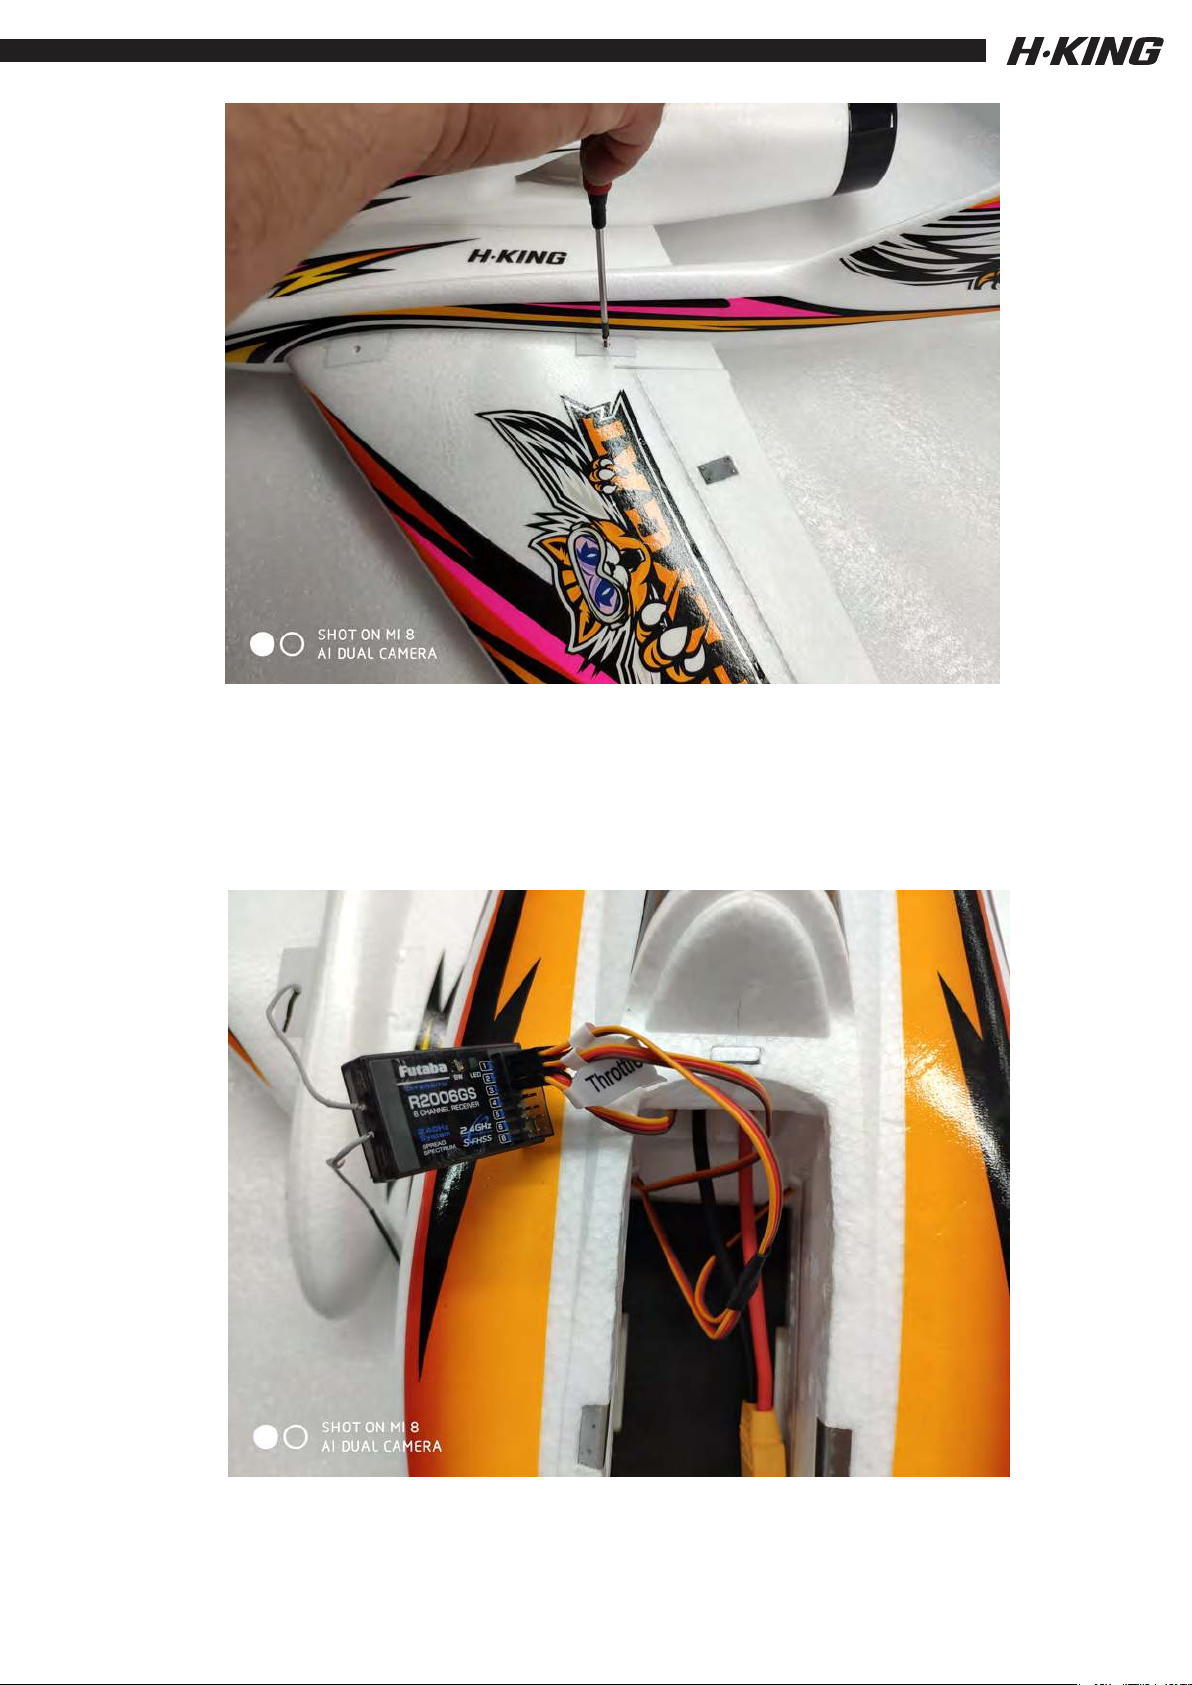
19. Screw the supplied PK screws through the plastic
wing fixings and into the plywood tongue. Repeat this
whole operation with the other wing.
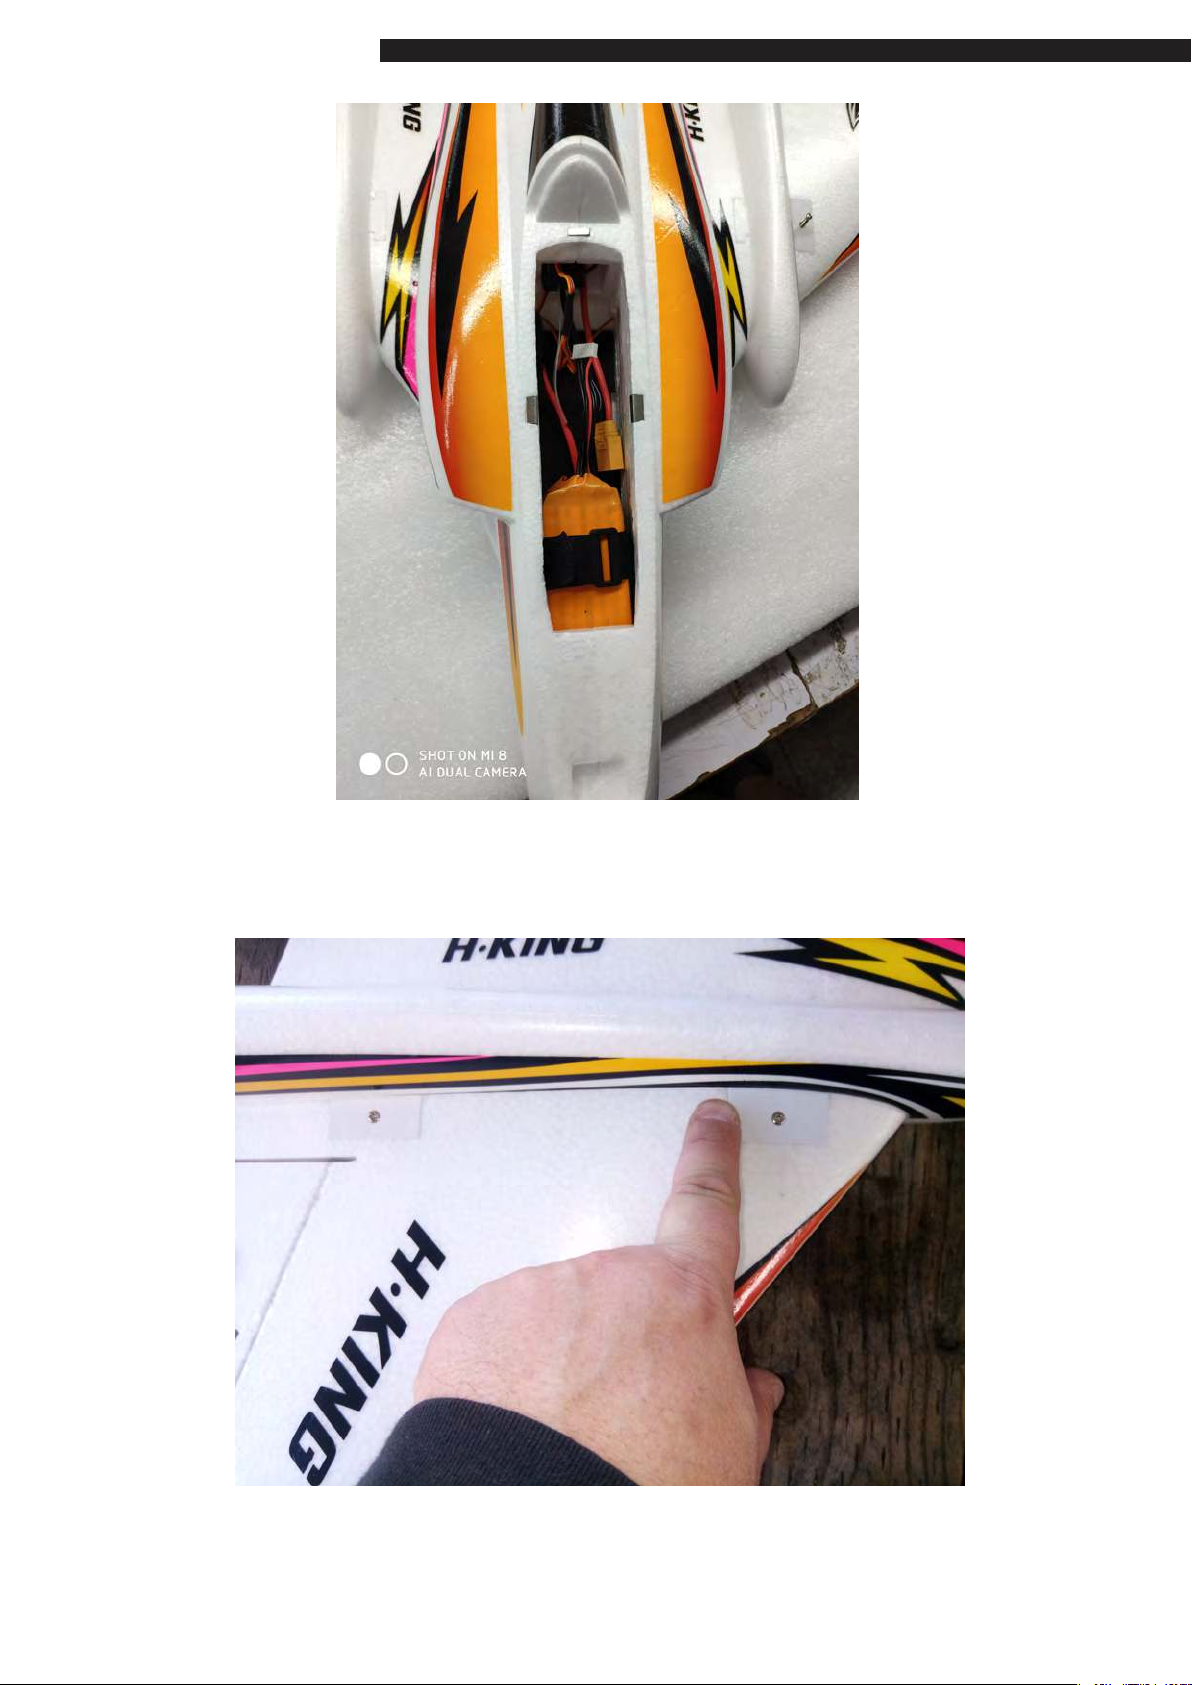
20. Install your chosen receiver and tuck it into the
recess at the rear of the battery compartment.
15
Page 18
FLYCAT
21. Install a 6S 3000mah lipoly battery into the
battery compartment
C of G should be 510mm ± 5mm from the nose of the
Flycat. As shown this position is in the vicinity of the
rear of the front wing fixing.
16
Page 19
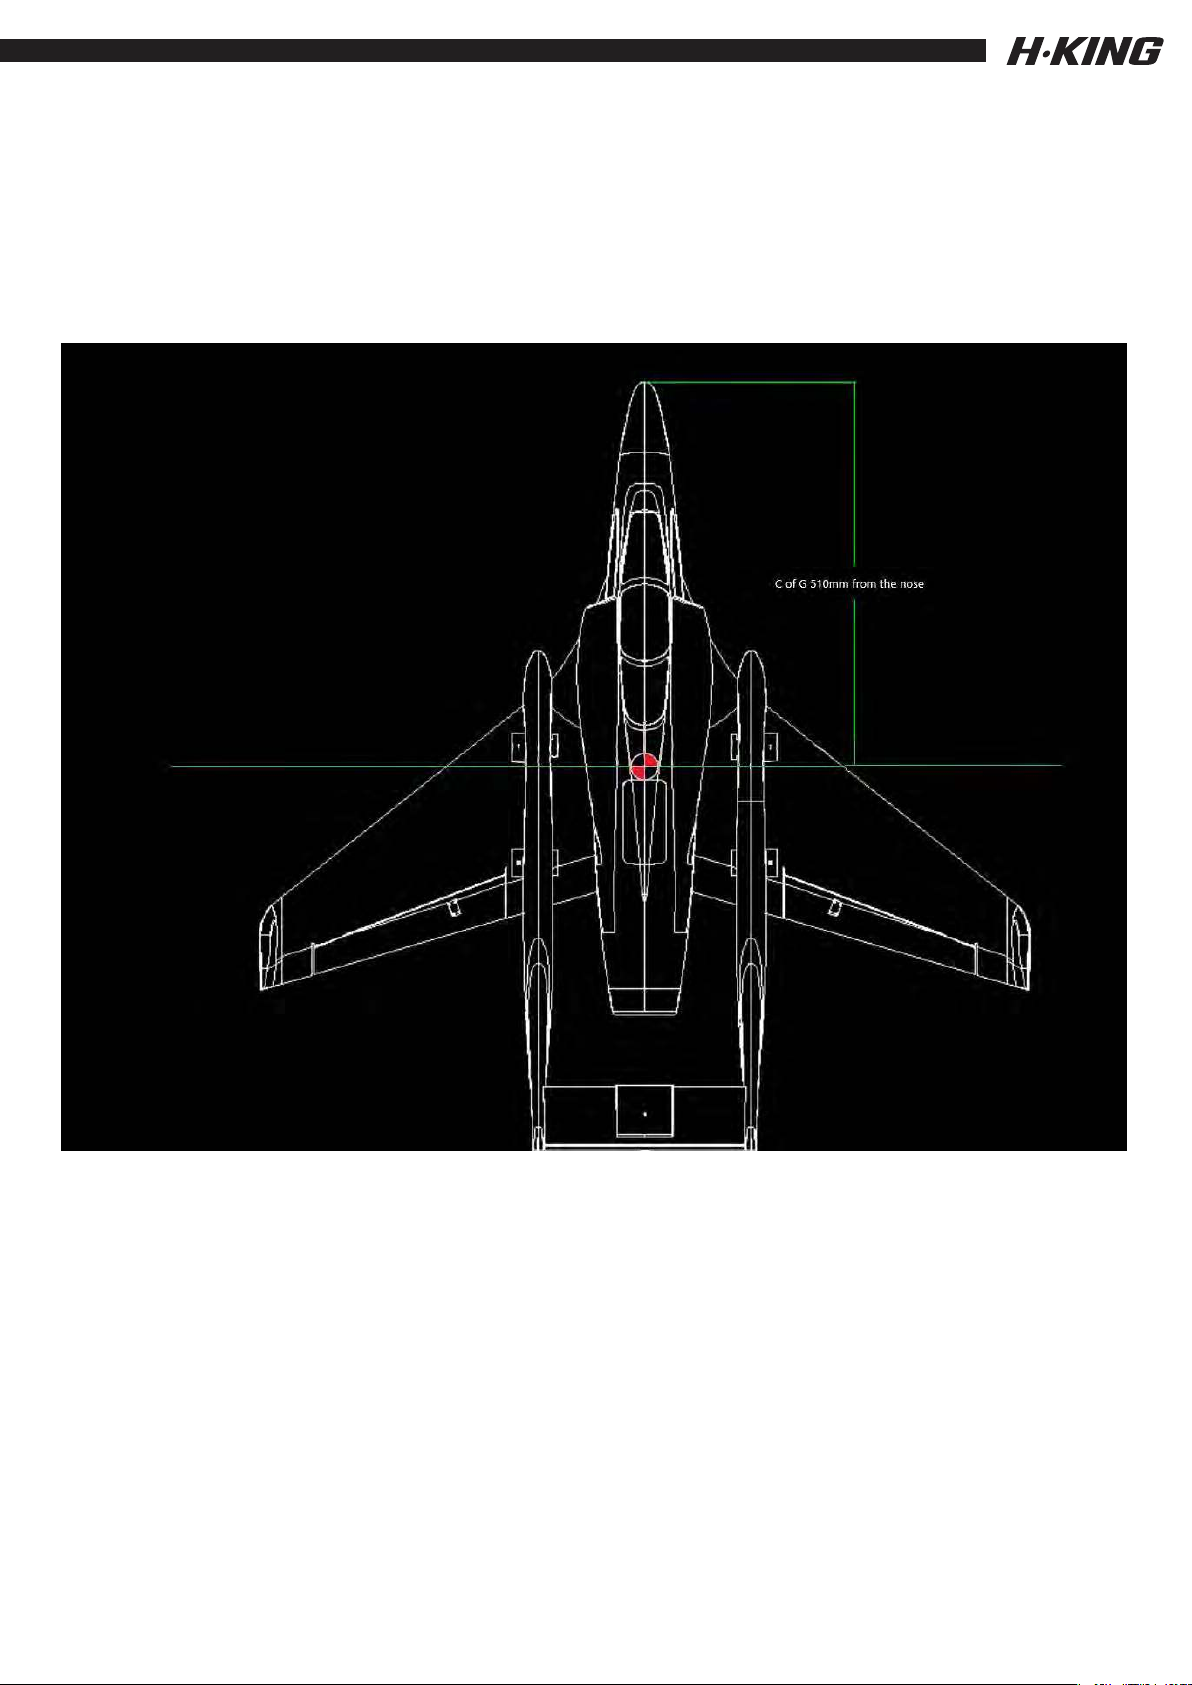
C of G Position
Adjust the position of the battery to achieve
the correct balance
---------------------------------------------------------------------------------
The following pictures show the
recommended set-up.
17
Page 20
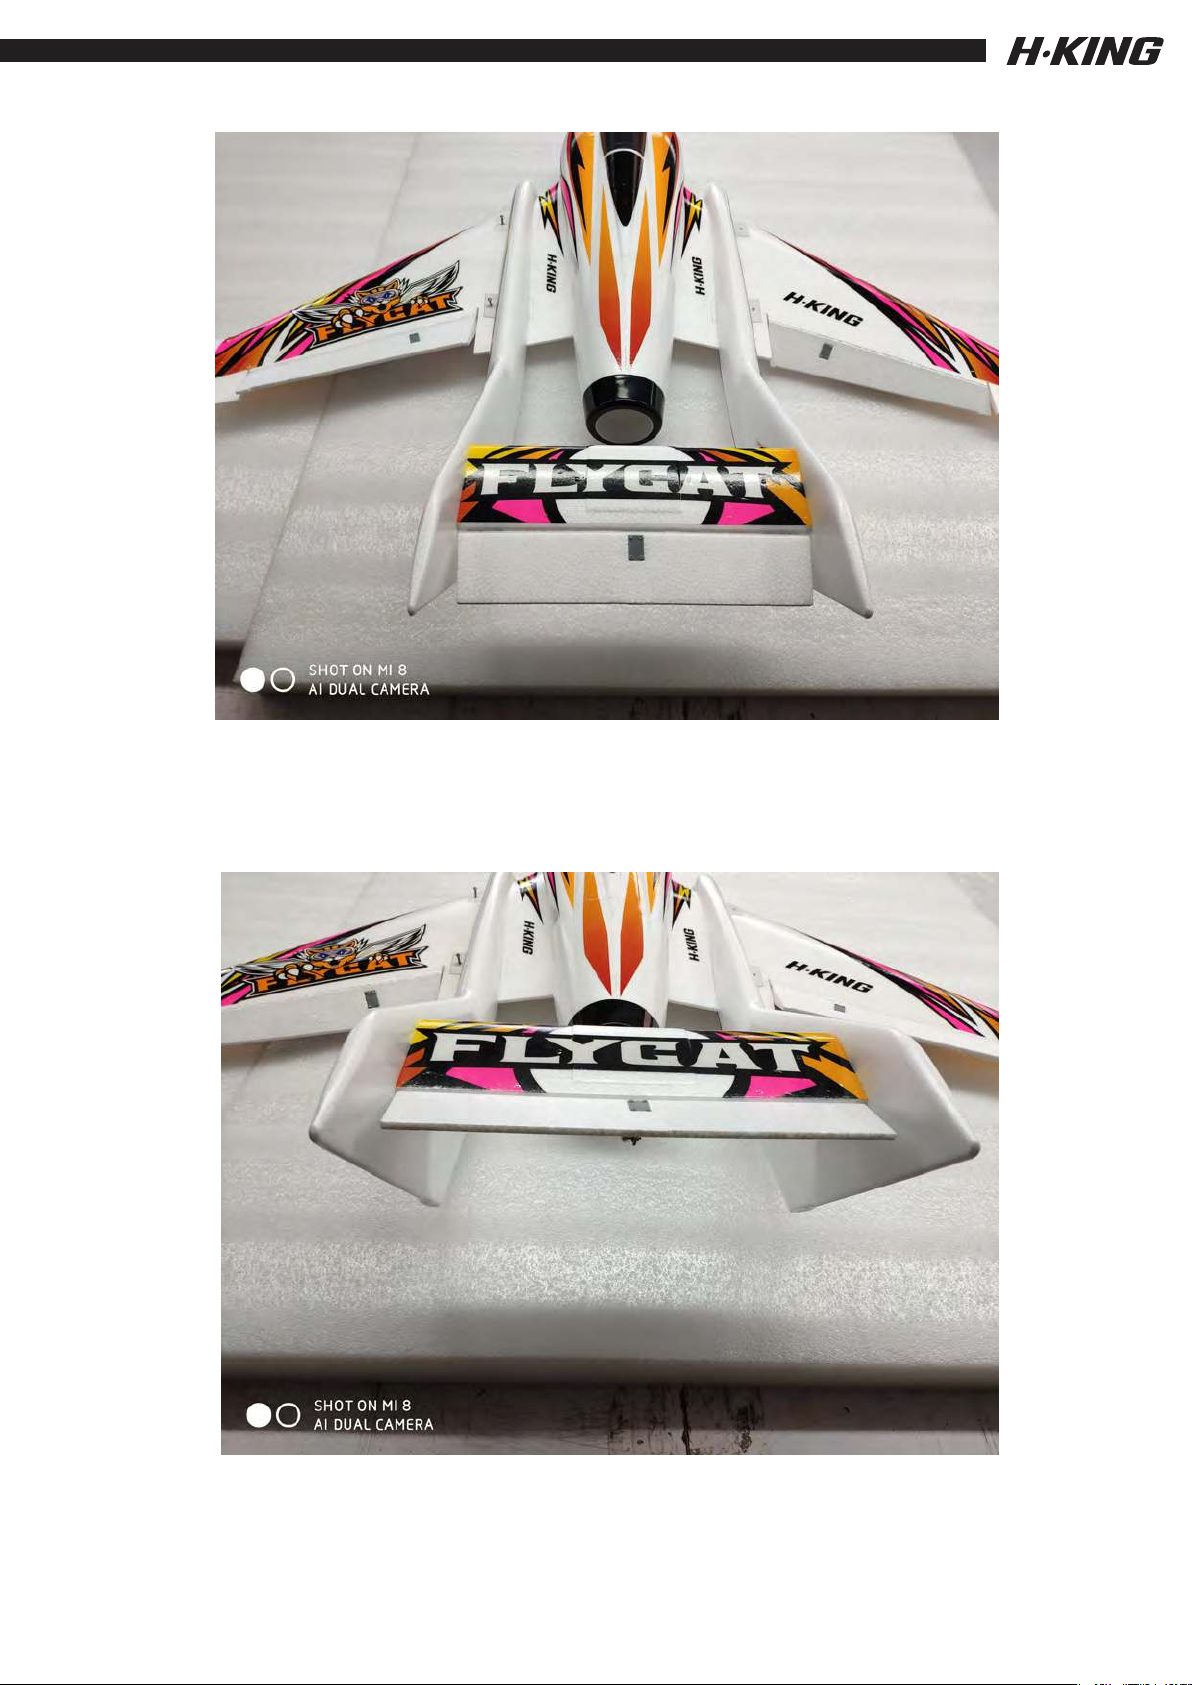
22. Set the aileron travel to 15mm each way and we
recommend you use between 20~30% exponential travel.
23. Set the elevator travel to 30mm each way and we
recommend you use between 20~30% exponential
travel.
18
Page 21
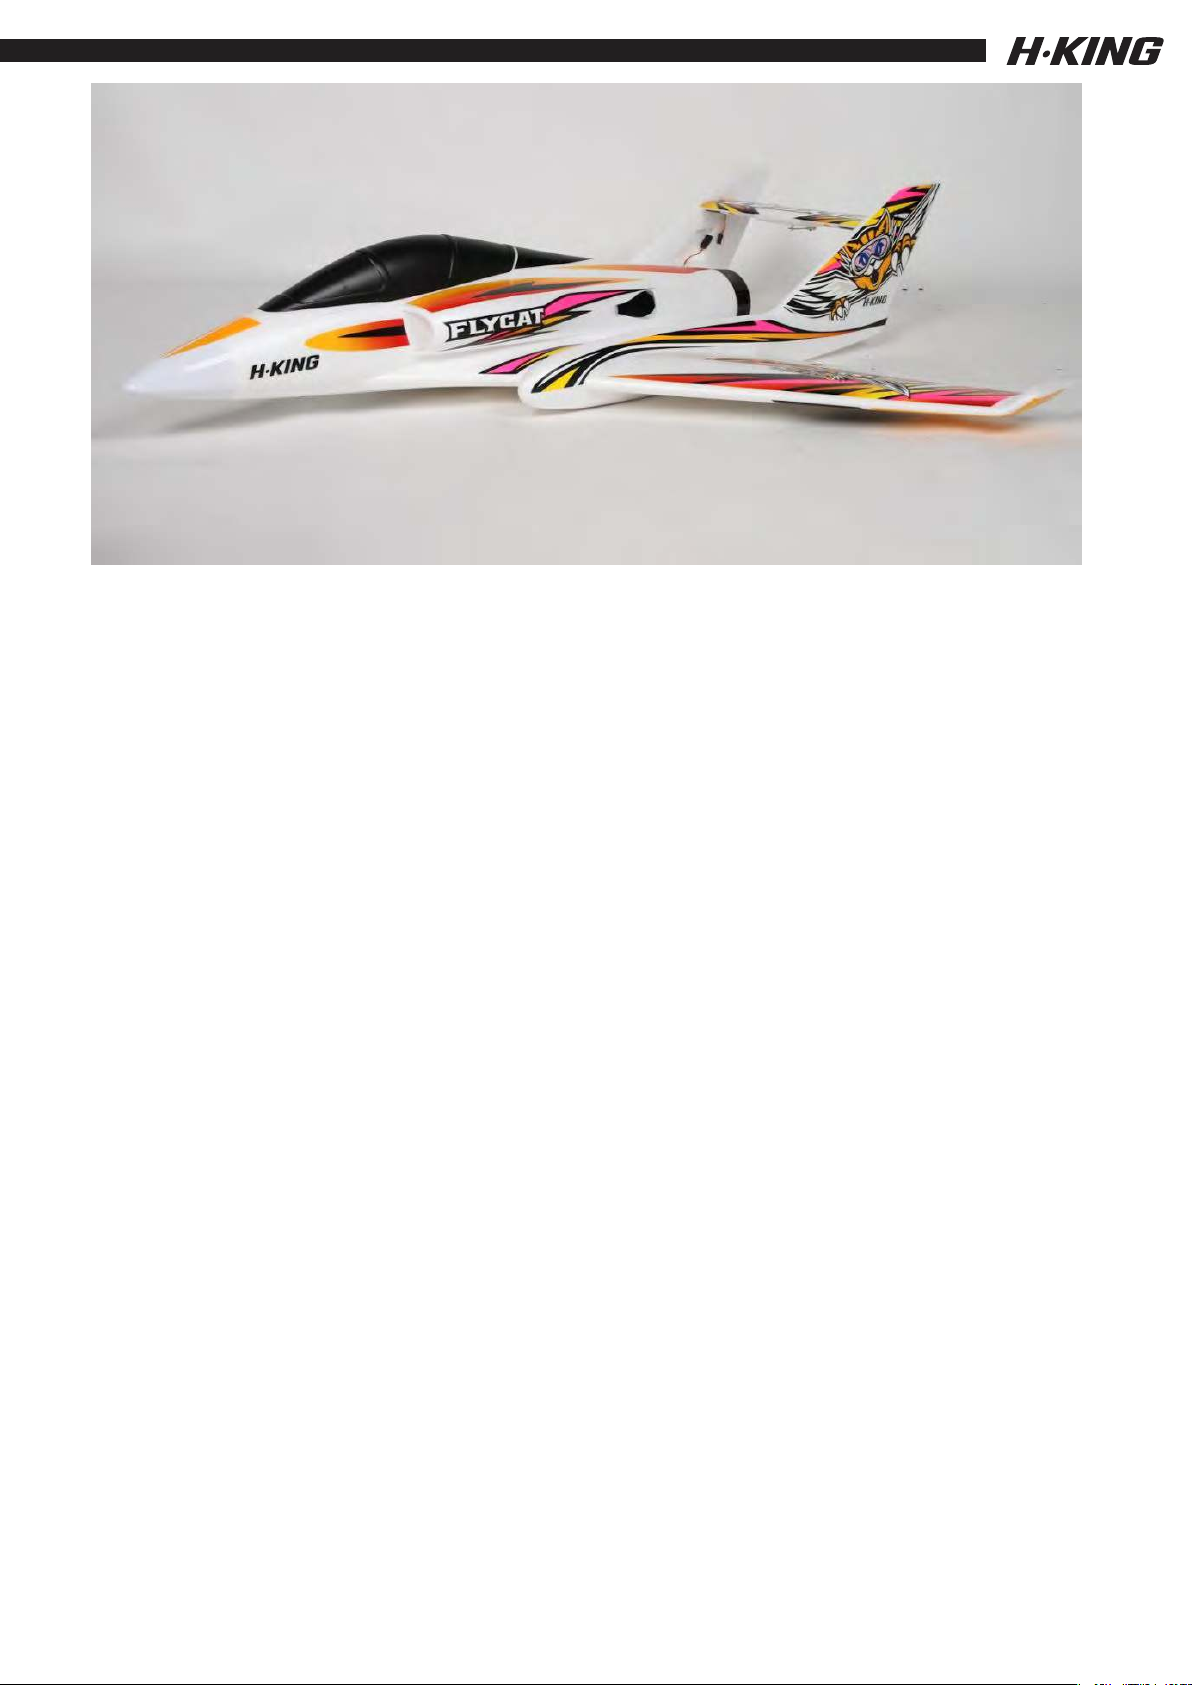
Your FLYCAT should now be ready to fly
Flying Tips.
Before you fly please check your controls and make sure you double
check!
Left aileron, the left aileron should go up, right aileron, the right aileron
should go up, back stick and the elevator should go up, forward stick
the elevator should go down. Double check that the model balances on
the C of G correctly, it should balance at the 510mm ± 5mm mark in a
slight nose down attitude..
Now you’re ready to for your first flight, please make sure you do a
range check of your radio equipment first.
The H-King Flycat is a hand launched RC airplane, If you are unsure of
hand launching your plane then please find someone who can assist
with launch. Hold the model underneath and about head high, facing into
wind, check the controls once again then smoothly open the power up to
full. Give the model a good level throw and allow the nose to drop just
slightly so that the plane builds up speed. Being a ducted fan you do not
get the prop wash as you do with a propeller driven plane so you do
require airspeed before you initiate a climb.
Once airborne and safely in the climb carry on to a safe altitude to
adjust your trim to get the Flycat Flying straight and level on about ¾
throttle. If your plane is not flying correctly land and adjust your radio
or the Flycat's linkages where necessary.
Once you have your Flycat flying well it will perform as if it is on rails,
it's fast, smooth and manoeuvrable. You will be able to fly all the usual
jet like aerobatics with ease and it looks really great in the sky.
When it comes to landing line up your plane with the landing area
(hopefully a flat grassed area) using your elevator to control pitch and
speed, throttle to control descent and ailerons to keep the wings level
simply glide the Flycat home. As it's name, it's a real pussycat and will
float into land very easily due to it's low stalling speed.
Your maiden and the sweating is now over, recharge your batteries and
really have fun with the Flycat, your fellow flyers when they see it go
will all want one, hope you have fun with this amazing RC plane from HKing.
19
Page 22
FLYCAT
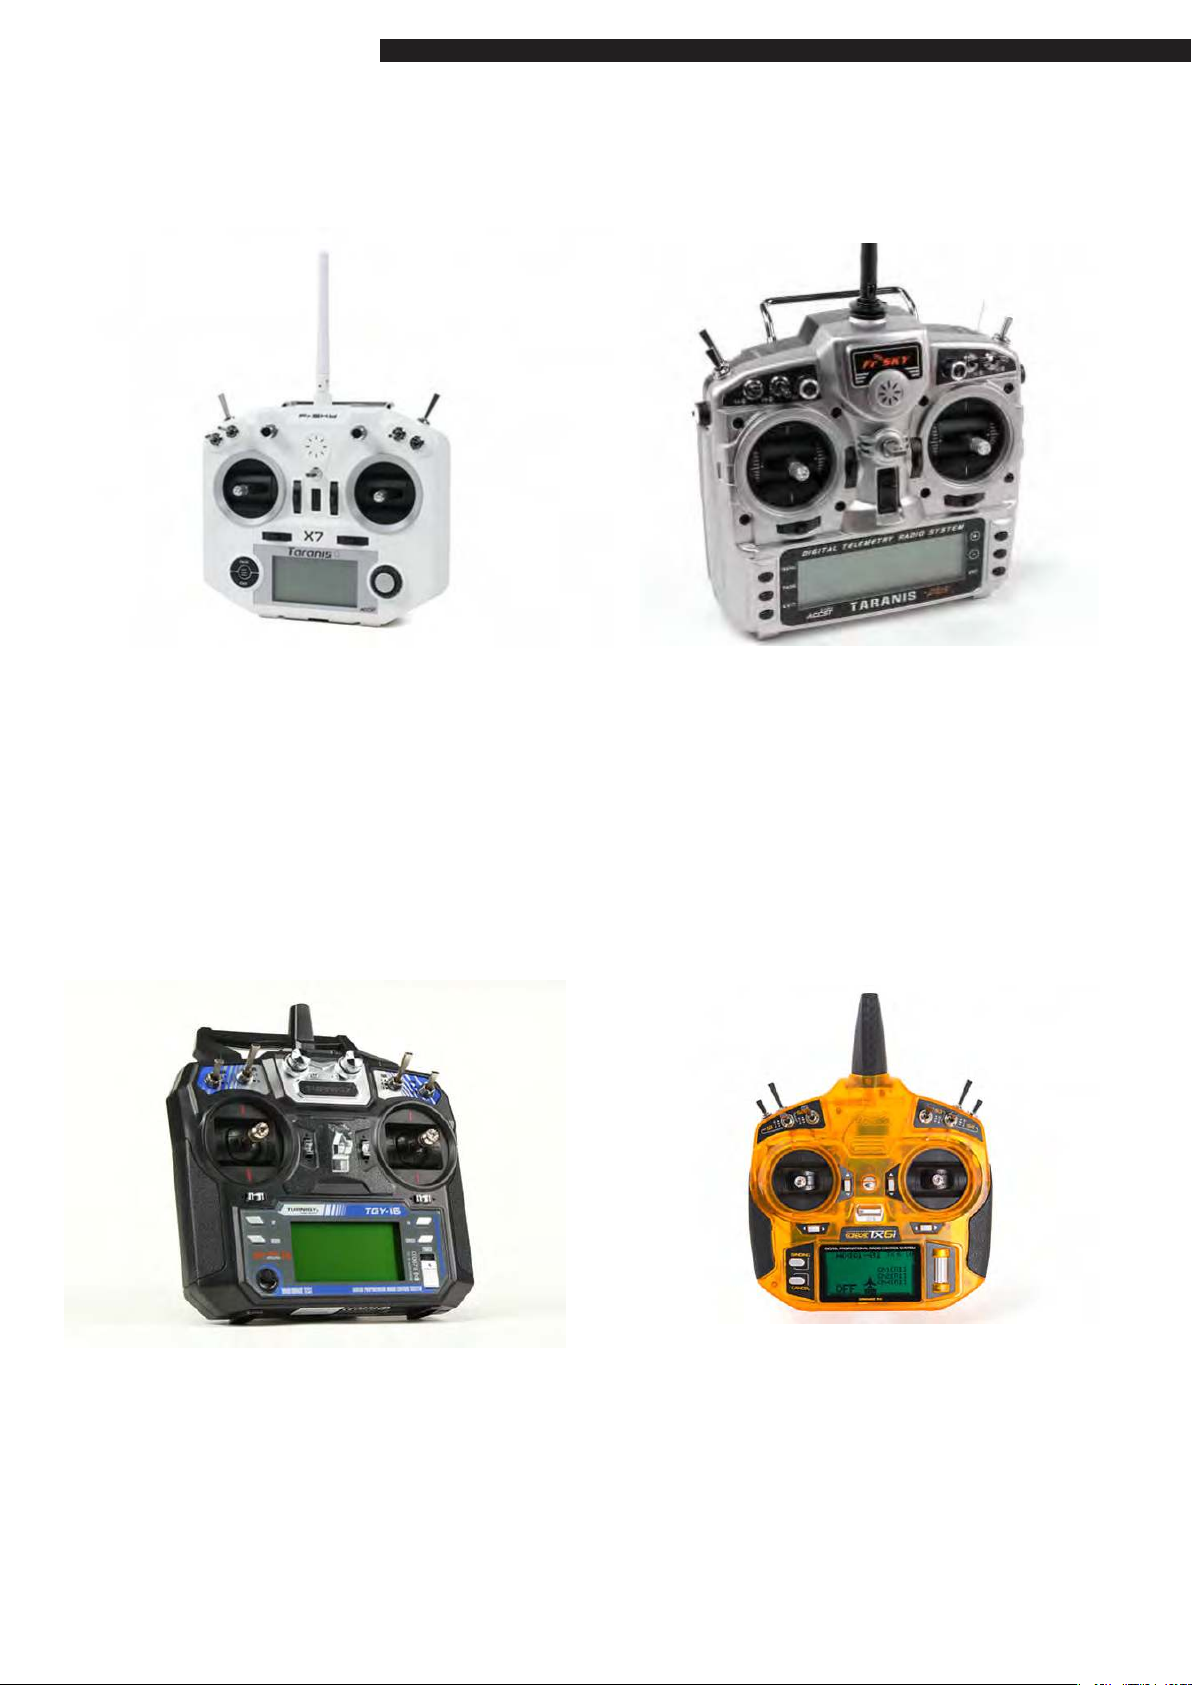
Recommended Accessories
FrSky Taranis Q X7 Digital Telemetry
Radio System 2.4GHz ACCST (White-
no plugs)
SKU: 236000106-3
FrSky 2.4GHz ACCST TARANIS X9D
PLUS Digital Telemetry Transmitter
(Mode 2) (EU)
SKU: 236000062-0
Turnigy TGY-i6 AFHDS Transmitter and
6CH Receiver (Mode 2)
SKU: 9114000020-0
OrangeRx Tx6i Full Range
2.4GHz DSM2/DSMX compatible
6ch Radio System (Mode 2)
International Version
SKU: 9171001328-03
20
Page 23
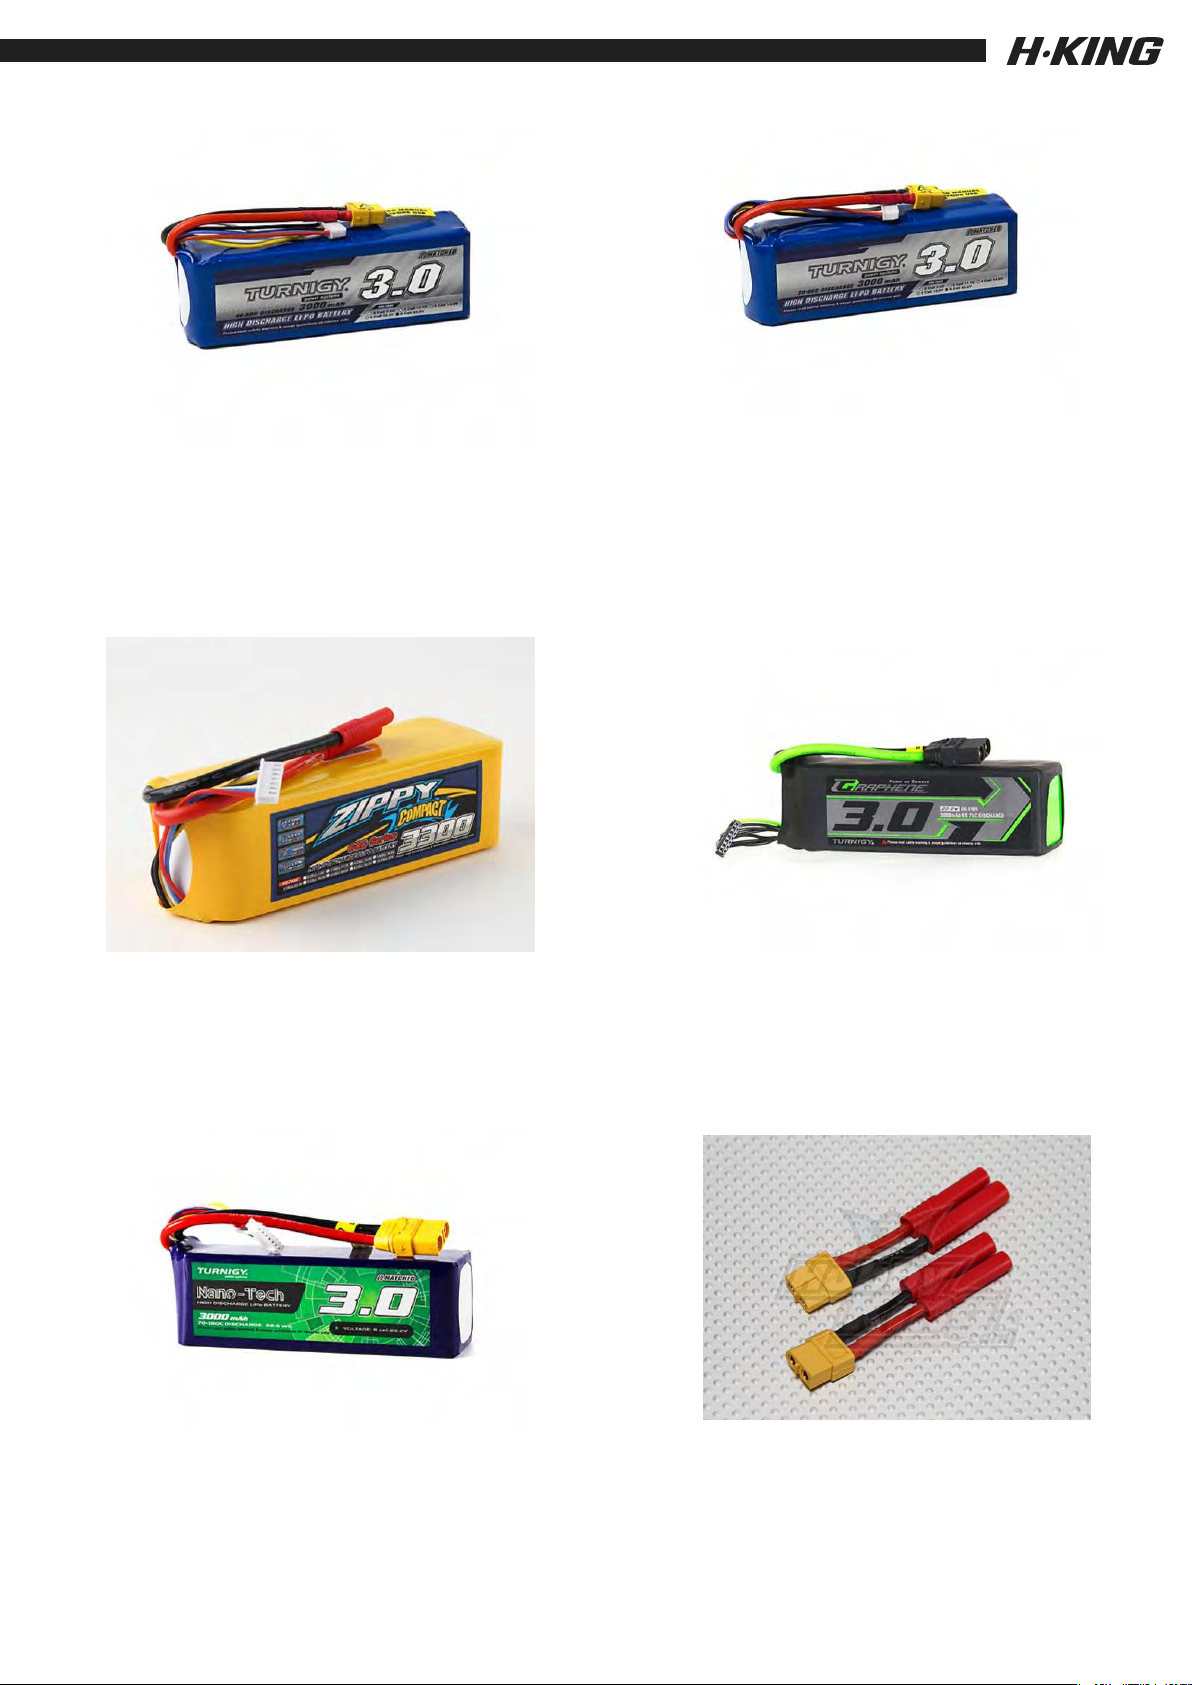
Turnigy 3000mAh 6S 40C
Lipo Pack w/XT-60
Turnigy 3000mAh 6S 30C Lipo Pack
w/XT-60
SKU: 9067000256-0
ZIPPY Compact 3300mAh
6s 60c Lipo Pack
SKU: 9067000040-0
SKU: 9067000255-0
Turnigy Graphene Panther 3000mAh
6S 75C Battery Pack
SKU: 9067000376-0
Turnigy Nano-Tech Plus
3000mAh 6S 70C Lipo Pack
w/XT90
SKU: 9210000266-0
HXT 4mm to XT-60 Battery Adapter
(2pcs/bag)
SKU: XT60-HXT4MM
21
Page 24
FLYCAT
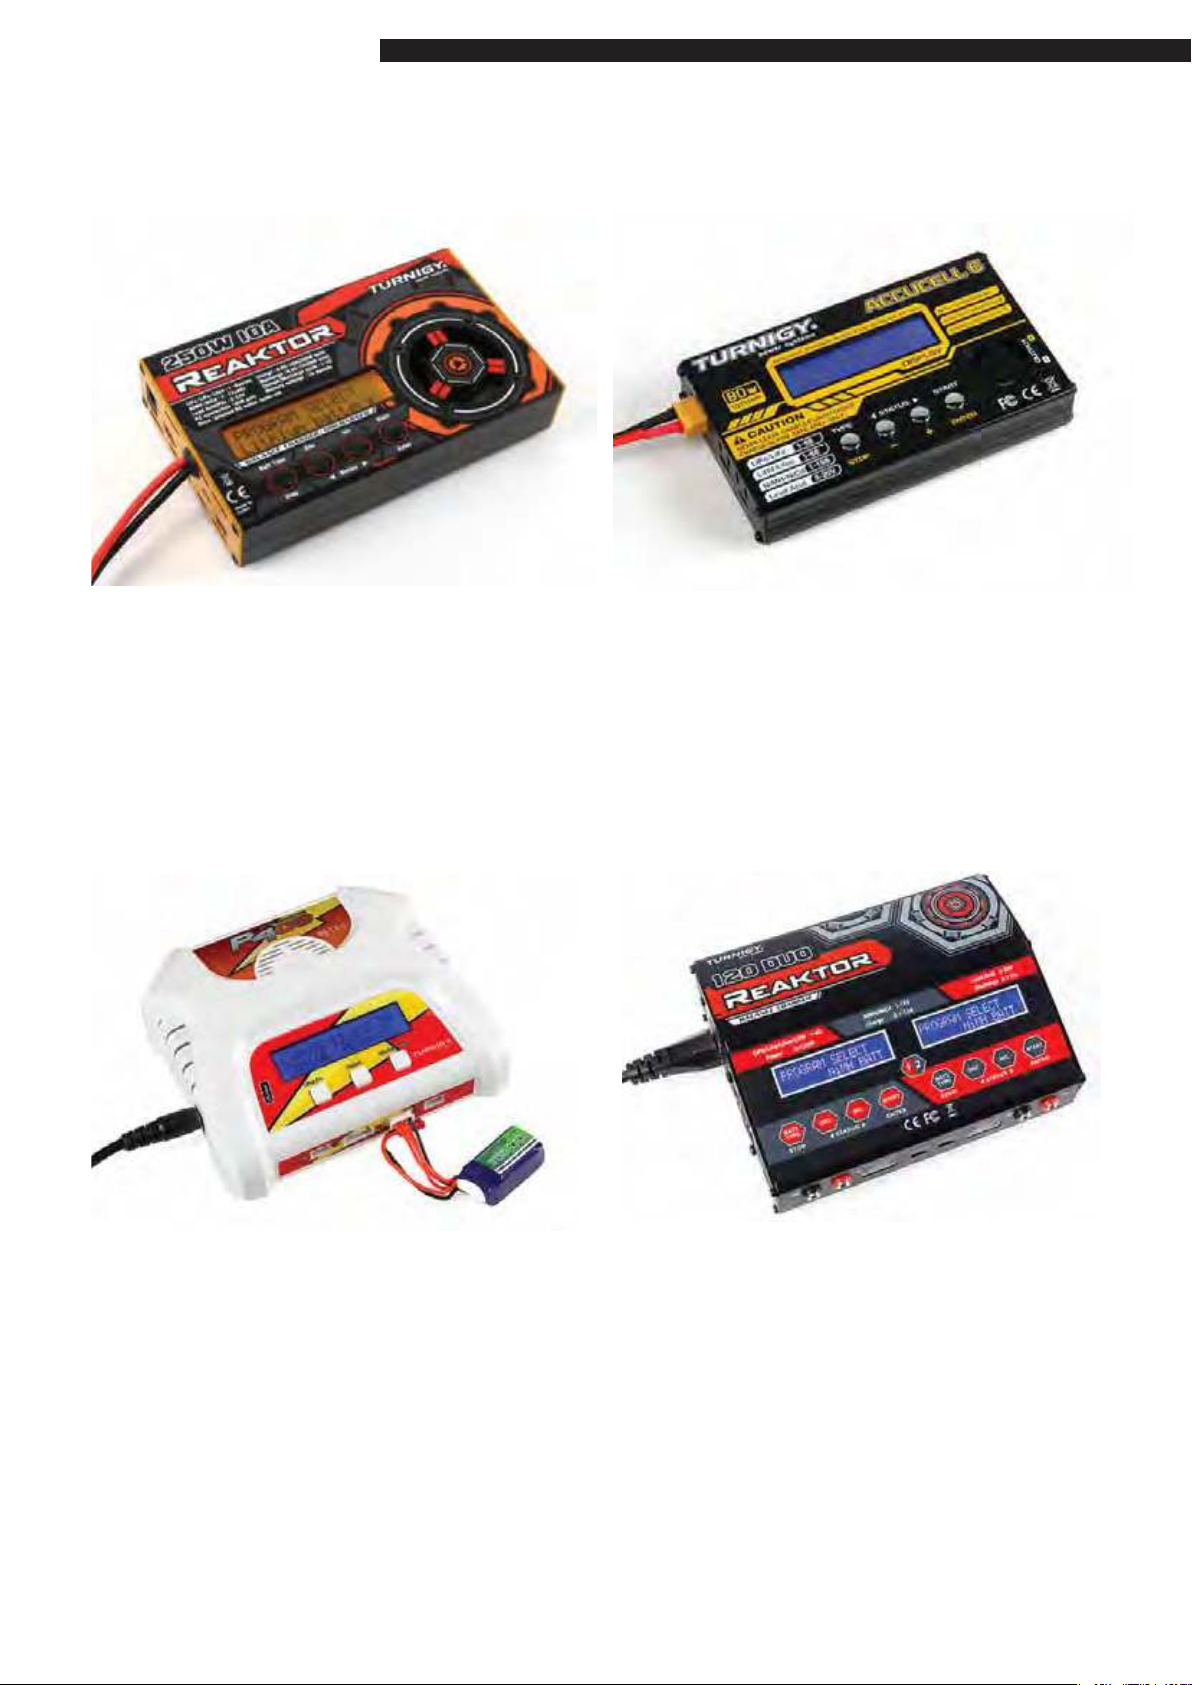
Turnigy Reaktor 250W 10A 1-6S Balance
Charger
SKU: 9466000004-0
Turnigy Accucel-6 80W 10A Balancer/
Charger LiHV Capable
SKU: 9052000071-0
Turnigy P403 LiPoly / LiFe AC/DC
Battery Charger
SKU: 9070000039-1 (EU Plug)
SKU: 9070000039-2 (UK Plug)
SKU: 9070000039-3 (US Plug)
SKU: 9070000039-4 (AU Plug)
Turnigy Reaktor 120 DUO 2x120W
(240W) Balance Charger AC/DC
SKU: 9910000003-1 (EU Plug)
SKU: 9910000003-2 (UK Plug)
SKU: 9910000003-3 (US Plug)
SKU: 9910000003-4 (AU Plug)
22
Page 25
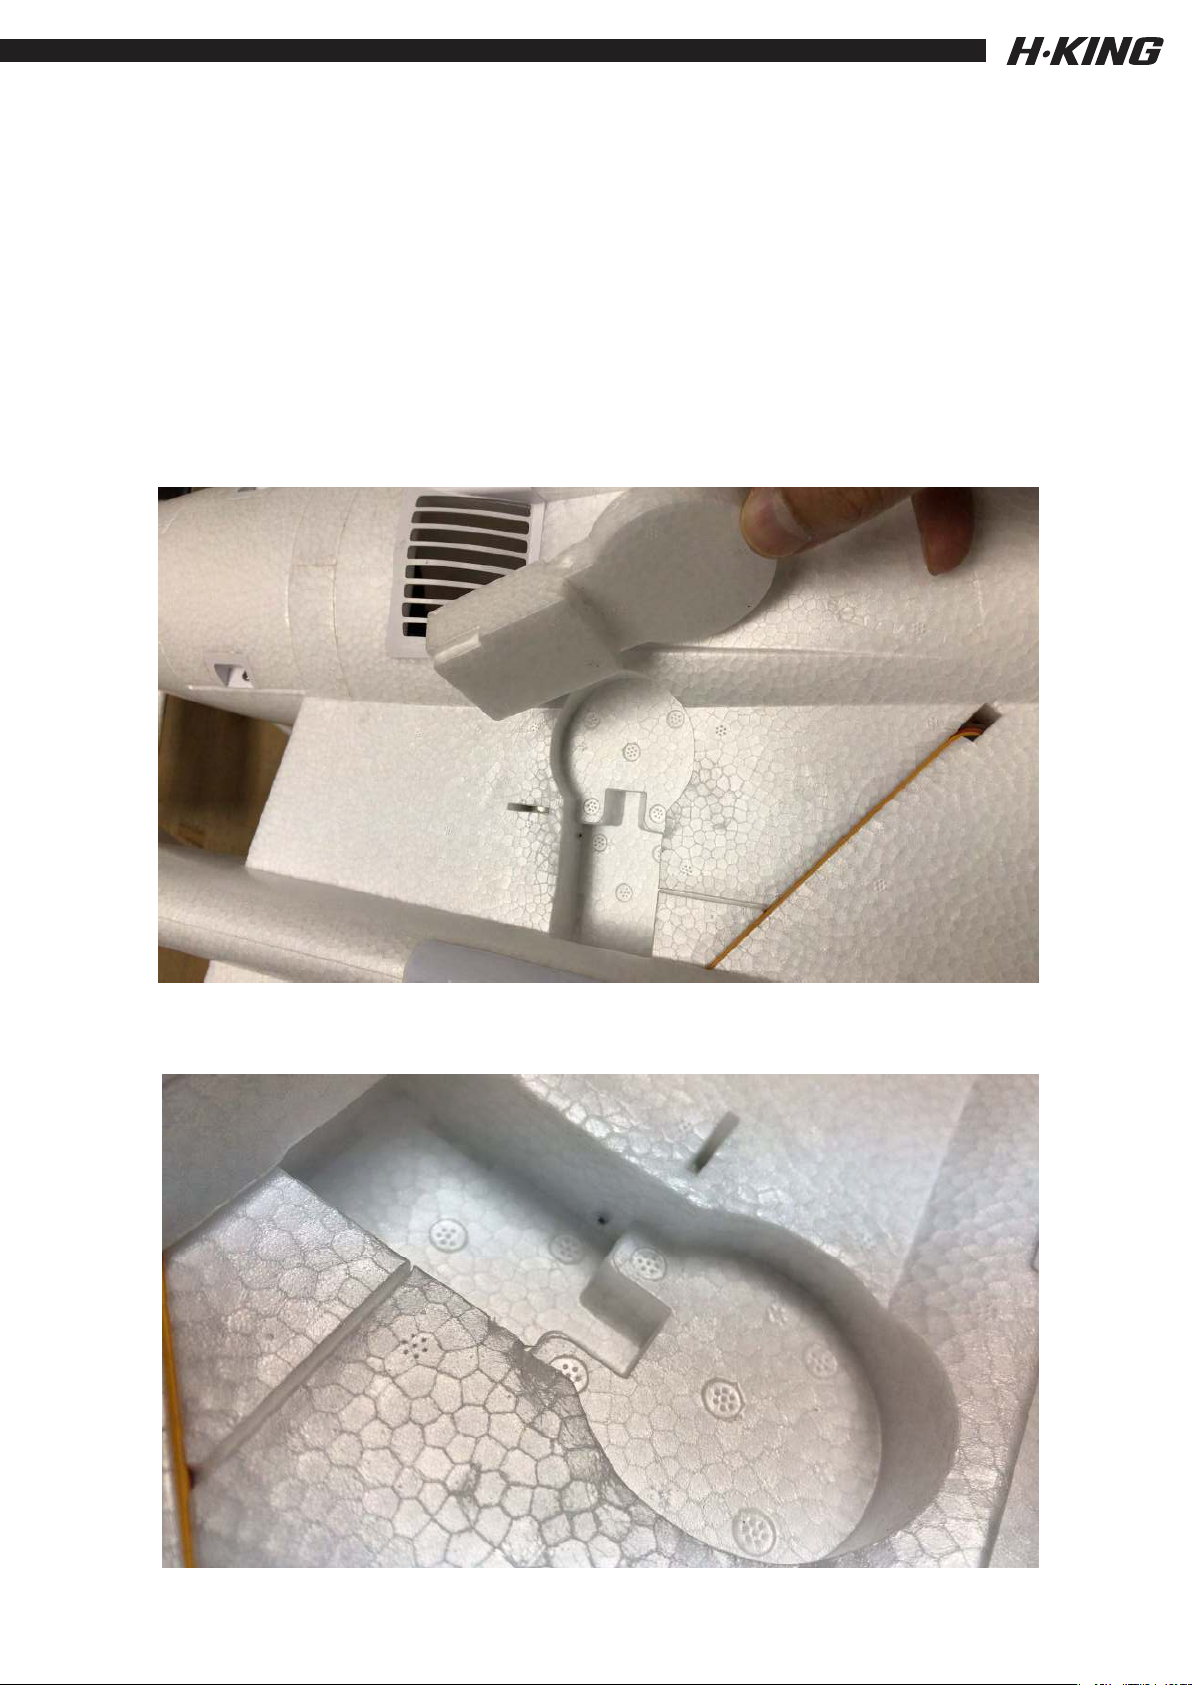
Option for fitting retracts.
As shown in the following pictures the foam has been
pre-cut to allow for the installation of retracts. There is
not a bespoke set of retracts made for the Flycat. They
is a good selection on HobbyKing.Com or you may even
have a set in your workshop from a redundant model.
23
Page 26
FLYCAT
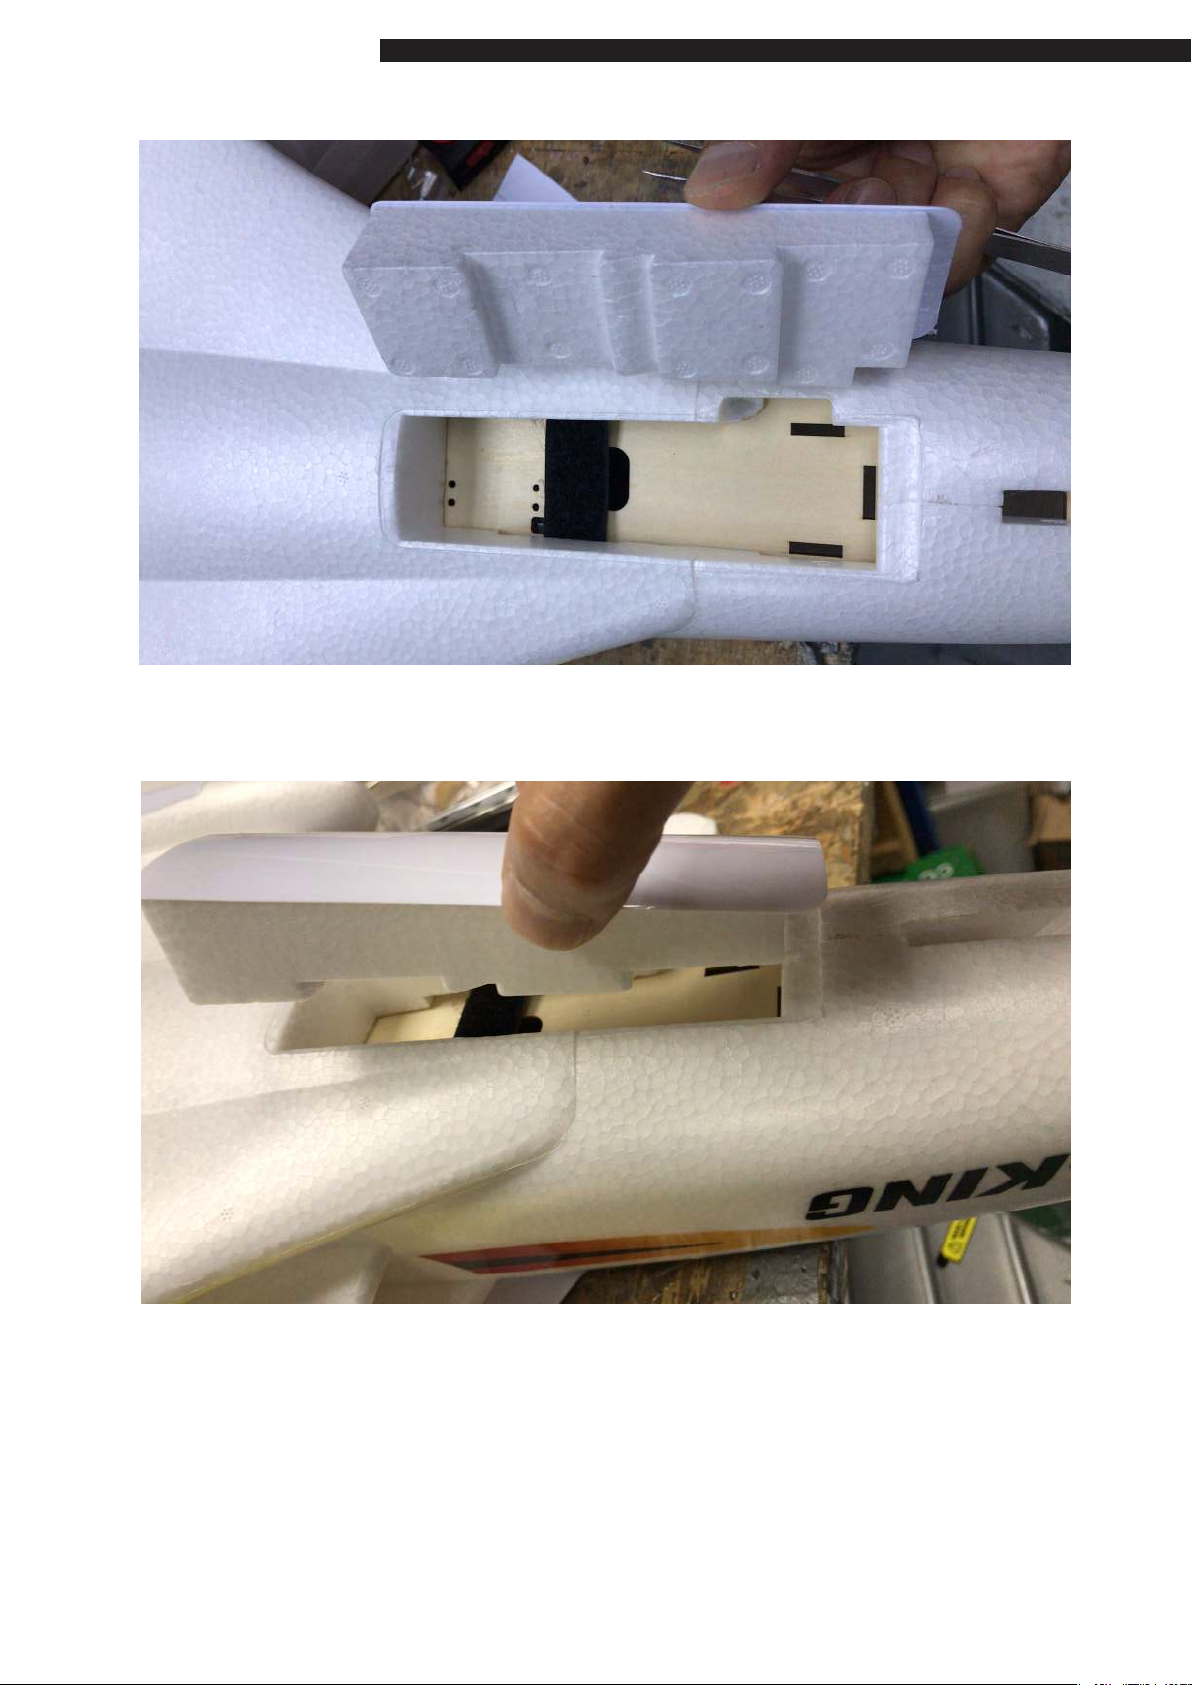
If you do not intend to fit retracts to start with then
we recommend you tack glue the foam blanking
parts into the model. This is so they can be easily
removed at a later date if you wish.
24
Page 27

 Loading...