

Hobby Easy Breeder Operating Instructions Manual
Bedienungsanleitung · Operating instructions · Istruzioni d’uso
Mode d’emploi · Gebruiksaanwijzing · Manual de instrucciones
Art.-Nr. / Item no. / Codize / Réf. / Art. nr. / Código: 36319
s
e
l
i
t
p
e
R
Easy
s
e
l
t
r
u
T
Breeder
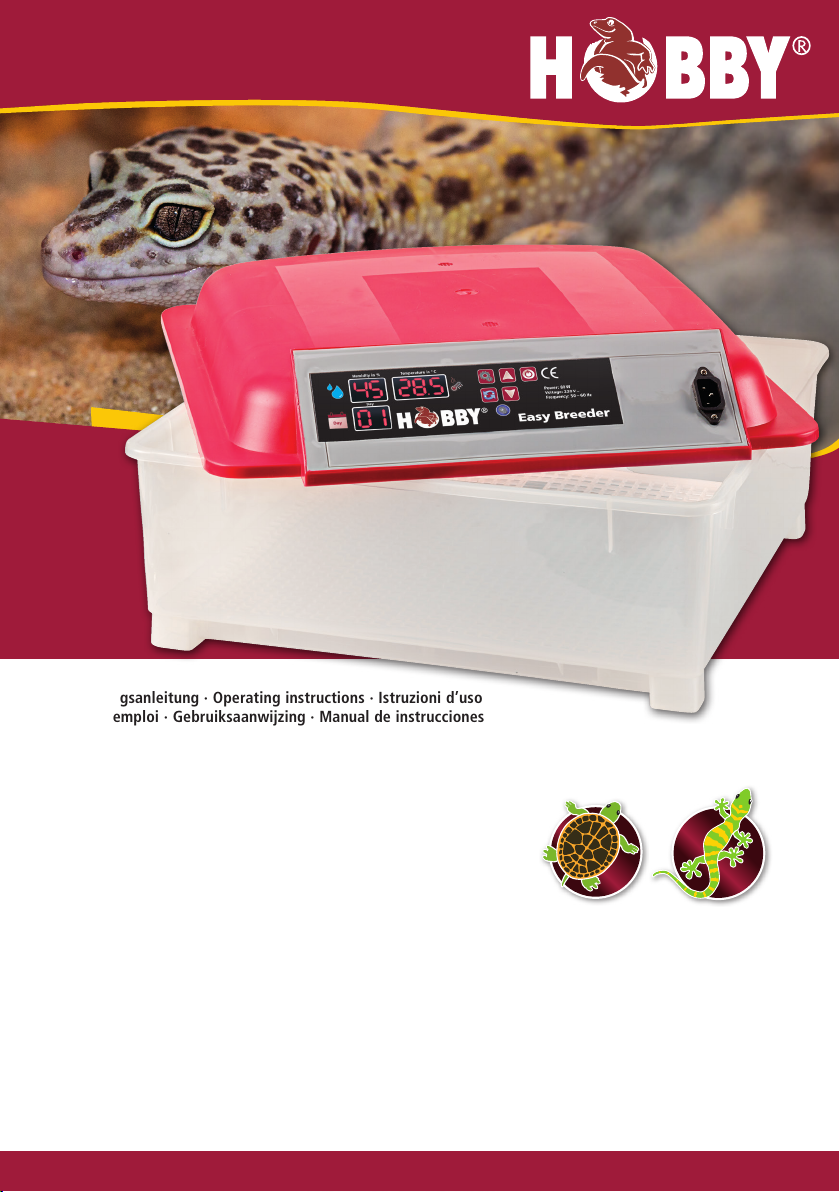
Digitaler Inkubator für Reptilieneier · Digital Incubator for Reptile Eggs
Incubatrice digitale per uova di rettile · Incubateur à affichage numérique pour œufs de reptiles
Digitale incubator voor reptieleneieren · Incubadora digital para huevos de reptiles
Dohse Aquaristik GmbH & Co. KG · Otto-Hahn-Str. 9 · 53501 Gelsdorf · Germany · www.dohse-terraristik.com
Digitaler Inkubator für Reptilieneier
Vielen Dank, dass Sie sich für den Easy Breeder entschieden haben. Für optimale Schlupfquoten und gesunde Jungtiere lesen Sie vor
der Inbetriebnahme bitte die Betriebsanleitung.
Ausstattung: Der Easy Breeder wird ausgeliefert mit einem zweiteiligen Styropor-Außengehäuse. Dieses dient nur dem sicheren Transport der Eier und
wird im normalen Betrieb nicht benötigt. Das Inkubator-Gehäuse selbst besteht aus einem transparenten Kunststoffunterteil, welches ermöglicht, die Eier
im Inneren von allen Seiten zu beobachten. In der Abdeckung integriert sind die digitale Steuerung, das Display mit Anzeige der aktuellen Temperatur,
Luftfeuchtigkeit und einem Tagezähler, der Ihnen anzeigt, wie viele Tage Ihre Eier schon im Easy Breeder sind. Ein technisches Highlight ist die moderne
Heiz-Lüftungs-Kombination. Diese ermöglicht es, die Eier bei kaum schwankenden Temperaturen zu inkubieren und sorgt für eine erstklassige Schlupfrate!
Die Fühler für Luftfeuchtigkeit und Temperatur sind sicher unter einem Gitter in der Abdeckung verstaut. Am Boden befinden sich Wasserrinnen für die
Feuchtigkeitsregulierung während der Brut- und Schlupfphase. Der zweite im Lieferumfang befindliche Gitterrost, dient zur Inkubation auf zwei Etagen,
somit kann die doppelte Menge an Eiern Inkubiert werden.
Inhaltsverzeichnis:
1. Inbetriebnahme
2. Einstellen der Temperatur
3. Alarm-Einstellung der Temperatur
4. Alarm-Einstellung der Luftfeuchtigkeit
5. Einstellen eines eingeschränkten Temperaturbereichs
6. Zurücksetzen des Tagezählers/Reset auf Werkseinstellungen
7. Nützliche Tipps/Zeitigungstabelle
8. Reinigung und Pflege des Easy Breeders
9. Problem und Lösung
10. Sicherheitshinweise und technische Daten
11. Konformitätserklärung
12. Garantie
1. Inbetriebnahme:
1.1 Verbinden Sie das Stromkabel zuerst mit dem Easy Breeder und stecken dann den Stecker in die Steckdose.
1.2 Schalten Sie nun den Easy Breeder durch Betätigen der ON / OFF - Taste ein.
1.3 Es ertönt ein Alarmsignal. Alarmsignale können Sie jederzeit durch Drücken der Pfeiltasten beenden.
1.4 Öffnen Sie den Easy Breeder und füllen Sie mithilfe der beiliegenden Flasche die 7 Wasserrinnen.
Diese befinden sich unterhalb des Ablagegitters. Es passt je 1 volle Flasche (ca. 200 ml) Wasser in eine Rinne.
1.5 Stellen Sie die Temperatur auf den gewünschten Wert ein. Je nach Reptil benötigt man unterschiedliche Temperaturen (siehe Zeitigungstabelle).
2. Einstellen der Temperatur:
2.1 Drücken Sie einmal die Menü - Taste am Bedienfeld.
2.2 Drücken Sie die Pfeil rauf - oder Pfeil runter - Taste um die gewünschte Temperatur einzustellen.
2.3 Drücken Sie erneut die Menü - Taste um den Vorgang abzuschließen.
Die Temperaturanzeige im Bedienfeld zeigt immer die aktuelle Temperatur. Wenn der Easy Breeder aktiv ist, wird dies durch die Kontrollleuchte
angezeigt. Der Einstellbereich beträgt 20,0 – 39,5° C. Einzustellen in 0,1° C Schritten.
3. Alarm-Einstellung der Temperatur: Der Temperaturalarm ist vom Werk aus auf 1° C über oder unter dem eingestellten Sollwert
programmiert. Wird dieser Wert überschritten, ertönt ein Alarmsignal. Falls Sie diese Einstellung ändern möchten, gehen Sie bitte wie folgt vor:
3.1 Einstellen des unteren Temperaturalarms (AL):
3.1.1 Halten Sie die Menü - Taste für ca. 3 Sekunden gedrückt.
3.1.2 Drücken Sie die Pfeil rauf - oder Pfeil runter - Taste bis (AL) im Display erscheint.
3.1.3 Drücken Sie erneut die Menü - Taste um den Vorgang zu bestätigen.
3.1.4 Stellen Sie mit den Pfeiltasten den gewünschten unteren Alarmwert ein.
Der Einstellbereich beträgt 0,0 – 15,0° C. Einzustellen in 0,1° C Schritten.
3.1.5 Drücken Sie erneut die Menü - Taste um den Vorgang abzuschließen.
3.2 Einstellen des oberen Temperaturalarms (AH):
3.2.1 Halten Sie die Menü - Taste für ca. 3 Sekunden gedrückt.
3.2.2 Drücken Sie die Tasten Pfeil rauf - oder Pfeil runter - Taste bis (AH) im Display erscheint.
3.2.3 Drücken Sie erneut die Menü - Taste um den Vorgang zu bestätigen.
3.2.4 Stellen Sie mit den Pfeiltasten den gewünschten unteren Alarmwert ein.
Der Einstellbereich beträgt 0,0 – 15,0° C. Einzustellen in 0,1° C Schritten.
3.2.5 Drücken Sie erneut die Menü - Taste um den Vorgang abzuschließen.
2
Dohse Aquaristik GmbH & Co. KG · Otto-Hahn-Str. 9 · 53501 Gelsdorf · Germany · www.dohse-terraristik.com
4. Alarm-Einstellung der Luftfeuchtigkeit (AS): Der Alarm für die Luftfeuchtigkeit ist vom Werk aus auf 45 % eingestellt.
Wird dieser Wert unterschritten, ertönt ein Alarmsignal. Falls Sie diese Einstellung ändern möchten, gehen Sie bitte wie folgt vor:
4.1 Halten Sie die Menü - Taste für ca. 3 Sekunden gedrückt.
4.2 Drücken Sie die Pfeil rauf - oder Pfeil runter - Taste bis (AS) im Display erscheint.
4.3 Drücken Sie erneut die Menü - Taste um den Vorgang zu bestätigen.
4.4 Stellen Sie mit den Pfeiltasten den gewünschten Alarmwert ein.
Der Einstellbereich beträgt 1 – 99 % Luftfeuchtigkeit. Einzustellen in 1 % Schritten.
4.5 Drücken Sie erneut die Menü - Taste um den Vorgang abzuschließen.
5. Einstellen eines eingeschränkten Temperaturbereichs: Mit dieser Funktion wird verhindert, das die eingestellte Solltemperatur
versehentlich über- oder unterschritten wird. Vom Werk aus ist keine Grenze voreingestellt. Wenn Sie diese Einstellung ändern möchten,
gehen Sie bitte wie folgt vor:
5.1 Einstellen der oberen Temperaturgrenze (HS):
5.1.1 Halten Sie die Menü - Taste für ca. 3 Sekunden gedrückt.
5.1.2 Drücken Sie die Pfeil rauf - oder Pfeil runter - Taste bis (HS) im Display erscheint.
5.1.3 Drücken Sie erneut die Menü - Taste um den Vorgang zu bestätigen.
5.1.4 Stellen Sie mit den Pfeiltasten die gewünschte obere Temperaturgrenze ein.
Der Einstellbereich beträgt 20 - 50° C. Einzustellen in 0,1° C Schritten.
5.1.5 Drücken Sie erneut die Menü - Taste um den Vorgang abzuschließen.
5.2 Einstellen der unteren Temperaturgrenze (LS):
5.2.1 Halten Sie die Menü - Taste für ca. 3 Sekunden gedrückt.
5.2.2 Drücken Sie die Pfeil rauf - oder Pfeil runter - Taste bis (LS) im Display erscheint.
5.2.3 Drücken Sie erneut die Menü - Taste um den Vorgang zu bestätigen.
5.2.4 Stellen Sie mit den Pfeiltasten die gewünschte untere Temperaturgrenze ein.
Der Einstellbereich beträgt 20 – 50° C. Einzustellen in 0,1° C Schritten.
5.2.5 Drücken Sie erneut die Menü - Taste um den Vorgang abzuschließen.
Beispiel: Wenn Sie die obere Temperaturgrenze auf 28,2° C eingestellt haben und die untere auf 27,4° C,
dann können Sie auch nur in diesem Bereich die Temperatur wie im Punkt 2 beschrieben einstellen.
6. Zurücksetzen des Tagezählers:
6.1 Der Easy Breeder verfügt über einen eingebauten Tagezähler (im Display „
die Eier schon im Inkubator sind. Um den Tagezähler zurückzusetzen, halten Sie bitte die
Somit springt der Zähler zurück auf „O“.
Day
“ genannt). So können Sie jederzeit sehen, wie lange
Reset - Taste
einige Sekunden lang gedrückt.
7. Nützliche Tipps/Richtiger Umgang mit den Eiern/Zeitigungstabelle
7.1 Nützliche Tipps:
· Betreiben Sie den Easy Breeder in einem Raum mit gleich bleibender Temperatur, da sich äußere Temperaturschwankungen auf die Temperatur im
Brutapparat auswirken können. Die Aufstellung sollte fern von Wärmequellen und Sonneneinstrahlung erfolgen. Achten Sie auf waagerechten Stand frei
von Vibrationen oder Erschütterungen und freien Stand, der die Luftzufuhr nicht einschränkt.
· Für das Einregulieren der Temperatur vergehen in Abhängigkeit von Raum- und Solltemperatur, Sensorposition und Anzahl der Schälchen mit
Inkubationsmaterial unter Umständen mehrere Stunden. Damit das Inkubationsmaterial die Wärme richtig aufnehmen kann, empfehlen wir einen
eintägigen Betrieb ohne Bruteier.
· Fügen Sie nach dem eintägigen Betrieb der Schälchen mit Inkubationsmaterial die Eier hinzu. Durch das Öffnen des Easy Breeders sowie die Anzahl und
die Eigentemperatur der Bruteier kann es zu einem Abfallen, dem langsamen Ansteigen und Schwankungen der Temperatur kommen. Bitte ändern Sie in
dieser Zeit nicht die Programmierung!
· Auch während des Inkubationsverlaufes kann es zu geringen Schwankungen der Temperatur und der Luftfeuchtigkeit kommen. Dies ist durch die
Raumtemperatur, der Anzahl der Inkubationsschälchen und Eier, Inkubationsmaterial und der Raumluftfeuchtigkeit bedingt. Dies wirkt sich nicht
schädlich auf den Inkubationsverlauf aus. Auch in der Natur gibt es keine konstanten Temperaturen.
· Allgemein gilt, dass Sie den Easy Breeder nur im Bedarfsfall öffnen sollten (um nach den Eiern zu sehen oder um fehlende Flüssigkeit nachzufüllen),
damit ein gleichbleibendes Klima gewährleistet werden kann.
Expertentipp: Es empfiehlt sich, selbst bei einem einzigen Gelege, den Inkubator mit Heimchenboxen oder anderen Gefäßen zu bestücken und
mit feuchtem Substrat wie Vermiculit, Erde oder ähnlichem zu befüllen. Dies erhöht die Wärmekapazität des gesamten Systems deutlich und hält
Temperaturschwankungen niedrig. Außerdem wird im Falle von Stromausfällen im Inkubator wesentlich länger die Temperatur gehalten.
7.2 Richtiger Umgang mit den Eiern:
· Die Bebrütung der Eier im Easy Breeder dient dazu, unter kontrollierten und optimalen Bedingungen eine möglichst hohe Schlupfrate zu erzielen und die
Eier geschützt werden vor äußeren Einflüssen zu schützen.
Tel: +49 (0) 22 25 - 94 15 0 · Fax: +49 (0) 22 25 - 94 64 94 · info@dohse-aquaristik.de
3

· Sammeln Sie die Eier erst ein, wenn das Weibchen vollständig mit der Eiablage fertig ist. Damit verhindern Sie, das dass Weibchen aus Stress eine unter
Umständen tödliche Legenot bekommt.
· Entnehmen Sie nach der Eiablage die Eier aus dem Terrarium. Dabei müssen diese unbedingt in der gleichen Position in das Brutsubstrat (z.B.: Vermiculit
Art.-Nr.: 36320 und 36325) gelegt werden, wie sie entnommen wurden, um eine Verlagerung der Eipole (Reptilieneier haben keine
Halteschnüre („Hagelschnüre“) wie Vogeleier) zu verhindern. Dies könnte zum Absterben des Fötus führen.
· Falls Sie die Eier kennzeichnen möchten, warten Sie mit der Kennzeichnung, bis diese ausgehärtet sind um eine Verletzung der noch weichen Eihülle zu
vermeiden. Grundsätzlich sollten alle Eier vorsichtig behandelt werden.
· Eine wesentliche Rolle bei der Entwicklung von Reptilieneiern spielt die Feuchtigkeit des Brutsubstrates. Hier gilt die Regel, dass weichschalige Eier einen
höheren Feuchtigkeitsbedarf haben als hartschalige. Zu geringe Substratfeuchte würde den Eiern Feuchtigkeit entziehen und durch den
Flüssigkeitsverlust ein Absterben des sich entwickelnden Tieres zur Folge haben.
· Als gutes Brutsubstrat können wir Vermiculit (z.B.: Vermiculit Art.-Nr.: 36320 und 36325) empfehlen. Bei diesem Brutsubstrat lässt sich die
Substratfeuchte über die Wasserzugabe und die Körnungsgröße steuern. Feinkörniges Vermiculit (z.B.: Vermiculit 0 – 4 mm Art.-Nr.: 36320) empfiehlt sich
für kleine und weichschalige Eier. Gröberes Vermiculit (z.B.: Vermiculit 3 – 6 mm Art.-Nr.: 36325) empfiehlt sich eher für große und hartschalige Eier.
· Prüfen Sie regelmäßig die Feuchtigkeit des Brutsubstrates. Dosieren Sie bei Bedarf das Wasser direkt in das Brutsubstrat und nicht über den Eiern.
· Der Schlupfzeitpunkt kann auch innerhalb eines Geleges sehr unterschiedlich sein. Hervorgerufen wird dieser Unterschied hauptsächlich durch
Temperatur und Feuchtigkeitsunterschiede.
7.3 Zeitigungstabelle:
Die folgende Tabelle enthält Erfahrungs· und Richtwerte einiger Reptilienarten. Diese garantiert nicht den Zuchterfolg!
Siedleragame Agama Agama 30 ca. 60 – 70 Tage
Grüne Ameive Ameiva Ameiva 30 ca. 130 Tage
Rotkehlanolis Anolis carolinensis 27 – 30 ca. 40 – 60 Tage
Ritteranolis Anolis equestris 27 – 30 ca. 70 – 100 Tage
Bahamaanolis Anolis sagrei 27 – 30 ca. 40 – 60 Tage
Stirnlappenbasilisk Basiliscus plumifrons 30 ca. 55 – 65 Tage
Streifenbasilisk Basiliscus vittatus 30 ca. 50 – 70 Tage
Fischers Chamäleon Kinyongia fisheri steigend von 17, 22 und 25 ca. 300 Tage
Zweihornchamäleon Kinyongia tavetanum tagsüber 22 – 23, Nachts 18 ca. 140 Tage
Jemenchamäleon Chamaeleo c. calyptratus 28 ca. 180 Tage
Helmleguan Corytophanes cristatus 28 ca. 100 Tage
Wüstenhalsbandleguan Crotaphytus bicinctores 28 – 32 ca. 45 – 60 Tage
Halsbandleguan Crotaphytus collaris 28 – 32 ca. 45 – 60 Tage
Schwarzer Leguan Ctenosaura similis 28 – 29 ca. 80 – 100 Tage
Augenfleck-Bogenfingergecko Cyrtodactylus peguensis 25 – 28 ca. 90 – 95 Tage
Afrikanische Eierschlange Dasypeltis scabra 30 ca. 60 – 70 Tage
Wüstenleguan Dipsosaurus dorsalis 28 – 33 ca. 45 – 80 Tage
Amurnatter Elaphe schrenckii 28 ca. 40 – 60 Tage
Leopardgecko Eublepharis macularius 28 ca. 45 – 55 Tage
Pantherchamäleon Furcifer pardalis 26 – 28 ca. 150 – 300 Tage
Tokee Gekko gecko 30 ca. 100 Tage
Streifengecko Gekko vittatus 28 – 30 ca. 90 – 160 Tage
Chinesischer Leopardgecko Goniurosaurus luii 26 – 28 ca. 70 – 80 Tage
Westafrikanischer Krallengecko Hemitheconyx caudicinctus 28 ca. 70 – 90 Tage
Grüner Leguan Iguana iguana 29 ca. 70 – 90 Tage
Kalifornische Kettennatter Lampropeltis g. california 28 ca. 60 – 70 Tage
Milchnatter Lampropeltis t. campbelli 28 ca. 55 – 65 Tage
Rollschwanzleguan Leiocephalus carinatus 28 ca. 60 – 70 Tage
Bunter Maskenleguan Leiocephalus personatus 28 ca. 60 – 70 Tage
Schmetterlingsagame Leiolepis reevesii 28 ca. 60 – 70 Tage
Weißlippen Python Leiopython albertisii 29 – 31 ca. 55 – 70 Tage
Teppichpython Morelia spilota variegata 29 ca.70 – 85 Tage
Grüner Baumpython Morelia viridis 29 – 30 ca. 45 – 55 Tage
Rauhe Grasnatter Opheodrys aestivus 27 – 28 ca. 50 – 60 Tage
Prärie Kornnatter Pantherophis emoryi 27 ca. 60 Tage
Kornnatter Pantherophis guttatus 27 ca. 60 Tage
Wüsten Krötenechse Phrynosoma plartyrhinos 27 – 28 ca. 45 – 55 Tage
Grüne Wasseragame Physignathus cocincinus 28 ca. 70 – 90 Tage
Zwergbartagame Pogona henrylawsoni 30 ca. 60 – 70 Tage
Bartagame Pogona vitticeps 28,5 – 30 ca. 60 – 70 Tage
Blutpython Python curtus 29 – 31 ca. 70 Tage
Dunkler Tigerpython Python molurus bivittatus 29 – 31 ca. 60 – 90 Tage
Königspython Python regius 29 – 31 ca. 70 Tage
Kronengecko Rhacodactylus ciliatus 36 – 28 ca. 60 – 120 Tage
Chuckwalla Sauromalus obesus 31 ca. 70 Tage
Bruttemperatur in° C Dauer der Inkubation:
4
Dohse Aquaristik GmbH & Co. KG · Otto-Hahn-Str. 9 · 53501 Gelsdorf · Germany · www.dohse-terraristik.com

Pinkbauch Stachelleguan Sceloporus variabilis 28 ca. 50 – 60 Tage
Sechsstreifen-Langschwanzeidechse Takydromus sexlineatus 24 – 25
Rübenschwanz Vipern Gecko Teratolepis fasciata 26 ca. 60 – 70 Tage
Kleiner Wundergecko Teratoscincus microlepis 28 ca. 85 – 150 Tage
Orangeaugen Krokodilskink Tribolonotus gracilis 24 ca. 60 – 70 Tage
Vierhornchamäleon Trioceros q.quadricornis 20 – 25 ca. 125 – 160 Tage
Schwarz weißer Teju Tupinambis merianae 30 ca. 70 – 80 Tage
Mopskopfleguan Uranoscodon superciliosus 26 ca. 90 – 110 Tage
Fgeschmückte Dornschwanzagame Uromastyx ocellata 32 ca. 80 – 90 Tage
Bunte Dornschwanzagame Uromastyx ornata 32 ca. 80 – 90 Tage
Seitenfleckleguan Uta stansburiana 28 ca. 40 – 45 Tage
Steppenwaran Varanus exanthematicus 27 – 31 ca. 115 – 180 Tage
Biberschwanzagame Xenagama taylori 29 ca. 50 – 55 Tage
ca. 30
– 45 Tage
Für weitere Informationen empfehlen wir Ihnen das Buch: „Die Inkubation von Reptilieneiern“ von Dr. Gunther Köhler aus dem Herpeton Verlag.
8. Reinigung und Pflege des Easy Breeders: Vor und nach jeder Inkubation sollten Sie grundsätzlich den Easy Breeder gründlich mit einem
feuchten Tuch reinigen und mit Reptix Desinfect (Art.-Nr.: 38002) desinfizieren.
9. Problem und Lösung: Bei Problemen kontrollieren Sie Ihre Einstellungen am Easy Breeder und führen ggf. einen Reset (Netzstecker ziehen und
mir gedrückter Reset-Taste wieder einstecken) durch. Sollte dies keinen Erfolg bringen, so wenden Sie sich bitte an Ihren Fachhändler.
10. Sicherheitshinweise und Technische Daten
10.1 Sicherheitshinweise:
· Produkt darf nur wie geliefert betrieben werden.
· Bei Defekten an Zuleitung, Heizelement und Display darf das Gerät nicht mehr betrieben werden.
· Es darf keine Änderungen an elektronischen Bauteilen oder Kürzen von Leitungen vorgenommen werden.
· Vor Öffnen, Wartungsarbeiten und Reinigen den Netzstecker ziehen.
· Heizelement muss vor Inbetriebnahme von Staub- und Schmutzteilchen befreit werden.
· Das Heizelement darf erst nach Abkühlung berührt werden, um Verbrennungen zu vermeiden.
· Das Oberteil mit den Elektroinstallationen nur mit einem feuchten Tuch reinigen.
· Nicht in Wasser tauchen oder in einen Wasserstrahl halten.
10.2 Technische Daten:
Temperatur Anzeigebereich: -9,9° C – 99,9° C
Temperatur Regelbereich: 20,0° C – 39,5° C
Temperatur Regelgenauigkeit: 0,1° C
Display Anzeigegenauigkeit: 0,1° C
Alarm Programmier- und Messbereich: 0 – 15° C
Leistung Heizelement: 80 W
Betriebsspannung: 240 V ~
11. Konformitätserklärung: Der Hersteller bescheinigt, dass die Geräte mit der EMC Norm 2014/30/EU, der LVD Norm 2014/35/EU
& ROHS Norm 2011/65/EU konform sind.
12. Garantie: Die Garantiekarte mit den Garantiebedingungen finden Sie im Bereich Service auf unserer Homepage: www.dohse-terraristik.com
Digital Incubator for Reptile Eggs
Thank you for purchasing the Easy Breeder. For ideal hatching rates and healthy young animals, please read these operating
instructions before initial operation.
Equipment: The Easy Breeder is supplied with a two-part housing of polystyrene. This is only designed for safe transport of the eggs and is not needed
for normal operation. The incubator housing itself consists of a transparent bottom section of plastic, allowing visual inspection of the eggs in the interior
from all sides. The digital controls, the display indicating the current temperature, relative humidity and a day counter showing how many days your eggs
have been in the Easy Breeder are integrated in the cover. The modern combined heating-ventilation system is a technical highlight. This allows
incubating the eggs with temperatures hardly fluctuating and ensures a first class hatching rate! The sensors for relative humidity and temperature are
safely accommodated under a grid in the cover. Water channels are provided in the floor for regulating the humidity during the breeding and hatching
phases. The second grid included in the delivery is used for incubation on two levels, so that twice the number of eggs can be incubated.
Table of contents:
1. Starting up:
2. Setting the temperature
Tel: +49 (0) 22 25 - 94 15 0 · Fax: +49 (0) 22 25 - 94 64 94 · info@dohse-aquaristik.de
5
3. Alarm setting for temperature
4. Alarm setting for relative humidity
5. Defining a restricted temperature range
6. Resetting the day counter / Reset to factory setting
7. Useful hints/Incubation table
8. Cleaning and care of the Easy Breeder
9. Problems and solutions
10. Safety instructions and technical data
11. Declaration of conformity
12. Warranty
1. Starting up:
1.1 First connect the power cable to the Easy Breeder and then plug the connector into the mains socket.
1.2 Now press the ON / OFF - key to switch on the Easy Breeder
1.3 An alarm signal sounds. You can clear alarms at any time by pressing the arrow keys.
1.4 Open the Easy Breeder fill the 7 water channels using the included bottle. These are located underneath the deposition grid. Each channel has a
capacity for 1 full bottle (approx. 200 ml) of water.
1.5 Set the temperature to the desired value. Different temperatures are required for different reptiles (see incubation table.
2. Setting the temperature:
2.1 Press the menu - key control panel once.
2.2 Press the up arrow - or down arrow - key to set the desired temperature.
2.3 Press the menu - key again to complete this process.
The temperature indicator in the control panel always shows the current temperature. The status light will show when the Easy Breeder is
activated. The setting range is 20.0 – 39.5° C. Adjustable in 0.1° C increments.
3. Alarm setting for temperature: The factory setting for the temperature alarm is programmed at 1° C above or below the defined desired
temperature. When this value is exceeded an alarm signal sounded. If you wish to change this setting, proceed as follows:
3.1 Setting the low temperature alarm (AL):
3.1.1 Hold the menu - key for approx. 3 seconds.
3.1.2 Press the up arrow - or down arrow - key until the display reads (AL).
3.1.3 Press the menu - key again to confirm.
3.1.4 Use the arrow keys to set the lower alarm limit. The setting range is 0.0 – 15.0° C. Can be set in 0.1° C steps.
3.1.5 Press the menu - key again to complete the process.
3.2 Setting the high temperature alarm (AH):
3.2.1 Hold the menu - key for approx. 3 seconds.
3.2.2 Press the up arrow - or down arrow - key until the display shows (AH).
3.2.3 Press the menu - key again to confirm.
3.2.4 Use the arrow keys to set the lower alarm limit. The setting range is 0.0 – 15.0° C. Can be set in 0.1° C steps.
3.2.5 Press the menu - key again to complete the process.
4. Alarm setting for relative humidity (AS): The factory setting for the relative humidity alarm is set to 45 %. When the humidity falls below this
value, an alarm signal sounded. If you wish to change this setting, proceed as follows:
4.1 Hold the menu - key for approx. 3 seconds.
4.2 Press the up arrow - or down arrow - key until the display shows (AS).
4.3 Press the menu - key again to confirm.
4.4 Use the
4.5 Press the menu - key again to complete the process.
5. Defining a restricted temperature range: This function prevents that the temperature accidentally exceeds or drops below the defined
desired temperature. The factory setting has no defined limit. If you wish to change this setting, proceed as follows:
5.1 Setting the upper temperature limit (HS):
5.1.1 Hold the menu - key for approx. 3 seconds.
5.1.2 Press the up arrow - or down arrow - key until the display shows (HS).
5.1.3 Press the menu - key again to confirm.
5.1.4 Use the arrow keys to set the desired upper limit. The setting range is 20 - 50° C. Can be set in 0.1° C steps.
5.1.5 Press the menu - key again to complete the process.
5.2 Setting the lower temperature limit (LS):
5.2.1 Hold the menu - key for approx. 3 seconds.
6
arrow keys
to set the desired alarm limit. The setting range is 1 – 99 % relative humidity. Can be set in steps of 1 %.
Dohse Aquaristik GmbH & Co. KG · Otto-Hahn-Str. 9 · 53501 Gelsdorf · Germany · www.dohse-terraristik.com
5.2.2 Press the up arrow - or down arrow - key until the display shows (LS).
5.2.3 Press the menu - key again to confirm.
5.2.4 Use the
arrow keys
to set the desired lower temperature limit. The setting range is 20 – 50° C. Can be set in 0.1° C steps.
5.2.5 Press the menu - key again to complete the process.
For example: If you have defined an upper temperature limit of 28.2° C and a lower limit of 27.4° C, you will only be able to set the
temperature – as described in item 2 – within this range.
6. Resetting the day counter:
6.1 The Easy Breeder has an integrated day counter (called “Day”
in the display). This means you can always see how long the eggs have been in the
incubator. To reset the day counter, press and hold the Reset - key a few seconds. This will cause the counter to jump back to “O”.
7. Useful hints / Correct handling of the eggs / incubation table
7.1 Useful hints:
· Operate the Easy Breeder in a room with a constant temperature, because external temperature fluctuations can affect the incubator. It should be set
up away from heat sources and direct sunlight. Make sure it rests on a horizontal base and is free from vibrations or shock and is free-standing without
obstructions to the air flow.
· It may take several hours until the temperature stabilises at the desired level, depending on room and set temperature, sensor position and the number
of bowls with incubation material. We recommend you operate the incubator for one day without hatching eggs so that the incubation material can fully
absorb the heat.
· After this day of operation for the bowls with incubation material, add the eggs. Opening the Easy Breeder and the number as well as the intrinsic
temperature of the hatching eggs can cause a temperature drop, a gradual increase and temperature fluctuations. Please do not change the
programming during this period!
· During the incubation period, minor temperature and humidity fluctuations may also occur. This is caused by the room temperature, the number of
incubation bowls and eggs, the incubation material and the relative humidity in the room. This has no harmful effect on the incubation process. Constant
temperatures do not occur in natural environments either.
· In principle, the Easy Breeder should only be opened when needed (to inspect the eggs or replenish liquid) to ensure a constant climate.
Expert hint: Even when incubating only one clutch of eggs the incubator should be equipped with cricket boxes or other containers and filled with
moist substrate such as vermiculite , soil or similar material. This significantly increases the heat capacity of the entire system keeps temperature
fluctuations low. The incubator will also maintain its temperature much longer in the event of a power failure.
7.2 Correct handling of the eggs:
· Incubating the eggs in the Easy Breeder has the purpose of achieving as high a hatching rate as possible under controlled and optimum conditions and
protecting the eggs against external influences.
· Only collect the eggs once the female has completely finished depositing the eggs. This will ensure that the female is not subjected to stress, which may
cause a fatal retention of eggs.
· After egg deposition, remove the eggs from the terrarium. It is essential that the eggs are placed into the incubation substrate (e.g.: Vermiculit item no.:
36320 and 36325) in the same position as before their removal to prevent the poles of the eggs from shifting (reptile eggs do not have any retaining
chords („chalazas“) like birds have). This could cause the foetus to die.
· If you wish to mark the eggs, wait until they have fully hardened to avoid damaging the egg membrane. All eggs should always be handled with care.
· The moisture of the incubation substrate plays a key role in the development of the reptile eggs. Here the rule applies that soft-shelled eggs have a
higher moisture requirement than hard-shelled ones. Too little substrate moisture would extract moisture from the eggs and this loss of moisture would
be fatal for the developing animal.
· We can recommend vermiculite (e.g.: Vermiculit item no.: 36320 and 36325) as a good incubation substrate. With this substrate it is possible to regulate
the substrate moisture by means of adding water and the grain size. fine grained vermiculite (e.g.: Vermiculit 0 – 4 mm item no.: 36320) is recommended
for small and soft-shelled eggs. Coarser vermiculite (e.g.: Vermiculit 3 – 6 mm item no.: 36325) is recommended for large and hard-shelled eggs.
· Regularly check the moisture of the incubation substrate. When required, dose the water directly into the incubation substrate and not above the eggs.
· The time of hatching can differ greatly, even within the same clutch of eggs. Primarily this is caused by differences in temperature and humidity.
7.3 Incubation table: The table below contains the guidance values for a number of reptile species based on experience.
These do not guarantee successful breeding!
Common agama Agama Agama 30 approx. 60 – 70 days
Green ameiva Ameiva Ameiva 30 approx. 130 days
Red-throated anole Anolis carolinensis 27 – 30 approx. 40 – 60 days
Knight anole Anolis equestris 27 – 30 approx. 70 – 100 days
Bahaman anole Anolis sagrei 27 – 30 approx. 40 – 60 days
Plumed basilisk Basiliscus plumifrons 30 approx. 55 – 65 days
Striped basilisk Basiliscus vittatus 30 approx. 50 – 70 days
Fischer's chameleon Kinyongia fisheri increasing from 17, 22 and 25 approx. 300 days
Kilimanjaro two-horned chameleon Kinyongia tavetanum day 22 – 23, night 18 approx.140 days
Incubation temperature in °C Duration of incubation:
Tel: +49 (0) 22 25 - 94 15 0 · Fax: +49 (0) 22 25 - 94 64 94 · info@dohse-aquaristik.de
7

Veiled chameleon Chamaeleo c. calyptratus 28 approx. 180 days
Helmeted iguana Corytophanes cristatus 28 approx. 100 days
Desert collared lizard Crotaphytus bicinctores 28 – 32 approx. 45 – 60 days
Eastern collared lizard Crotaphytus collaris 28 – 32 approx. 45 – 60 days
Black iguana Ctenosaura similis 28 – 29 approx. 80 – 100 days
Pegu forest gecko Cyrtodactylus peguensis w 25 – 28 approx. 90 – 95 days
African egg-eating snake Dasypeltis scabra 30 approx. 60 – 70 days
Desert iguana Dipsosaurus dorsalis 28 – 33 approx. 45 – 80 days
Russian ratsnake Elaphe schrenckii 28 approx. 40 – 60 days
Leopard gecko Eublepharis macularius 28 approx. 45 – 55 days
Panther chameleon Furcifer pardalis 26 – 28 150 – 300 days
Takay Gekko gecko 30 approx. 100 days
Lined gecko Gekko vittatus 28 – 30 approx. 90 – 160 days
Chinese leopard gecko Goniurosaurus luii 26 – 28 approx. 70 – 80 days
African fat-tailed gecko Hemitheconyx caudicinctus 28 approx. 70 – 90 days
Green iguana Iguana iguana 29 approx. 70 – 90 days
Californian kingsnake Lampropeltis g. california 28 approx. 60 – 70 days
Pueblan milk snake Lampropeltis t. campbelli 28 approx. 55 – 65 days
Northern curly-tailed lizard Leiocephalus carinatus 28 approx. 60 – 70 days
Hispaniolan masked curly-tailed lizard Leiocephalus personatus 28 approx. 60 – 70 days
Reeve’s butterfly lizard Leiolepis reevesii 28 approx. 60 – 70 days
White-lipped python Leiopython albertisii 29 – 31 approx. 55 – 70 days
Carpet python Morelia spilota variegata 29 approx. 70 – 85 days
Green tree python Morelia viridis 29 – 30 approx. 45 – 55 days
Rough green snake Opheodrys aestivus 27 – 28 approx. 50 – 60 days
Great plains grass snake Pantherophis emoryi 27 approx. 60 days
Corn snake Pantherophis guttatus 27 approx. 60 days
Desert horned lizard Phrynosoma plartyrhinos 27 – 28 approx. 45 – 55 days
Chinese water dragon Physignathus cocincinus 28 approx. 70 – 90 days
Rankin’s dragon Pogona henrylawsoni 30 approx. 60 – 70 days
Central bearded dragon Pogona vitticeps 28,5 – 30 approx. 60 – 70 days
Blood python Python curtus 29 – 31 approx. 70 days
Burmese python Python molurus bivittatus 29 – 31 approx. 60 – 90 days
Royal python Python regius 29 – 31 approx. 70 days
Crested gecko Rhacodactylus ciliatus 36 – 28 approx. 60 – 120 days
Chuckwalla Sauromalus obesus 31 approx. 70 days
Rosebelly lizard Sceloporus variabilis 28 approx. 50 – 60 days
Six-striped long-tailed lizard Takydromus sexlineatus 24 – 25 approx. 30 – 45 days
Viper gecko Teratolepis fasciata 26 approx. 60 – 70 days
Dwarf wonder gecko Teratoscincus microlepis 28 approx. 85 – 150 days
Red eyed crocodile skink Tribolonotus gracilis 24 approx. 60 – 70 days
Four horned chameleon Trioceros q.quadricornis 20 – 25 approx. 125 – 160 days
Argentine black and white tegu Tupinambis merianae 30 approx. 70 – 80 days
Mop head iguana Uranoscodon superciliosus 26 approx. 90 – 110 days
Ocellated uromastyx Uromastyx ocellata 32 approx. 80 – 90 days
Ornate uromastyx Uromastyx ornata 32 approx. 80 – 90 days
Side-blotched lizard Uta stansburiana 28 approx. 40 – 45 days
Savannah monitor lizard Varanus exanthematicus 27 – 31 approx. 115 – 180 days
Shield tailed agama Xenagama taylori 29 approx. 50 – 55 days
For more detailed information we recommend the book: “Die Inkubation von Reptilieneiern” (The Incubation of Reptile Eggs by Dr. Gunther
Köhler published by Herpeton Publishing.
8. Cleaning and care of the Easy Breeder: The Easy Breeder should always be thoroughly cleaned using a damp cloth and and disinfected with
Reptix Desinfect (item no.: 38002) after each incubation.
9. Problems and solutions: When you encounter problems, check you settings on the Easy Breeder and carry out a reset if necessary (disconnect
the mains plug and plug back in while pressing and holding the Reset button). Should this not lead to success, please speak to your specialist dealer.
10. Safety instructions and technical data
10.1 Safety instructions:
· The product must only be operated as supplied
· The device must not be operated if there are any defects on feed lines, heating element or display.
· Electronic components must not be modified in any way, and the leads must not be shortened.
· Disconnect the mains plug prior to opening, maintenance or cleaning.
· The heating element must be cleaned of dust and dirt particles before initial use.
8
Dohse Aquaristik GmbH & Co. KG · Otto-Hahn-Str. 9 · 53501 Gelsdorf · Germany · www.dohse-terraristik.com
 Loading...