

Hobbico TX24203 User Manual
Radio Controlled Buggy
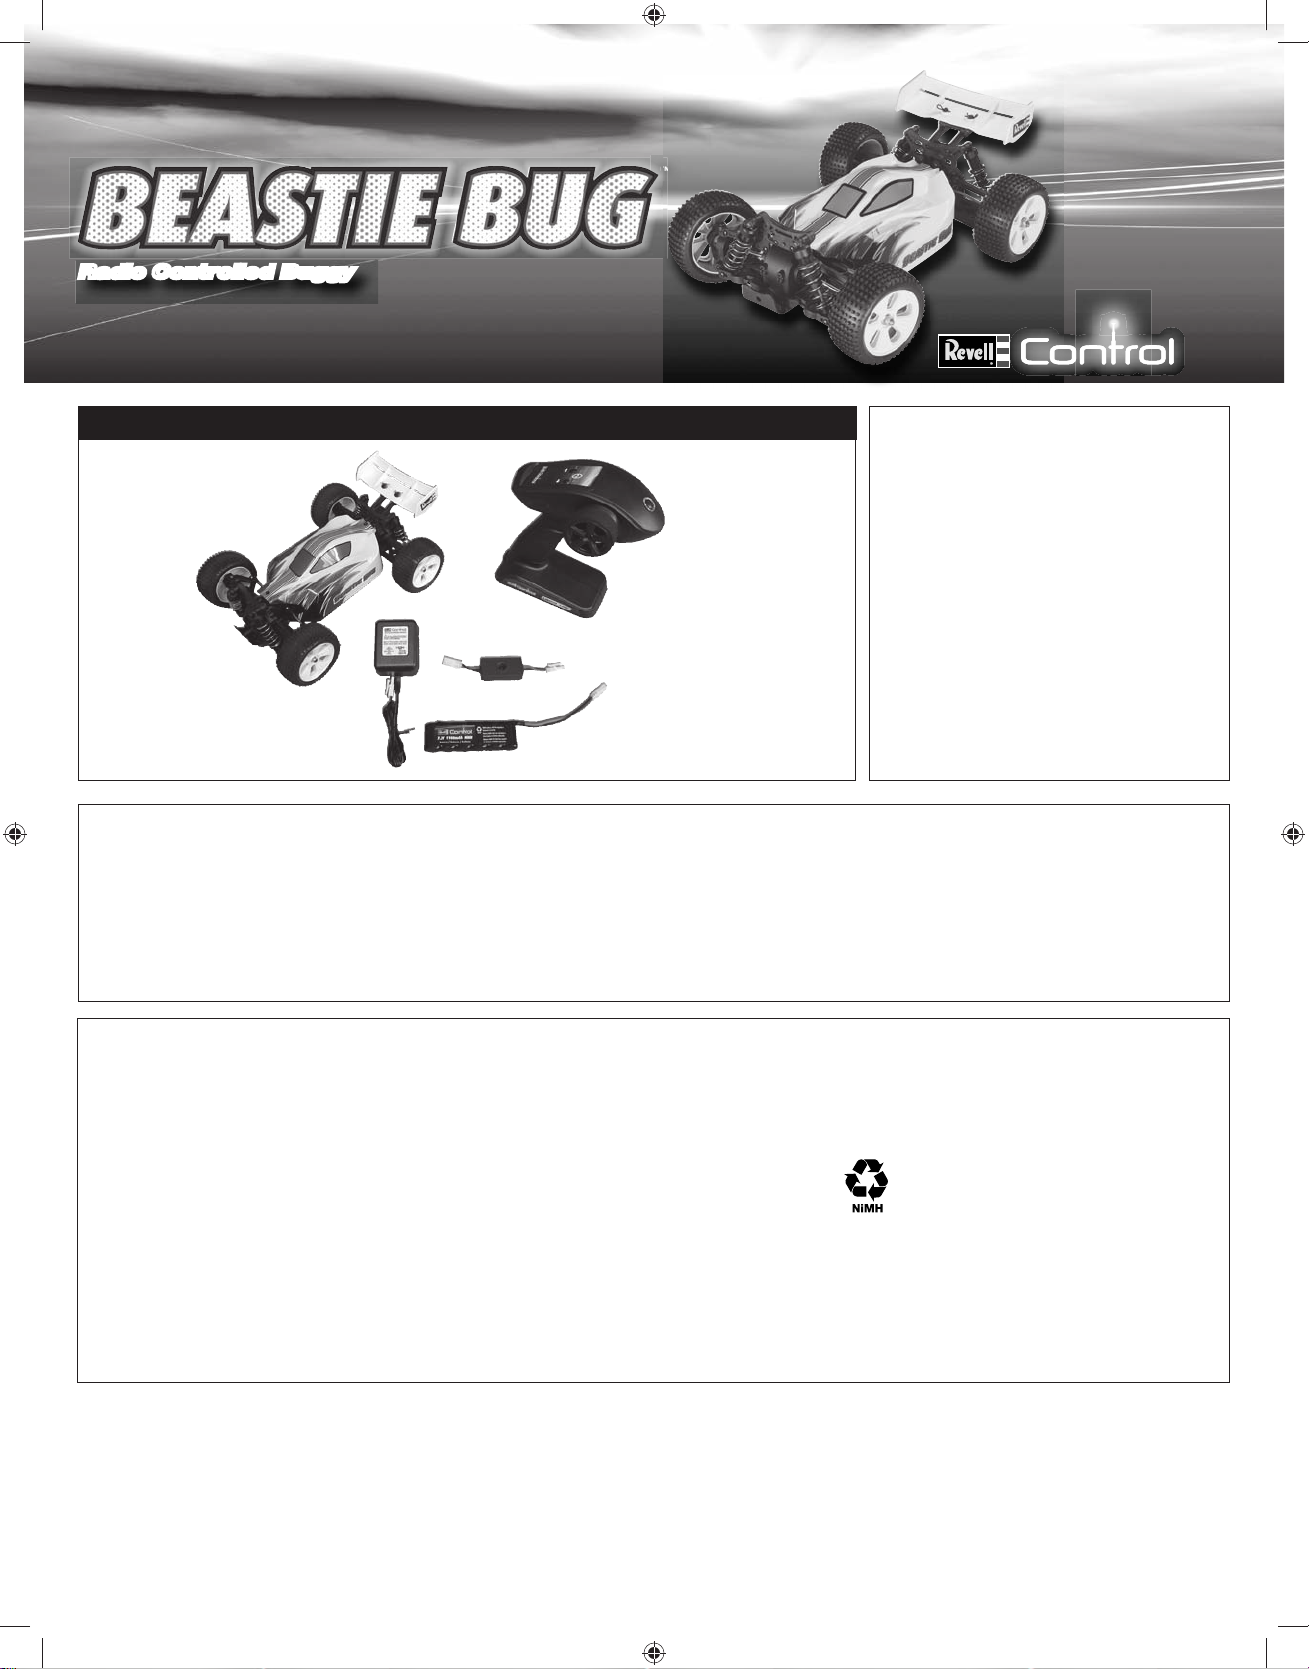
55-3968
™
Contents
FCC REQUIREMENT
This device complies with part 15 of the FCC
rules. Operation is subject to the following two
Beastie Bug
™
Controller
conditions.
(1) This device may not cause harmful
interference.
(2) This device must accept any interference
received, including interference that may
cause undesired operation.
Peak Detection Unit
NOTE: THE MANUFACTURER IS NOT RESPONSIBLE
FOR ANY RADIO OR TV INTERFERENCE CAUSED
BY UNAUTHORIZED MODIFICATIONS TO THIS
Charger
Battery
EQUIPMENT. SUCH MODIFICATIONS COULD
VOID THE USER’S AUTHORITY TO OPERATE THE
EQUIPMENT.
Safety Precautions:
Warning: Do not modify or alter this unit. Changes or modifi cations to this unit not expressly approved by the party responsible for compliance could void the user’s
authority to operate the equipment.
• This vehicle is suitable for indoor or outdoor use in
dry conditions.
•
The vehicle is suitable for ages 14 and above. Parents
should supervise children who operate the vehicle.
•
Remove batteries from the controller when not in use.
• Switch off the car and disconnect the battery when
it is not in use.
• Keep hands, face and loose clothing away from the
vehicle.
• Keep these instructions for future reference.
• Always keep an eye on the vehicle. Careless or
irresponsible use may cause damage.
• Always follow these instructions when operating this
vehicle.
• Do not operate near people, animals or water.
Battery Requirements for Controller:
Requires: 4 x 1.5V AA size batteries (not included)
Care and Maintenance:
• Regularly examine all parts for damage. If any is
found, do not use again until the damage has been
repaired.
• Use a clean cloth to wipe the vehicle clean.
• Keep the vehicle and batteries away from direct
sunlight and/or heat sources.
Battery Cautions:
• Parental guidance is recommended when installing or
replacing batteries.
• For best performance, use new alkaline batteries in
controller.
• Insert new batteries in the controller as soon as any
function becomes diminished.
• Do not power controller by mixing different types of
batteries, or old and new batteries.
• Use only batteries of the same or equivalent type as
those recommended.
The vehicle is equipped with a NiMH battery. Always
follow these safety instructions:
• Never dispose of batteries in a fi re or store near
sources of heat.
• The charger is specially designed for charging the
battery of this car. Only use it for this purpose.
• Batteries should only be charged on a fi reproof
surface, away from any fl ammable materials.
• Never leave the battery unattended when charging.
• Batteries must be discharged before being disposed
of. Cover exposed poles with adhesive tape to
prevent short-circuiting!
• Never disassemble or alter the battery contacts.
Do not damage or puncture battery cells. Doing so
would result in an explosion hazard!
• Keep the NiMH battery away from children.
This product contains a NiMH battery. Must be
recycled or disposed of properly.
WARNING: This product contains a chemical known
to the State of California to cause cancer.
90 DAY LIMITED WARRANTY
PLEASE DO NOT RETURN YOUR PRODUCT TO THE STORE – Revell will repair or replace factory defects for 90 days from the date of purchase. This warranty specifi cally does not
cover crash damage, misuse or abuse. To make a warranty claim, please contact our product support team at 1-217-398-8970 or e-mail us at productsupport@hobbico.com.
If requested by Product Support, please send defective product to: Hobby Services, 3002 N Apollo Dr., Suite #1, Champaign, IL 61822.
This warranty applies only if the product is operated in compliance with the instructions and warnings provided with each model. Revell assumes no liability except for
the exclusive remedy or repair of parts as specifi ed above. Revell shall not be liable for consequential or incidental damages. Some states do not allow the exclusion of
consequential or incidental damages so the above exclusion may not apply to you. This warranty gives you specifi c legal rights and you may also have other rights which vary
from state to state.
1
RMXC3968 Instr.indd 1 6/21/2013 8:16:40 AM
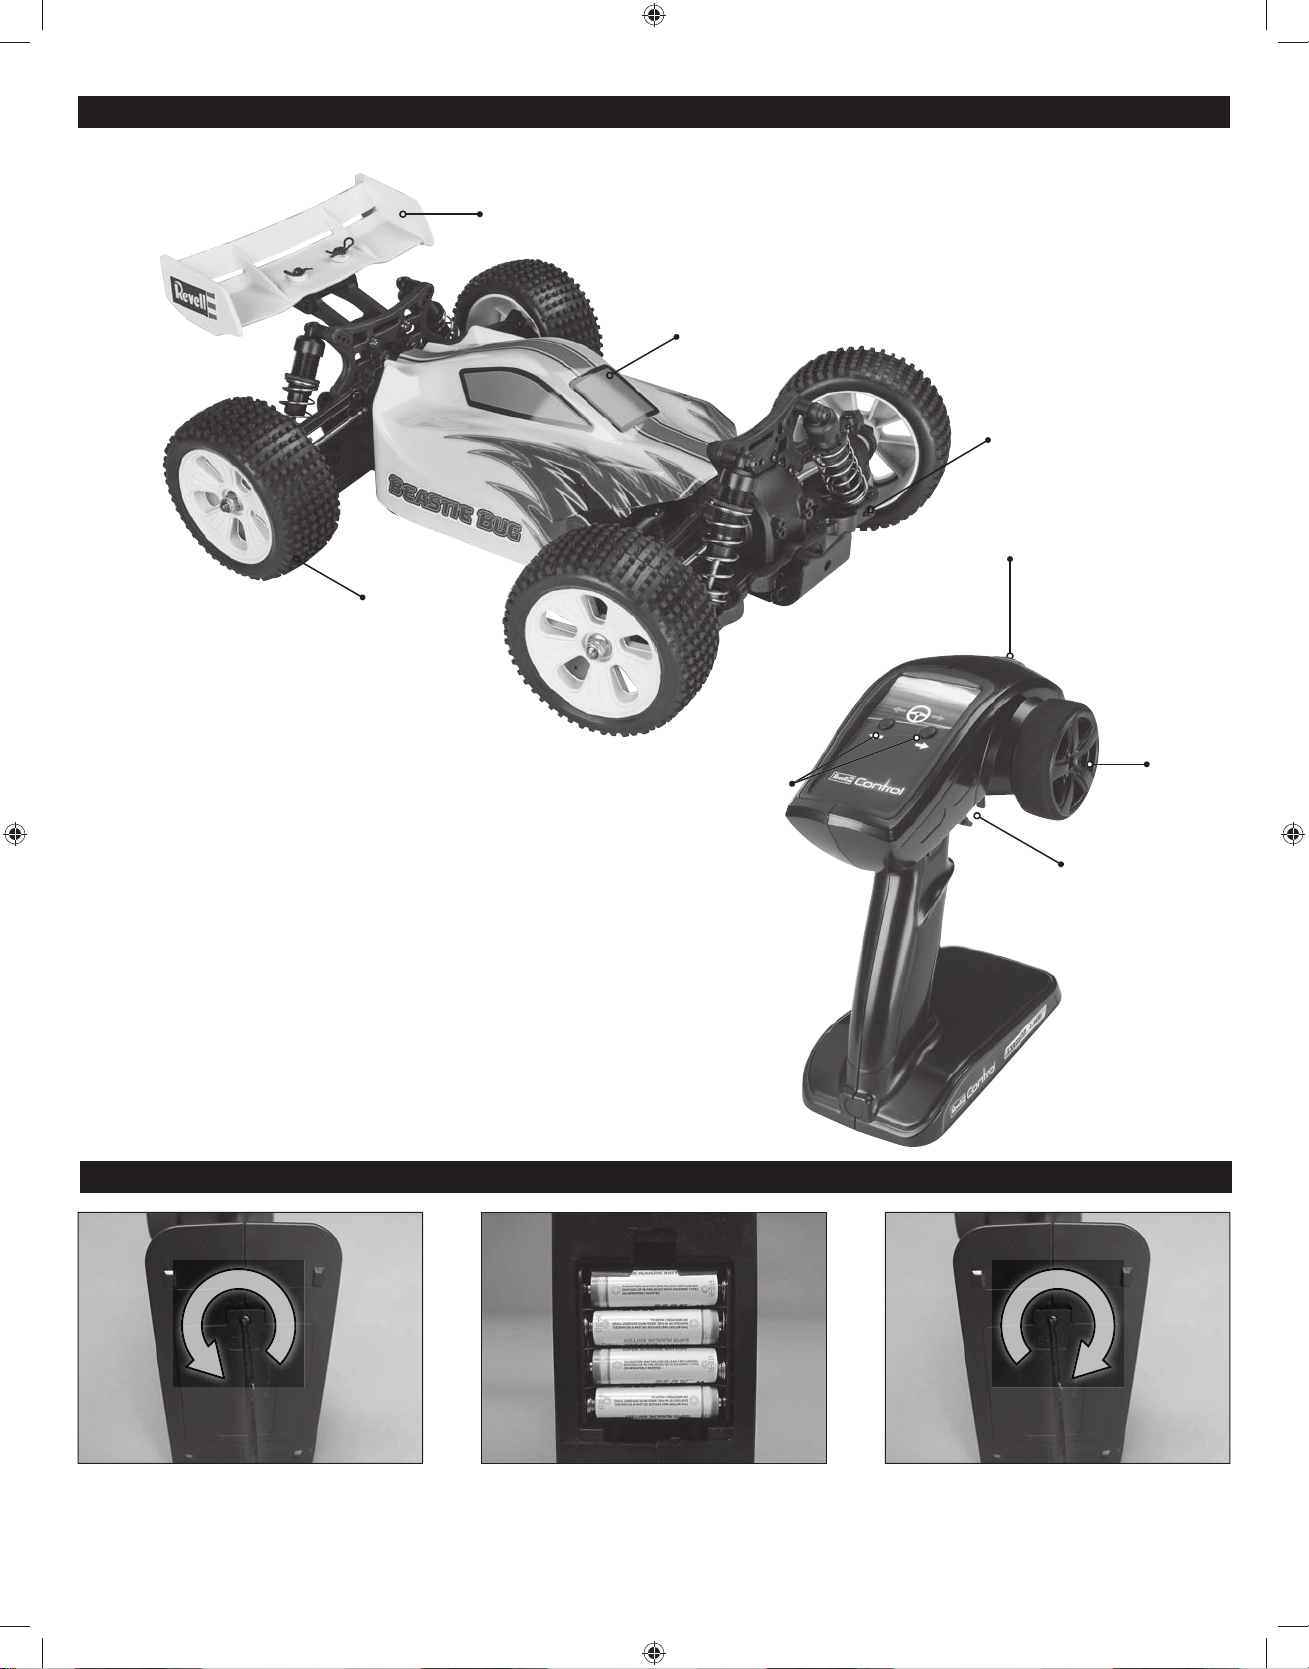
High Grip
Rubber Tires
Vehicle and Controller Parts
High Downforce Wing
Removeable Body
Independent Suspension
Power Switch
Steering Trims
Insert Batteries into the Controller
Steering
Throttle
1. Remove the screw and battery cover from the
bottom of the transmitter.
2
RMXC3968 Instr.indd 2 6/21/2013 8:16:43 AM
2. Insert (4) 1.5V AA batteries, following the polarity
information.
3. Re-install the battery cover and the screw.
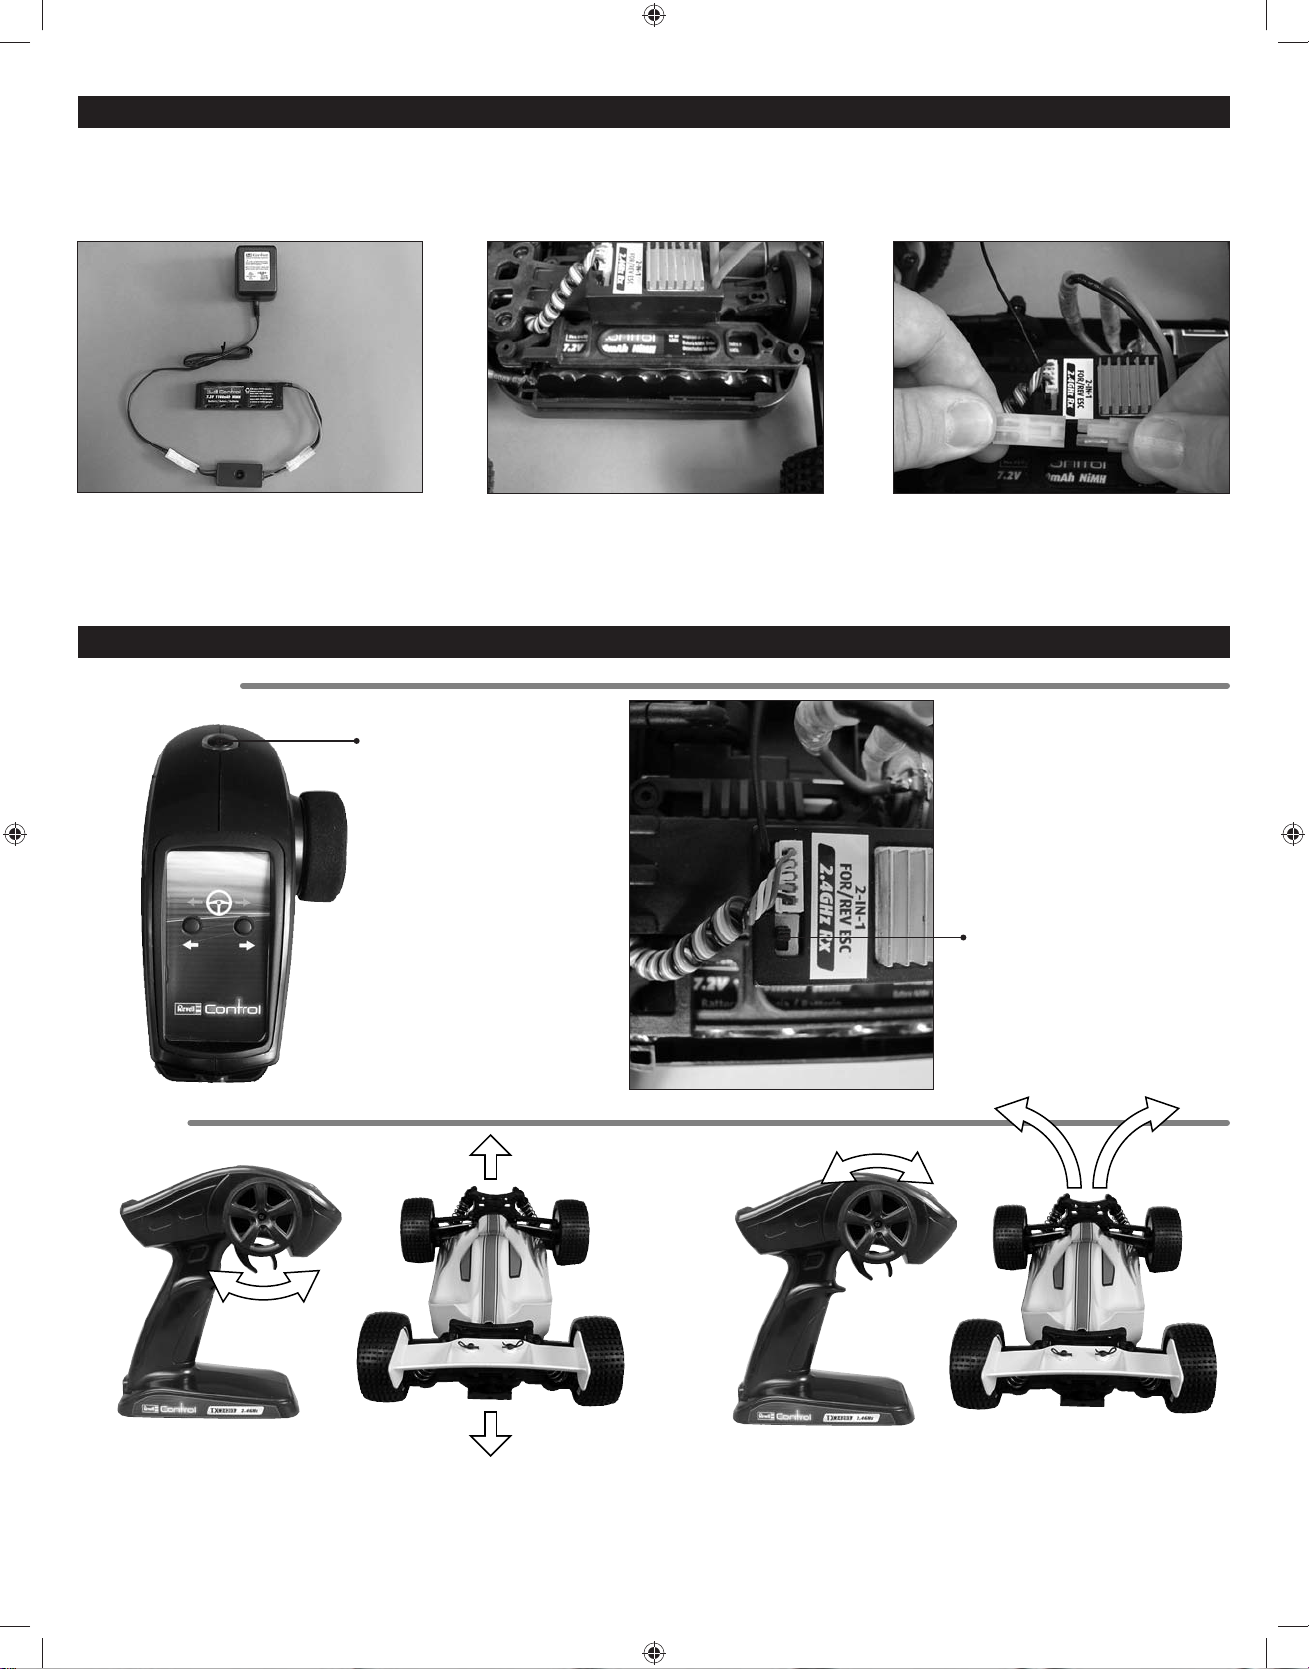
Charging Procedure
Attention: • Allow the battery to cool off for 10-15 minutes before recharging.
• Do not leave the battery unattended during the charging process.
• The car can be driven for approximately 6 minutes following a charge time of approximately 2 hours.
• Charge times will vary depending on how much charge is left in the battery.
1. Switch off the car.
2. Carefully connect the battery to the peak
detection unit.
3. Plug the other end of the charger into an AC wall
outlet.
Getting Started:
4. The charging process takes approximately 2
hours. For safety reasons, never charge the battery
for longer than 2 hours. While charging, the peak
detection unit LED will be on. When the battery is
fi nished charging, the LED will be off.
Driving the Vehicle
5. Disconnect the battery from the charger and
reconnect the battery to the speed control.
Operation:
1. Turn the controller on by
pressing the button.
To turn the controller off,
press and hold the button
until the blue light turns off.
2. Switch the car to ON.
The ESC will «BEEP» 4 times
if the controller is not on.
• To slowly drive forward, pull the trigger slightly. To drive
faster, pull the trigger further.
• To brake, push the trigger. To drive in reverse, push again.
• During a crash, release the trigger.
• When the vehicle battery becomes low, the vehicle will roll to a stop and the motor will begin beeping.
• Allow the battery to cool before recharging.
RMXC3968 Instr.indd 3 6/21/2013 8:16:46 AM
• To turn, rotate the wheel to the left or right.
• Always move the controls slowly and with a gentle touch.
3
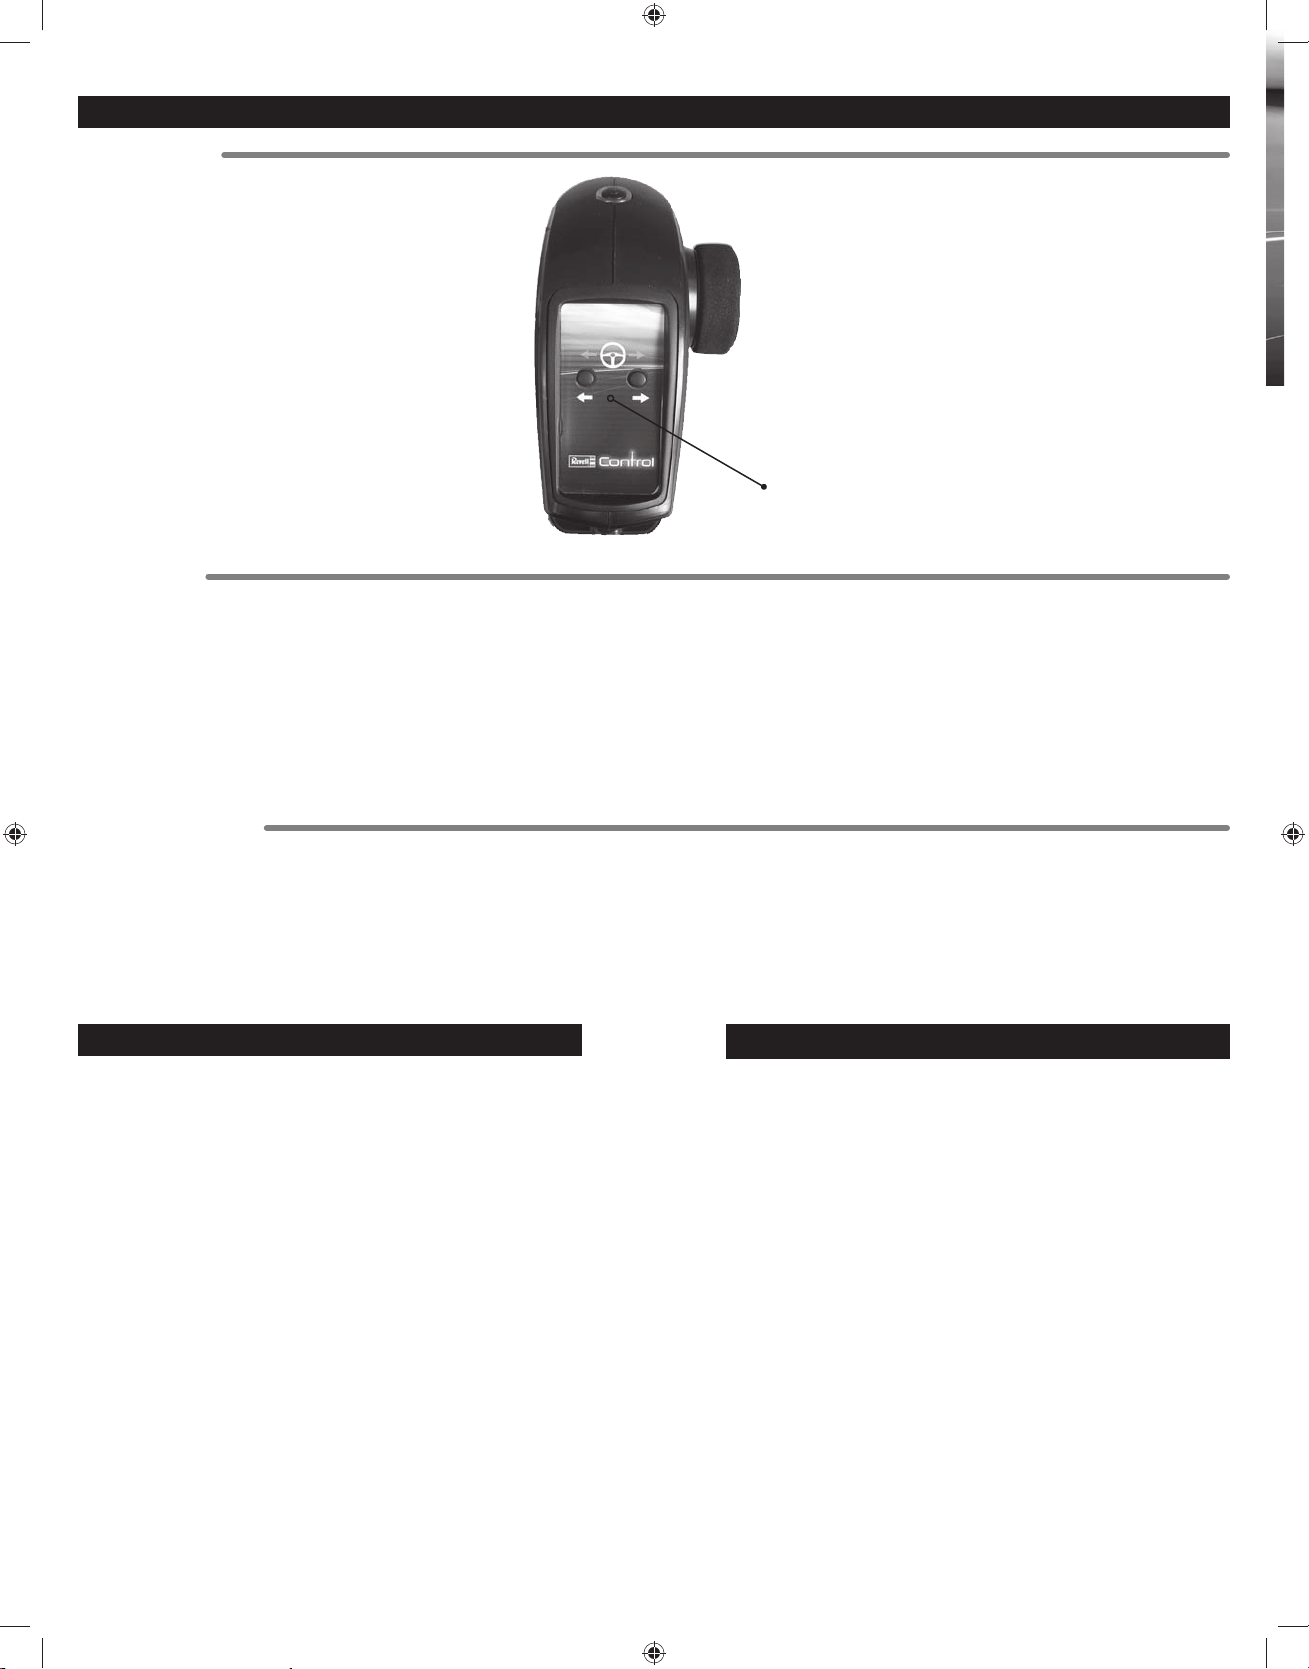
Steering Trim:
• If the vehicle pulls right (when viewed from
behind), push the left Õtrim button.
• If the vehicle pulls left (when viewed from
behind), push the right Ötrim button.
Driving Tips:
Driving the Vehicle (continued)
Steering Trim Buttons
•
If the controller sits idle (without input) for 2 minutes,
minutes without input, the controller will shut off.
• Run the car on a fl at surface.
• Watch the car instead of looking at the controller.
• Always release the throttle trigger right away following a crash to prevent damaging the electronics.
• The vehicle should be operated in an area that has as much open space as possible with no people or animals nearby.
• Do not operate this vehicle on the street.
it will go into P
ower Save Mode. The LED will begin fl ashing slowly. After 9
Binding Procedure
To bind the controller to the receiver:
1. Hold the right trim button on the controller and turn on the controller. The LED on the controller will blink.
2. Turn on the receiver. The LED on the controller will turn solid.
3. Process is complete.
Troubleshooting
Problem: The wheels won’t turn.
Solution: Recharge the battery.
Problem: The controller doesn’t function.
Solution: Make sure the batteries are inserted correctly.
Insert new batteries.
Problem: The car loses speed or comes to a stop.
Solution: Recharge the battery.
If your Beastie Bug™ requires repairs or replacement,
DO NOT RETURN TO RET
Hobby Services
3002 N. Apollo Drive, Suite 1
Champaign, Il, 61822, U.S.A.
9am-5pm Central Mon.-Fri.
(217) 398-0007
hobbyservices@hobbico.com
Service
AILER. Contact:
Problem: Controller LED fl ashing slowly (low voltage).
Solution: Replace the controller batteries.
REVELL, INC. 1850 HOW
A SUBSIDIARY OF HOBBICO
MADE IN SHANGHAI, CHINA
© 2013 REVELL INC. PLEASE RETAIN PACKAGING FOR FUTURE REFERENCE.
CONTENTS AND SPECIFICATIONS SUBJECT TO CHANGE WITHOUT NOTICE.
4
RMXC3968 Instr.indd 4RMXC3968 Instr.indd 4 6/21/2013 8:16:47 AM6/21/2013 8:16:47 AM
ARD ST., UNIT A, ELK GROVE VILLAGE, IL 60007 U.S.A.
Industry Canada Notice:
This device complies with Industry Canada licence-exempt RSS
standard(s).
1.Operation is subject to the following two conditions:
(1) this device may not cause interference, and
(2) this device must accept any interference, including interference
that may cause undesired operation of the device.
2.Changes or modifications not expressly approved by the party
responsible for compliance could void the user’s authority to
operate the equipment.
revell.com
 Loading...