

Hobbico TX24201 User Manual
Radio Controlled Buggy
Carrito con Tadiocontrol
Buggy Télécommandé
55-3979
™
1
RMXC3979 Chiller Mnl.indd 1 4/18/2013 10:32:22 AM
™
CHILLER
Radio-controlled kit with 2.4GHz
•
technology.
Pistol-type controller.
•
™
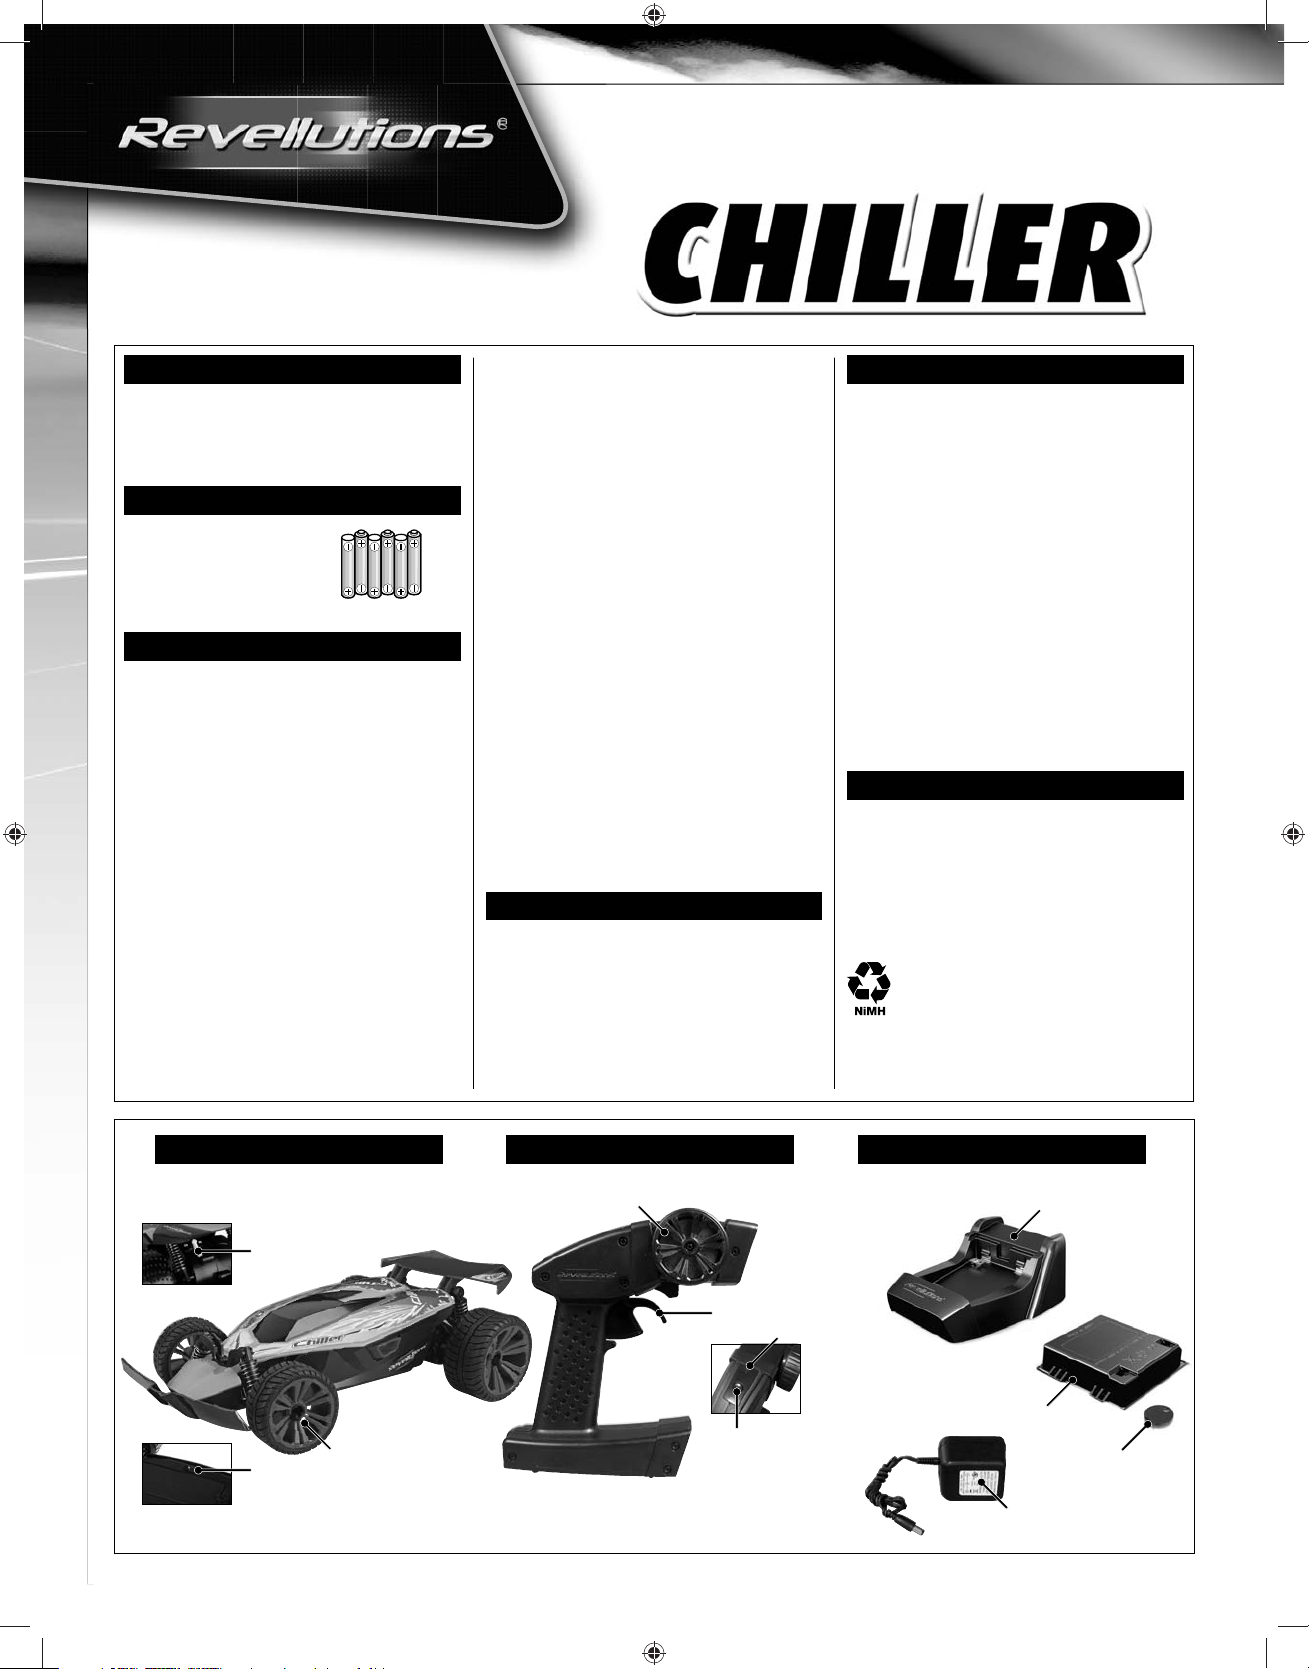
REQUIRED BATTERIES
Batteries: (4) 1.5 V “AA”
(not included)
SAFETY INSTRUCTIONS
This vehicle is suitable for children who
•
are at least 10 years of age. Parental
supervision is required.
This vehicle is suitable for use indoors
•
and in a safe outdoor area.
Keep your hands, face and loose clothing
•
away from the vehicle.
Switch off the controller and vehicle when
•
not in use.
Remove batteries from the controller and
•
vehicle when not in use.
Do not drive near people, animals, bodies
•
of water or power lines.
Never disassemble or alter the battery.
•
Do not damage or puncture the batteries.
Only recommended batteries or those of
•
an equivalent type may be used.
Keep out of reach of children.
•
The electronics are protected from dust
•
and splashing, but complete immersion
or driving in water for an extended period
must be avoided! After use, remove the
battery and dry completely!
Do not expose the controller and
•
charging unit to moisture!
Never throw batteries into a fi re or store in
•
hot places.
Only use the supplied charger to charge
•
the battery.
Do not leave the battery unsupervised
•
during charging.
When disposing of batteries, they must
•
be fully depleted. Cover exposed
terminals with adhesive tape.
Rechargeable batteries may only be
•
charged under the supervision of an adult.
Combinations of different types or new
•
and used batteries may not be used.
Never store the battery in the charger base.
•
MAINTENANCE AND CARE
Use a clean, damp cloth to wipe off the
•
vehicle.
Protect the vehicle and batteries from
•
direct sunlight and/or heat.
Never allow the controller or charger to
•
come into contact with water. Damage
may result.
FCC REQUIREMENT
This device complies with part 15 of the
FCC rules. Operation is subject to the
following two conditions.
(1) This device may not cause harmful
interference.
(2) This device must accept any
interference received, including
interference that may cause undesired
operation.
NOTE: THE MANUFACTURER IS NOT
RESPONSIBLE FOR ANY RADIO OR TV
INTERFERENCE CAUSED BY
UNAUTHORIZED MODIFICATIONS TO
THIS EQUIPMENT. SUCH MODIFICATIONS
COULD VOID THE USER’S AUTHORITY
TO OPERATE THE EQUIPMENT.
CAUTION – ELECTRIC TOY
Not recommended for children under 8
years of age. As with all electrical products,
precautions should be observed during
handling and use to prevent electric shock.
Input: 120V AC, 60Hz;
Output: 6V DC 0.5A
This product contains a NiMH
battery. Must be recycled or
disposed of properly.
WARNING: This product contains a
chemical known to the State of California to
cause cancer.
CHILLER
Gear
™
CONTROLLER ACCESSORIES
Steering
Charger
base
lever
Throttle
Power LED
Battery
ON/OFF
switch
Quick-change
wheels
ON/OFF
switch
Battery
locking disk
Charger
2
RMXC3979 Chiller Mnl.indd 2 4/18/2013 10:32:23 AM
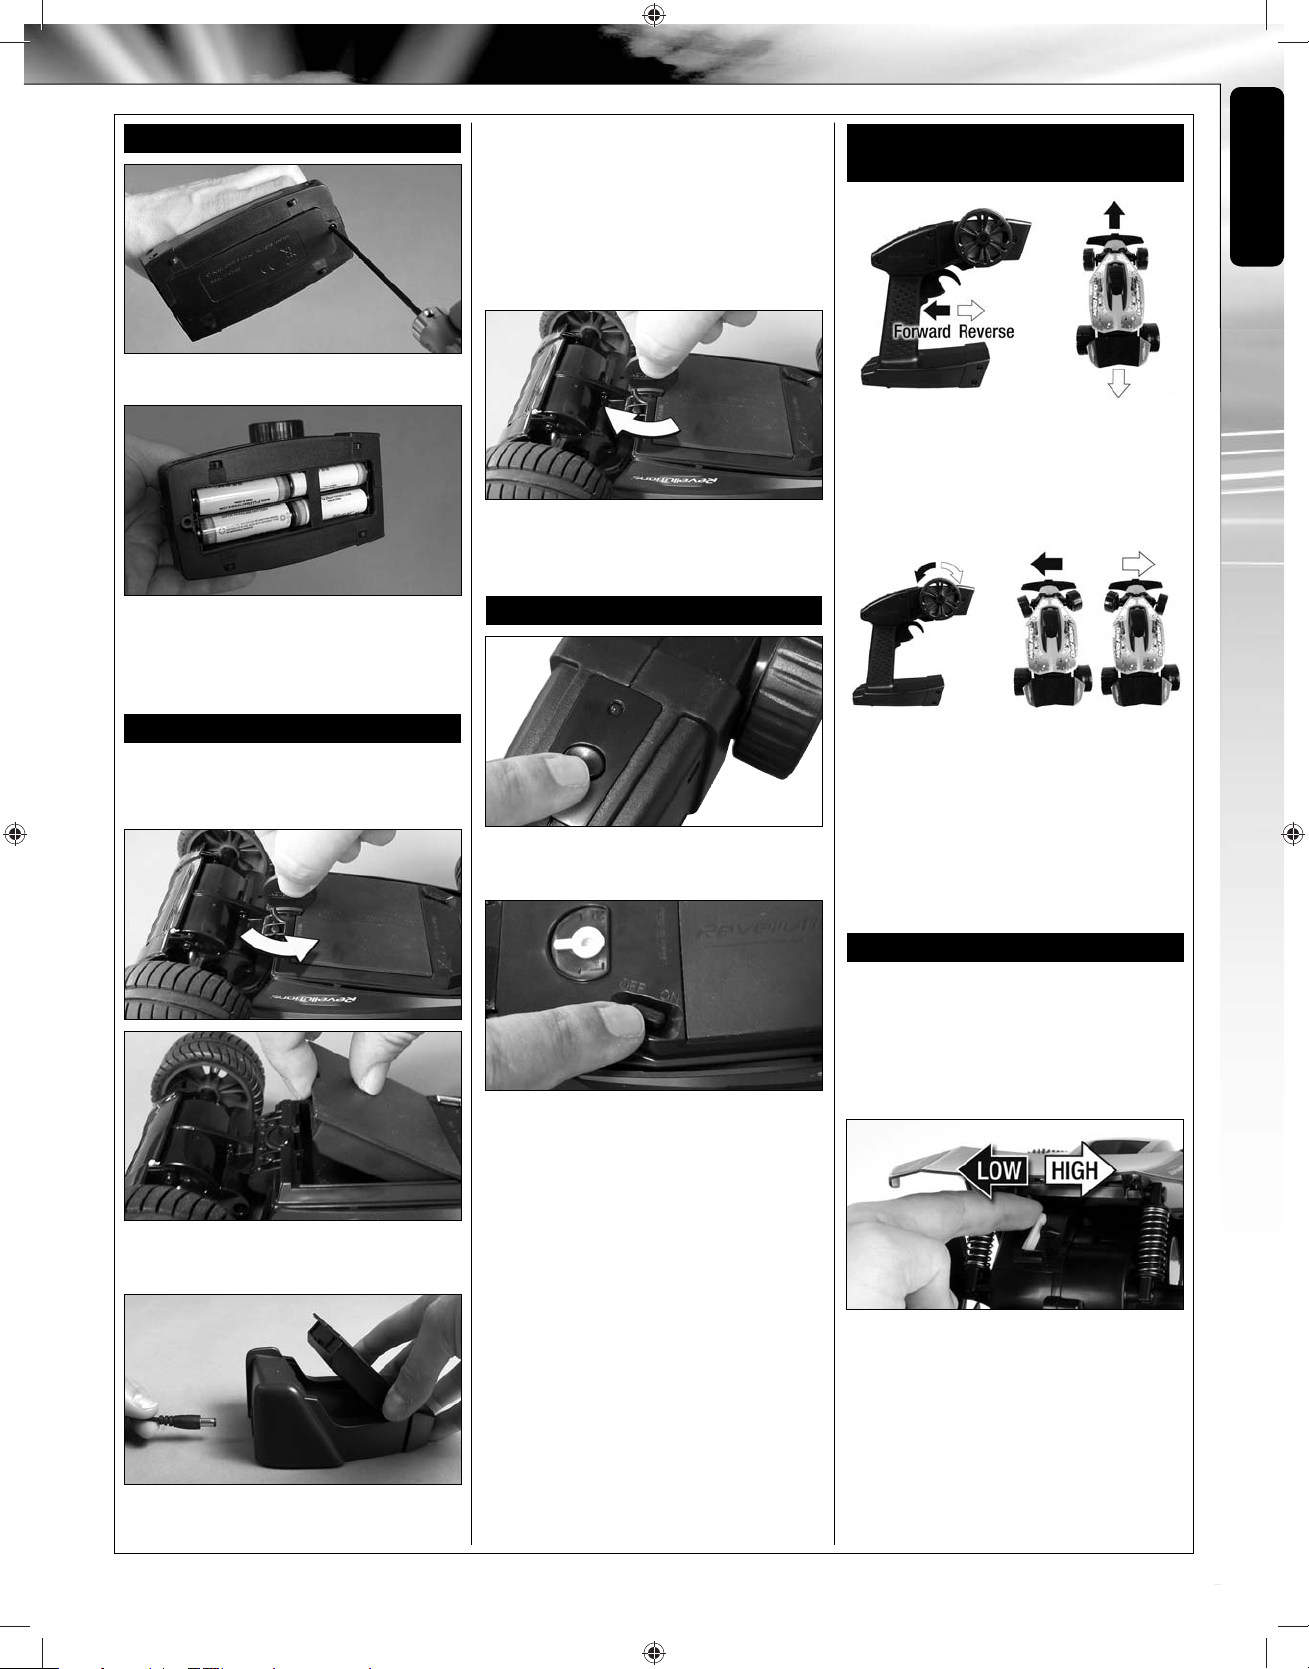
INSERTING BATTERIES
1. Unscrew the battery cover.
3. Plug the battery into the charger
base. The charger LED glows red to
show that charging is in progress.
When the LED turns off, the battery is
fully charged.
4.Unplug the charger and remove the
battery.
5. Re-insert the battery in the vehicle.
VEHICLE CONTROL
AND DRIVING TIPS
To slowly drive forward, pull the
•
trigger slightly. To drive faster, pull the
trigger further.
To brake, push the trigger. To drive in
•
reverse, push again.
English
2. Insert 4 x 1.5V AA batteries. Reinstall the cover.
CHARGING THE VEHICLE
Attention: After each use, the battery
and the motor must cool down for 10
to 15 minutes.
START
1. Press the ON/OFF button on the
controller; the LED illuminates.
2. Move the ON/OFF switch on the
vehicle to the “ON” position.
To turn, rotate the wheel to the left or
•
right.
Always move the controls slowly and
•
with a gentle touch.
During a crash, release the trigger.
•
GEAR SHIFTING
Attention! Do not switch while the
motor is running!
1.
Use low gear for indoors or large
inclines. Slide the lever to the left until it
locks.
1. Open the battery lock and remove
the battery.
2. Use high gear for open areas. Slide
the lever to the right until it locks.
2. Plug the charger into a standard AC
outlet and the charger base.
3
RMXC3979 Chiller Mnl.indd 3 4/18/2013 10:32:36 AM
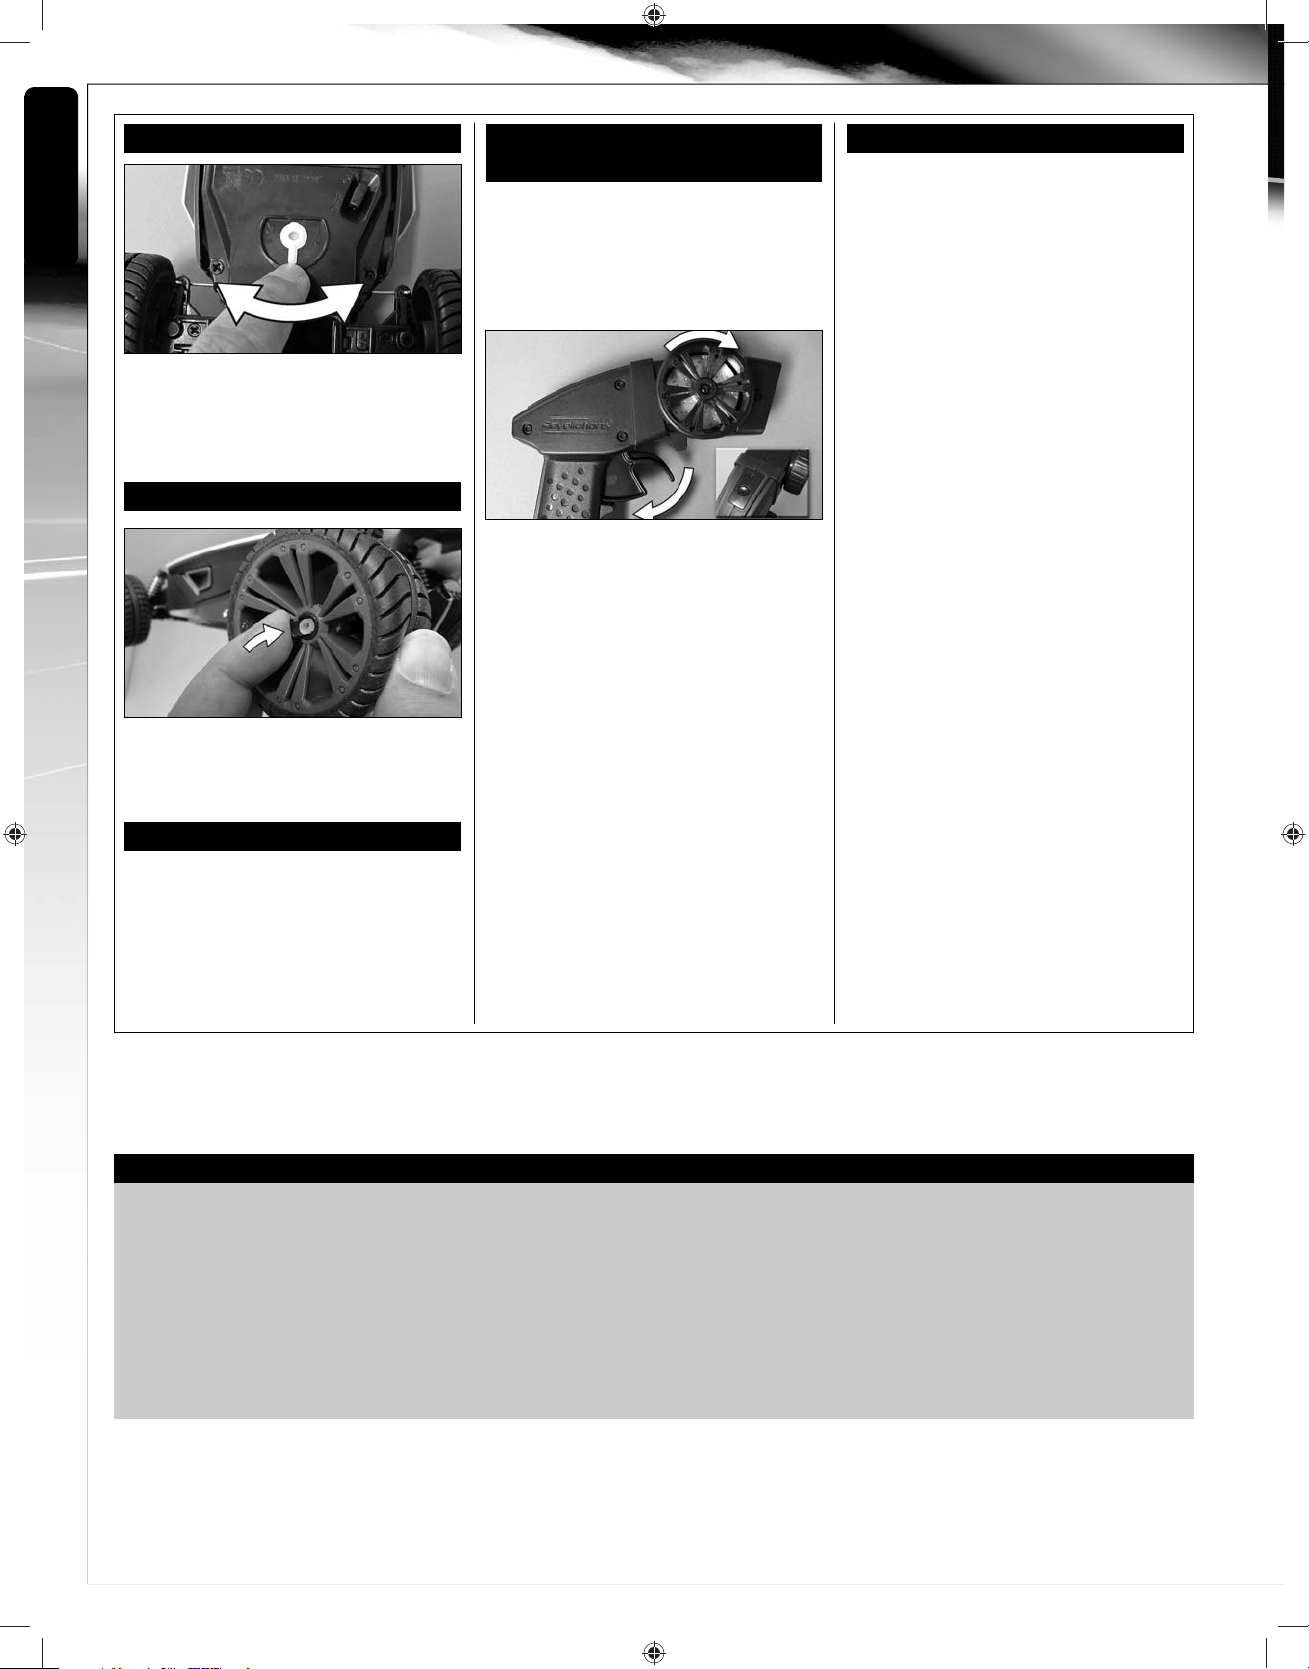
STEERING ADJUSTMENT
English
If your kit “pulls” to one side when the
steering wheel is pointed straight,
move the steering trim lever the
opposite direction. Adjust as needed.
WHEEL CHANGE
ess the r
Pr
When replacing the wheel, make sure
the hex engages properly in the rim.
etainer to pull the wheel off.
BATTERY SA
VER
CONNECTING THE VEHICLE
AND CONTROLLER
The connection of your vehicle and
controller is established at the factory.
If necessary to re-establish connection,
proceed as follows:
1. Turn off the car and controller.
2. Pull the controller trigger and hold it.
urn the wheel all the way to the right
3. T
and hold it.
4. Turn on the controller and the LED
will begin to blink.
5. Hold the controller near the vehicle
and turn it on.
6. Once the controllers LED stops
blinking, the connection has been
made.
SERVICE
If your Revellutions Kit requir
replacement, DO NOT RETURN TO
RETAILER. Contact:
Hobby Services
3002 N. Apollo Drive, Suite 1
Champaign, Il, 61822, U.S.A.
9am-5pm Central Mon.-Fri.
(217) 398-0007
hobbyservices@hobbico.com
es repairs or
Industry Canada Notice:
This device complies with Industry Canada
licence-exempt RSS standard(s).
1.Operation is subject to the following two
conditions:
(1) this device may not cause interference,
and
(2) this device must accept any interference,
including interference that may cause
undesired operation of the device.
2.Changes or modifications not expressly
approved by the party responsible for
compliance could void the user’s
authority to operate the equipment.
After 5 minutes of no use, the contr
oller
makes a tone and the LED blinks. After
an additional 5 minutes, it switches of
f.
The vehicle switches off approximately 3
minutes after the controller. To resume
driving, switch the controller and vehicle
off and on again.
TROUBLESHOOTING
Problem: The car does not move.
Cause: The battery is too weak or depleted.
Remedy: Charge the battery (see “Charging the Vehicle”).
Problem: The vehicle cannot be controlled with the controller.
Cause: The controller is switched off. The connection between the
controller and vehicle has been severed.
Remedy: Move the controller switch to the “ON” position.
Re-establish connection between the vehicle and controller.
Problem: Controller does not work.
Cause: The controller is switched off. The batteries were not inserted
correctly. The batteries do not have enough power.
Remedy: Repeat the switch-on process as described. Check that
the batteries are inserted correctly.
Problem:
Cause:
The vehicle slows down and stops for no apparent reason.
The vehicle battery is too weak.
Remedy: Charge the battery.
4
RMXC3979 Chiller Mnl.indd 4RMXC3979 Chiller Mnl.indd 4 4/18/2013 10:32:37 AM4/18/2013 10:32:37 AM
 Loading...