

Hobbico Swarm, Sky Pilot, Star Blaze Assembly And Operation Manual
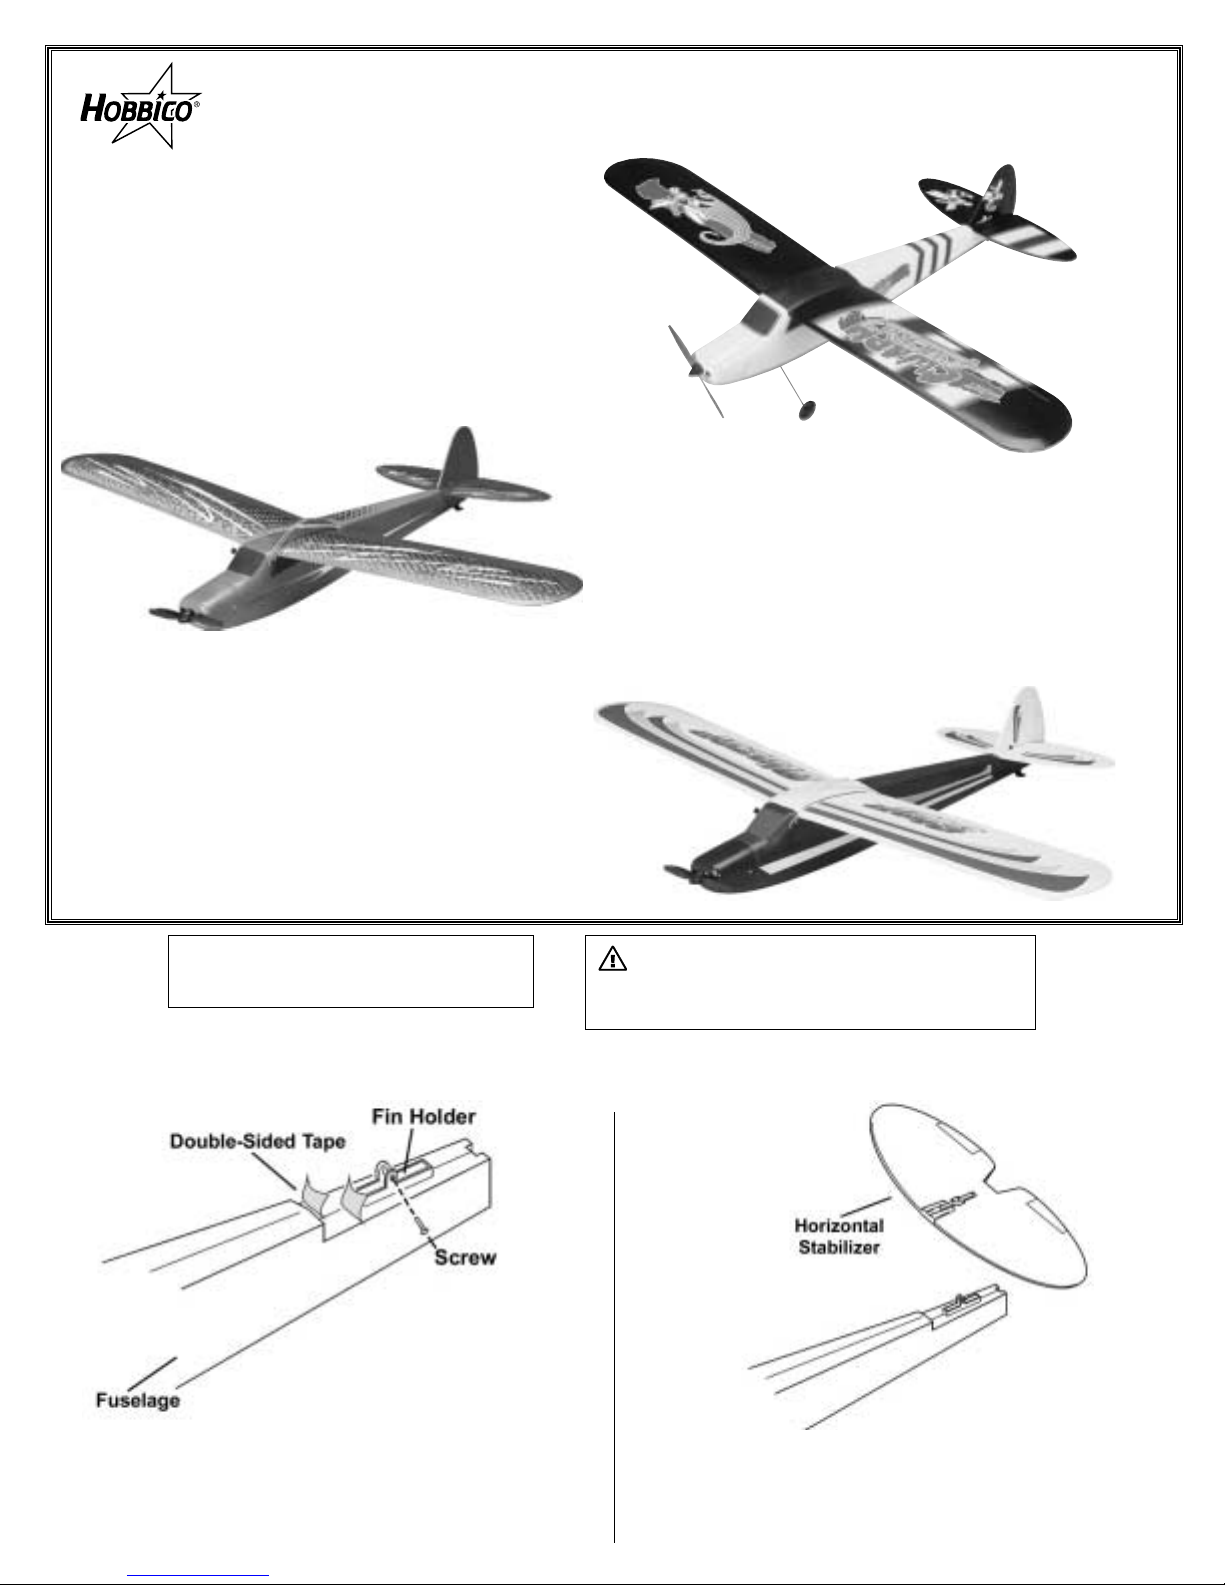
Step 1. Remove the screw from the fin holder at the back
of the
fuselage using a small Phillips screwdriver. Remove
the
backing from the adhesive strips at the top rear of
the fuselage.
Step 2. Carefully slide the horizontal stabilizer ov er the fin
holder with the decal side up. Firmly press the stabilizer
onto the adhesive tape.
WARNING: Read ALL instructions carefully.
Improper use of this product may result in
personal injury or damage to the public.
WARNING:
CHOKING HAZARD – Small parts.
Not recommended for children under 3 years.
Recommended for ages 10 and up.
Use with adult supervision.
Assembly and Operation Manual for the
Swarm, Sky Pilot or Star Blazer
Champaign, IL 61826
Swarm (HCAA0300) Replacement Parts
HCAA3350 Complete Wing Set HCAA3356 Decal
HCAA3352 Complete Tail Set HCAP9905 Charger
HCAA3354 Fuselage HCAQ3270 Propeller (2)
HCAQ3272 Landing Gear
Sky Pilot (HCAA0301) Replacement Parts
HCAA3370 Complete Wing Set HCAP9905 Charger
HCAA3371 Complete Tail Set HCAQ3300 Propeller (2)
HCAA3372 Fuselage HCAQ3302 Landing Gear
Star Blazer (HCAA0302) Replacement Parts
HCAA3380 Complete Wing Set HCAP9905 Charger
HCAA3381 Complete Tail Set HCAQ3300 Propeller (2)
HCAA3382 Fuselage HCAQ3302 Landing Gear
*Requires 6 “C”Alkaline Batteries (not included), and Phillips Screwdriver
ASSEMBLING YOUR SWARM, SKY PILOT OR STAR BLAZER
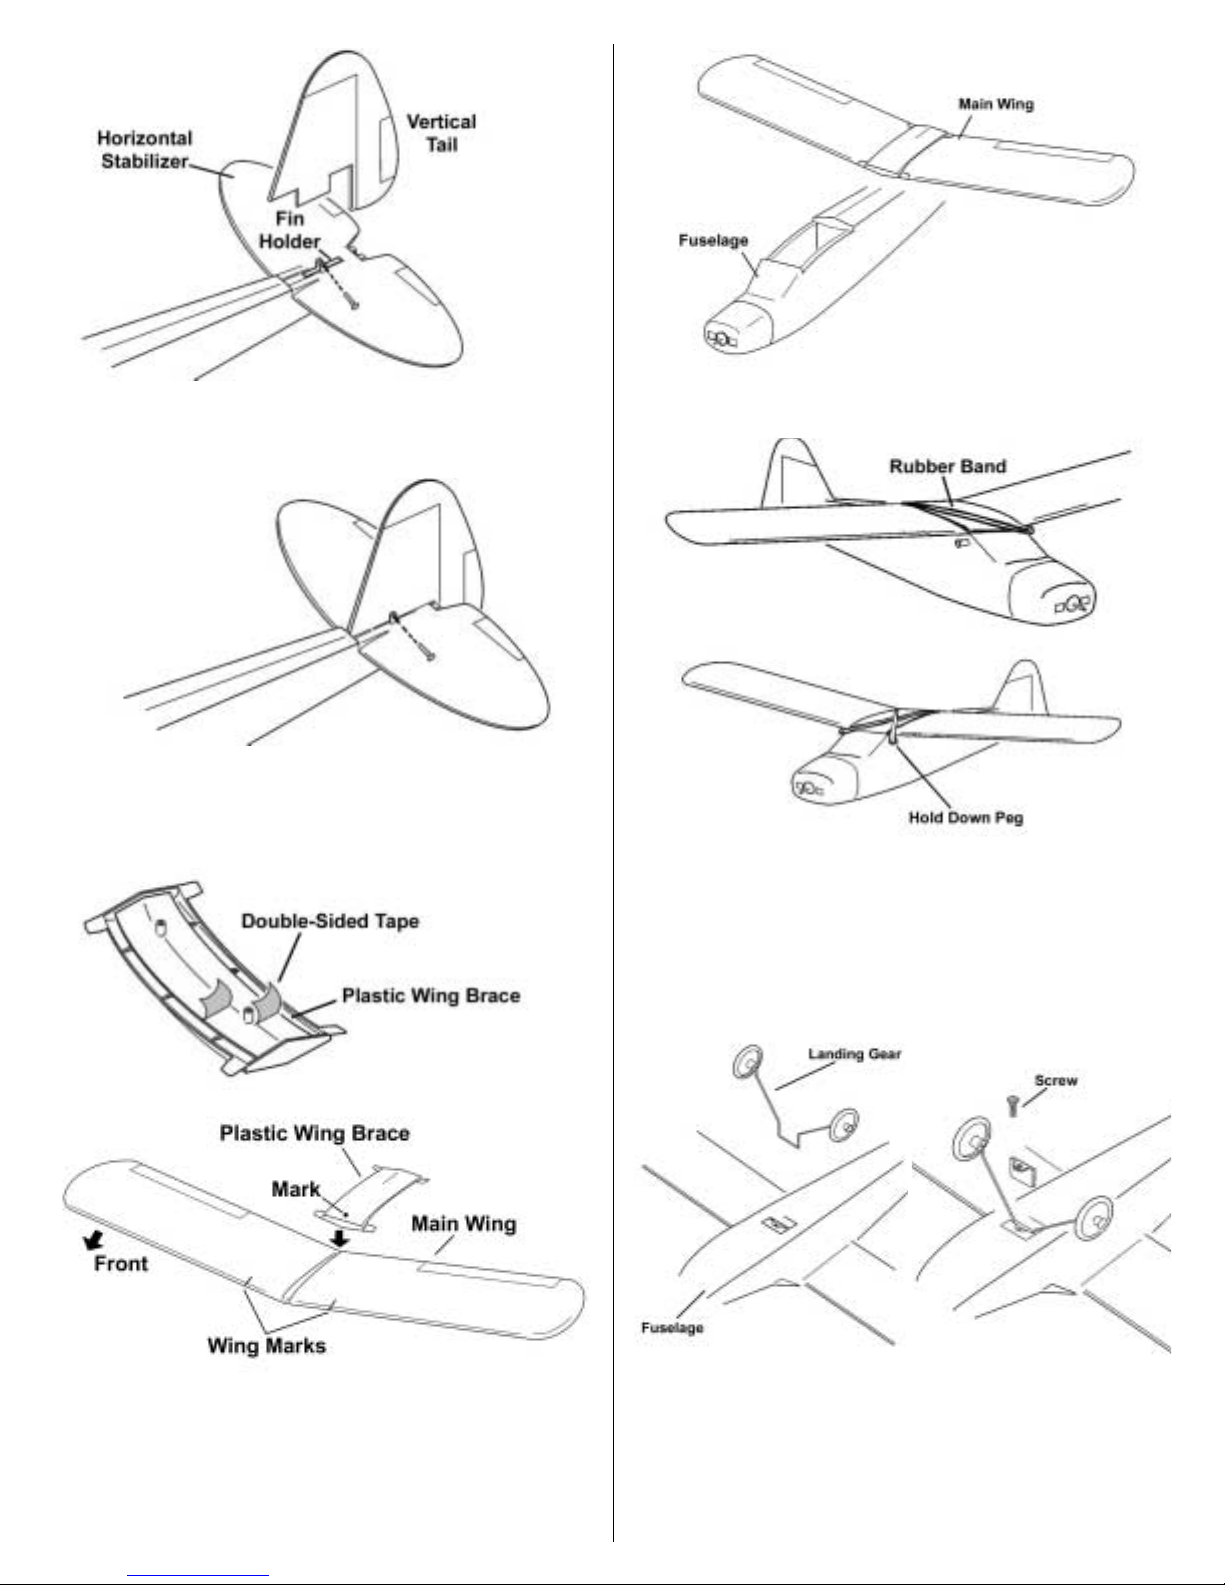
Step 3. Hold the vertical fin near the bottom and press it
into the fin holder. It must fit snug against the
horizontal stabilizer.
Step 4. Use the screw removed in step 1 to secure the
vertical fin. The screw goes into the thin side of the fin
holder, and threads into the thicker side.Do not overtighten the screw, as it could break the fin holder.
Step 5. Check the alignment of the plastic wing brace
before removing the backing paper from the adhesive
tape. The front of the wing brace is mar ked and this will
go towards the front of the main wing (see diagram).Test
fit the part. The wing brace must line up with the wing
marks on the main wing.
Step 6. Place the wing onto the fuselage. Align the wing
brace with the fuselage.
Step 7. Attach a rubber band to one of the rear pegs, and
stretch it to the opposite front peg.Repeat the process so
there are two rubber bands going from the right rear peg
to the left front peg, and two from the left rear peg to the
right front peg.The rubber bands should criss-cross.
Step 8. Remove the screw from the landing gear holder
using a small Phillips screwdriver.Then, remov e the landing gear holder. Slide the landing gear into the opening.
Slide the landing gear holder back into the opening, and
replace the screw. Do not tighten the screw to tight, it
could strip the plastic.
 Loading...