

Page 1
INSTRUCTION MANUAL
Page 2

BATTERY PRECAUTIONS
The C-me uses a lithium polymer (LiPo) battery. Follow these
precautions to ensure safe and trouble-free operation.
● ALWAYS turn off the C-me when it is not in use.
● Do not attempt to use a damaged battery.
● This product contains a LiPo battery that must be recycled or
disposed of properly.
● Do not leave the C-me unattended while charging. It is normal
for the drone to get warm. Disconnect the C-me immediately
if it becomes hot!
● Never disassemble or modify the C-me wiring in any way or
puncture battery.
● Always unplug the charge cable when not in use.
● After the C-me has landed because the battery is exhausted,
recharge the battery before attempting another ight.
● ALWAYS KEEP OUT OF REACH OF CHILDREN
SAFETY PRECAUTIONS
Follow these safety precautions when operating this or any drone.
● Adult supervision required.
● Before ying, go to www.knowbeforeyou y.org.
● Do not touch the spinning blades or y over another person’s
head.
● Keep your face and body as well as all spectators away from
the rotors whenever the battery is connected.
● Stay clear of trees and power lines. AVOID ying in or near
crowded areas. DO NOT y close to people, children or pets.
Do not y in windy conditions or when the C-me may get wet
from rain or snow.
● Your C-me should not be considered a toy, but rather a small,
working model. If not operated correctly, the model could
possibly cause injury to you or spectators and damage to
property.
● You must check the operation of the model before every ight
to ensure that the model has remained structurally sound.
● Do not alter or modify the model, as doing so may result in an
unsafe or un yable model.
● Do your part in preserving the integrity of the RC hobby. Know
the boundaries of your ying area and ALWAYS respect the
privacy of others.
Page 3

PRODUCT FEATURES
● Portable: Fits in your pocket
● Simple Operation
● GPS Controlled Stability
● 8 megapixel 1080p camera, same as on the iPhone6
● One button 360° Panoramic Video
● One Button Take Off/Landing
● Auto Return to Home
● Find Me/Follow Me
● Instant Sharing of Social Media
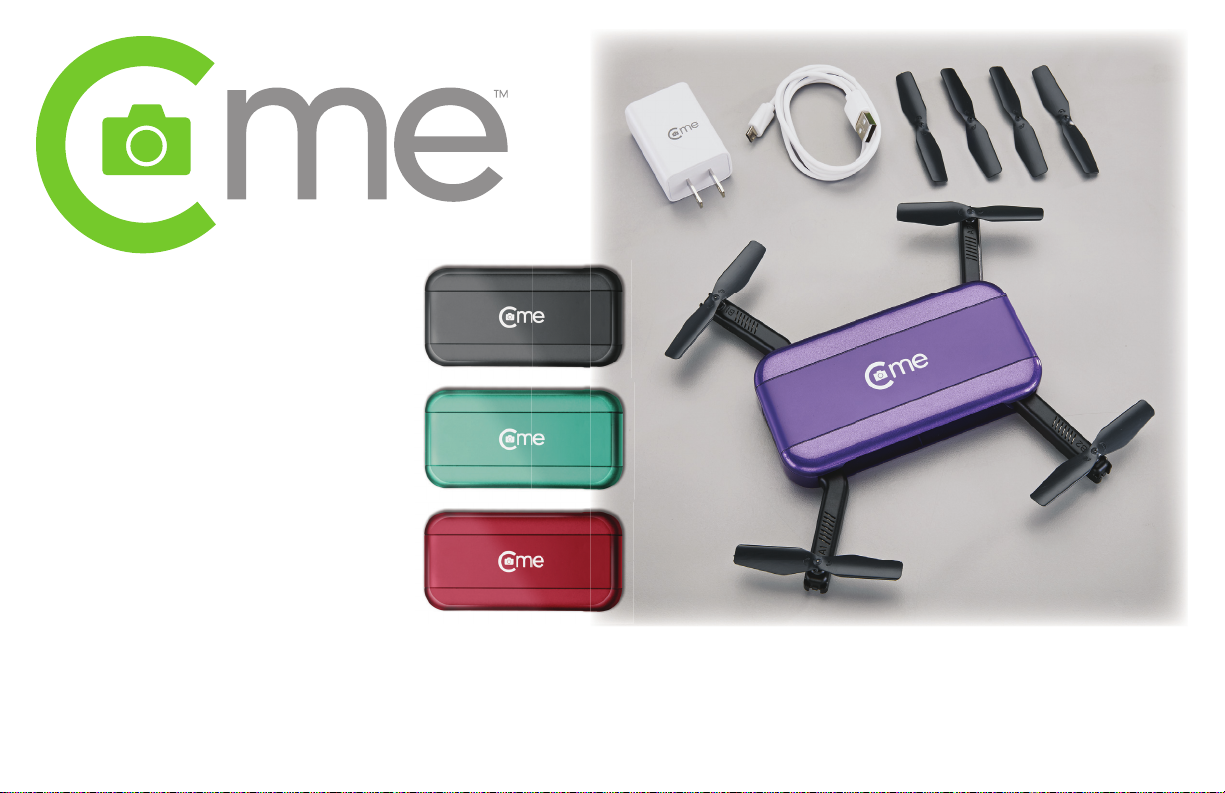
CONTENTS
C-me Sel e Drone
Micro USB Charge Cable
2Amp AC to USB Adapter
Spare Propellers (4)
Quick Start Guide
SPECIFICATIONS*
Weight: 4.97 oz. [141g]
Width: 6.26 in. [159mm]
Length: 6.06 in. [154mm]
Height: 0.98 in. [25mm]
Prop Size: 29.1 in. [74mm]
Size: 7.67 in. [195mm] diagonal motor to motor
Flight Time: Approximately 10 minutes
(*With arms extended, not including the propellers.)
LIMITED WARRANTY
PLEASE DO NOT RETURN YOUR PRODUCT TO THE STORE.
This warranty speci cally does not cover crash damage, misuse
or abuse. Please refer to the warranty package for more details
about coverage. To make a warranty claim, please contact
our product support team at 1-217-398-8970 option 6 or
e-mail us at helihotline@greatplanes.com. If requested by
Product Support, please send defective product to:
Hobby Services
3002 N Apollo Dr., Suite #1
Champaign, IL 61822
Please include a note about the problem, your contact
information, and a copy of the receipt. This warranty applies only
if the product is operated in compliance with the instructions
and warnings provided with each model. Hobbico assumes no
liability except for the exclusive remedy or repair of parts as
speci ed above. Hobbico shall not be liable for consequential
or incidental damages. Some states do not allow the exclusion
of consequential or incidental damages so the above exclusion
may not apply to you. This warranty gives you speci c legal rights
and you may also have other rights which vary from state to state.
Page 4
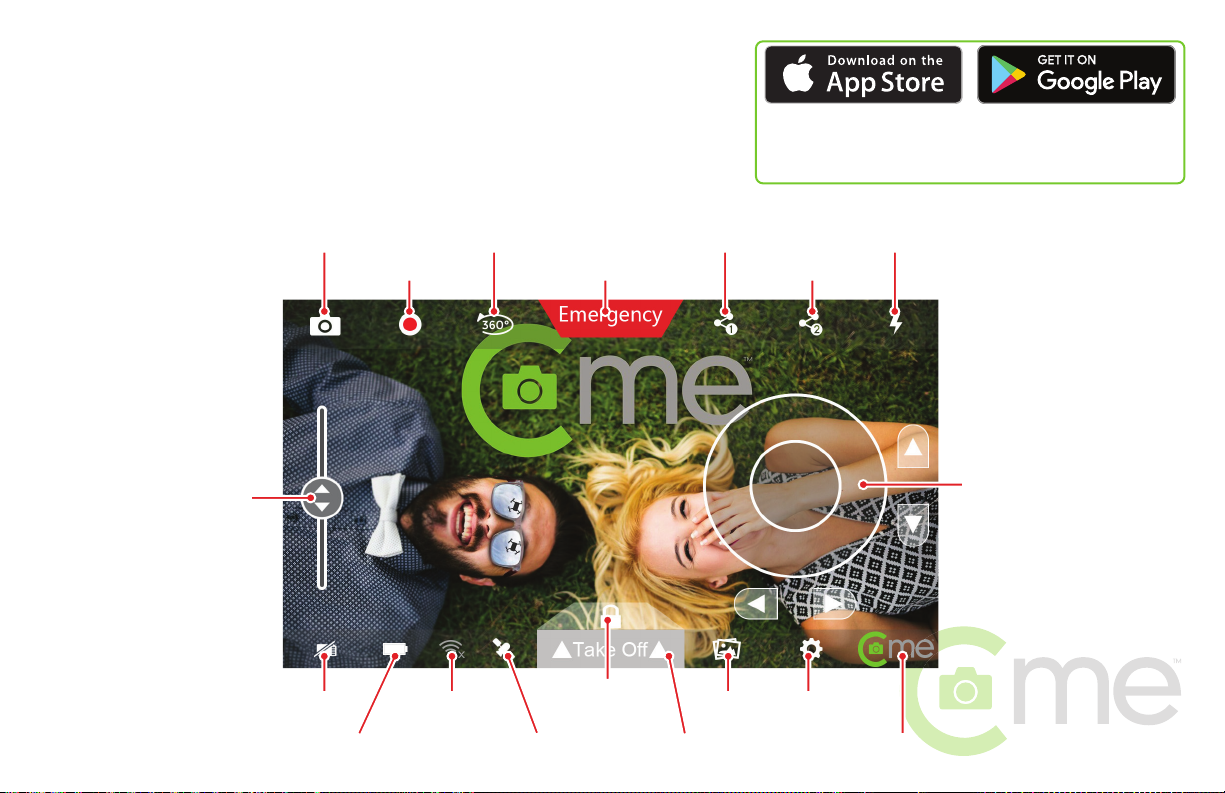
APP
S
O
Download the latest version of the C-me app from the App Store or Google Play.
he C-me can be linked to two phones at the same time. The rst phone to link
ill have directional control. The second phone will only be able to monitor the
eed from the camera.
CAMERA
VIDEO RECORD
360° PANORAMIC VIEW
EMERGENCY
INSTANT SHARE
ALTITUDE SLIDE BAR
Apple and the Apple logo are trademarks of Apple, Inc., registered in the U.S.
and other countries. App Store is a service mark of Apple Inc.
™
and Google Play are trademarks of Google Inc.
Android
®
Wi-Fi
and Wi-Fi Alliance® are registered trademarks of Wi-Fi Alliance.
FLASH
INSTANT SHARE
DIRECTIONAL CONTROL
W/INCREMENTAL TRIM
MEMORY CARD CAPACITY
BATTERY CHARGE/LIFE
WI-FI STRENGTH
ATELLITE SIGNAL
SAFETY UNLOCK
NE-TAP TAKEOFF/LAND
GALLERY SETTINGS
Page 5
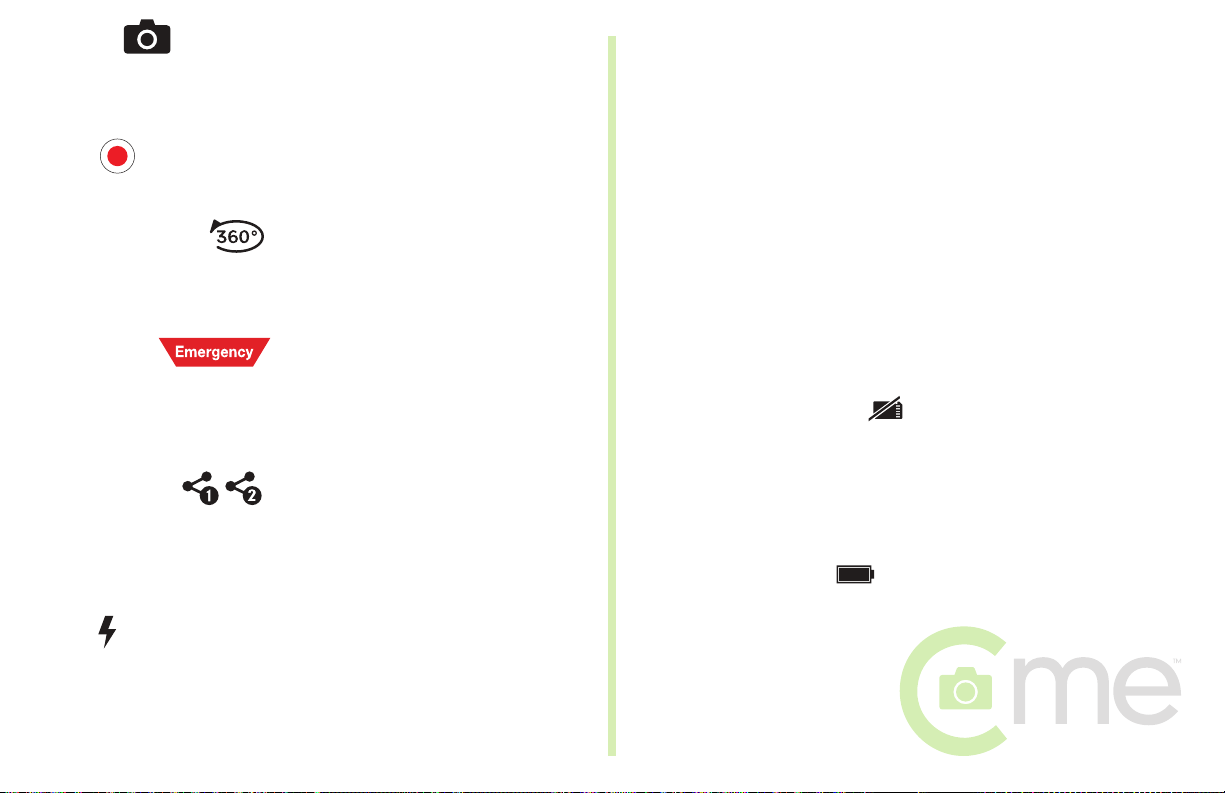
Camera
A tap on the Camera button captures a still photograph. Push and
hold to access the Self-Timer and Burst mode functions for the
camera. Please refer to the Photo/Video section for more details.
Video
Tapping this button Video button starts/stops recording a video.
2. Off with camera ash. This mode turn the LED off except
when capturing a photo.
3. Always off.
Altitude Slide Bar
Slide this control up or down to change the C-me altitude. When
the control is released, the C-me will hover at the selected height.
Panoramic View
Available only in Outdoor Mode. Automatically starts a video
recording, rotates the C-me 360° within 20 seconds, and stops
the video.
Emergency
Tapping this button will make the C-me land quickly without
returning to home. The Directional Controls can be used to
guide the C-me while it is landing. Holding this button will stop
the motors immediately.
Instant Share
Pressing these buttons before capturing a photo or making a
video will share the media with the desired social media site.
Select the desired Instant Share link and the options for captions
in Settings.
Flash
Press the Flash Button to cycle through the three Flash modes.
1. Always on. This is the default mode and is recommended
because the LED can be used determine the orientation
of the C-me.
Directional Controls
Move the inner circle in the desired direction with your thumb
to change the C-me drone’s position. This control will be more
sensitive when own in the Outdoor Mode.
Swiping the center of the screen will yaw the C-me. This control
can be used to point the camera away from the pilot.
Memory Card Capacity
When an optional memory card is loaded on the C-me, the
available free space is displayed. The C-me can use a micro
memory card with a capacity of 2 to 32 GB. (A memory card is
not required for operation. However, if you desire high quality
images and video, we recommend using a card.)
Battery Charge/Life
The battery life remaining is displayed by this indicator.
White indicates the charge is above 40%
Red (steady) indicates the charge is between 40% and 20%
Red ( ashing) indicates the charge is below 20%.
Page 6

Wi-Fi Signal Strength
This icon will be white with an “X” when there is no Wi-Fi
connection. The icon will be green without the “X” when the app
is connected to the C-me.
GPS Satellite
This icon will show how many satellite signals are being
received. The C-me has to receive at least 6 satellite signals
and the Indoor Mode setting must be “off” before it will enter
Outdoor Mode. When Outdoor Mode is active, the following
changes are made
● The status LED on the top of the C-me will start ashing
● Control sensitivity is increased
● GPS enhanced stability is active
● 360° button is active
● Land Button activates the return to the launch point and
land (RTL) function
● C-me Button in the app activates the Follow Me Mode
Safety Unlock
Tap and hold this button for 2 seconds to unlock the Take Off
button. This button will lock again if not used within 5 seconds.
Land
The Take Off button will change to a Land button after the C-me
takes off. Tapping this button will make the C-me slowly land.
When the C-me is in the Outdoor Mode, it will climb to
3 meters and start to RTL (Return To Launch). If C-me is
performing a RTL, moving the Directional Control will stop
the RTL procedure and hover.
When the C-me is in the Indoor Mode, the Directional Control
can be used to guide the drone to a speci c landing area.
When the battery charge level drops to 10%, the C-me will
automatically RTL. If indoors, it will land straight down.
Gallery
Tapping this button will display the images and videos that have
been created by the C-me and stored in Photo Gallery on the
mobile device. Tap the thumbnail to view, delete or play a video.
This button does not access any of the les stored on the option
memory card. Those les must be viewed on a computer.
NOTE: Files stored on a memory card will be larger and have
more detail than what is stored on the phone.
Take Off
Tap this button when it is green (unlocked) to take off. The pilot
should keep a thumb on the Directional Control to guide the
C-me to the desired hover point.
Page 7

Settings
This button opens
i. Basic Operation
1. Instant Share Settings where the social media links are selected
2. Camera settings
A. White Balance
B. Exposure
C. Contrast
D. Brightness
E. Factory default settings for the camera
3. Device settings
A. Change the Wi-Fi network name and password
B. Reset all the app settings back to the factory default values
4. Help screens
A. C-me Quick Start Guide
B. Help section which has guides for the following subjects
(Please review this section before ying the C-me.)
ii. Taking Pictures
iii. Video
iv. 360°Panoramic Video
v. Flash usage
vi. Emergency
vii. Share (Instant Share Buttons)
viii. Equipment Usage (Memory Card and Battery Life indicators)
ix. Take Off
C. C-me Manual
D. Compass Calibration
E. Find Me
F. Contact Us link
G. C-me website link
5. Wi-Fi (Android app only) This section allows you to turn on the
phone’s Wi-Fi and select or setup the C-me network connection
without leaving the app.
6. Calibration procedures have guides to help correctly calibrate the
sensors.
A. Compass Calibration is for calibrating the compass on the C-me
which should be done every time the drone is used in a new
location.
B. Accelerometer Calibration is for calibrating the accelerometers
which should be done any time the C-me will not remain in a
stable hover.
7. Full Screen Mode – sliding this button the right activates this mode.
When active, it removes the buttons and controls from the screen
after a few seconds of inactivity. Tapping the screen will make the
buttons and controls appear again.
8. Indoor Mode – Sliding this button to the right keeps the C-me in
the Indoor Mode even when it is outside and receiving GPS satellite
signals. The following conditions are set when Indoor Mode is active.
A. Control sensitivity is decreased
B. GPS enhanced stability is disabled
C. Panoramic View is disabled
D. Return to Home when landing is disabled
E. The C-Me button in the app activates just the Find Me mode
Page 8

Follow Me/Find Me
Indoors: Tapping this button turns on the Find Me mode so
the C-me will always point towards the pilot. The Directional
Controls are used to position the drone. Small adjustments to
the camera’s direction can be made by slowly turning the phone
while in the Follow Me mode.
Outdoors:
mode. Hover the drone at the height and distance desired before
tapping the C-me button. The drone will maintain that altitude
and distance from the phone while the pilot is walking at a normal
pace. While in the Follow Me Mode, holding the Directional
Control all the way to the left or right will make the C-me slowly
circle the phone. Keep the phone still while in this mode.
Tap the C-me button again to the exit the Find Me/Follow Me
Mode.
Tapping the C-me button will activate the Follow Me
SETUP
Charge the Battery
The charge time will be
approximately 1 hour and 40 minutes.
The C-me must be off while charging.
Linking the C-me and the C-me App
Power on the C-me by pressing
button until it lights up.
Open the Wi-Fi settings
on your phone and verify
that the C-me network
is selected. The default
password is 12345678.
To make sure that there will be no
interruptions while running the C-me app,
close any other apps that may be open.
OPEN
The phone will have a live image from the
camera when it is linked to the C-me.
NOTE: It make take up to 10 seconds to
connect.
Page 9

PREPARING TO FLY
Please review the Basic Operation animation in the Settings/Help
section of the settings menu if you are not familiar with ying the
C-me.
Flight Modes
The C-me will automatically be in the Indoor Mode when inside
or when less than 6 satellite signals are being received while
outside.
When 6 or more satellite signals are received and the Indoor
Mode Setting is “off”, the C-me will switch to the Outdoor Mode.
The Indoor Mode can also be turned on with the button in
Settings/Indoor Mode.
Calibration
The C-me compass and accelerometers should be calibrated
the rst time the C-me is own and:
1. Every time it is own outside at
a different location.
2. Any time the motors are shut
down by the overload
protection circuit.
3. Hard landing or
crash.
Follow the animation to rotate
hoizontally, then vertically.
Rotate slowly and steadily for
best results.
IMPORTANT!
Place on level surface.
Page 10

FLYING
TIP: The C-me will perform best when the winds are below 3
mph (5 km/H).
Takeoff
NOTE: The LED will ash when
C-me has acquired 6 or more
GPS satellite signals and is in the
Outdoor Mode”
Full charge
Hold until the
Take Off button
is green
Tap to takeoff
The C-me will immediately climb to about 1 meter indoors and
up to 2 meters outdoors.
TIP: If the Take Off button is not tapped within 5 seconds, it will
lock. Hold the lock button again to unlock.
On level surface
with LED steady
Motor Overload Protection
When the C-me has a hard landing, crashes into a solid object or
if the propellers get stuck and cannot spin, the motors will turn
off to protect the control board. The C-me will have to be turned
off and back on again any time this happens. Both calibration
procedures should be run before the C-me is own again.
Trimming
The trim control buttons below and to the right of the Directional
Control should be used when C-me constantly drifts in the same
direction. After the C-me takes off in calm conditions, let it sit for
a moment to see of it is stable. If it drifts in one direction, use the
opposite trim button to correct it. For example, if the drone drifts
to the left, the right trim button below the Directional Control
should be tapped until the drone stops drifting in that direction.
Flight
Practice indoors before ying
outside because the controls are
more sensitive when in the Outdoor
Mode. To guide the C-me to a new
position, use short movements with
the Directional Control in the desired
direction. Holding the control for more than a second in
Tap to land
one direction will usually require movement in the opposite direction
because the C-me will have own past the desired position.
Please keep in mind that the Directional Controls use the front of
the C-me as reference. If the drone is pointed to the right and the
Directional Control is moved forward, the drone will y to the right.
When the ight is completed, always turn off the power and
recharge the battery before the C-me is put away.
Page 11

PHOTO/VIDEO
Camera Settings
White Balance (the default setting is automatic white balance.)
The settings for lighting conditions can also be selected
(Sunshine, Clouds. Night, Indoors, and Candlelight).
The Exposure, Contrast, and Brightness can be increased or
decreased as needed.
NOTE: These settings will not change when the app is closed
and opened again.
Factory Reset will set the White Balance to automatic and center
the other adjustments.
Still Photos
Tap the Camera button to take a single photo. The image will
be stored in the Photo Gallery on the phone and on an optional
memory card that can be loaded on the C-me.
Hold the camera button for 2 seconds to put the Self-timer and
Burst Mode buttons on the screen.
The Self-Timer has 3 second and 10 second timer options. Tap
the number to start the timer.
The Burst Mode has options for taking 3, 5, 10 or 15 photos at
the rate of 2 photos per second. Tap the desired number to start
the camera.
Tap the camera button to remove the Self-timer and Burst Mode
buttons from the screen.
Video
Tap the Video button to start recording a video which will be
stored in the phone’s Photo Gallery and also on the optional
memory card. A timer and Stop button will appear when the
video starts. Tap on the Stop button to end the video.
TIP:
The video camera works best when the C-me is not moving.
Do not start a video until the C-me is hovering at the desired
height and distance from you.
Memory Card Not included.
Page 12

REPLACEMENT PARTS
1
2
3
4
3
2
Replacement Parts:
1. Propeller Set Black (4)
2. Arm Set Front A1/B1 (2)
3. Propeller Shaft Bearings 1.5x4x2mm (4)
4. Crown Gear 22T w/Shaft Set (2)
5. A/B Motor Set with 8T Pinion (2)
Not Pictured:
Propeller Guard Set Black (4)
AC to USB Adapter, 5VDC, 2A, AC 120-240V
USB/Micro Charge Cord, 1M
Arm Set Rear A2/B2 (2)
5
HCAE6001
HCAE6070
HCAE6055
HCAE6050
HCAE6040
HCAE6002
HCAE6010
HCAE6011
HCAE6071
TROUBLESHOOTING
PROBLEM: The C-me App will not connect to the drone
SOLUTION: (1) Completely close the C-me app.
(2) Open the Wi-Fi setting for the phone and select
the C-me network if not already connected.
(3) Open the C-me app.
PROBLEM: I cannot remember the Wi-Fi password.
SOLUTION: The default password is 12345678. If the password
has been changed, reset the setting on the C-me to
restore the default Wi- Fi name and password.
PROBLEM: The C-me circles instead of hovering when outside.
SOLUTION: The compass on the C-me should be calibrated.
Please follow the procedure in the Calibration
section of Settings
PROBLEM: The C-me is very noisy.
SOLUTION: The propeller and/or propeller shaft needs to be
replaced.
PROBLEM: The C-me is drifting.
SOLUTION: (1) Winds are above 3mph (5kmph)
(2) The accelerometers on the C-me need to be
calibrated. Please follow the procedure in the
Calibration section of Settings
PROBLEM: The C-me is hard to control when outside.
SOLUTION: (1) The Indoor Mode setting is turned on in Settings.
(2) The C-me is not receiving 6 or more satellite signals.
(3) The wind is above 5 mph (8kmph)
Page 13

MAINTENANCE
Propeller Installation
Be sure to match the letter on the propeller
with the letter on the arm.
Motor/Gear/Bearing Replacement
The Motor, Gear, and Bearings can be replaced without removing
the arm from the C-me. When installing a new gear or motor, place
some lubricant from the old gear on the teeth of the new part.
FCC IC PRECAUTIONS
IC RSS WARNING
This device complies with Industry Canada license-exempt RSS standard(s). Operation
is subject to the following two conditions: (1) this device may not cause interference,
and (2) this device must accept any interference, including interference that may
cause undesired operation of the device.
IC RADIATION EXPOSURE STATEMENT
This equipment complies with IC RF radiation exposure limits set forth for an
uncontrolled environment. This transmitter must not be co-located or operating in
conjunction with any other antenna or transmitter. This equipment should be installed
and operated with minimum distance 20 cm between the radiator and your body.
FCC RADIATION EXPOSURE STATEMENT
This equipment complies with FCC radiation exposure limits set forth for an
uncontrolled environment. This equipment should be installed and operated with
minimum distance 20 cm between the radiator and your body. This transmitter must
not be co-located or operating in conjunction with any other antenna or transmitter.
Arm Replacement
1. Remove the parts from the
damaged arm.
2. Remove the 4 large screws from
the frame below each arm.
3.
Carefully separate the cover from the frame enough to allow
the arm to be removed.
4. Remove the motor wire from the slot in
the damaged arm.
5. Remove the damaged arm from the
frame.
6. Install the new arm and reverse these steps.
CE COMPLIANCE INFORMATION FOR THE EUROPEAN UNION
Instructions for Disposal of Waste Equipment by Private Users
in the European Union:
This symbol on the product or its packaging indicates this product must not be
disposed of with other household waste. Instead, it is the user’s responsibility
to dispose of their waste equipment by handing it over to a designated
collection point for the recycling of waste electrical and electronic equipment. The
separate collection and recycling of your waste equipment at the time of disposal will
help to conserve natural resources and ensure that it is recycled in a manner that
protects human health and the environment. For more information about where you
can drop off your waste equipment for recycling, please contact your local city of ce,
your household waste disposal service or location where you purchased the product.
Page 14

Declaration of Conformity:
Product: Hobbico C-me Camera Drone FCC ID: IYFCME
Item number: HCAE10
Equipment class: 1
C-me Camera Drone: The objects of the declaration described here are in conformity
with the requirements of the speci cations listed below, following the provisions of
the European 2006/95/EC Low Voltage Directive:
EN 60950-1:2013 Safety
The objects of the declaration described here are in conformity with the requirements
of the speci cations listed below, following the provisions of the European R&TTE
directive 1999/5/EC:
EN300 328 V1.9.1.
Technical requirements for radio equipment
ETSI EN 301 489-1 V1.9.1, 301 489-17 V2.2.1 General EMC requirements for radio
equipment
Hobbico, Inc.
2904 Research Road
Champaign, IL USA 61826
The associated regulatory agencies of the following countries recognize the noted
certi cations to this product as authorized for sale and use.
UK DE DK BG SE FI GR
EE LV LT PL CZ SK HU
RO SI AT IT ES PT IE
NL LU MT CY
IC: 11104A-CME
STATEMENTS: This device complies with Part 15 of the FCC Rules. Operation
is subject to the following two conditions: (1) this device may not cause harmful
interference, and (2) this device must accept any interference received, including
interference that may cause undesired changes or modi cations not expressly
approved by the party responsible for compliance and could void the user’s authority
to operate the equipment.
This equipment has been tested and found to comply with the limits for a Class B digital
device, pursuant to Part 15 of the FCC Rules. These limits are designed to provide
reasonable protection against harmful interference in a residential installation. This
equipment generates, uses and can radiate radio frequency energy and, if not installed
and used in accordance with the instructions, may cause harmful interference to radio
communications. However, there is no guarantee that interference will not occur in a
particular installation.
If this equipment does cause harmful interference to radio or television reception,
which can be determined by turning the equipment off and on, the user is encouraged
to try to correct the interference by one or more of the following measures:
● Reorient or relocate the receiving antenna.
● Increase the separation between the equipment and receiver.
● Co nnect the equipment into an outlet on a circuit different from that to which
the receiver is connected.
Consult the dealer or an experienced radio/TV technician for help.
The FCC ID number is: IYFCME.
Page 15

FCC Radiation Exposure Statement:
This equipment complies with FCC radiation exposure limits set forth for an uncontrolled environment .
This transmitter must not be co-located or operating in conjunction with any other antenna or transmitter.
This equipment should be installed and operated with minimum distance 20cm between the radiator& your body.
ISEDC Radiation Exposure Statement:
This equipment complies with ISEDC RF radiation exposure limits set forth for an uncontrolled environment.
This transmitter must not be co-located or operating in conjunction with any other antenna or transmitter.
This equipment should be installed and operated with minimum distance 20cm between the radiator& your body.
Cet appareil est conforme aux limitesd'exposition de rayonnement RF ISEDC établiespour un environnement non contr?lé.
Cetémetteur ne doit pas être co-implanté oufonctionner en conjonction avec toute autreantenne ou transmetteur
Cet équipement doit être installé et utiliséavec une distance minimale de 20cm entre leradiateur & votre corps.
 Loading...