

Page 1

HCAZ3009 for HCAC0003
BBBBaaaattttttttlllliiiinnnngggg TTTTaaaannnnkkkk SSSSeeeett
tt
Warranty
• Hobbico®, Inc. will warrant this product for 90 days after the date of purchase
from defects in materials or workmanship.
• Make sure you save the receipt or invoice you were given when you bought
your model! It is your proof of purchase and we must see it before we can
honor the warranty.
• In no case shall Hobbico's liability exceed the original cost of the product.
• Hobbico reserves the right to change or modify this warranty without notice.
• For repairs covered under warranty, send your model to:
Hobby Services
3002 N. Apollo Drive, Suite 1
Champaign, Illinois 61822
Attn: Service Depar tment
Phone: (217) 398-0007 9:00 am - 5:00 pm Central Time M-F
E-mail: hobbyservices@hobbico.com
Batter
Batter
y Installation
y Installation
Tips
Tips
• Do not mix old and new batteries.
• Do not mix alkaline, standard (carbon zinc), or rechargeable (Nickel Cadmium
or Nickel Metal Hydride) batteries.
Page 2
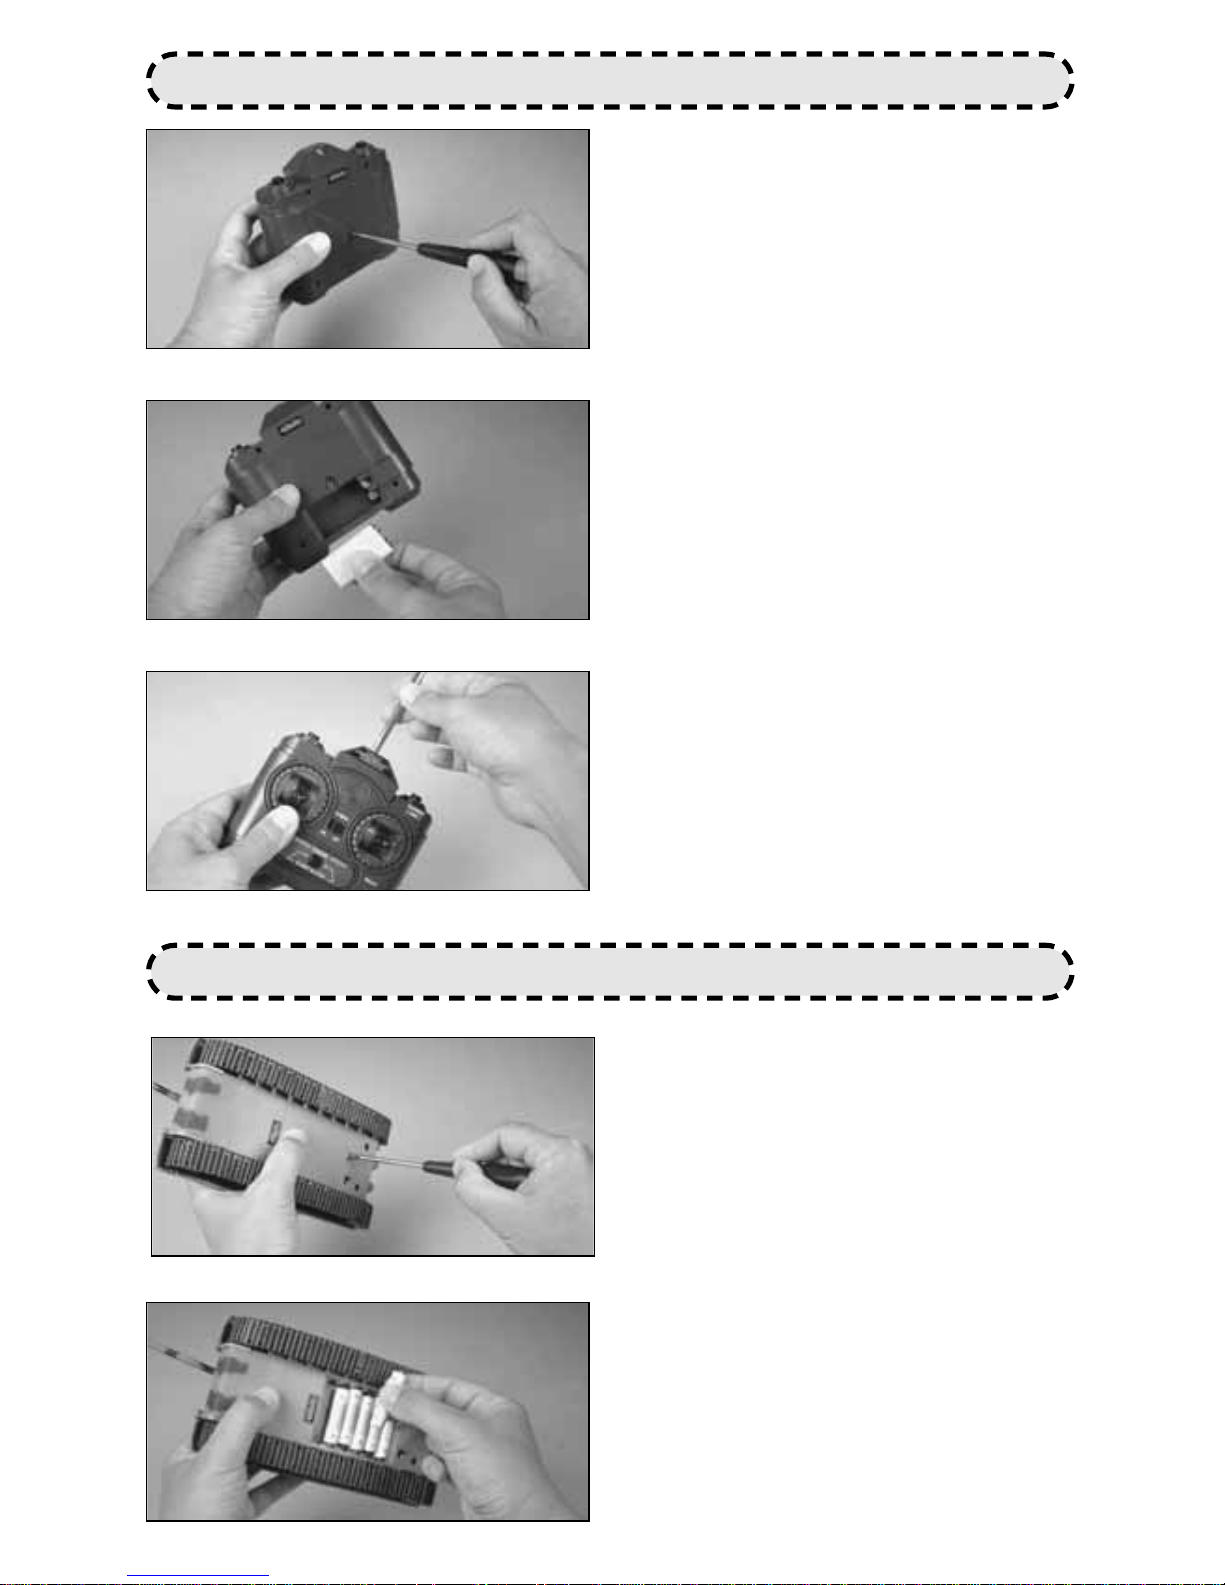
1. Using a small Phillips head screwdriver,
loosen the battery cover screw and
carefully remove the cover from the back
of the transmitter.
2. Install a new 9V battery. Make sure
that the (+) positive and (-) negative tabs
match up correctly with the diagram
molded inside the battery compar tment
of the transmitter.
Replace the transmitter battery cover and
tighten the screw (do not over-tighten).
3.Insert the antenna into the hole on top
of the transmitter and twist it in a
clockwise direction until tight. Do not
over-tighten the antenna.
PREP ARE THE BATTLE T ANKS
1. Using a small Phillips head
screwdriver, loosen the battery cover
screw and carefully remove the cover
from the bottom of the tank.
2. Install 6 new 'AAA' batteries. Make
sure that the (+) positive and (-)
negative poles match up correctly with
the diagram molded inside the battery
compartment of the tank.
3.Replace the tank's battery cover and
tighten the screw (do not over-tighten).
Now your battle tank is armed and
ready to fight!
PREP ARE THE TRANSMITTERS
Page 3

TRANSMITTER FUNCTIONS
Push both transmitter
sticks forward to start the
tank moving forward.
Push the left stick
forward; this will make
the tank turn right.
Pull the left stick
back; this will make
the tank turn left.
Pull the right stick
back; this will make
the tank turn right.
FIRING THE CANNON: Push the CANNON “FIRE”
button located on the right side atop your
transmitter in order to attack your opponent. The
tank will recoil as it fires.
SHUT DOWN: Push the “Engine Start”button again
and you will hear your tank's engine wind down to
a halt. Turn off the power to the tank first and then
the transmitter. (in that order)
Push one stick forward and pull the other stick back for lightning-fast
turnabout maneuvers.
1.Fully extend the transmitter antenna.
2. Turn the power on to the transmitter
first and then the tank. (in that order)
3. Push the transmitter button marked
“Engine Start” and the tank will lurch
forward as the tank roars to life.
Push the right stick
forward; this will make
the tank turn left.
Pull both transmitter
sticks back to start the
tank moving backward.
Page 4

Each tank is equipped with an infra-red cannon which is located on the turret next
to the tank's cannon. Each time the “FIRE” button is pressed, the tank will recoil
as it shoots an invisible infra-red beam. The “HIT SENSOR” on top of your
opponent's tank is your target.Each time a tank receiv es damage you will hear the
sound of crunching, twisting metal as the tank shakes violently. When this
happens the tank will be disabled for 3 to 5 seconds .After three such hits the tank
becomes completely disabled and needs to be re-started before continuing.
Remember!
• Your tank's infra-red beam widens and weakens the further you are away from
your opponent. In battle you will want to get close and blast away every chance
you get!
• Light does not travel through objects so you'll want an unobstructed line of fire
to your opponent.
• Set up obstacles to hide behind, practice maneuvering and firing on the run.
These are some of the ways to put victory within your grasp!
TANK BATTLE ACTION
Entire Contents © Copyright 2003 Printed in China
 Loading...