

Hobbico Aero Cruiser Manual
ASSEMBLE ONLY WITH ADULT SUPERVISION
Please read through this instruction booklet to THOROUGHLY familiarize yourself with the assembly and
flight characteristics of this airplane before beginning to assemble the kit.
Please inspect all parts carefully before starting assembly! If any parts are missing, broken or defective, or if
you hav e any questions about the assembly or flying of this airplane, please call us at (217) 398-8970 and we'll
be glad to help.
WARRANTY
Hobbico, Inc. guarantees this kit to be free from defects in both material and workmanship at the date of
purchase. This warranty does not cover any component parts damaged by use or modification. In no case shall
Hobbico's liability exceed the original cost of the purchased kit. Further, Hobbico reserves the right to change
or modify this warranty without notice.
In that Hobbico has no control over the final assembly, no liability shall be assumed nor accepted for any
damage resulting from the use by the user of the final user-assembled product. By the act of using the
user-assembled product, the user accepts all resulting liability.
If the buyers are not prepared to accept the liability associated with the use of this product, they are advised
to return this kit immediately in new and unused condition to the place of purchase.
CCOMPLETE R
OMPLETE R
TF
TF
AIRPLANE
AIRPLANE
Requires 8 (AA) Alkaline
Batteries (not included)
Quiet Electric Flight
Radio-Controlled Model
Entire Contents © Copyright 2000 HCAZ3004 for HCAA2004 V1.0
™
Aero
Your R/C Action Series plane is not a toy, but rather a
sophisticated, working model that functions very
much like an actual airplane. Because of its realistic
performance, the model, if not assembled and
operated correctly, could possibly cause injury to
yourself and spectators or damage property.
We highly recommend that you get experienced,
knowledgeable help with assembly and during your
first flights, to make your R/C modeling experience
totally enjoyable. You’ll learn faster and avoid risking
your model before you’re truly ready to solo. Your local
hobby shop has information about flying clubs in your
area whose membership includes qualified instructors.
You can also contact the national Academy of Model
Aeronautics (AMA), which has more than 2,500
chartered clubs across the country. Instructor training
programs and insured newcomer training are
available through any one of these clubs.
Contact the AMA at the address or toll-free phone
number below.
Academy of Model Aeronautics
5151 East Memorial Drive
Muncie, IN 47302
(800) 435-9262
Fax: (765) 741-0057
or via the internet at: http://www.modelaircraft.org
1. Assemble the plane according to the instructions.
Do not alter or modify the model. If you make any
modifications, you will void your warranty.
2. Test the operation of the model before each flight
to insure that all equipment is operating properly,
and that the model remains structurally sound.
3. Fly only on calm days (with wind speeds less than
7mph) and in large open areas free of trees, people,
buildings or any other obstacles.
Remember: Take your time and follow the
instructions to end up with a well-built model that is
straight, durable and easy to fly.
The R/C model hobby becomes more and more
enjoyable as your experience gro ws. Y our c hances for
success and graduation to higher levels are very good
if you take your time and follow the assembly and
flying instructions carefully and completely. We hope
you enjoy flying your R/C Action Series plane.
Charge the battery before assembling the airplane.
You will need to use the battery to set up the radio
system during assembly.
Charging the battery pack is safe and easy when you
follow these instructions. Before charging, make sure
that all wires and connectors are in good shape and
properly insulated.
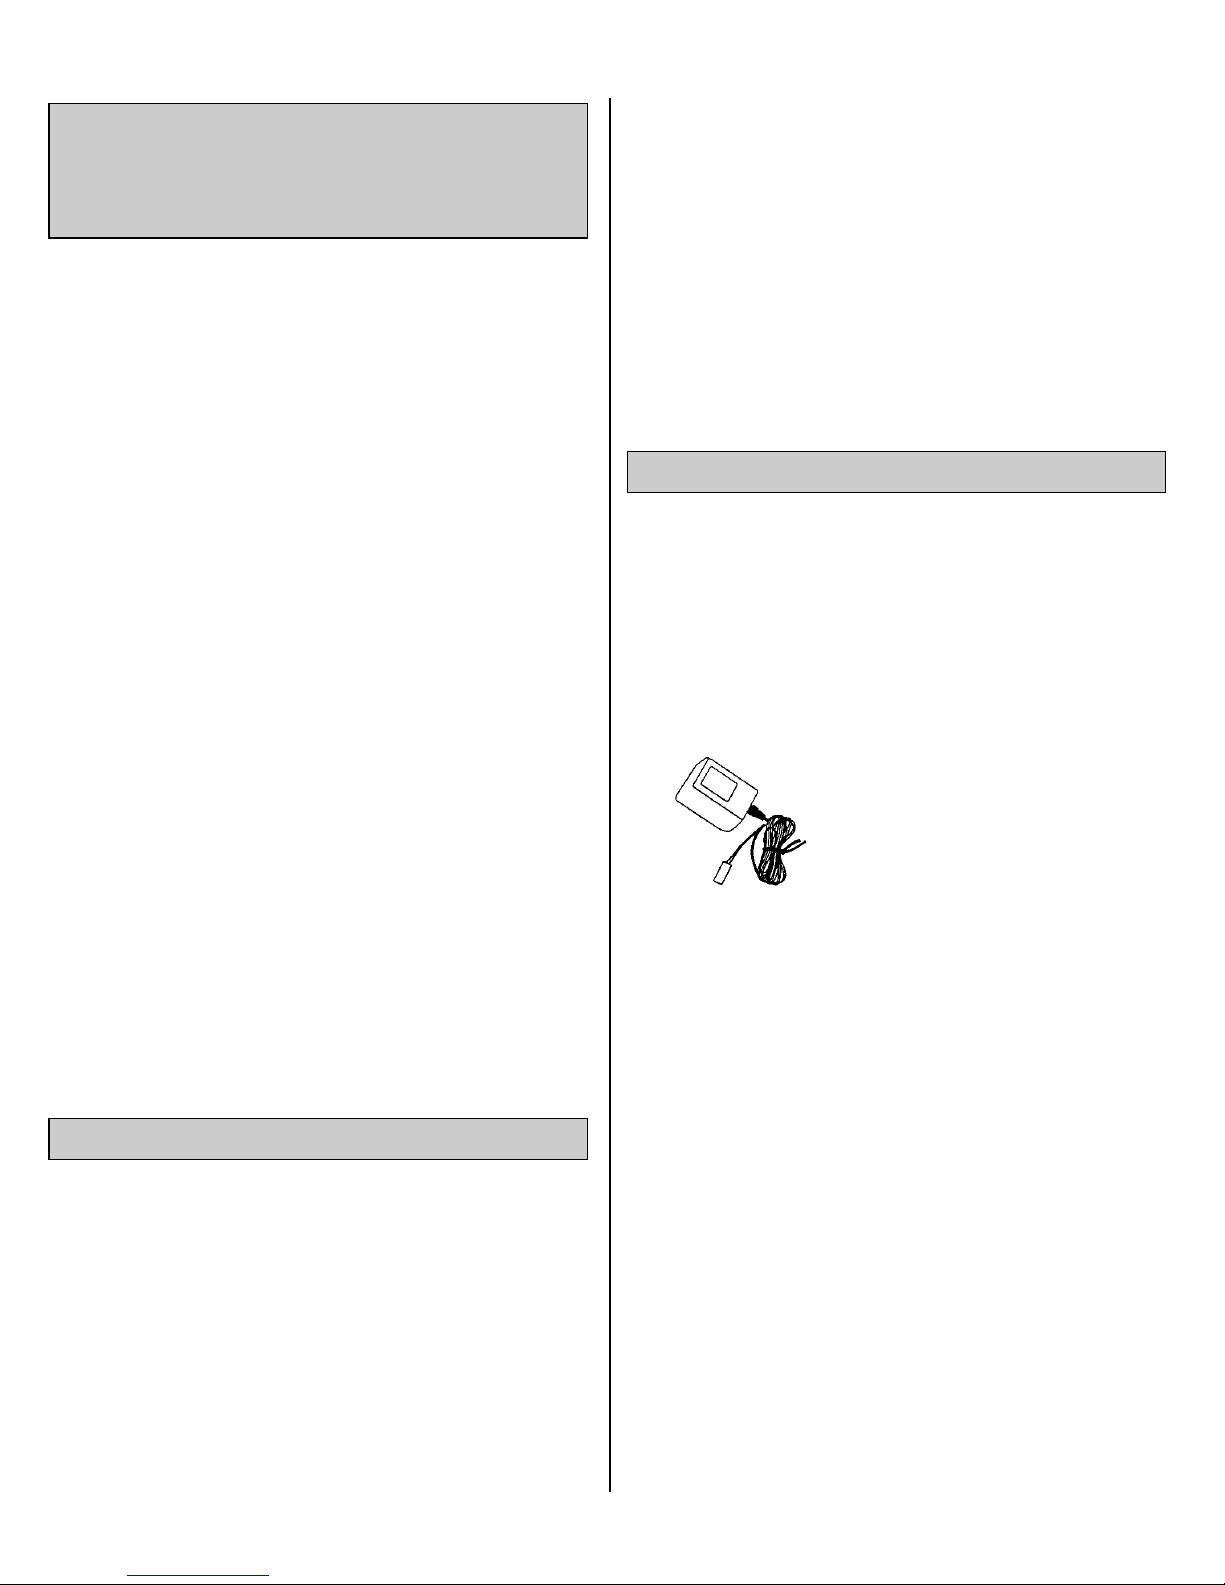
1. Plug the included
battery charger into a
110 volt A/C wall outlet.
2. Remove the battery pack from the box. Plug the
battery into the charger connector. Be careful – the
battery will plug in only one way.
3. Allow the battery to charge for 3 hours using the
A/C wall charger.
4. IMPORTANT! NEVER LEAVE A CHARGING
BATTERY UNATTENDED.
5. During charging, feel the battery to see if it is
starting to warm up. A warmed up (but not hot!)
battery pack is a sign that it is fully charged. Once the
pack is warm, disconnect it from the charger.
Depending on how much charge was already in the
pack, you may have to disconnect the battery early.
6. After each flight, remo ve the battery from the airplane
and allow it to cool completely before recharging.
CHARGING THE NiMH BATTERY PACK
PRECAUTIONS
PROTECT Y OUR MODEL, YOURSELF
AND OTHERS.
FOLLOW THIS IMPORT ANT SAFETY
PRECAUTION
2
1. Never leave a charging battery unattended.
2. Never let the battery charge until it feels hot. A hot
battery is an overcharged battery. Only let the battery
get warm to the touch.
3. Only use the included charger! A higher rate
charger will charge the pack too quickly and heat up
the wires.
4. A properly cared for battery pack will last a long time.
If the battery pack is continually overc harged or charged
at too high of a rate, the pack will not last long.
ATTENTION: The product you have purchased is
powered by a rechargeable battery. At the end of its
useful life, under various state and local laws, it may
be illegal to dispose of this battery into the municipal
waste system. Check with your local solid waste
officials for details in your area for recycling options
or proper disposal.
This product contains a c hemical kno wn to the State
of California to cause cancer and birth defects or
other reproductive harm.
Electronic Speed Control with Auto Cut-off:T his unit
controls the speed of the motor. Also it monitors the
battery voltage and turns off the motor so that there
will be enough battery power to operate the radio
while you glide and land the airplane.
Motor: The motor rotates the prop to provide thrust.
NiMH Battery: Rechargeable batteries which are
used as power for the airplane.
Receiver (RX): The radio unit in the airplane which
receives the transmitter signal and relays the control
to the servos.
Servos: The electronic/mechanical device which
moves the control surfaces of the airplane according
to the commands of the transmitter/receiver.
Switch: Turns on the power to the receiver, servos
and motor.
Start Button: With the switch on, pressing the start
button arms the motor. To turn the motor on, move the
throttle lever on the back of the transmitter to the right.
Notice that the motor RPM increases gradually. To turn
the motor off, move the throttle lever to the left.
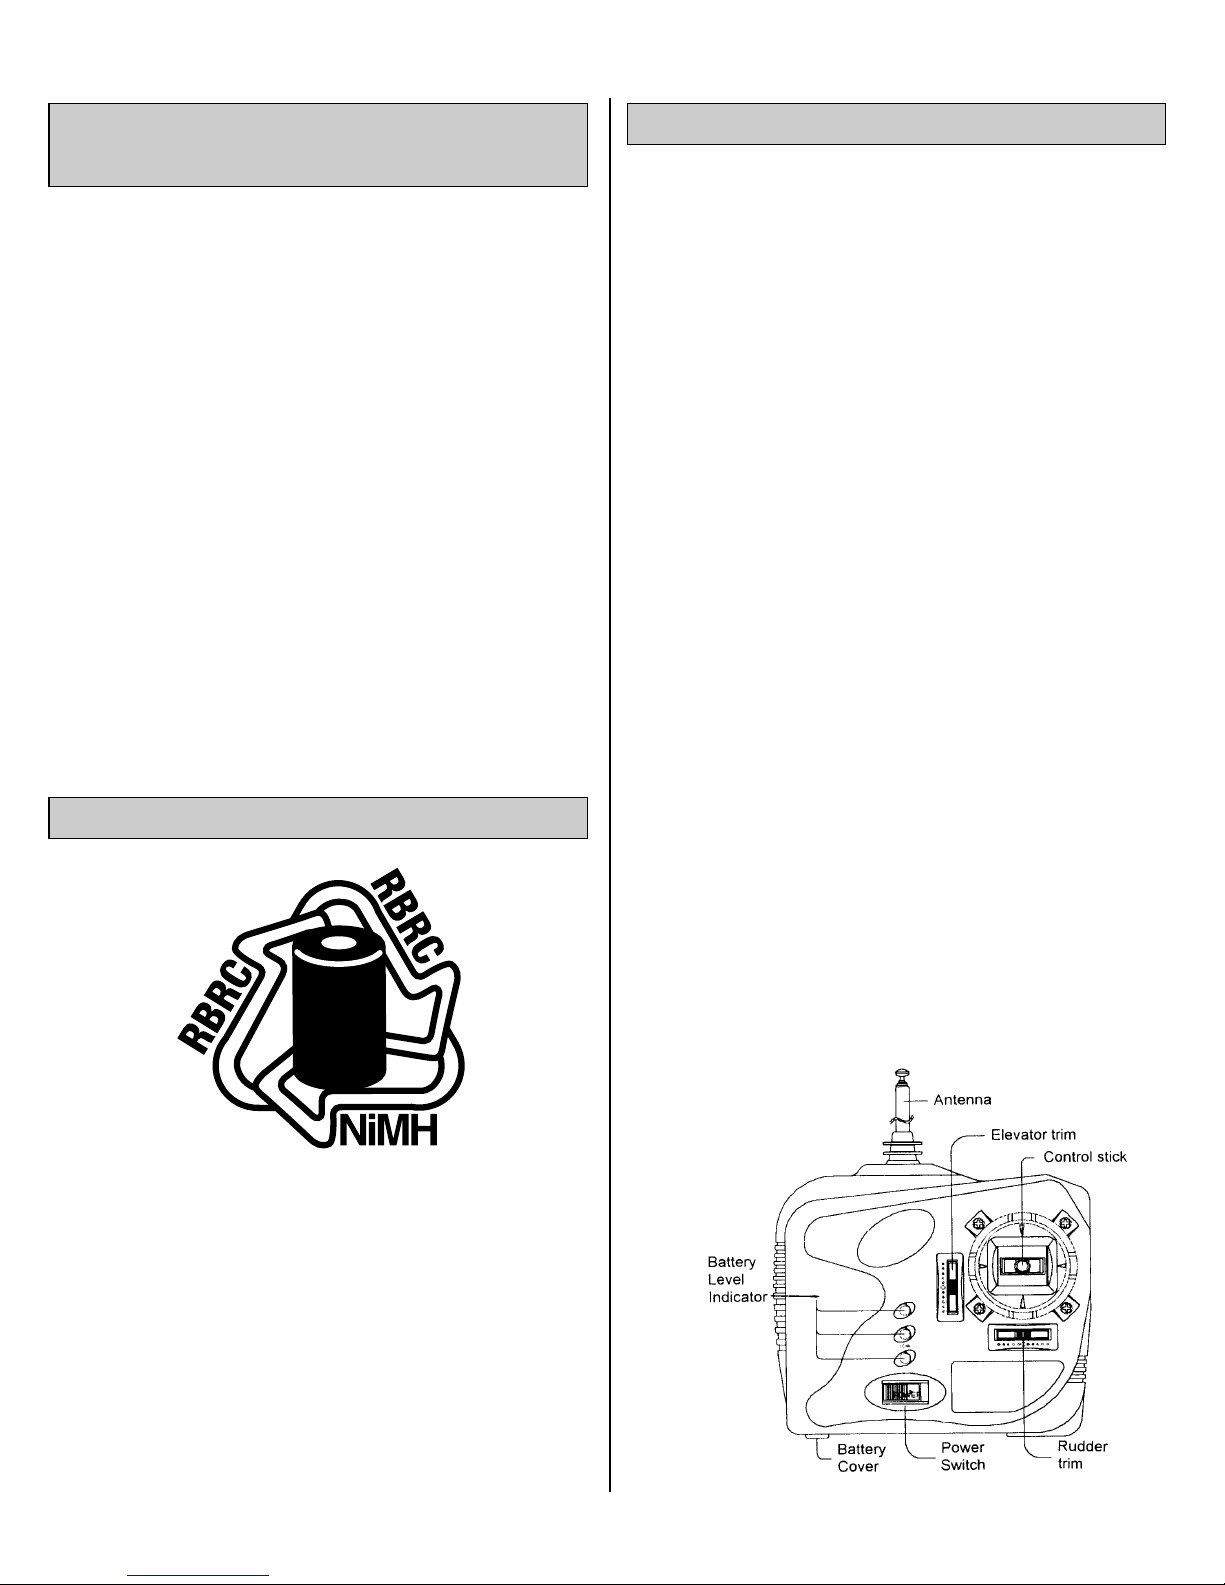
Transmitter (Tx): This is the hand-held unit that
sends the signal to the receiver. As you move the
stick on the
transmitter, the servos in the airplane will
react
accordingly.
GLOSSARY
BA TTER Y WARNING
SAFETY PRECAUTIONS FOR
CHARGING BATTERIES
3
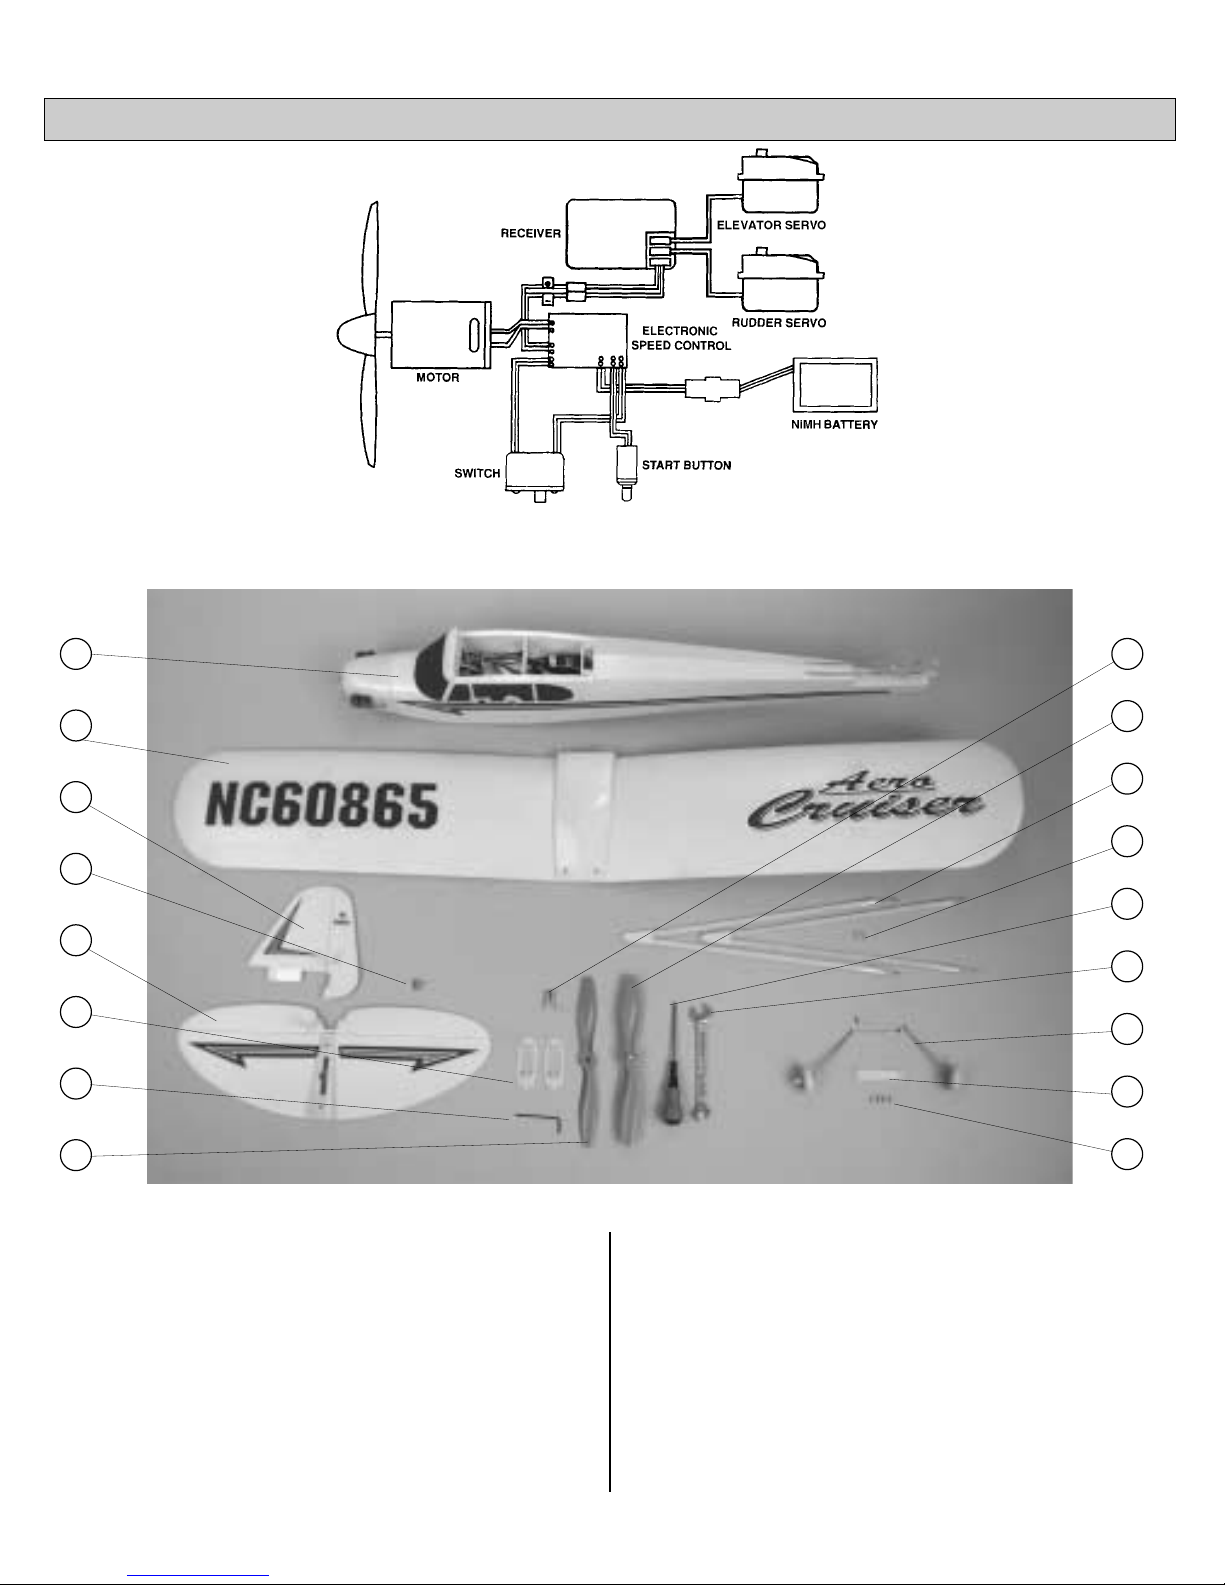
Part Name Qty.
❏ 1. Fuselage .......................................1
❏ 2. Main Wing ...................................1
❏ 3. Fin................................................1
❏ 4. Medium Screws............................3
❏ 5. Stabilizer ......................................1
❏ 6. Mini Servo Trays...........................2
❏ 7. Hex Wrench.................................1
❏ 8. Spare Propeller.............................1
❏ 9. Large Screws ................................4
❏ 10. Propeller w/Adapter......................1
❏ 11. Wing Struts ...................................2
❏ 12. Medium Screws ............................2
❏ 13. Screwdriver ..................................1
❏ 14. Propeller Wrench .........................1
❏ 15. Landing Gear................................2
❏ 16. Landing Gear Cover .....................1
❏ 17. Small Screws ................................4
4
THE RADIO CONTROL SYSTEM
Above is a sketch detailing the layout and function of
the R/C system. It is important to understand the
principles of the system in order to operate your model correctly.
Check the parts against the list below. If any parts are damaged or missing, give us a call at: (217) 398-8970.
1
8
9
2
3
4
5
6
7
17
10
11
12
13
14
15
16
 Loading...