

Hobart Food Machines SDPE Installation Manual

SALAD DRYERS
MODELS
SDPE ML-136310
SDPS ML-136311
701 S. RIDGE AVENUE
TROY, OHIO 45374-0001
937 332-3000
www.hobartcorp.com
FORM 35018 (August 2014)

TABLE OF CONTENTS
GENERAL ..............................................................................................................................................................3
INSTALLATION ......................................................................................................................................................4
Unpacking ........................................................................................................................................................4
Location ...........................................................................................................................................................4
Electrical Connections .....................................................................................................................................4
OPERATION ...........................................................................................................................................................4
Using the Salad Dryer ......................................................................................................................................4
CLEANING .............................................................................................................................................................6
Interior Surface of Tank (SDPS Model) ............................................................................................................6
Interior Surface of Tank (SDPE Model) ............................................................................................................6
Exterior Surface of Tank (SDPS Model) ...........................................................................................................6
Exterior Surface of Tank (SDPE Model) ...........................................................................................................6
Spin Basket and Lid .........................................................................................................................................6
MAINTENANCE .....................................................................................................................................................7
Service .............................................................................................................................................................7
TROUBLESHOOTING ...........................................................................................................................................7
© HOBART, 2014
– 2 –
Installation, Operation and Care of
SALAD DRYERS
SAVE THESE INSTRUCTIONS
GENERAL
The Hobart Salad Dryers are designed to dry large amounts of lettuce within minutes. Salad drying extends the shelf
life of lettuce, providing a fresh, crisp appearance.
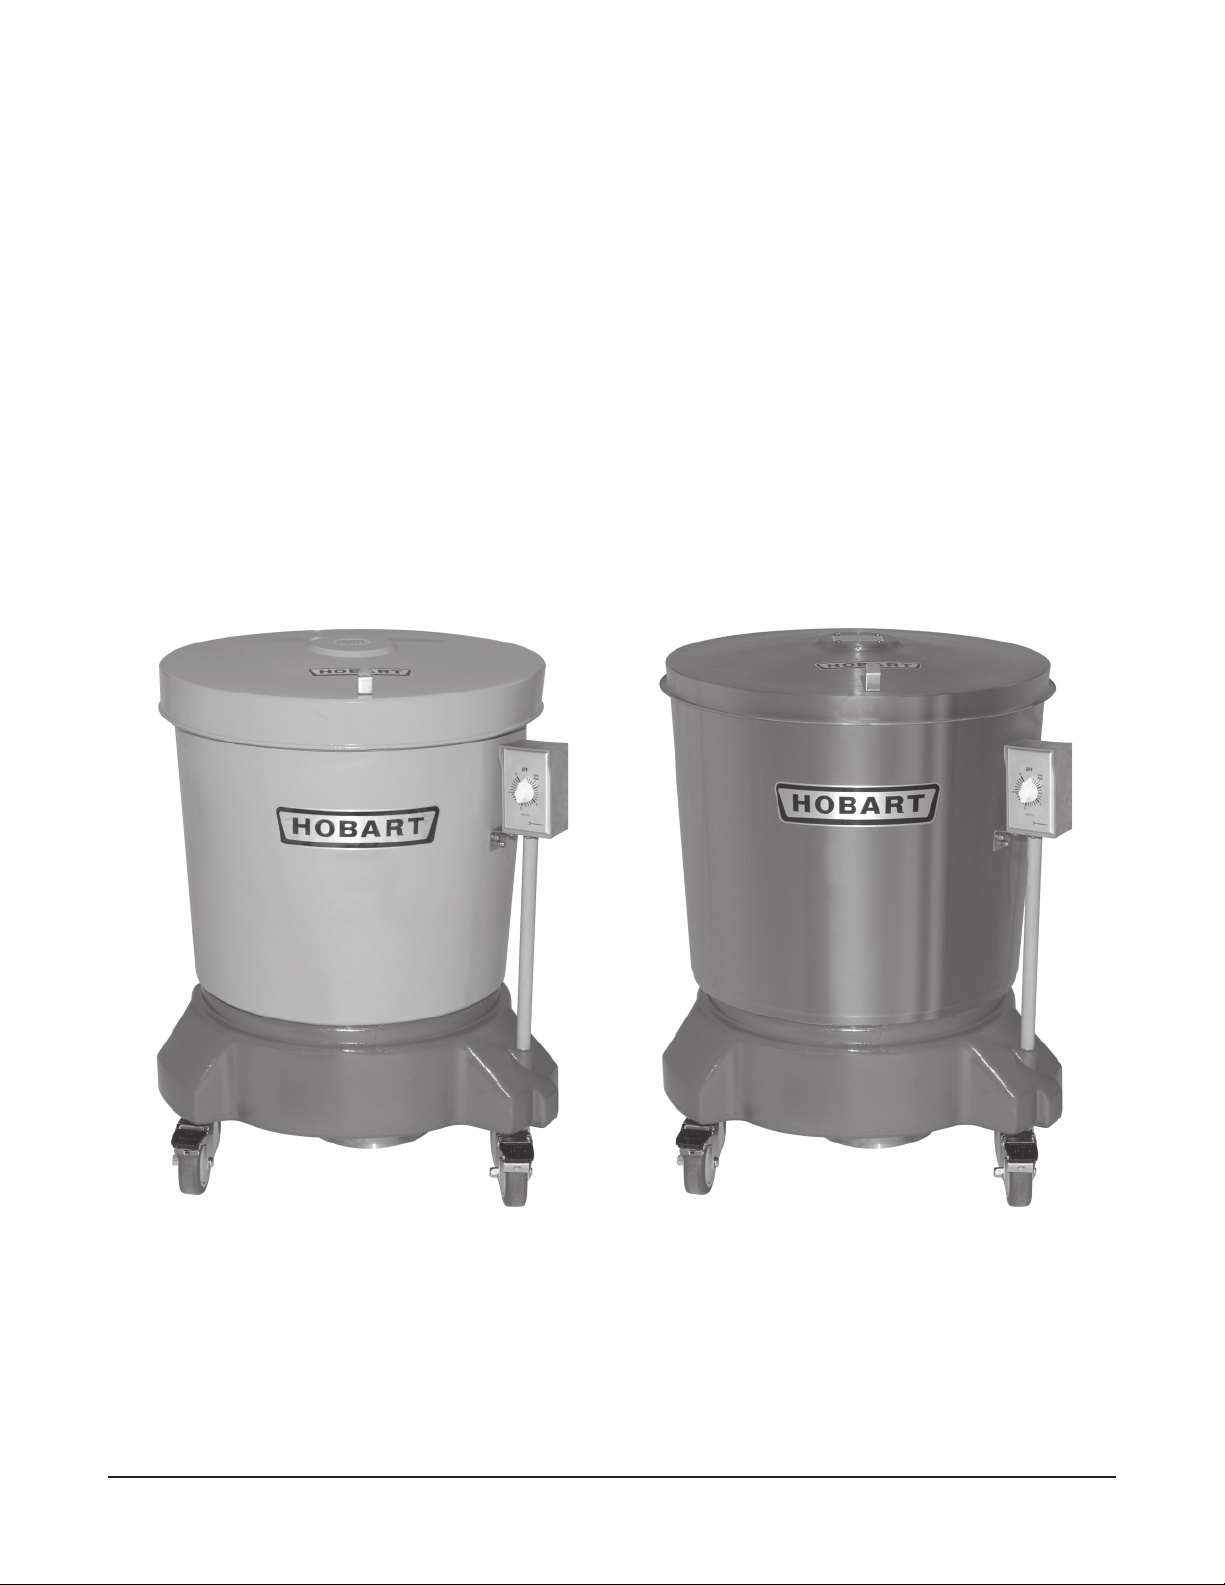
The model SDPE (Fig. 1) has a sturdy polyethylene base, with a polyethylene tub and lid cover.
The model SDPS (Fig. 2) has a sturdy polyethylene base, with a stainless steel tub and lid cover.
The Salad Dryer is powered with a 1/4 Hp motor. The spin basket is removable to make loading and washing easy
and convenient. The timer is conveniently located on the top of the machine and can be set from 1 to 5 minutes.
Fig. 1 Fig. 2
– 3 –
INSTALLATION
UNPACKING
Immediately after unpacking, check salad dryer for possible shipping damage. If the machine is found to
be damaged, save the packaging material and contact the carrier within 15 days of delivery.
Prior to installation, verify that the electrical service agrees with the specifi cations on the data plate located
on the machine.
LOCATION
Place the salad dryer on a solid, fl at fl oor surface over the fl oor drain or place a two gallon capacity
container under the drain tube.
ELECTRICAL CONNECTIONS
The electrical cord on this machine is equipped with a grounding- type plug which
must be connected to a properly grounded receptacle. If the receptacle is not the proper grounding
type, contact an electrician. Do not remove the grounding prong from the plug.
ELECTRICAL DATA
Motor Volts Hertz Phase Amps
1
/4 HP 115 60 1 2.5
OPERATION
Moving parts. Keep hands, clothing and utensils out while in operation.
USING THE SALAD DRYER
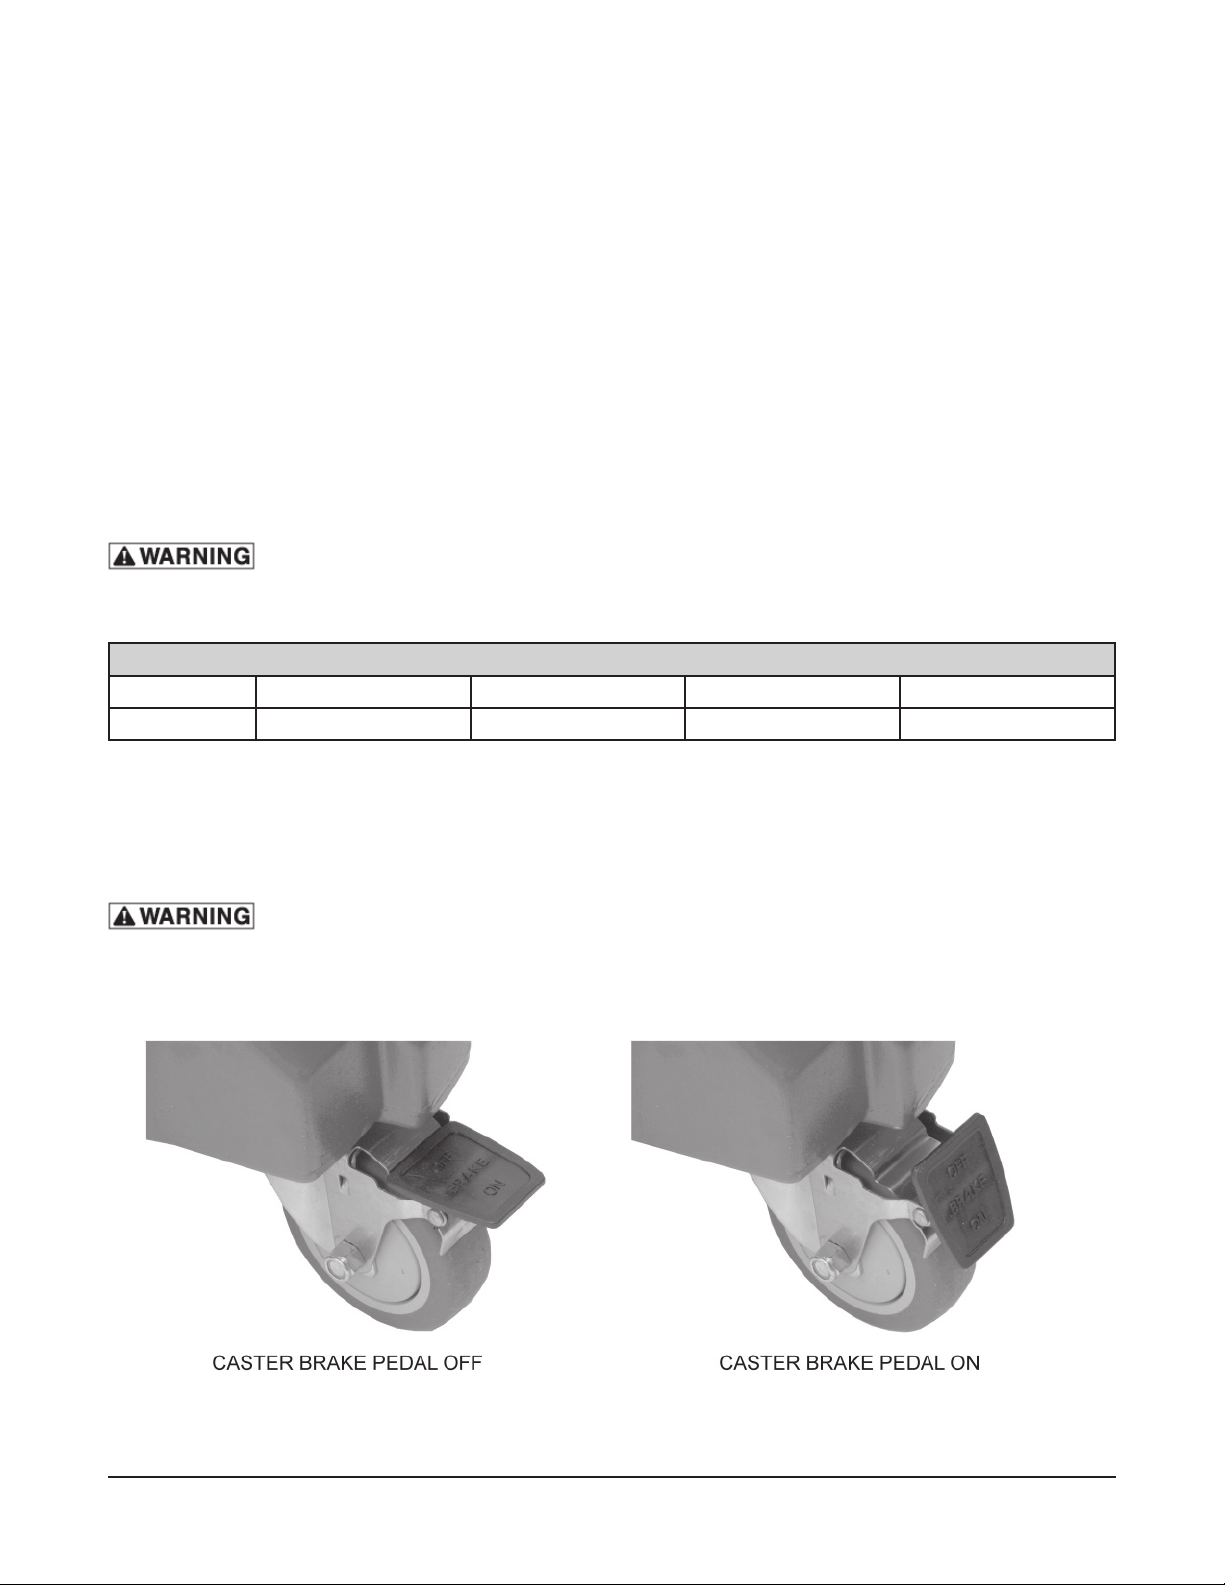
1. Secure machine in position by depressing the brake pedal on each caster (Fig. 3).
Fig. 3
– 4 –
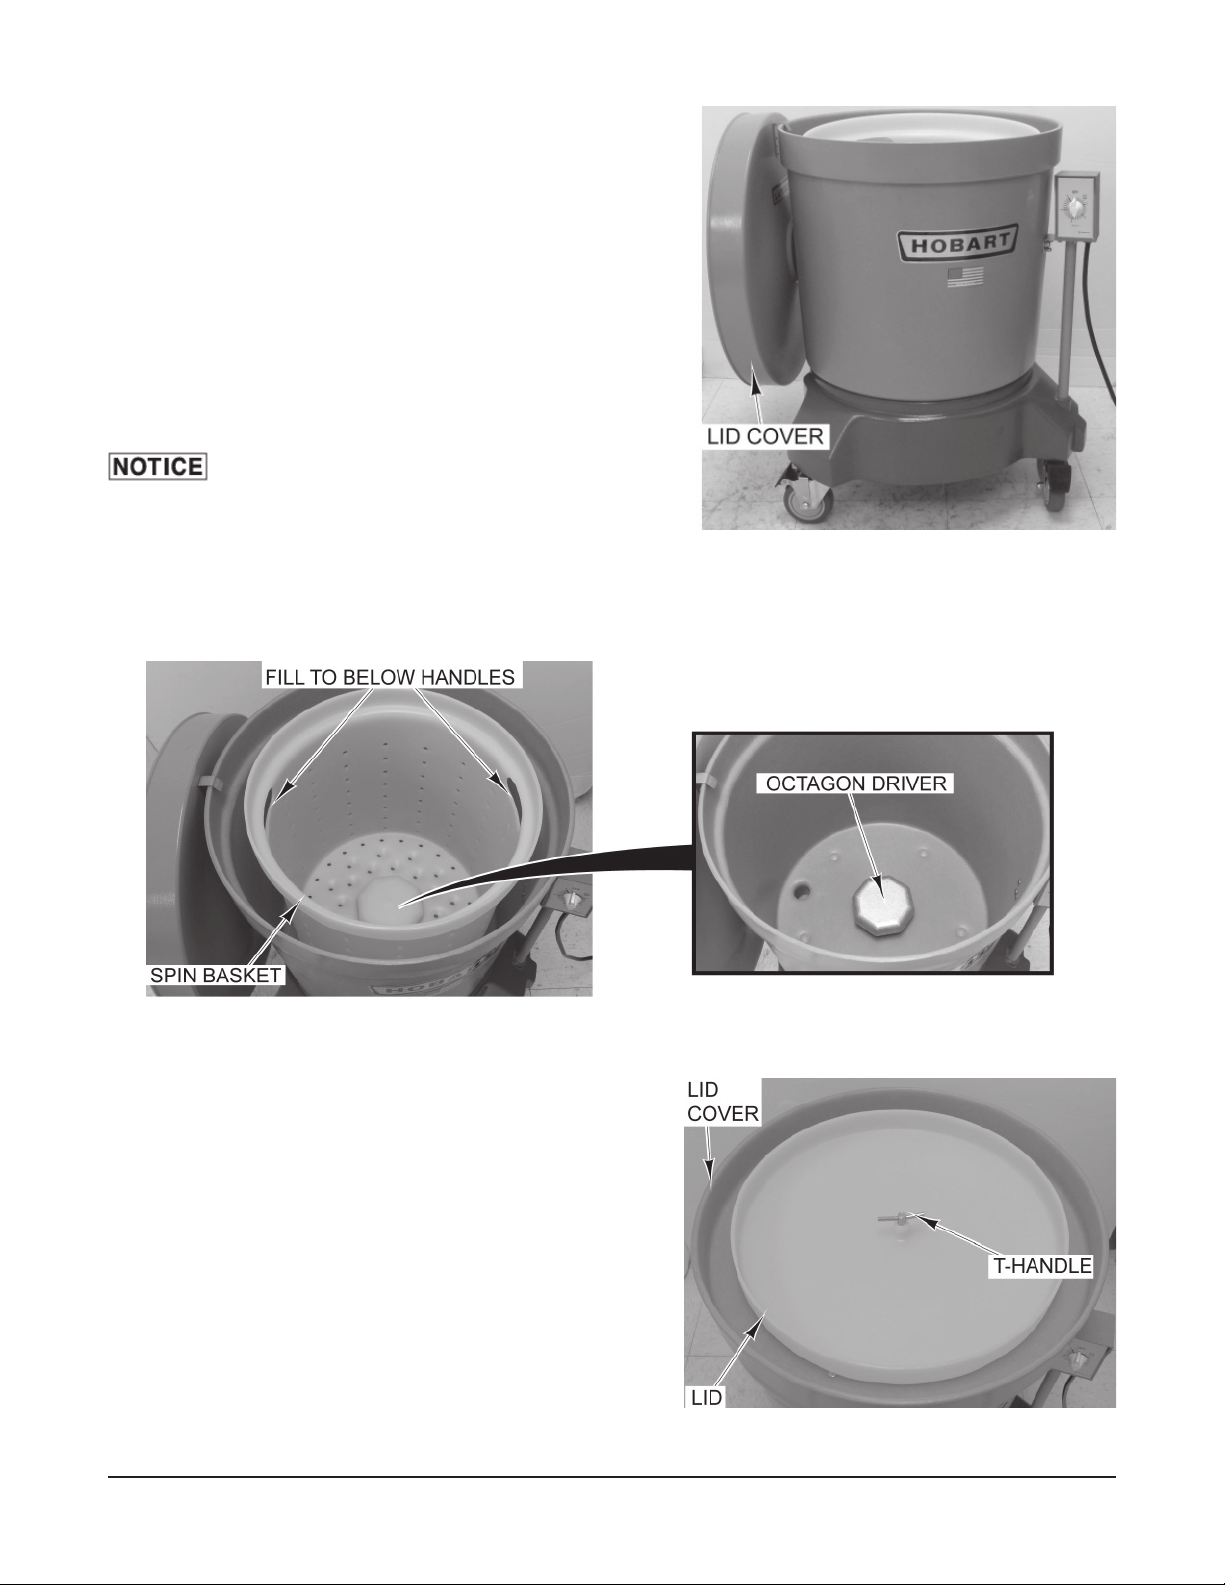
2. Remove the lid cover (Fig. 4) by peeling it off on one
side fi rst for easy removal.
The white polyethylene lid is attached to the lid cover. Do
not pull or force lid off in a quick motion.
3. Suspend the lid cover (Fig. 4) from the salad dryer tub
using the hook provided on the lid cover.
4. Remove the spin basket (Fig. 5) and place in sink.
5. Load washed lettuce/salad into spin basket to below
handle holes (Fig. 5) only. Let excess water drain from
salad and spin basket prior to loading spin basket into
salad dryer.
Do not overload spin basket. Overloading will
cause lid and motor failure. Best results are achieved by
fi lling the spin basket
and denser product, like Romaine, load may need to be
reduced to
1
/2 full so as not to overload the unit.
3
/4 full. For shredded lettuce, cabbage
Fig. 4
6. Place loaded spin basket into salad dryer ensuring the octagon shaped recess in the spin basket
lines up with the metal octagon driver (Fig. 5) in the salad dryer.
Fig. 5
7. Make sure that the T-Handle (Fig. 6), that secures the white polyethylene lid to the lid cover, is tight
before each use.
8. Place the lid cover onto the salad dryer, making sure
it sits fl ush on top of the tub.
The white polyethylene lid attached to the inside of the lid
cover is designed to hold the spin basket in the center of
the salad dryer. Proper alignment will keep the salad dryer
balanced and vibration free. Overloading will prevent the lid
from lining up properly with the spin basket and will cause
the salad dryer to wobble.
Fig. 6
– 5 –
 Loading...