

HMS Industrial Networks IP Series User Manual
Redirector Software for Windows PCs
Serial/IP is a general-purpose redirector client from Tactical Software that lets Windows-based PC
applications use shared serial lines on serial servers. The software is
compatible with numerous serial servers that use open TCP/IP
protocols.
With Serial/IP, you can configure Windows applications to communicate
with COM ports on a remote serial server as if they were local to the
PC. If the serial server supports the open protocol, COM Port Control,
additional control lines are available through the connection between
the PC and the device.
This document is updated for Version 3.0 of Serial/IP. You can find the
latest revision
of this information on the Tactical Software website.
Quick Start Procedure for the Serial/IP Client
Users with a basic understanding of Windows can follow the steps
below to be up and running in minutes. More information is available in
the full User’s Guide
1. Confirm the following:
• You are using an Intel-compatible PC running Windows 2000,
Windows NT 4.0 SP5, Windows ME, Windows 98 or Windows XP.
on the Tactical Software website.
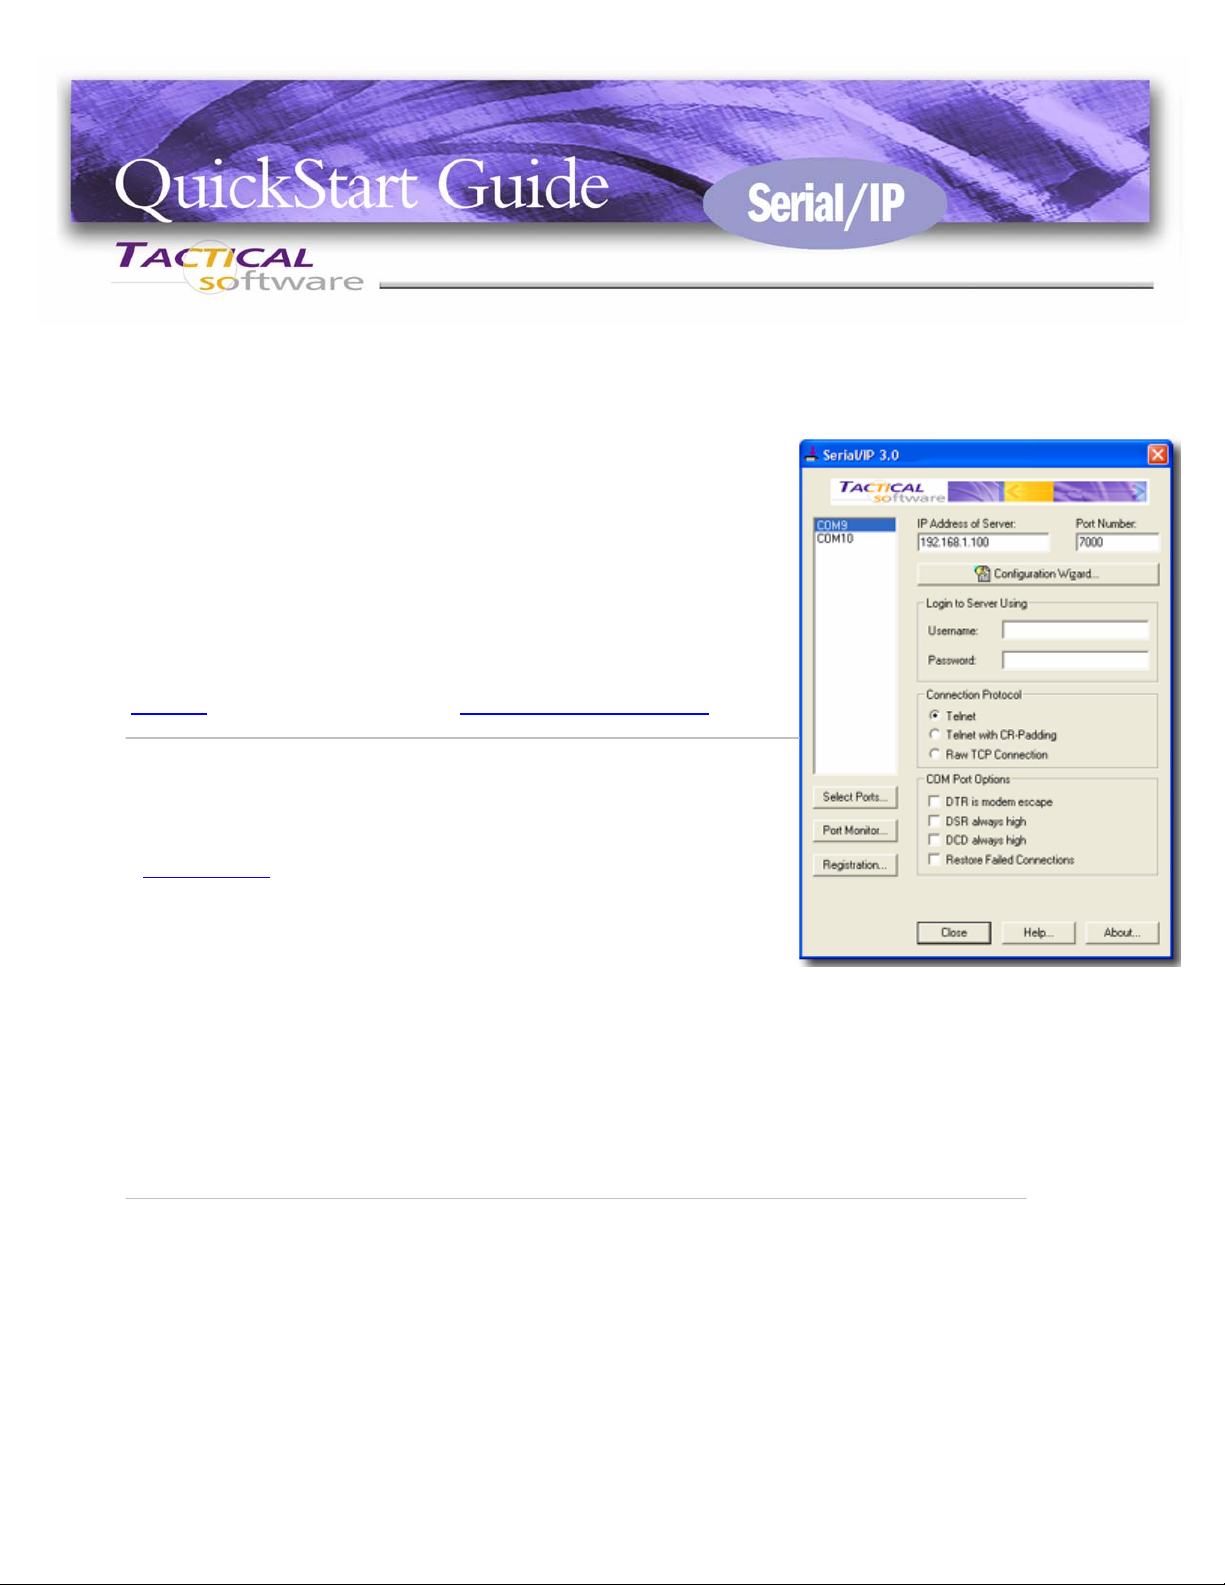
Fig. 1 – Main Window
• Your PC is networked to a device-sharing server on a TCP/IP network.
• Your server is configured to provide COM ports for remote access at one or more TCP/IP port
numbers. Contact your server manufacturer if you are not sure how to do this. Note: Tactical Software
does not have detailed information on all serial servers. This information must be obtained from the
server manufacturer.
2. Install Serial/IP on your PC:
• Log in as a user with administration privileges. (It is not necessary to be an admin to use Serial/IP.)
• Quit all Windows programs that use COM ports.
• Run the Serial/IP installer program and enter your name, company and serial number in the boxes
provided. Then click Finish. Note: Inserting no serial number will invoke a 30-day evaluation.
• If you have previously installed an evaluation copy of Serial/IP, you will be prompted to run the Uninstall
procedure.
Page 1
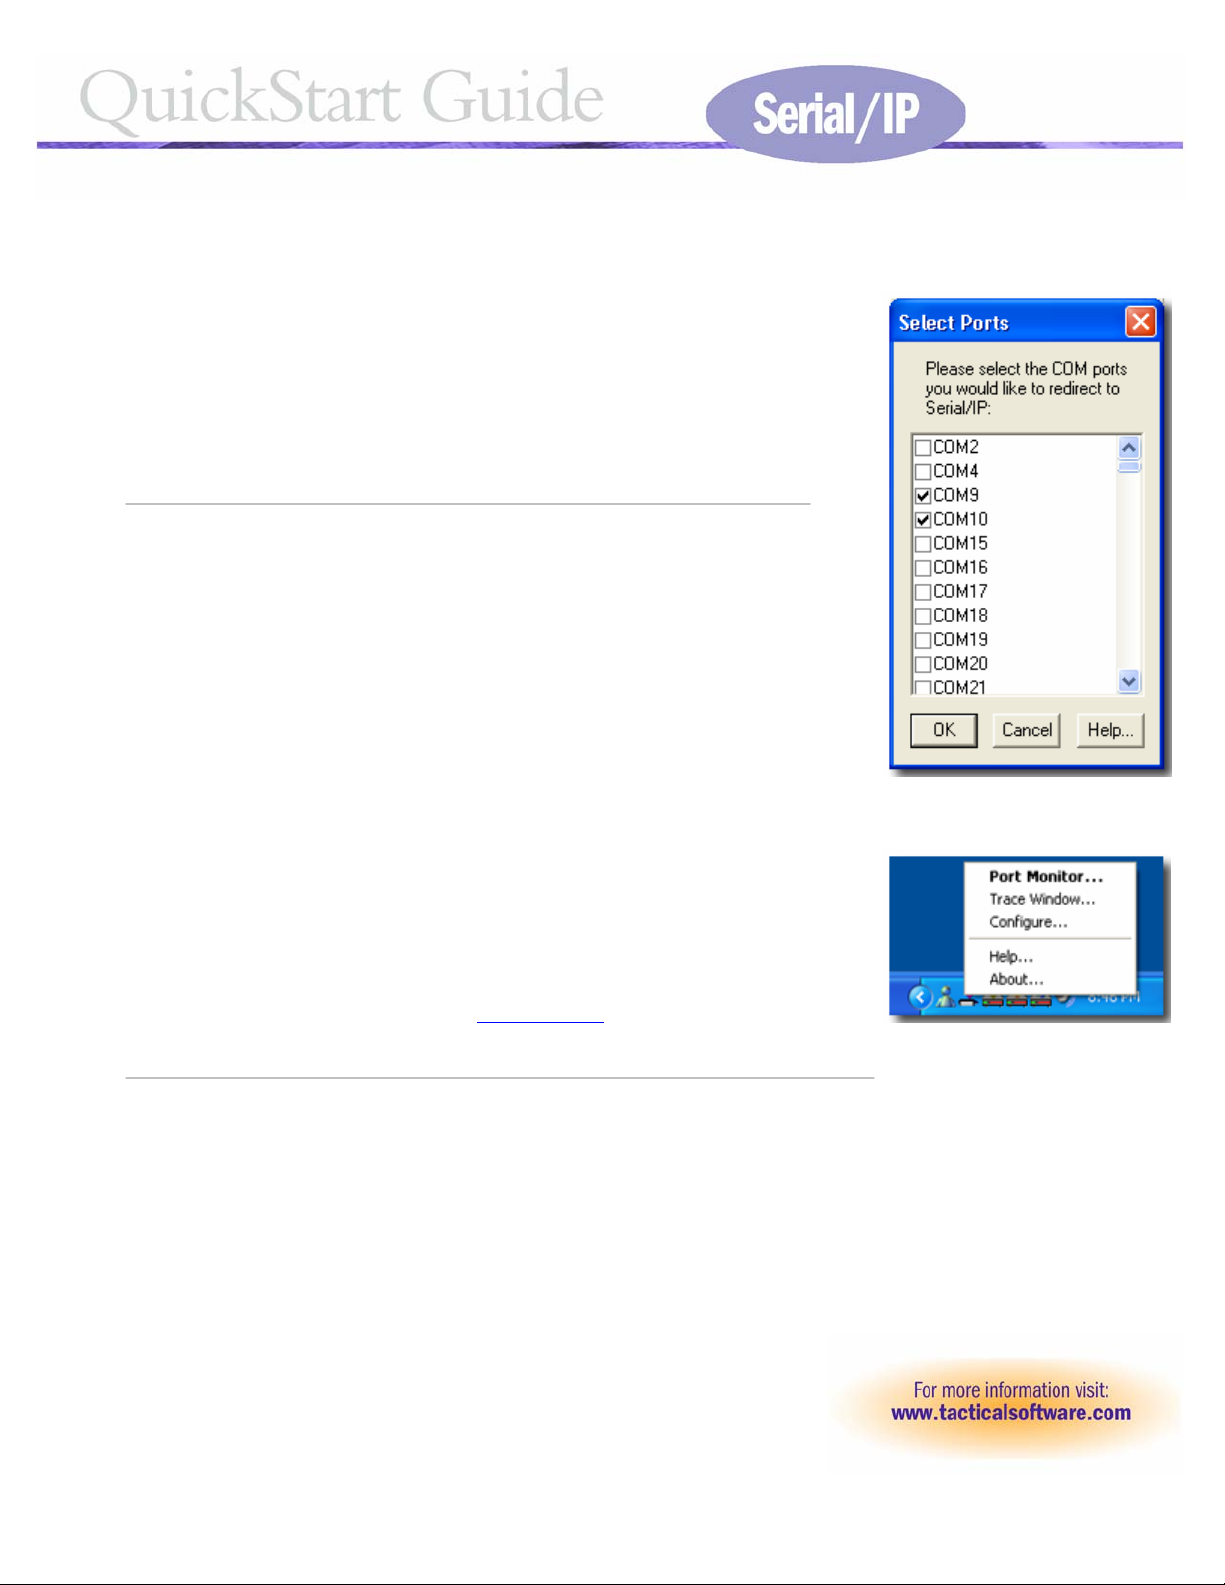
3. Create the Serial/IP COM ports:
• After the installer runs, the Select Ports Window appears (Fig. 2). Check
one or more new COM ports for DialOut/IP to create and click OK. Note:
The list of COM ports will not include those already in use by Windows on
this PC.
4. Configure and verify Serial/IP COM ports:
• The main Serial/IP Window (Fig. 1) should now be open. If not, right click
on the Serial/IP icon in the System Tray (Fig. 3) and choose Configure.
Then enter the serial server’s IP Address and Port Number in the boxes
provided for each COM port. Note: Common port numbers are 7000,
7001 or 6001. Contact your serial server manufacturer for the correct port
number.
• Enter the user name and password, if required to authenticate to your
serial server. Note: This information is entered just once for each port on
this PC.
Fig. 2 – Select Ports
• Click the Configuration Wizard button in the Main Window and then click
Start. This important step will confirm that each new port just created can
communicate with the serial server at the specified IP address and port
number. Once the Status returns a series of green checkmarks indicating
a working configuration click the Use Settings button and proceed to the
last step of setting up your applications.
• See the Installation chapter in the User’s Guide
if you need more
information.
5. Reconfigure your applications to use remote devices or Serial/IP COM ports:
• Change your application settings to use a previously-installed Serial/IP COM port.
• Your application can now be used over a TCP/IP network.
Fig. 3 – System Tray
© 2002. Tactical Software, LLC. Tactical Software is a registered trademark of Tactical Software, LLC
Page 2
 Loading...