

Page 1
Page 2

<<< This page intentionally blank >>>
Page 3
Mediaserver Quick Start – Windows XP
If you do NOT know how to configure your PC for a DHCP network configuration, then this procedure is not for you. Please refer to
the Mediaserver User Guide for more detailed instructions on setting up your Local Area Network (LAN).
Overview
This Quick Start Guide is intended for individuals with prior experience in setting up new PCs and local area networks (LANs). If
your home or office already has a LAN established and you are familiar with how to attach new PCs to the LAN, then this Quick Start
Guide is for you. If you are new to computer networking, and/or have no existing network established at the location where you
intend to install your Home Media Storage Mediaserver, then please refer to the Mediaserver User Guide for detailed instructions on
setting up your LAN. If any of the following steps do not work as described, please refer to the Trouble-shooting section of the
User’s Guide.
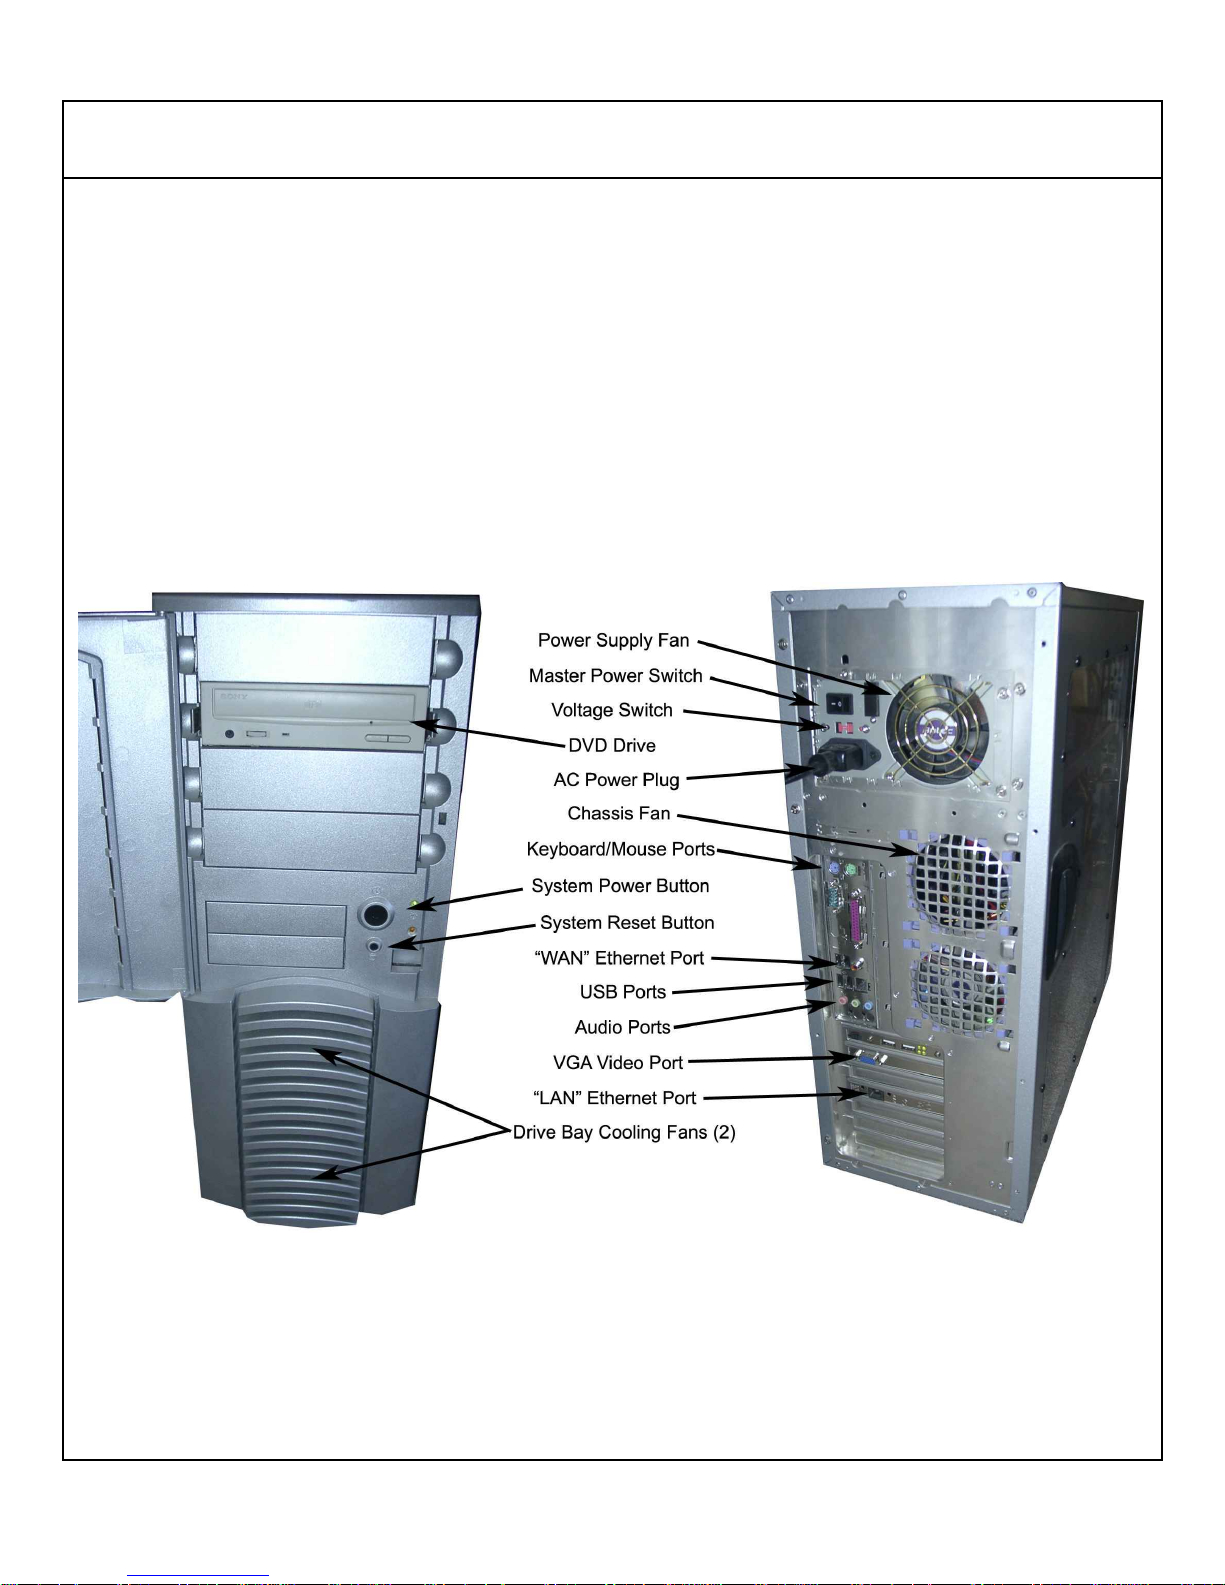
Figure 1: Mediaserver Front and Back views
Step 1: Initial Mediaserver Test Configuration
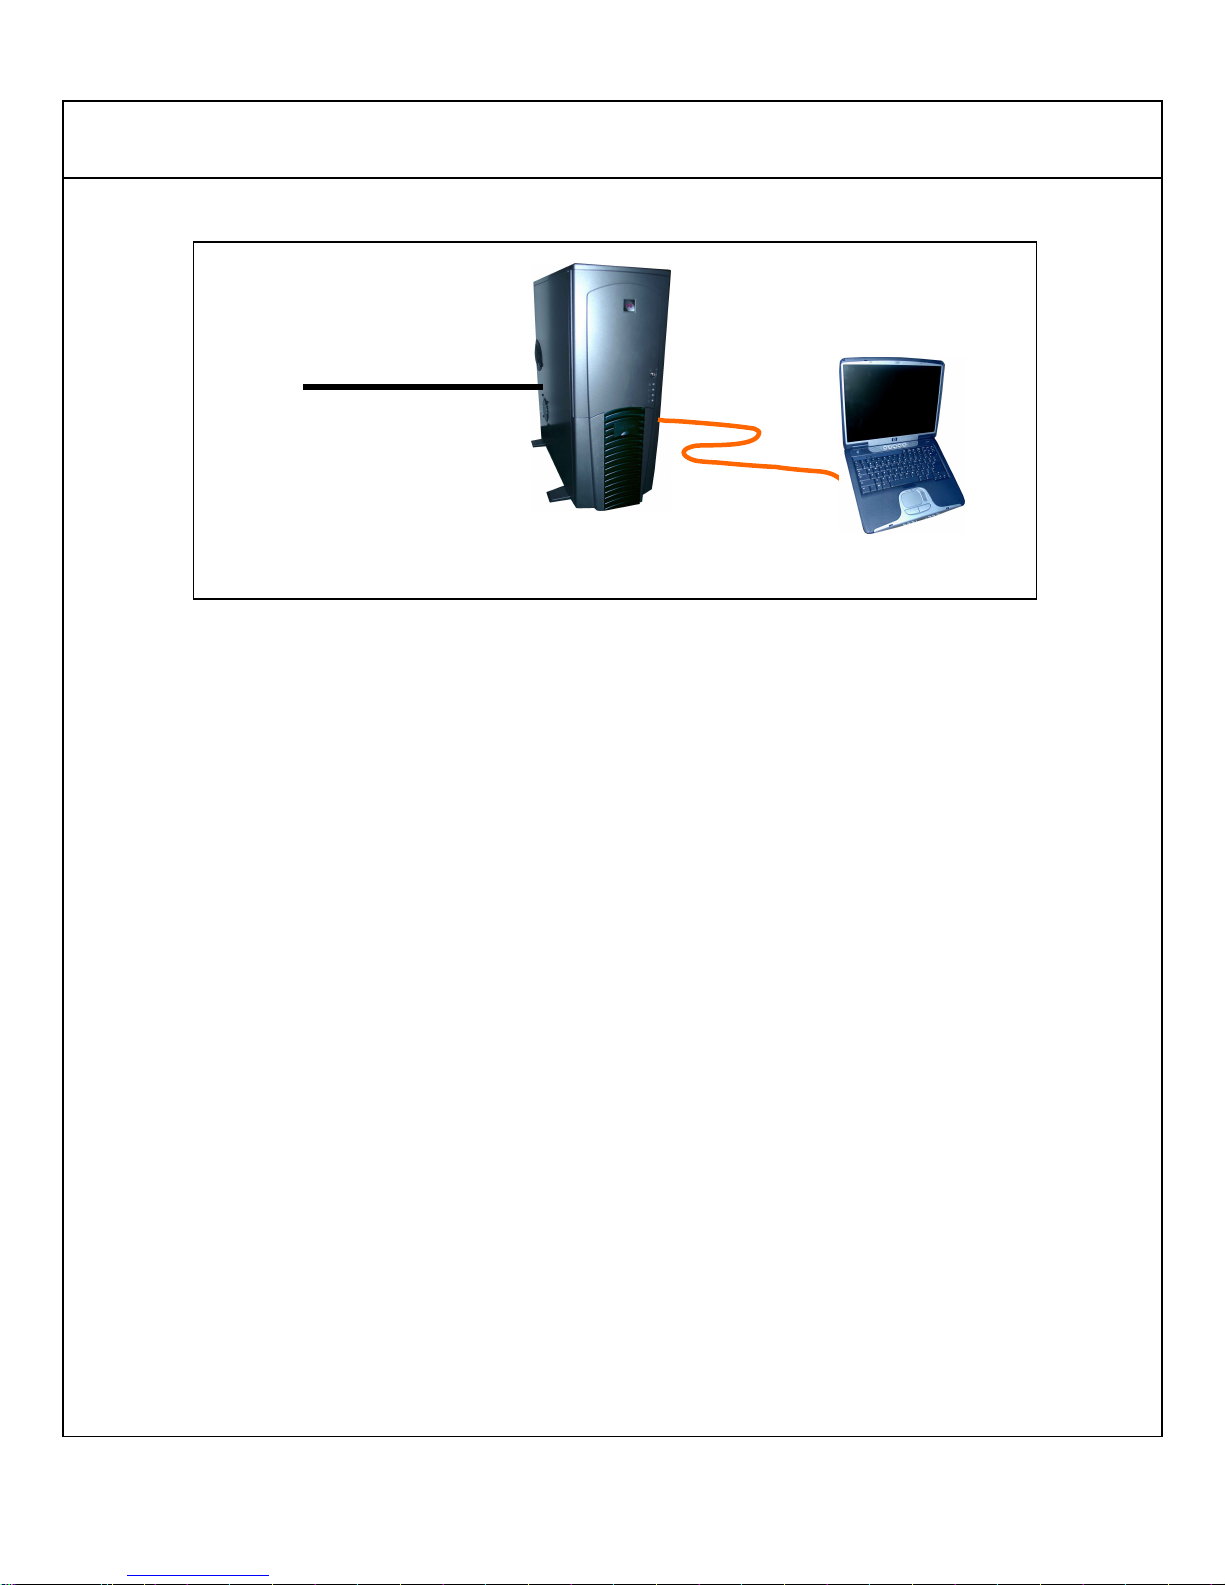
1. Attach the orange Ethernet cable, supplied with your Mediaserver, to your PC’s Ethernet port and to the “LAN” Ethernet
port on the back of the Home Media Storage Mediaserver.
© 2009 Home Media Storage LLC Quick Start Guide
Page 1 of 3
Page 4
Mediaserver Quick Start – Windows XP
Orange
ethernet
cable
A/C
Power
Power
Cable
Mediaserver PC
Figure 2 – Mediaserver Initial Test Configuration
2. Attach the AC power cable to the back of the Mediaserver and plug into a 110v AC outlet.
3. Switch the master power switch on the back of the Mediaserver to the “1” or “On” position.
4. Open the front access door on the Mediaserver, and press the large power button on the face of the access panel
5. Wait 2 to 3 minutes for the system to power up and initialize the network.
Step 2: Accessing the Mediaserver
1. Power-up the PC connected to the Mediaserver.
2. Set your PC to obtain an IP address automatically (DHCP)
3. Right click on “My Computer” and select “Map Network Drive…”
4. Enter drive letter (perhaps M:) and Folder: \\Mediaserver\home
5. Select the “Reconnect at Logon” checkbox
6. Click the “Connect using a different username” Link
7. In the username and password dialog, enter “homenet” for username and “home.net” for the password.
8. Click “OK” and then “Finish”
9. A folder should appear with the contents of the home folder on the Mediaserver.
10. You may now drag and drop files to and from the home folder on the Mediaserver.
WARNING: The orange ethernet cable can ONLY be used for connecting your Mediaserver directly to another PC bypassing all
other network equipment, such as a switch, hub, or router. The orange ethernet cable CANNOT be used for connecting a PC to a
switch, hub, or router. In the event that you have accidentally attached the orange cable from the Mediaserver to a switch, hub, or
router you may have to replace the cable with a standard ethernet cable and then restart the server if you booted up the
Mediaserver in this configuration. Neither the Mediaserver nor your networking equipment will be harmed by using the wrong
ethernet cable.
© 2009 Home Media Storage LLC Quick Start Guide
Page 2 of 3
Page 5
Mediaserver Quick Start – Windows XP
Step 3: Configure the Mediaserver for your LAN
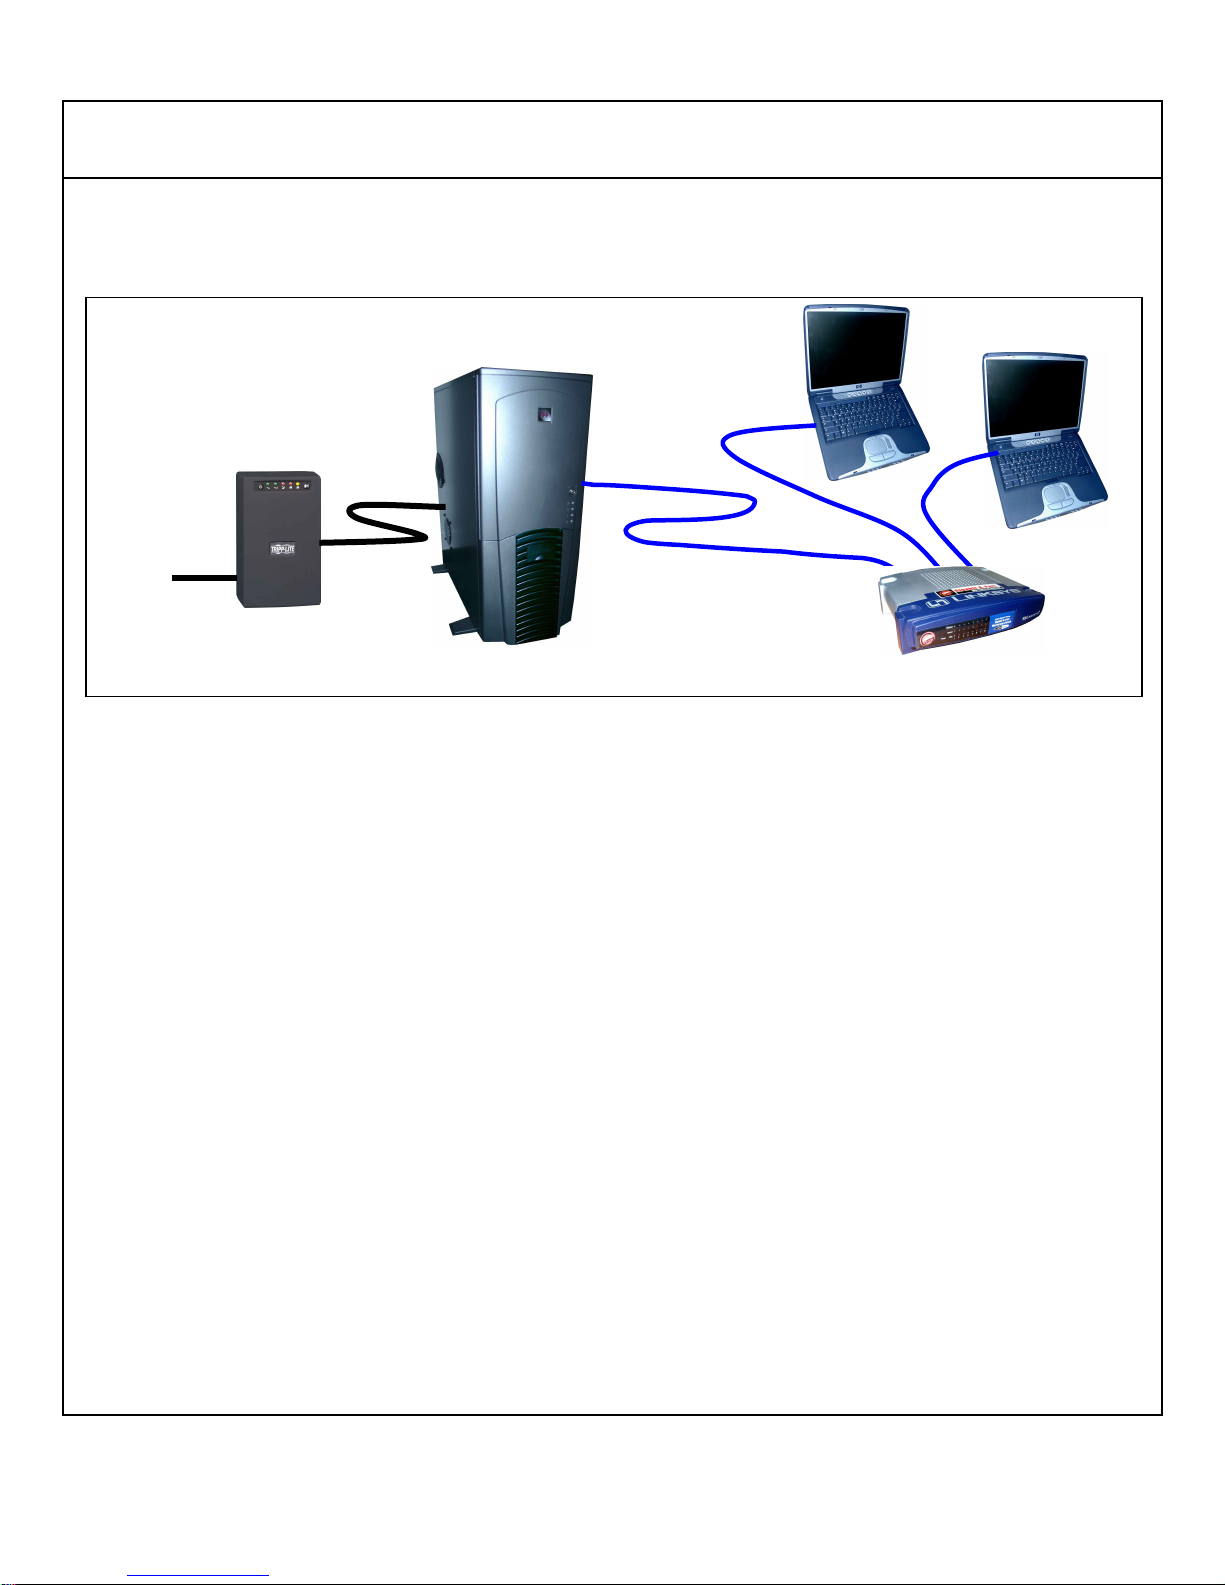
Standard
Cat5
ethernet
cable
A/C
Power
UPS – Uninterruptible
Power Supply
Power
Cable
Mediaserver
Figure 3: Typical Mediaserver LAN installation
Hub, Switch, or Router
After testing the Mediaserver by directly connecting it to one PC and verifying that the Mediaserver is functioning properly, you are
now ready to install the Mediaserver on to your LAN. By default, the Mediaserver is configured with an IP Address of 10.1.1.1, and a
subnet mask of 255.255.255.0. The Mediaserver is initially set to provide DHCP services to PCs on your LAN and will offer IP
addresses between 10.1.1.50 and 10.1.1.200. To accept this setting, you do not have to take further action, other than to attach the
Mediaserver to your switch, hub, or router and verify no other DHCP servers are active on your local network Make sure you
disconnect the orange ethernet cable and store it away for future network troubleshooting procedures. After connecting the
Mediaserver to your LAN using a standard ethernet cable (do NOT use the orange cable provided with your system), power up each
PC on the LAN and verify its IP address is in the range of 10.1.1.50 to 10.1.1.200. To do this, open a command prompt window and
type “ipconfig” to list your network interfaces and their settings. If your IP address is not in the specified range, then refer to the
“Trouble-shooting Tips” to set DHCP on your PC and to verify no other DHCP servers are running on your LAN.
To configure the Mediaserver to use the services of another DHCP server on your LAN or to manually set its IP address and / or turn
off the Mediaserver’s DHCP services, please refer to the Mediaserver User’s Guide for detailed instructions.
Step 4: Shutting down the Mediaserver
1. On a client PC with a LAN connection to the Mediaserver, Open a web browser (Internet Explorer)
2. In the address bar type : “http:\\Mediaserver:10000”
3. In the login page type username: “root” and password: “home.net” ( and click login)
4. Select “Boot-up and Shutdown”.
5. Select “Reboot” or “Shutdown” as desired.
6. If you reboot, wait at least 3 minutes before reattempting to access the Mediaserver to ensure all network processes are up
and running.
7. Once you shutdown or reboot, the web browser will no longer be connected to the Mediaserver. You must wait for the
Mediaserver to finish booting up before you can log back into the user interface.
© 2009 Home Media Storage LLC Quick Start Guide
Page 3 of 3
 Loading...