

HMS Hands on the Flexy 205 User Manual

Hands on the Flexy 205
USER MANUAL
UM-0002-00 1.0 ENGLISH

Important User Information
Liability
Every care has been taken in the preparation of this document. Please inform HMS Industrial Networks SA of any
inaccuracies or omissions. The data and illustrations found in this document are not binding. We, HMS Industrial
Networks SA, reserve the right to modify our products in line with our policy of continuous product development.
The information in this document is subject to change without notice and should not be considered as a commitment by HMS Industrial Networks SA. HMS Industrial Networks SA assumes no responsibility for any errors that
may appear in this document.
There are many applications of this product. Those responsible for the use of this device must ensure that all the
necessary steps have been taken to verify that the applications meet all performance and safety requirements including any applicable laws, regulations, codes, and standards.
HMS Industrial Networks SA will under no circumstances assume liability or responsibility for any problems that
may arise as a result from the use of undocumented features, timing, or functional side effects found outside the
documented scope of this product. The effects caused by any direct or indirect use of such aspects of the product
are undefined, and may include e.g. compatibility issues and stability issues.
The examples and illustrations in this document are included solely for illustrative purposes. Because of the many
variables and requirements associated with any particular implementation, HMS Industrial Networks SA cannot assume responsibility for actual use based on these examples and illustrations.
Intellectual Property Rights
HMS Industrial Networks SA has intellectual property rights relating to technology embodied in the product described in this document. These intellectual property rights may include patents and pending patent applications in
the USA and other countries.
Hands on the Flexy 205 User Manual UM-0002-00 1.0

Hands on the Flexy 205 User Manual UM-0002-00 1.0
Table of Contents
Page
1 Preface ............................................................................................................................... 3
1.1 About This Document .....................................................................................................3
1.2 Document history...........................................................................................................3
1.3 Related Documents .......................................................................................................3
1.4 Trademark Information ...................................................................................................3
2 Requirements................................................................................................................... 4
2.1 Hardware ......................................................................................................................4
2.2 Software .......................................................................................................................4
3 Get in Touch with the Flexy 205................................................................................... 5
3.1 Assigning an IP Address .................................................................................................5
3.2 Accessing the Web Configuration Interface......................................................................5
4 Quick Launch Wizard ..................................................................................................... 6
4.1 System Wizard ..............................................................................................................6
4.2 Internet Wizard ..............................................................................................................7
4.3 VPN Wizard...................................................................................................................8
4.4 Gateway Wizard ............................................................................................................8
5 Remote Access................................................................................................................ 9
6 Create Tags and Monitor Values................................................................................ 10
6.1 Available IO Servers ....................................................................................................10
6.2 Tag Management .........................................................................................................10
6.3 Tag Creation................................................................................................................10
6.4 Monitor Tags................................................................................................................ 13
7 Alarm Management....................................................................................................... 14
7.1 Configure Alarm Settings for a Tag ................................................................................ 14
7.2 Alarm Display .............................................................................................................. 14
7.3 Alarm Summary ...........................................................................................................14
7.4 Alarm History ............................................................................................................... 15
7.5 Alarm Actions .............................................................................................................. 15
8 Real-time Logging.........................................................................................................17
8.1 Real-time Logging Configuration ................................................................................... 17
8.2 Real-time Graph ..........................................................................................................17

Hands on the Flexy 205 User Manual UM-0002-00 1.0
Table of Contents
9 Historical Logging ........................................................................................................ 18
9.1 Historical Logging Configuration....................................................................................18
9.2 Historical Logging Graph .............................................................................................. 18
9.3 Historical Logging Table ............................................................................................... 18
10 Files Transfer Page ....................................................................................................... 19
11 Task Planner................................................................................................................... 20
11.1 Configure FTP Server Settings......................................................................................21
12 Tag Publishing ............................................................................................................... 22
13 Data Management ......................................................................................................... 23
14 NAT 1:1............................................................................................................................. 24
15 Custom Web Pages ...................................................................................................... 25
16 Backup and Restore .....................................................................................................26
17 Other Configuration Mechanisms............................................................................. 27
17.1 FTP ............................................................................................................................ 27
17.2 SD Card...................................................................................................................... 27
18 Export Block Descriptors............................................................................................28
19 Scripting ..........................................................................................................................29
20 User Management .........................................................................................................30
21 Troubleshooting ............................................................................................................31
21.1 Summary Page ............................................................................................................ 31
21.2 Event Log .................................................................................................................... 31
21.3 Scheduled Actions ....................................................................................................... 32

Preface 3 (34)
1 Preface
1.1 About This Document
This guide presents the features of the eWON Flexy 205 and explains briefly the steps to take
to get a functional Flexy 205.
For additional related documentation and file downloads, please visit www.ewon.biz/support.
1.2 Document history
Version Date Description
1.0 2018-01-12 First release
1.3 Related Documents
Document Author Document ID
eWON Configured by SD Card CTS AUG-0062-00
eBuddy CTS AUG-0063-00
Configure your eWON using FTP CTS KB-0020-00
Email & text message (SMS) relaying using Talk2M CTS KB-0046-00
Alarm Email & SMS Templates CTS KB-0054-00
Publish Tags in SNMP CTS KB-0150-00
Publish Tags in Modbus TCP CTS KB-0184-00
Publish Tags in OCPUA CTS KB-0265-00
IO Servers CTS RG-0007-00
General Reference Guide for the Flexy 205 CTS RG-0008-00
Export Block Descriptor CTS RG-0009-00
1.4 Trademark Information
eWON®is a registered trademark of HMS Industrial Networks SA. All other trademarks mentioned in this document are the property of their respective holders.
Hands on the Flexy 205 User Manual UM-0002-00 1.0

Requirements 4 (34)
2 Requirements
2.1 Hardware
This guide presents the features of the Flexy 205 which can be combined with optional extension cards if needed.
Without extension cards, the Flexy 205 provides Remote Access and Remote Data Services to
Ethernet devices over the local Ethernet network.
Extension cards permit the Flexy 205 to communicate to a wider range of field devices including
USB and serial devices and to use additional Internet connectivity technologies such as Wi-Fi
and cellular modems.
2.2 Software
The Flexy 205 is configured through its web interface which is accessible with any modern web
browser. The recommended platforms are:
• Firefox 15 and higher.
• Chrome 16 and higher.
• Safari 6 and higher.
• Edge 13 and higher.
eBuddy
The companion tool eBuddy assists with initial IP address configuration for the Flexy 205 and
with maintenance tasks such as upgrading firmware, creating/restoring backups...
Download eBuddy.
eCatcher
The companion tool eCatcher is needed if the Flexy 205 will connect to the Talk2M infrastructure to allow remote access to its plugged in equipment.
Download eCatcher.
Hands on the Flexy 205 User Manual UM-0002-00 1.0

Get in Touch with the Flexy 205 5 (34)
3 Get in Touch with the Flexy 205
3.1 Assigning an IP Address
The first communication with the Flexy 205 can be established using the companion tool
eBuddy (check Software, p. 4 for more details about eBuddy).
To change the IP address of the Flexy 205:
1. Connect the port labeled LAN (port #1) of the Flexy 205.
This can be done either to the computer point-to-point or through a network if the default IP
of the Flexy 205 which is 10.0.0.53 will not conflict with another connected device.
2. Start the eBuddy application.
The application scans through the Ethernet adapter network and identifies the connected
eWON devices displaying the IP address, subnet mask and serial number.
The utility also allows the modification of the default IP address without necessarily being
in the same network range.
3. Optional: Highlight the row representing the device to be modified
4. Click on the button Set IP from the top bar menu or hit the F2 keyboard shortcut.
5. If step 2 was skipped, indicate the serial number of the Flexy 205 to be modified. Click Next.
6. Enter the new IP address and its subnet mask. By clicking Next, eBuddy sends the com-
mands to the Flexy 205 to change its IP address and to reboot.
7. Once the reboot completes, the Flexy 205 will be accessible at its new IP address.
3.2 Accessing the Web Configuration Interface
The configuration of the Flexy 205 can be done using its internal web pages.
While the computer is connected to a LAN port of the Flexy 205, open an Internet browser and
enter the LAN IP address of the Flexy 205 into the address field. If the computer is not in the
same network address range as the Flexy 205, its web pages can be reached using the “EZ
DHCP” feature of the eBuddy utility. For more information, refer to the eBuddy reference in Re-
lated Documents, p. 3.
Before beginning the configuration of the Flexy 205, authentication is required. The default login
and password are both “adm”.
For security reasons, the default password must be changed.
The password can be changed through the System Wizard described below.
At the first boot of the Flexy 205 or after a reset level 2 and after successfully logging in, a
prompt will appear to set the interface language.
After the interface language is selected, a configuration wizard is proposed to permit a quick
configuration of the system and communication settings of the Flexy 205. On later connections,
the configuration wizard is accessible through the Wizards button in the upper right corner.
Hands on the Flexy 205 User Manual UM-0002-00 1.0
Quick Launch Wizard 6 (34)
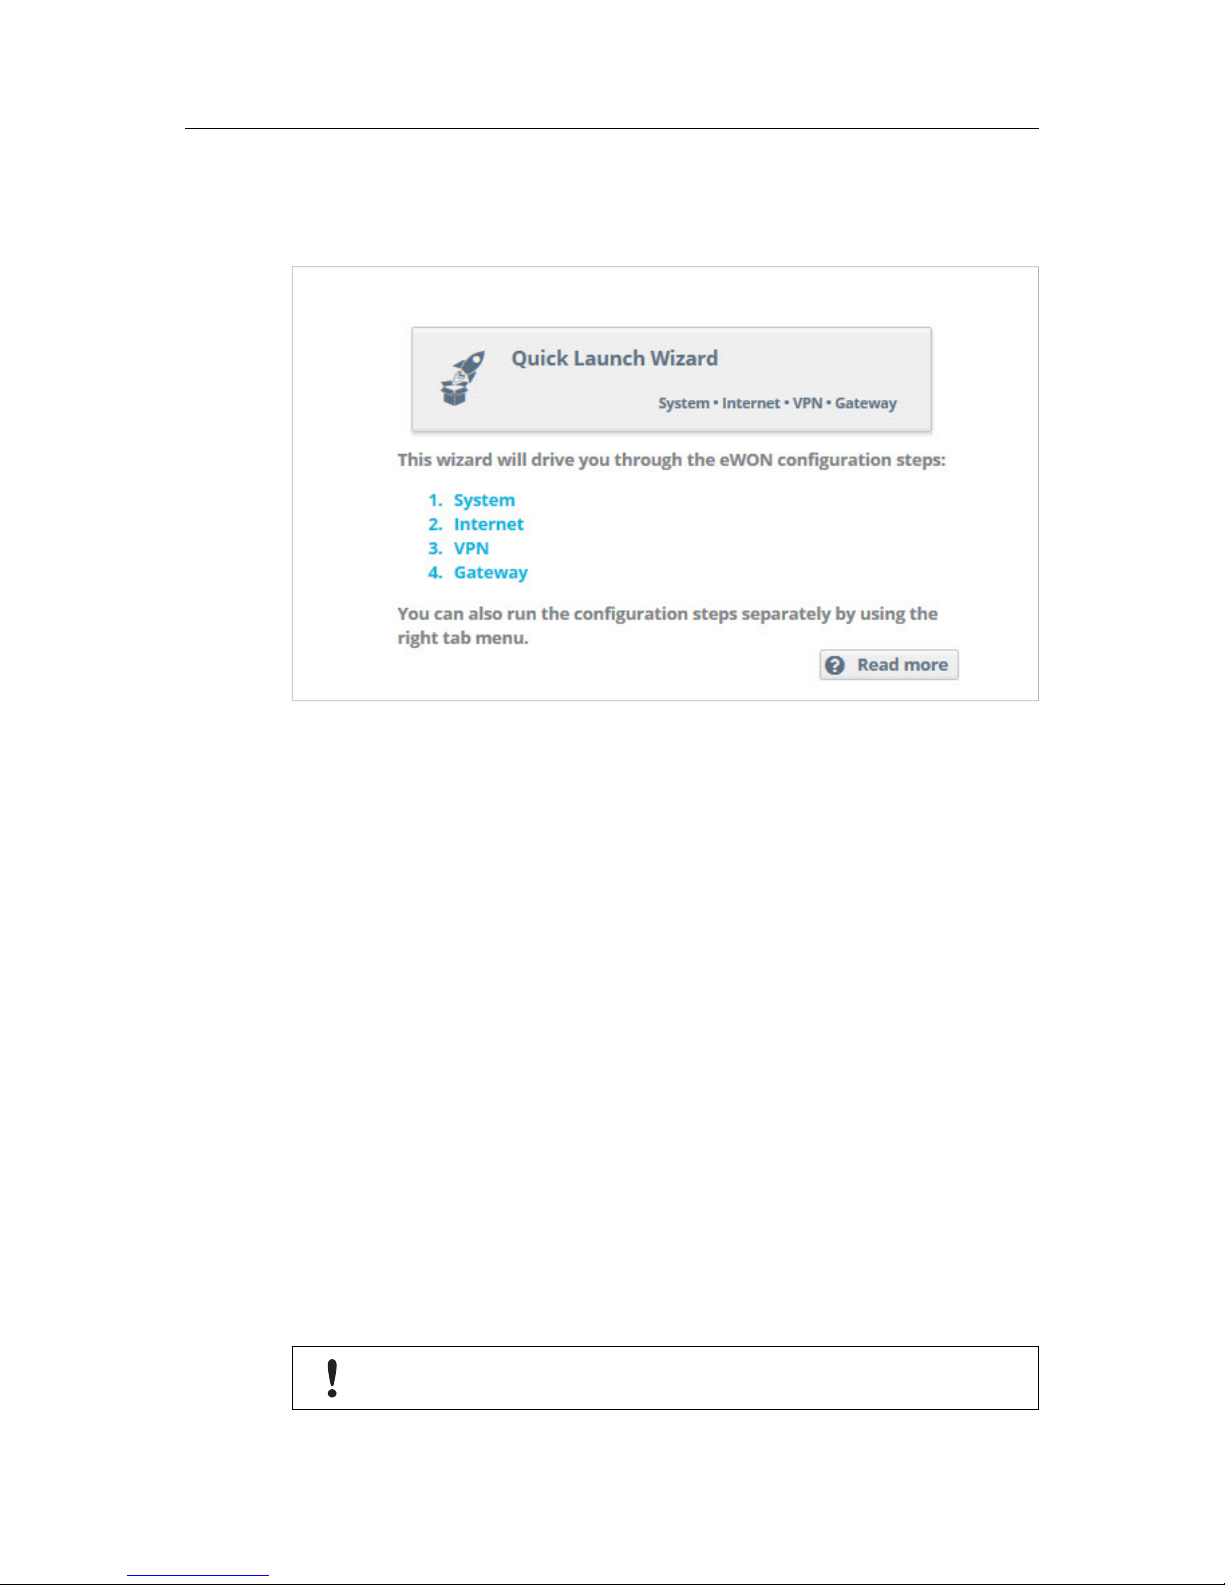
4 Quick Launch Wizard
The Quick Launch Wizard makes it easy to configure the initial system and communication settings for the Flexy 205.
Fig. 1 Quick Launch Wizard Button
It passes sequentially through the System Wizard, the Internet Wizard and the VPN wizard:
• The System Wizard configures basic system settings such as the date & time and the de-
fault username & password.
• The Internet Wizard configures the WAN or Internet communication settings for the Flexy
205.
• Once the Internet Wizard is complete, the VPN Wizard connects the Flexy 205 to the
Talk2M VPN infrastructure or to an eFive VPN server.
Based on the hardware configuration of the Flexy 205, the Quick Launch Wizard can also include the Gateway Wizard which assists in configuring communication to serial, MPI and USB
devices. Each wizard can also be run independently through the menu options on the right hand
of the Wizards page.
4.1 System Wizard
The System Wizard configures basic system settings.
The first screen of the System Wizard configures the name of the device and the default user
settings. However, checking the “Erase all first” checkbox will erase all previously configured
settings on the Flexy 205.
The eWON name helps identify the Flexy 205 for an application. The name appears in the footer of every web page and can be included in reports and alarm notifications.
The Flexy 205 comes with an initial default user with username “adm” and password “adm”.
For security reasons, it is required to change the default password for the adm user.
This username and password can be changed in the System Wizard.
Hands on the Flexy 205 User Manual UM-0002-00 1.0

Quick Launch Wizard 7 (34)
Additional users can be added from Setup > Users menu. More information about adding additional users is described later in this document.
Click Next to proceed to the second screen.
The second screen of the System wizard configures the date & time settings. For Talk2M communication, the date of the Flexy 205 must be correct. Click on the calendar icon in the date &
time field to adjust it. If typing the date & time directly into the field, be sure to format the value
as shown.
To enable automatic date and time synchronization with an NTP server, check the “Enable
NTP” checkbox and adjust the NTP synchronization settings as needed.
The default NTP server is ntp.talk2m.com but other NTP servers can be used.
Click Next to proceed to the next screen.
The third screen of the System Wizard configures the attribution of the ports of the four port
switch. Click on a port to change its attribution.
If no Ethernet extension card is detected then ports #2, #3, and #4 can be configured to be either a LAN (local access) port or a WAN (Internet access) port. Port #1 will always remain a
LAN port.
The attribution of a port can be easily recognized by its LED color:
• Orange for a WAN port.
• Green for a LAN port.
If an Ethernet extension card is detected, all four ports are set to LAN ports and are not
configurable.
Click Next to save the system settings.
If the attribution of the ports changed during the wizard, reboot the Flexy 205 to apply the
changes.
4.2 Internet Wizard
The Internet Wizard configures the WAN or Internet settings for the Flexy 205. The options
available will depend on the specific hardware configuration of the Flexy 205.
The first screen selects the WAN interface that will be active.
Checking the Initialize Configuration checkbox will delete any existing WAN and VPN settings
already configured.
From the drop down menu, select the WAN interface to configure and activate.
Click Next to begin the WAN interface configuration.
Subsequent screens will differ depending on the WAN interface selected.
Below are the steps for connecting the Flexy 205 to an Ethernet network. Information about
configuring other WAN interfaces is available in the General Reference Guide for the Flexy 205
reference from the Related Documents, p. 3.
In the Address Setup section, select DCHP from the dropdown menu to have the Flexy 205 receive an address automatically from the network or Static and then enter the network address
settings manually.
If the network uses a proxy server and the Flexy 205 will connect to Talk2M, check the Connect
to Talk2M through Proxy checkbox.
Hands on the Flexy 205 User Manual UM-0002-00 1.0

Quick Launch Wizard 8 (34)
Click Next to proceed to the next screen.
Check the Enabled checkbox to make a test connection to the Internet. If this network uses a
proxy server or if port 80 is closed for outbound connections, leave this checkbox unchecked.
Click Next to apply the configuration changes.
If the wizard completes successfully, the Flexy 205 is now connected to the local Ethernet network. If the wizards fails, check with the local network administrator for any special connection
instructions.
4.3 VPN Wizard
The VPN Wizard configures the settings required to connect the Flexy 205 with the Talk2M infrastructure or an eFive network.
The first screen of the VPN Wizard selects the VPN network to use. Information for connecting
to an eFive network is available on www.ewon.biz/support.
To connect the Flexy 205 to the Talk2M VPN infrastructure, click the T2M Configure Talk2M
connectivity button.
Before proceeding with the Talk2M wizard, the Flexy 205 must first be defined in eCatcher. Information about eCatcher and defining eWON devices is available on Flexy 205.
On the next screen select the registration mechanism.
To register with an activation key, select Register with Activation Key and enter the appropriate
activation key.
To register with an eWON Name, select Register with eWON Name and enter the Talk2M account name, the name of the Flexy 205 on the account, and valid user credentials for this
account.
Click Next to advance to the next screen.
If the network used for Internet access uses a proxy server, check the Enable checkbox in the
Connect via HTTP Proxy section and enter the appropriate connection information for the proxy
server.
Click Next to test and apply the Talk2M connection settings.
If the wizard completes successfully, the Flexy 205 is properly configured for Remote Access
through Talk2M. If the wizard fails, the Diagnosis section will give additional troubleshooting
information.
4.4 Gateway Wizard
If the hardware configuration of the Flexy 205 includes certain extension cards that allow communication with field devices over interfaces other than Ethernet, the Wizards might include the
Gateway Wizard.
The Gateway Wizard configures any necessary communication parameters for these cards.
For specific information about the hardware configuration of the Flexy 205, check the General
Reference Guide for the Flexy 205 from the Related Documents, p. 3.
Hands on the Flexy 205 User Manual UM-0002-00 1.0

Remote Access 9 (34)
5 Remote Access
The Flexy 205 can be used to allow remote access to a wide variety of PLCs.
Under most circumstances, completing the Quick Launch Wizard successfully configures the
Flexy 205 for remote access. In addition, there may be additional configuration steps required
in the programming software of the field device.
Specific documentation for remote access to different manufacturers’ PLCs is available, check
www.ewon.biz/support.
Hands on the Flexy 205 User Manual UM-0002-00 1.0
 Loading...