

Page 1
D31420-08-01-02_R4_27/10/2011
User Manual
HMM Diagnostics GmbH
D-69221 Dossenheim, Germany
www.hmm.info
Upper Arm Blood Pressure Monitor
with wireless data transfer module
Please read the user manual carefully before
the rst use.
Page 2

Page 3

3
Inhalt
I. Introduction
Product description 5
Normal variations of your blood pressure 6
II. Your smartLAB®pro+
Display & functions 7
Specications 8
Information: 10
III. Setup & operating functions
Making the device ready for operation 11
Setting time, date and average 12
Setting up the wireless data transfer 14
Connecting the cuff to the monitor 19
Applying the cuff 19
Body posture during measurement 20
Measurement 21
Displaying stored values 22
Deleting measured values 24
IV. Miscellaneous
Assessing high blood pressure for adults 26
Troubleshooting 31
Maintenance 32
Explanation of symbols 32
Guidance and manufacture’s declaration – electromagnetic
emission for all equipment & systems 33
Guidance and manufacture’s declaration – electromagnetic
immunity for all equipment & systems 34
Page 4

4
Guidance and manufacture’s declaration – electromagnetic
immunity for ME EQUIPMENT 36
DPA technology for a more accurate measurement 38
Measure-during-ination 39
Warranty: 39
Page 5

5
I. Introduction
Thank you for having decided for our smartLAB®pro+ blood pressure
monitor for the upper arm. Our device enables you to control your
blood pressure and your pulse rate very easily. Furthermore. You
can store your values by an internal measured data storage. The
classication by colors of the measured values on the side of your
device enables you to interpret your values immediately.
Please read carefully the instructions before your use the
smartLAB®pro+ blood pressure monitor for the rst time.
Product description
Blood pressure and heart rate can be identied automatically and
without any invasive method by an integrated pressure sensor
technology and by an oscillometric measurement method. Blood
pressure, pulse rate and (possible) irregular heartbeats can be seen
on the LCD display. You can store the last 60 results (2 user proles)
with date and time. In addition to that you can see the average of the
last 3, 4 or 5 measurements. Your smartLAB®pro+ blood pressure
monitor can also indicate the average of the measurements you did in
the mornings/ evenings as well as the average for all results.
* For more information on h
Fon
or h
Line
Terminal go to www.hmm.info
Page 6

6
ANT+ wireless data transfer
Thanks to the integrated ANT module all results can be transmitted to
their receiver (laptop, personal computer, h
Fon
) in order to interpret
your measured values.
The smartLAB®pro+ blood pressure monitor is an ANT+ Device, which
supports the ANT+ protocoll (version 1.0) and is compatible with
receive terminal s, which support the ANT+ protocoll.
Normal variations of your blood pressure
Many factors inuence your blood pressure such as physical exercises,
excitement, stress, nutrition, drinking, smoking and other activities
(including measuring your blood pressure). For this reason you almost
never get the same results.
Your blood pressure is subject to permanent variations – day and
night. The highest values are usually in the day, the lowest usually at
midnight. Usually your blood pressure starts increasing after 3 a.m.
and reaches its highest value in the daytime when you are awake and
active.
For this reason we recommend to measure your blood pressure every
day at the same time under the same circumstances. Please relax 3 to
5 minutes between the measurements so that your blood circulation
can start again in your arm. It is very rare that you get identical
measured values when you measure your blood pressure several times
subsequently.
Page 7
7
ENGLISH
II. Your smartLAB®pro+
Display & functions
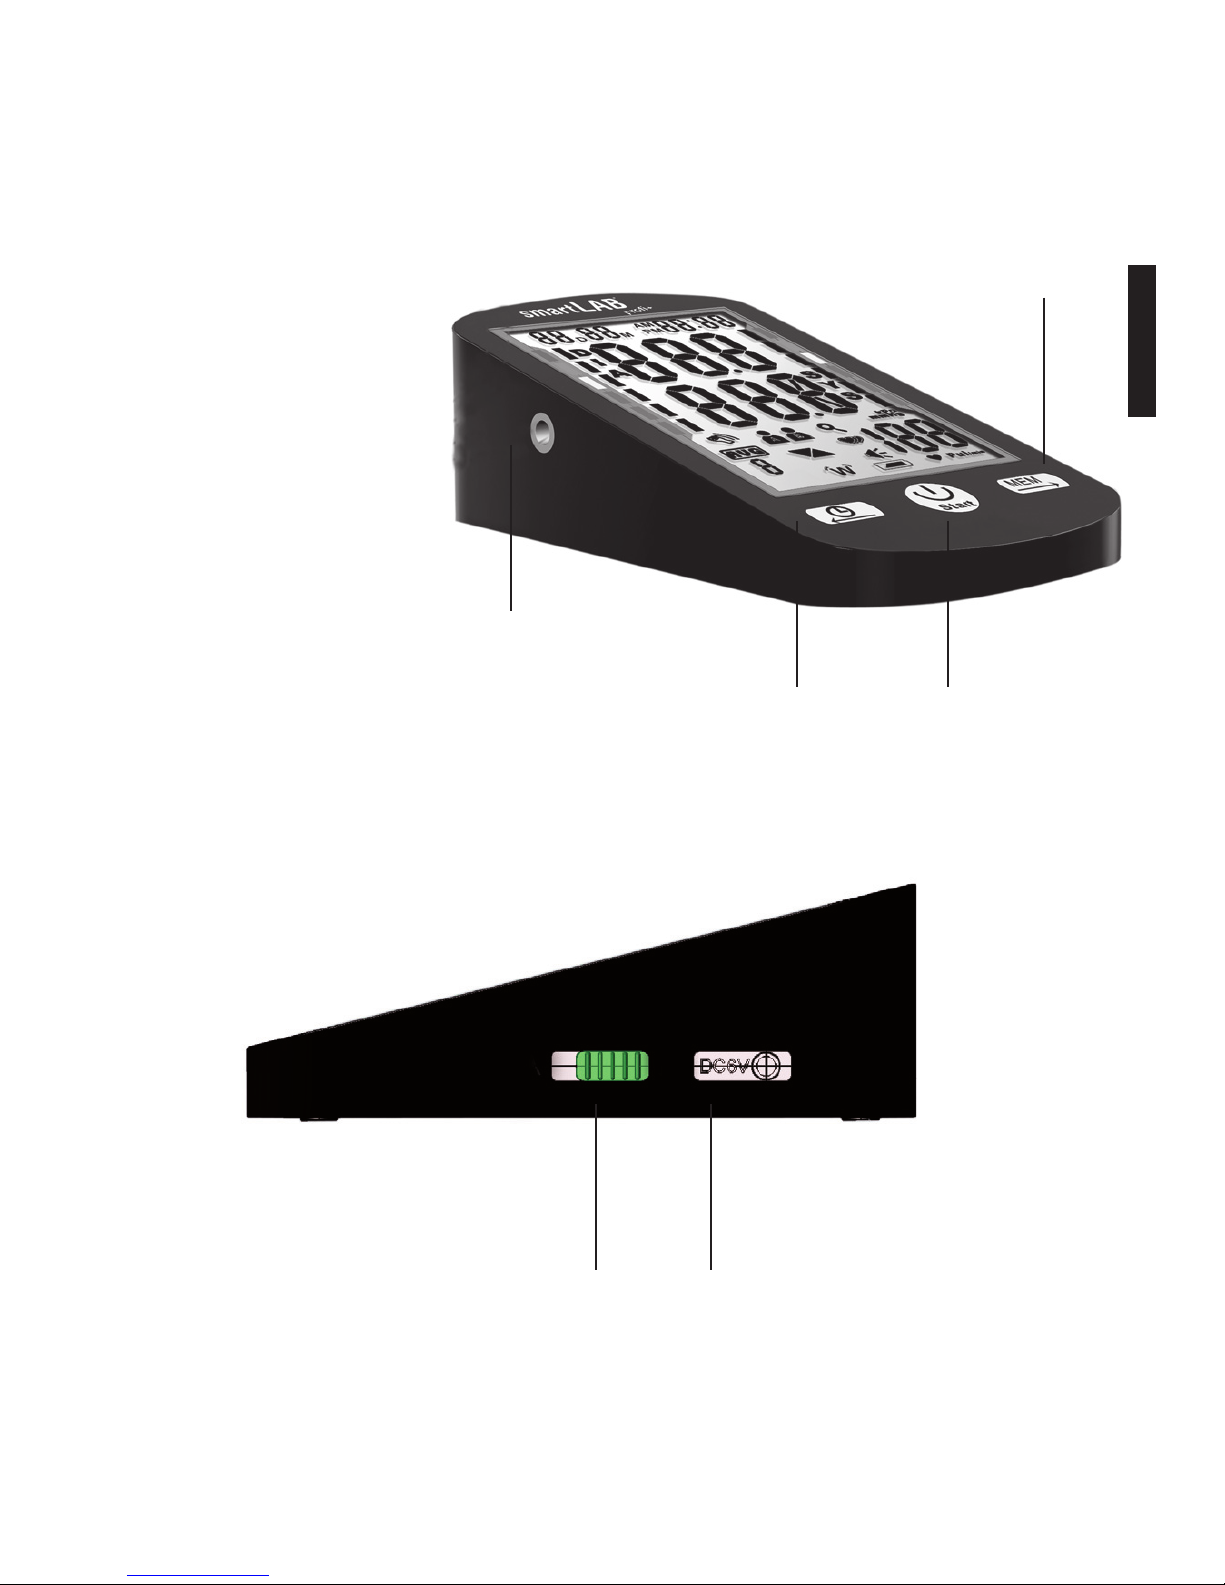
Port for the blood pressure cuff
Setting/ left arrow key On/off start
Measured data storage/
right arrow key
Button to choose the user prole (A or B)
External electricity supply
(DC 6V)
Page 8
8
Specications
1. device type: smartLAB®pro+
2. classication: class II, type B
3. size of device: 170 mm x 100 mm x 60 mm
4. size of cuff: 550 mm x 150 mm
5. weight: 330 g (without batteries)
6. measurement method: oscillometric, automatic
ination and measurement
7. storage capacity: 60 values with date and time (2
user proles)
8. batteries: DC 6V or 4 „AAA“ batteries or alternative
CD adapter
9. blood pressure range: 30 - 280 mmHg
10. accuracy of measurement: ±3 mmHg
11. range of heartbeat/ pulse rate: 40 - 199 / min
12. operating conditions - temperature: 5°C ~ 40°C
13. operating conditions – air humidity: < 80%
14. storage temperature: -20°C~55°C
15. conditions for air humidity when storing: < 95%
16. external pressure: atmospheric, 86 kPa ~ 106 kPa
17. durability of the batteries: about 2 months when
using 3 minutes per day
18. material cuff: Terylene (surface), Nylon (part of
sticking), PVC (internal part + tube)
19. communication / data transfer: ANT wireless
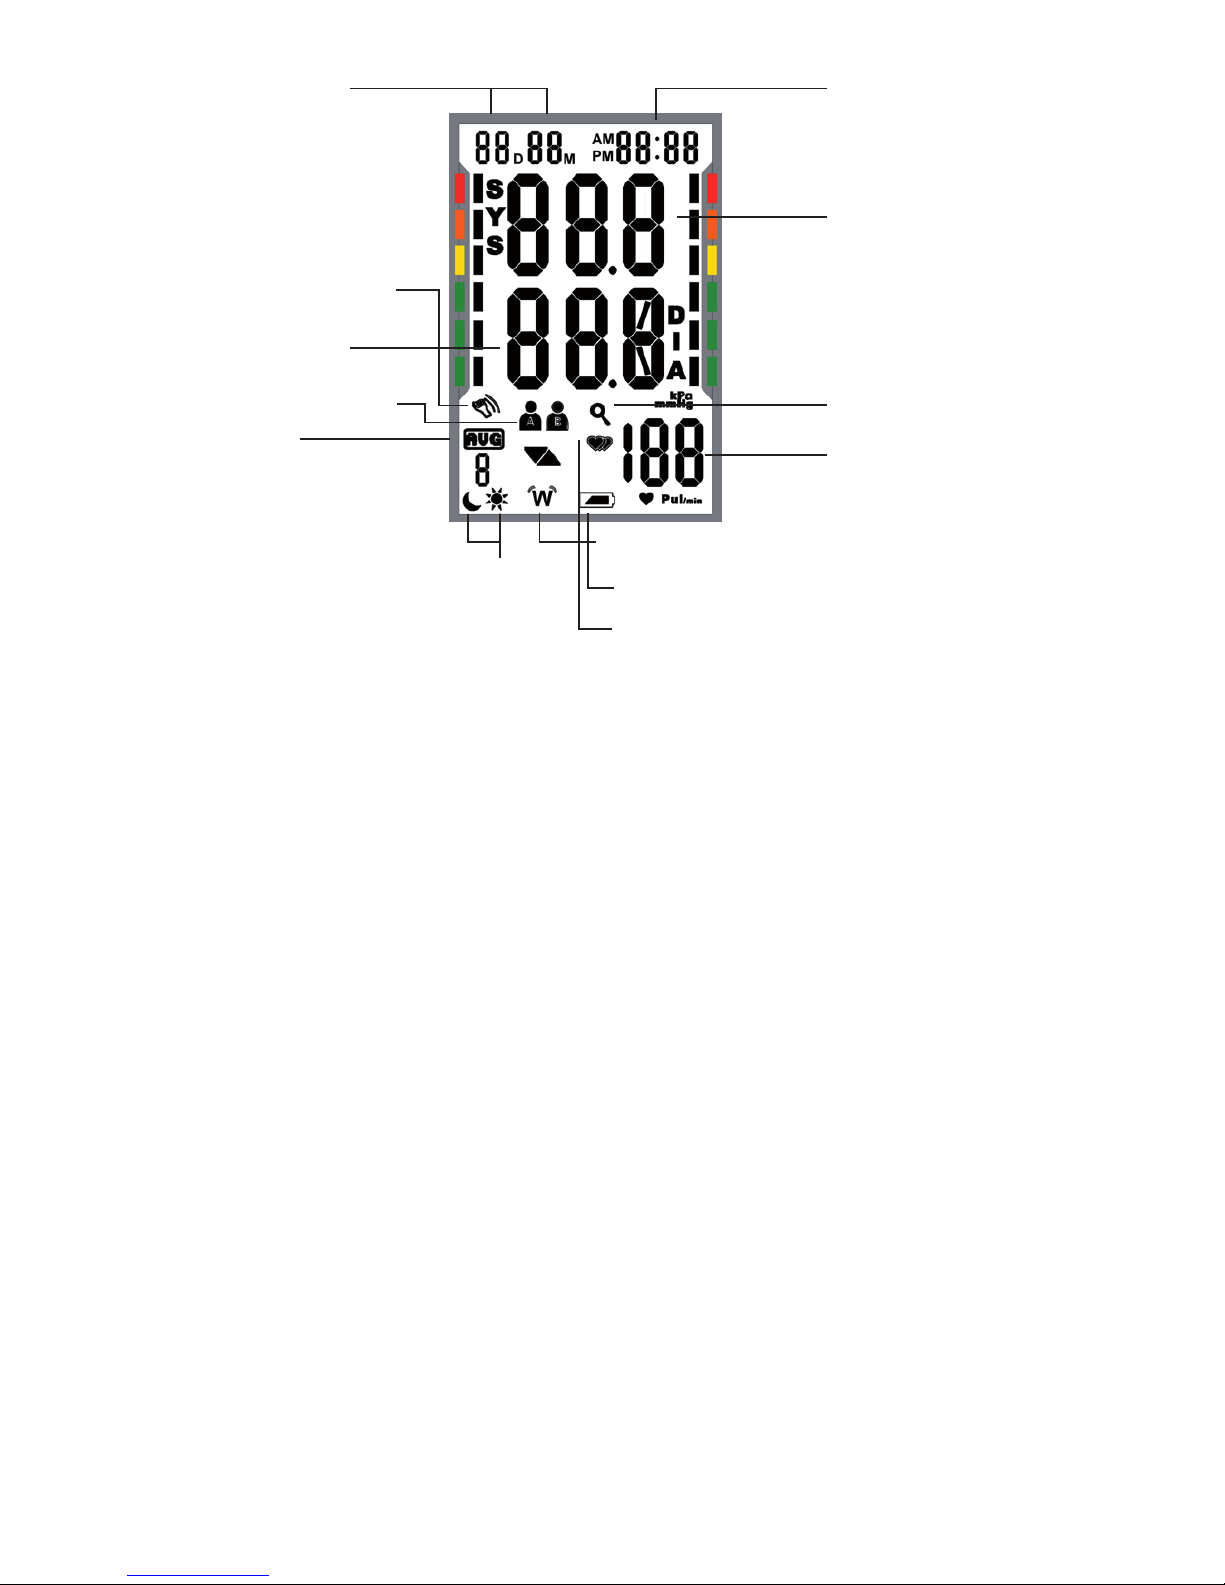
Day/month/
year
Time
Systolic
Diastolic
Average
values
Average in the morning, in the
evening, total average
Data transfer
Low battery
Pulse
Memory mode
User prole A / B
Irregular heartbeat
Warning „wrong
measurement because
of movement of the
arm“
Page 9

9
ENGLISH
Contents
1 smartLAB®pro+ blood pressure monitor
1 comfort cuff (size: 22-42 cm)
1 User manual
1 smartLAB® wallett
1 smartLAB® blood pressure passport
4 „AAA“ batteries
Page 10

10
Information:
1. Please relax 5 minutes before measuring.
2. The arm cuff should be placed on top of the elbow (please refer to
the indication on the cuff)
3. Do not move or speak when measuring.
4. Please always use the same arm.
5. Please relax 3 to 5 minutes between the measurements so that your
blood circulation can start again in your arm.
6. When you do not use the device for one month or more please
remove the batteries in order to prevent them from discharging
automatically.
7. The device is dedicated for adults with an arm circumference from
22 - 42 cm and not for children or infants.
8. The device works according to its specications even in case of
general cardiac arrhythmia as well as arterial or ventricular cardiac
brillation.
9. The blood pressure values measured by this device are comparable
to the values identied by skilled persons using arm cuff and
stethoscope and they range within the required limitations of
the American National Standard for electronic or automatic
sphygmanometer.
10. Please avoid strong magnetic interferences such as mobile phone,
microwaves etc.
Page 11
11
ENGLISH
III. Setup & operating functions
Making the device ready for operation
• Please open the cover of the battery case on the back side of the
device.
• Please insert the „AAA“ batteries according to the required
polarity.
• Then close the cover of the battery case.
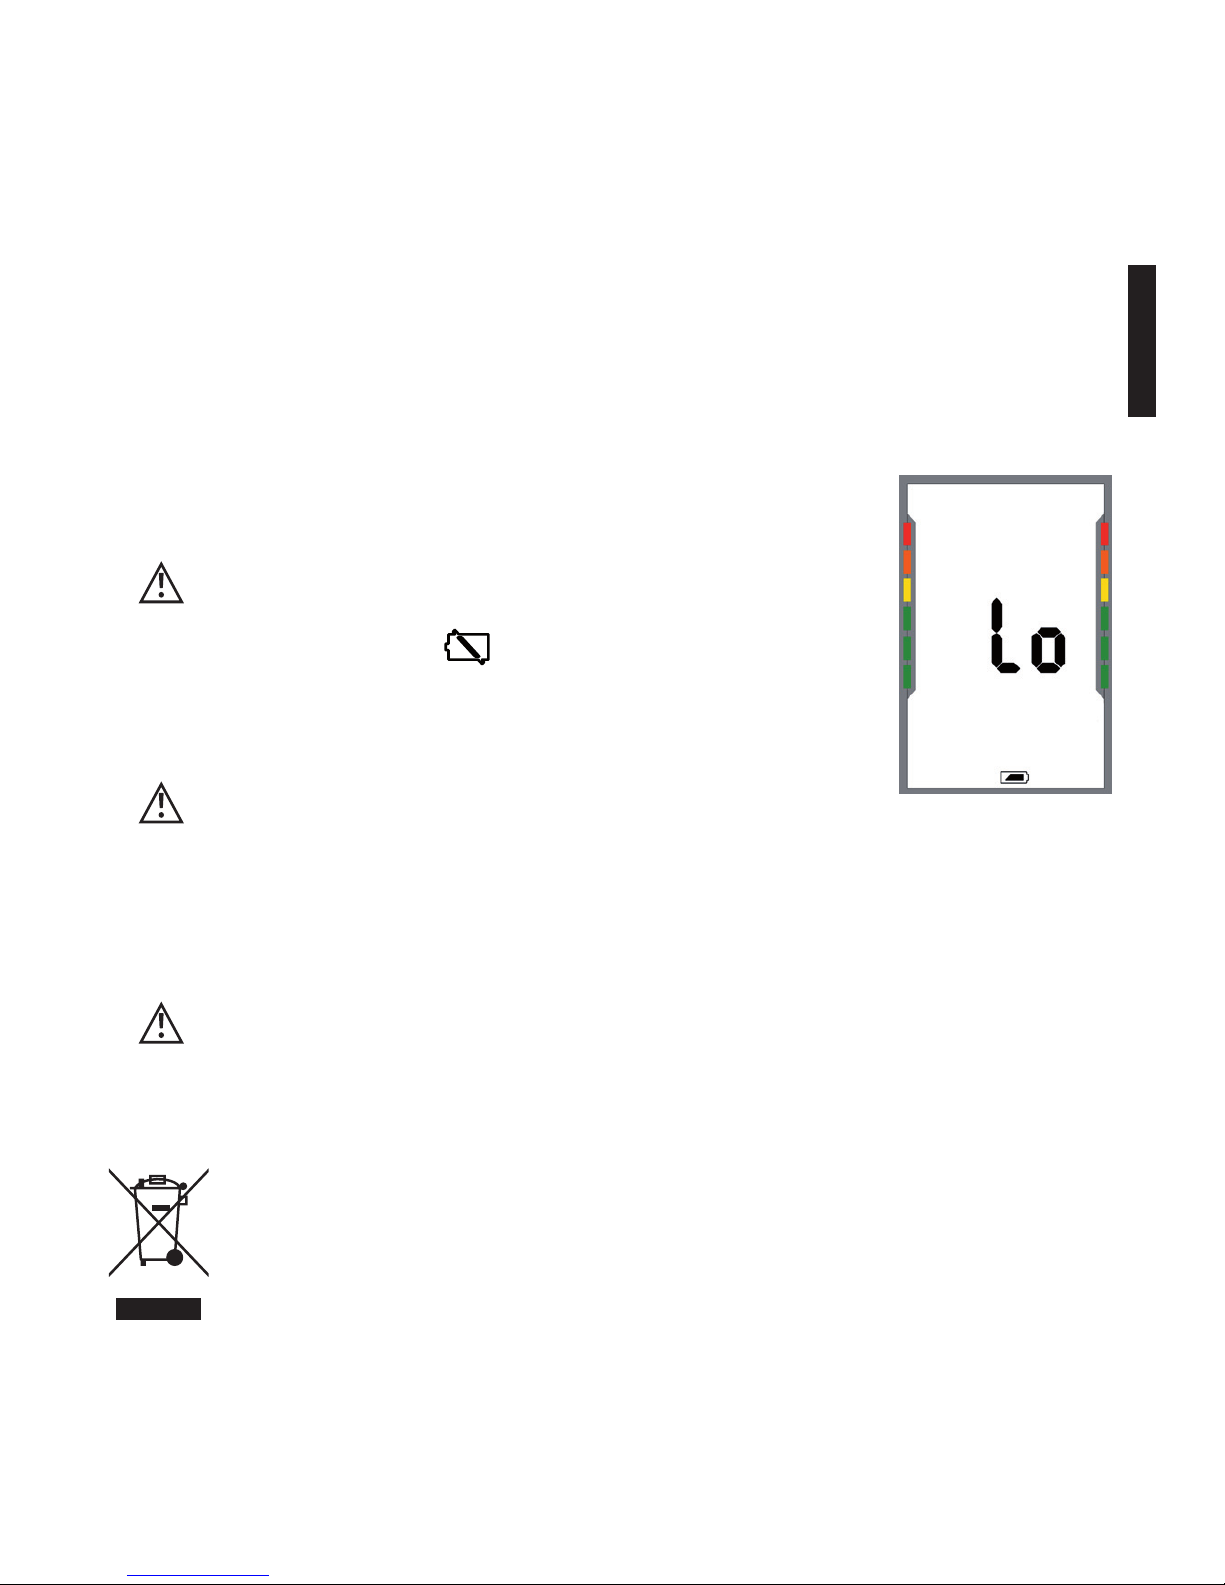
When the display shows the symbol for
low batteries please change them
all (see picture 1).
Please do not use rechargeable
batteries for this device.
When you do not use the device for one month or more
please remove the batteries in order to prevent them
from discharging automatically.
Measurement device, batteries and arm cuff have to be
disposed of according to the local regulation.
pict. 1
Page 12
12
Setting time, date and average
Setting date and time from your device is important for using
storage or transfering results onto your computer.
The smartLAB®pro+ blood pressure meter uses a special function
to automatically set usersettings and function setup. A receiving
device (z.B. HMM h
Fon®
oder h
Fon®
Collect) that supports this function
is required.
The advantage of this automatic function is that you don‘t have to
setup the device manually. When there is a receiving device, after
rst-use or changing batteries, date, time and usersettings will be
set automatically in less then 4 minutes.
Now, data will be requested every hour. Information about batterie status also is attached. So the receiving device receives battery
status and Information, if the device is in range. All this makes it
possible for the service-provider to offer a better service.
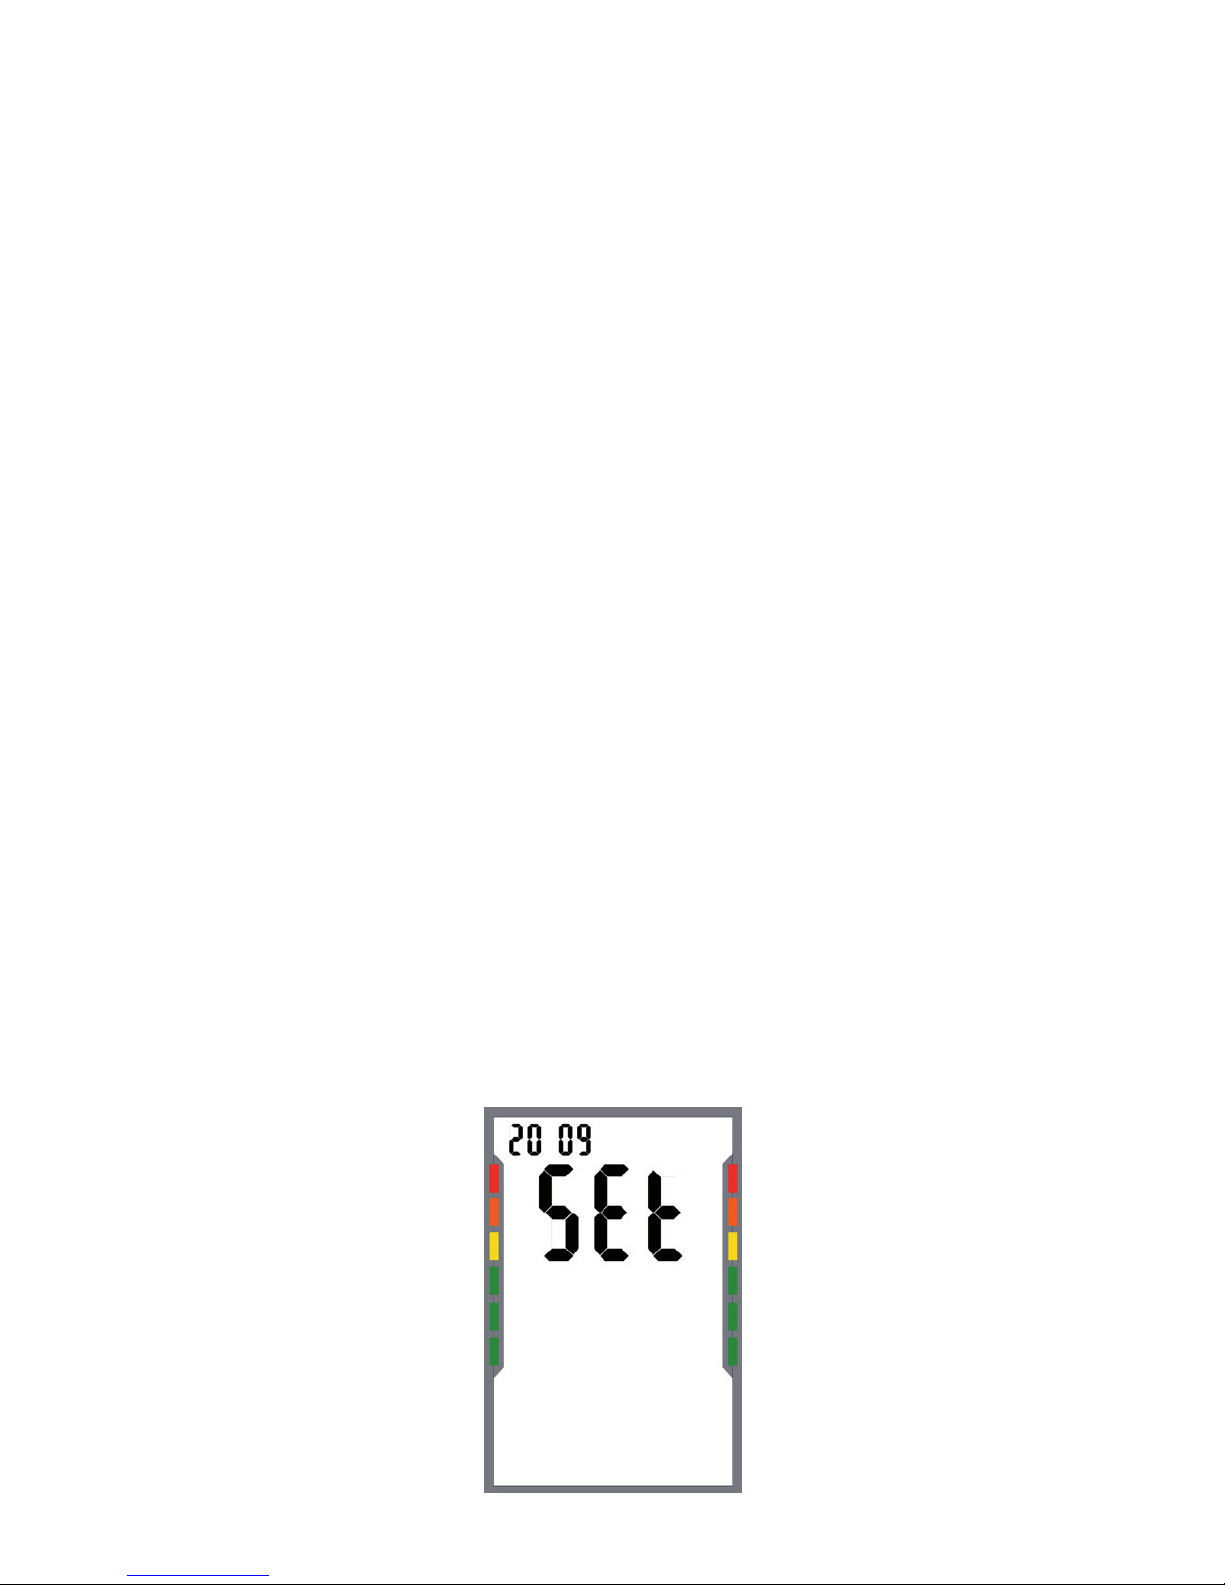
Please press the left arrow key more than 3 seconds to set date
and time. The mode starts now with the current year that you
have to choose by the arrow keys. Press button „On/Off START“
to conrm.
pict. 2
Page 13
13
ENGLISH
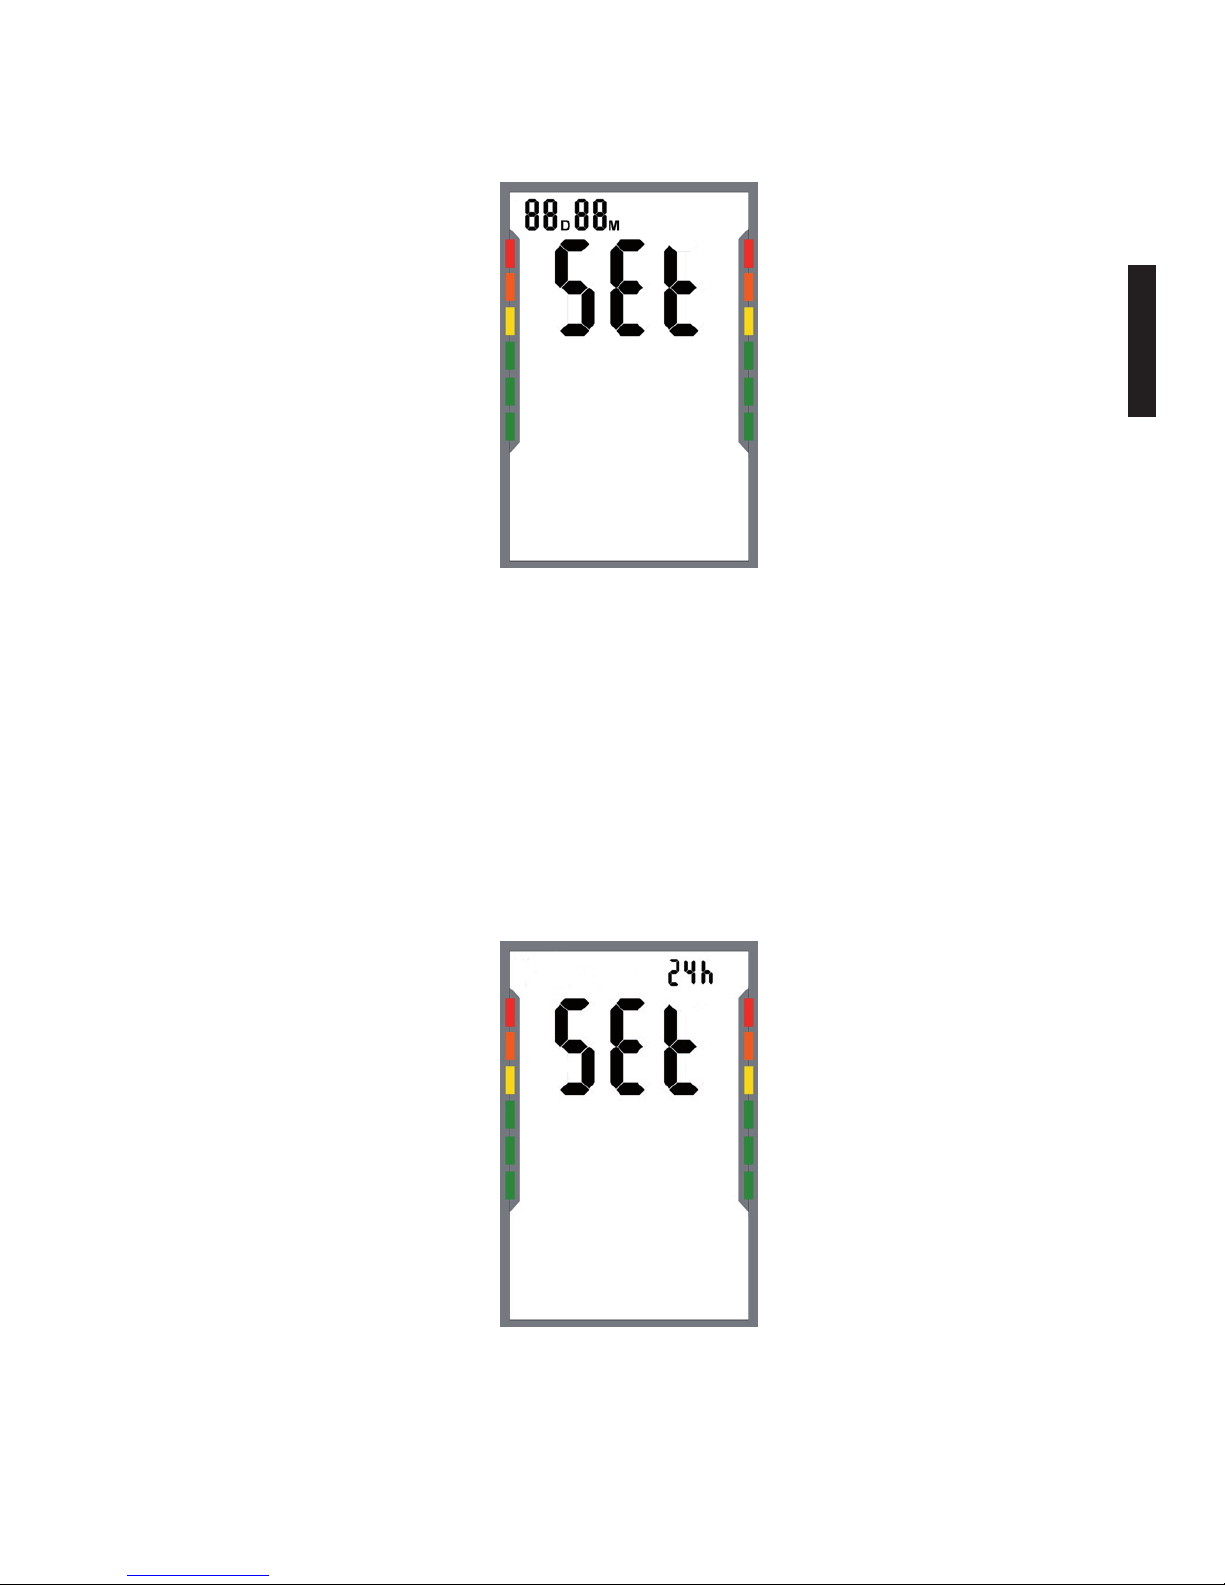
After that you can choose the month. The display shows the letter “M”
(picture 2a). Use the arrow keys and conrm with the button „On/Off
START“.
Then you have to choose the right day (display shows „D“). Use the arrow keys for your choice and conrm with the button „On/Off START“.
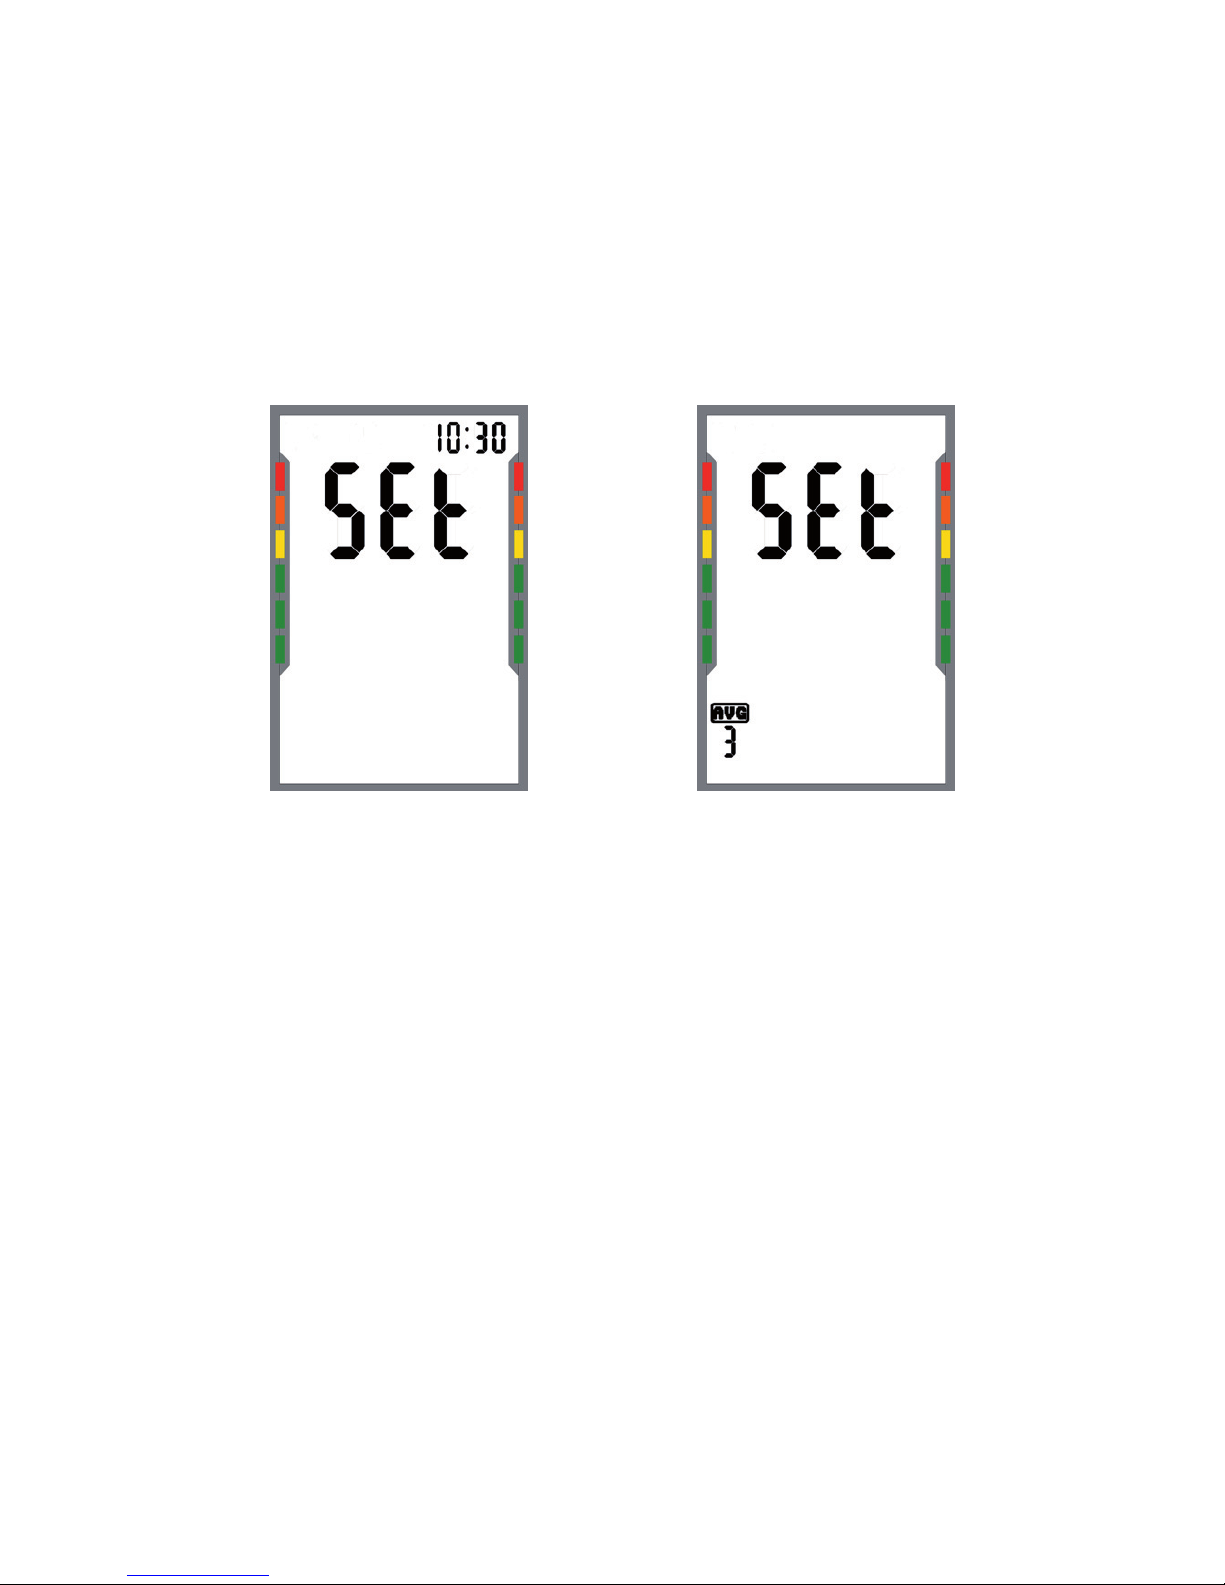
After that you have to choose between „12h“ (am/pm) and „24h“.
Use the arrow keys to conrm (pict. 2b). If you chose “12h”, “AM” and
“PM” will ash on the Display, this will not happen in the “24h” clock
mode. Conrm your choice with the button „On/Off START“.
Then you can continue by setting the hour (use the arrow keys, see
pict. 2c). If you choose the mode “12h” the time is indicated by the
number 1 – 12 with “am” (morning) and “pm” (afternoon). Conrm
your choice with the button „On/Off START“.
pict. 2a
pict. 2b
Page 14
14
Finally set the minutes in the same way (use the arrow keys and conrm your choice with the button „On/Off START“).
pict. 2c
After that you can choose (3,4 or 5 measurements) the average of your
measured values. Please use the arrow keys for your choice (pict. 2d)
and conrm with the button „On/Off START“. Your smartLAB®pro+
will then calculate the average results, based on your settings.
pict. 2d
Then the device starts again with the current year. You can stop the
setting by using the button „On/Off START“ for more than 3 seconds.
Your smartLAB®pro+ blood pressure monitor has an integrated ANT+
module. It enables you to transmit your measured values to your
personal computer, your laptop or your mobile phone (e.g. our HMM
h
Fon*
). After that you can store, analyze and process your data with
the correspondent software.
What does ANT mean?
ANT is a wireless transmission standard for your measured values. You
need a module for your transmitter as well as for your receiver to use
this technology.
Setting up the wireless data transfer
Page 15
15
ENGLISH
The Advantage of ANT+ is that equipment with ANT+ technology can
connect with other manufacturers receiving devices. smartLAB®pro+
supports the ANT+ protocoll for blood pressure meters (Version 1.0).
Please press „On/Off START” more than 5 seconds for the setting of
your wireless transmission („ANT mode“). In this mode you can set
the following items:
• Data transfer of the last measured value (dc)
• Data transfer of all values stored by the device (dc. A)
• Automatic data transfer of the last measured values (1 Au)
• Automatic data transfer of all values stored by the device (dAu)
• Pairing (setting of the communication with the receiver) (htb)
• Heart Beat (automatic settings of meter)
Data transfer of the last measured values (dc):
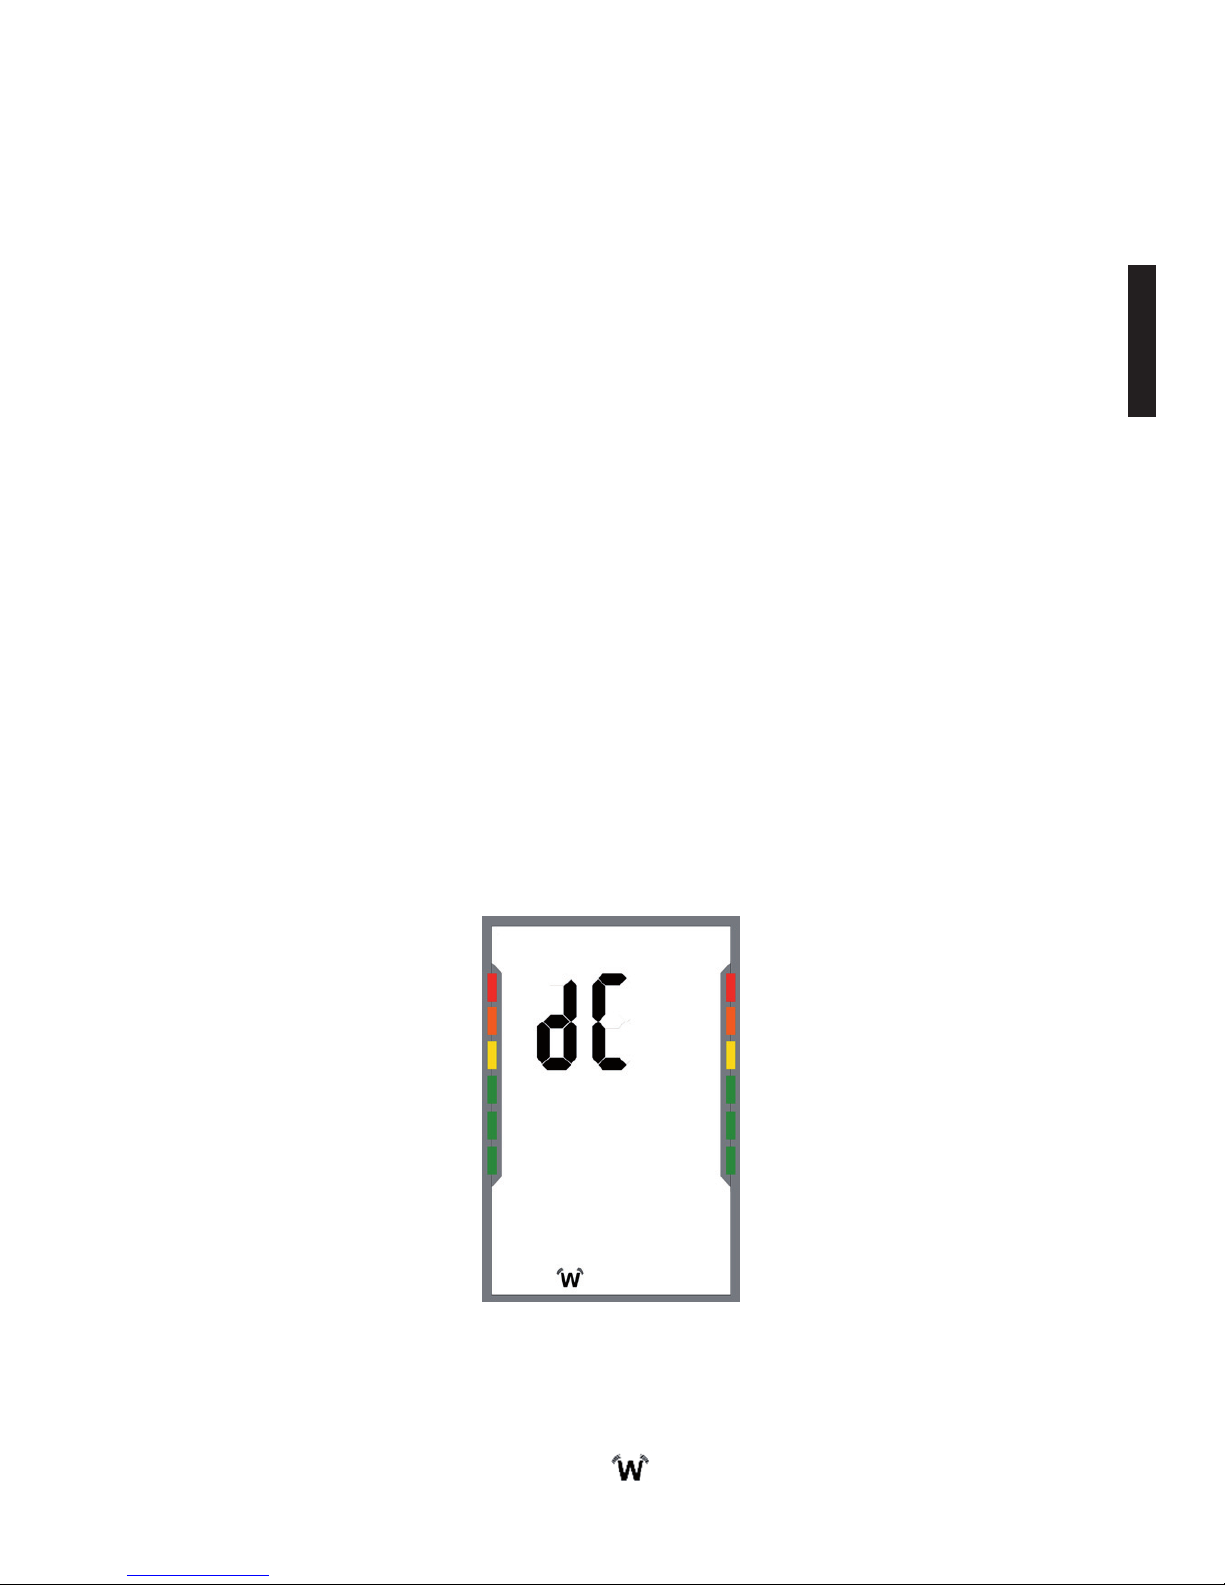
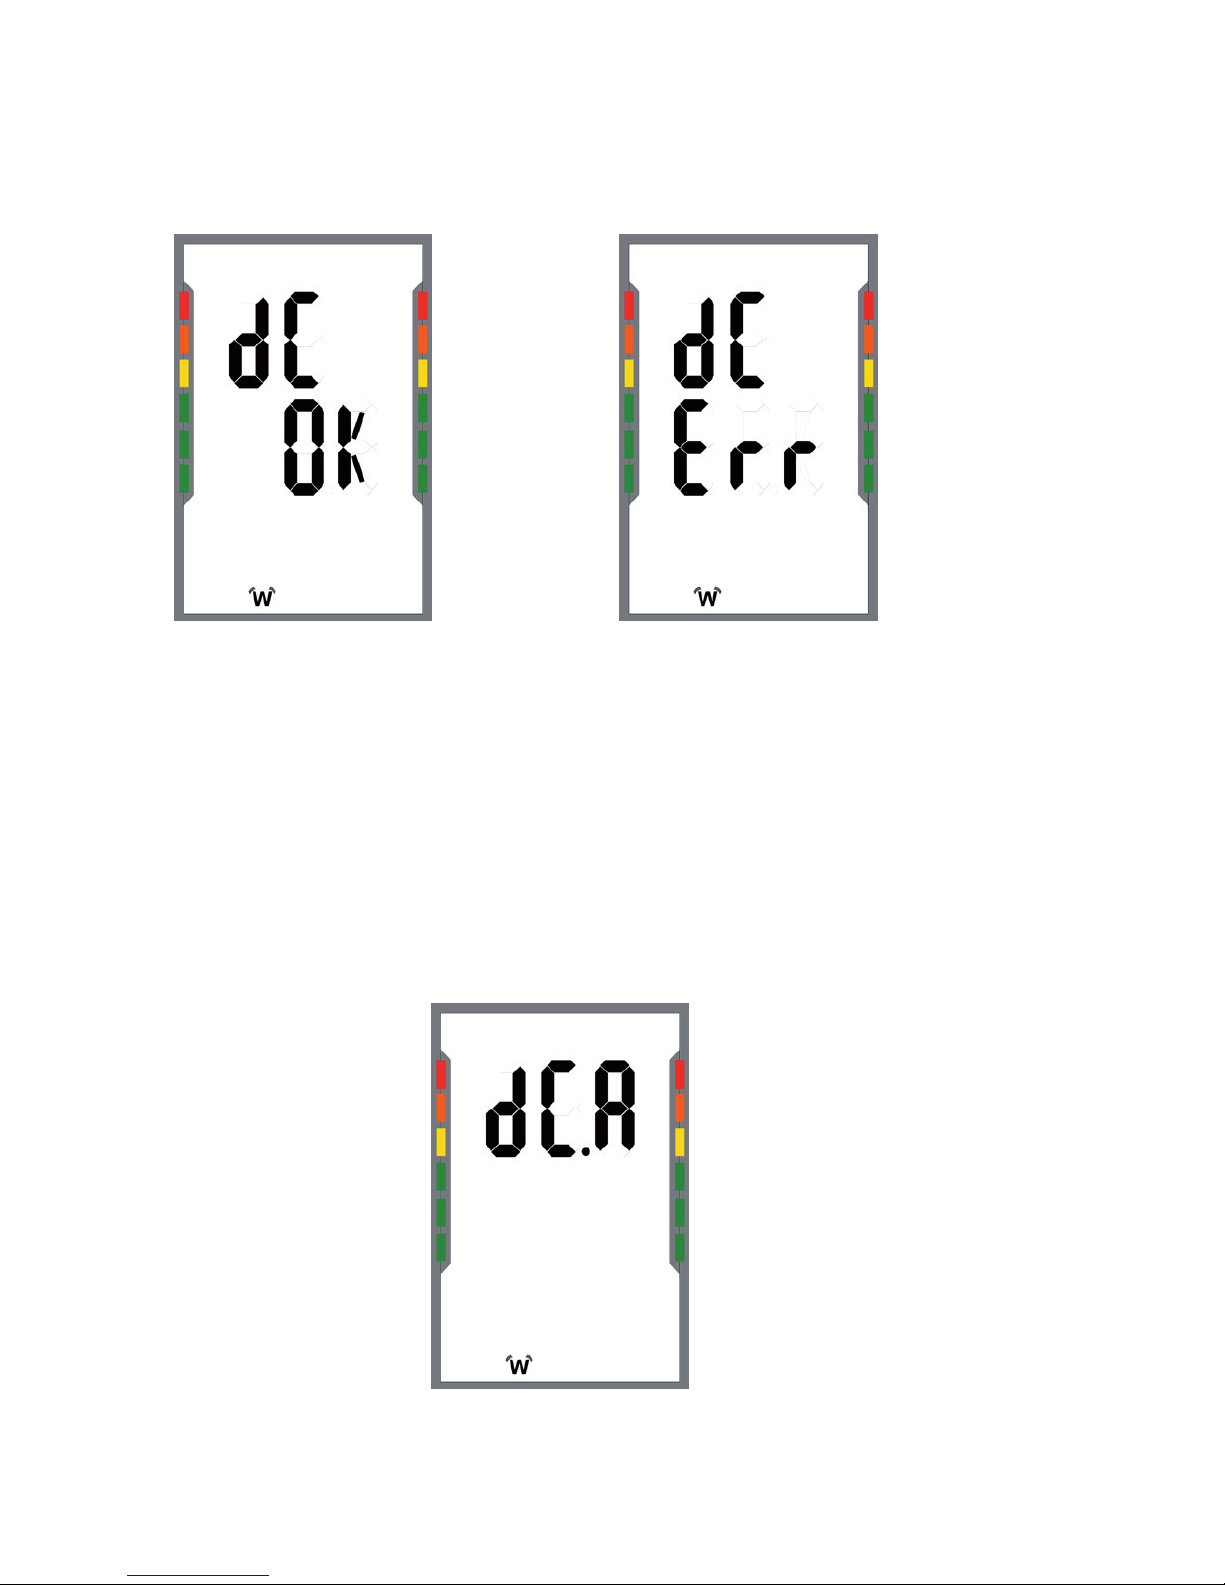
When you enter the ANT mode the display shows the data transmission of the last measured values (see pict. 3).
You can start the data transfer by pressing the left or right arrow key.
Your smartLAB®pro+ is going to try to transmit the last measured
values to your receiver (laptop, personal computer, h
Fon
). The symbol
for the wireless data transmission is blinking in the display. If the
* For more information on h
Fon
or h
Line
Terminal go to www.hLine.eu
pict. 3
Page 16
16
data transfer was successful you can see the symbol (see pict. 3a).
In case the value could not be transmitted the corresponding symbol
appears on the display (see pict. 3b).
Please proceed by pressing the button „On/Off START“.
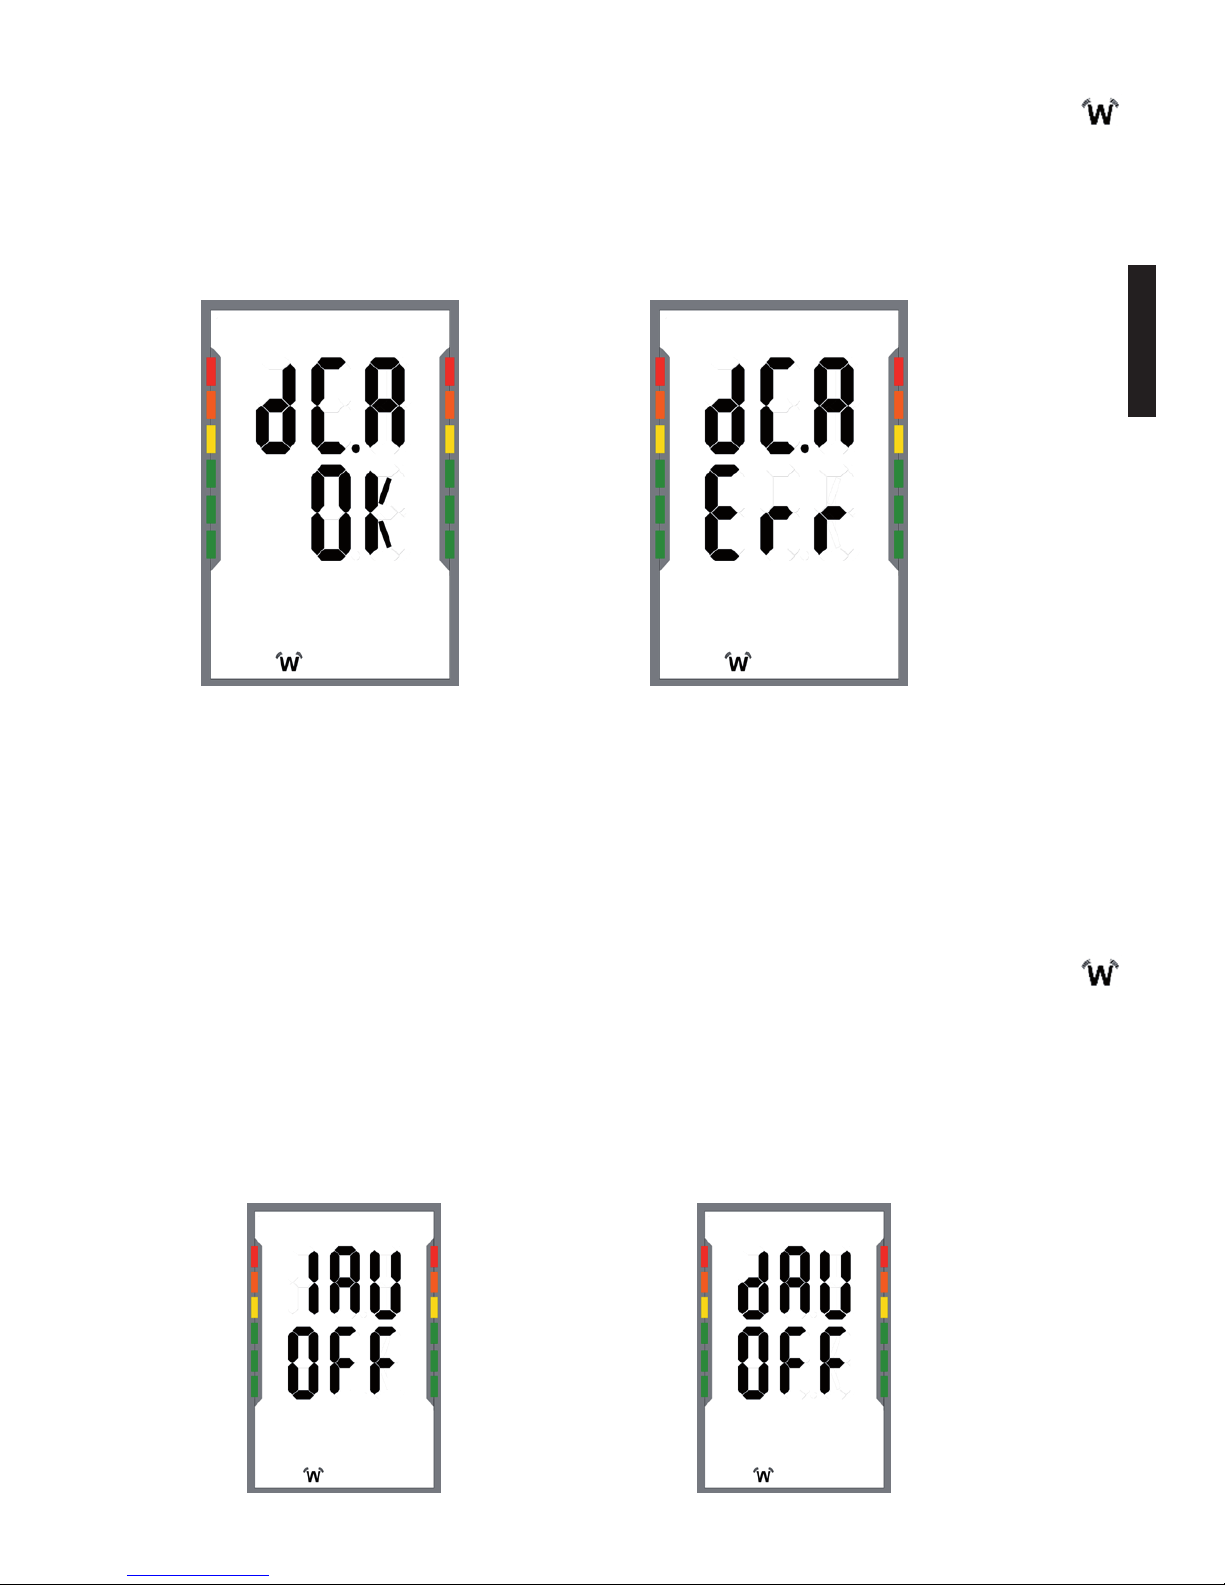
Data transfer of all measured values stored by the device (dc.A):
You can start the data transfer by pressing the left or right arrow key.
Your smartLAB®pro+ is going to try to transmit all measured values
to your receiver (laptop, personal computer, h
Fon
).
pict. 3a
pict. 3b
pict. 3c
Page 17
17
ENGLISH
When you start the transfer of all data the corresponding symbol
in the display starts blinking. A successful data transfer is conrmed
by the symbol you can see in picture 3d. In case the data transfer was
not successful you will see the symbol of picture 3e.
Please press “On/Off START” to proceed to the next setting mode.
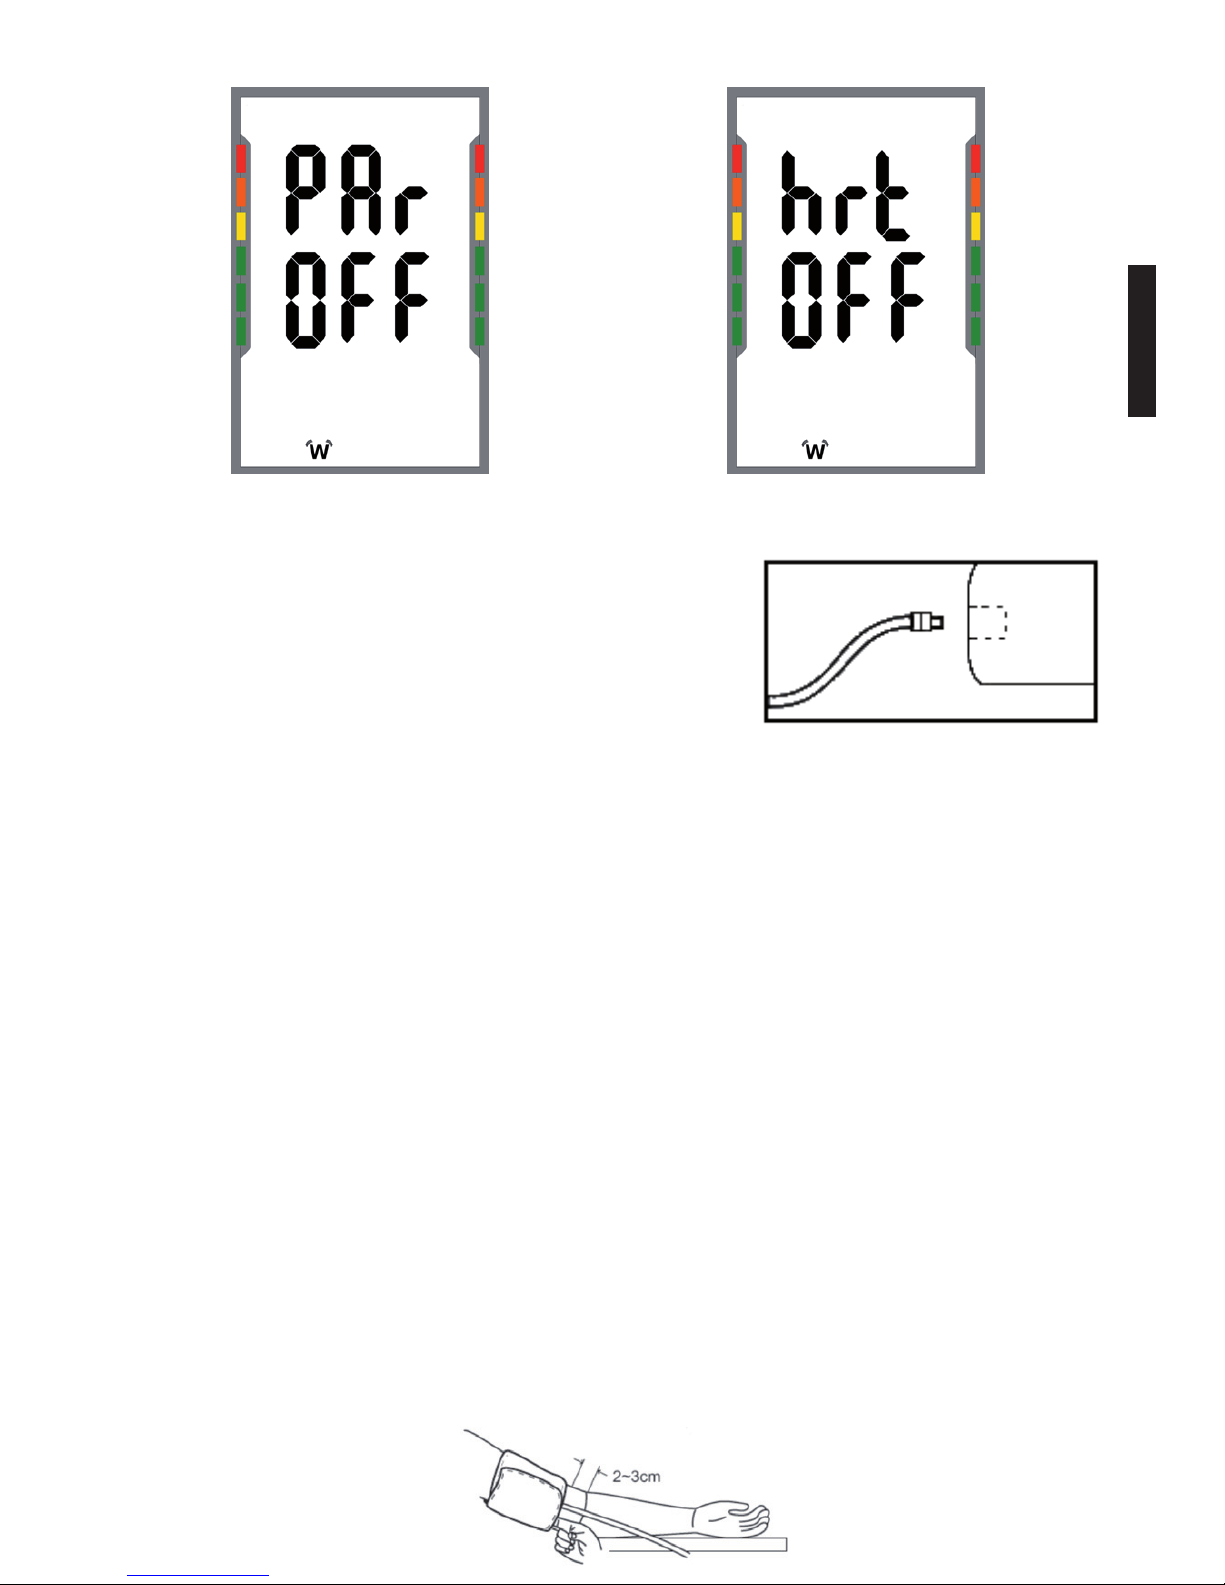
Automatic data transfer of the last measured values (1AU):
Please make your choice: Do you want the latest measured value automatically to be transferred, turn the option either ON or OFF with the
arrow keys. If the mode is turned ON, the correspondent symbol
appears with every data transfer (see pict. 3f). Press “On/Off START”
to conrm your choice. All new measurements will then be sent out
automatically, when you are in reach of your receiving device (laptop,
personal computer, h
Fon
).
pict. 3d pict. 3e
pict. 3f pict. 3g
Page 18

18
Automatic data transfer of all values stored by the device (dAU):
Please make your choice: Do you want all unsent values stored on the
device to be automatically transferred to the partner device, turn the
option either ON or OFF with the arrow keys. If the mode is turned ON,
the correspondent symbol appears with every data transfer (see
pict. 3g). Press “On/Off START” to conrm your choice. All unsent
measurements will then be sent out automatically, when you are in
reach of your receiving device (laptop, personal computer, h
Fon
).
Pairing (establishing a connection with a receiving device)
(PAr):
The pairing function is necessary to establish a connection between
the device and the receiving device. This guarantees that only the
receiving device can receive data from smartLAB®pro+ . It is
recommended to turn off this function after successful pairing. The
PIN Code for enabling communication is „8888“.
With the arrow keys you can either turn these setting options on (ON)
or off (OFF). Press „On/Off START“ to conrm your choice. The setting
(ON) is set by default.
Heart Beat (setting the device automatically) (htb):
The Heart Beat function is able to set the device automatically.
Every 3 minutes the device trys to connect to the receiving device
(the receiving device has to be compatible with this function). Was
the connection successful, the device will be set automatically. This
applies to all users. Another advantage is that, with this function, the
device sends its battery status to the receiving device, which can alert
the user when the battery should be changed.
With the arrow keys you can either turn these setting options on (ON)
or off (OFF). Conrm your choice by pressing „On/Off START“. The
setting (ON) is set by default.
Page 19
19
ENGLISH
Abb. 3h
Abb. 3i
Connecting the cuff to the monitor
Insert the cuff tubing connector into the
socket of your smartLAB®pro+ on the left
side of the monitor (see pict. 5). Make sure
that the connector is completely inserted
to avoid air leakage during blood pressure
measurements.
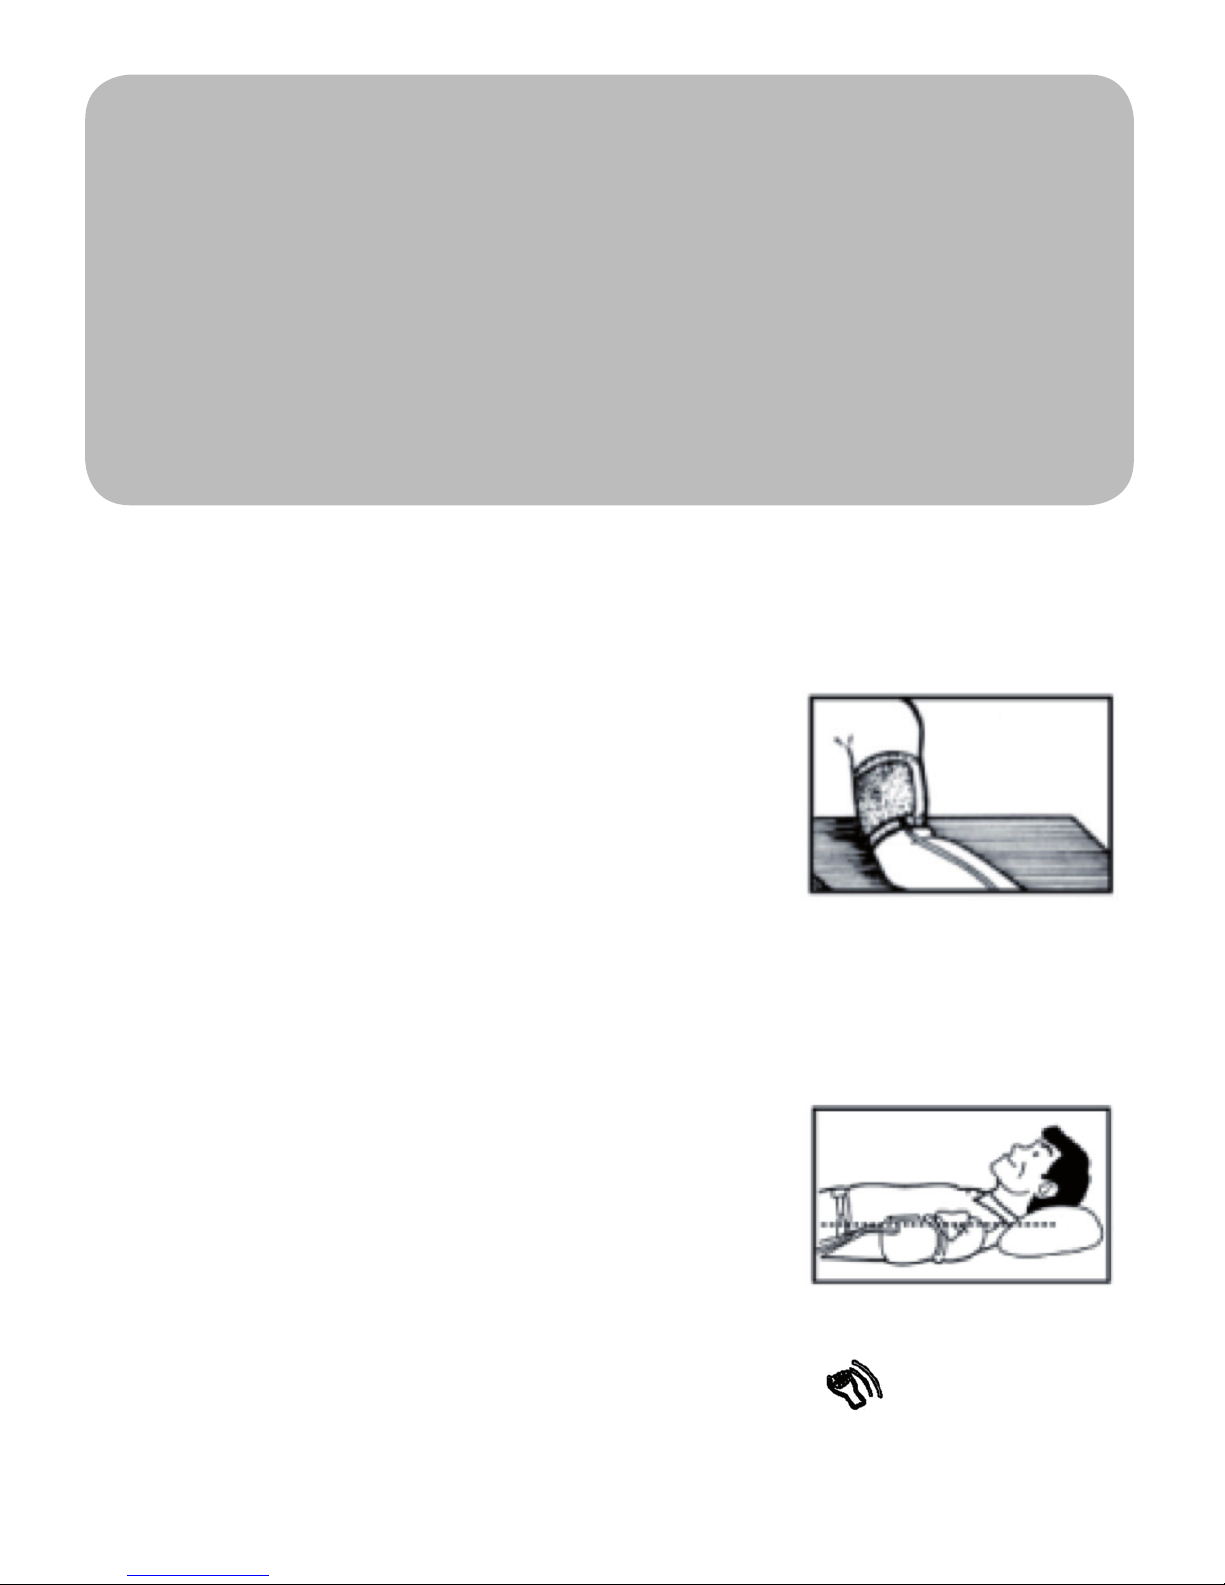
Applying the cuff
• Place the cuff around a bare arm 1-2cm above the elbow joint
(see. pict. 6)
• While seated, place palm upside in front of you on a at surface
such as a desk or table. Position the air tube in the middle of your
arm in line with your middle nger.
• Pull the cuff end through the metal loop (the cuff is packaged
like this already), turn it outward (away from your body) and
tighten it and close the Velcro fastener.
• The cuff should fit comfortably, yet snugly around your arm. Y o u
should be able to insert one finger between your arm and t h e
cuff.
pict. 5
pict. 6
Page 20
20
Note:
• Use the same arm for each time you measure.
• Do not move your arm, body or the monitor and do not move t h e
rubber tube during measurement
• Stay quiet and calm for 5 minutes before blood pressure
measurement
• If the cuff becomes dirty, remove it from the monitor and clear
it by hand in a mild detergent, then rinse it thoroughly in cold
water. Never dry the cuff in clothes dryer or iron it.
Body posture during measurement
Sitting Measurement – Recommended Position
• Sit upright
• Place palm upside in front of you on a at
surface such as a desk or table, with your
elbow resting on a chair or table.
• The cuff should be at the same level as
your heart.
• Place your arm on the monitor’s plastic case as shown in the
picture, to aid maintaining a correct and still arm position.
Lying Down Measurement
• Lie on your back.
• Place your arm straight along your side
with your palm upside.
• The cuff should be placed at the same level
as your heart
• In case you move your arm and the monitor
is not able to measure correctly, the symbol appears on the
display.
Page 21
21
ENGLISH
Measurement
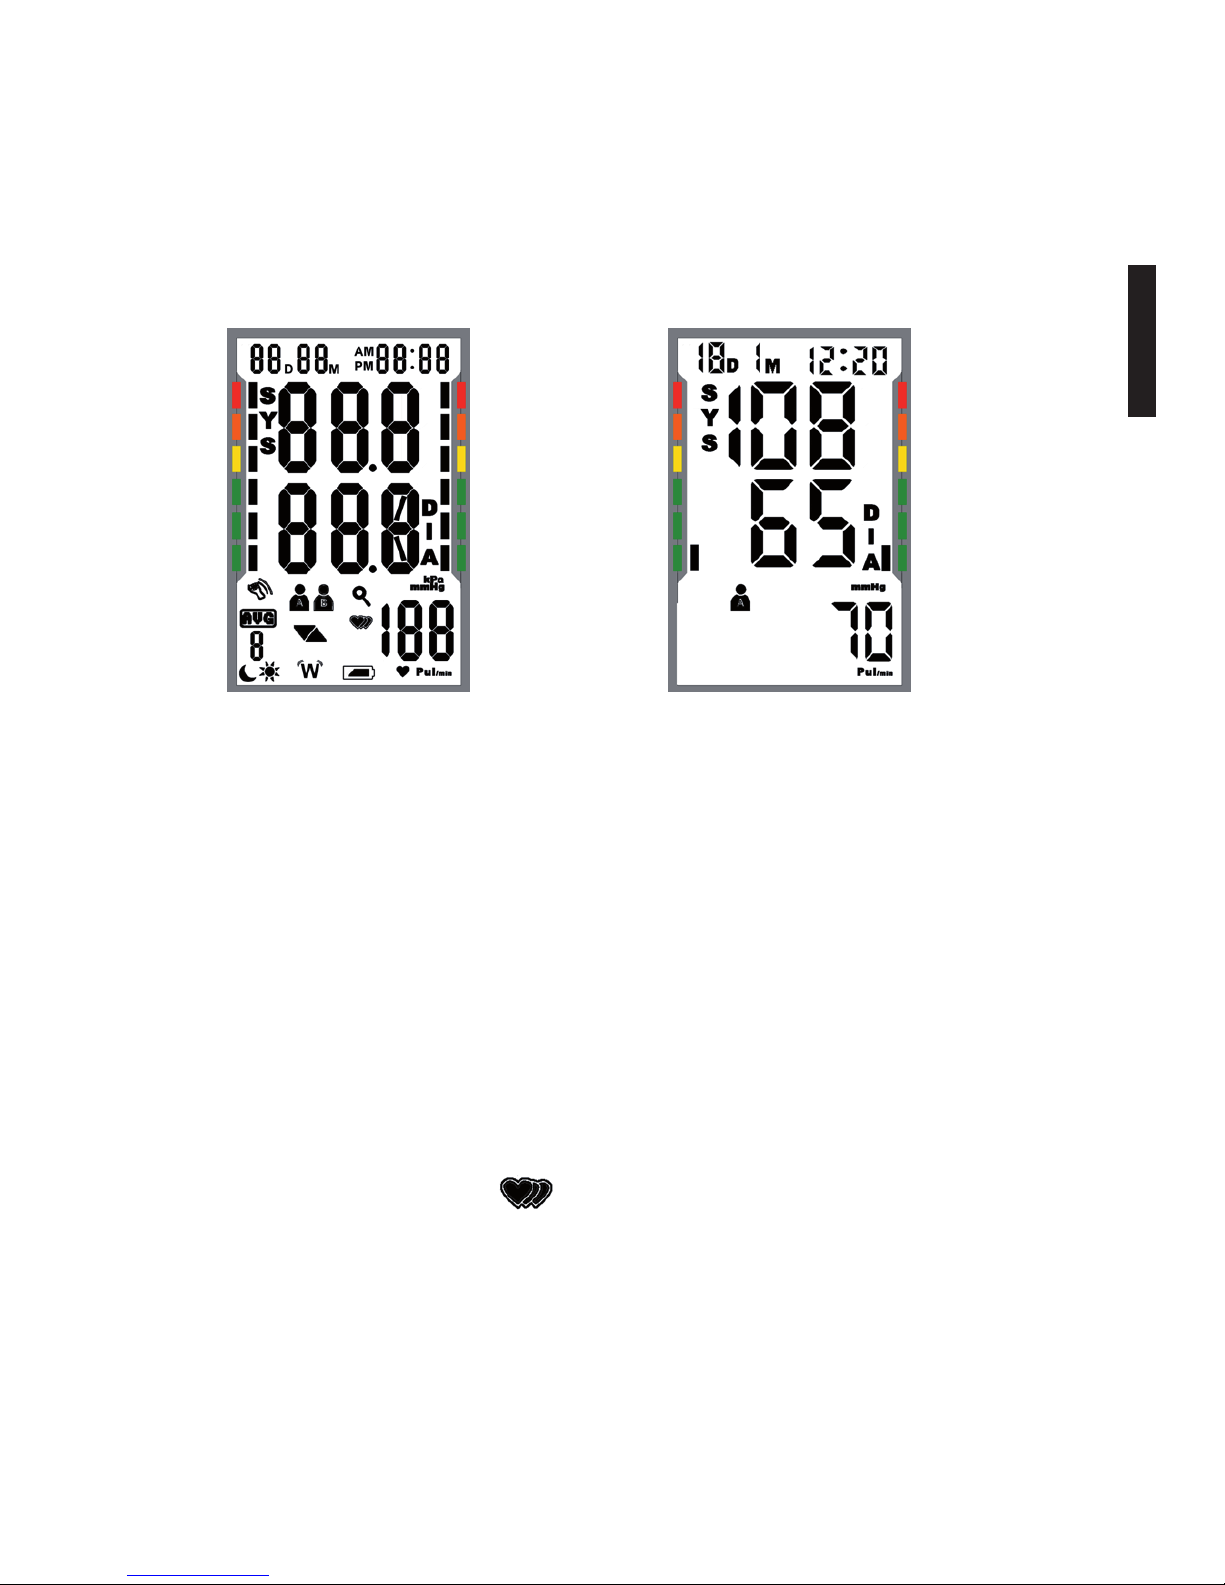
• After having applied the cuff, seat yourself comfortably and press
the “On/Off START” button. A signal tone appears and all display
symbols will be shown (see pict. 7)
• After that, the last stored result with the correspondent user “A”
or “B” (see pict. 7a) will be displayed. You can switch the user
prole by using the user prole button on the side of the device.
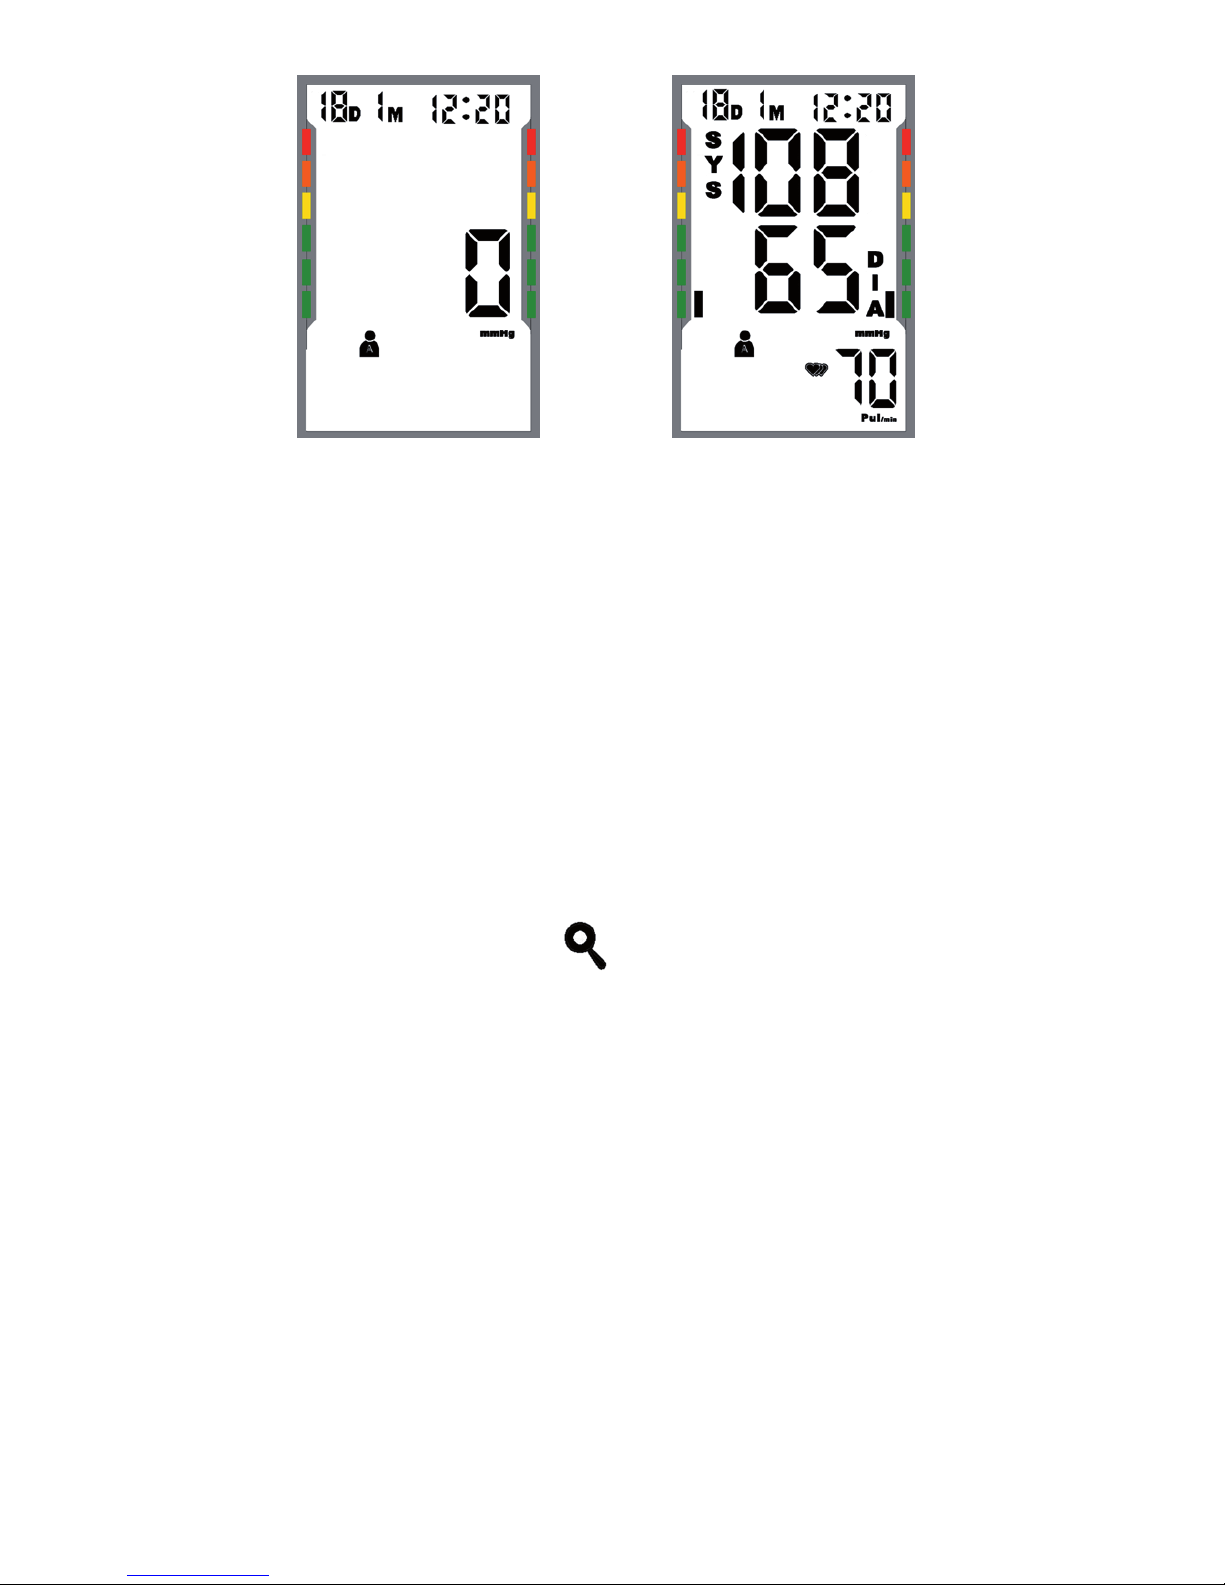
• Then, the monitor will start with the measurement by inating the
cuff. (see pict. 7b)
• After the measurement, the air will slowly be released from the
cuff. Your blood pressure value and pulse frequency will be shown
on the display. Irregular heartbeats will also be shown by the
correspondent symbol , if they occure. On the left and right
display side you can see how your values are according to the WHO
scheme (see. pict. 7c). The result will be saved automatically.
pict. 7 pict. 7a
Page 22
22
pict. 7b pict. 7c
• smartLAB®pro+ will automatically turn off after 1 minute. You
can manually shut down the monitor by pressing “On/Off START”
after the measurement.
• You can interrupt the measurement by pressing “On/Off START”.
The cuff will then release air and the monitor will turn off.
Displaying stored values
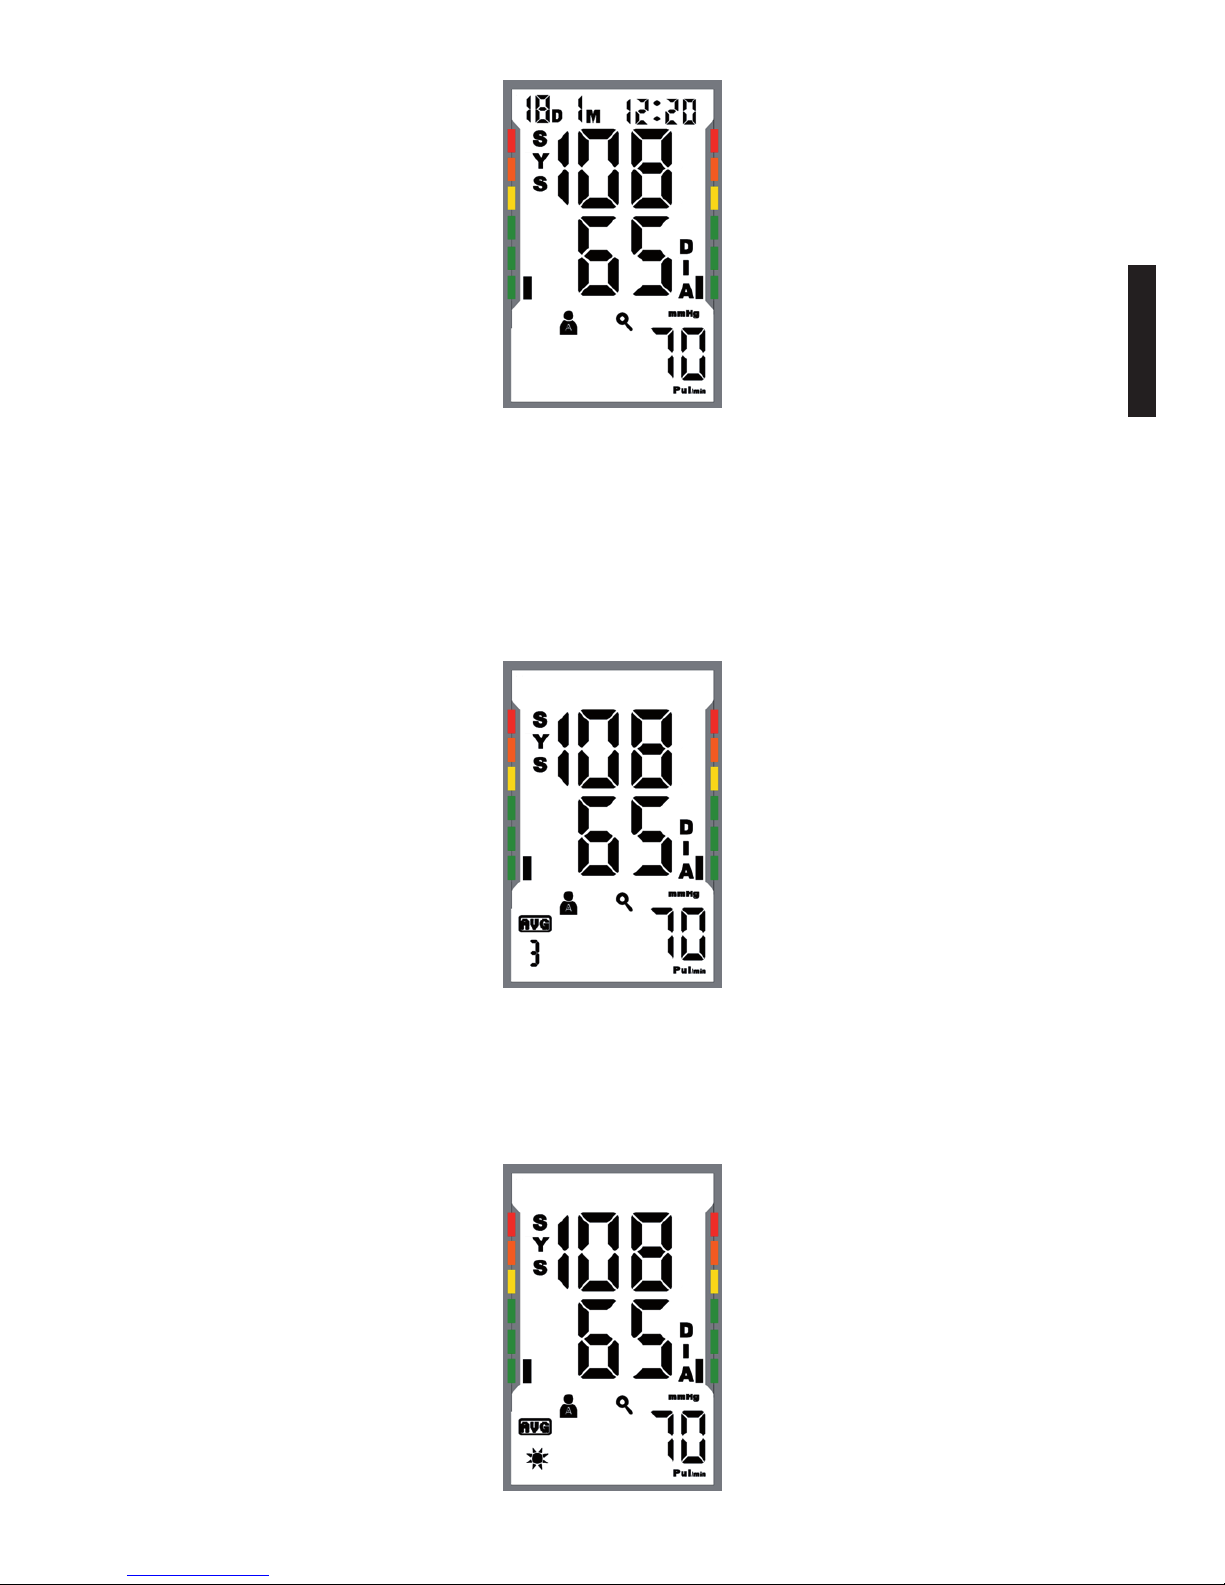
• Press “MEM” longer than 3 seconds, to enter the memory mode.
The correspondant symbol indicates that you are in memory
mode.
• Press the right arrow key “MEM” longer than 3 seconds. The last
measured value will be shown on the display (see pict. 8). Use
the arrow keys to scroll through the results, from the most recent
to past results. Each result is displayed with measurement date
and time, as well as the Bi-classication scale (according to WHO
scheme)
Page 23
23
ENGLISH
pict. 8
• Press “On/Off START” to display the average values (see pict. 8a,
next page). The gure below “AVG” on the display shows, how many
of the last measurements are taken to calculate the average value.
(Please refer to the chapter “Setting time, date and average” in
this manual, to change this gure.)
• By pressing “On/Off START” once more, you can display the
average values of your measurements taken in the morning. This
will be indicated by a little sun symbol on the display (see pict. 8
b)
pict. 8a
pict. 8b
Page 24
24
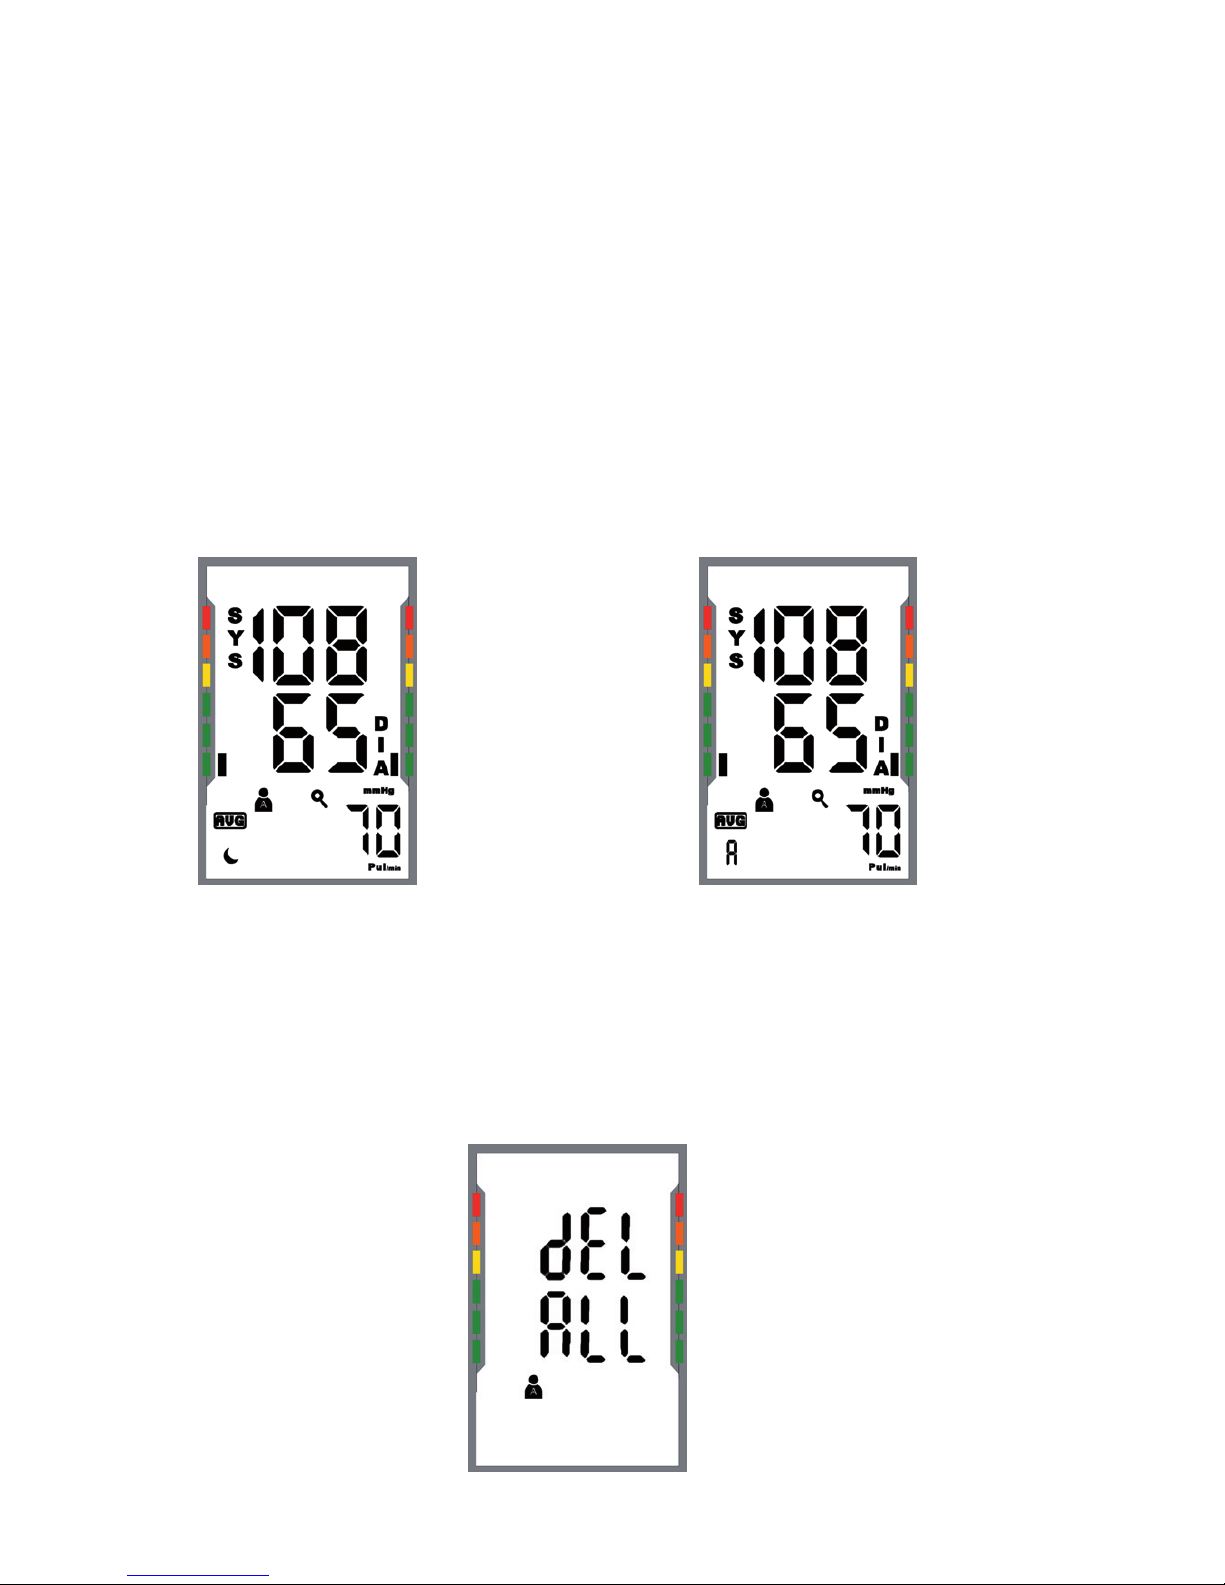
• By pressing “On/Off START” once more, you can display the
average values of your measurements taken in the afternoon/
evening. This will be indicated by a little moon symbol on the
display (see pict. 8 c)
• By pressing “On/Off START” once more, the average value of all
stored measurements will be displayed. (see pict. 8d) This is also
indicated by the letter “A” below “AVG” on the display.
• You can exit memory mode at any time, by pressing “On/Off
START” longer than 3 seconds. The monitor will then power off.
Deleting measured values
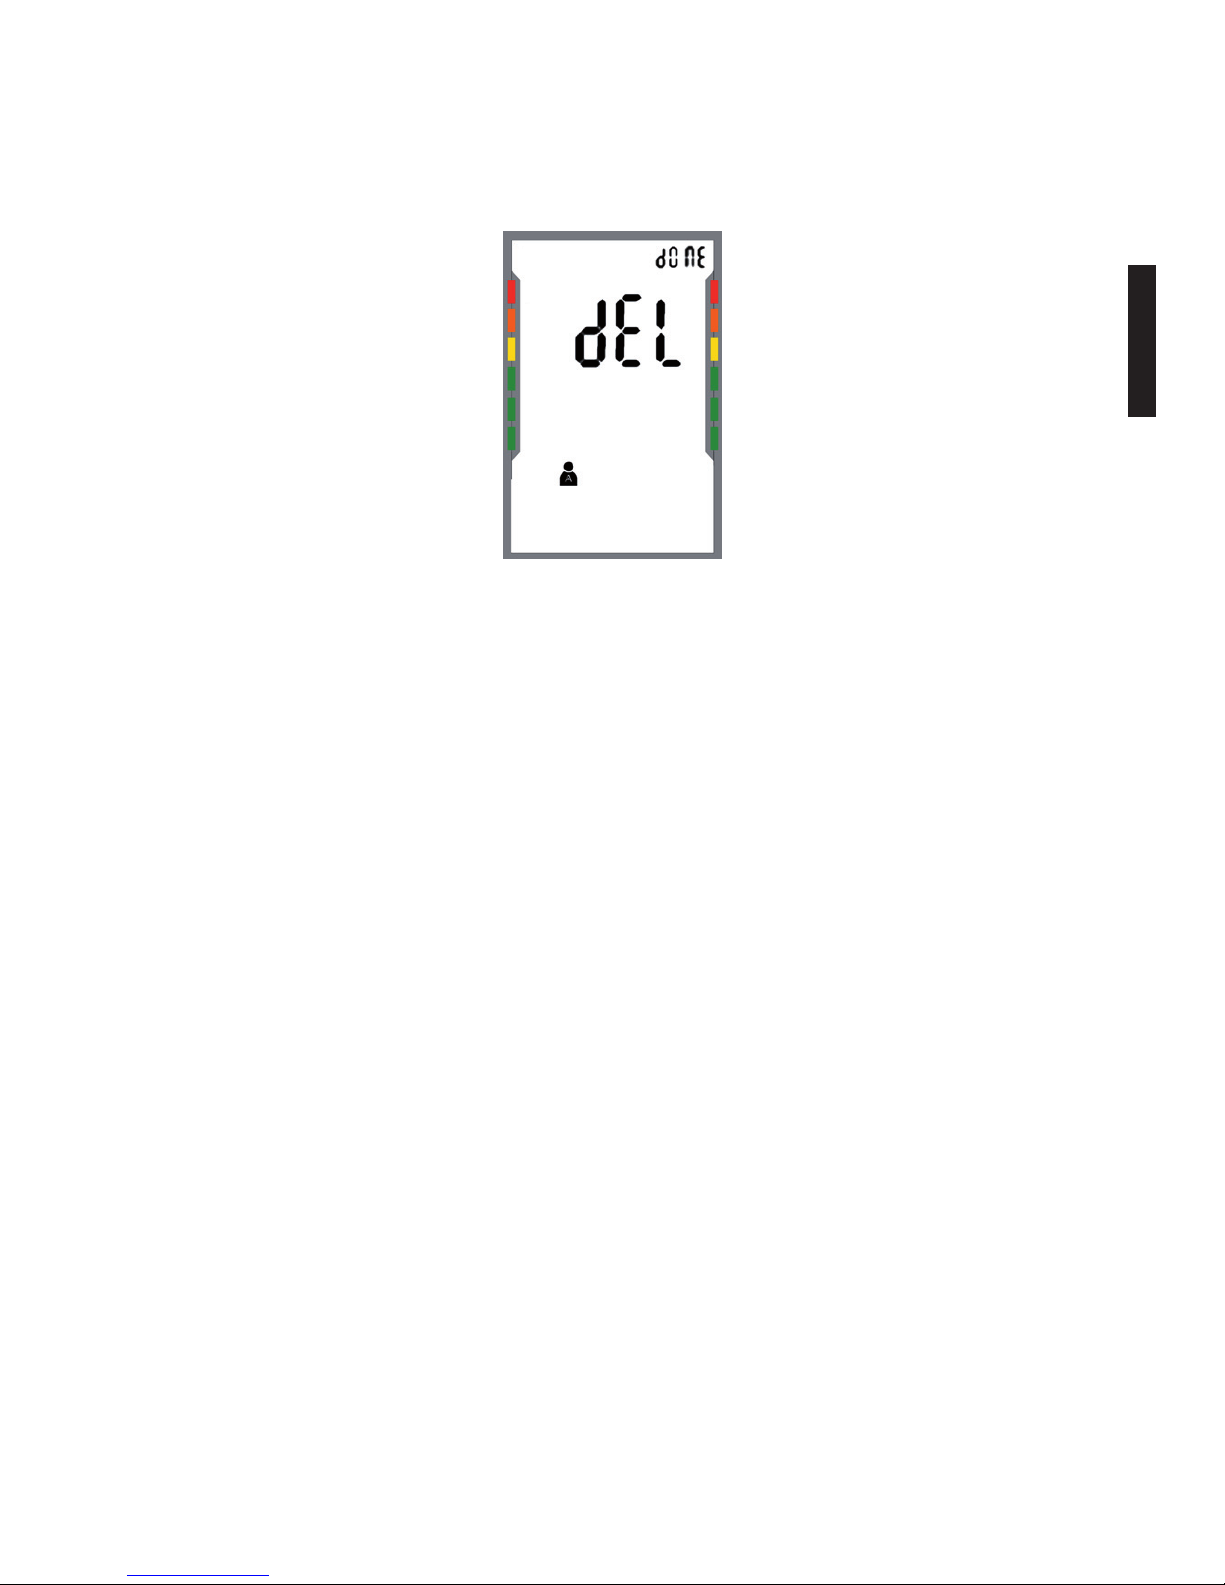
• Press both left and right arrow keys together longer than 3
seconds. The display will show the currently set user prole and
the message “dEL All” (see pict. 9).
pict. 8c pict. 8d
pict. 9
Page 25
25
ENGLISH
• To delete all values from memory, now press the left arrow key.
Afterwards, the display will show picture 9a and the monitor will
power off.
pict. 9a
Page 26
26
IV. Miscellaneous
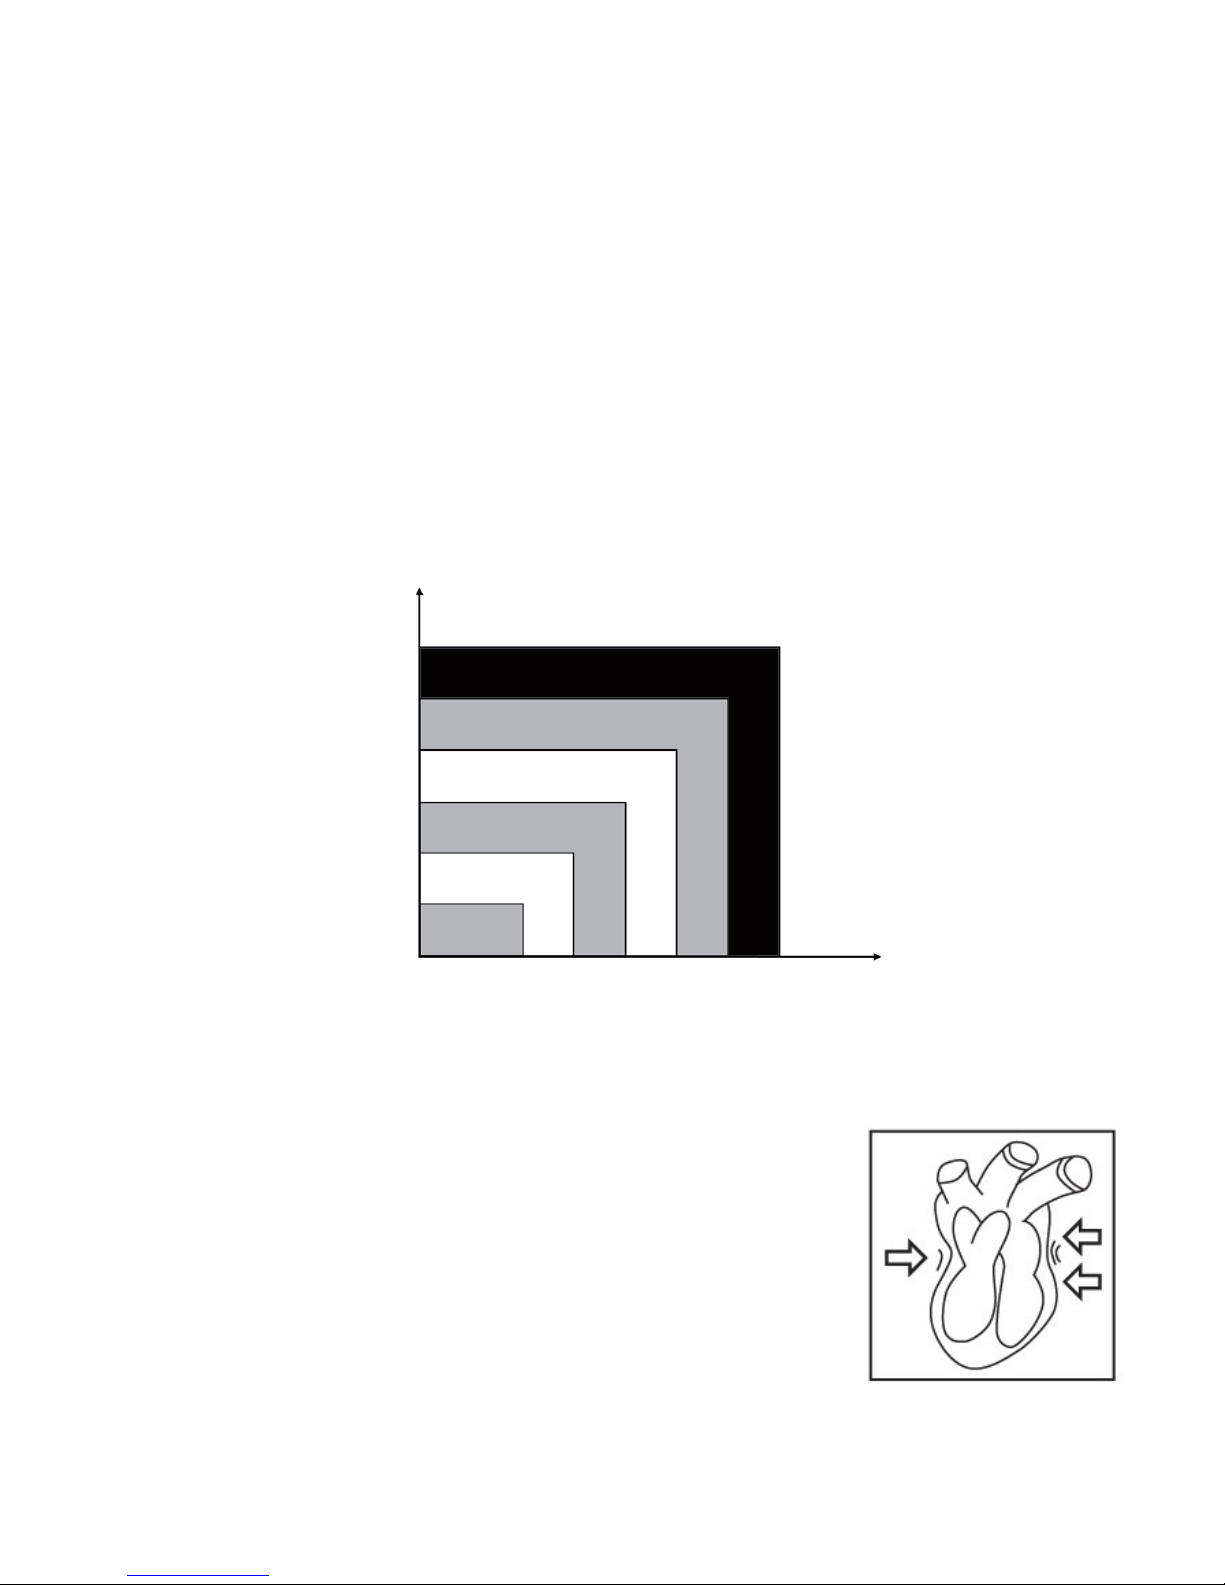
Assessing high blood pressure for adults
The following guidelines for assessing high blood pressure (without
regard to age or gender) have been established by the World Health
Organization (WHO). Please note that other factors (e.g. diabetes,
obesity, smoking, etc.) need to be taken into consideration. Consult
your physician for accurate assessment.
systolic
mmHg
180
160
140
130
120
80 85 90 100 110
severe hypertension
moderate hypertension
diastolic
mmHg
mild hypertension
high-normal BP
normal BP
Knowledge on blood pressure:
Your heart is just like a pump which causes the
blood to circulate through all vessels. As a result,
the blood pressure is the pressure on the wall of
the blood vessel pressed by blood. The output of
blood from the heart when it is a systole is called
systolic pressure. The blood returning to the heart when it is a diastole is called diastolic pressure.
Page 27
27
ENGLISH
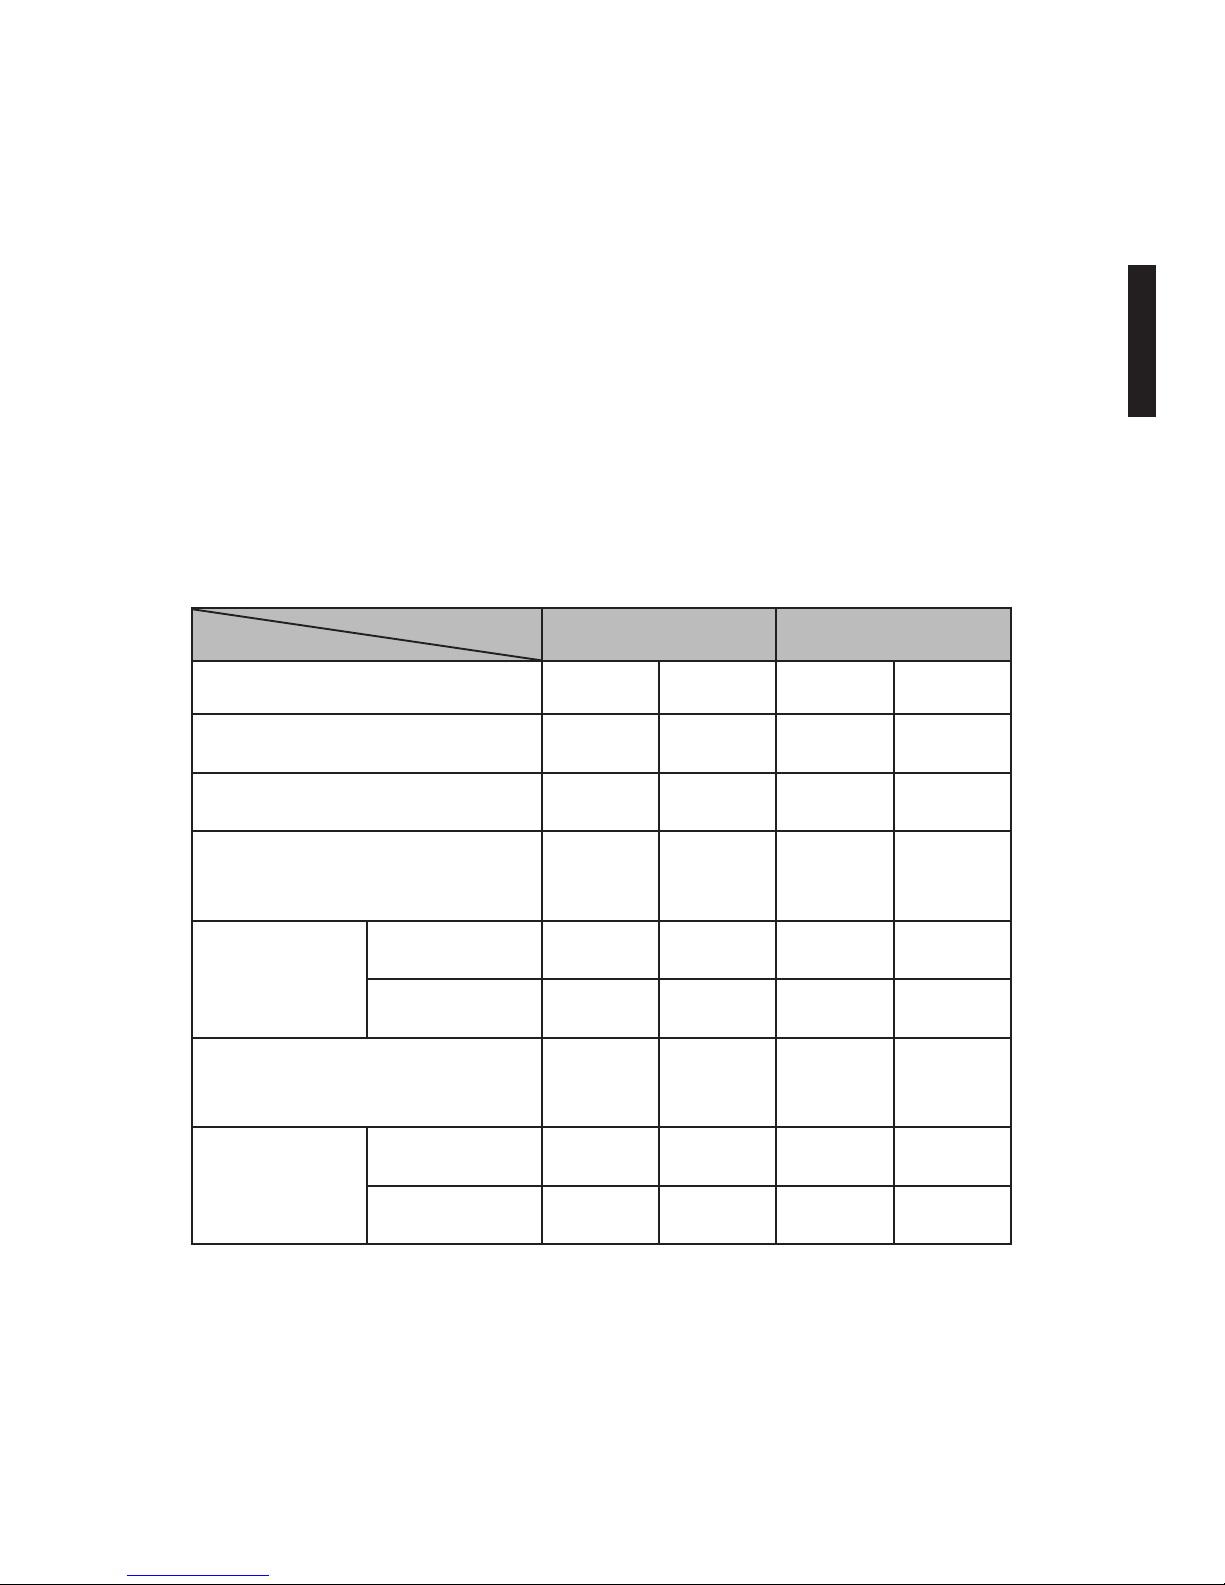
Blood pressure uctuates continually — day and night. The highest
value usually appears in the daytime and the lowest one usually at
midnight. Typically, the value begins to increase at around 3:00AM,
and reaches to highest level in the daytime while most people are
awake and active.
For this reason it is recommended to measure your blood pressure
each day at the same time.
Reason sytolic pressure diastolic pressure
high low high low
Drinking, smoking
• •
Excitement or sporting
• •
seeing a doctor, desire to
urinate
• •
change of
temperature
high
• •
low
• •
After bathing, deep breathing or yawning
• •
Cuff placing tight
• •
loose
• •
BODY & CIRCUMSTANCESO P E R A T I O N
Page 28
28
The blood pressure is inuenced by a variety of different factors, such
as bodily circumstances or a wrong operation of the monitor. Some
people even get nervous when seeing a doctor and that will make
their blood pressure rise. Single measurements can not indicate the
whole blood level, so you need not to be anxious for isolated higher
or lower blood pressure results. The most important thing is to master
one‘s blood pressure trend through long-term measurement. Please
talk to your doctor for useful judgement of your recorded values.
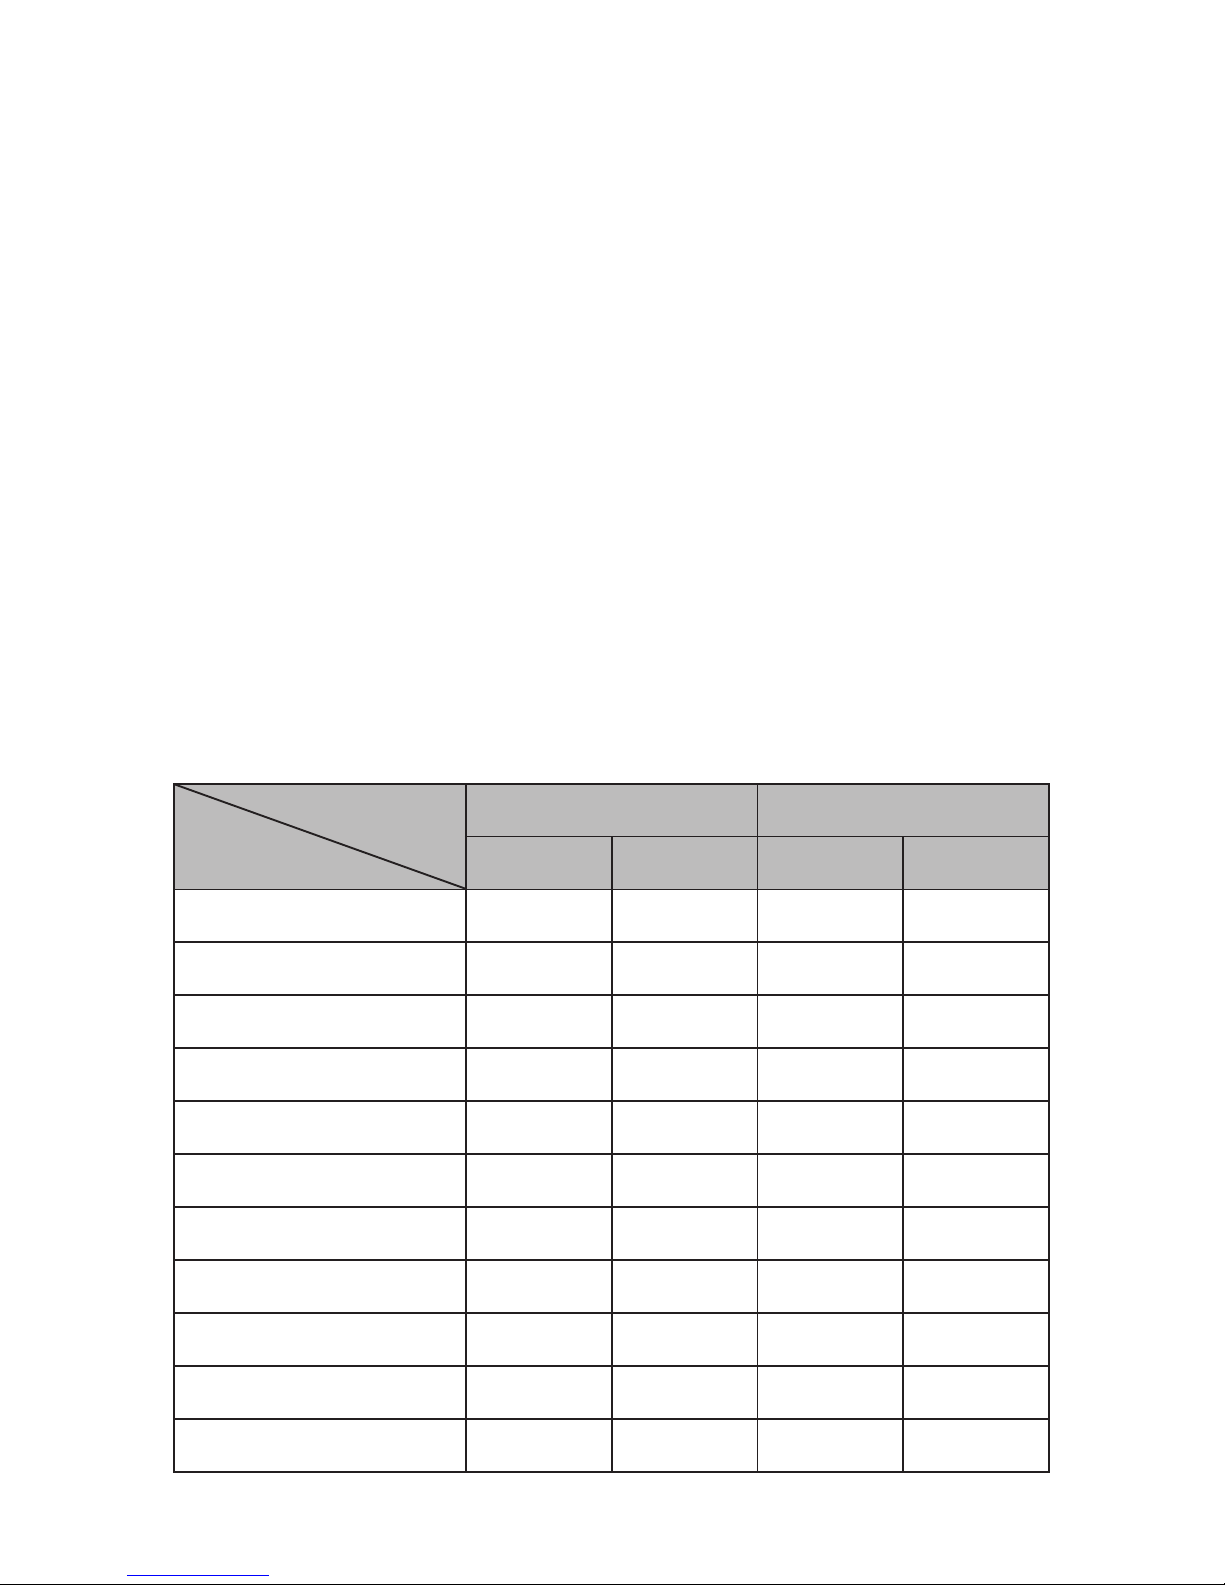
Average values of normal arterial blood pressure (mmHg):
The following chart shows usual average values. You could obtain
similar results by measuring your blood pressure for several days at
the same time. (so called „Basic Blood Pressure“)
Age
Male Female
systolic diastolic systolic diastolic
11-15 114 72 109 70
16-20 115 73 110 70
21-25 115 73 110 71
26-30 115 75 112 73
31-35 117 76 114 74
36-40 120 80 116 77
41-45 124 81 122 78
46-50 128 82 128 79
51-55 134 84 134 80
56-60 137 84 139 82
61-65 148 86 145 83
Page 29
29
ENGLISH
Hypertension:
Various cardiovascular or kidney diseases can
cause hypertension. Long-term hypertension can
also cause pathological changes in heart, brain
and kidney. These changes can lead to hypertension complications which are often diagnosed or
treated too late.
Low Blood Pressure:
There are two kinds of minimum pressure:
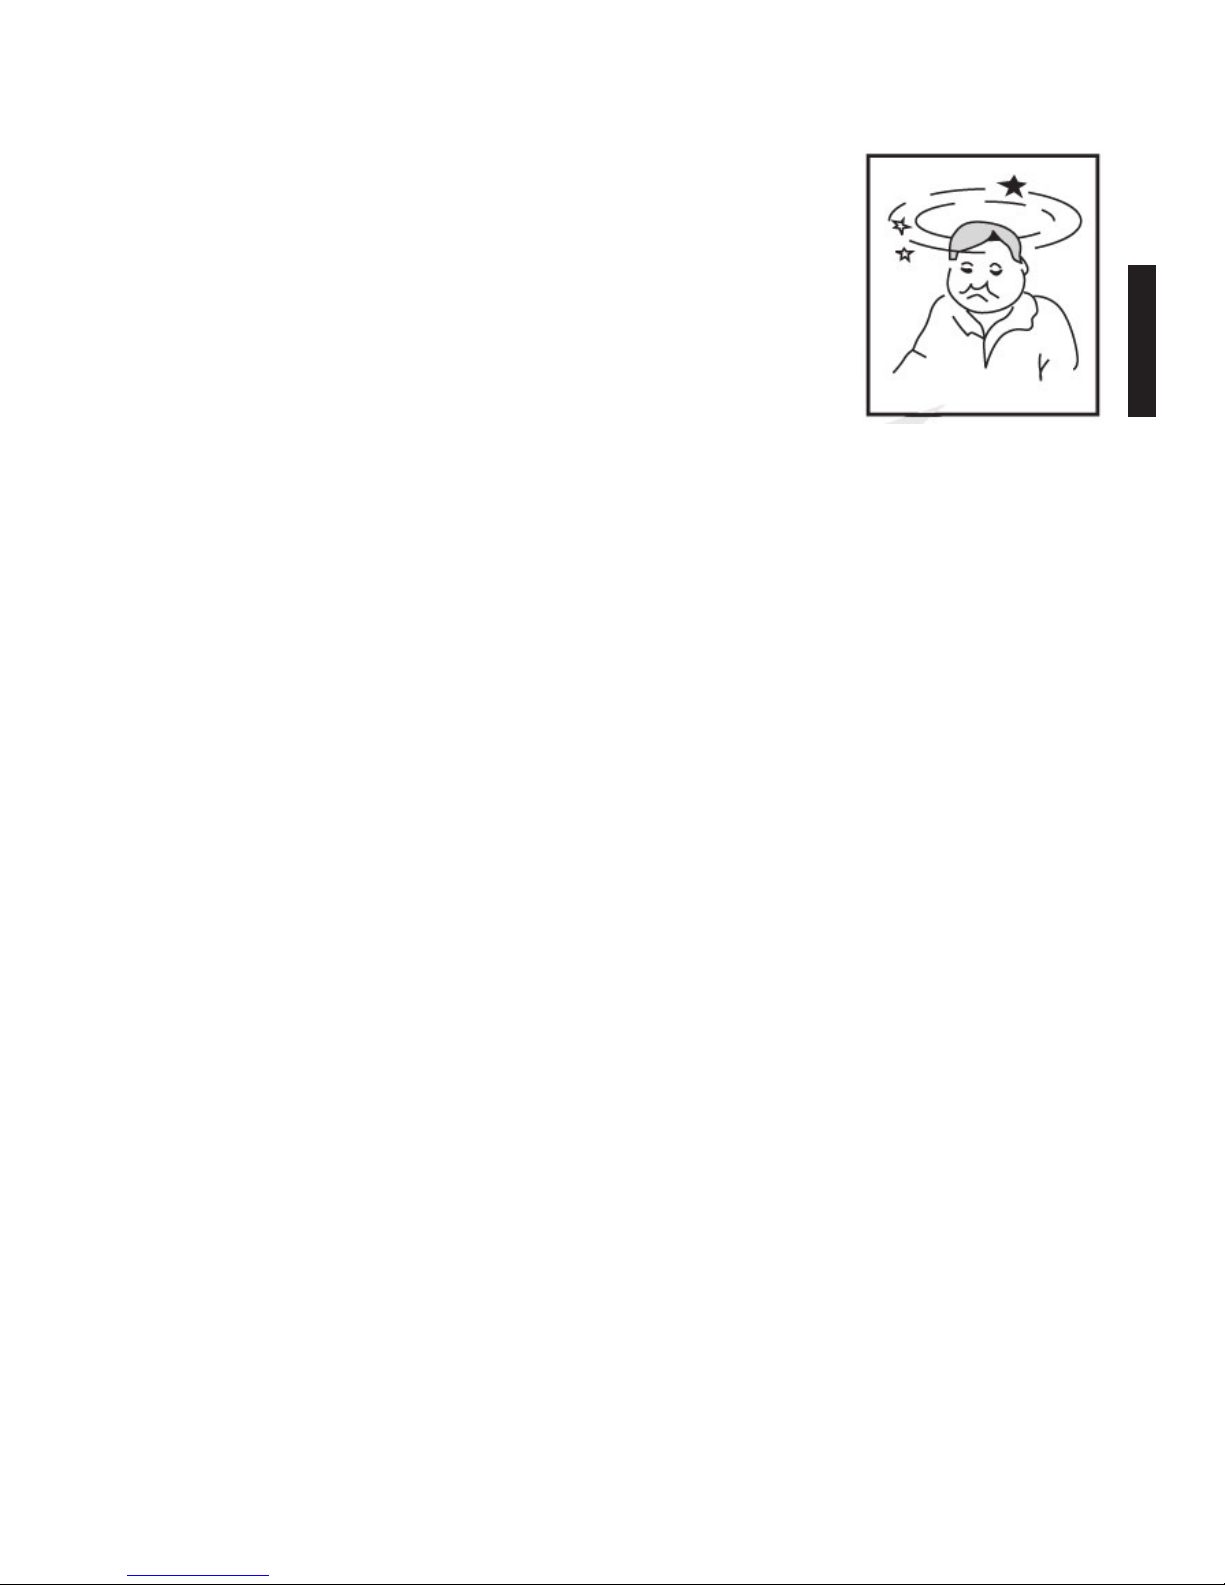
• If you always feel dizzy, unsuitable in the chest and have
difculties in breathing or occurences of temporary myopia
when standing up, you might have a standing minimum
pressure disease. You should go to see a doctor.
• The original minimum pressure disease has no self-symptoms
(besides low blood pressure). To get rid of it, you should pay
more attention to nutrition and do more physical exercise.
Page 30
30
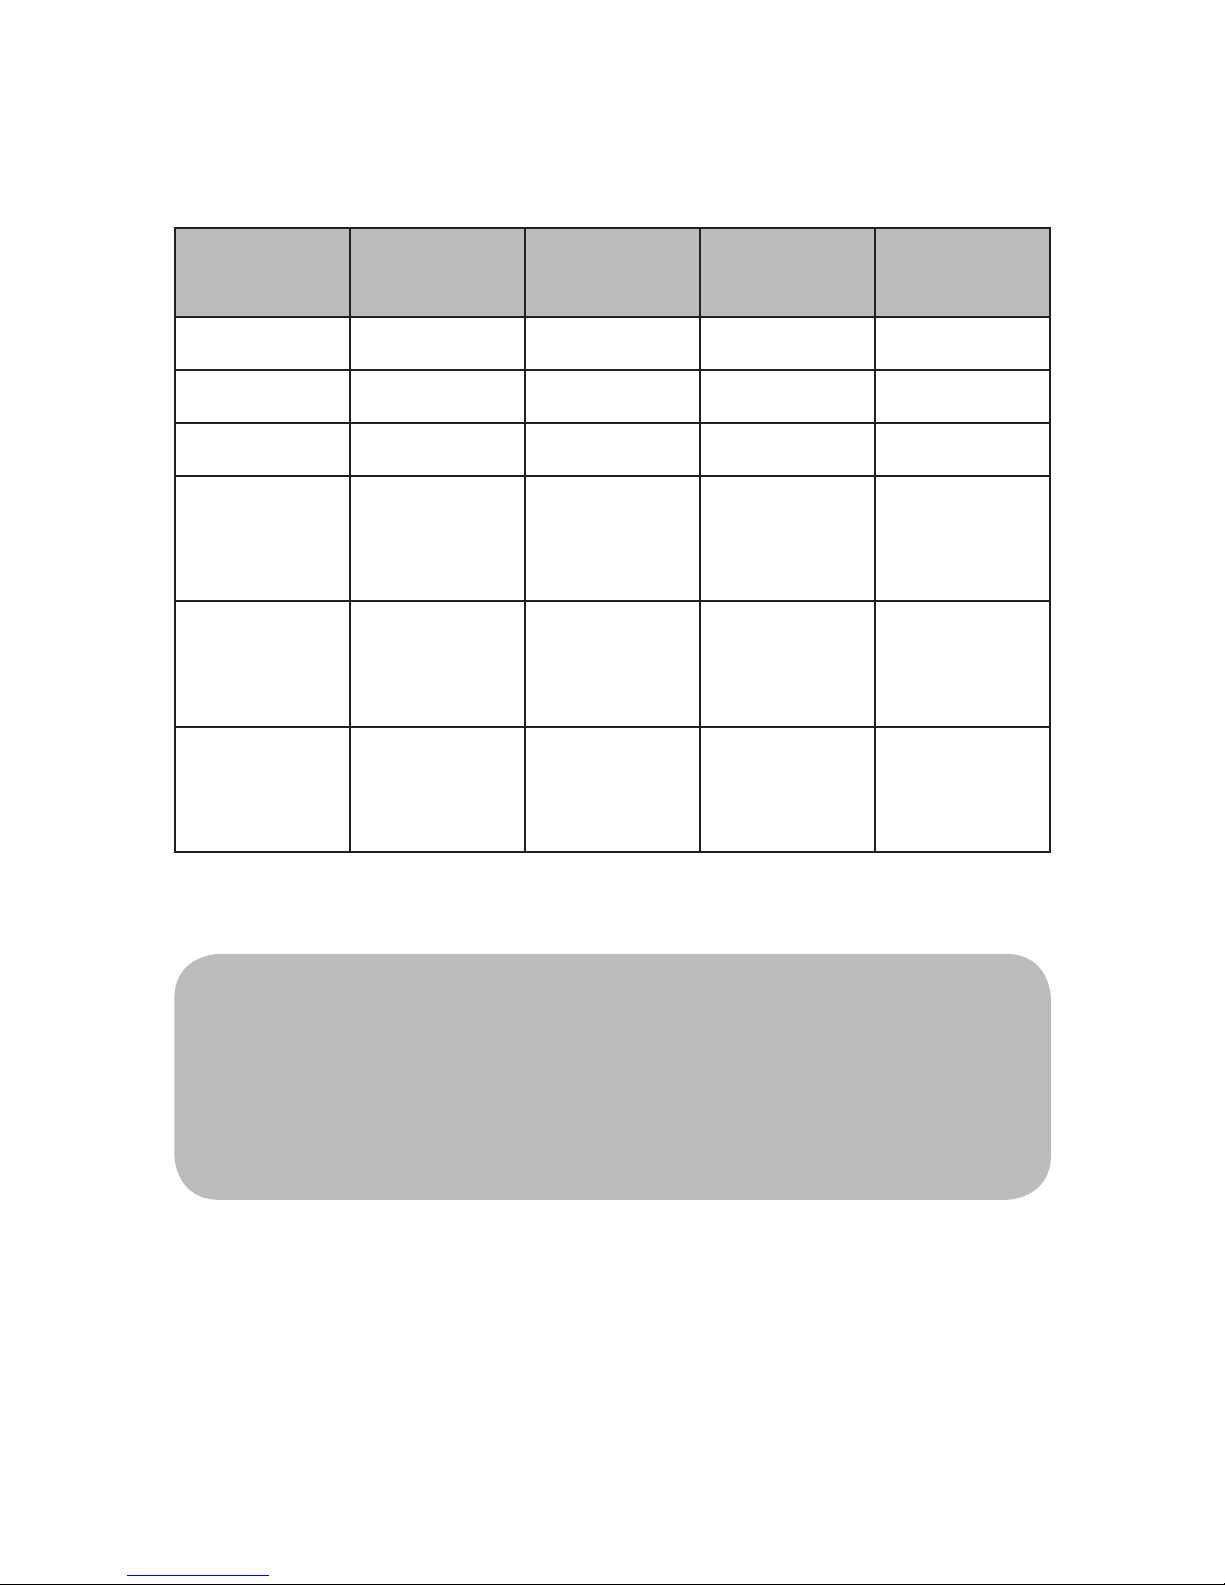
BD Classication
SBP
mmHg
DBP
mmHg
Color indicator
Color changing area
Optimal < 120 < 80 GREEN GREEN
Normal 120-129 80-84 GREEN GREEN
High- 130-139 85-89 GREEN GREEN
Stage 1
Hypertension
140-159 90-99 YELLOW YELLOW
Stage 2
Hypertension
160-179 100-109 ORANGE RED
Stage 3
Hypertension
≥180 ≥110
RED RED
Note: It is not intended to provide a basis of any type of
rush toward emergency conditions/diagnosis based on
the color scheme. This color scheme is only meant to
discriminate between the different levels of blood pressure.
Page 31
31
ENGLISH
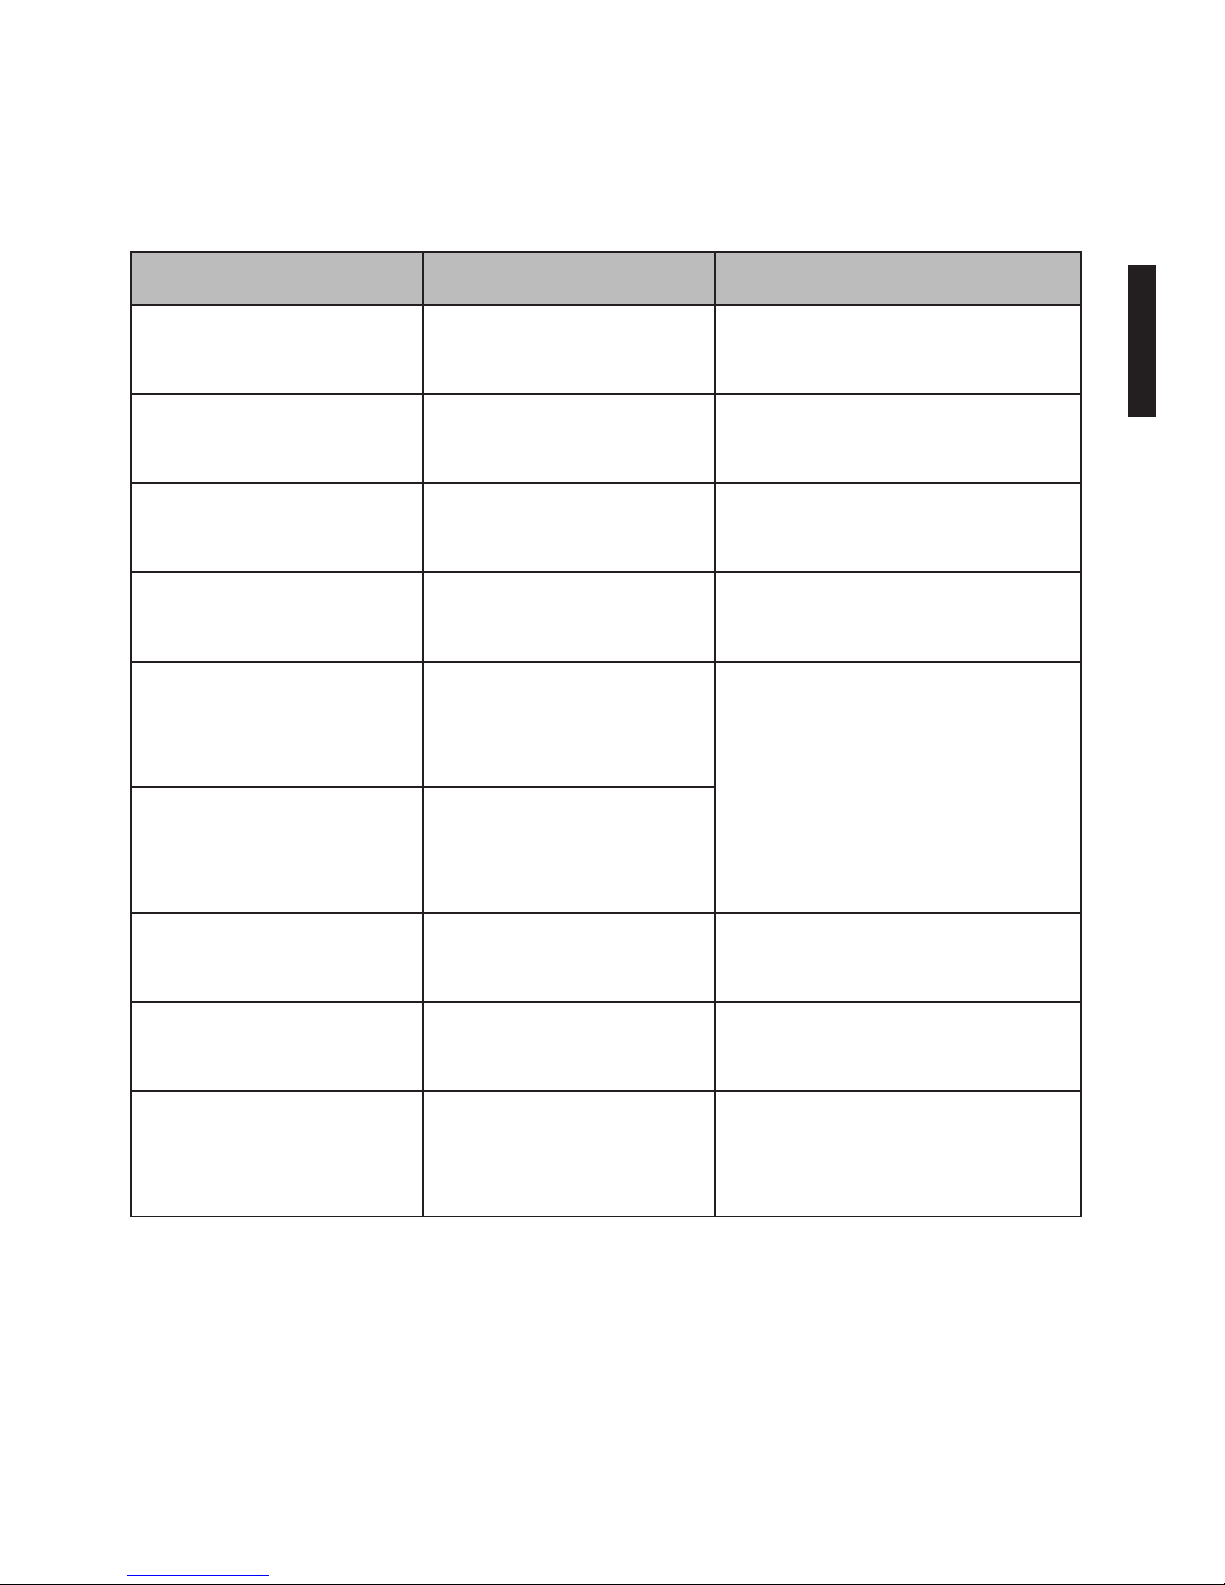
Problem Cause Remedy
LCD is dark / shows
„LO“
Battery too weak
Insert new batteries
Display shows „E1“ Cuff too loose Reapply cuff and start the
measurement again
Display shows „E2“ Cuff too tight Loosen the cuff and repeat
measurement
Display shows „E3“ Cuff overburdened Repeat measurement after a
short break
Display shows „E4“ Measurement not pre-
cise because of movement, talking etc.
Repeat measurement in a
calm state and environment
Display shows „E10 /
E11“
Measurement not precise because of movement, talking etc.
Display shows „E20“ No pulse during mea-
surement
Repeat measurement; if necessary, roll up your sleeve
Display shows „E21“ Measurement failed Repeat measurement after a
short break
Display shows „EXXX“ Standardizing error Repeat measurement. If error
reoccurs, please contact your
distributor / manufacturer
Troubleshooting
Page 32
32
Maintenance
• Do not drop this monitor or subject it to strong impact.
• Avoid high temperature and solarization. Do not immerse the
monitor in water as this will cause damage to the monitor.
• If this monitor is stored near freezing, allow it to acclimate to
room temperature before use.
• Do not attempt to disassemble this monitor.
• If you do not use the monitor for a long time, please remove
the batteries.
• It is recommended to check the monitor performance every 2
years or after repair.
• If the cuff becomes dirty, remove it from the monitor and clear
it by hand in a mild detergent, then rinse it thoroughly in cold
water. Never dry the cuff in clothes dryer or iron it.
Explanation of symbols
Caution! Please read user manual thoroughly!
M
Type-B Applied Parts
Disposal information
Page 33
33
ENGLISH
Guidance and manufacture’s declaration – electromagnetic
emission for all equipment & systems
The smartLAB
®
pro+ is intended for use in the electromagnetic en-
vironment specied below. The customer of the user of the device
should assure that it is used in such an environment.
Emission test Compliance Electromagnetic environment –
guidance
RF emissions
CISPR 11
Group 1 This device uses RF energy only for
its internal function. Therefore, its
RF emissions are very low and are
not likely to cause any interference
in nearby electronic equipment.
RF emission
CISPR 11
Class B This device is suitable for use in all
establishments other than domestic
and those directly connected to the
public low-voltage power supply network that supplies buildings used for
domestic purposes.
Harmonic emissions
IEC 61000-3-2
Not
applicable
Voltage uctuations/ icker emissions
IEC 61000-3-3
Not
applicable
Page 34
34
The smartLAB®pro+ is intended for use in the electromagnetic
environment specied below. The customer of the user of the device
should assure that it is used in such and environment.
Guidance and manufacture’s declaration – electromagnetic
immunity for all equipment & systems
Immunity test IEC 60601 test level compliance level Electromagnetic
environment guidance
Electrostatic
discharge (ESD)
IEC 61000-4-2
±6 kV contact
±8 kV air
±6 kV contact
±8 kV air
Floors should be
wood, concrete
or ceramic tile. If
oor are covered
with synthetic
material, the
relative humidity should be at
least 30%.
Electrical fast
transient/burst
IEC 61000-4-4
±2 kV for power supply lines
±2kV for power
supply lines
Mains power
quality should be
that of a typical
commercial or
hospital environment.
Surge
IEC 61000-4-5
± 1 kV line(s) to
line(s)
±1 kV differential
mode
Page 35
35
ENGLISH
Immunity test IEC 60601 test level compliance level Electromagnetic
environment guidance
Voltage dips,
short interruptions and voltage
variations on power supply input
lines
IEC 61000-4-11
<5% UT
(>95% dip in UT)
for 0.5 cycle
40% U
T
(60% dip in UT)
for 5 cycles
70% U
T
(30% dip in UT)
for 25 cycles
<5% UT
(>95% dip in UT)
for 5 sec
<5% UT
(>95% dip in UT)
for 0.5 cycle
40% U
T
(60% dip in UT)
for 5 cycles
70% U
T
(30% dip in UT)
for 25 cycles
<5% UT
(>95% dip in UT)
for 5 sec
Mains power
quality should be
that of a typical
commercial or
hospital environment. If the user
of the device requires continued
operation during
power mains interruptions, it is
re c o m me n de d
that the device
should be powered from an
uninterruptible
power supply or a
battery.
Power frequency
(50Hz) magnetic
eld
IEC 61000-4-8
3 A/m 3 A/m Power frequency
magnetic elds
should be at levels characteristic of a typical
location in a typical commercial
or hospital environment.
Note: U
T
is the a.c. mains voltage prior to application of the test level.
Page 36
36
Guidance and manufacture’s declaration – electromagnetic
immunity for ME EQUIPMENT
and ME SYSTEMS that are not LIFE-SUPPORTING
I m m u n i t y
test
IEC 60601
test level
compliance
level
Electromagnetic environment - guidance
Conducted RF
IEC 61000-4-6
Radiated RF
IEC 61000-4-3
3 V
rms
150 kHz - 80 MHz
3 V/m
80 MHz - 2,5 GHz
3 V
rms
3 V/m
Portable and mobile RF communications equipment should be
used no closer to any part of the
device, including cables, than
the recommended separation distance calculated from the equation applicable to the frequency
of the transmitter.
Recommended separation distance:
d= 1.167 √P
d= 1.167 √P 80 MHz - 800 MHz
d=2,333 √P 800 MH - 2,5 GHz
where P is the maximum output power
rating of the transmitter in watts (W)
according to the transmitter manufacturer and d is the recommended separation distance in metres(m).
Field strengths from xed RF
transmitters, as determined by
an electromagnetic site survey
,
a
should be less than the compliance level in each frequency
range.
b
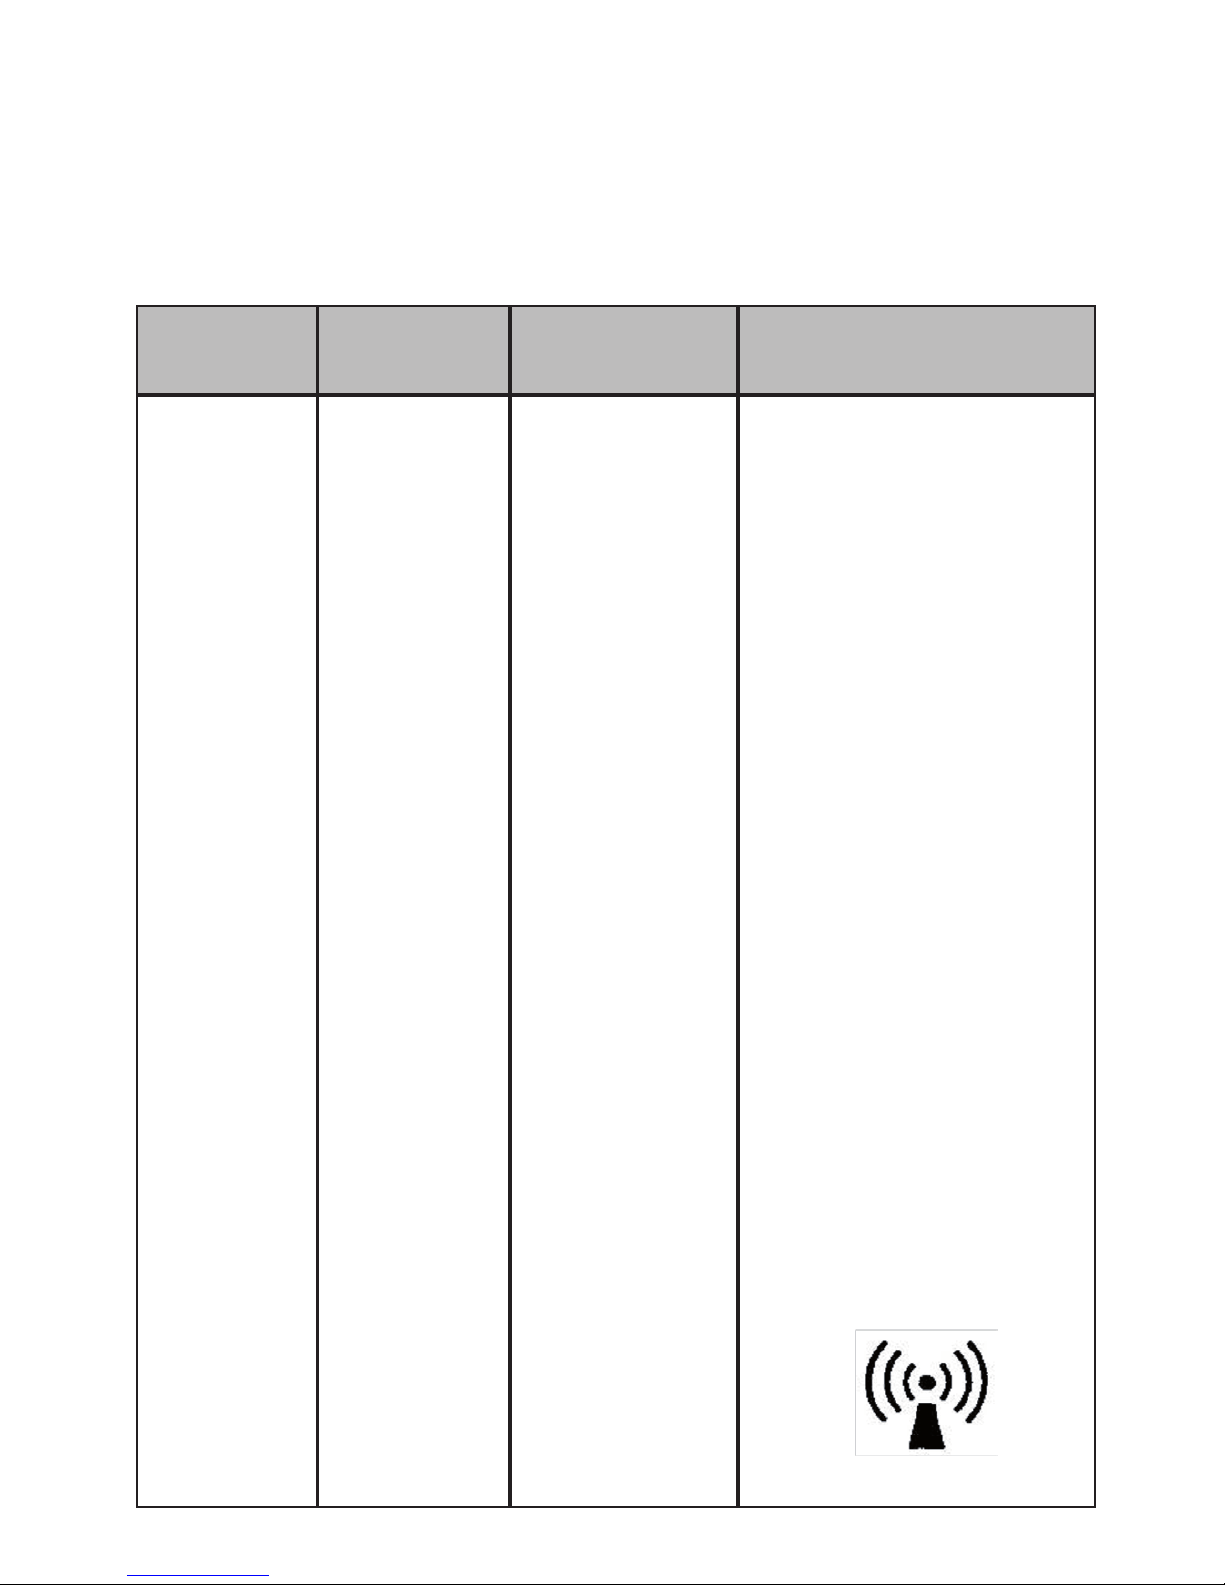
Interference may occur in the vicinity of equipment marked with
the following symbol:
Page 37

37
ENGLISH
Note 1: At 80 MHz and 800 MHz, the higher frequency range applies.
Note 2: These guidelines may not apply in all situations. Electromagnetic propagation is
affected by absorption and reection from structures, objects and people.
a
Field strengths from xed transmitters, such as base stations for radio (cellular/cordless) telephones and land mobile radios, amateur radio, AM and FM radio broadcast
and TV broadcast cannot be predicted theoretically with accuracy. To assess the electromagnetic environment due to xed RF transmitters, an electromagnetic site survey
should be considered. If the measured eld strength in the location in which the
device is used exceeds the applicable RF compliance level above, the ELE007839V1
should be observed to verify normal operation. If abnormal performance is observed,
additional measures may be necessary, such as reorienting or relocating the device.
b
Over the frequency range 150 kHz to 80 MHz, eld strengths should be less than 3
V/m.
The smartLAB®pro+ is intended for use in an electromagnetic environment in which radiated RF disturbances are controlled. The customer or the user of the smartLAB®pro+ can help prevent electromagnetic interference by maintaining a minimum distance between
portable and mobile RF communications equipment (transmitters)
and the smartLAB®pro+ as recommended below, according to the
maximum output power of the communications equipment.
Page 38
38
Rated maximum output power of transmitter
W
Separation distance according to frequency of transmitter
150 kHz - 80
MHz
d= 1,167 √P
80 MHz - 800
MHz
d= 1,167 √P
800 MHz - 2,5
GHz
d= 2,333 √P
0,01 0,167 0,167 0,233
0,1 0,369 0,369 0,738
1 1,167 1,167 2,333
10 3,690 3,690 7,388
100 11,67 11,67 23,330
For transmitters rated at a maximum output power not listed above, the recommended
separation distance d in meters (m) can be estimated using the equation applicable
to the frequency of the transmitter, where P is the maximum output power rating of the
transmitter in watts (W) according to the transmitter manufacturer.
Note 1: At 80 MHz and 800 MHz, the separation distance for the higher frequency range
applies.
Note 2: These guidelines may not apply in all situations. Electromagnetic propagation is
affected by absorption and reection from structures, objects and people.
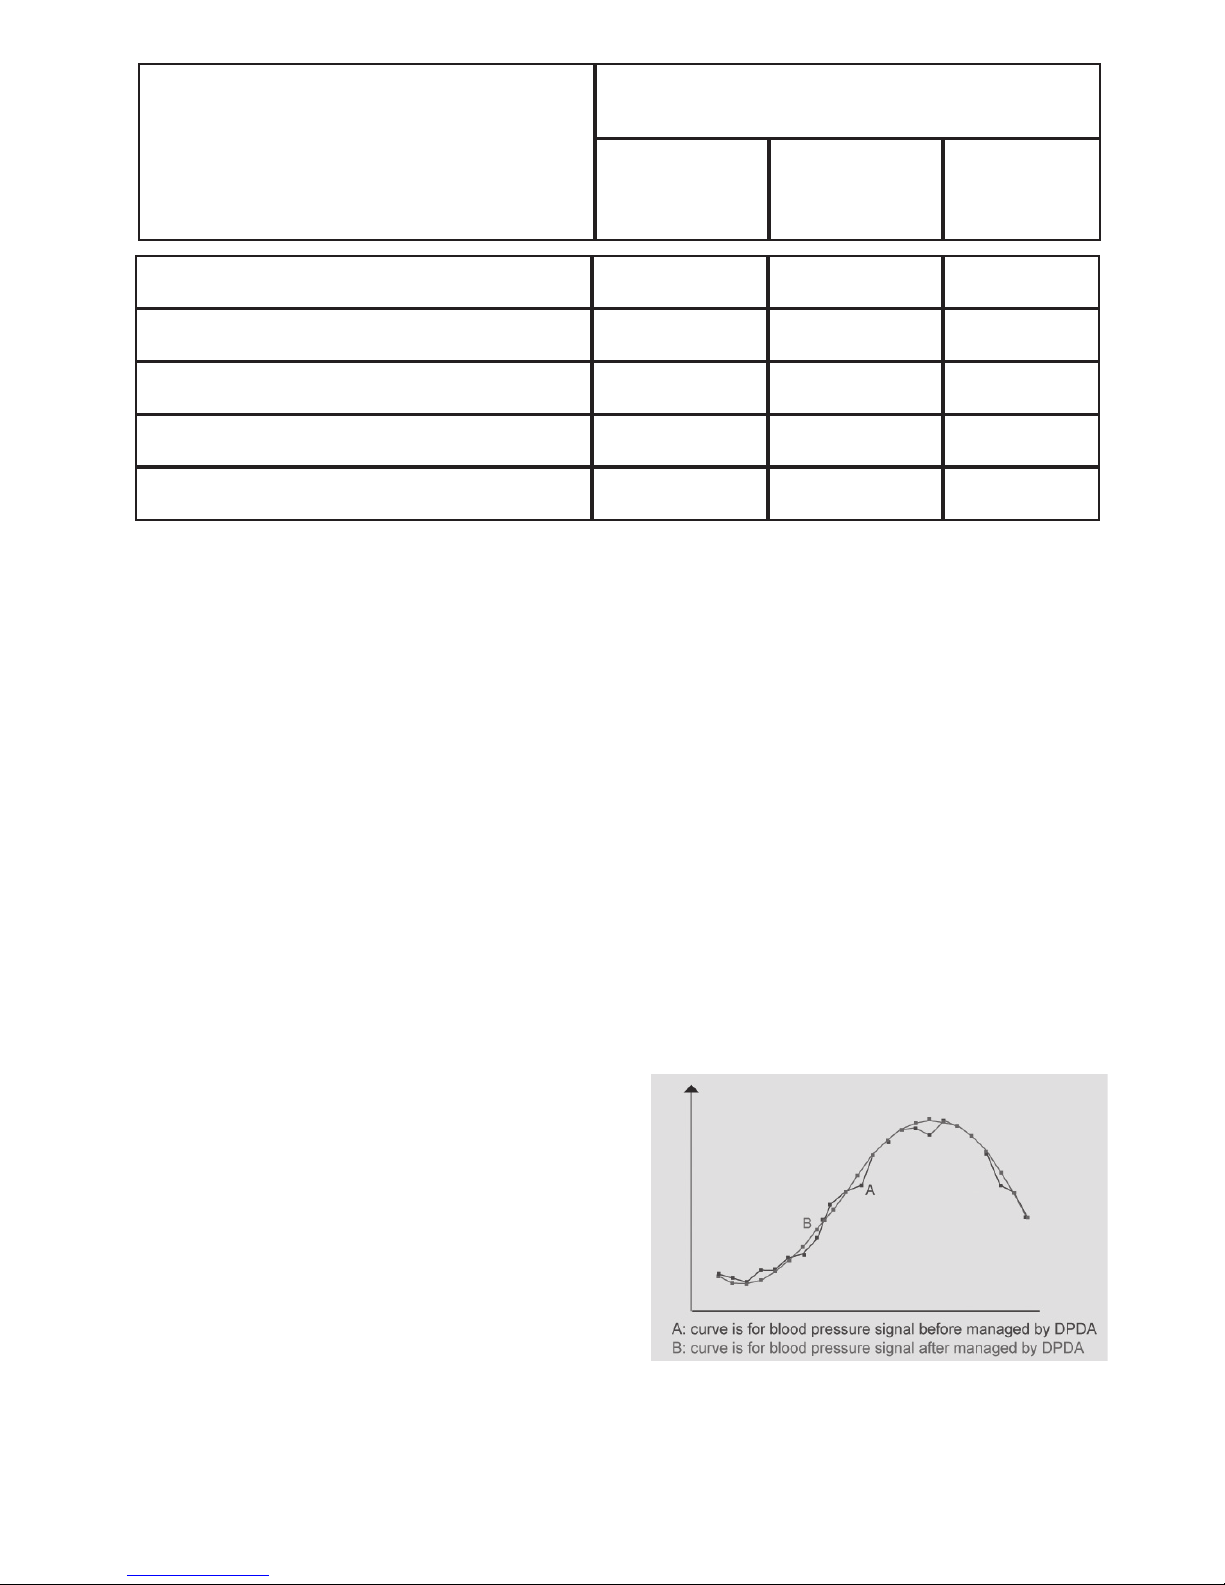
DPA technology for a more accurate measurement
The smartLAB
®
pro+ uses a unique
measuring technology called DPDA
(double pulse detection algorithm)
with which the units manage the
blood pressure signals twice. The chart
left shows the blood pressure signals
after managed by DPDA. The result is a
more linearized curve, proving the improved measuring accuracy of your
smartLAB®pro+.
Page 39
39
ENGLISH
Warranty:
HMM Diagnostics GmbH products need to fulll high quality requirements.
Because of this reason, HMM Diagnostics GmbH gives a 2-year warranty by purchasing this smartLAB® product. You can even extend the
warranty from 2 to 5 years without extra pay when you register your
product. Please use the warranty card included in your product set.
Wear parts, cuff, batteries etc. are excluded from warranty.
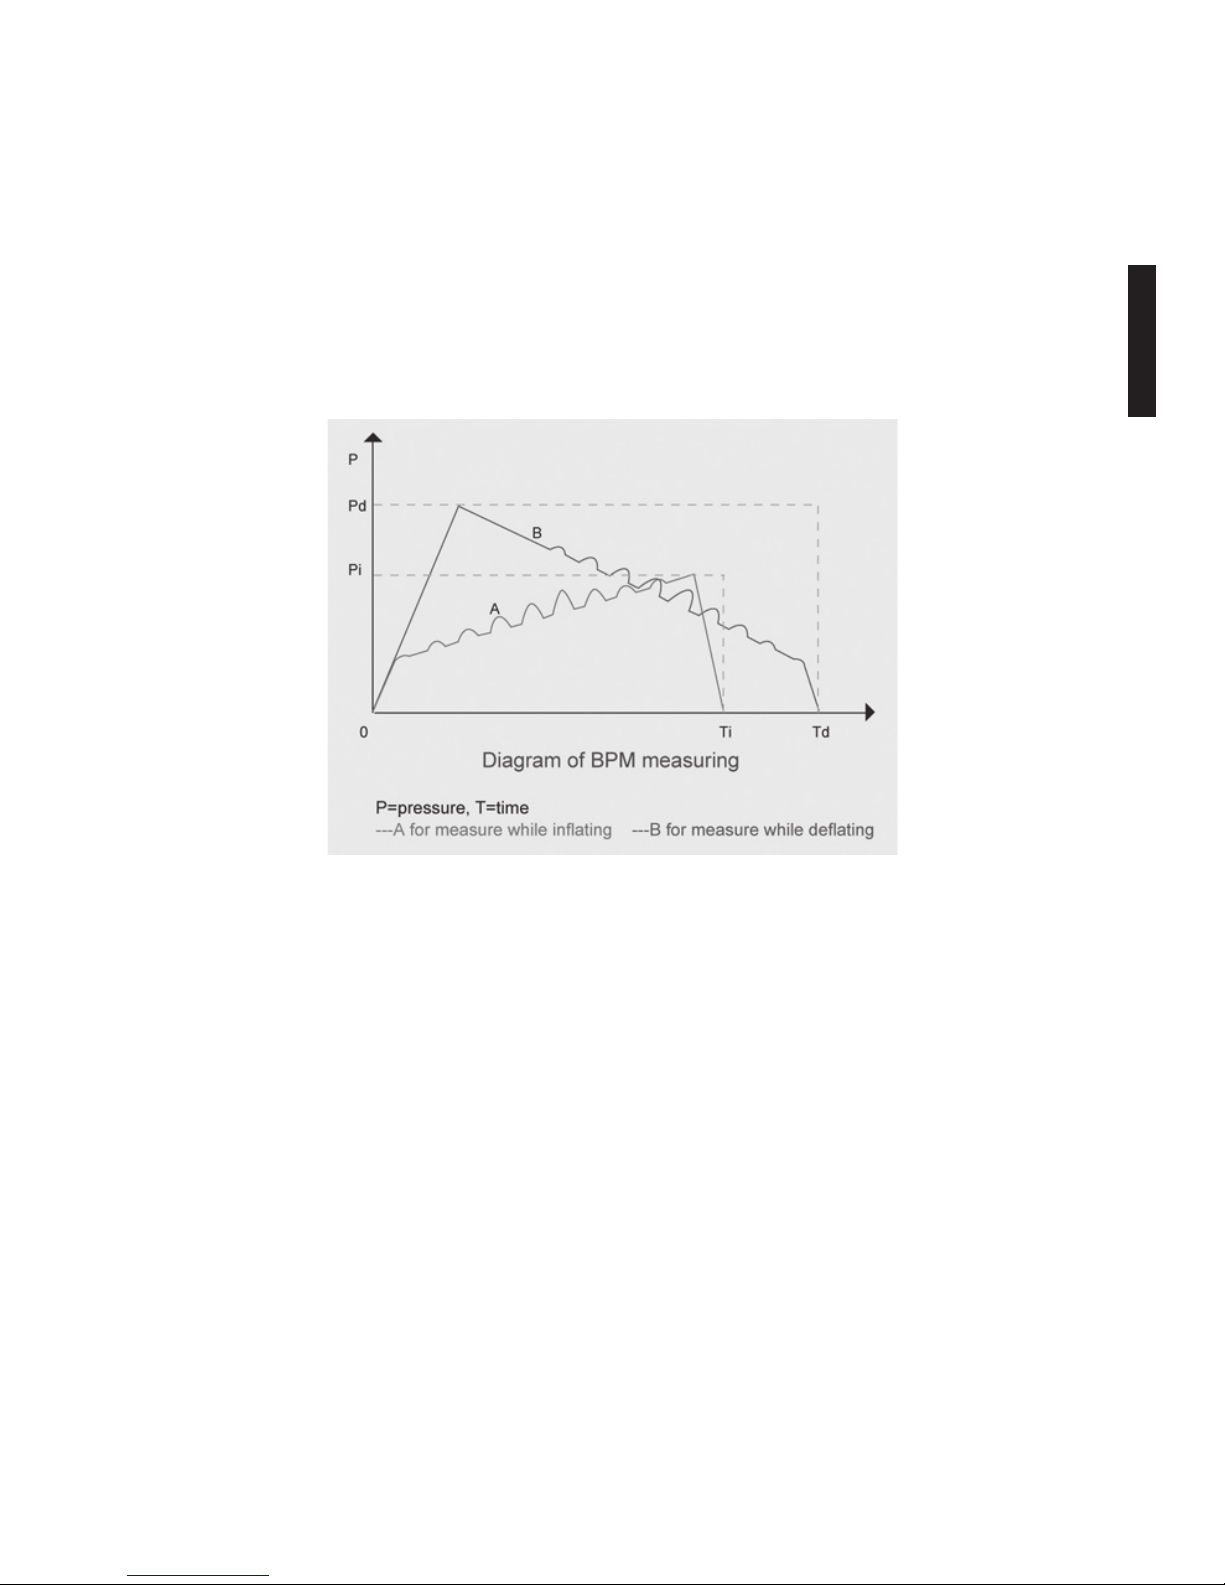
Measure-during-ination
This technology accelerates the measuring process while giving a
more comfortable feeling for the users while the cuff is being inated. It also guarantees a much higher accuracy compared to normal
inating processes.
Page 40

HMM Diagnostics GmbH
Friedrichstr. 89
D-69221 Dossenheim, Germany
mail: [email protected]
www.hmm.info
Manufacturer:
Weitere Informationen zu den smartLAB® Produkten /
More information on our smartLAB® products:
www.smartlab.org
 Loading...