

H.Koenig VIO9 User manual
Ins
truction manual
Manuel d'utilisation
Bedienungsanleitug
Handboek
Manual de utilizacion
Manuale d'uso
VI
O9
M
icrowave Oven
Micro-ondes
mikrowellenofen
Oven-magnetron
Horno microondas
Forno a microonde

NGLISH
E
IIMMPPOORRTTAANNTT SSAAFFEETTYY IINNSSTTRRUUCCTTIIOONNSS
en using electrical appliance basic safety precautions should be followed, including the
Wh
following:
WARNING: To reduce the risk of burns, electric shock, fire, injury to persons or exposure
to excessive microwave energy:
Read all instructions before using the appliance.
1.
2.
3.
4.
5.
e this appliance only for its intended use as described in this manual. Do not use
Us
corrosive chemicals or vapors in this appliance. This type of oven is specifically
designed to heat, cook or dry food. It is not designed for industrial or laboratory use.
Do not
operate the oven when empty.
Do not operate this appliance if it has a damaged cord or plug, if it is not working
pr
operly or if it has been damaged or dropped. If the supply cord is damaged, i t mus t
be replaced by the manufacturer or its service agent or a similarly qualified person in
order to avoid a hazard
RNING: Only allow children to use the oven without supervision when adequate
WA
instructions have been given so that the child is able to use the oven in a safe way and
understands the hazards of improper use.
Warning: When the appliance is operated in the combination mode, children should
only use the oven under adult supervision due to the temperatures generated.
6.
To
reduce the risk of fire in the oven cavity:
Wh
a.
en heating food in plastic or paper container, keep an eye on the oven due to
the possibility of ignition;
b. Rem
c.
ove wire twist-ties from paper or plastic bags before placing bag in oven.
smoke is observed, switch off or unplug the appliance and keep the door closed
If
in order to stifle any flames.
Do not
d.
ensils or food in the cavity when not in use.
ut
7.
RNING: Liquid or other food must not be heated in sealed containers since they
WA
use the cavity for storage purposes. Do not leave paper products, cookin
are liable to explode.
crowave heating of beverage can result in delayed eruptive boiling, therefore care
8.
Mi
has to be taken when handling the container.
9.
Do not
fry food in the oven. Hot oil can damage oven parts and utensils and even
result in skin burns.
10.
Egg
s in their shell and whole hard-boiled eggs should not be heated in microwav
ov
ens since they may explode even after microwave heating has ended.
11. Pierce foods with heavy skins such as potatoes, whole squashes, apples and
chestnuts before cooking.
g
e
12. The contents of feeding bottles and baby jars should be stirred or shaken and the
temperature should be checked before serving in order to avoid burns.
13. Cook
ing utensils may become hot because of heat transferred from the heated food.

holders may be needed to handle the utensil.
Pot
14.
Ut
ensils should be checked to ensure that they are suitable for use in microw ave oven.
WA
15.
RNING: It is hazardous for anyone other than a trained person to carry out any
service or repair operation which involves the removal of any cover which gives
protection against exposure to microwave energy.
Thi
16.
s product is a Group 2 Class B ISM equipment. The definition of Group 2 which
contains all ISM (Industrial, Scientific and Medical) equipment in which radio-frequenc
ener
gy is intentionally generated and/or used in the form of electromagnetic radiation
for the treatment of material, and spark erosion equipment. For Class B equipment is
equipment suitable for use in domestic establishments and in establishments directl
c
onnected to a low voltage power supply network which supplies buildings used for
domestic purpose.
y
y
17. Thi
s appliance is not intended for use by persons (including children) with reduced
physical, sensory or mental capabilities, or lack of experience and knowledge, unless
they have been given supervision or instruction concerning use of the appliance by a
person responsible for their safety.
Chi
18.
19.
20.
21.
22.
23.
24.
25.
26.
ldren should be supervised to ensure that they do not play with the appliance.
The
microwave oven is only used in freestanding.
WA
RNING: Do not install oven over a range cooktop or other heat-producin
appl
iance. if installed could be damaged and the warranty would be avoid .
accessible surface may be hot during operation.
The
microwave oven shall not be placed in a cabinet.
The
door or the outer surface may get hot when the appliance is operating.
The
temperature of accessible surfaces may be high when the appliance is operating.
The
The appl
Appl
iance shall be placed against a wall.
iance is not to be used by children or persons with reduced physical, sensory or
mental capabilities, or lack of experience and knowledge, unless they have been given
supervision or instruction
Chi
27.
28.
ldren being supervised not to play with appliance
WA
RNING: If the door or door seals are damaged, the oven must not be operated until
it has been repaired by a competent person
g
The
29.
instructions shall state that appliances are not intended to be operated by means
of an external timer or separate remote-control system.
30.
31.
microwave oven is for household use only and not for commercial use.
The
er remove the distance holder in the back or on the sides, as it ensures a minimum
Nev
distance from the wall for air circulation.
ease secure the turn table before you move the appliance to avoid damages.
32. Pl
33. Caut
ion: It is dangerous to repair or maintain the appliance by no other than a

pecialist because under these circumstances the cover have to be removed which
s
assures protection against microwave radiation. This applies to changing the power
cord or the lighting as well. Send the appliance in these cases to our service centre.
34. The microwave oven is intended for defrosting, cooking and steaming of food only.
Us
35.
36.
37.
e gloves if you remove any heated food.
Caut
ion! Steam will escape, when opening lids or wrapping foil.
Th
is appliance can be used by children and persons with reduced physical, sensory or
mental capabilities or lack of experience and knowledge if they have been giv
s
upervision or instruction concerning use of the appliance in a safe way and
understand the hazards involved. Children shall not play with the appliance. Cleanin
and us
er maintenance shall not be made by children unless they are aged from 8
years and above and supervised.
If
38.
smoke is emitted, switch off or unplug the appliance and keep the door closed in
order to stifle.
en
g
PPRREECCAAUUTTIIOONNSS TTOO AAVVOOIIDD PPOOSSSSIIBBLLEE EEXXPPOOSSUURREE TTOO EEXXCCEESSSSIIVVE
G
EENNEERRG
1. D
YY
o not attempt to operate this oven with the door open since open door operation
E
MMIICCRROOWWAAVVEE
can result in harmful exposure to microwave energy. It is important not to defeat or
tamper with the safety interlocks.
2. Do not place any object between the oven front face and the door or allow soil or
cleaner residue to accumulate on sealing surfaces.
o not operate the oven if it is damaged. It is particularly important that the oven
3.
D
door close properly and that there is no damage to the
1)Door (bent),
2)Hinges and latches (broken or loosened),
3)Door seals and sealing surfaces.
T
4.
he oven should not be adjusted or repaired by anyone except properly qualified
service personnel.
SSPPEECCIIFFIICCAATTIIOONNSS
ower Supply 230-240V~ 50Hz
P
P
ower Consumption (Microwave) 1400W
P
ower Consumption (Grill) 1000W
R
ated Microwave Power Output: 900W
peration Frequency: 2450MHz
O
O
utside Dimensions: 281mm(H)×483mm(W)×420mm(D)
O
ven Cavity Dimensions: 220mm(H)×340mm(W)×344mm(D)
ven Capacity: 25Litres
O

Co
oking Uniformity: Turntable System
et Weight: Approx. 14.5 kg
N
IINNSSTTAALLLLAATTIIOONN
ake sure that all the packing materials are removed from the inside of the door.
M
1.
2.
W
ARNING: Check the oven for any damage, such as misaligned or bent door,
damaged door seals and sealing surface, broken or loose door hinges and l atches an d
dents inside the cavity or on the door. If there is any damage, do not operate the ove
and c
ontact qualified service personnel.
3.
T
his microwave oven must be placed on a flat, stable sur face to hold its w eight and the
heaviest food likely to be cooked in the oven.
o not place the oven where heat, moisture, or high humidity are generated, or near
4. D
combustible materials.
5.
For
correct operation, the oven must have sufficient airflow. Allow 20cm of space
above the oven, 10cm at back and 5cm at both sides. Do not cover or block any
openings on the appliance. Do not remove feet.
6.
D
o not operate the oven without glass tray, roller support, and shaft in their proper
positions.
ake sure that the power supply cord is undamaged and does not run under the oven
M
7.
or over any hot or sharp surface.
8.
T
he socket must be readily accessible so that it can be easily unplugged in an
emergency.
9.
D
o not use the oven outdoors.
n
RRAADDIIOO IINNTTEERRFFEERREENNCCEE
O
peration of the microwave oven can cause interference to your radio, TV, or similar
equipment.
When there is interference, it may be reduced or eliminated by taking the following
measures:
1.
Clean door and sealing surface of the oven.
2.
R
eorient the receiving antenna of radio or television.
elocate the microwave oven with respect to the receiver.
3. R
M
4.
ove the microwave oven away from the receiver.
lug the microwave oven into a different outlet so that microwave oven and receiver
5.
P
are on different branch circuits.

GGRROOUUNNDDIINNGG IINNSSTTRRUUCCTTIIOONNSS
his appliance must be grounded. This oven is equipped with a cord having a grounding
T
wire with a grounding plug. It must be plugged into a wall receptacle that is properly
installed and grounded. In the event of an electrical short circuit, grounding reduces risk of
electric shock by providing an escape wire for the electric current. It is recommended that
a separate circuit serving only the oven be provided. Using a high voltage is dangerous
and may result in a fire or other accident causing oven damage.
WARNING Improper use of the grounding plug can result in a risk of electric shock.
Note:
f you have any questions about the grounding or electrical instructions, consult a
1.
I
qualified electrician or service person.
2. N
either the manufacturer nor the dealer can accept any liability for damage to the oven
or personal injury resulting from failure to observe the electrical connection
procedures.
The wires in this cable main are colored in accordance with the following code:
Green and Yellow = EARTH
Blue = NEUTRAL
Brown = LIVE
MMIICCRROOWWAAVVEE CCOOOOKKIINNGG PPRRIINNCCIIPPLLEESS
1.
rrange food carefully. Pl ace thickest areas towards outside of dish.
A
2.
W
atch cooking time. Cook for the shortest amount of time indicated and add more as
needed. Food severely overcooked can smoke or ignite.
Cover foods while cooking. Covers prevent spattering and help foods to cook evenly.
3.
urn foods over once during microwaving to speed cooking of such foods as chicken
4.
T
and hamburgers. Large items like roasts must be turned over at least once.
R
5.
earrange foods such as meatballs halfway through cooking both from top to bottom
and from the center of the dish to the outside.
BBEEFFOORREE YYOOUU CCAALLLL FFOORR SSEERRVVIICCEE
If
the oven fails to operate:
1.
C
heck to ensure that the oven is plugged in securely. If it is not, remove the plug from
the outlet, wait 10 seconds, and plug it in again securely.
2.
heck for a blown circuit fuse or a tripped main circuit breaker. If these seem to
C
ating properly, test the outlet with another appliance.
oper
heck to ensure that the control panel is programmed correctly and the timer is set.
C
3.
Check to ensure that the door is securely closed e ngaging the doo r sa fety lock system .
4.
Otherwise, the microwave energy will not flow into the oven
be
IF NONE OF THE ABOVE RECTIFIES THE SITUATION, THEN CONTACT A QUALIFIED
TECHNICIAN. DO NOT TRY TO ADJUST OR REPAI R THE OVEN YOURSELF.
UUTTEENNSSIILLSS GGUUIIDDEE
T
1.
he ideal material for a microwave utensil is transparent to microwave, it allows energy
to pass through the container and heat the food.
icrowave cannot penetrate metal, so metal utensils or dishes with metallic trim
2. M
should not be used.
o not use recycled paper products when microwave cooking, as they may contai
D
3.
mall metal fragments which may cause sparks and/or fires.
s
R
4.
ound /oval dishes rather than square/oblong ones are recommend, as food in
corners tends to overcook.
arrow strips of aluminum foil may be used to prevent overcooking of exposed areas.
5.
N
But be careful don’t use too much and keep a distance of 1 inch (2.54cm) between foil
and cavity
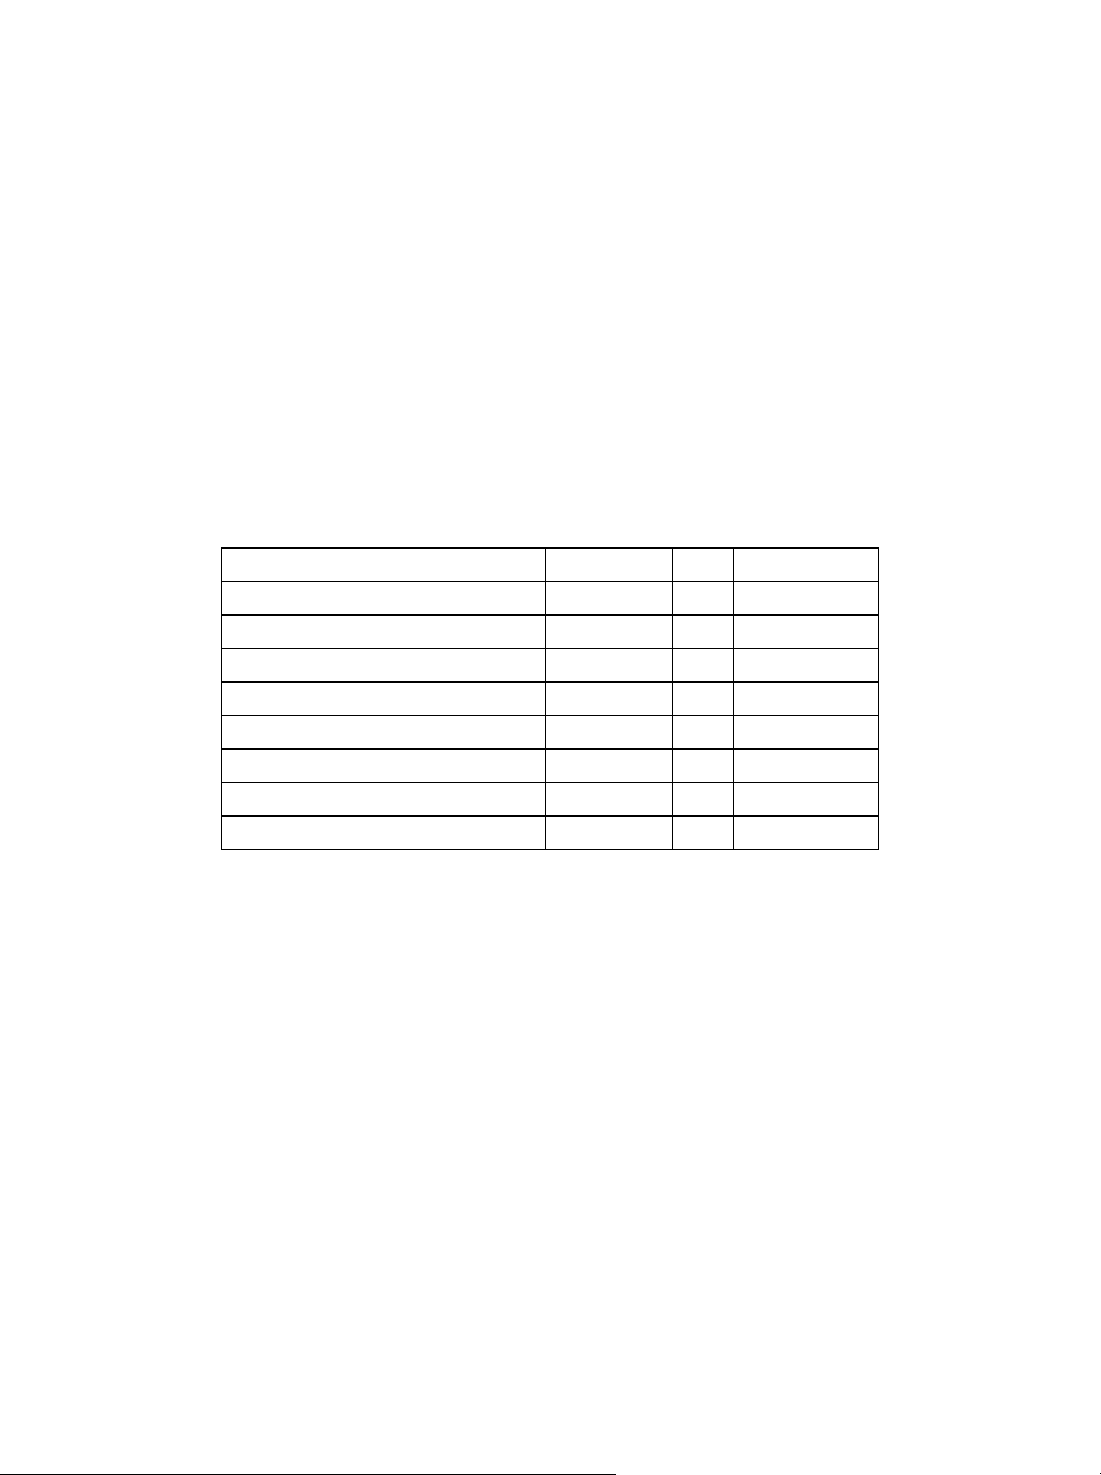
The list below is a general guide to help you select the correct utensils.
Cookware Microwave Grill Combination
H
eat–Resistant Glass Yes Yes Yes
on Heat–Resistant Glass No No No
N
eat–Resistant Ceramics Yes Yes Yes
H
M
icrowave–Safe Plastic Dish Yes No No
K
itchen Paper Yes No No
etal Tray No Yes No
M
etal Rack No Yes No
M
luminum Foil & Foil Container No Yes No
A
n

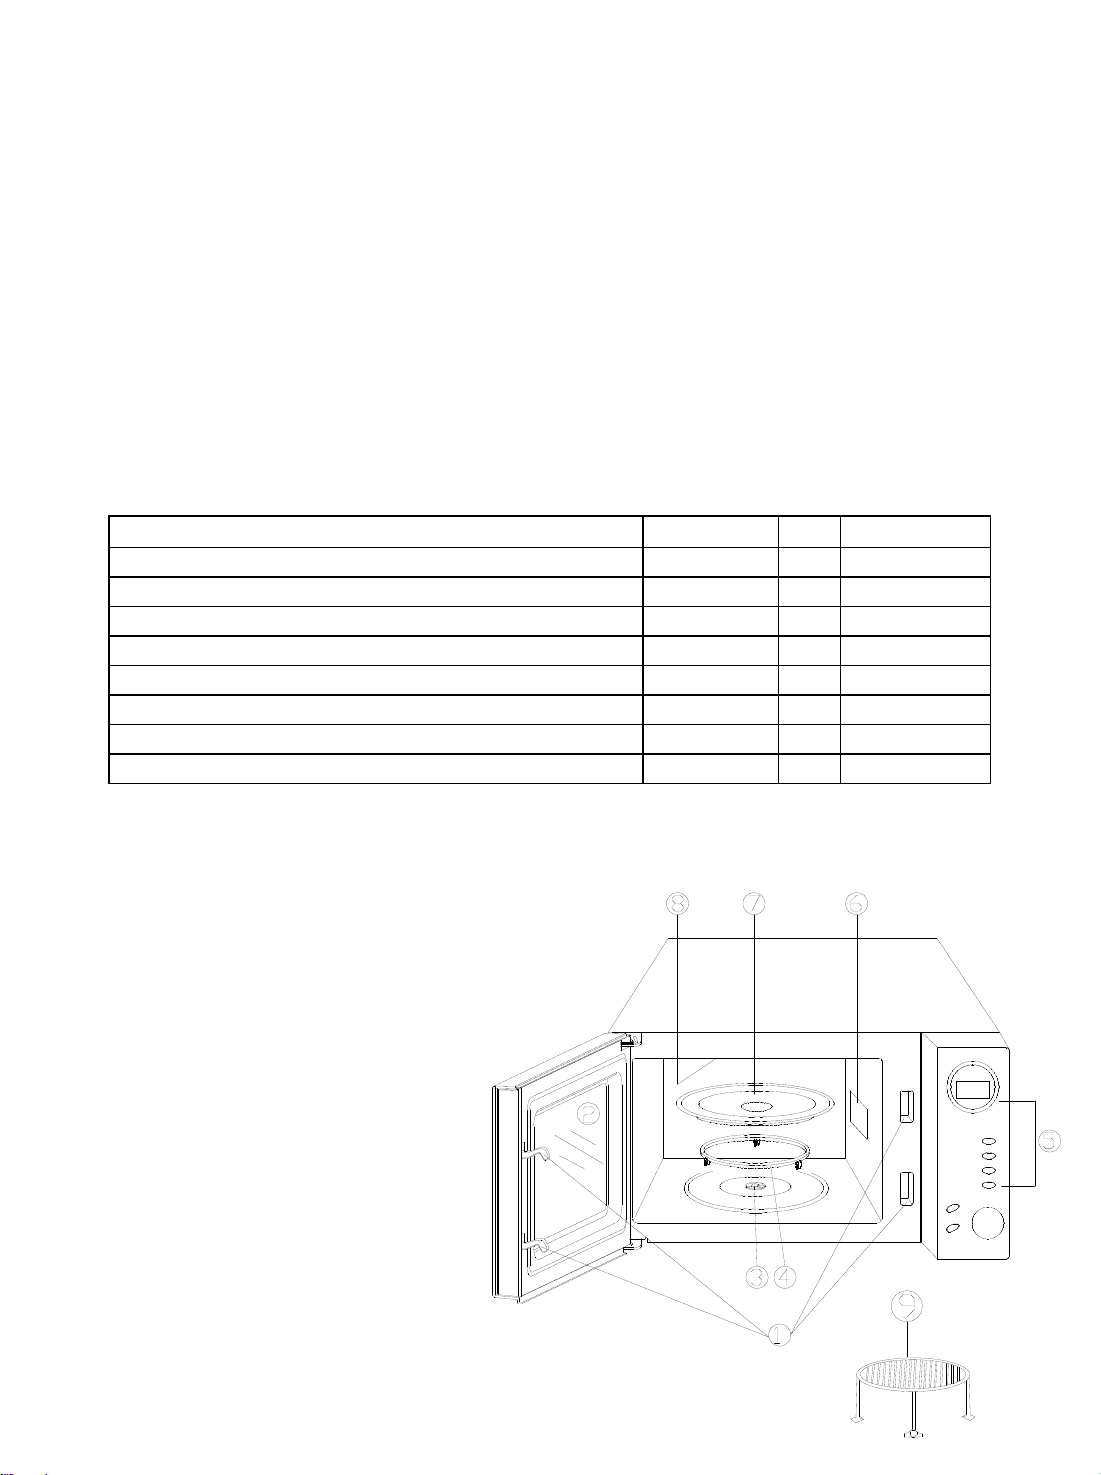
PPAARRTT NNAAMMEESS
1. Door Safety Lock System
2. Oven Window
3. Shaft
4. Roller Ring
5. Control Panel
6. Wave Guide(Please do not r emov e t he
mica plate covering the w ave guide)
7. Glass Tray
8. Grill Heater
9. Metal Rack
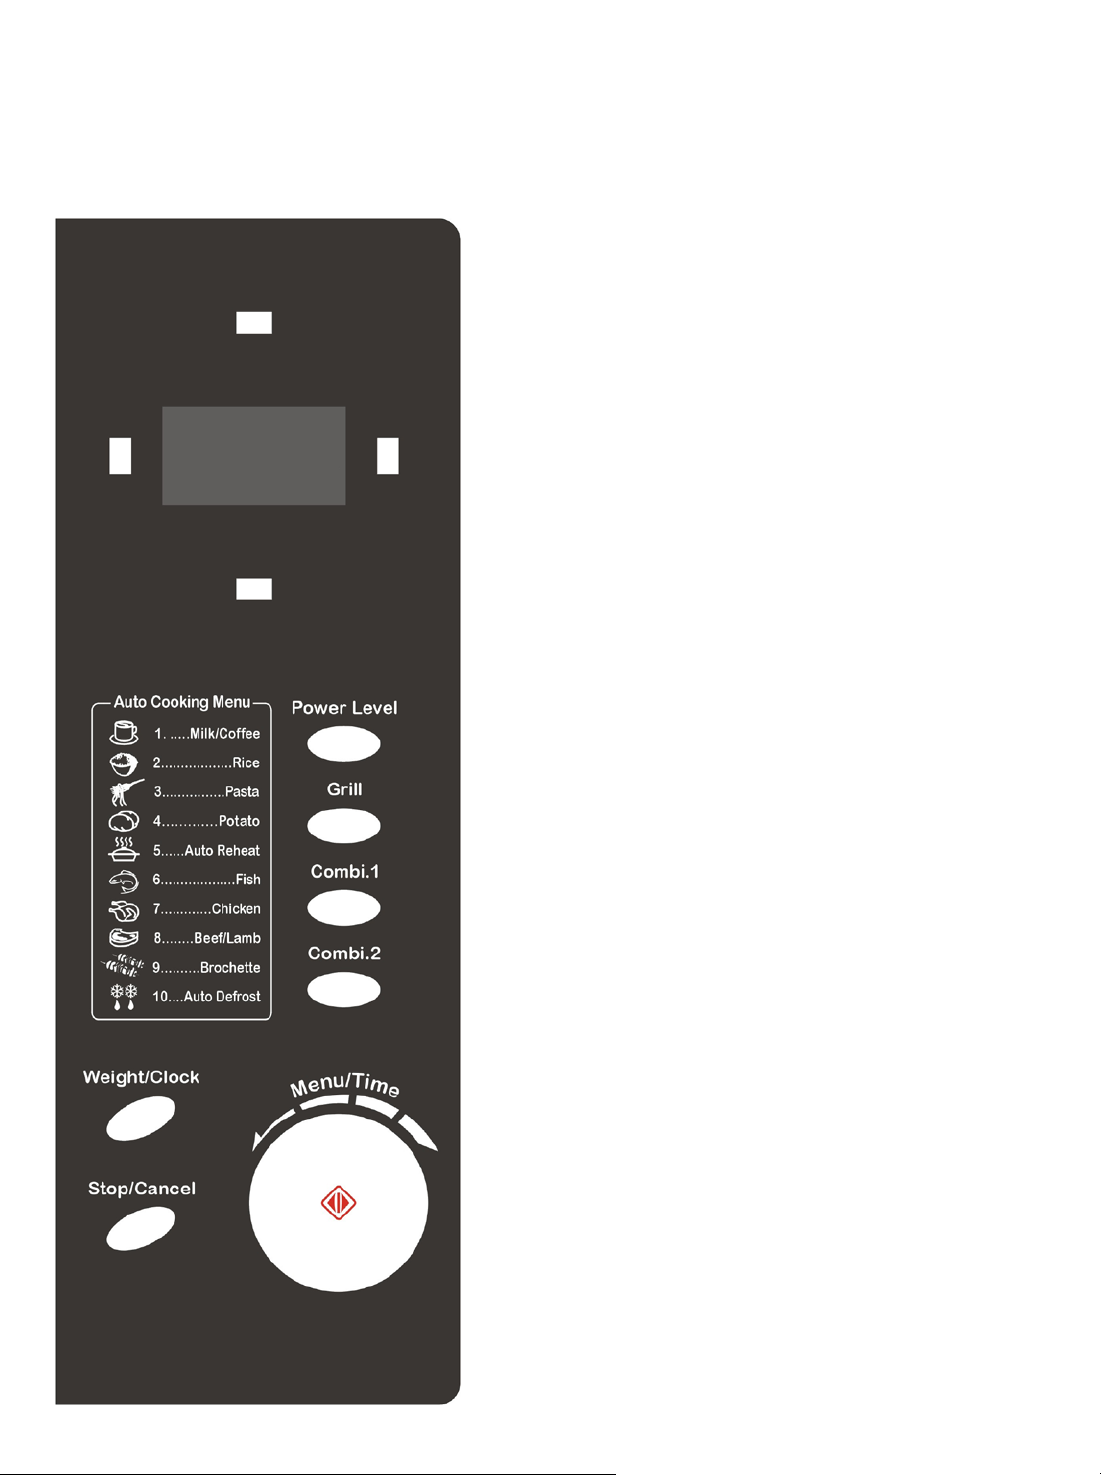
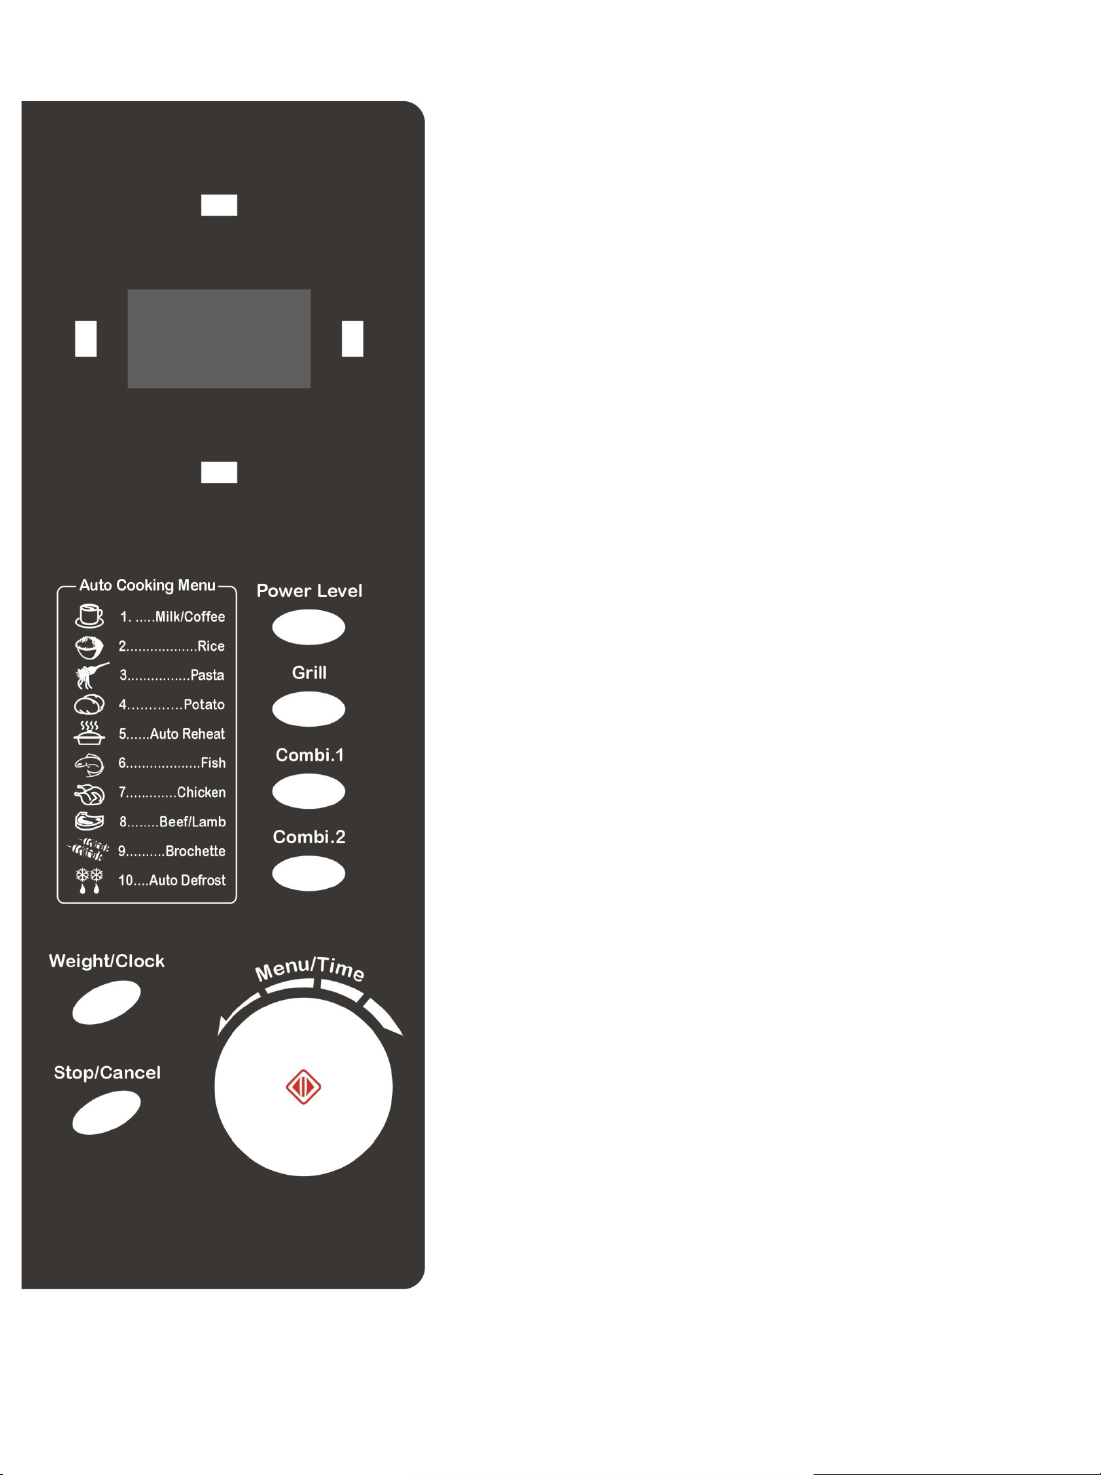
CCOONNTTRROOLL PPAANNEELL
D
isplay Screen
Cooking time, power, indicators and present time
are displayed.
Power Level
Touch this button a number of times to set
microwave cooking power level.
Grill
To uch to set a g rilling cooking pr ogram.
Combi.1 & Combi.2
To uch to set a c ombinati on cooking program.
Weight / Clock
Press a number of times to specify weight.
Stop/Cancel
Press to cancel setting or reset the oven before
setting a cooking program.
Press once to temporarily stop co oking, or twic e to
cancel cooking altogether.
It is also used for setting child lock.
Menu/Time
Turn the dial to input cooking time, select the kind of
food you want to cook.
Start/Quick Start
Touch to start a cooking program.
Simply touch it a number of times to set cooking
time and the oven will cook immediately at full power
level.

HHOOWW TTOO SSEETT TTHHEE OOVVEENN CCOONNTTRROOLLSS
ach time a button is touched, a beep will sound to acknowledge the touch.
E
During cooking program ,pr ess STOP/CANCEL to pause it, then press start/quick start to
resume the rest program. Or press STOP/CANCEL t wice to cancel the program.
After a cooking or defrosting program has completed, the oven will automatically continue
to sound every two minutes until the door is opened or STOP/CANCEL is touched. (This
note is available for other cooking programs.)
During the setting mode, the system will return to waiting mode if there is not any
operation within 20 seconds.
SET
TING
HE
T
CLO
CK
It is a 24-hour cycle clock.
FOR EXAMPLE: Suppose you want to set the oven clock time to 8:30.
1.Press WEIGHT/CLOCK once.
2. Turn MENU/TIME dial to indicate the hour digit 8.
3. Press WEIGHT/CLOCK once again.
4. Turn MENU/TIME dial to indicate the minute digits until the screen shows 8: 30.
5. Press WEIGHT/CLOCK to confirm the setting.
NOTE:
o check clock time during cooking, press the WEIGHT/CLOCK once, the time will
T
splayed for 5 seconds.
di
TART
S
UICK
Q
be
This feature allows you to start the oven quickly.
In waiting mode, press START/QUICK START a number of times to set the cooking time
(the maximum is 10 minutes), the oven starts work at full power level immediately.
OKING
CO
M
ICROWAVE
o cook with microwave power alone, press the POWER LEVEL button a number of times
T
to select a cooking power level, and then use the MENU/TIME dial to set a desired
cooking time. The longest cooking time is 95 minutes.
For example, suppose you want to cook for 1 minute at 60% of microwave power.
1.
I
n waiting mode, place food into oven ,close it.
ress POWER LEVEL button 3 times.
2. P
PRESS POWER LEVEL BUTTON COOKING POWER
O
nce 100%
Tw
ice 80%
3
times 60%
times 40%
4
times 20%
5
6
times 00%

3.
T
urn MENU/TIME dial clockwise to 1:00.
ess START/QUICK START to start.
4.
Pr
Note:
During cooking program, you can check present power by pressing POWER LEVEL.
ILL
GR
The grill cooking is particularly useful for thin slices of meat, steaks, chops, kebabs,
sausages of piece of chicken. It is also suitable for hot sandwiches and au gratin dishes.
For example, suppose you want to grill for 12 minutes.
1. In waiting mode, place food into oven ,close it.
2. Press GRILL button once.
3. Turn MENU/TIME dial to 12:00.
4.Press START/QUICK START to start.
Note:
The longest grill cooking time can be set is 95 minutes.
1
MBINATION
CO
T
he longest cooking time is 95 minutes.
30% time for microwave cooking, 70% for grill cooking. Use for fish or au gratin.
FOR EXAMPLE: Suppose you want to set combination 1 cooking for 25 minutes.
. In
1
waiting mode, place food into oven ,close it.
2. Press COMBI. 1 button once.
3. Turn MENU/TIME dial to enter cooking time 25:00.
4.Press START/QUICK START to start.
CO
MBINATION
T
he longest cooking time is 95 minutes.
2
55% time for microwave cooking, 45% for grill cooking. Use for puddings omelettes, baked
potatoes and poultry.
FOR EXAMPLE: Suppose you want to set combination 2 cooking for 12 minutes.
1. In waiting mode, place food into oven ,close it.
2. Press COMBI. 2 button once.
3. Turn MENU/TIME dial to to enter cooking time 12:00.
4.Press START/QUICK START to start.
M
For
C
ENU
food or the following cooking mode, it is no t n ecessary to pro gram the duration and the
OOK
cooking power. It is sufficient to indicate the type of food that you wish to cook as well as
the weight of this food.
You need to turn food over at the middle of cooking time to obtain uniform cooking.
For example, to cook 400g of fish.
1. In waiting mode, place food into oven ,close it.
2.Turn MENU/TIME anti-clockwise to show food code(6).
3. Press WEIGHT/CLOCK to indicate weight of food.
4.Press START/QUICK START to start.
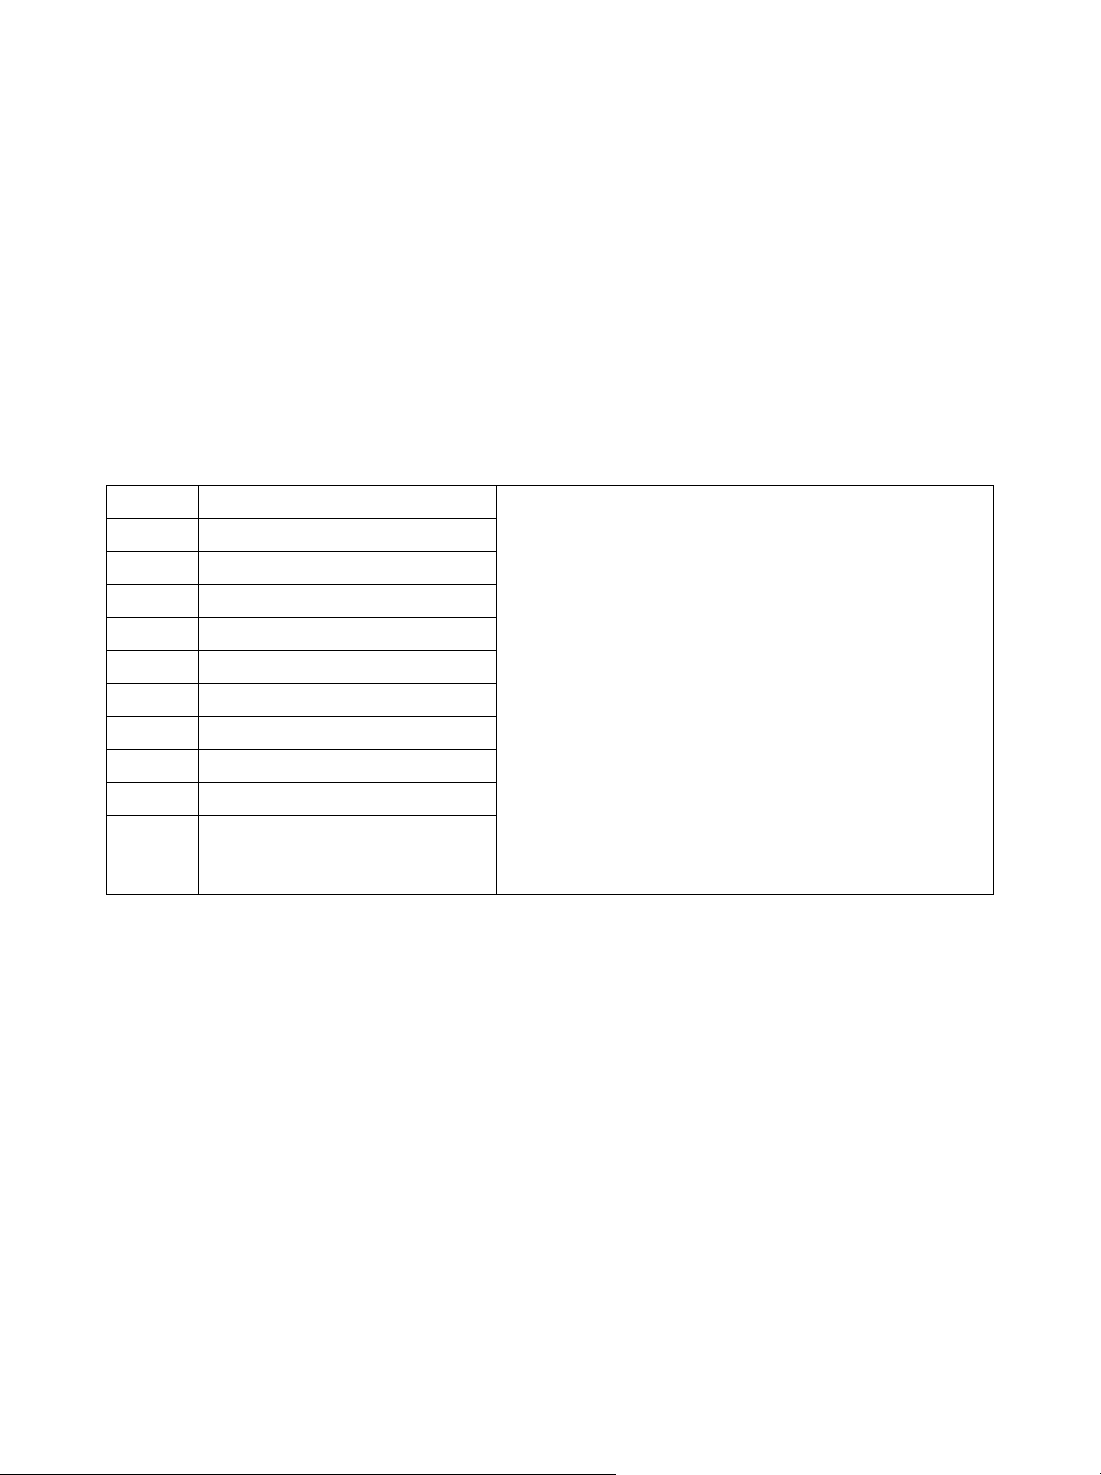
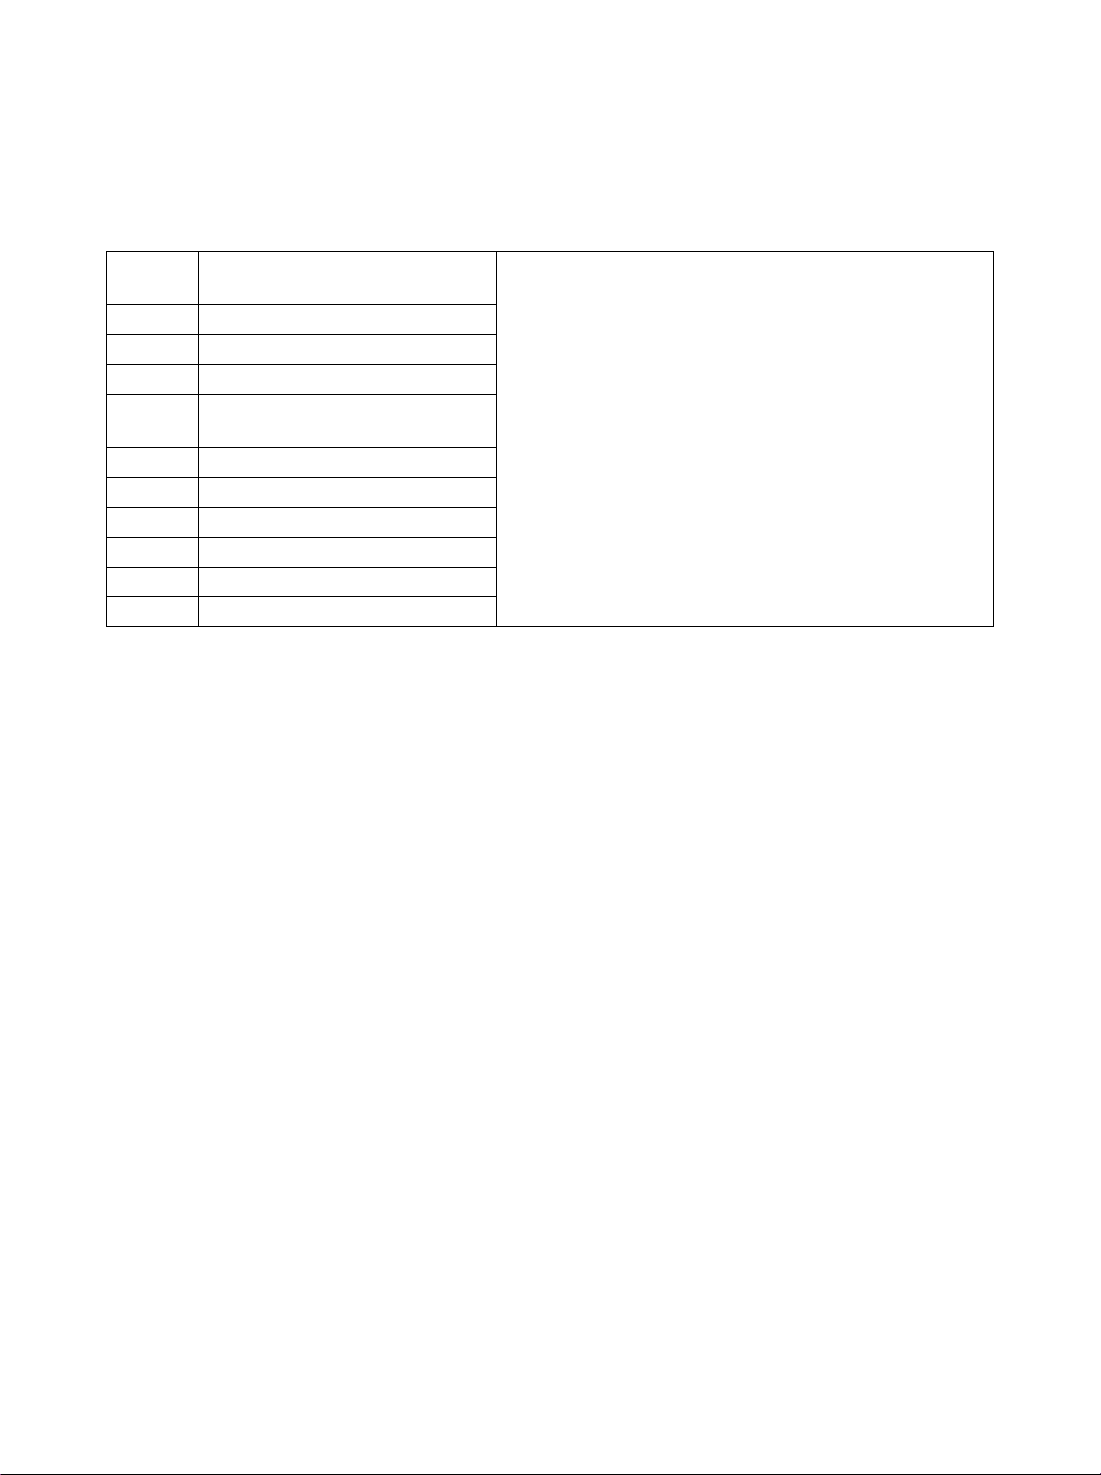
A
uto Cook Menu
Code Food/Cooking Mode
he result of auto cooking depends on
1 Milk/Coffee (
2 Rice(g)
3 Pasta(g)
200ml/cup)
1. T
factors such as the shape and size of food,
your personal preference as to the doneness
of certain foods and even how well you
4 Potato (230g/unit)
5 Auto Reheat (g
6 Fish (g
)
7 Chicken (g
8 Beef/Lamb (g
9 Brochette (g
)
)
)
)
happen to place food in the oven. If you find
the result at any rate not quite satisfactory,
please adjust the cooking time a little bit
accordingly.
2. For some foods, turn over in half cooking
time, s uch as chicken and beef, meet. This
would make better cooking result.
10 Auto defrost
3. For Spaghettis add boiling water before
cooking.

IGHT
WE
T
he oven allows the defrosting of meat, poultry, and seafood. The time and the defrosting power are
DE
FROST
adjusted automatically once the weight is programmed. The range weight of frozen foods varies
between 100g and 1800g.
FOR EXAMPLE: Suppose you want to defrost shrimp.
1. In waiting mode, place the shrimp to be defrosted into the oven.
2. Turn MENU/TIME dial auti-clockwise to select 10.
3. Press WEIGHT/CLOCK to enter the food weight (100g~1800g).
4.Press START/QUICK START to start.
NOTE:
During defrosting program, the system will pause and sound beeps to remind user to turn food over,
and then press START/QUICK START to resume the defrosting.
CHI
LD
ROOF
P
LO
CK
Use to prevent unsupervised operation of the oven by little children. The CHILD LOCK indicator will
show on display screen, and the oven cannot be operated while the CHILD LOCK is set.
To set the CHILD LOCK: Press and hold the STOP/CANCEL butt on for 3 seconds, a beep sounds
and LOCK indicator lights.
To cancel the CHILD LOCK: Press and hold the STOP/CANCEL button for 3 seconds until lock
indicator on display turns off.
E
CCLLEEAANNIINNGG AANNDD CCAARRE
urn off the oven and remove the power plug from the wall socket before cleaning.
1. T
2. Keep the inside of the oven clean. When food splatters or spilled liquids adhere to oven walls,
wipe with a damp cloth. Mild detergent may be used if the oven gets very dirty. Avoid the use of
spray and other harsh cleaners as they may stain, streak or dull the door surface.
3. The outside surfaces should be cleaned with a damp cloth. To prevent damage to the operatin
arts inside the oven, water should not be allowed to seep into the ventilation openings.
p
g
4. Wipe the door and window on both sides, the door seals and adjacent parts frequently with a
damp cloth to remove any spills or spatters. Do not use abrasive cleaner.
5. Do not allow the control panel to become wet. Clean with a soft, damp cloth. When cleaning the
control panel, leave oven door open to prevent oven from accidentally turning on.
6. If steam accumulates inside or around the outside of the oven door, wipe with a soft cloth. This
may occur when the microwave oven is operated under high humidity condition. And it is normal.
7. It is occasionally necessary to remove the glass tray for cleaning. Wash the tray in warm sudsy
water or in a dishwasher.
8. The roller ring and oven floor should be cleaned regularly to avoid excessive noise. Simply wipe
the bottom surface of the oven with mild detergent. The roller ring may be washed in mild sudsy
water or dishwasher. When removing the roller ring from cavity floor for cleaning, be sure to
replace in the proper position.
9. Remove odors from your oven by combining a cup of water with the juice and skin of one lemo
n a deep microwaveable bowl, microwave for 5 minutes. Wipe thoroughly and dry with a soft
i
cloth.
10. When it becomes necessary to replace the oven light, please consult a dealer to have it
n

repl
aced.
11. The oven should be cleaned regularly and any food deposits r emoved. Failure to maintain the
oven in a clean condition could lead to deterioration of the surface that could adversely affect the
life of the appliance and possibly result in a hazardous situation.
12. Please do not dispose this appliance into the domestic rubbish bin; it should be disposed to the
particular disposal center provided by the municipalities.
13. When the microwave oven with grill function is first used, it may produce slight smoke and smell.
This is a normal phenomenon, because the oven is made of a steel plate coated with lubricating
oil, and the new oven will produce fumes and odor generated by burning the lubricating oil. This
phenomenon will disappear after a period of using.
EENNVVIIRROONNMMEENNTT
CA
UTION :
Do not dispose of this product as it has with other household products. There is a separation of
this waste product into communities, you will need to inform your local authorities about the
places where you can return this product. In fact, electrical and electronic products contain
hazardous substances that have harmful effect s on the environment or human health and should
be recycled. The symbol here indicates that electrical and electronic equipment should be
chosen carefully, a wheeled waste container is marked with a cross.
Adeva SAS / H.Koenig Europe - 8 rue Marc Seguin, 77290 Mitry-Mory, France
www.hkoenig.com - sav@hkoenig.com - contact@hkoenig.com - Tél: +33 1 64 67 00 01

ANCAIS
FR
INS
TRUCTIONS IMPORTANTES DE SECURITE
Toujours suivre les instructions suivantes lorsque vous utilisez un appareil électrique
ATTENTION: La surexposition aux microondes peut provoquer des brulures.
1.
sez le manuel avant l´utilisation.
Li
2.
Ut
iliser l´appareil exclusivement selon les instructions décrites dans ce manuel. Ne
pas utiliser des substances corrosives ou vaporeuses pouvant endommager l´appareil.
Ce type de four est conçu pour réchauffer, cuire ou déshydrater les aliments. Il est
destiné à une utilisation domestique et n´est en aucun cas adapté à l´utilisation
industrielle ou en laboratoire.
3.
Ne pas
Ne jamais utilisé l´appareil si le câble d´alimentation ou la prise sont endommagés.
4.
utiliser vide.
Faites intervenir un professionnel pour les réparer avant d´utiliser l´appareil à
nouveau.
5.
AT
TENTION: Ne jamais laisser les enfants utiliser l´appareil sans la surveillance d´un
adulte responsable pour sa sécurité.
6.
7.
8.
9.
10.
11.
12.
13.
14.
15.
16.
17.
18. Cet
19. Ne pas
TENTION: Lors de l´utilisation des modes de cuisson combinés l´appareil peut
AT
dégager de la chaleur, il est conseillé de le maintenir hors de portée des enfants pour
éviter les brulures.
éviter que les aliments ne s´enflamment dans le four:
Pour
a.
Sur
veillez l´appareil lorsque vous réchauffez les aliments dans du plastique ou
papi
er
Tou
b
.
c.
d
.
ATTE
jours retirer tout élément métallique avant de mettre les aliments dans le four.
E c
as de fumée, débranchez l´appareil pour éviter l´inflammation des aliments.
Ne pas
laisser quoi que ce soit dans le four lorsque celui-ci n´est pas utilisé
NTION: Ne pas réchauffer la nourriture liquide ou solide dans un récipient
hermétique car celui-ci exploserait.
Réc
hauffer dans un four à microondes peut atteindre des températures très élevées,
soyez toujours prudent lorsque vous retirez un aliment ou un liquide de l´appareil
après l´avoir réchauffé.
amais frire les aliments dans le four à microondes : la quantité d´huile trop
Ne j
importante peut causer des brulures en éclaboussant ou même en explosant.
amais réchauffer des œufs dans leur coquille ou bien durs : ils explosent un fois
Ne j
réchauffés.
Per
cez les peaux des pommes de terre, des cucurbitacées ou bien des noix ou des
fruits comme les pommes pur éviter que leur peau trop épaisse ne retienne trop la
chaleur et les fasse exploser.
Tou
jours touiller les aliments pour bébé réchauffés et vérifier leur température avant de
les administrer pour éviter les brulures.
iliser des maniques pour retirer les plats ou ustensiles du four après les avoir
Ut
réchauffés.
jours s´assurer que les récipients et ustensiles sont adaptés à l´utilisation au four
Tou
microondes.
A
TTENTION: Ne jamais essayer de réparer l´appareil soit même seul un professionne
s
aurait se protéger d´éventuelles radiations.
Ce
produit est un équipement ISM (Industriel, Scientifique et Médical) Groupe
Cla
sse B. il produit intentionnellement des radio-fréquences sous la forme d´ondes
électromagnétique. Il est adapté à un usage domestique.
appareil n´est pas adapté pour être utilisé par toute personne souffrant d´un
handicap physique ou mental à moins d´être assisté par un adulte responsable de sa
sécurité.
laisser les enfants jouer avec l´appareil.
du
l
2

20.
Ut
iliser indépendamment.
21.
ENTION: Ne pas installer le four à microonde s au des sus d´un appareil produisant
ATT
de la chaleur, ceci l´endommagerait et annulerait la garantie.
22.
La surface de l´appareil peut chauffer pendant l´usage.
23.
24.
25.
26.
27.
Ne pas
La por
Les
Pl
Cet
installer l´appareil dans un placard fermé
te peut chauffer pendant l´utilisation.
surfaces environnantes peuvent chauffer pendant l´utilisation.
acer l´appareil contre un mur.
appareil n´est pas adapté pour être utilisé par toute personne ne connaissant pas
.
les règles de sécurité et d´utilisation décrites dans ce manuel.
28.
Tou
jours surveiller les enfants quand l´appareil est utilisé
tention: Si les joints de la porte sont endommagés, faites réparer par un
29.
At
professionnel avant d´utiliser l´appareil à nouveau
30.
Ne pas
utiliser l´appareil est conjonction avec un minuteur ou tout autre appareil
secondaire.
31.
32.
Cet
appareil est prévu pour un usage exclusivement domestique
Ne pas
enlever les équerres installées à l´arrière de l´appareil, elles sont prévues pour
.
assurer une distance minimale permettant à l´air de circuler au tour de l´appareil
jours s´assurer que le plateau tournant est fient installé avant d´introduire les
Tou
33.
aliments pour éviter d´endommager le mécanisme.
At
tention: Il est dangereux de faire réparer l´appareil par tout autre personne qu´un
34.
professionnel compétent car ceci pourrait compromettre la protection antiradiation.
Cet appareil est conçu exclusivement pour la cuisson et la décongélation d´aliments.
35.
Tou
36.
37.
38.
jours récupérer les ustensiles avec des maniques après cuisson ou réchauffage.
ntion! Il se peut que de la vapeur s´échappe lors vous dégagez les couvercles
Atte
ilms protecteurs des aliments.
f
appareil n´est pas adapté pour être utilisé par toute personne souffrant d´un
Cet
handicap physique ou mental à moins d´être assisté par un adulte responsable de sa
sécurité. Tout enfant ou toute personne souffrant d´un handicap doit être
préalablement avertie des dangers liés à l´utilisation de l´appareil
39.
En c
as de production de fumée, débranchez immédiatement l´appareil et faites
intervenir un réparateur avant de l´utiliser è nouveau
.
ou
PR
ECAUTIONS POUR EVITER LA SUREXPOSITION AUX MICROONDES
e jamais essayer de démarrer l´appareil avec la porte ouverte ou mal fermée.
N
1.
N
2.
e pas placer quoi que ce soit entre l´appareil et la surface sur laquelle il repose,
et éviter l´accumulation de poussière ou de saleté sous l´appareil.
e jamais se servir de l´appareil si celui-ci est endommagé. Il est particulièrement
3.
N
important que la porte fonctionne correctement, vérifiez donc les éléments
suivants avant l´utilisation
1)Porte (qu´elle ne soit pas déformée ou endommagée),
2)charnières et les loquets
3)Les joints de la porte.
4.
N
e jamais essayer de réparer l´appareil vous même, toute réparation mêm
m
inime doit être effectuée par un professionnel qualifié.
PECIFICATIONS
S
Pui
ssance 230-240V~ 50Hz
C
onsommation (Microondes) 1400W
Consommation (Grill) 1000W
uissance nominale du four à microondes: 900W
P
Fr
équence: 2450MHz
D
imensions extérieures: 281mm (H)×483mm(L)×420mm(P)
Dimensions intérieures: 220mm (H)×340mm(L)×344mm(P)
apacité du four: 25 Litres
C
iformité de cuisson: Cuisson rotative
Un
P
oids Net: Approx. 14.5 kg
e
NSTALLATION
I
1.
D
éballez l´appareil.
TTENTION: Toujours vérifier que l´appareil est en parfait état avant de l´utiliser
A
2.
érifiez l´état de la porte, des joints etc. En cas de dommage consulter un réparateur
v
qualifié.
lacez l´appareil sur une surface place et stable permettant de supporter le poids
3.
P
´appareil
l
4.
P
lacer l´appareil dans un endroit protégé de l´humidité et à l´abri de matériaux
s
ubstances inflammables.
L´
5.
air doit pouvoir circuler au tour du four. Laissez 20cm au dessus de l´appareil, 10cm
.
de
ou
à l´arrière et 5cm de chaque côté. Ne pas bloquer les sorties d´air de l´appareil ou
enlever les pieds.
e pas utiliser avant de s´assurer que le plateau de verre est correctement installé.
N
6.
ssurez vous que le câble d´alimentation est en parfait état avant toute utilisation.
A
7.
La pr
8.
ise doit toujours être accessible afin de pouvoir débrancher l´appareil en cas de
danger.
N
9.
e pas utiliser en extérieur.
NTERFERENCES RADIO
I
Le four à microondes peut causer des interférences avec d´autres appareils électroniques
tels que votre télévision, téléphones sans fil, routeur wifi, etc.
Vous pouvez réduire ces interférences en prenant les mesures suivantes :
1. N
ettoyez le joint de la porte du four.
:

éorienter l´antenne de vos appareils électroniques.
2.
R
éplacez votre four microondes en l´éloignant des appareils affectés.
D
3.
4.
D
éplacez votre four microondes en l´éloignant des récepteurs ou relais.
B
5.
ranchez le microondes sur une prise indépendante pour éviter qu´il ne soit branché
sur le même circuit que les autres appareils.
rancher l’appareil sur un circuit doté de prises terre
B
Cet appareil doit être branché sur un circuit doté de prises terre. Son câble d´alimentation
est doté d´un fil terre qui, en cas de court circuit, réduit les risques d´électrocution en
laissant le surplus d´énergie s’échapper par le fil de terre. Il est conseillé de brancher le
four sur une ligne réservée à son utilisation. L´utilisation sur un circuit à haute tension peut
endommager l´appareil.
TTENTION : Ne pas brancher l´appareil sur un circuit doté de prises terre peut
A
provoquer des électrocutions
N
ote:
1.
P
our toute question concernant la compatibilité électrique consultez un professionnel.
Ni le
2.
C
ode couleur pour les câbles:
fabricant, ni le revendeur ne peuvent être tenus pour responsables pour tout
bl
essure ou dommage causé par une mauvaise installation de l´appareil
e
Vert et Jaune = Terre
Bleu = Neutre
Marron = Chargé
P
rincipes de la cuisson par microondes
1.
lacez les aliments correctement dans le plat en veillant à tourner les parties les plus
P
épaisses vers les côtés du plat.
S
2.
urveillez la cuisson. Choisissez toujours le temps minimum conseillé et rallongez si
nécessaire. Cuire la nourriture trop longtemps peut amener la nourriture à
s´enflammer.
ouvrez les aliments pendant la cuisson, ceci permet d´éviter les éclaboussures et à
C
3.
obtenir une cuisson homogène.
jours tourner les aliments à moitié de cuisson, surtout pour cuire des aliments de
Tou
4.
grande taille ou épaisseur.
5.
aliments de petite taille doivent être réarrangés pendant la cuisson, non seulemen t
Les
retournés mais d´placez de l´intérieur vers l’extérieur du plat.
Avant de solliciter un réparateur
If Si le four ne s´allume pas
1.
V
érifier que la prise du four est correctement branchée.
érifiez que vous n´avez pas un plomb défaillant ou un problème avec le circuit
V
2.
électrique en lui même. Testez la prise avec un autre appareil que vous savez
fonctionner correctement.
3. Vérifiez que le panneau de control fonctionne.
4. V
érifiez que la porte est bien fermée.
i aucun des conseils ci-dessus ne fonctionne, sollicitez l´aide d´un réparateur, mais
S
n´essayez jamais de réparer l´appareil vous même.
UIDE des USTENSILES
G
1.
Dans l´idéal pour le four à microondes
il est conseillé d´utiliser des récipients
transparents pour que les ondes
puissent passer sans encombre.
2.
Les
outils métalliques sont à proscrire
lorsque vous utilisez le four à
microondes. Attention aux tasses avec
3.
Ne pas utiliser de papier recycle pour
la cuisson car ils peuvent contenir des
particules métalliques.
4.
U
tilisez des plats ronds ou ovales
plutôt que des plats carrés pour éviter
que les aliments ne cuisent trop dans
les recoins du plat.
un bord métallique également.
Li
ste des ustensiles à utiliser avec votre four microondes.
Ustensiles
V
erre résistant à la chaleur Oui Oui Oui
V
erre non résistant à la chaleur Non Non Non
C
éramique résistante à la chaleur Oui Oui Oui
C
ontenant en plastique adapté au four à microondes Oui Non Non
P
apier de cuisson Oui Non Non
P
lateaux en métal Non Oui Non
G
rille en métal Non Oui Non
P
apier ou contenants en aluminium Non Oui Non
Microondes Grill Combinaison
N
omenclature
1. Séc
urité de la porte
2. Porte du four
3. Toupie
4. Roller Ring
5. Support de plateau
6. Guide de radiation (Ne pas enlever
la protection de cette plaque)
7. Plateau en verre
8. Grill
9. Grille en métal
P
anneau de control
É
cran d´affichage
Temps de cuisson, puissance, modes et temps ou
heures s´y affichent.
Power Level (Puissance)
Pressez pour sélectionner la puissance de cuisson.
Grill
Pressez pour sélectionner le mode grill
Combi.1 & Combi.2
Pressez pour choisir un des deux modes cuisson
combinés.
Weight/Clock (Poids/Horloge)
Pressez pour sélectionner le poids.
Stop/Cancel (Arrêt/Annuler)
Pressez pour annuler un programme.
Pressez une fois pour mettre un programme en pause
pendant la cuisson ou deux fois pour annuler un
programme.
Est aussi utilisé pour annuler le Child Lock.
Menu/Time (Temps/Menu) (DIAL)
Tournez pour sélectionner le temps de cuisson ou le
type de cuisson souhaité.
Start/Quick Start (Temps/Menu)
Pressez pour commencer un programme.
Appuyez un certain nombre de fois pour programmer le
temps de cuisson et le four démarrera auto matiquement
à puissance maximale.

MENT
COM
p retentit chaque fois que vous pressez un bouton.
Un bi
PRO
GRAMMER
LE FOUR A MI
CROONDES
Pendant la cuisson le programme peut être mis en pause en appuyant sur le bouton
STOP/CANCEL, pour le reprendre il suffit dappuyer à nouveau sur le bouton
STOP/CANCEL.
Vous pouvez presser le bouton STOP/CANCEL deux fois de suite pour annuler le
programme en cours.
Une fois un programme terminé, une alarme vous avertira toutes les 2 minutes jusqu´à ce
que la porte du four soit ouverte ou jusqu’à ce que vous appuyiez sur le bouton
STOP/CANCEL.
Pendant la programmation du four, les programmations effectuées s´annuleront
automatiquement si vous interrompez votre programmation pendant plus de 20 secondes.
HORLOGE
L´
GRAMMER
PRO
C´est une horloge à 24 heures.
PAR EXEMPLE: Supposons que vous voulez programmer l´heure du four à 8:30.
1. Pressez le bouton WEIGHT/CLOCK une fois.
2. Tournez le bouton MENU/TIME pour choisir le chiffre des heures et mettez le sur 8.
3. Pressez le bouton WEIGHT/CLOCK à nouveau.
4. Tournez le bouton MENU/TIME pour choisir le chiffre des minutes et mettez le sur 30.
5. Pressez une dernière fois le bouton WEIGHT/CLOCK pour confirmer.
NOTE:
vérifier l´horloge pendant la cuisson appuyez sur le bouton WEIGHT/CLOCK, l´heure
Pour
s´affichera pendant 5 secondes.
RT
STA
CK
QUI
Cette option permet de lancer la cuisson instantanément.
Pressez le bouton START/QUICK START plusieurs fois pour sélectionner le temps de
cuisson (le temps maximum est de 10 m inutes), le four microondes commence la cuisson
instantanément à puissance maximale.
CUIS
SON
CROONDES
MI
Pour cuire uniquement aux microondes, presse le bouton POWER LEVEL autan de fois
qu´indiqué ci-dessous pour choisir la puissance de cuisson avant de tourner le bouton
MENU/TIME pour choisir le temps de cuisson.
Le temps de cuisson le plus long est de 95 minutes.
I
SSANCE DE CUISSON
PRESS
1 f
2 foi
3 foi
4 fo
5 foi
6 fo
EZ LE BOUTON POWER LEVEL
oi
s 100%
s 80%
s 60%
is 40%
s 20%
is 00%
PU

PA
EXEM
R
PUISSANCE DU FOUR MICROONDES
P
lacez les aliments dans le four.
1.
P
2.
ressez le bouton POWER LEVEL 3 fois (pour 60%).
ournez le bouton MENU/TIME dans le sens des aiguilles d´une montre pour
T
3.
SUPPOSONS QUE VOUS VOULEZ CUIRE PENDANT 1 MINUTE A
PLE:
.
60%
DE LA
sélectionner 1:00.
essez START/QUICK START pour lancer la cuisson.
4.
Pr
Note:
Pour vérifier la puissance de cuisson pendant la préparation vous pouvez presser le
bouton POWER LEVEL.
GR
ILL
Le temps de cuisson le plus long est de 95 minutes.
Idéal pour les coupes de viande, les steaks, les côtelettes, les kebabs, les s aucisses et les
morceaux de poulet. Convient aussi pour griller les sandwichs et les gratins.
EXEM
PAR
NUTES
MI
1. P
lacez les aliments dans le four.
PLE:
.
PPOSONS QUE VOUS VOULEZ ACTIVER LE MODE
SU
GR
ILL
ENDANT
P
12
2. Pressez le bouton GRILL une fois
3. Tournez le bouton MENU/TIME pour sélectionner 12 :00.
4.Pressez START/QUICK START pour lancer la décongélation.
CO
CU
ISSON
Le t
emps de cuisson le plus long est de 95 minutes.
MBINEE
1
30% du temps de cuisson à microondes et 70% d u temps de cuisson au grill. Idéal pour le
poisson et les gratins.
EXEM
PAR
P
ENDANT
1. P
25
lacez les aliments dans le four.
PLE:
M
INUTES
SU
PPOSONS QUE VOUS VOULEZ ACTIVER LE MODE
.
CO
MBINAISON
1
2. Pressez le bouton COMBI. 1 une fois
3. Tournez le bouton MENU/TIME pour sélectionner 25 :00.
4. Pressez START/QUICK START pour lancer la cuisson.
MBINEE
CO
ISSON
CU
emps de cuisson le plus long est de 95 minutes.
Le t
2
55% du temps de cuisson à microondes et 45% du temps de cuisson au grill. Idéal pour
les puddings, les omelettes, les pommes de terre et la volaille.
PAR
EXEM
PENDANT 12 MINUTES
1. P
lacez les aliments dans le four.
PLE:
SUPPOSONS QUE VOUS VOULEZ ACTIVER LE MODE
.
MBINAISON
CO
2
2. Pressez le bouton COMBI. 2 une fois
3. Tournez le bouton MENU/TIME pour sélectionner 12 :00.
4.Pressez START/QUICK START pour lancer la cuisson.
DE
CUI
M
ENU
Lor
sque vous utilisez les modes de cuisson automatiques, il n´est pas nécessaire de
SSON
programmer la puissance ou le temps, bien que vous puissiez l es adapter à v os besoins si
nécessaire. Il suffit de choisir le programme qui correspond à ce que vous souhaitez
préparer et d´en indiquer le poids.
Pour obtenir une cuisson homogène, pensez à tourner les aliments à la moitié du temps
de cuisson.
P
ar exemple, pour cuire 400g de poisson
1. Placez le poisson dans le four.
2. Tournez le bouton MENU/TIME dans le sens contraire des aiguilles d´une montre et
placez le sur 6.
3.Pressez WEIGHT/CLOCK pour entrer le poids (entre 100g et 1800g soit ici, 40 0g).
4.Pressez START/QUICK START pour lancer la cuisson.
NU DE CUISSON AUTOMATIQUE
E
M
C
ode
1 Lai
2 Riz (g
3 S
4
5 Réc
6 Poisson (g)
7 P
8 B
9 B
10 Déc
Nourriture / Mode de
cuisson
t / Café (200ml / 1 tasse)
)
paghettis (g)
Pommes de
terre (230g /
unité)
hauffer (g)
oulet (g)
œuf / Mouton (g)
rochette (g)
ongélation Automatique
1. La
forme et la taille des aliments a un effet
sur les résultats de cuisson, vos gouts vont
aussi influencer vos attentes (ex : aimez
vous la viande bien cuite ou bleue ?) C´est
pour cela que vous pouvez adapter le temps
de cuisson en cas de besoin
2. Pour certains aliments comme la viande il
est conseiller de les tourner à la moitié du
temps de cuisson.
3. Pour les Spaghettis ajoutez de l´eau
bouillante avant de commencer la cuisson.
D
ECONGELATION
four permet de décongeler la viande, la volaille et les fruits de mer. Le temps et la
Le
puissance décongélation se calculent automatiquement une fois que vous indiquez le
poids (entre 100g et 1800g).
EXEMPLE: Supposons que vous voulez décongeler des crevettes.
1. Placez les crevettes dans le four.
2. Tournez le bouton MENU/TIME dans le sens contraire des aiguilles d´une montre et
placez le sur 10.
3.
P
ressez WEIGHT/CLOCK pour entrer le poids (entre 100g et 1800g).
4.Pressez START/QUICK START pour lancer la décongélation.
N
OTE:
Pendant le programme de décongélation, le système se mettra en pause et un bip vous
rappellera de tourner la nourriture, il suffira de presser START/QUICK START pour
décongeler.
ERROUILLAGE SECURITE ENFANTS
V
our la sécurité des enfants, vous pouvez activer pendant le CHILD LOCK sur le panneau
P
de control pour empêcher que le four ne s´active tant que le CHILD LOCK est actif.
Pour activer le CHILD LOCK: Pressez le bouton STOP/CANCEL pendant 3 secondes, une
fois que le bip retentit le symbole LOCK s´allume.
Pour désactiver le CHILD LOCK: Pressez le bouton STOP/CANCEL pendant 3 secondes,
jusqu´à ce que le symbole LOCK s´éteigne.
 Loading...