

Page 1
English
Deutsch
Manual 1.0
Page 2
Important Safety Instructions! Read before connecting!
This product has been built by the man ufacturer in accordance w ith IEC 60065 and left th e factory in safe working
order. To maintain th is condition and ensure n on-risk operation, the us er must follow the advice and warning
comments foun d in the operating instru ctions. If this product s hall be used in vehicles, ships or aircraft or at altitudes
exceeding 200 0 m above sea level, take care of the relevant saf ety regulations which may exceed the IEC 60065
requirements.
WARNING: To prevent the ri sk of fire and shock hazar d, do not expose this app liance to moisture or rai n. Do not open
case – no use r serviceable parts insid e. Refer service to quali fied service personnel.
• This product is capabl e of delivering sound pre ssure levels in excess of 90 dB, which may cause p ermanent hearing
damage! Expos ure to extremely high noi se levels may cause a per manent hearing loss. Wear hearing protection if
continously e xposed to such high level s.
• The manufacturer only guarantees the safety, reliability and efficiency of this pro duct if:
- Assembly, extension, re-adjustme nt, modifications or repai rs are carried out by the manufacturer or by perso ns
authorized to do so.
- The electrical install ation of the relevant are a complies with the requi rements of IEC (ANSI) spe cifications.
- The unit is used in ac cordance with the operati ng instructions.
- The unit is regularly checked and tested for el ectrical safety by a comp etent technician.
This symbol, wherever it appears, aler ts you to the presence of uninsulated dangerous vo ltage inside the
enclosure – v oltage that may be suffici ent to constitute a risk of shock.
This symbol, wherever it appears, aler ts you to the presence of externally accessible ha zardous voltage.
External wiri ng connected to any termi nal marked with this symb ol must be a “ready made cable” complying with the
manufacturers recommendations, or must be a wiring installed by instructed persons only.
This symbol, wherever it appears, aler ts you to important opera ting and maintenance inst ructions in the
accompanying literature. Read the manu al.
This symbol, wherever it appears, tell s you: Take care! Hot s urface! To prevent burn s you must not touch.
• Read these instruction s.
• Keep these instruction s.
• Follow all warnings and ins tructions marked on the p roduct and in this manual .
• Do not use this produc t near water. Do not place the prod uct near water, baths, wash basins, kitchen sinks, wet areas ,
swimming pool s or damp rooms.
• Do not place objects c ontaining liquid on the p roduct – vases, glasses, bottles etc.
• Clean only with dry cl oth.
• Do not remove any cove rs or sections of the hou sing.
• The set operating volt age of the product must m atch the local mains supp ly voltage. If you are no t sure of the type of
power availab le consult your dealer or local power company.
• To reduce the risk o f electrical shock, the g rounding of this product must be maintained. Use o nly the power supply
cord provided with this product, and m aintain the function of t he center (grounding) pin of the mains connection at
any time. Do not defeat the safety pur pose of the polarized or grounding-type plug.
• Protect the power cord from being walked on or pinched particularly at p lugs, convenience recepta cles, and the point
where they ex it from the device! Power supply cords should alwa ys be handled carefully. Periodical ly check cords for
cuts or sign of stress, especially at the plug and the point wh ere the cord exits the de vice.
• Never use a damaged po wer cord.
• Unplug this product du ring lightning storms or when unused for long peri ods of time.
• This product can be fu lly disconnected from mai ns only by pulling the ma ins plug at the unit or t he wall socket. The
product must be placed in such a way a t any time, that disconne cting from mains is easil y possible.
• Fuses: Replace with IEC127 (5x20mm) typ e and rated fuse for best performance only! It is prohibited to use “patche d
fuses” or to short the fuse-holder. Replacing an y kind of fuses must only be carried out by qualifi ed service personal.
• Refer all servicing to qualified service personn el. Servicing is required when the unit has been d amaged in any way,
such as:
- When the power cord or plug is damaged or fraye d.
- If liquid has been spi lled or objects have fall en into the product.
- If the product has bee n exposed to rain or mois ture.
- If the product does no t operate normally when t he operating instructions are followed.
- If the product has bee n dropped or the cabinet has been damaged.
• Do not connect externa l speakers to this produc t with an impedance lower than the rated impedance given on the
product or in this manual. Use only ca bles with sufficient cross section according to the local safety regulations .
• Keep away from direct sunlight.
• Do not install near he at sources such as radiat ors, heat registers, stov es or other devices that produce heat.
• Do not block any venti lation openings. Install in accordance with manufa cturer’s instructions. Th is product must not
be placed in a built-in installation s uch as a rack unless prop er ventilation is provide d.
• Always allow a cold de vice to warm up to ambien t temperature, when being moved into a room. Condensa tion can
form inside i t and damage the product, when being used without warming up.
• Do not place naked flam e sources, such as lighte d candles on the product.
• The device must be pos itioned at least 20 cm/8" away from walls.
• Use only with the cart , stand, tripod, bracket or table specified by the manufacturer or sold with the product. When a
cart is used, use caution when moving the cart/product combinat ion to avoid injury from tip-over.
• Use only accessories r ecommended by the manufac turer, this applies for all kind of accessori es, for example
protective co vers, transport bags, sta nds, wall or ceiling moun ting equipment. In case o f attaching any kind of
accessories t o the product, always fol low the instructions for use, provided by the manu facturer. Never use fi xing
points on the product other than speci fied by the manufacturer.
• This appliance is NOT suitable to be used by an y person or persons (incl uding children) with limi ted physical,
sensorical or mental ability, or by persons with insufficient experience a nd/or knowledge to operat e such an
appliance. Ch ildren under 4 years of a ge must be kept away from this appliance at all ti mes.
• Never push objects of any kind into this produc t through cabinet slots a s they may touch dangerou s voltage points or
short out par ts that could result in r isk of fire or electric sh ock.
General Notes on Safety for Loudspeaker Systems
Mounting syst ems may only be used for those loudspeaker systems authorized by the manufa cturer and only
with the moun ting accessories specified by the manufacturer in t he installation instructi ons. Read and heed the
manufacturer’ s installation instructio ns. The indicated load-be aring capacity cannot be guaranteed and the
manufacturer will not be liable for da mages in the event of imp roper installation or the use of unauthorized moun ting
accessories.
The system’s load-bearing capacity can not be guaranteed and the manufacturer will not be liable for damages in th e
event that lo udspeakers, mounting acce ssories, and connecting a nd attaching components a re modified in any way.
Components affec ting safety may only be r epaired by the manufactur er or authorized agents, otherwise the operating
permit will b e voided.
Installation may be performed qualified personnel only, and then only at p ick-points with sufficient loadcarrying capa city and in compliance wi th local building regulat ions. Use only the mounti ng hardware specified by t he
manufacturer in the installation instr uctions (screws, anchors, etc.). Take all the pr ecautions necessary to en sure
bolted connec tions and other threaded locking devices will not loosen.
Fixed and por table installations (in t his case, speakers and mo unting accessories) must be secured by two
independent s afeties to prevent them f rom falling. Safeties mus t be able to catch access ories or parts that are l oose or
may become lo ose. Ensure compliance wi th the given national reg ulations when using conne cting, attaching, and
rigging devic es. Factor potential dynamic forces (jerk) in to the equation when dete rmining the proper size a nd loadbearing capac ity of safeties.
Be sure to ob serve speaker stands’ max imum load-bearing capacit y. Note that for reas ons of design and
construction, most speaker stands are approved to bear centric loads only; that is, the speakers’ mass has to be
precisely cen tered and balanced. Ensur e speaker stands are set up stably and securely. Take appropriate added
measures to s ecure speaker stands, for example when:
- the floor or ground surface does not provide a stable, secure base.
- they are ex tended to heights that im pede stability.
- high wind p ressure may be expected.
- there is th e risk that they may be k nocked over by people.
Special measu res may become necessary as precautions against un safe audience behavior. Do not set up speaker
stands in eva cuation routes and emerge ncy exits. Ensure corrido rs are wide enough and pu t proper barriers and
markings in p lace when setting speaker stands up in passageways . Mounting and dismountin g are especially
hazardous tas ks. Use aids suitable for this purpose. Observe th e given national regulati ons when doing so.
Wear proper protectio n (in particular, a helmet, gloves, and safety shoes) and us e only suitable means of ascent
(ladders, sca ffolds, etc.) during insta llation. Compliance with thi s requirement is the sole responsibility of the com pany
performing th e installation.
After instal lation, inspect the syste m comprised of the mounti ng fixtures and loudspeake rs to ensure it is
properly secu red.
The operator of loudspeaker systems (fi xed or portable) must reg ularly inspect or task a third party to regularly
inspect all s ystem components in accor dance with the given coun try’s regulations and hav e possible defects repair ed
immediately.
We also strongly reco mmend maintaining a logbo ok or the like to documen t all inspections.
When deployin g speakers outdoors, be s ure to take into account the stability and load-be aring capacity of platfor ms
and surfaces; loads and forces exerted by wind, snow, and ice; as well as thermal influences. Also be sure to provide
sufficient saf ety margins for the riggi ng points used for flown s ystems. Observe the given national regulations whe n
doing so.
Professional loudspeaker systems can p roduce harmful volume lev els. Even prolonged exposure to seemingly
harmless leve ls (starting at about 95 dBA SPL) can cause perman ent hearing damage! There fore we recommend that
everyone who i s exposed to high volume l evels produced by loudspea ker systems wears professi onal hearing protection
(earplugs or earmuffs).
Manufacturer: Stamer Musikanlagen GmbH , Magdeburger Str. 8, 66606 St. Wendel, Ger many
Version 2.2 01/2011
Page 3

Wichtige Sicherheitshinweise! Bitte vor Anschluss lesen!
Dieses Produk t wurde gemäß IEC 60065 h ergestellt und hat das Werk in ei nem sicheren, betriebsfäh igen Zustand
verlassen. Um diesen Zustand zu erhalt en und um einen gefahrlos en Betrieb zu gewährleist en, ist es notwendig, das s
der Benutzer die Empfehlungen und Warnhinweise befolgt, die in der Betri ebsanleitung zu finden sin d. Bei Einsatz
dieses Produk tes in Fahrzeugen, Schiffen oder F lugzeugen, oder in Höhen oberhalb 2000 m Meereshöh e müssen die
entsprechende n Sicherheitsstandards zu sätzlich zur IEC 60065 be achtet werden.
WARNUNG: Um d as Risiko von Feuer oder Strom schlag zu verhüten, darf dieses Gerät nicht Feuchtigkei t oder Regen
ausgesetzt we rden. Öffnen Sie das Gehä use nicht – im Inneren gi bt es keine Bauteile, die vom Benutzer wartbar sin d.
Die Wartung darf nur v on einem qualifiziertem Ku ndendienst durchgeführt w erden.
Dieses Symbol , wo immer es erscheint, warnt Sie vor gefährliche r, nicht isolierter S pannung im Gehäuse –
Spannung, die möglicherweise genügt, e ine Stromschlaggefahr dar zustellen.
Dieses Symbol , wo immer es erscheint, warnt Sie vor außen zugän glicher, gefährlicher Spannung. Eine
Verbindung zu jeder A nschlussklemme, die mit d iesem Symbol versehen ist , darf nur mit konfektion iertem Kabel
hergestellt w erden, dass den Empfehlun gen des Herstellers genüg t, oder mit Kabel, das vo n qualifiziertem Personal
installiert w urde.
des Geräts, d ie vom Hersteller vorgese hen sind.
• Dieses Gerät ist NICHT geeignet für eine Person oder Personen (einschlie ßlich Kindern) mit einges chränkten
physischen, s ensorischen und geistigen Fähigkeiten, oder f ür Personen mit unzulängl icher Erfahrung und/oder
Fachkenntnis, um solch ein Gerät zu bedienen. K inder unter 4 Jahren soll ten stets von diesem Gerä t fern gehalten
werden.
• Es sollten keinerlei G egenstände durch die Gehä useschlitze eingeführt we rden, da dadurch gefährli che,
spannungsführ ende Bauteile berührt ode r kurzgeschlossen werden können. Dies könnte zu ei ner Feuer- oder
Stromschlagge fahr führen.
• Dieses Gerät ist imsta nde, Schalldruckpegel von mehr als 90 dB zu produz ieren. Dies könnte zu ein em dauerhaften
Hörschaden fü hren! Eine Belastung durc h extrem hohe Geräuschpeg el kann zu einem dauerhaf ten Gehörverlust
führen. Bei e iner anhaltenden Belastun g durch solch hohe Pegel sollte ein Gehörschutz ge tragen werden.
• Der Hersteller gewährl eistet die Sicherheit, Zu verlässigkeit und Leistun g des Gerätes nur unter f olgenden
Voraussetzungen:
- Einbau, Erweiterung, N eueinstellung, Modifikatio nen oder Reparaturen werd en vom Hersteller oder au torisiertem
Personal ausg eführt.
- Die elektrische Instal lation des betreffenden B ereiches entspricht den A nforderungen der IEC (ANS I) Maßgaben.
- Das Gerät wird entspre chend der Bedienungsanlei tung benutzt.
- Das Gerät wird regelmä ßig von einem fachkundige n Techniker auf elektri sche Sicherheit geprüft u nd getestet.
Dieses Symbol , wo immer es erscheint, macht Sie auf wichtige Be dienungs- und Wartungsanweisungen
aufmerksam, d ie in beiliegenden Unterl agen zu finden sind. Bitte lesen Sie das Handbuch.
Dieses Symbol , wo immer es erscheint, sagt Ihnen: Vorsicht! Heiße Oberfl äche! Um Verbrennungen zu
vermeiden, ni cht anfassen.
• Bitte lesen Sie diese Anweisungen.
• Bewahren Sie diese Anw eisungen auf.
• Befolgen Sie alle Warnhinweise und Anweisungen auf dem G erät und in dieser Anleit ung.
• Benutzen Sie dieses Ge rät nicht in der Nähe von Wasser. Stellen Sie das Gerä t nicht in der Nähe von Wasser,
Badewannen, Waschbecke n, Küchenspülen, nassen S tellen, Schwimmbecken ode r feuchten Räumen auf.
• Stellen Sie keine Gefä ße, wie Vasen, Gläser, Flaschen usw., die Flüssigkeite n enthalten, auf das Gerä t.
• Reinigen Sie das Gerät nur mit einem trockenen Tuch.
• Entfernen Sie keine Ab deckungen oder Teile des Gehäuses.
• Die auf dem Gerät eing estellte Betriebsspannung muss mit der örtlichen S pannung der Netzstromvers orgung
übereinstimme n. Wenn Sie sich n icht sicher sind, welche Spannung in Ihrem Netz zu r Verfügung steht, konsultieren
Sie bitte Ihr en Händler oder den örtli chen Stromversorger.
• Um das Risiko eines St romschlags zu verringern, muss die Erdung des Gerä tes beibehalten werden. Verwende n Sie
nur das mitge lieferte Stromführungskab el und behalten Sie die Funktion der seitlichen, geerdete n Schutzkontakte des
Netzanschluss es immer aufrecht. Versuchen Sie nicht, die Sicherheitsauf gabe des geerdeten Stecke rs zu umgehen.
• Schützen Sie das Strom führungskabel vor Betrete n und Quetschen, besonder s in der Nähe der Stecker,
Gerätesteckdo sen – und dort, wo sie am Gerät austreten! Stromfü hrungskabel sollten immer vorsichtig behandelt
werden. Kontr ollieren Sie die Stromfüh rungskabel in regelmäßige n Abständen auf Einschnit te und Anzeichen von
Abnutzung, be sonders in der Nähe des S teckers und an der Verbindung zum Gerät.
• Benutzen Sie niemals e in beschädigtes Stromführ ungskabel.
• Ziehen Sie bei Gewitte rn den Stecker des Geräte s und wenn das Gerät über einen längeren Zeitraum nicht benutzt
wird.
• Dieses Gerät wird nur vollständig von Stromnetz getrennt, wenn der Steck er vom Gerät oder aus der Steckdose
gezogen wird. Das Gerät sollte so aufg estellt werden, dass das Trennen vom Stromnetz l eicht möglich ist.
• Sicherungen: Ersetzen Sie Sicherungen nur mit d em Typ IEC127 (5x20m m) und dem korrekten Nenn wert, um
die optimale Leistung zu gewährleisten ! Es ist untersagt, kurzg eschlossene Sicherungen z u verwenden oder den
Sicherungshal ter zu überbrücken. Siche rungen dürfen nur von qua lifiziertem Personal gewec hselt werden.
• Alle Wartungsarbeiten sollten n ur von qualifiziertem Pers onal ausgeführt werden. Wartung i st notwendig, wenn das
Gerät auf irg endeine Weise beschädigt wurde, w ie zum Beispiel:
- Wenn das Stromf ührungskabel oder der Ste cker beschädigt oder abge nutzt ist.
- Wenn Flüssigkei t oder Gegenstände in das Gerät gelangt sind.
- Wenn das Gerät Regen oder Feuchtigkeit ausges etzt war.
- Wenn das Gerät nicht ordnungsgemäß funkt ioniert, obwohl die Bedie nungsanleitung beachtet w urde.
- Wenn das Gerät hingefallen ist oder das Gehäuse beschädigt wurde.
• Beim Anschluss von Lau tsprechern an dieses Gerä t darf die auf dem Gerät oder in dieser Anleitung angegebene
Mindestimpeda nz nicht unterschritten w erden. Die verwendeten Ka bel müssen entsprechend d en lokalen Regelungen
über einen au sreichenden Querschnitt v erfügen.
• Halten Sie das Gerät v om Sonnenlicht fern.
• Installieren Sie das G erät nicht in der Nähe vo n Wärmequellen, wie zum Beispiel Heizkörper, Heizregis ter, Öfen oder
anderen Gerät en, die Hitze erzeugen.
• Verstopfen Sie nicht die Lüftungsöffnung en. Installieren Sie das Gerät entsprechend der An leitung des Herstellers.
Das Gerät dar f nicht eingebaut werden – wie zum Beispiel in ein en Gestellrahmen, es sei denn, dass für angemessen e
Belüftung ges orgt wird.
• Ein kaltes Gerät sollt e immer auf die Umgebungs temperatur erwärmt werden , wenn es in einen Raum t ransportiert
wird. Es könn te sich Kondensation im I nneren bilden, die das Ge rät beschädigt, wenn es o hne vorherige Erwärmung
benutzt wird.
• Stellen Sie keine offe nen Flammen, wie brennend e Kerzen, auf das Gerät.
• Das Gerät sollte minde stens 20 cm von Wänden aufgestellt werden.
• Das Gerät darf nur mit Rollwagen, Ständern, Sta tiven, Tischen oder Halte rungen benutzt werden, di e vom Hersteller
spezifiziert s ind oder zusammen mit dem Gerät verkauft wurden. Wenn ein Rollwagen benutzt wird, s eien Sie
vorsichtig, w enn Sie die Rollwagen/Ger äte-Kombination transport ieren, um Verletzungen durch Umki ppen zu
vermeiden.
• Verwenden Sie n ur Zubehör, das vom Hersteller empf ohlen ist. Das gilt für a lle Arten von Zubehör, wie zum Beis piel
Schutzabdecku ngen, Transporttaschen, Ständer sowie Wand- und Deckenhal terungen. Wenn Sie irgendein Zube hör
am Gerät anbr ingen, befolgen Sie immer die Anleitungen des Hers tellers. Benutzen Sie nur die Befestigungspunkte
Allgemeine Sicherheitshinweise für Lautsprechersysteme
Befestigungss ysteme dürfen ausschließl ich für die vom Herstelle r freigegebenen Lautsprec hersysteme und mit
dem in der Mo ntageanleitung genannten Montage-Zubehör verwendet werden. Die Montagehinwe ise des Herstellers
sind dabei un bedingt zu beachten. Bei unsachgemäßer Montage bzw. Verwendung von n icht freigegebenem Montag eZubehör kann die angegebene Belastung nicht garantiert und kein erlei Haftung seitens des Herstellers übernommen
werden.
Sollten Änder ungen an Lautsprechern, a n Montage-Zubehör, Verbindungs- und Befesti gungselementen sowie
Anschlagmitte ln vorgenommen werden, ka nn die Tragfähigkeit de s Systems nicht mehr gara ntiert werden und seitens
des Herstelle r keinerlei Haftung übern ommen werden.
Reparaturen a n sicherheitsrelevanten B auteilen dürfen nur vom H ersteller oder Bevollmäch tigten durchgeführt
werden, ander nfalls erlischt die Betri ebserlaubnis.
Die Installat ion darf ausschließlich d urch Sachkundige und nur an Montagepunkten mit aus reichender
Tragfähigkeit, ggf. unter der Berücksichtigung von Bauauflagen, erfolgen. Das vom Hersteller in der Mo ntageanleitung
vorgeschriebe ne Befestigungsmaterial ( Schrauben, Dübel, etc.) m uss verwendet werden. Sch raubverbindungen
müssen durch geeignete Maßnahmen gegen Lösen gesichert sein.
Ortsfeste ode r mobile Installationen ( hier Lautsprecher inkl. M ontagezubehör) müssen dur ch zwei unabhängig
voneinander w irkende Einrichtungen geg en Herabfallen gesichert sein. Lose Zusatzteile od er sich lösende Teile
müssen durch geeignete Einrichtungen a ufgefangen werden können. Bei Verwendung vo n Verbindungs- und
Befestigungse lementen sowie Anschlagmi tteln sind die nationalen Vorschriften zu b eachten. Hinsichtlich der
Bemessung der Sicherungsmittel sind mö gliche dynamische Belastu ngen (Ruckkräfte) mit zu berücksichtigen.
Bei Stativen ist vor allem die maximal e Traglast zu beachten. Außerdem sind die meiste n Stative aus
konstruktiven Gründen nur für das Tragen von genau zentrischer Belastung zug elassen. Stative müssen s tandsicher
aufgestellt w erden. Stative sind durch geeignete Maßnahmen zusä tzlich zu sichern, wenn z um Beispiel:
- ihre Aufsta ndfläche keinen sicheren S tand zulässt,
- ihre Höhen die Standsicherheit einsc hränken,
- mit zu hohe m Winddruck zu rechnen is t,
- damit zu re chnen ist, dass sie durch Personen umgestoßen werd en.
Besondere Maß nahmen können auch zur Vorsorge g egen gefährdendes Verhalten von Zuschauern erforderlich w erden.
Stative dürfe n nicht in Flucht- und Re ttungswegen aufgestellt w erden. Bei Aufstellung in Verkehrswegen ist auf die
erforderliche Breite der Wege und auf ordnungs gemäße Absperrung sowie K ennzeichnung zu achten. B eim Auf- und
Absetzen ist eine besondere Gefährdung gegeben. Hierzu sind gee ignete Hilfsmittel zu ver wenden. Es sind hierbei d ie
nationalen Vorschrift en zu beachten.
Während der Montage is t geeignete Schutzausrüst ung (insbesondere Kopfsch utz, Handschuhe und
Sicherheitssc huhe) zu tragen und es si nd nur geeignete Aufstieg shilfen (Leitern, Gerüste , etc.) zu verwenden. Die
Verantwortung dafür l iegt alleine beim ausführ enden Installationsbetrie b.
Nach der Mon tage ist die Aufhängung d es System aus Halterung u nd Lautsprecher auf siche re Befestigung zu
überprüfen.
Der Betreiber von Lautsprechersystemen (ortsfest oder mobil) is t verpflichtet, alle Syste mkomponenten unter
Berücksichtig ung der jeweils nationale n Regelungen regelmäßig z u überprüfen bzw. prüfen zu lassen und mögliche
Schäden unver züglich beseitigen zu las sen.
Weiterhin raten wir d ringend zu einer ausführl ichen Dokumentation aller Überprüfungsmaßnahmen
in Prüfbücher n o.ä.
Beim Einsatz von Lautsprechern im Freien sind für Standsicherheit und Tragfähigkeit von Aufba uten und Flächen
insbesondere a uch die Windlasten, Schnee- und Eislasten sowie thermi sche Einflüsse zu berücksich tigen. Insbesondere
die Lastaufna hmepunkte geflogener Syste me sollten hier mit ausre ichenden Sicherheitsreser ven dimensioniert werden.
Es sind hierb ei die nationalen Vorschriften zu beachten.
Professionell e Lautsprechersysteme sin d in der Lage, gesundheit sschädliche Schallpegel z u erzeugen. Selbst
die Einwirkun g scheinbar harmloser Sch allpegel über einen länge ren Zeitraum kann zu blei benden Schäden am Gehör
führen (ab ca . 95 dBA SPL)! Daher rate n wir für alle Personen, die durch den Betrieb von Lautsprechersystemen dem
Einfluss hoher Schallpegel ausgesetzt s ind, zum Tragen von pro fessionellem Gehörschutz (Ohrstöpsel oder
Kapselgehörsc hutz).
Hersteller: S tamer Musikanlagen GmbH, Magdeburger Str. 8, 66606 St. Wendel, Deuts chland
Version 2.2 01/2011
Page 4
Consignes de sécurité importantes ! A lire avant de se connecter !
Ce produit a été construit conformément à la norme IEC 60065 par l e fabricant et a quitté l ’usine en bon état de
marche. Pour garantir son intégrité et un fonctionnement sans r isque, l’utilisateur se d oit de suivre les conseil s et les
avertissement s préconisés dans cette n otice d’utilisation. En c as d’utilisation de ce pr oduit dans un véhicule te rrestre,
un navire ou un avion, ou encore à une altitude supérieure à 2 000 mètres, il convient d e prendre en considératio n les
normes de séc urité suivantes, en plus de la norme IEC 60065.
ATTENTION : Afin d’évit er tout risque d'incendie et d'électrocution, n'ex posez pas cet appareil à l’humidité ou à
la pluie. N’o uvrez pas le boîtier ; le s pièces se trouvant à l’ intérieur ne nécessitent pas d’entretien de la par t des
utilisateurs. Adressez-vous à un spéci aliste qualifié pour procé der à l'entretien de l'ap pareil.
Ce symbole, quel que soit l’endroit où il apparaît, vous signale d es pièces sous tension no n isolées dans le
boîtier. Une tension su ffisante pour présenter un risque d’électrocution.
Ce symbole, quel que soit l’endroit où il apparaît, vous signale d es pièces sous tension ac cessibles depuis
l’extérieur d u boîtier. Tous les câbles extéri eurs raccordés à un compo sant marqué de ce symbole doivent être de type
préfabriqués et conformes aux spécifica tions du fabricant ou doi vent avoir été installés par des spécialistes qual ifiés.
faire fonctio nner le présent appareil. Cet appareil doit dans tous les cas et être tenu constamment ho rs de portée des
enfants de mo ins de quatre ans.
• N’insérez jamais d'obj ets à travers les grilles du boîtier, car ils pourraient tou cher des pièces sous tens ion
dangereuses o u provoquer un court-circ uit pouvant causer un ris que d’incendie ou d’élect rocution.
• Cet appareil est capable de délivrer un niveau de pression acoustique de 90 dB, pouvant ainsi causer des troubles
irréversibles de l’audition ! L’exposition continue à une nuisance sonore peu t provoquer une perte d’a udition
permanente. P ortez des protections aud itives adéquates si vous vous exposez de manière c ontinue à un tel niveau d e
pression acou stique.
• Le fabricant garantit la sécurité, la fiabilité et l’efficacité de fonctio nnement de son produit un iquement si :
- l’assemblage, l’extens ion, le réajustement, la modification ou la réparat ion de l’appareil ont été effectués par le
fabricant ou par des personnes agréées pour ce genre de travaux .
- l’installation électri que concernée est conform e aux normes IEC (ANSI).
- l’unité est utilisée c onformément aux instructi ons d’utilisation.
- l’unité est régulièrem ent contrôlée et testée q uant à la sécurité électr ique par un technicien co mpétent.
Consignes de sécurité générales pour systèmes de haut-parleurs
Ce symbole, quel que soit l’endroit où il apparaît, vous signale d es instructions important es relatives à
l’utilisation ou l’entretien de l’appa reil à lire dans les docu ments l’accompagnant. Lis ez la notice d’utilisatio n.
Ce symbole, quel que soit l’endroit où il apparaît, vous signale u n risque de brûlure dû à une surface chaude.
Ne touchez pa s cette surface afin d’évi ter de vous brûler.
• Lisez ces instructions .
• Conservez ces instruction s.
• Prenez en compte tous les avertissements et tou tes les instructions ment ionnés sur le produit ou dans cette notice
d’utilisation .
• N’utilisez pas ce prod uit à proximité de l’eau. Ne le placez pas près de l’eau, d’une baignoire, d’un bassin, d’un évier,
d’une surface humide, d’une piscine ou d’une pièce humide.
• Ne mettez pas d’objet contenant du liquide sur l’appareil, par exemple, un vase, un verre ou une bouteille, etc.
• Nettoyez-le exclusivem ent avec un chiffon sec.
• N’enlevez pas le boîti er, ne serait-ce que partiellement.
• La tension de fonction nement de l’appareil doit être réglée de manière à correspondre à la tensio n d’alimentation
de l’endroit où vous vous trouvez. Si vous n’êtes pas sûr de co nnaître la tension d’alim entation, demandez à votr e
revendeur ou à la compagnie d’électric ité locale.
• Afin de réduire le risq ue d’électrocution, vous ne devez jamais supprimer la mise à la terre de l’ appareil. Utilisez
uniquement le câble d’alimentation fou rni avec le produit et ma intenez la broche central e de la prise (mise à la terre)
en état de fo nctionnement. Ne négligez pas la sécurité offerte par les prises polarisées ou avec mise à la terre.
• Protégez le câble d’al imentation afin d’éviter q ue quelqu’un marche dessu s ou qu’il soit pincé, no tamment près de
la prise, de la prise murale ou à la s ortie de l’appareil même ! Les câbles d’alimentati on doivent être tout le t emps
maniés avec p récaution. Vérifiez régulièrement que le câble n’est pas fe ndu ou qu’il ne présente pas de signe d’usure,
en particulie r près de la prise et à l a sortie de l’appareil.
• N’utilisez jamais de c âble d’alimentation usé.
• Débranchez l’appareil en cas d’orage ou si vous ne l’utilisez pas pendan t une longue période.
• Débranchez l’appareil uniquement en le tenant p ar la prise au niveau de la prise murale ou de la rallonge. L’appareil
doit être pla cé de telle manière à ce qu’il puisse être débranc hé facilement à tout mome nt.
• Fusibles : si nécessaire, remplacez-les uniquement par des fusib les de type IEC127 (5x20 mm) afin de garantir
une meilleure performance. Il est inte rdit d’utiliser des fusib les bricolés ou de raccou rcir le porte-fusible. Se ul un
personnel qua lifié est habilité à rempl acer les fusibles.
• Confiez tous les travaux d ’entretien à des spéciali stes qualifiés. Il est néc essaire d’effectuer de te ls travaux lorsque
l’unité a été endommagée, comme par ex emple dans les cas suivan ts :
- Lorsque le câble d’ali mentation est endommagé o u effiloché.
- Si du liquide a pénétr é ou un objet est tombé d ans le boîtier.
- Si l’appareil a été ex posé à la pluie ou à l’hu midité.
- Si l’appareil ne fonct ionne pas correctement al ors que vous avez suivi t outes les instructions à la lettre.
- Si l’appareil est tomb é ou que le boîtier est e ndommagé.
• En cas de raccordement de haut-parleurs à cet a ppareil, il faut veiller à ne pas descendre sous l ’impédance minimale
indiquée sur ledit appareil ou dans la présente notice. Les câb les employés doivent prés enter une section suffisan te,
qui soit conf orme aux réglementations locales en vigueur.
• Ne l’exposez pas direc tement aux rayons du sole il.
• Ne l’installez pas à p roximité d’une source de chaleur, telle qu’un radiateur, une grille de chauffage , un four ou tout
autre apparei l susceptible de produire de la chaleur.
• Ne masquez pas les bou ches d’aération. Installe z l’appareil conformément aux instructions du fabr icant. Il ne doit
pas être plac é dans un emplacement con finé, comme un rack ou une console, sauf si une ven tilation suffisante est
garantie.
• Si vous déplacez l’app areil, attendez qu’il soit à température ambiante a vant de le démarrer, sinon de la con densation
peut se forme r à l’intérieur et endomm ager l’appareil.
• Ne posez pas de d’obje t à flamme ouverte sur l’a ppareil, comme par exempl e une bougie allumée.
• L’appareil doit être placé à au moins 20 cm/8" pouces du premier mur.
• Utilisez l’appareil un iquement avec un chariot, un support, un trépied, des fixations ou une table recommandés par
le fabricant ou vendus avec le produit . Si vous utilisez un cha riot, maniez-le avec préc aution afin d’éviter tout risque
de blessure s ’il se renverse.
• Utilisez uniquement le s accessoires recommandés par le fabricant. Cette con signe concerne toute sort e
d’accessoires , qu’il s’agisse de couve rcles de protection, de s acs de transport, de supp orts ou de dispositifs de
fixation au mu r ou au plafond. Si vous fixez un accessoire à l’ap pareil, suivez toujours l es instructions d’utilisa tion du
fabricant. N’ utilisez pas d’autres poi nts de fixation que ceux p réconisés par le fabrican t.
• Cet appareil NE convient PAS aux personnes dont le s capacités motrices, sen sorielles ou mentales son t déficientes
(y compris le s enfants) ou aux personn es ne disposant pas de l’ expérience ou des connais sances nécessaires pour
Les systèmes de fixation doivent exclus ivement être employés pou r les systèmes de haut-pa rleurs fournis par le
fabricant et avec les accessoires de m ontage tels qu’évoqués da ns la notice de montage. Dans ce cadre, il convien t de
respecter scr upuleusement les indicati ons de montage du fabrica nt. En cas d’utilisation non conforme d’accessoire s
ou d’installa tion d’accessoires de mon tage non d’origine, le do mmage en résultant éventu ellement ne sera pas couv ert
par la garant ie et la responsabilité d u fabricant ne pourra en aucun cas être engagée.
Si des modific ations sont apportées aux haut-parleurs, aux acces soires de montage, aux ra ccords et fixations ainsi
qu’au matérie l d’élingage, la portabil ité du système ne pourra plus être garantie et la responsabilité du fabrica nt ne
pourra en auc un cas être engagée.
Toute réparation d’élément s de sécurité ne peut êtr e effectuée que par le fa bricant ou son représenta nt agréé, faute de
quoi le permi s d’exploitation s’éteint .
L’installation sera exclusi vement réalisée par un sp écialiste, et ce, uniquem ent dans des zones de mon tage
présentant un e capacité de charge suffi sante, un point à vérifier notamment par la prise e n compte des normes de
construction appliquées. Le matériel d e fixation prescrit par le constructeur dans la not ice de montage (vis, chev illes,
etc.) doit im pérativement être employé . Les raccords boulonnés doivent être assurés cont re tout desserrement au
moyen de mesu res appropriées.
Les installat ions fixes ou mobiles (ici les haut-parleurs, acces soires de montage compris ) doivent être assurés
contre la chu te par deux dispositifs i ndépendants l’un de l’aut re. Les éléments suppléme ntaires lâches ou les piè ces se
desserrant do ivent pouvoir être retenu s par des dispositifs ada ptés. En cas d’utilisatio n de raccords, d’éléments de
fixation et de matériel d’élingage, il convient de respecter les dispositions nationales en la matière. Le calcul du
dimensionneme nt des dispositifs de séc urité requiert la prise e n compte des charges dyna miques possibles (forces de
recul).
En cas d’util isation de trépieds, il f aut surtout prendre en co nsidération la charge max imale supportée. En
outre, de par leur conception, la plup art des trépieds permette nt uniquement de supporte r des charges parfaitemen t
centrées. Les trépieds doivent dès lor s être disposés de façon stable. Il est nécessaire d’assurer les trépieds p ar des
mesures suppl émentaires dans les cas s uivants (liste non exhaus tive) :
- lorsque leu r surface de pose n’offre pas une stabilité suffisa nte ;
- lorsque leu r hauteur limite leur sta bilité ;
- lorsque la force du vent risque d’êt re élevée ;
- lorsqu’ils risquent d’être heurtés p ar des personnes.
Des mesures p articulières peuvent égal ement s’avérer nécessaire s, à titre préventif, pou r se prémunir contre des
comportements dangereux de la part de spectateurs. Les trépieds ne doivent donc pas être disposés dans des voies
d’évacuation ou des passages réservés aux secours. En cas d’ins tallation sur des voies d e circulation, veiller à respecter
la largeur de circulation requise, à v errouiller le secteur de façon adaptée et à mettre en place la signalisatio n idoine. Le
montage et le démontage sont des phase s qui présentent des risq ues particuliers. Il faut dès lors employer des mo yens
auxiliaires a ppropriés. Veiller également, lor s de ces opérations, à re specter la législation na tionale en la matière.
Lors du monta ge, il est indispensable de porter des équipements de sécurité adaptés (en particulier un casque,
des gants et des chaussures de sécurit é) et d’utiliser uniqueme nt des dispositifs d’aide à l’ascension adaptés (é chelles,
échafaudages, etc.). La responsabilité dans ce domaine incombe uniquement à la société d e montage exécutante.
À l’issue du montage, il y a lieu de contre-vérifier la fixation ou la suspension du syst ème (haut-parleurs et
supports).
L’exploitant des systèmes d e haut-parleurs (fixes ou mobiles) est tenu de véri fier, ou de faire véri fier, tous les
composants du système en fonction des réglementations en vigueu r dans le pays concerné, et de faire éliminer sans
délai les éve ntuels défauts constatés.
En outre, nou s recommandons fortement de constituer une documen tation détaillée sur tout es les mesures
d’inspection dans les registres de con trôle ou similaires.
En cas d’util isation de haut-parleurs en plein air, tenir compte, pour la stabilité et la capacité portante des structures
et surfaces, de l’influence de paramètr es tels le vent, la neige , la glace et autres fact eurs thermiques. Dans ce cas, il
convient en p articulier de dimensionne r avec des réserves de sé curité suffisantes les poi nts de support de charge de
systèmes susp endus. Veiller également, lors de ces opérations, à respec ter la législation nation ale en la matière.
Les systèmes de haut-parleurs professi onnels sont capables de p roduire des niveaux sonor es dangereux pour la
santé. Même d es niveaux sonores a prio ri inoffensifs peuvent, e n cas d’exposition prolon gée, provoquer des pertes
auditives irr éversibles (à partir de 9 5 dBA SPL environ) ! C’es t pourquoi nous conseillo ns à toutes les personnes
soumises à de s niveaux sonores élevés en raison de l’exploitati on de systèmes de haut-pa rleurs, de porter des
protections a uditives professionnelles (bouchons d’oreilles ou casques antibruit).
Fabricant : Stamer Mus ikanlagen GmbH, Magdeburg er Str. 8, 66606 St. Wendel, Allemagne
Version 2.2 01/2011
Page 5
Istruzioni di sicurezza importanti.
Leggere prima di effettuare il collegamento!
Il presente p rodotto è stato fabbricat o dal produttore in confo rmità alla norma IEC 6006 5 ed è uscito dallo
stabilimento in perfette condizioni di funzionamento. Per prese rvare tali condizioni e g arantirne l’uso sicuro, l ’utente
deve atteners i alle indicazioni e alle avvertenze riportate nel le istruzioni per l’uso. Se volete usare questo pr odotto
su veicoli, a bordo di navi o di aerei oppure ad altitudini sup eriori a 2000 m dovete ba dare alle rispettive norm e di
sicurezza sup pletive alla norma IEC 60 065.
AVVISO: Per evitare il rischio di incendio o folgorazione, non esporre l’apparecchio ad umidità o pioggia. Non aprire
l’involucro p oiché al suo interno non vi sono parti riparabili dall’utente. Per la ripar azione rivolgersi a perso nale
tecnico quali ficato.
Questo simbol o segnala la presenza all ’interno dell’involucro d i tensione pericolosa pri va di isolamento
sufficientemen te alta da costituire un pericolo di folgorazione.
Questo simbol o segnala la presenza di tensione pericolosa acces sibile dall’esterno. Il c ablaggio esterno
collegato ad un qualunque morsetto con trassegnato da questo sim bolo deve essere un cavo preconfezionato conforme
ai requisiti indicati dal produttore o un cablaggio installato da personale qualificato.
Questo simbol o segnala importanti istr uzioni per l’uso e la man utenzione nella documenta zione allegata.
Leggere il ma nuale.
Questo simbol o ha il seguente significa to: Attenzione! Superficie calda! Non toccare per e vitare scottature.
• Leggere queste istruzi oni.
• Conservare queste istruzi oni.
• Attenersi a tutti gli avvisi e istruzioni ripor tati sul prodotto e nel m anuale.
• Non utilizzare il prod otto vicino all’acqua. No n collocare il prodotto v icino ad acqua, vasche, l avandini, zone umide,
piscine o sta nze con presenza di vapor e.
• Non collocare sul prod otto oggetti contenenti l iquidi, quali vasi, bicch ieri, bottiglie ecc.
• Pulire solo con un pan no asciutto.
• Non togliere alcun cop erchio o parti dell’invol ucro.
• La tensione di eserciz io prescritta per il prod otto deve corrispondere a lla tensione di alimentaz ione della rete locale.
In caso di du bbi sul tipo di alimentaz ione disponibile, rivolge rsi al proprio rivenditor e o all’azienda di fornit ura
elettrica loc ale.
• Per ridurre il rischio di folgorazione, la mess a a terra del prodotto de ve essere mantenuta. Util izzare solo il cavo
di alimentazi one in dotazione al prodo tto e mantenere sempre in funzione il connettore c entrale (di terra) del
collegamento alla rete. Non escludere la funzione di sicurezza del connettore polarizzat o o di messa a terra.
• Proteggere il cavo di alimentazione affinché non venga calpestato o pizzi cato, in particolare in c orrispondenza
delle prese e degli innesti e nel punt o di uscita dal dispositi vo. Maneggiare sempre con cura i cavi di alimentaz ione.
Controllare peri odicamente la presenza di tagli o usura sui cavi, soprattutto all’altezza d ella presa e nel punto di
uscita dal di spositivo.
• Non utilizzare mai il cavo di alimentazione se danneggiato.
• Scollegare il prodotto in caso di temporale o d i lunghi periodi di inuti lizzo.
• Il prodotto si scolleg a completamente dall’alim entazione di rete solo st accando la spina di alime ntazione dall’unità
o dalla presa a muro. Il prodotto va c ollocato sempre in modo c he sia possibile scollega rlo dall’alimentazione co n
facilità.
• Fusibili: per garantire prestazioni ott imali, i fusibili utilizz ati come ricambio devono essere di tipo IEC127 (5x 20
mm) e dell’am peraggio nominale richies to. È vietato utilizzare fusibili riparati o corto circuitare il portafusibi li. Fate
sostituire i fusibili soltanto da un t ecnico qualificato.
• Per tutte le operazion i di riparazione, rivolge rsi a personale qualificat o. L’unità va riparata n el caso abbia subito
danni, come n ei seguenti casi:
- Il cavo o la presa di alimentazione sono danneg giati o usurati.
- È penetrato del liquid o o degli oggetti all’int erno del prodotto.
- Il prodotto è stato es posto a pioggia o umidità .
- Il prodotto non funzio na correttamente seguendo le istruzioni.
- Il prodotto ha subito una caduta o l’armadio è stato danneggiato.
• Quando collegate altop arlanti badate di non sce ndere sotto l’impedenza m inima dichiarata sull’app arecchio oppure
in questo man uale. Usate sempre cavi d ello spessore adatto e co rrispondenti alle vigenti norme locali.
• Non esporre ai raggi s olari diretti.
• Non installare accanto a fonti di calore quali radiatori, bocchette di d iffusione d’aria calda, f ornelli o altri dispositi vi
che generano calore.
• Non chiudere le apertu re di ventilazione. Insta llare l’unità seguendo le istruzioni fornite dal p roduttore. Il prodotto
non è adatto all’installazione ad inca sso, ad esempio in un rac k, a meno di non garantir e un’adeguata ventilazion e.
• Quando viene spostato all’interno di un locale, attendere sempre che il dispositivo, se freddo, r aggiunga la
temperatura a mbiente. Qualora venga ut ilizzato senza che si sia riscaldato, sussiste il rischio di formazione di
condensa al s uo interno e di conseguen ti danni.
• Non collocare sul prod otto fiamme libere, come a d esempio candele accese.
• Il dispositivo va coll ocato ad almeno 20 cm/8" di distanza dalle pareti.
• Utilizzare solo in abb inamento al carrello, sup porto, piedistallo, staff a o tavola specificati dal produttore o venduti
insieme al pr odotto. Qualora si utiliz zi un carrello, prestare attenzione nello spostare il carrello/la combinazi one di
prodotto per evitare lesioni causate d all’inciampamento.
• Utilizzare solo access ori consigliati dal produ ttore. Tale prescrizion e si applica a tutti i ti pi di accessori, ad esemp io
coperchi di p rotezione, borse per il t rasporto, supporti, dispo sitivi per il montaggio a parete o a soffitto, ecc. In
caso di appli cazione di qualsiasi tipo di accessorio al prodott o, osservare sempre le is truzioni per l’uso fornit e dal
produttore. N on utilizzare mai punti d i fissaggio sul prodotto d iversi da quelli indicati dal produttore.
• Questo apparecchio NON è adatto all’uso da part e di persone (compresi i bambini) con capacità fisi che, mentali o
sensoriali li mitate o da persone prive della necessaria esperie nza e/o conoscenza. Tenere sempre l’ap parecchio al di
fuori della p ortata dei bambini di età inferiore ai 4 anni.
• Non inserire mai ogget ti di alcun tipo all’inte rno del prodotto attraver so le fessure dell’armadi o, poiché potrebbero
toccare punti con presenza di tensione pericolosa o causare il cortocircuito dei compone nti, con il conseguente
rischio di in cendio o folgorazione.
• Questo prodotto genera livelli di pressione son ora superiori a 90 dB in grado di causare danni pe rmanenti all’udito.
L’esposizione a livelli di rumore estremamente eleva ti può causare la perdita permanente dell’udito. I n caso di
esposizione c ontinua, indossare protez ioni per l’udito.
• Il produttore garantis ce la sicurezza, l’affidab ilità e l’efficienza del p rodotto solo se:
- l’assemblaggio, l’ampl iamento, la reimpostazion e, le modifiche o le ripar azioni sono eseguiti dal produttore o da
personale aut orizzato.
- l’impianto elettrico d ell’area interessata è co nforme ai requisiti speci ficati nelle norme IEC (AN SI).
- l’unità è utilizzata s econdo le istruzioni per l’uso.
- la sicurezza elettrica dell’unità è controllata e testata da un tecnico competente.
Avvisi di sicurezza per sistemi di altoparlanti
Usate soltant o sistemi di montaggio au torizzati dal produttore per il rispettivo sistema di altoparlanti. Seguite
attentamente le istruzioni di montaggi o ed usate soltanto acces sori di montaggio omologa ti. È escluso qualsiasi d iritto
di garanzia i n caso di montaggio impro prio o se vengono usati a ccessori di montaggio non omologati.
Modificazioni agli altoparlanti, agli a ccessori di montaggio, ag li elementi di connession e e di fissaggio e alle
imbracature p otrebbero alterare la sta bilità del sistema e fara nno decadere ogni forma d i garanzia.
La riparazion e di componenti rilevanti dal punto di vista della sicurezza deve venir ese guita soltanto dal produt tore o
da un suo rap presentante autorizzato – altrimenti decadrà ogni forma di garanzia.
L’istallazione deve venir e seguita soltanto da perso nale competente. Usate so ltanto punti di montaggio con una
sufficiente ca pacità portante, consider ando eventuali vincoli ar chitettonici. È assolutam ente obbligatorio di usar e il
materiale di fissaggio (viti, tasselli ecc.) indicato nelle istr uzioni di montaggio del p roduttore. Adottate provv edimenti
adatti (frena filetti, dadi autobloccant i) per prevenire un allen tamento dei raccordi filet tati.
Assicurate is tallazioni stazionarie e/ o mobili (in questo caso gli altoparlanti e gli ac cessori di montaggio)
contro una ca duta dall’alto con due di spositivi indipendenti. P rovvedete ad istallare di spositivi adatti per cogl iere ogni
elemento alle ntato prima che questo po ssa cadere in terra. Ass icuratevi che gli element i di montaggio e di fissag gio e
le imbracatur e vengano scelti e montat i nel rispetto delle norm ative nazionali e locali vigenti. Tenete conto d ei carichi
dinamici (for ze di trazione-compressio ne) per calcolare le dime nsioni dei dispositivi di sicurezza.
Se usate stat ivi, badate che non venga oltrepassato il loro car ico massimo ammissibile. Badate inoltre che, per
motivi costru ttivi, gli stativi di sol ito sono concepiti ed omo logati soltanto per porta re un carico centrato. Gl i stativi
devono essere posizionati in modo sicu ro e stabile. Provvedete ad assicurare (o meglio a ncora fissare) gli stativi se per
esempio:
- la loro sup erficie di appoggio non co nsenta un posizionamento stabile,
- la loro alt ezza limita la stabilità,
- si potrebbe ro manifestare venti fort i,
- potrebbero essere rovesciate da pers one.
Prendete prov vedimenti contro ogni for ma di comportamento risch ioso da parte degli spett atori. È vietato posare
stativi che i ngombrano le vie di fuga e l’accesso soccorsi. Se volete posare stativi in una via di comunicazione,
verificate pri ma che la larghezza della via lo consenta e badate in ogni caso ad una prot ezione (transenne, cordon e
ecc.) e ad un a segnalazione adeguata. Il montaggio e smontaggio degli altoparlanti signi fica un rischio elevato.
Utilizzate se mpre l’attrezzatura adatt a e assicuratevi che le a ttività vengano svolte ne l rispetto delle normativ e
nazionali in vigore.
Durante il mo ntaggio, indossate sempre indumenti protettivi app ropriati (casco, guanti, calzature di sicurezza)
ed usate solt anto mezzi di salita adat ti e sicuri (scala, ponte ggio ecc.). Il rischio è a esclusivo carico della ditta o del
tecnico che e segue i lavori di montagg io.
Verificate dopo il mo ntaggio del sistema di al toparlanti che il montagg io e cablaggio sia avvenu to in modo
corretto e ch e tutte le giunzioni sian o stabili.
L’operatore di un sistema d i altoparlanti (stazionar io o mobile) è obbligato a controllare o a fare co ntrollare
regolarmente ogni componente del siste ma nel rispetto delle nor mative nazionali e locali in vigore e a fare ripar are
ogni danno im mediatamente.
Vi consigliam o di documentare meticolo samente ogni missione di controllo in un libretto di controllo.
Per un sicuro montaggio di altoparlant i all’aperto dovete prend ere in considerazione i v ari fenomeni che potrebbe ro
limitare la s tabilità e la capacità po rtante dell’impianto, sop rattutto i carichi dovuti al vento, al peso della neve o del
ghiaccio e gl i influssi di temperatura. Badate a dimensionare i punti di sollevamento per un montaggio in sospensi one
prendendo in considerazione una suffici ente riserva di sicurezza . Assicuratevi che tutto avvenga nel rispetto dell e
normative naz ionali in vigore.
I sistemi di sonorizzazione profession ali sono in grado di prod urre livelli sonori nociv i alla salute. Anche esse re
sottoposto a livelli apparentemente in offensivi (a partire da c irca 95 dBA SPL) per un e levato periodo di tempo p uò
provocare per dite dell’udito. Quindi c onsigliamo che ogni perso na sottoposta ad alti liv elli sonori provenienti d a un
sistema di so norizzazione porti un’ada tta protezione per l’udit o (tappi auricolari o par aorecchie).
Produttore: S tamer Musikanlagen GmbH, Magdeburger Str. 8, 66606 St. Wendel, Germa nia
Version 2.2 01/2011
Page 6
Importantes instrucciones de seguridad. ¡Leer antes de encender!
Este producto ha sido elaborado por el fabricante de conformida d con IEC 60065 y ha sali do de fábrica en perfecto
estado. Para que se mantenga en perfec tas condiciones y asegura r que no exista riesgo al guno, el usuario deberá
observar los avisos y advertencias que se encuentran en el manu al de instrucciones. En c aso de utilizar este prod ucto
en vehículos, embarcaciones o aviones, así como a altitudes sup eriores a los 2.000 m sob re el nivel del mar, además
de la norma I EC 60065 también se deber án cumplir las demás norm as de seguridad aplicable s
ADVERTENCIA: Para prevenir el riesgo d e incendio y el peligro d e electrocución, evite la exposición del equipo
a humedad o l luvia. No abra la cubiert a: en el interior no hay elementos que deba manipu lar el usuario. El
mantenimiento deberá quedar a cargo de personal cualificado.
La presencia de este símbolo advierte de la existencia de tensi ón peligrosa sin aislar e n el interior que podría
ser suficiente para provocar una electr ocución.
de este tipo. El dispositivo deberá ma ntenerse siempre fuera de l alcance de los niños me nores de 4 años.
• Nunca introduzca objet os de ninguna clase en el producto a través de las ranuras del cajetín, ya que podrían tocar
puntos de ten sión peligrosa, ni cortoc ircuite elementos que pud ieran causar riesgo de in cendio o electrocución.
• El producto puede emit ir niveles de presión son ora por encima de 90 dB, lo que puede causar daños auditivos
permanentes. La exposición a niveles s onoros extremadamente alt os puede causar pérdidas auditivas permanentes.
Lleve protecc ión auditiva si va a esta r expuesto de forma conti nua a dicho tipo de eleva dos niveles.
• El fabricante solament e garantiza la seguridad, la fiabilidad y la eficien cia del producto si:
- el montaje, la extensi ón, el reajuste, las modi ficaciones o las reparacio nes son realizados por el fabricante o por
personal auto rizado;
- la instalación eléctri ca del área interesada es conforme con los requisi tos de las especificacione s de IEC (ANSI);
- la unidad se utiliza c onforme a las instruccion es de uso;
- la unidad es sometida periódicamente a revisión e inspección de la segur idad eléctrica por parte de un técnico
cualificado.
La presencia de este símbolo advierte de la existencia de tensi ón peligrosa accesible de sde el exterior. Todo
cableado exte rno conectado con algún t erminal marcado con este símbolo deberá ser un cab leado preelaborado que
satisfaga las recomendaciones del fabr icante o deberá ser insta lado por personal cualific ado.
La presencia d e este símbolo advierte d e importantes instruccion es de uso y mantenimiento en la bibliografía
adjunta. Lea el manual.
La presencia de este símbolo indica: ¡ Precaución! ¡Superficie ca liente! No tocar para evi tar quemaduras.
• Lea las presentes inst rucciones.
• Conserve las presentes in strucciones.
• Observe todas las adve rtencias e indicaciones s eñaladas en el producto y en las instrucciones.
• No utilice el producto cerca del agua. No coloq ue el producto cerca de a gua, baños, bañeras, freg aderos, zonas
húmedas, pisc inas o saunas.
• No coloque objetos que contengan líquidos sobre el producto, como jarron es, vasos, botellas, etcé tera.
• Limpie exclusivamente con paños secos.
• No retire ninguna cubi erta ni elementos del arm azón.
• La tensión operativa d el producto deberá ajusta rse a la tensión del sumi nistro eléctrico local. S i no está seguro del
tipo de elect ricidad disponible, consu lte con su distribuidor o con la compañía eléctric a local.
• Para reducir el riesgo de electrocución, deberá mantenerse la puesta a t ierra del producto. Utili ce solamente el cable
de alimentaci ón suministrado con el pr oducto y mantenga siempre activo de la patilla cen tral (puesta a tierra) de l
cuadro de con exiones. No desactive la función de seguridad del enchufe polarizado o con puesta a tierra.
• Proteja el cable de al imentación de pisadas o p inzamientos, especialment e junto a enchufes, sopor tes de dispositivos
y el punto de salida desde el equipo. Los cables de alimentació n deberán manipularse sie mpre con precaución.
Compruebe periód icamente que los cables n o tengan cortes ni signos de desgaste, especialmen te en el enchufe y en
el punto de s alida desde el equipo.
• No utilice nunca un ca ble dañado.
• Desenchufe el producto durante las tormentas co n aparato eléctrico o cua ndo vaya a estar en desus o durante
periodos prol ongados.
• El producto solamente se puede desconectar por completo de la red extray endo el enchufe de red de la unidad o de
la toma de la pared. El producto deber á colocarse en todo momen to de tal modo que su des conexión de la red sea
sencilla.
• Fusibles: Reem place solamente con fusib les de tipo (5x20 mm) y a mperaje según IEC 127. Es tá prohibido usar
"fusibles par cheados" o cortocircuitar los portafusibles. La su stitución de los fusibles debe ser realizada única mente
por personal cualificado.
• El mantenimiento deber á quedar a cargo de perso nal cualificado. Será nece saria una revisión si la unidad resulta
dañada de cua lquier forma, por ejemplo :
- si el cable de aliment ación o el enchufe están dañados o deshilachados;
- si se han derramado lí quidos sobre el producto o han caído objetos en él ;
- si el producto se ha v isto expuesto a lluvia o humedad;
- si el producto no func iona con normalidad pese a seguirse las instruccio nes de uso;
- si el producto ha sido salpicado o el cajetín h a sido dañado.
• Cuando se conecten alt avoces a este aparato no se podrá sobrepasar el lí mite de impedancia mínima especificado en
el aparato o en las presentes instrucc iones. La sección de los cables empleados debe ser suficiente en conformidad
con la reglam entación local.
• Proteja de la luz sola r directa.
• No instale cerca de fu entes de calor como radia dores, difusores de calor, estufas u otros dispositivos que produzcan
calor.
• No bloquee ninguna abe rtura de ventilación. Ins tale de conformidad con l as instrucciones del fabr icante. No deberá
situarse el p roducto en una instalació n integrada, como una rej illa, a no ser que exista la ventilación necesaria .
• Permita siempre que un dispositivo frío se cali ente a temperatura ambien te cuando se traslade a a lguna sala. Pueden
formarse cond ensaciones en el interior del producto y dañarlo c uando se usa sin precalen tamiento.
• No sitúe fuentes de ll ama abierta, como velas e ncendidas, sobre el produ cto.
• El dispositivo deberá situarse al menos a 20 cm /8" de distancia de las p aredes.
• Utilice solamente con el carro, soporte, trípod e, abrazadera o tablero e specificado por el fabrica nte o vendido junto
con el produc to. Cuando se use un carr o, deberá tenerse precauc ión al mover la combinaci ón de carro/producto para
evitar daños por vuelcos.
• Utilice solamente acce sorios recomendados por e l fabricante; esto será d e aplicación para todo ti po de accesorios,
por ejemplo, cubiertas protectoras, bo lsas de transporte, pies, soportes murales o de te cho. En caso de instalaci ón
de cualquier tipo de accesorio en el p roducto, siga siempre las instrucciones de uso sum inistradas por el fabrica nte.
Nunca utilice puntos de fijación distin tos de los especificados p or el fabricante.
• El dispositivo NO es a propiado para su uso por parte de cualquier person a o personas (niños inclu idos) con las
capacidades f ísicas, sensoriales o men tales limitadas o sin la experiencia o el conocimi ento suficientes con produ ctos
Instrucciones generales de seguridad para sistemas de altavoces
Los sistemas de fijación deben usarse e xclusivamente para los si stemas de altavoces autor izados por el
fabricante y con los accesorios de mon taje indicados en las Ins trucciones de montaje. De ben tenerse en cuenta
obligatoriame nte las Instrucciones de montaje del fabricante. N o puede garantizarse la c arga indicada y el fabric ante
no asume ning una responsabilidad en ca so de montaje inadecuado o uso de accesorios de mo ntaje no autorizados.
No puede gara ntizarse la capacidad de carga del sistema y el fa bricante no asume ninguna responsabilidad si se
realizan modi ficaciones en los altavoce s, los accesorios de mont aje, los elementos de uni ón y de fijación, así como los
medios de suj eción.
Los reparacio nes en las piezas relevan tes para la seguridad deb en ser realizadas sólo po r el fabricante o persona s
autorizadas p or él, de lo contrario se extinguirá la autorizaci ón de funcionamiento.
La instalació n tiene que realizarla ex clusivamente un experto y sólo en puntos de montaj e con una capacidad de
carga suficien te, si procede, teniendo en cuenta las servidumbre s de construcción. Debe u sarse el material de fijac ión
(tornillos, t acos, etc.) estipulado po r el fabricante en las In strucciones de montaje. L as uniones atornilladas d eben
asegurarse co ntra aflojamiento con las medidas apropiadas.
Las instalaci ones estacionarias o móvi les (altavoces incluidos accesorios de montaje) de ben asegurarse contra
caídas por me dio de dos dispositivos d e actuación independiente entre sí. Las piezas adi cionales sueltas o las qu e se
aflojen deben sujetarse con los disposi tivos apropiados. Si se u san elementos de unión y de fijación, así como medi os
de sujeción, deben tenerse en cuenta l as normas nacionales. Res pecto a la medición de lo s medios de seguridad,
deben tenerse en cuenta las posibles c argas dinámicas (fuerzas a sacudidas).
En los pies d e soporte debe tenerse en cuenta principalmente la carga máxima. Además, po r motivos
constructivos , la mayoría de los pies de soporte sólo están aut orizados para soportar la carga exactamente centra da.
Los pies de s oporte deben instalarse d e forma estable. Los pies de soporte tienen que as egurarse adicionalmente c on
las medidas a propiadas, por ejemplo cu ando:
- su superfici e de apoyo no permita un apoyo estable,
- sus alturas limiten la estabilidad,
- se espere u na presión del viento exc esiva,
- se prevea q ue puedan ser volcados po r personas.
Pueden ser ta mbién necesarias medidas especiales como precaució n contra el comportamient o peligroso de los
espectadores. Los pies de soporte no d eben instalarse en las ví as de escape y de emergen cia. En caso de instalaci ón en
vías de circu lación debe tenerse en cu enta la anchura necesaria de las vías y el bloqueo y señalización reglament arios.
Existe un pel igro especial al colocar y apilar. Para ello d eben usarse los medios au xiliares adecuados. Deben tenerse en
cuenta las no rmas nacionales.
Durante el mo ntaje debe usarse equipo protector adecuado (espec ialmente casco protector, guantes y calzado
de seguridad) y sólo deben usarse ayud as para subir apropiadas (escaleras, andamios, etc .). La responsabilidad
exclusiva ser á de la empresa que reali ce la instalación.
Después del montaje tiene que comprob arse la suspensión del si stema en el soporte y la fijación segura de los
altavoces.
El explotador de los sistemas de altav oces (estacionarios o móv iles) está obligado a com probar o hacer comprobar
regularmente todos los componentes del sistema teniendo en cuen ta las regulaciones nacio nales respectivas y hacer
solucionar in mediatamente los posibles daños.
Además, recom endamos una documentación completa de todas las me didas de comprobación en los libros de
inspección o similares.
Si se utiliza n altavoces al aire libre , para la estabilidad y c apacidad de carga de las superestructuras y superfi cies deben
tenerse espec ialmente en cuenta tambié n las cargas de viento, n ieve y hielo, así como la s influencias térmicas. En
especial, los puntos de sujeción de la carga de los sistemas su spendidos tienen que dime nsionarse con reservas de
seguridad sufi cientes. Deben tenerse en cuenta las normas nacion ales.
Los sistemas de altavoces profesionale s pueden crear niveles ac ústicos perjudiciales par a la salud. La influencia
de un nivel a cústico aparentemente ino fensivo durante un period o prolongado puede causar daños permanentes en la
audición (des de aprox. 95 dBA SPL).Por ello, aconsejamos que to das las personas expuesta s a un nivel acústico alt o
debido al fun cionamiento de sistemas d e altavoces usen protecci ón acústica profesional ( tapones para los oídos o
auriculares p rotectores).
Fabricante: Stamer Mus ikanlagen GmbH, Magdeburg er Str. 8, 66606 St. Wendel, Alemania
Version 2.2 01/2011
Page 7
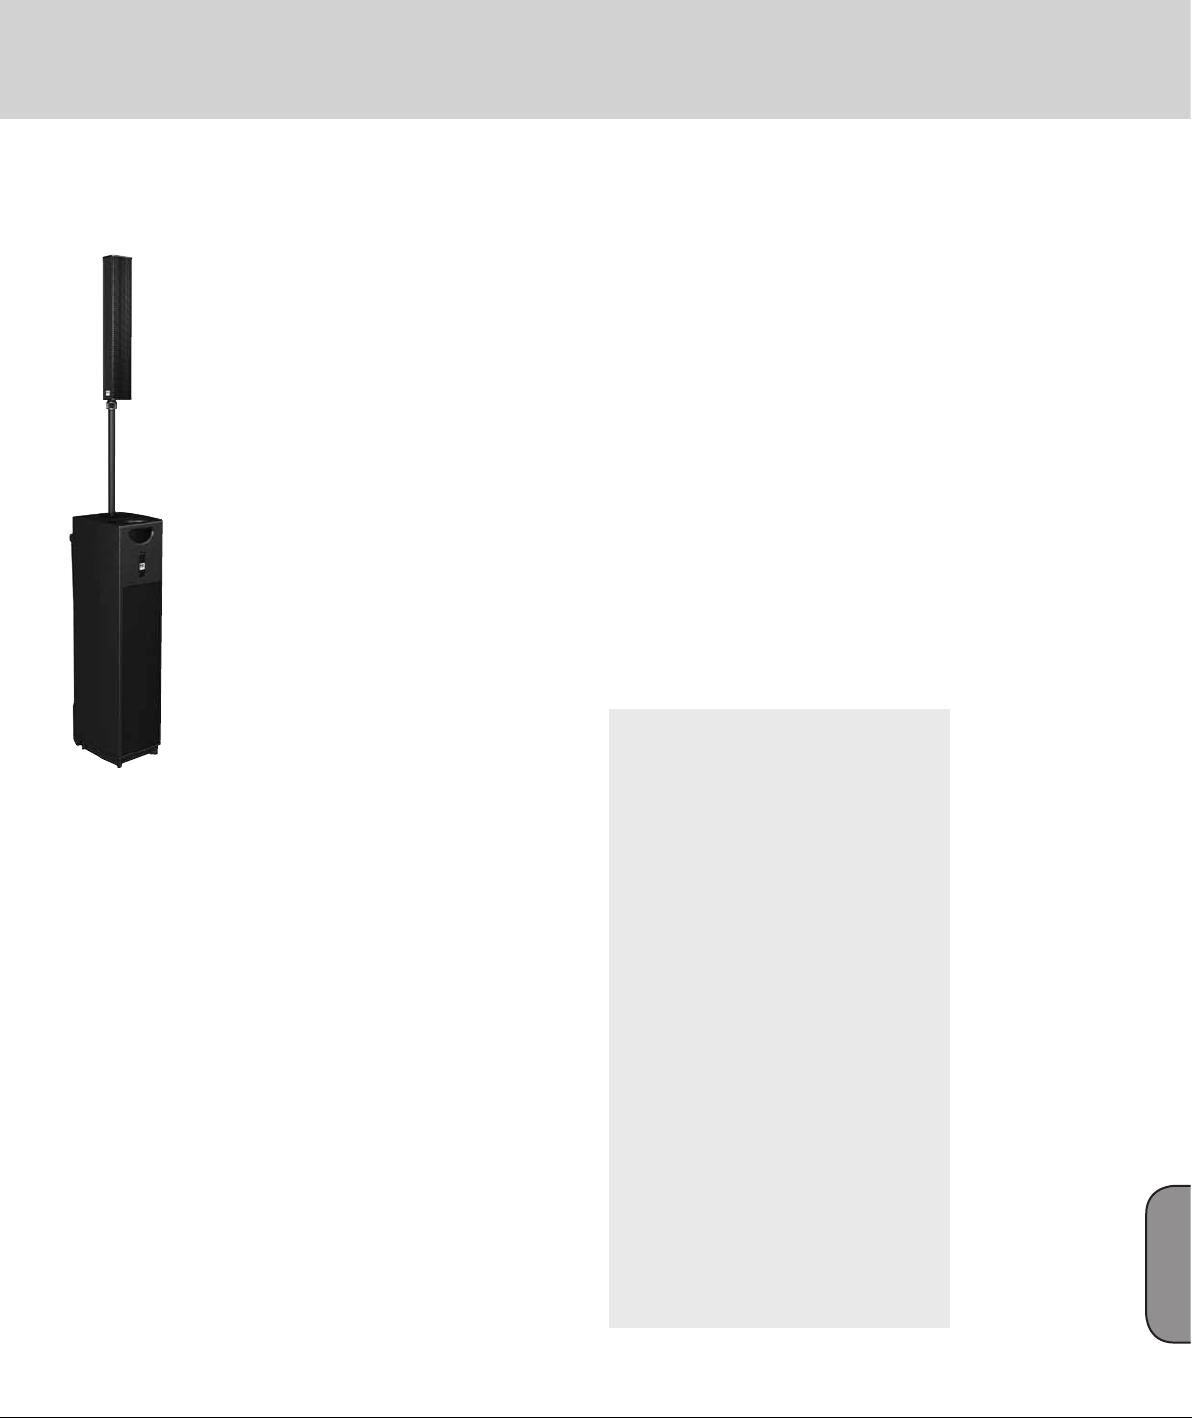
Welcome to the HK Audio family!
Thank you for choosing an HK AUDIO product.
Our engineers aimed
high when they developed
SOUNDCADDY ONE. They
sought to create a highperformance audio system
that is easier to handle and
faster to deploy than any other
PA on the market. So they
tweaked and tuned all the
different components – the
mixing console, controller,
power amp, line source mid-/
high-range unit, subwoofer,
and even a pneumatic speaker
pole – to create a peerless
all-in-one solution that sets up
and tears down in a matter of
seconds.
7
Table of contents
1 About the System ................................................8
2 Control Features ..................................................8
3 Setting Up .........................................................10
4 Powering Up .....................................................10
5 Example Applications ........................................ 11
6 Maintenance and Transport .............................. 11
7 Tips and Tricks .................................................. 11
8 Troubleshooting ................................................ 11
9 Technical Specifications .................................... 12
10 Appendix: You’ll find diagrams of example
applications and connections on page. ............. 19
They also succeeded in making
handling self-explanatory, so
you can operate it without
necessarily consulting the
manual. However, we recommend that you take
the time to read it. You’re sure to find plenty of
interesting information that will help you make the
most of SOUNDCADDY ONE.
The HK AUDIO team wishes you lots of fun and
success with your SOUNDCADDY ONE!
Warranty
Register the SOUNDCADDY ONE system using the
enclosed warranty card to extend your warranty to
five years free of charge!
Use the convenient Online Registration option at
www.hkaudio.de.
If you are unable to register online, please fill out
the enclosed warranty card completely and mail or
fax it to us. The registration is only valid if the warranty registration card is filled out and returned to
HK AUDIO or the device is registered via Internet
within 30 days of the date of purchase. We are also
interested in learning where and by whom our devices are used. This information will help us design
future products. Your data is of course protected by
privacy laws.
Thank you!
HK AUDIO
Technical Service
Postfach 1509
66959 St. Wendel, Germany
English
Page 8

SOUNDCADDY One 1.0
1 About the System
The mid-/ high-range unit is equipped with six highquality 3.5" wide-range speakers that HK AUDIO
developed in a joint effort with one of the world’s
most prestigious speaker manufacturers. Arrayed
vertically in close proximity to one another, these
six speakers deliver excellent directivity and provide
remarkably uniform coverage across the audience
area. Signals are routed to speakers via a bus built
into the hardware, so you do not need to fuss with
further speaker cables.
The subwoofer is loaded with three 6" woofers
that provide the perfect low-end underpinning for
SOUNDCADDY ONE.
SOUNDCADDY ONE is a fully powered system. Next
to the loudspeakers, the enclosure features a built-in
module with the electronic circuitry and the control
unit, as well as a 600-watt, Class-D amp module
2 Control Features
• Integrated four-channel mixing
console
1
2
3
2
3
2
6
2
6
8
7
4
5
7
9
1 Status LED (Signal/Limit/Error)
This dual-color LED shows the signal’s status: green
= power on; red = limit. The LED lights up red to
indicate signal peaks at high volumes.
Caution! This is not a clip LED. It’s okay if it lights up
red briefly every now and then. This tells you that the
RMS limiter has engaged. If the LED lights up red
continuously, an error has occurred.
• Mic In channel
2 Volume
This rotary knob adjusts the given input channel’s
volume level. Twisting it to the far left off position
turns the signal level all the way down. Twisting it
to the far right max position turns it all the way up.
Always turn the rotary knob to off before connecting
a microphone or audio device. Once you have
connected the device, turn the knob slowly towards
the right until you dial in the desired volume level.
10 12
11
3 Tone
This rotary knob tunes the system’s sound to suit
speech applications.
Flat = no change in tone
Speech = maximum speech filtering
Note: Try out the different knob positions to find the
best setting for your microphone.
13
4 Input
This combination XLR/1/4” mono input is electrically
balanced to accept a microphone The XLR’s port’s
pin assignments are 1= ground, 2= +, 3= -.
Page 9

9
• Combi In channel
5 Input
This combination XLR/1/4” mono input is electrically
balanced to accept a microphone or instrument such
as a guitar equipped with pick-ups. The XLR’s port’s
pin assignments are 1= ground, 2= +, 3= -. The ¼”
jack’s assignments are tip = +/-, sleeve = ground.
Note: Be sure to use a balanced cord equipped
with XLR connectors for a microphone and a cord
equipped with mono jack plugs to connect an
instrument.
• Line In channel
6 Contour
This rotary knob adjusts the audio signal’s tone.
When it boosts high and low frequencies, it also rolls
off midrange frequencies.
• off (far left position) = no change in tone
• max. (far right position) = maximum change in tone
Tip: To find the best possible sound for the room’s
acoustics and the given setup, simply twist the
Contour knob until you like what you’re hearing.
7 Inputs
Use these XLR/1/4” ports to connect stereo
instruments and devices such as keyboards, CD
players, and mixing consoles. The XLR’s port’s pin
assignments are 1= ground, 2= +, 3= -. The ¼” jack’s
assignments are tip = +/-, sleeve = ground.
• Aux In channel
8 Input A (left, right)
Use this unbalanced input (RCA) to connect a CD
player, laptop, or PC (with a separate audio card).
Heads up: Plugging a connector into this port mutes
input B.
9 Input B (stereo)
Use this stereo input (3.5 mm jack) to connect MP3
and other audio players or the headphones output of
a laptop or PC.
Heads up: Plugging a connector into this port mutes
input A.
• Line-Out
10 Line Out
Use this balanced XLR output to route the master
signal to another SOUNDCADDY ONE unit or other
powered speaker systems
11 Line Out switch
This switch determines the device’s operating mode.
SOUNDCADDY ONE is a monaural system, but you
can pair it with another SOUNDCADDY ONE (slave)
to configure a stereo system. This switch lets you
determine what type of signal will be sent to a further
SOUNDCADDY ONE unit or other active speaker.
You have two operating modes to choose from:
a) Mono mode
(see also section 5, Example Applications)
SOUNDCADDY ONE in mono mode with the option
of connecting another SOUNDCADDY ONE or active
speaker.
Mono
Mono
(Master)
• Set the Line Out switch to mono. This merges all
incoming signals to create a mono master signal
that is patched out via the Line Out port.
Tip: This setting is recommended if you want speech
to be heard over great distances because then all
the daisy-chained SOUNDCADDY ONE units will
produce the same signal. In this case, you can
connect more than two systems. Be sure to set all
systems’ Line Out switch to mono.
b) Stereo mode
(see also section 5, Example Applications)
SOUNDCADDY ONE (master) mode with another
SOUNDCADDY ONE (slave) connected in stereo
mode.
Mono
(Slave)
Stereo
Left
(Master)
• Set the master system Line Out switch to left/
right and the slave system’s switch to mono.
Then connect the master’s Line Out to the slave
system’s Input using an XLR-equipped cord. This
separates the stereo signal’s two channels. The
SOUNDCADDY ONE master renders the left
channel; the slave system is responsible for the
right channel.
Note: Be sure to set the Volume knob of the
connected SOUNDCADDY ONE (slave) to the center
or 12 o’clock position so the two systems’ volume
levels are equal. You now have a real stereo system.
Heads up: This does not apply to the Bass knobs.
You can adjust them individually to suit the room’s
acoustics.
• Rec Out
12 REC Out (left/right)
Use this balanced stereo output to connect a PC, HD
recorder, or the like.
• Bass
13 Bass
Use this rotary knob to adjust bass frequencies. The
standard setting is flat, with the knob turned to the
far right. If you need to reduce the amount of low
frequencies due to the room’s acoustics, simply turn
the knob to the left until you like what you’re hearing.
Twisting the knob all the way to the left cuts the bass
level by 10 dB.
Right
(Slave)
English
Page 10

SOUNDCADDY One 1.0
• Connector panel
Power
Use the factory-included locking mains cord to
connect this socket to a wall outlet.
Caution: Make sure the local mains voltage matches
the voltage specified on SOUNDCADDY ONE.
Connecting it to the wrong mains voltage may
destroy the electronic components.
Heads up: Always switch SOUNDCADDY ONE on
last - that is, after powering up all other components
- and switch it off first before powering down all
other connected devices.
3 Setting Up
Set the system on a flat, level surface at the desired
position with the front facing forward towards
the audience area. Ensure the distance to the first
listener is no less than two meters.
min. 2 m
Fig.: Setting up SOUNDCADDY ONE
Heads up: You need at least one meter clearance
above the enclosure, so make sure no people or
objects are leaning over the housing.
Press the top edge of the mid-/ high-range unit to
release the catch. It will rise automatically from the
housing, stopping at a fixed height.
Press!
Fig.: Extending the mid-/ high-range unit
Loosen the adjusting nut on the underside of the
mid-/ high-range unit to set it to the desired height.
Then tighten the locking screw to lock the mid-/
high-range unit in place.
Twist
left!
Fig.: Adjusting height and locking the mid-/ high-range unit
in place
Tip: Adjust the height so the mid-/ high-range unit’s
top speaker is situated just above the audience's
head level.
Fig.: Aligning height to the audience
4 Powering Up
Caution: You must release the locking device that
secures SOUNDCADDY ONE for transport before
you power up for the first time!
Make sure SOUNDCADDY ONE is off before you
connect it to a mains power supply.
• Turn the Volume knob all the way down to the far
left position.
• Ensure all other connected components are up
and running before you connect a line signal. First
switch on all connected devices – an outboard
mixing console, keyboards, instrument amps,
effects, or other signal source.
Heads up: Always switch SOUNDCADDY ONE on
last - that is, after powering up all other components
- and switch it off first before powering down all
other connected devices.
• Turn the Volume knob slowly towards the right until
you dial in the desired volume level. If you connect
a CD player, keyboard, or the like directly, you can
turn the Volume knob all the way to the right to
achieve maximum volume, depending on the input
signal’s level.
Page 11

11
5 Example Applications
On pages 19-21, you’ll find a small selection of
example applications compiled to help you achieve
the best audio results with your SOUNDCADDY ONE
every time.
6 Maintenance and Transport
Designed for utmost convenience, SOUNDCADDY
ONE requires no maintenance. You don’t even have
to lubricate any moving parts!
Caution: Always transport SOUNCADDY ONE in
the horizontal position in vehicles; that is, lying flat.
If you transport it in the upright position, sudden
vertical pressure could release the catch that locks
the hydraulic riser and extend the mid-/ high-range
unit.
equipment. Make sure all components that
are connected directly and indirectly to the
SOUNDCADDY ONE system have sufficient power
ratings, and that they don’t distort because they’re
running at their respective limits.
4. Avoid ground loops! You may encounter a ground
loop when a device is grounded via a mains cord
which isn’t connected to the same mains circuit
as the SOUNDCADDY ONE system. Always plug
the system and the connected devices to the same
electrical circuit (same phase!).
CAUTION: Never tape over the plug’s ground
terminal - this endangers lives!
5. Handling microphones.
For optimum results when speaking or singing into
a microphone, keep a normal handheld microphone
near your lips. If you hold the microphone further
than five cm from your lips, the volume will be low
and your words hard to understand. When employing
a headset microphone, please read its operating
manual to make sure you use it properly.
About 2 mm should do the trick. The device is now
operating in mono, which in many cases solves the
noise problem.
Heads up: Make sure your laptop's audio card
settings are configured so the volume is up and
speakers are on. The line out fader or knob must be
up and the speaker mute button off. A quick way to
check if your laptop is providing an audio signal is to
audition its internal loudspeakers.
8 Troubleshooting
1 The Status LED does not light up when you switch
the device on.
• Check if the power cord is plugged into the Mains
Input.
• Check if the mains power supply is providing
current.
• Check if the house circuit breaker has tripped.
2 The Power On LED lights up green, but no sound is
issuing from the speakers.
• Check the cords connecting the signal sources and
inputs.
• Check if the signal sources (mixer, keyboard, CD
player, etc.) are on.
• Inspect the cords for damage.
7 Tips and Tricks
1. Do not expose electronic circuitry to moisture!
When you set the system up outdoors, be sure to
protect it against rain. Keep drinks and all other
liquids well away from the device to protect their
electronic components from short circuits.
2. HK AUDIO systems deliver optimum sound,
so you should provide them with optimum input
signals! Noise such as humming is generally caused
by defective cables, the wrong type of cords, or
unbalanced signals routed into the mixing console.
Check all signal and mains cables.
3. Prevent distortion! Not only is it unpleasant
to your audience’s ears, it also endangers your
Fig.: Proper use of a handheld microphone
6. When using MP3 players and the like, make sure
the device’s internal volume control is turned up.
Audio quality is normally not a problem when using
MP3 players.
7. You may hear a soft humming noise when playing
audio files on a laptop (via the headphones jack),
depending on the quality of the laptop’s internal
audio card. Experience teaches that such noise is
usually confined to one of the two stereo channels.
Audio quality may improve if you gently pull the
plug in the laptop’s headphones output partially out.
3 The signal sounds distorted.
• Check the LED displays on your mixer. Ensure they
are not constantly in the red. If necessary, back off
the volume at the mixer.
English
Page 12

SOUNDCADDY One 1.0
9 Technical Specifications
SOUNDCADDY ONE
Frequency response +/-3 dB:
Frequency response -10 dB:
Maximum SPL @ 1m:
Maximum SPL calculated:
Mid/high range amplifier:
Protective circuits:
Connections:
Mid-range speaker:
Woofer:
Directivity (hor., vert.):
Crossover frequency:
Dimensions (WxHxD):
Weight:
49 Hz - 18 kHz (system)
42 Hz - 18 kHz (system)
120 dB @10% THD (half-space, average)
125 dB (half-space)
600W Class D
Peak, RMS Limiter (master)
Integrated 4-channel mixing console
6 x 3.5" Wide-range OEM Speaker, 16 ohms
3 x 6" Sub OEM Speaker, 18 ohms
70° / 15°
150 Hz - 12 dB/octave
102 x 27 x 34 cm
29 kg / 63 lbs, 15 oz.
Page 13

Willkommen
in der HK Audio Familie!
13
Vielen Dank, dass Sie sich für ein HK AUDIOProdukt entschieden haben.
Bei der Entwicklung des
SOUNDCADDY ONE war es
das Ziel unserer Ingenieure,
die am schnellsten und
einfachsten zu bedienende
Hochleistungs-Audio-Anlage
auf dem Markt zu schaffen.
Die verschiedenen Komponenten wie Mischpult,
Controller, Endstufe, LineSource-Topteil, Subwoofer
und sogar eine pneumatisch
ausfahrende Distanzstange
sind zu einem einzigartigen
All-in-one-Konzept vereinigt, das Aufbau und Inbetriebnahme in Sekunden
ermöglicht.
Zu diesem Konzept gehört
es auch, die Bedienung so
selbsterklärend zu gestalten, dass Sie als Anwender
nicht unbedingt auf das
Studium der Bedienungs-
anleitung angewiesen sind
– dennoch finden Sie hier zusätzlich zu den Basics
viele interessante Informationen, die Ihnen dabei
helfen werden, das Potential Ihres SOUNDCADDY
ONE voll auszuschöpfen.
Viel Spaß und Erfolg mit Ihrem SOUNDCADDY
ONE wünscht Ihnen Ihr HK AUDIO Team!
Inhaltsverzeichnis
1 Systembeschreibung .........................................14
2 Bedienelemente ................................................14
3 Aufbau .............................................................. 16
4 Inbetriebnahme .................................................16
5 Anwendungsbeispiele ....................................... 17
6 Wartung und Transport ..................................... 17
7 Tipps und Tricks ................................................ 17
8 Fehlerbehebung ................................................ 17
9 Technische Daten .............................................. 18
10 Appendix: Illustrationen mit Anwendungs - und
Anschlussbeispielen finden Sie auf Seite ..........19
Garantie
Registrieren Sie Ihren SOUNDCADDY ONE mit der
beigelegten Registrierungskarte und erhalten Sie
eine kostenlose Garantieverlängerung bis 5 Jahre!
Nutzen Sie die komfortable Online-Registrierung
über www.hkaudio.de.
Falls Sie keine Möglichkeit haben, sich online
zu registrieren, füllen Sie bitte die beiliegende
Garantiekarte vollständig aus und senden diese per Post oder Fax an uns. Die Registrierung
ist nur gültig, wenn die vollständig ausgefüllte
Registrierungskarte innerhalb von 30 Tagen ab
Kaufdatum an HK AUDIO eingesendet wurde bzw.
die fristgerechte Registrierung über das Internet
erfolgte. Weiterhin möchten wir uns einen Eindruck
verschaffen, wo und von wem unsere Geräte angewendet werden. Diese Informationen unterstützen
unsere zukünftige Produktentwicklung. Ihre Angaben unterliegen selbstverständlich den Datenschutzbestimmungen.
Vielen Dank!
Deutsch
HK AUDIO
Technischer Service
Postfach 1509
66959 St. Wendel, Deutschland
Page 14

SOUNDCADDY One 1.0
1 Systembeschreibung
Das Topteil ist mit sechs hochwertigen 3,5“
Breitbandlautsprechern bestückt, die HK AUDIO
zusammen mit einem der renommiertesten Lautsprecherhersteller entwickelt hat. Durch die enge und
durchgehende Anordnung dieser sechs Lautsprecher
in einer vertikalen Linie wird eine gerichtete und
sehr homogene Abstrahlung auf die zu beschallende
Publikumsfläche erreicht. Da die Signalführung zu
den Lautsprechern in die Systemmechanik integriert
wurde, brauchen Sie keine weiteren Kabel.
Im Subwoofer-Gehäuse sind drei 6“-Basslautsprecher
integriert, die für das optimale Bassfundament des
SOUNDCADDY ONE sorgen.
SOUNDCADDY ONE ist vollaktiv und besteht neben
den Lautsprechern aus einer im Gehäuse integrierten
Elektronik- und Bedieneinheit sowie einem Class-D
Verstärkermodul mit 600 Watt Verstärkerleistung.
2 Bedienelemente
• Integriertes 4-Kanal-Mischpult
1 Status-LED (Signal/Limit/Error)
Die zweifarbige LED zeigt je nach Farbe das Signal
an (grün = Power On, rot = Limit). Signalspitzen bei
hoher Lautstärke werden durch rotes Aufleuchten
angezeigt.
Achtung: Hier handelt es sich nicht um eine ClipLED. Die LED darf hin und wieder schon mal kurz
rot leuchten, dies zeigt lediglich an, dass der RMSLimiter arbeitet. Leuchtet die Status-LED dauerhaft
rot, liegt ein Fehler (Error) vor.
1
2
3
4
2
3
5
10 12
11
2
6
2
6
8
7
7
9
13
• Mic-In-Kanal
2 Volume
Dreh-Regler, der die Signallautstärke für den jeweiligen Inputkanal verändert. In der Stellung „off“
(Linksanschlag) ist das Signal komplett abgedreht, in
der Stellung „max“ (Rechtsanschlag) ist die maximale Signallautstärke erreicht. Drehen sie vor Anschluss
eines Mikrofons oder Audiogerätes den Dreh-Regler
auf „off“ (Linksanschlag). Wenn Sie die Geräte verbunden haben, drehen Sie den Regler langsam nach
rechts bis die gewünschte Lautstärke erreicht ist.
3 Tone
Dreh-Regler zur Optimierung der Klangeigenschaften
bei Sprachanwendungen.
Flat = keine Klangbeeinflussung
Speech = maximale Sprachfilterung
Tipp: Zur optimalen Einstellung Ihres Mikrofons probieren Sie einfach verschiedene Stellungen aus.
4 Input-Buchse
Kombibuchse XLR/Klinke, elektrisch symmetrierter
Monoeingang für den Anschluss eines Mikrofons
(Anschlussbelegung XLR: 1= Ground, 2= +, 3= -).
Page 15

15
• Combi-In-Kanal
5 Input-Buchse
XLR/Klinke, elektrisch symmetrierte Eingangsbuchse
für den Anschluss eines Mikrofons oder Instruments
(z.B. Gitarre mit Tonabnehmer) (Anschlussbelegung
XLR: 1= Ground, 2= +, 3= -, Anschlussbelegung Klinkenstecker: Tip = +/-, Shield = Ground).
Wichtiger Hinweis: Für den Anschluss eines Mikrofons nutzen Sie bitte ein XLR-Kabel mit symmetrischer Signalführung – für den Anschluss eines
Instruments ein Mono-Klinkenkabel.
• Line-In-Kanal
6 Contour
Dreh-Regler zur Klangeinstellung des Audiosignals.
Neben Anhebung des Tief- und Hochtons erfolgt
gleichzeitig auch eine Absenkung der Mitten.
• off (Linksanschlag) = keine Klangbeeinflussung
• max. (Rechtsanschlag) = maximale Klangbeeinflussung
Tipp: Je nach Raumakustik und Aufstellung empfehlen wir Ihnen, den bestmöglichen Klang durch Drehen des Contour-Reglers herauszufinden.
7 Input-Buchsen
XLR/Klinke. Zum Anschluss von Stereo-Instrumenten, wie Keyboard, CD-Spielern oder Mischpulten
(Anschlussbelegung XLR: 1= Ground, 2= +, 3= -,
Anschlussbelegung Klinkenstecker: Tip = +, Ring = -,
Shield = Ground).
• Aux-In-Kanal
8 Input A (left, right)
Unsymmetrische Eingangsbuchsen (Cinch) zum Anschluss z.B. eines CD-Players oder Laptops bzw. PCs
(mit separater Soundkarte).
Achtung: Dieser Eingangskanal ist stummgeschaltet
sobald Input B belegt ist.
9 Input B (stereo)
Stereo-Eingangsbuchse (3,5 mm Klinke) zum Anschluss von Audio-Abspielgeräten (z.B. MP3-Player
oder Kopfhörerausgang eines Laptops/PCs).
Achtung: Sobald dieser Eingangskanal belegt wird,
ist Input A stummgeschaltet.
• Line-Out
10 Line-Out-Buchse
XLR, symmetrischer Ausgang zum Weiterschleifen des Summensignals an einen weiteren
SOUNDCADDY ONE oder andere aktive Lautsprechersysteme.
11 Line-Out-Schalter
Mit diesem Schalter stellen Sie ein, in welchem
Modus das Gerät intern betrieben wird. SOUNDCADDY ONE ist zwar ein Mono-System – kann aber
beim Anschluss eines weiteren SOUNDCADDY ONE
(Slave) als Stereo-System betrieben werden. Mit dem
Schalter wählen Sie, welches Signal an den weiteren
SOUNDCADDY ONE bzw. anderen Aktivlautsprecher
geschickt wird.
Sie haben zwei unterschiedliche Betriebsarten zur
Auswahl:
a) Monobetrieb
(siehe auch Punkt Anwendungsbeispiele)
SOUNDCADDY ONE im Monobetrieb mit Anschlussmöglichkeit eines weiteren SOUNDCADDY ONE oder
Aktiv-Lautsprechers.
Mono
Mono
(Master)
• Stellen Sie den Line-Out-Schalter auf „mono“.
Jetzt sind alle Eingangssignale monosummiert und
werden auch als Monosumme am Line-Out ausgegeben.
Tipp: Diese Einstellung empfiehlt sich beispielsweise
bei Sprachübertragungen über längere Distanzen
– so kommt aus jedem „in Reihe geschalteten“
SOUNDCADDY ONE das identische Signal. Dabei
können auch mehr als zwei Systeme verbunden werden. Achten Sie darauf dass bei allen verwendeten
Systemen der Schalter auf „mono“ steht.
Mono
(Slave)
b) Stereobetrieb
(siehe auch Punkt 5 Anwendungsbeispiele)
SOUNDCADDY ONE (Master) mit Anschluss eines
weiteren SOUNDCADDY ONE (Slave) im Stereobetrieb.
Stereo
Left
(Master)
• Stellen Sie den Schalter des Master-Systems auf
„left/right“ und den Schalter des Slave-Systems auf
„mono“. Verbinden Sie nun die Line-Out-Buchse
des Masters mittels XLR-Kabel mit der Input-Buchse
des Slave-Systems. Damit trennen Sie die einzelnen
Kanäle des Stereosignals auf – der SOUNDCADDY
ONE-Master gibt die linke Seite wieder, das SlaveSystem ist für den rechten Kanal zuständig.
Hinweis: Achten Sie darauf, dass der Dreh-Regler
„Volume“ des angeschlossenen SOUNDCADDY ONE
(Slave) auf Mittelstellung steht, damit der Lautstärkepegel beider Systeme gleich ist. Sie haben jetzt ein
vollwertiges Stereosystem.
Achtung: Die Bass-Regler sind davon nicht betroffen,
sie können separat an die Raumverhältnisse angepasst werden.
• Rec-Out
12 REC-Out (left/right)
Symmetrischer Stereo-Signalausgang zum Anschluss
z.B. an einen PC, HD-Recorder oder ähnliches.
• Bass
13 Bass-Regler
Dreh-Regler zum Einstellen des Bassanteils. Für die
Standardeinstellung drehen Sie den Regler auf „flat“
(Rechtsanschlag). Wenn Sie aufgrund der räumlichen
Gegebenheiten den Anteil tiefer Frequenzen reduzieren wollen, drehen Sie den Regler einfach soweit
Right
(Slave)
Deutsch
Page 16

SOUNDCADDY One 1.0
nach links, bis Ihnen der Klang gefällt. Wenn Sie den
Regler ganz nach links drehen, reduziert sich der
Basspegel um 10 dB.
Press!
• Anschlussplatte
Power
Verbinden Sie diese Anschlussbuchse mittels des verriegelbaren Stromkabels (im Lieferumfang enthalten)
mit der Netzsteckdose.
Wichtig: Achten Sie darauf, dass die Spannungsangabe des SOUNDCADDY ONE der verwendeten
Netzspannung entspricht. Der Anschluss an eine
falsche Netzspannung kann die elektronischen Bauteile zerstören.
Wichtig: SOUNDCADDY ONE sollte immer zuletzt,
d.h. nach allen anderen Komponenten, eingeschaltet
und vor allen angeschlossenen Geräten ausgeschaltet werden.
3 Aufbau
Stellen Sie das System an die gewünschte Position
und achten Sie auf einen festen Stand (ebener Untergrund). Die Vorderseite sollte jetzt in Richtung
der Publikumsfläche zeigen. Der Abstand zum ersten
Zuhörer sollte die Distanz von 2 Metern nicht unterschreiten.
min. 2 m
Abb.: Herausfahren des Topteils
Lösen Sie jetzt die Feststellmutter an der Unterseite
des Topteils, um es auf die gewünschte Höhe zu bringen. Drehen Sie anschließend die Feststellschraube
zu, um das Topteil zu arretieren.
Twist
left!
Abb.: Einstellen der Höhe und Arretierung des Topteils
Tipp: Achten Sie hierbei darauf, dass der oberste
Lautsprecher des Topteils sich etwas über der Kopfhöhe der anwesenden Zuhörer befindet.
Abb.: Optimale Anpassung der Höhe bei Publikum
4 Inbetriebnahme
Achtung: Bei Erstinbetriebnahme des SOUNDCADDY ONE muss die Transportsicherung entfernt
werden!
Bevor Sie das System mit Netzspannung versorgen,
achten Sie darauf, dass SOUNDCADDY ONE ausgeschaltet ist.
• Drehen Sie den Volumen-Regler komplett zurück
(Linksanschlag).
• Achten Sie beim Anschluss eines Line-Signals
darauf, dass alle übrigen angeschlossenen Komponenten schon vorher in Betrieb sind. Sowohl ein
angeschlossenes externes Mischpult als auch alle
anderen verbundenen Signalquellen wie Keyboards,
Instrumentalverstärker, Effekte o.ä. sollten eingeschaltet sein.
Wichtig: SOUNDCADDY ONE sollte immer zuletzt,
d.h. nach allen anderen Komponenten, eingeschaltet
und vor allen angeschlossenen Geräten ausgeschaltet werden.
Abb.: Aufstellen des SOUNDCADDY ONE
Achtung: Achten Sie darauf, dass sich mindestens 1
Meter über dem Gehäuse keine Personen oder Gegenstände befinden.
Anschließend drücken sie auf die Oberkante des Topteils, um dieses aus der Arretierung zu lösen. Jetzt
fährt das Topteil automatisch aus dem Gehäuse hoch
und bleibt auf einer fest definierten Höhe stehen.
• Drehen Sie den Volume-Regler langsam nach
rechts, um die gewünschte Lautstärke zu erreichen.
Falls Sie direkt einen CD-Player oder z.B. ein Keyboard anschließen, kann je nach Signalstärke der
Volume-Regler ganz nach rechts gedreht werden,
um die maximale Lautstärke zu erzielen.
Page 17

17
5 Anwendungsbeispiele
Damit Sie immer das bestmögliche Beschallungsergebis mit Ihrem SOUNDCADDY ONE erreichen,
haben wir Ihnen auf Seite 19-21 eine kleine Auswahl
an Anwendungsbeispielen zusammengestellt.
6 Wartung und Transport
Die Aufbau des SOUNDCADDY ONE ist so konzipiert, dass eine Wartung (z.B. Nachölen der
Mechanik) nicht notwendig ist! Das Gerät ist damit
wartungsfrei!
Achtung: Es ist darauf zu achten, dass beim Transport (z.B. im Auto) des SOUNCADDY ONE das
System stets im Liegen transportiert wird, denn bei
plötzlicher vertikaler Belastung könnte die Mechanikverriegelung des SOUNDCADDY ONE auslösen und
das Topteil ausfahren.
7 Tipps und Tricks
1. Lassen Sie keine Feuchtigkeit an die Elektronik
kommen! Achten Sie beim Einsatz im Freien darauf,
dass Ihr System vor Regen geschützt aufgestellt wird.
Getränke oder andere Flüssigkeiten dürfen nicht
auf dem Gerät abgestellt werden und nicht an die
Elektronik gelangen, da dies zu Kurzschlüssen führen
kann.
3. Verhindern Sie Verzerrungen! Verzerrungen sind
nicht nur unangenehm für die Ohren der Zuhörer,
sie sind auch gefährlich für Ihre Anlage. Achten Sie
darauf, dass alle direkt und indirekt an das SOUNDCADDY ONE-System angeschlossenen Komponenten
über genügend Leistung verfügen und niemals Verzerrungen produzieren, weil sie am Limit betrieben
werden.
4. Vermeiden Sie Brummschleifen!
Ist beispielsweise ein Gerät über das Netzkabel geerdet und hängt nicht auf dem gleichen Stromkreis
wie das SOUNDCADDY ONE-System, so kann es
zu einer sogenannten „Brummschleife“ kommen.
Schließen Sie deshalb stets das System und Ihre
übrigen Geräte an den gleichen Stromkreis (gleiche
Phase!) an.
ACHTUNG: Nie die Erdung am Netzstecker abkleben
– Lebensgefahr!
5. Einsatz von Mikrofonen.
Achten Sie beim Sprechen oder Singen in eine
Mikrofon auf die richtige Halteposition. Halten Sie
das normale Handmikrofon beim Sprechen nah an
Ihre Lippen, um optimale Ergebnisse zu erhalten.
Wenn Sie das Mikrofon beim Sprechen mehr als 5
cm von Ihren Lippen entfernt halten, führt dies zu
weniger Gesamtlautstärke und kann die Sprachverständlichkeit deutlich verringern. Wenn Sie ein
Kopfbügel-Mikrofon benutzen, lesen Sie bitte die
Bedienungsanleitung des Mikrofons durch, um die
richtige Anwendung sicher zu stellen.
tät der Übertragung bei MP3-Playern ist in der Regel
problemlos.
7. Beim Abspielen von Audiodateien über einen Lap-
top (Kopfhörerbuchse) kann es je nach Qualität der
internen Soundkarte des Laptops unter Umständen
zu leisen Brummgeräuschen kommen, die erfahrungsgemäß nur auf einem der beiden Stereokanäle
liegen. Probieren Sie aus, ob sich die Soundqualität
verbessert, in dem Sie den Stecker um 2 mm aus
dem Kopfhörerausgang des Laptop herausziehen.
Jetzt arbeit das Gerät mono und in vielen Fällen ist
das leise Brummgeräusch verschwunden.
Wichtig: In den Einstellungen Ihrer Laptop-Soundkarte muss der Line-Out-Regler aufgedreht und die
Lautsprecher-Mute Taste außer Funktion sein. Um
sicher zu gehen, dass der Laptop ein Audiosignal
ausgibt, können sie zuerst prüfen, ob das Audiosignal über die internen Lautsprecher übertragen wird.
8 Fehlerbehebung
1 Die Status-LED leuchtet beim Einschalten nicht auf.
• Überprüfen Sie, ob das Netzkabel am Mains Input
angeschlossen ist.
• Vergewissern Sie sich, dass das Netz Spannung
führt.
• Prüfen Sie, ob evtl. die Haussicherung ausgelöst
hat.
2 Die Power On LED leuchtet grün auf, aber es
kommt kein Ton aus den Lautsprechern.
• Überprüfen Sie die Signal-Anschlusskabel, die Sie
an den Input-Anschlüssen angeschlossen haben.
• Prüfen Sie, ob die Signalquellen (Mischpult, Keyboard, CD-Player, usw. ) eingeschaltet sind.
• Überprüfen Sie die zusätzlichen Signalkabel auf
evtl. Beschädigungen.
Deutsch
2. HK AUDIO Systeme sorgen für optimalen Sound
- sorgen Sie für das optimale Eingangssignal!
Brummen ist in den meisten Fällen das Resultat
defekter Kabel, falscher Kabel oder unsymmetrischer
Eingangssignale am Mischpult. Überprüfen Sie alle
Signal- und Netzkabel.
Abb.: Richtige Nutzung eines Handmikrofons
6. Achten Sie beim Einsatz von MP3-Playern und
ähnlichen Geräten darauf, dass der interne Lautstärkeregler des Gerätes aufgedreht ist. Die Soundquali-
Page 18

SOUNDCADDY One 1.0
3 Die Musikwiedergabe scheint verzerrt zu sein.
• Überprüfen Sie die LED Anzeigen an Ihrem Mischpult. Sie sollten sich nicht ständig im roten Bereich
befinden. Nehmen Sie gegebenenfalls die Lautstärke am Mischpult zurück.
9 Technische Daten
SOUNDCADDY ONE
Speaker Top: 6 x 3,5" Breitband OEM Speaker, 16 Ohm
Speaker Sub: 3 x 6" Sub OEM Speaker, 18 Ohm
X-over frequency (passive): 150Hz - 12dB/oct
Directivity (hor., vert.): 70° / 15°
Internal Amplifier: 600 W Class D
System frequency -3 dB: 49 Hz - 18 kHz
System frequency -10 dB: 42 Hz - 18 kHz
Max SPL @ 10% THD/1m: 120 dB (halfspace, average)
Max SPL calculated: 125 dB (halfspace)
Limiter: Peak, RMS Limiter (Master)
Dimensions (WxHxD): 27 x 102 x 34 cm • 10-5/8 x 40-5/32 x 63-3/8"
Weight: 29 kg / 63.9 lbs.
Page 19

Example Applications and Connections
• Stero mode
Stereo
19
• Mono mode
Left
(Master)
Mono
(Master)
Mono
Right
(Slave)
Illustration
Master Slave Slave Slave Slave
Mono
(Slave)
Page 20

SOUNDCADDY One 1.0
• Musical performance with microphone and instrument
• Speech
Page 21

• Acoustic band with separate mixing console • Presentation with laptop or CD player
21
CD Player
Illustration
• Presentation with MP3 player
• Aligning the system
70°
CD Player
Page 22

SOUNDCADDY One 1.0
Page 23

23
Page 24

Technische Änderungen vorbehalten
Copyright 2011 Music & Sales GmbH • 03/2011
9840212 D-2414
HK Audio® • Postfach 1509 • 66595 St. Wendel
Germany • info@hkaudio.com • www.hkaudio.com
International Inquiries: fax +49-68 51-905 215
international@hkaudio.com
 Loading...