

Page 1
POLAR 10
Manual 1.1
• English • Français• Deutsch • Italiano • Español
Page 2

Important Safety Instructions!
Read before connecting!
This product has been built by the manufacturer in accordance with
IEC 62368-1 and left the factory in safe working order. To maintain
this condition and ensure non-risk operation, the user must follow the
advice and warning comments found in the operating instructions. If
this product shall be used in vehicles, ships or aircraft or at altitudes
exceeding 2000 m above sea level, take care of the relevant safety
regulations which may exceed the IEC 62368-1 requirements.
WARNING: To prevent the risk of fire and shock hazard, do not
expose this appliance to moisture or rain. Do not open case – no user
serviceable parts inside. Refer service to qualified service personnel.
This symbol, wherever it appears, alerts you to the presence
of uninsulated dangerous voltage inside the enclosure – voltage that
may be sufficient to constitute a risk of shock.
This symbol, wherever it appears, alerts you to the presence
of externally accessible hazardous voltage. External wiring connected
to any terminal marked with this symbol must be a "ready made
cable" complying with the manufacturers recommendations, or must
be a wiring installed by instructed persons only.
This symbol, wherever it appears, alerts you to important
operating and maintenance instructions in the accompanying
literature. Read the manual.
This symbol, wherever it appears, tells you: Take care! Hot
surface! To prevent burns you must not touch.
All electrical and electronic products including batteries
should be disposed of separately from the municipal waste stream via
designated collection facilities appointed by the government or the
local authorities.
Read these instructions. Keep these instructions. Follow all
warnings and instructions marked on the product and in this manual.
• Do not use this product near water. Do not place the product near
water, baths, wash basins, kitchen sinks, wet areas, swimming pools
or damp rooms.
• Do not place objects containing liquid on the product – vases,
glasses, bottles etc.
• Clean only with dry cloth.
• Do not remove any covers or sections of the housing.
• The set operating voltage of the product must match the local mains
supply voltage. If you are not sure of the type of power available
consult your dealer or local power company.
• Before connecting the device, please ensure that the mains supply
you are using is equipped with adequate protection against short
circuiting and grounding faults when the device is plugged in.
• To reduce the risk of electrical shock, the grounding of this product
must be maintained. Use only the power supply cord provided with
this product, and maintain the function of the center (grounding)
pin of the mains connection at any time. Make sure the mains outlet
used provides a proper protective ground connection.
• Do not defeat the safety purpose of the polarized or grounding-type
plug. A polarized plug has two blades with one wider than the other.
A grounding type plug has two blades and a third grounding prong.
The wide blade or the third prong are provided for your safety. If the
provided plug does not fit into your outlet, consult an electrician for
replacement of the obsolete outlet.
• Protect the power cord from being walked on or pinched particularly
at plugs, convenience receptacles, and the point where they exit
from the device! Power supply cords should always be handled
carefully. Periodically check cords for cuts or sign of stress, especially
at the plug and the point where the cord exits the device.
• Never use a damaged power cord.
• Unplug this product during lightning storms or when unused for long
periods of time.
• This product can be fully disconnected from mains only by pulling
the mains plug at the unit or the wall socket. The product must be
placed in such a way at any time, that disconnecting from mains is
easily possible.
• Fuses are to be replaced exclusively by qualified personnel, and then
only with fuses of the proper type and rating.
• Refer all servicing to qualified service personnel. Servicing is
required when the unit has been damaged in any way, such as:
- When the power cord or plug is damaged or frayed.
- If liquid has been spilled or objects have fallen into the product.
- If the product has been exposed to rain or moisture.
- If the product does not operate normally when the operating
instructions are followed.
- If the product has been dropped or the cabinet has been damaged.
• Do not connect external speakers to this product with an impedance
lower than the rated impedance given on the product or in this
manual. Use only cables with sufficient cross section according to
the local safety regulations.
• Keep away from direct sunlight.
• Do not install near heat sources such as radiators, heat registers,
stoves or other devices that produce heat.
• This apparatus is for moderate climates areas use, not suitable for
use in tropical climates countries.
• Do not block any ventilation openings. Install in accordance with
manufacturer’s instructions. This product must not be placed in
a built-in installation such as a rack unless proper ventilation is
provided.
• Always allow a cold device to warm up to ambient temperature,
when being moved into a room. Condensation can form inside it and
damage the product, when being used without warming up.
• Do not place naked flame sources, such as lighted candles on the
product.
• The device must be positioned at least 20 cm/8" away from walls.
• Use only with the cart, stand, tripod, bracket or table specified by
the manufacturer or sold with the product. When a cart is used, use
caution when moving the cart/product combination to avoid injury
from tip-over.
• Use only accessories recommended by the manufacturer, this applies
for all kind of accessories, for example protective covers, transport
bags, stands, wall or ceiling mounting equipment. In case of
attaching any kind of accessories to the product, always follow the
instructions for use, provided by the manufacturer. Never use fixing
points on the product other than specified by the manufacturer.
• This appliance is NOT suitable to be used by any person or persons
(including children) with limited physical, sensorical or mental
ability, or by persons with insufficient experience and/or knowledge
to operate such an appliance. Children under 4 years of age must be
kept away from this appliance at all times.
• Never push objects of any kind into this product through cabinet
slots as they may touch dangerous voltage points or short out parts
that could result in risk of fire or electric shock.
• This product is capable of delivering sound pressure levels in excess
of 90 dB, which may cause permanent hearing damage! Exposure
to extremely high noise levels may cause a permanent hearing loss.
Wear hearing protection if continously exposed to such high levels.
• The manufacturer only guarantees the safety, reliability and
efficiency of this product if:
- Assembly, extension, re-adjustment, modifications or repairs are
carried out by the manufacturer or by persons authorized to do so.
- The electrical installation of the relevant area complies with the
requirements of IEC (ANSI) specifications.
- The unit is used in accordance with the operating instructions.
• This product is optimized for use with music and speech signals.
Using this product with sine wave, square wave or other kind of
measuring signals at higher level may lead to severe damage of the
product.
General Notes on Safety for Loudspeaker
Systems
Mounting systems may only be used for those loudspeaker
systems authorized by the manufacturer and only with the mounting
accessories specified by the manufacturer in the installation
instructions. Read and heed the manufacturer’s installation
instructions. The indicated load-bearing capacity cannot be guaranteed
and the manufacturer will not be liable for damages in the event of
improper installation or the use of unauthorized mounting accessories.
The system’s load-bearing capacity cannot be guaranteed and
the manufacturer will not be liable for damages in the event that
loudspeakers, mounting accessories, and connecting and attaching
components are modified in any way.
Components affecting safety may only be repaired by the manufacturer
or authorized agents, otherwise the operating permit will be voided.
Installation may be performed qualified personnel only, and
then only at pick-points with sufficient load-carrying capacity and
in compliance with local building regulations. Use only the mounting
hardware specified by the manufacturer in the installation instructions
(screws, anchors, etc.). Take all the precautions necessary to ensure
bolted connections and other threaded locking devices will not loosen.
Fixed and portable installations (in this case, speakers and
mounting accessories) must be secured by two independent safeties to
prevent them from falling. Safeties must be able to catch accessories
or parts that are loose or may become loose. Ensure compliance with
the given national regulations when using connecting, attaching,
and rigging devices. Factor potential dynamic forces (jerk) into the
equation when determining the proper size and load-bearing capacity
of safeties.
Be sure to observe speaker stands’ maximum load-bearing
capacity. Note that for reasons of design and construction, most
speaker stands are approved to bear centric loads only; that is, the
speakers’ mass has to be precisely centered and balanced. Ensure
speaker stands are set up stably and securely. Take appropriate added
measures to secure speaker stands, for example when:
- the floor or ground surface does not provide a stable, secure base.
- they are extended to heights that impede stability.
- high wind pressure may be expected.
- there is the risk that they may be knocked over by people.
Special measures may become necessary as precautions against
unsafe audience behavior. Do not set up speaker stands in evacuation
routes and emergency exits. Ensure corridors are wide enough and put
proper barriers and markings in place when setting speaker stands up
in passageways. Mounting and dismounting are especially hazardous
tasks. Use aids suitable for this purpose. Observe the given national
regulations when doing so.
gloves, and safety shoes) and use only suitable means of ascent
(ladders, scaffolds, etc.) during installation. Compliance with this
requirement is the sole responsibility of the company performing the
installation.
WARNING!
of the mounting fixtures and loudspeakers to ensure it is properly
secured.
The operator of loudspeaker systems (fixed or portable) must
regularly inspect or task a third party to regularly inspect all system
components in accordance with the given country’s regulations and
have possible defects repaired immediately.
We also strongly recommend maintaining a logbook or the like to
document all inspections.
Also be sure to provide sufficient safety margins for the rigging points
used for flown systems. Observe the given national regulations when
doing so.
Professional loudspeaker systems can produce harmful
volume levels. Even prolonged exposure to seemingly harmless levels
(starting at about 95 dBA SPL) can cause permanent hearing damage!
Therefore we recommend that everyone who is exposed to high volume
levels produced by loudspeaker systems wears professional hearing
protection (earplugs or earmuffs).
Manufacturer: Stamer Musikanlagen GmbH, Magdeburger Str. 8, 66606
St. Wendel, Germany
Wear proper protection (in particular, a helmet,
After installation, inspect the system comprised
Version 2.8 08/2019
Page 3

POLAR 10
POLAR 10 1.1
Welcome to the HK Audio family!
Thank you for choosing a brand-name product made by our company. It
was engineered and built with the greatest care so it will serve you well for
many tomorrows to come.
Even if your experience with sound systems runs deep, some things
about this product are sure to be new to you. This is why we ask that you do
not set this manual aside without reading it fi rst. Be sure to keep it in a
safe place for later reference.
Here's wishing you the best sound at every occasion!
Your HK Audio team
Strong electromagnetic interference or electrostatic discharge
may prevent the product from functioning normally. If this happens, the
product may be returned to normal operation by powering o and on
again. Should this not result in the product functioning normally again,
please move the product away from the source of disturbance and try
again.
Warranty
Use the convenient online registration option at www.hkaudio.com.
1 General Information
1.1 Unpacking and Inventory
Please remove the entire system from the cartons and make sure you have
received all its component parts. POLAR comes in two cartons and consists
of a subwoofer, a columnar mid/high unit and a spacer. The shipping box for
the subwoofer also contains a padded protective cover for the bass bin, a
gig bag for the two columnar elements, and the mains power cord.
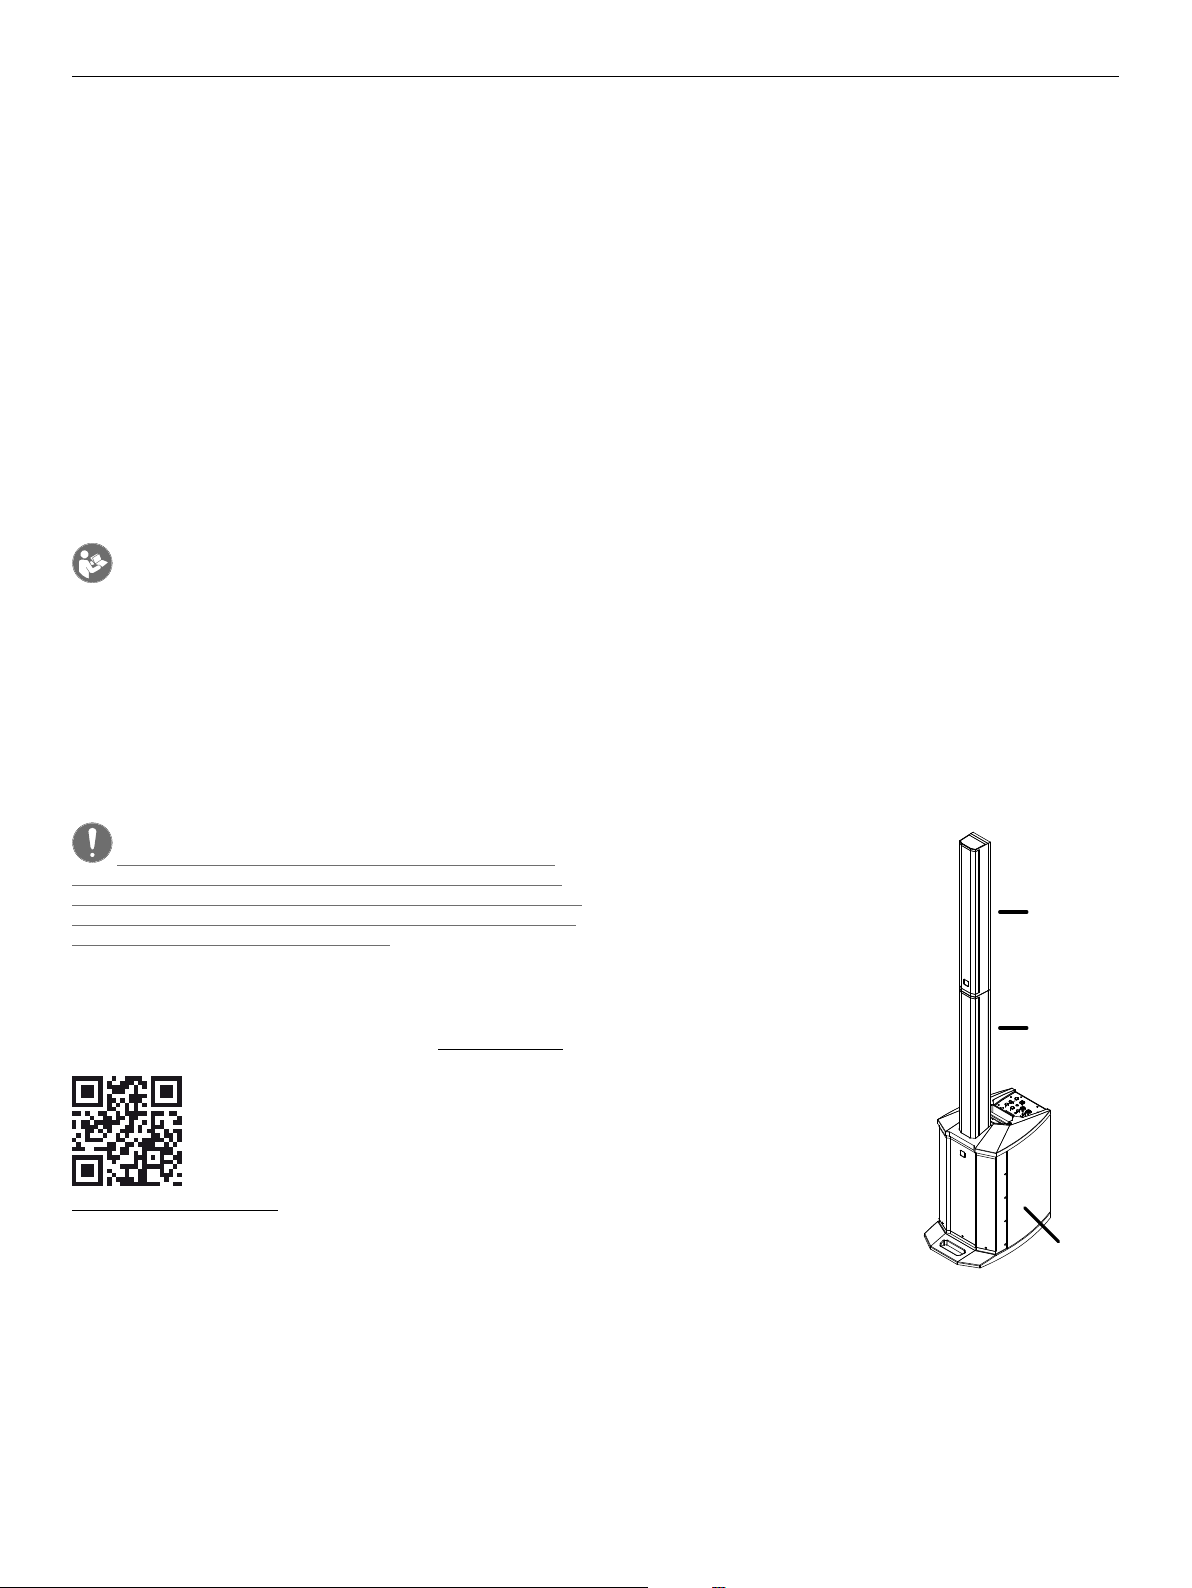
1.2 The Components
The Subwoofer
The powered subwoofer houses the bass woofer, the system’s electronic
components and the power amplifi ers. On the top panel is a signal-carrying,
plug-in port serving to connect the column’s elements and a carrying
handle. Another handy grip routed into the front of the bottom panel
lets you comfortably carry the subwoofer with one or two hands. The
integrated control panel with the display, control features and connectors
slopes slightly toward the rear to protect the
controls against damage. The bass refl ex
ports are located at the bottom of the front
panel. The power o /on switch and mains
socket are on the rear panel.
The Column
• The column consists of a mid/high unit and
a spacer.
• The spacer plugs into a signal-carrying
socket/coupler on the subwoofer. The mid/
high unit plugs into the spacer using the
same type of connector.
• This coupler provides a mechanical and
electrical connection between the mid/high
unit and spacer, so you do not need speaker
cables to connect the two.
Mid/high
unit
Spacer
• Français • Italiano • Español
http://warranty.hkaudio.com
The registration is only valid if the device is registered within 30 days of
the date of purchase.
HK Audio
Technischer Service
Postfach 1509
66595 St. Wendel, Germany
Fax: +49 6851 905 100
1.3 Setting up the System
Subwoofer
Connecting Components
• Place the subwoofer on a level, stable surface.
• Connect the spacer and the mid/high unit to the subwoofer as described
in section 1.2 above.
• Make sure the components are fi rmly seated and connected to one
another.
• Plug the power cord into the rear mains power socket.
• English • Deutsch
3
Page 4

POLAR 10 1.1
Heads up: Feel free to set the system up without a spacer if you wish to
place it on a high stage, table or the like.
Caution! Do not transport or otherwise move an assembled POLAR
system. This could damage it, or if it tips, injure people or destroy
property.
Stereo Setup
RL
2 Connectors and Control Features
Rear Panel
Caution: To reduce
the risk of electric
shock, grounding of
the center pin of
this plug must
be maintained.
100-240 V~
50-60 Hz
0.8 A @ 1/8
output power
1
Mains
●
Please use the factory-included power cable to connect this IEC mains
socket to a wall outlet.
Heads up: The built-in switching power unit features a wide-range input
that automatically adapts to AC voltages ranging from 100 V to 240 V at
50 or 60 Hz.
2
Power
●
This on/o button powers the system up and down. When you switch
POLAR on, it loads the most recently used DSP settings and will be ready
to operate within seconds when the four channels’ level indicators and the
Master volume setting appear in the display.
Mains
1
Serial No.
Power
2
Caution: Risk of
electric shock!
Do not open!
Refer servicing
On
O
to qualified
service
personnel.
If you wish to run two POLARs in stereo, route the mixing console’s left
channel to the system on the left and its right channel to the system on
the right. Make sure the DSP settings for Mode, EQ, Delay, and so on are
identical for both systems. See chapter 3 for more on this.
Delay Line for Distributed Systems
POLAR’s Delay function lets you use it for a delay line. See section 3.2,
Delay, to learn more about this. All you have to do is measure the distance
between the main speaker and POLAR in meters, and enter that number to
"Delay" in the DSP menu. POLAR factors the main speaker’s delay into the
equation, automatically calculates the delay time, and renders the signal
with the proper delay.
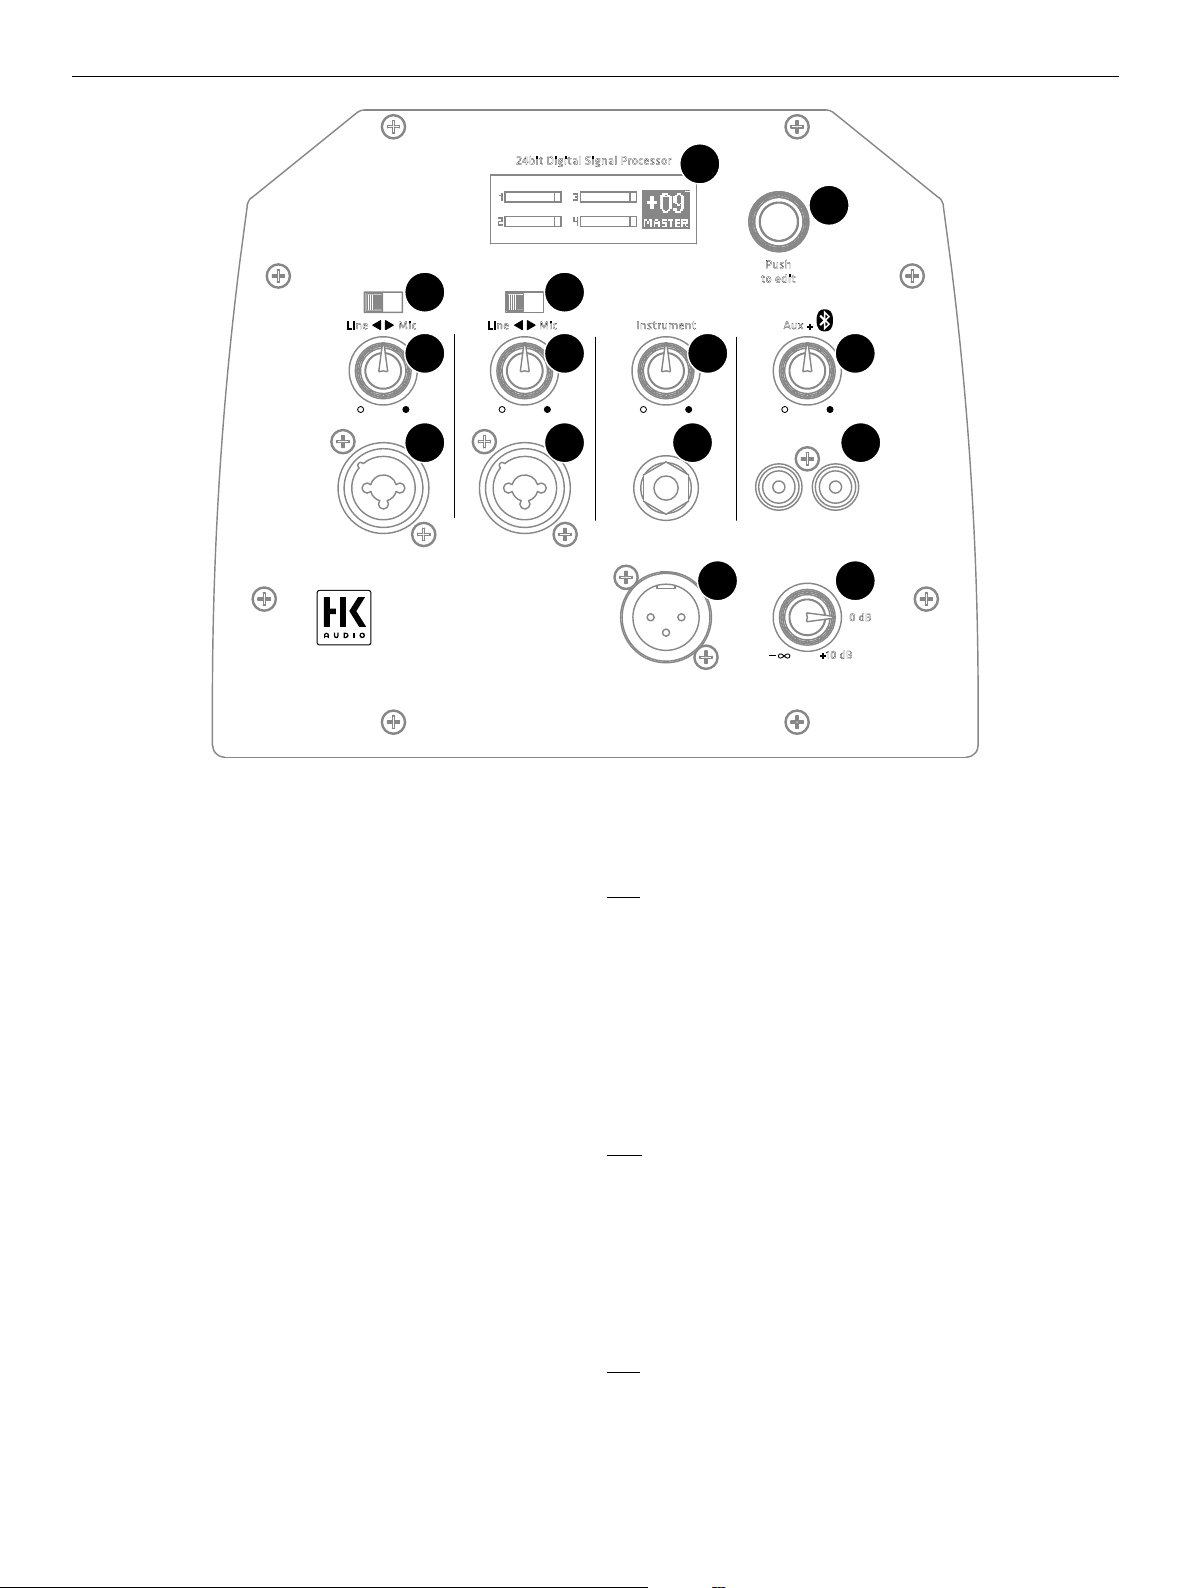
Channel 1 and Channel 2 (Line/Mic)
Channel 1 and 2’s feature sets are identical. These channels accept
microphones and line-level instruments such as keyboards.
3
Input
●
This balanced XLR / 1/4" (6.35 mm) combo jack accepts an XLR connector or
a balanced or unbalanced 1/4" (6.35 mm) jack plug.
Heads up: A balanced signal is always preferable because it is less
susceptible to HF and other interference.
4
Line/Mic
●
Adjust the preamplifi ers’ gain and impedance with this selector. Set it to
Line to connect a line-level device such as a mixing console, keyboard or the
like. Set it to Mic to connect a dynamic microphone.
5
Volume
●
Turn this knob to adjust the signal level. Twist it counterclockwise to the far
left to turn the volume all the way down and clockwise to the far right to
turn it all the way up.
4
Page 5

POLAR 10 1.1
24bit Digital Signal Processor
12
Master
13
Push
to edit
4
Line Mic Line Mic Instrument Aux +
5
1234
3
POLAR 10
4
5 7 9
3 6 8
SubMix Out
11
10
0 dB
+10 dB
Channel 3 (Instrument)
Use this input to connect an instrument with high-impedance (Hi-Z) output
signals such as an electric or acoustic guitar or bass or an electric piano.
The high-impedance input stage renders the instrument’s full tonal and
dynamic range.
6
Input
●
Connect instruments to this unbalanced 1/4" (6.35 mm) jack.
7
Volume
●
Turn this knob to adjust the signal level. Twist it counterclockwise to the far
left to turn the volume all the way down and clockwise to the far right to
turn it all the way up.
Channel 4 (Aux + Bluetooth)
Connect stereo sources such as DJ consoles, CD/MP3 players or mixing
consoles to Channel 4 and use it to stream audio via Bluetooth. Channel 4
accepts and renders Aux and Bluetooth signals at the same time.
8
Input
●
Connect audio sources with high output levels such as a CD/MP3 player,
smartphone, DJ mixer or a computer to this unbalanced input consisting of
two RCA/cinch connectors.
9
Volume
●
Turn this knob to adjust the signal level for both the Aux and Bluetooth
inputs. Twist it counterclockwise to the far left to turn the volume all the
way down and clockwise to the far right to turn it all the way up.
Heads up: When using the Aux input while streaming audio via
Bluetooth, balance the two signal levels by adjusting the Bluetooth
player’s volume to match that of the incoming Aux signal.
10
Sub
●
Turn this knob to adjust the amount of bass. Twist it counterclockwise to
the far left to turn the bass all the way down and clockwise to the far right
to turn it all the way up. Turn the Sub knob to 0 dB to achieve a relatively
balanced volume between the column and the subwoofer.
Good to know: It is often a good idea to back o the bass slightly when
placing the subwoofer in a corner or in very small rooms. Reducing
the amount of bass also increases the system’s peak volume without
triggering its limiter circuits.
11
Mix Out
●
This balanced XLR output provides a summed signal – that is, a mix of all
input channels’ signals.
Heads up: Mix Out serves to forward the summed signal to an FOH
mixer, other speakers, monitors or recording device. You can also send it
another powered subwoofer if the unit has a high-cut or low-pass fi lter
to suppress high frequencies.
• English • Deutsch • Français • Italiano • Español
5
Page 6
POLAR 10 1.1
12
LCD Display
●
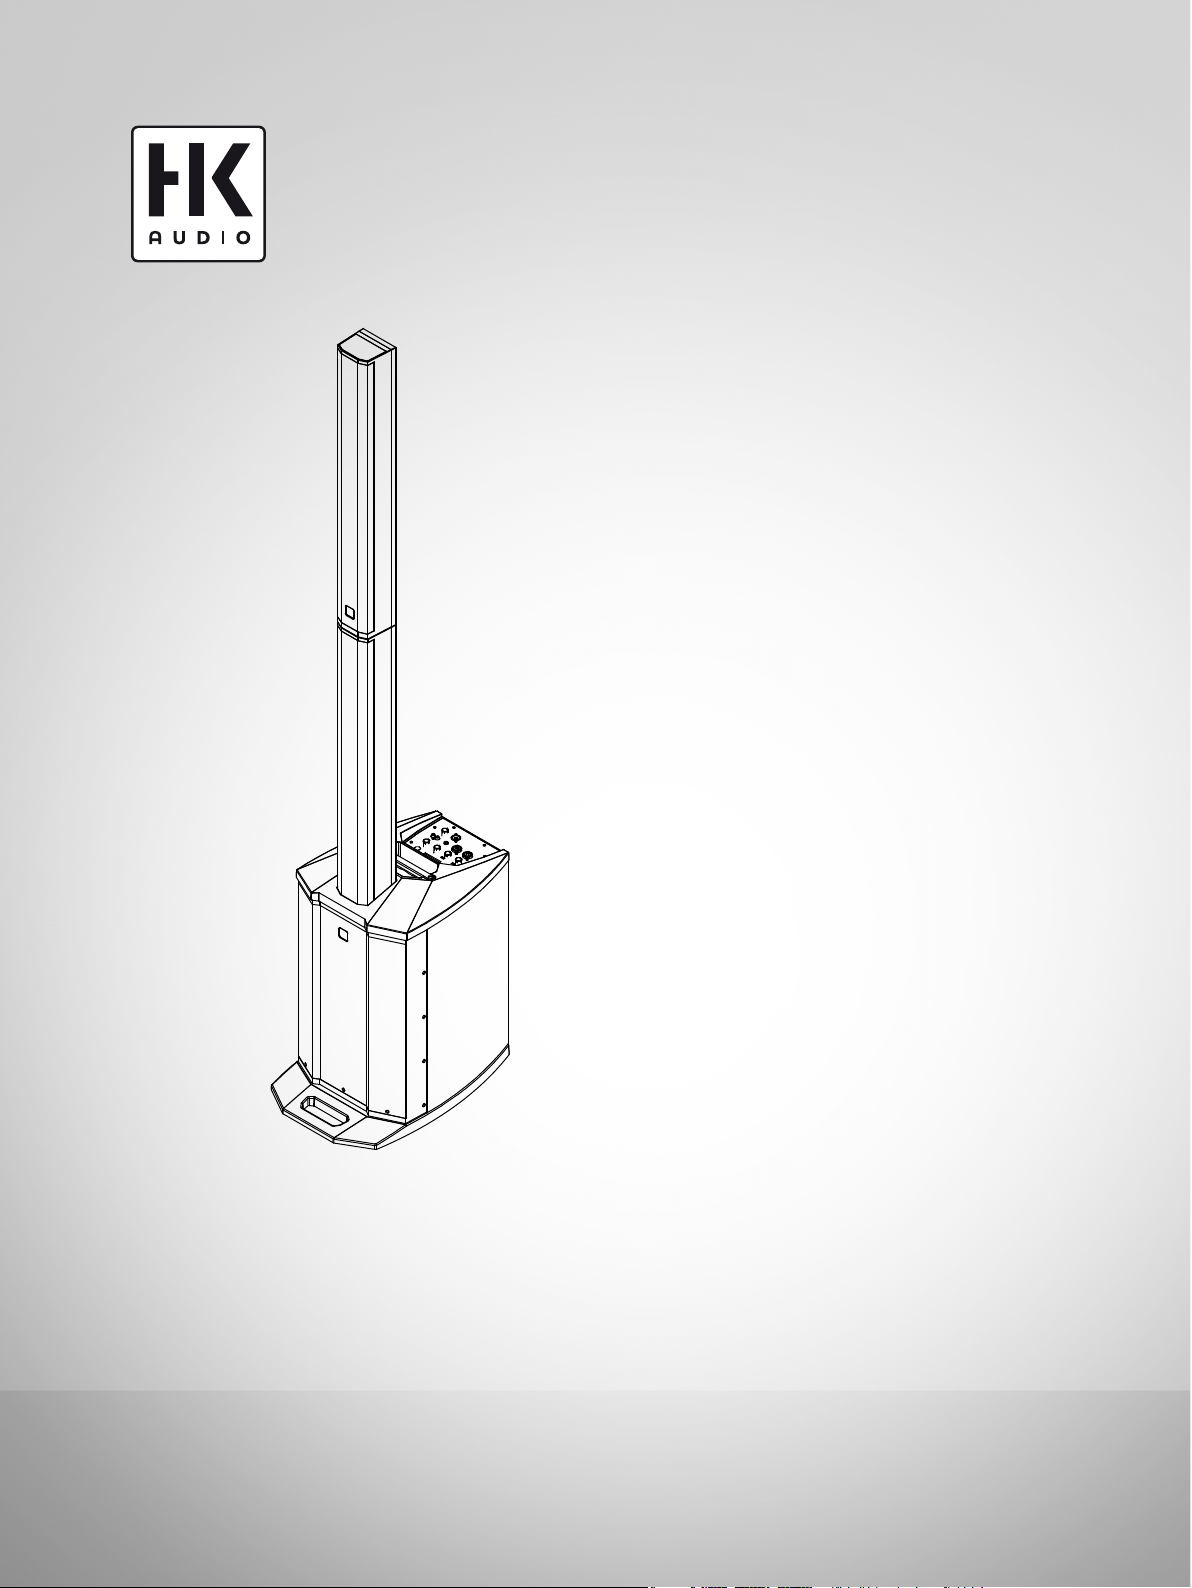
In normal operating mode, this display indicates the input channels’ levels
and the master volume.
In DSP mode, it shows the parameters of the currently selected DSP menu.
See section 3.2, DSP Settings, for more on this.
Level Indicators
The four level indicators show the input channels’ levels. The Overload
section tells you the incoming signal is saturating the input because its
level is too high. If Overload lights up, turn down the channel’s input gain
and/or the connected device’s output level.
Heads up: POLAR has enough dynamic range to handle occasional
spikes where the signal peaks out. However, if an Overload indicator
lights up continuously or it sounds like the signal is clipping, turn the
given channel’s volume down to prevent the distortion produced by an
overloaded system.
3.1 Bluetooth
Bluetooth
POLAR can stream audio via Bluetooth, which is a wireless way of rendering
music on mobile Bluetooth-enabled players such as smartphones and tablet
PCs.
Connecting to a Bluetooth device
• Press the master knob once. The display will show the menu option
"Bluetooth".
• Press the Master knob again ("Pairing") to start the Bluetooth connection
process known as pairing. Bluetooth-enabled devices should now be able
to discover POLAR. The Bluetooth icon in the display fl ashes slowly for 120
seconds, indicating that you can pair the system with a Bluetooth-enabled
device during this two-minute window.
• Go to the Bluetooth menu of your player and select "HK Audio POLAR" to
pair the two devices.
• The Bluetooth symbol lights up continuously in the POLAR display as soon
as the two are properly paired.
Pairing: activate Bluetooth connection
(push again to activate pairing process)
Good to know: It is important to dial in the proper signal levels to
minimize noise. The best way to do this is by maxing out the channel
levels: turn up the input channels’ volume until the Overload indicator
lights up at the loudest signal peak, and then back it o just enough so
the Overload indicator no longer lights up. Then turn the Master knob up
only as far as you need it to go.
13
Master (push to edit)
●
The Master knob on the right of the display serves primarily to adjust the
system’s overall volume. The display indicates the current value; the control
range sweeps from -60 to +10 dB in 1 dB increments.
3 DSP Menu
Press the Master knob (push to edit) to access and edit various DSP
parameters listed in a menu. The display shows the currently selected
parameter.
• Turn the Master knob to navigate the menu. Press it to select the current
menu option or confi rm your entry.
Note: POLAR will exit the selected menu option and automatically
return to the main Master Volume window if you do not make or confi rm
an entry within eight seconds. It does this to prevent inadvertent
operating errors.
The display indicates the Bluetooth status:
• Display shows the number 4 rather than a Bluetooth icon
Bluetooth is o
• Icon fl ashes slowly
You have 120 seconds to pair devices
• Bluetooth icon lights up continuously
Devices are connected
• Icon fl ashes quickly
Bluetooth pairing failed or the connection dropped out (e.g. out of
Bluetooth range)
Heads up: If the Bluetooth icon fl ashes quickly, check if your Bluetooth
device is within range, Bluetooth is enabled, and POLAR is selected in
the list of Bluetooth devices. If POLAR does not appear in the list of
Bluetooth devices, try Bluetooth Pairing again to reconnect.
Heads up: The system’s memory stores all current DSP settings when
you power it down and reloads those settings when you power the
system back up again.
The following functions are available:
6
Channel 4 renders audio signals sent from the Bluetooth device. Adjust the
level with channel 4’s Volume knob or with the control on the Bluetooth
device. We strongly recommend turning channel 4’s volume down before
you hit the play button on your Bluetooth device.
Read chapter 4 to learn more about Bluetooth.
Page 7
POLAR 10 1.1
3.2 Settings
System EQ
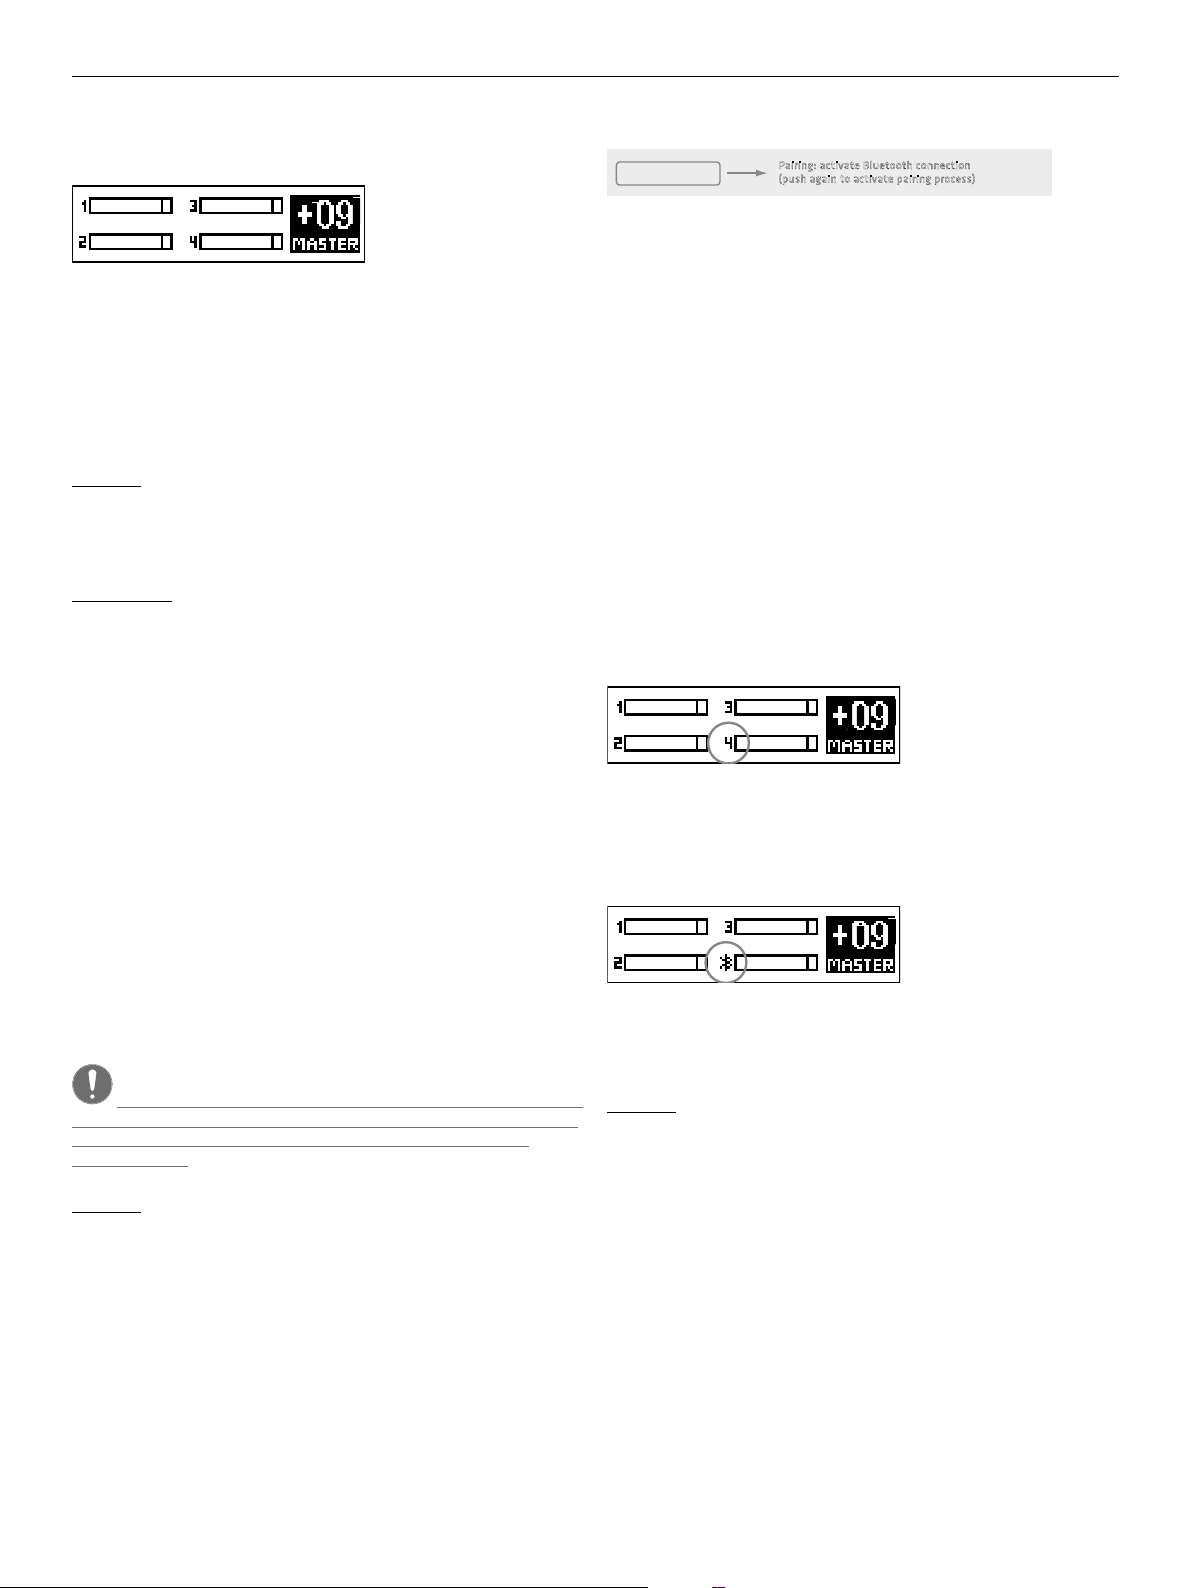
Hi EQ
Mid EQ
Mid Freq
Low EQ
POLAR’s three-band EQ serves to tune the system’s overall sound.
Hi EQ and Lo EQ are shelving fi lters; Mid EQ is semi-parametric.
Good to know: Use these tone controls to tweak the overall sound to
suit the application and your taste. It is often a good idea to dial down
the bass a bit in small rooms with short distances between the system
and walls and audiences. The same goes for high frequencies when a
sensitive microphone or highly refl ective surfaces such as glass walls or
windows increase the likelihood of feedback. Use the semi-parametric
midrange band to cut a specifi c frequency that is interfering with your
sound or boost a frequency range that sounds a little thin.
Hi EQ: Use this parameter to boost or cut high frequencies.
Control range: +/-12 dB • Frequency: 12 kHz
Mid EQ: Use this parameter to boost or cut midrange frequencies.
Control range +/-12 dB
Mid Freq: Use this parameter to select and adjust the midrange center
frequency. Frequency range: 70 Hz - 12 kHz
Low EQ: Use this parameter to boost or cut low frequencies.
Control range: +/-12 dB • Frequency: 70 Hz
Heads up: the EQ only applies to the speakers, it has no e ect on the Mix
Out.
Mode
Mode
Three preprogrammed modes let you tune the system’s sound to suit the
application.
Music: This mode is your go-to choice for live applications and playing all
kinds of music, apart from electronic music.
Voice: Optimized for the human voice, this mode is good for speaking
engagements and for other speech applications.
DJ: This mode is the best choice for playing electronic music.
Heads up: Changing the Music/Voice/DJ mode does not overwrite
the three-band EQ’s settings. The three-band EQ is an independent,
additional sound-shaping tool.
Adjust high frequency:
+/- 12 dB (default: 0 dB)
Adjust mid frequency:
+/- 12 dB (default: 0 dB)
Set mid frequency:
70 Hz – 12 kHz (default: 1 kHz)
Adjust low frequency:
+/- 12 dB (default: 0 dB)
Music (default)
Voice
DJ
Delay
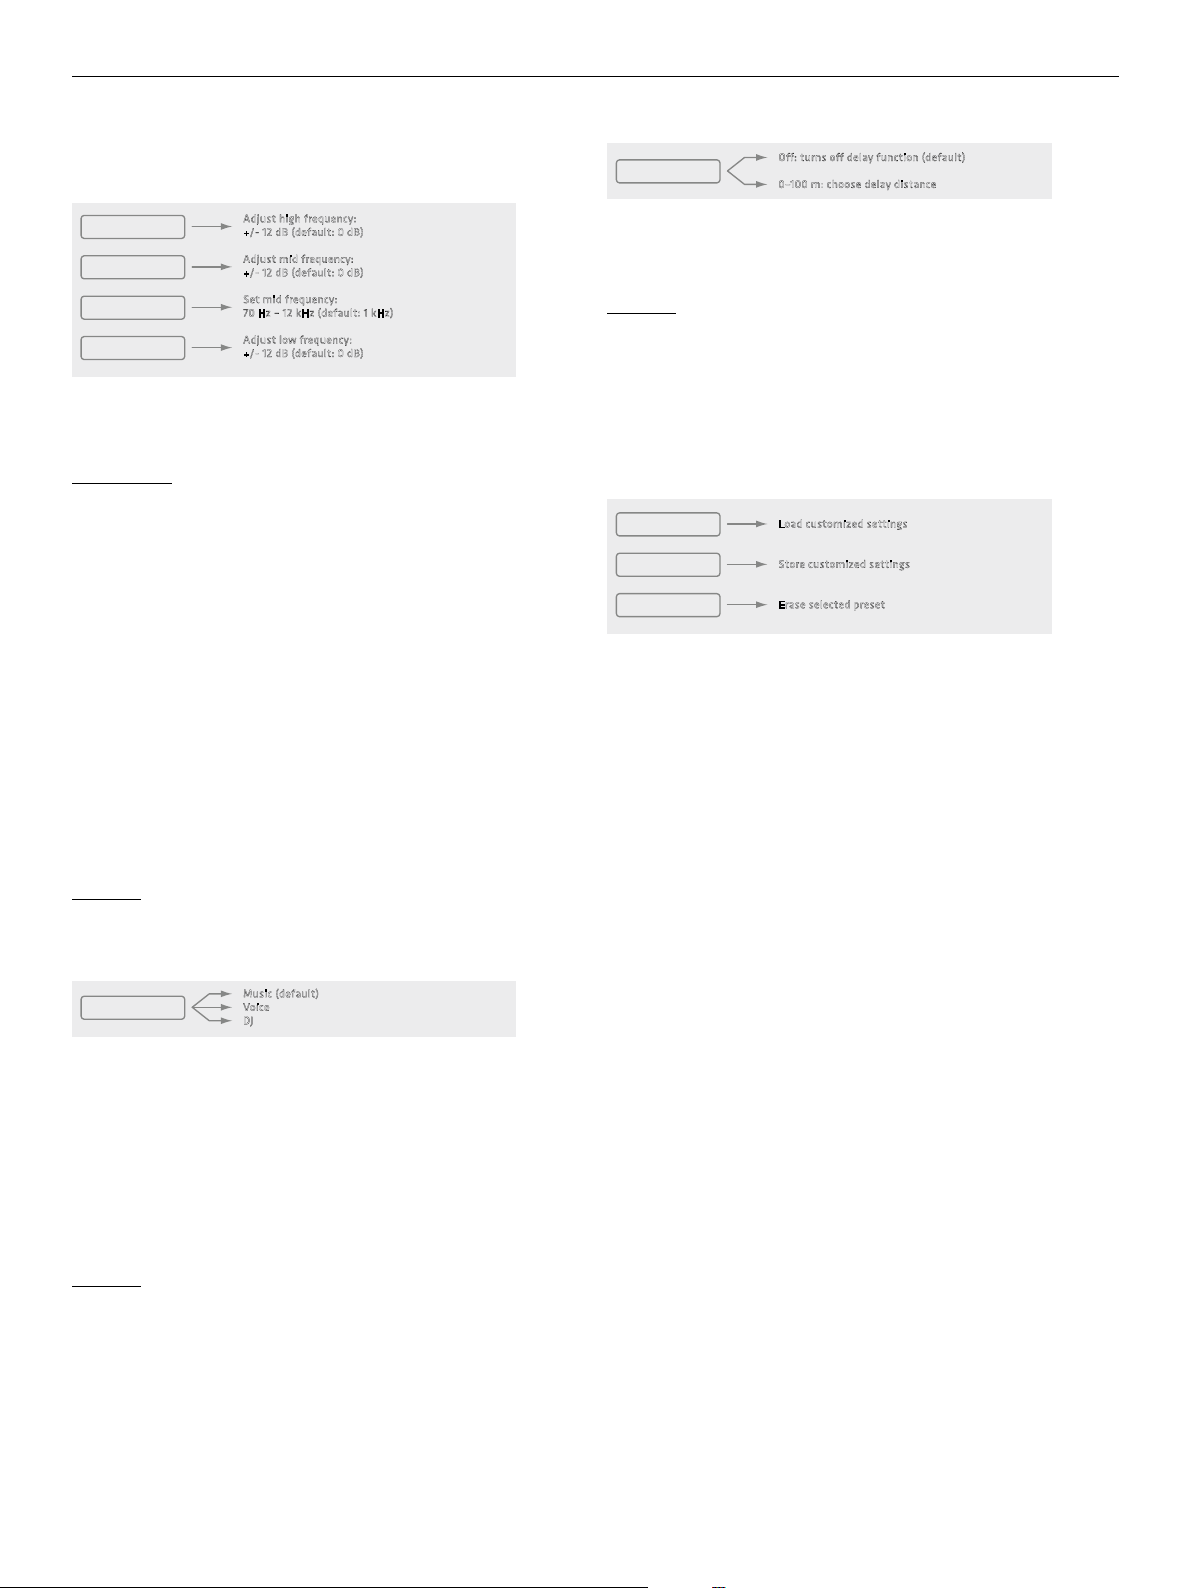
Delay
Use the "Delay" menu option if you need to delay the audio signal rendered
by the POLAR speakers. The system makes it easy to do this: simply set the
delay from 0 (o ) to 100 meters in 0.25-meter increments.
Heads up: The delay function comes very handy if you want to use
POLAR as a delay line for larger events. In acoustically challenging
venues, it can help you distribute sound more uniformly, improve speech
intelligibility all the way to the back rows, achieve high-quality audio,
and reduce the volume of the main PA up front by the stage. All you need
to do to sync POLAR up with the main PA is enter the distance between
POLAR and the stage in meters.
O: turns o delay function (default)
0–100 m: choose delay distance
3.3 Managing Presets
Load Preset
Store Preset
Erase Preset
Load Preset
Five memory slots (U1 to U5) are available for storing your personal DSP
settings. "U" stands for user preset. A user preset contains the settings
for all parameters in the DSP menu (mode, three-band EQ, delay, display
brightness, etc.).
Turn the Master knob to select the preset you wish to load from U1 through
U5, and then press the knob to load the selected preset. "Exit" quits the
menu without loading a preset.
Store Preset
This option stores the current DSP menu settings. Turn the Master knob to
select the desired memory slot from U1 through U5. Confi rm your selection
by pressing the Master knob. A box serving to name this preset appears in
the display. "Exit" quits the menu without saving a preset.
Text Editor: Turn the Master knob to access the text box and navigate the
menu to the Save, Clear and Cancel options. Once you have dialed up the
text box, press the knob to select the fi rst of the twelve character spaces,
and then turn it to select a letter or character. Press the knob again to
move to the next character space, and then turn it to select the next letter
or character. Press the Master knob twice – without turning it – to exit the
text box. The enter symbol, an arrow, will appear in the display. Now you can
turn the knob to navigate from the text box to the Save, Clear and Cancel
options.
Save: Selecting Save lets you store the preset by pressing the Master knob.
This takes you back to the U1 to U5 selection menu, where you can copy the
preset to another memory slot or quit the menu via Exit.
Clear: Selecting Clear lets you wipe the Text box clean by pressing the
Master knob so you can enter a new name.
Cancel: Selecting Cancel lets you stop the naming process by pressing the
Master knob. This takes you back to the U1 to U5 selection menu, where
you can select a di erent memory slot or cancel the entire saving process
via "Exit".
Load customized settings
Store customized settings
Erase selected preset
• English • Deutsch • Français • Italiano • Español
7
Page 8
POLAR 10 1.1
Erase Preset
This option serves to delete the selected preset. Pressing the Master knob
does not yet erase the preset. A confi rmation prompt appears fi rst:
Confi rm Erase: Yes/No
Turn the knob to select Yes or No, and then press the Master knob to
confi rm your selection. Yes irrevocably deletes the preset; No takes you back
to the DSP menu.
3.4 Display
LCD Dim
Brightness
Contrast
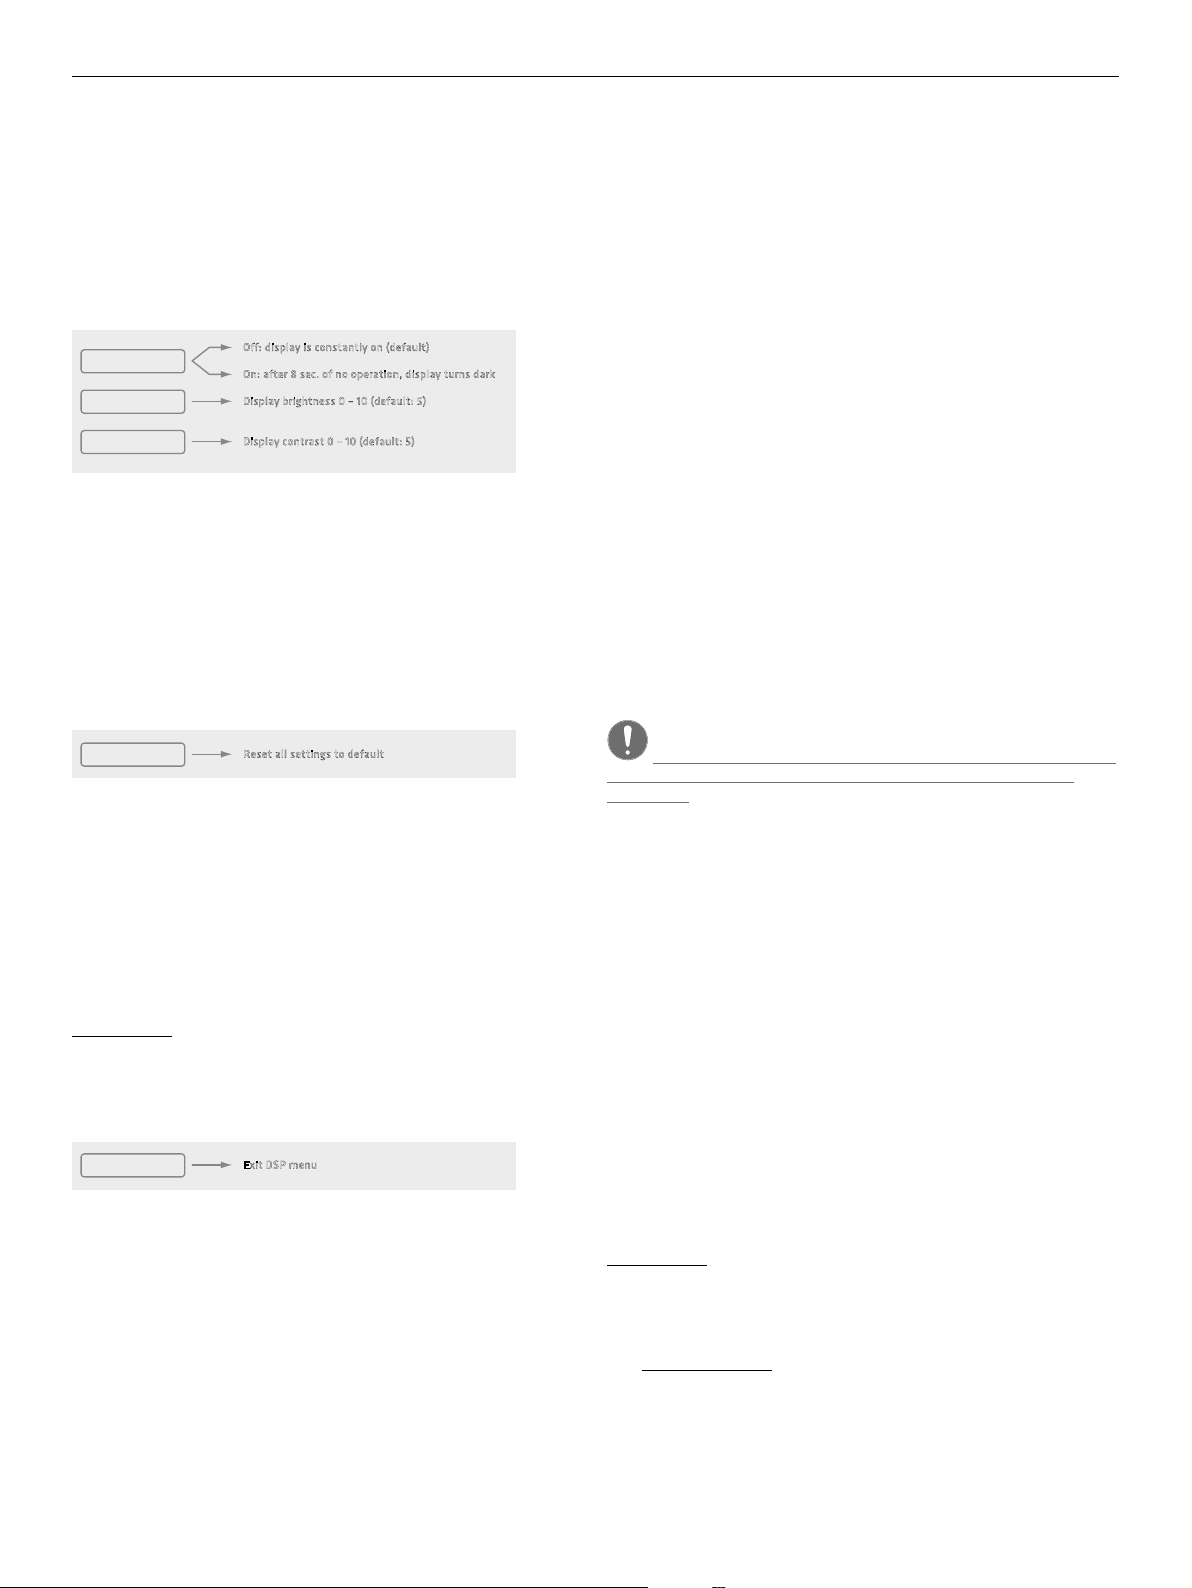
LCD Dim: Deactivate (O ) this function if you want the display to remain
bright. Activate it (On), and the display will dim eight seconds after you
last used the Master knob. The readout darkens, but it will remain clearly
legible. As soon as you use the Master knob, the display will brighten to the
set level.
Bright: Adjusts the display’s brightness from 0 to 10.
Contrast: Adjusts the display’s contrast from 0 to 10.
O: display is constantly on (default)
On: after 8 sec. of no operation, display turns dark
Display brightness 0 – 10 (default: 5)
Display contrast 0 – 10 (default: 5)
3.5 Factory Reset
4 Bluetooth
Pairing a Bluetooth device
• Press the Master knob once to access the "Bluetooth" menu.
• Press it again to start the pairing process.
• The Bluetooth icon in the display fl ashes slowly and "POLAR" can be found
in the Bluetooth list of the Bluetooth-enabled device for 120 seconds.
• Select "HK Audio POLAR" on the Bluetooth-enabled device to pair it with
POLAR.
The Bluetooth symbol lights up continuously in the POLAR display as soon
as the two are properly connected. Read section 3.1 to learn more about the
Bluetooth status indicator in the display.
Automatic Pairing
When you switch POLAR back on again, it automatically searches for the
most recently connected device for 120 seconds. Once it fi nds that device,
POLAR connects to it so you do not have to dial up and launch Bluetooth
Pairing manually. If the device fails to connect after 120 seconds, you can
either trigger an automatic search again by switching POLAR o and back
on again, or launch the search manually by activating Bluetooth Pairing.
Switching Bluetooth Devices
You cannot switch to another device while a Bluetooth device is paired or
POLAR is searching for the most recently connected device. You will have to
dial up and launch Bluetooth Pairing manually to disconnect the currently
paired device and connect another Bluetooth device.
Factory Reset
Reset all settings to default
Reset
• "Reset" lets you restore POLAR’s factory DSP settings.
• Pressing the Master knob does not yet trigger a reset. A security prompt
appears fi rst:
Confi rm Reset: Yes/No
Turn the knob to select Yes or No, and then press the Master knob to
confi rm your selection. Yes irrevocably resets all DSP functions to the
factory defaults, with Music mode activated, the Bluetooth connection
severed, and all fi ve user presets erased.
Good to know: This function comes in handy if you frequently rent
the system out. It lets you quickly restore the factory settings before
handing the system over to the next customer.
3.6 Exit DSP Menu
Exit
This menu option lets you quit the DSP menu and restore the Master knob
to its function as a volume control. This also happens automatically if you
leave the Master knob to idle for eight seconds.
Exit DSP menu
Heads up: Bluetooth Pairing always triggers a new attempt to pair
a Bluetooth-enabled device and disconnects the current Bluetooth
connection.
Range
POLAR supports Bluetooth 5. Bluetooth 5-enabled devices’ range can
extend up to 40 meters. Devices that do not support Bluetooth 5 typically
run up to 10 meters, but that depends on factors such as the given device’s
quality, transmission power and current environment. For example, walls
obstructing the transmission path or a protective cover on the Bluetooth
device impede radio communication. The sound drops out if the device
moves out of range or behind walls that interfere with the signal. In this
case, the Bluetooth icon in the POLAR display will fl ash quickly.
The connection re-establishes automatically if you bring the Bluetooth
device back in range within 120 seconds, and the Bluetooth icon in the
POLAR display will light up continuously.
Bluetooth Audio Stream Stutters or Drops Out
A cable is less susceptible to interference than Bluetooth, which has to send
a constant stream of audio data via a radio frequency.
To get a clear signal without dropouts, it is best to align POLAR and the
source device in line of sight of one another.
Good to know: Your source device may be set up to issue ringtones,
notifi cations and system sounds. The speakers will render these sounds
along with the audio stream if they arrive via Bluetooth, so be sure to
disable these functions on your Bluetooth device.
Visit www.bluetooth.org to learn more.
8
Page 9
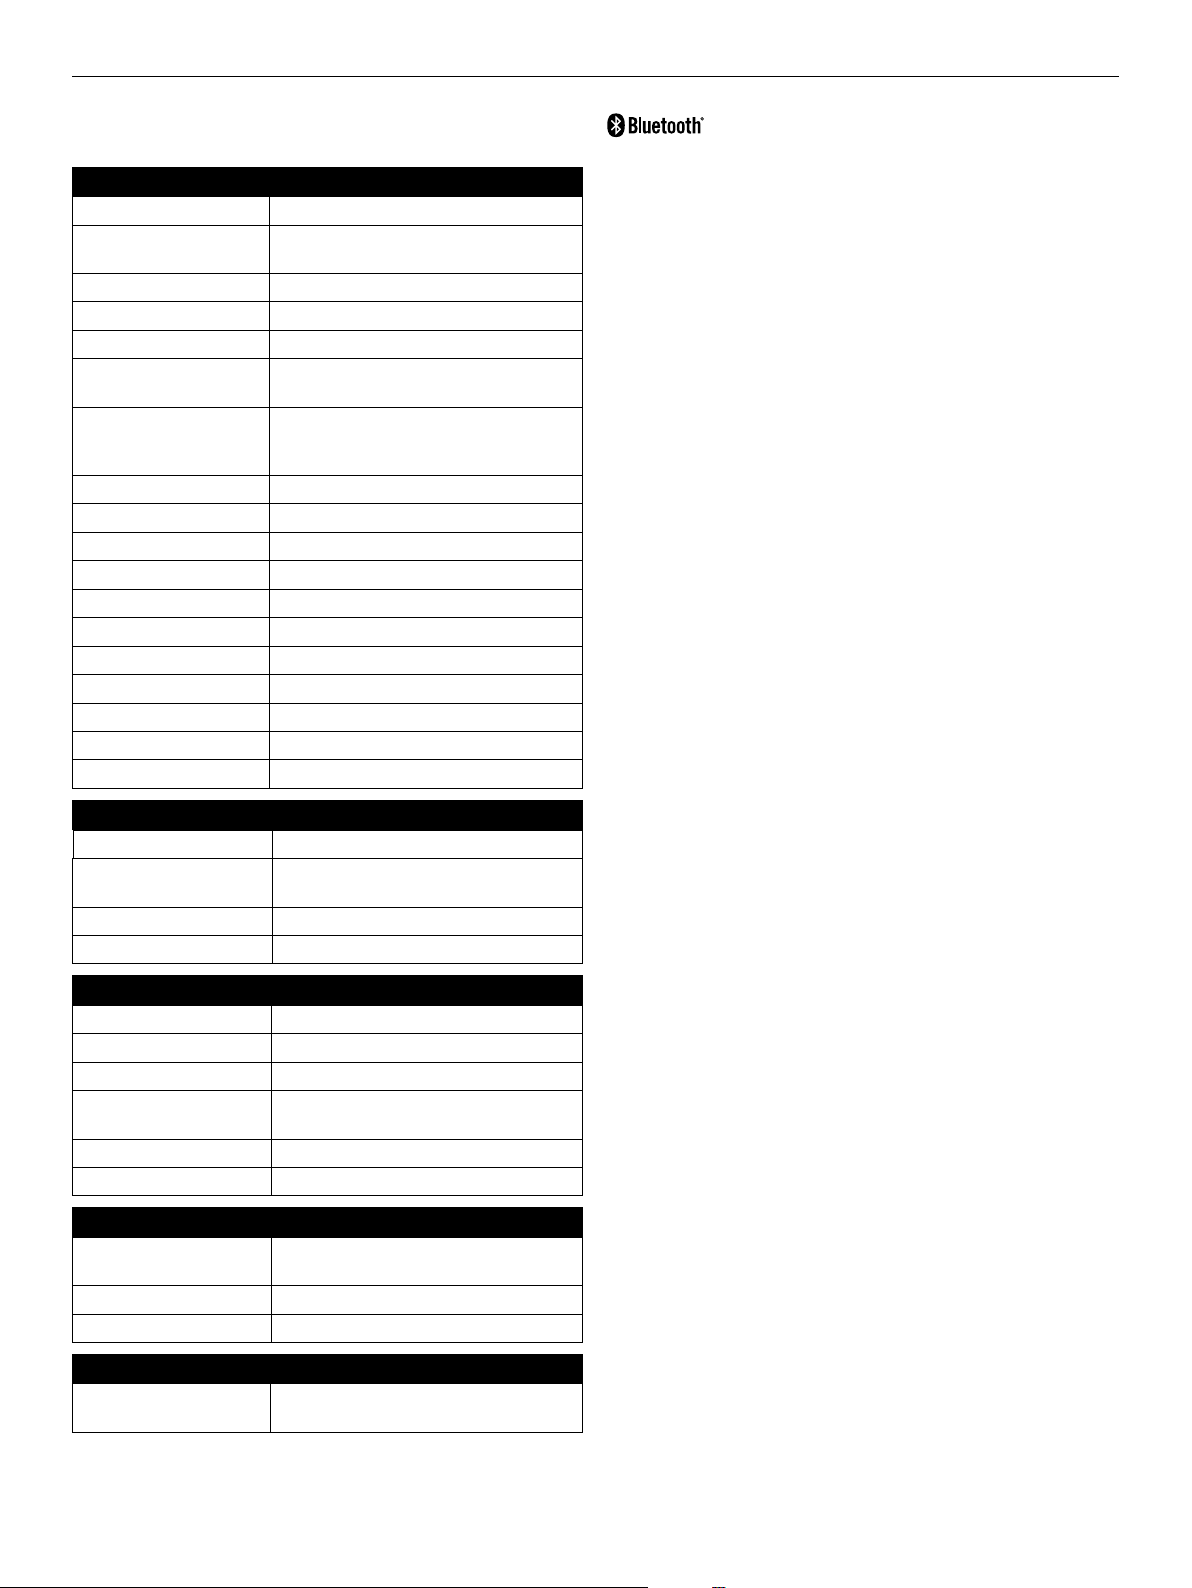
5 Technical Specifi cations
POLAR 10 System
Max. SPL peak calculated 126 dB half space
Frequency response
+/- 10 dB
Power amp output 2000 W
Amp type Class D – biamped
Crossover frequency 180 Hz, 24 dB/oct.
Active protective circuits Under-voltage, Thermal, Short Circuit, Over-
Inputs 2x Balanced XLR/ 1/4" (6.3 mm) combo
Outputs Mix Out
Max. input level +4 dBu
Modes (Filter presets) Music, Voice, DJ
User presets 5
EQ 3-band, semi-parametric mid EQ
System delay up to 291 ms (100 m)
Bluetooth 5.0
Housing Birch multiplex / ABS
Finish Black 2-component lacquer
Overall system height 213 cm
Weight 26.9 kg / 59.3 lbs
38 Hz – 20 kHz
current Protection; Peak, RMS Limiter
jack, 1x Hi-Z instrument jack, 2x RCA/Cinch,
Bluetooth audio stream
POLAR 10 1.1
The Bluetooth® word mark and logos are registered trademarks owned by Bluetooth SIG, Inc. and any
use of such marks by Stamer Musikanlagen GmbH is under license.
All mentioned trademarks and copyrights belong to their respective owners.
For the USA:
This device complies with part 15 of the FCC Rules. Operation is subject to the following two
conditions: (1) This device may not cause harmful interference, and (2) this device must accept any
interference received, including interference that may cause undesired operation.
This equipment complies with FCC radiation exposure limits set forth for an uncontrolled environment.
End users must follow the specific operating instructions for satisfying RF exposure compliance. This
transmitter meets both portable and mobile limits as demonstrated in the RF Exposure Analysis. This
transmitter must not be co-located or operating in conjunction with any other antenna or transmitter
except in accordance with FCC multi-transmitter product procedures.
For Canada:
This device complies with Industry Canada licence-exempt RSS standard(s). Operation is subject to the
following two conditions: (1) this device may not cause interference, and (2) this device must accept
any interference, including interference that may cause undesired operation of the device.
Under Industry Canada regulations, this radio transmitter may only operate using an antenna of
a type and maximum (or lesser) gain approved for the transmitter by Industry Canada. To reduce
potential radio interference to other users, the antenna type and its gain should be so chosen that
the equivalent isotropically radiated power (e.i.r.p.) is not more than that necessary for successful
communication.
POLAR 10 Subwoofer
Bass woofer 1x 10", 2" voice coil
Front grille 1.5 mm metal grille backed with black
acoustic foam
Dimensions (WxHxD) 36.6 x 62.5 x 54.1 cm
Weight 21 kg / 46.2 lbs
POLAR 10 Mid/High Unit
Mid speaker 6x 3", 3/4" voice coil, neodymium
HF driver 1x 1", 1" voice coil
Horn directivity 120° x 30°
Front grille 1 mm metal grille backed with black
acoustic foam
Dimensions (WxHxD) 10.8 x 82.5 x 9.8 cm
Weight 3.9 kg / 8.6 lbs
POLAR 10 Spacer
Front grille 1 mm metal grille backed with black
Dimensions (WxHxD) 10.8 x 82.5 x 9.8 cm
Weight 2 kg / 4.4 lbs
acoustic foam
General Technical Specifi cations
Current consumption
pursuant to EN 62368-1
0.6 A / 220-240 V AC
0.8 A / 100-120V AC
• English • Deutsch • Français • Italiano • Español
9
Page 10
Wichtige Sicherheitshinweise!
Bitte vor Anschluss lesen!
Dieses Produkt wurde gemäß IEC 62368-1 hergestellt und hat das
Werk in einem sicheren, betriebsfähigen Zustand verlassen. Um
diesen Zustand zu erhalten und um einen gefahrlosen Betrieb zu
gewährleisten, ist es notwendig, dass der Benutzer die Empfehlungen
und Warnhinweise befolgt, die in der Betriebsanleitung zu finden sind.
Bei Einsatz dieses Produktes in Fahrzeugen, Schiffen oder Flugzeugen,
oder in Höhen oberhalb 2000 m Meereshöhe müssen die entsprechenden Sicherheitsstandards zusätzlich zur IEC 62368-1 beachtet werden.
WARNUNG: Um das Risiko von Feuer oder Stromschlag zu verhüten,
darf dieses Gerät nicht Feuchtigkeit oder Regen ausgesetzt werden.
Öffnen Sie das Gehäuse nicht – im Inneren gibt es keine Bauteile, die
vom Benutzer wartbar sind. Die Wartung darf nur von einem qualifiziertem Kundendienst durchgeführt werden.
Dieses Symbol, wo immer es erscheint, warnt Sie vor
gefährlicher, nicht isolierter Spannung im Gehäuse – Spannung, die
möglicherweise genügt, eine Stromschlaggefahr darzustellen.
Dieses Symbol, wo immer es erscheint, warnt Sie vor außen
zugänglicher, gefährlicher Spannung. Eine Verbindung zu jeder
Anschlussklemme, die mit diesem Symbol versehen ist, darf nur mit
konfektioniertem Kabel hergestellt werden, dass den Empfehlungen
des Herstellers genügt, oder mit Kabel, das von qualifiziertem Personal
installiert wurde.
Dieses Symbol, wo immer es erscheint, macht Sie auf wichtige
Bedienungs- und Wartungsanweisungen aufmerksam, die in
beiliegenden Unterlagen zu finden sind. Bitte lesen Sie das Handbuch.
Dieses Symbol, wo immer es erscheint, sagt Ihnen: Vorsicht!
Heiße Oberfläche! Um Verbrennungen zu vermeiden, nicht anfassen.
Elektro- und Elektronikgeräte einschließlich Batterien sind
getrennt vom Hausmüll über offizielle Sammelstellen fachgerecht zu
entsorgen.
Bitte lesen Sie diese Anweisungen. Bewahren Sie diese
Anweisungen auf. Befolgen Sie alle Warnhinweise und Anweisungen
auf dem Gerät und in dieser Anleitung.
• Benutzen Sie dieses Gerät nicht in der Nähe von Wasser. Stellen Sie
das Gerät nicht in der Nähe von Wasser, Badewannen, Waschbecken,
Küchenspülen, nassen Stellen, Schwimmbecken oder in feuchten
Räumen auf.
• Stellen Sie keine Gefäße, wie Vasen, Gläser, Flaschen usw., die
Flüssigkeiten enthalten, auf das Gerät.
• Reinigen Sie das Gerät nur mit einem trockenen Tuch.
• Entfernen Sie keine Abdeckungen oder Teile des Gehäuses.
• Die auf dem Gerät angegebene Betriebsspannung muss mit der
örtlichen Spannung der Netzstromversorgung übereinstimmen.
Wenn Sie sich nicht sicher sind, welche Spannung in Ihrem Netz
zur Verfügung steht, konsultieren Sie bitte Ihren Händler oder den
örtlichen Stromversorger.
• Stellen Sie vor Anschluss des Gerätes unbedingt sicher, dass die
Netz versorgungsinstallation über ausreichende Schutz einrichtungen
gegen Kurzschluss und Erdungsfehler angeschlossener Geräte
verfügt.
• Um das Risiko eines Stromschlags zu verringern, muss die Erdung
des Gerätes beibehalten werden. Verwenden Sie nur das mitgelieferte
Stromführungskabel und behalten Sie die Funktion der seitlichen,
geerdeten Schutzkontakte des Netzanschlusses immer aufrecht. Stellen Sie sicher, dass das Gerät nur an Steckdosen angeschlossen wird,
die über eine ordnungsgemäß funktionierende Schutzerde verfügen.
• Schützen Sie das Stromführungskabel vor Betreten und Quetschen,
besonders in der Nähe der Stecker, Gerätesteckdosen – und dort, wo
sie am Gerät austreten! Stromführungskabel sollten immer vorsichtig
behandelt werden. Kontrollieren Sie die Stromführungskabel in
regelmäßigen Abständen auf Einschnitte und Anzeichen von Abnutzung, besonders in der Nähe des Steckers und an der Verbindung
zum Gerät.
• Benutzen Sie niemals ein beschädigtes Stromführungskabel.
• Ziehen Sie bei Gewittern den Stecker des Gerätes und wenn das Gerät
über einen längeren Zeitraum nicht benutzt wird.
• Dieses Gerät wird nur vollständig von Stromnetz getrennt, wenn der
Stecker vom Gerät oder aus der Steckdose gezogen wird. Das Gerät
sollte so aufgestellt werden, dass das Trennen vom Stromnetz leicht
möglich ist.
• Sicherungen dürfen nur von qualifiziertem Personal gewechselt werden, und nur unter Verwendung des korrekten Typs und Nennwerts.
• Alle Wartungsarbeiten sollten nur von qualifiziertem Personal ausge-
führt werden. Wartung ist notwendig, wenn das Gerät auf irgendeine
Weise beschädigt wurde, wie zum Beispiel:
- Wenn das Stromführungskabel oder der Stecker beschädigt oder
abgenutzt ist.
- Wenn Flüssigkeit oder Gegenstände in das Gerät gelangt sind.
- Wenn das Gerät Regen oder Feuchtigkeit ausgesetzt war.
- Wenn das Gerät nicht ordnungsgemäß funktioniert, obwohl die
Bedienungsanleitung beachtet wurde.
- Wenn das Gerät hingefallen ist oder das Gehäuse beschädigt wurde.
• Beim Anschluss von Lautsprechern an dieses Gerät darf die auf dem
Gerät oder in dieser Anleitung angegebene Mindestimpedanz nicht
unterschritten werden. Die verwendeten Kabel müssen entsprechend
den lokalen Regelungen über einen ausreichenden Querschnitt
verfügen.
• Halten Sie das Gerät vom Sonnenlicht fern.
• Installieren Sie das Gerät nicht in der Nähe von Wärmequellen, wie
zum Beispiel Heizkörper, Heizregister, Öfen oder anderen Geräten,
die Hitze erzeugen.
• Dieses Gerät wurde für die Verwendung in gemäßigten Klimazonen
entwickelt. Nicht geeignet zur Verwendung in tropischen Klimazonen.
• Verstopfen Sie nicht die Lüftungsöffnungen. Installieren Sie das
Gerät entsprechend der Anleitung des Herstellers. Das Gerät darf
nicht eingebaut werden – wie zum Beispiel in einen Gestellrahmen,
es sei denn, dass für angemessene Belüftung gesorgt wird.
• Ein kaltes Gerät sollte immer auf die Umgebungstemperatur erwärmt
werden, wenn es in einen Raum transportiert wird. Es könnte sich
Kondensation im Inneren bilden, die das Gerät beschädigt, wenn es
ohne vorherige Erwärmung benutzt wird.
• Stellen Sie keine offenen Flammen, wie brennende Kerzen, auf das
Gerät.
• Das Gerät sollte mindestens 20 cm von Wänden aufgestellt werden.
• Das Gerät darf nur mit Rollwagen, Ständern, Stativen, Tischen oder
Halterungen benutzt werden, die vom Hersteller spezifiziert sind
oder zusammen mit dem Gerät verkauft wurden. Wenn ein Rollwagen
benutzt wird, seien Sie vorsichtig, wenn Sie die Rollwagen/GeräteKombination transportieren, um Verletzungen durch Umkippen zu
vermeiden.
• Verwenden Sie nur Zubehör, das vom Hersteller empfohlen ist. Das
gilt für alle Arten von Zubehör, wie zum Beispiel Schutzabdeckungen,
Transporttaschen, Ständer sowie Wand- und Deckenhalterungen.
Wenn Sie irgendein Zubehör am Gerät anbringen, befolgen Sie immer
die Anleitungen des Herstellers. Benutzen Sie nur die Befestigungspunkte des Geräts, die vom Hersteller vorgesehen sind.
• Dieses Gerät ist NICHT geeignet für eine Person oder Personen (einschließlich Kindern) mit eingeschränkten physischen, sensorischen
und geistigen Fähigkeiten, oder für Personen mit unzulänglicher
Erfahrung und/oder Fachkenntnis, um solch ein Gerät zu bedienen.
Kinder unter 4 Jahren sollten stets von diesem Gerät fern gehalten
werden.
• Es sollten keinerlei Gegenstände durch die Gehäuseschlitze eingeführt werden, da dadurch gefährliche, spannungsführende Bauteile
berührt oder kurzgeschlossen werden können. Dies könnte zu einer
Feuer- oder Stromschlaggefahr führen.
• Dieses Gerät ist imstande, Schalldruckpegel von mehr als 90 dB zu
produzieren. Dies könnte zu einem dauerhaften Hörschaden führen!
Eine Belastung durch extrem hohe Geräuschpegel kann zu einem
dauerhaften Gehörverlust führen. Bei einer anhaltenden Belastung
durch solch hohe Pegel sollte ein Gehörschutz getragen werden.
• Der Hersteller gewährleistet die Sicherheit, Zuverlässigkeit und
Leistung des Gerätes nur unter folgenden Voraussetzungen:
- Einbau, Erweiterung, Neueinstellung, Modifikationen oder Reparatu-
ren werden vom Hersteller oder autorisiertem Personal ausgeführt.
- Die elektrische Installation des betreffenden Bereiches entspricht
den Anforderungen der IEC (ANSI) Maßgaben.
- Das Gerät wird entsprechend der Bedienungsanleitung benutzt.
• Dieses Produkt ist auf die Verwendung mit Musik- und Sprachsignalen optimiert. Verwendung mit Sinus-, Rechteck- oder anderen
Mess-Signalen bei höherem Pegel kann zu ernsten Beschädigungen
des Geräts führen.
Allgemeine Sicherheitshinweise
für Lautsprechersysteme
Befestigungssysteme dürfen ausschließlich für die vom
Hersteller freigegebenen Lautsprechersysteme und mit dem in der
Montageanleitung genannten Montage-Zubehör verwendet werden.
Die Montagehinweise des Herstellers sind dabei unbedingt zu
beachten. Bei unsachgemäßer Montage bzw. Verwendung von nicht
freigegebenem Montage-Zubehör kann die angegebene Belastung
nicht garantiert und keinerlei Haftung seitens des Herstellers
übernommen werden.
Sollten Änderungen an Lautsprechern, an Montage-Zubehör,
Verbindungs- und Befestigungselementen sowie Anschlagmitteln
vorgenommen werden, kann die Tragfähigkeit des Systems nicht
mehr garantiert werden und seitens des Hersteller keinerlei Haftung
übernommen werden.
Reparaturen an sicherheitsrelevanten Bauteilen dürfen nur vom
Hersteller oder Bevollmächtigten durchgeführt werden, andernfalls
erlischt die Betriebserlaubnis.
Die Installation darf ausschließlich durch Sachkundige und nur
an Montagepunkten mit ausreichender Tragfähigkeit, ggf. unter der
Berücksichtigung von Bauauflagen, erfolgen. Das vom Hersteller in der
Montageanleitung vorgeschriebene Befestigungsmaterial (Schrauben,
Dübel, etc.) muss verwendet werden. Schraubverbindungen müssen
durch geeignete Maßnahmen gegen Lösen gesichert sein.
Ortsfeste oder mobile Installationen (hier Lautsprecher
inkl. Montagezubehör) müssen durch zwei unabhängig voneinander
wirkende Einrichtungen gegen Herabfallen gesichert sein. Lose Zusatzteile oder sich lösende Teile müssen durch geeignete Einrichtungen
aufgefangen werden können. Bei Verwendung von Verbindungs- und
Befestigungselementen sowie Anschlagmitteln sind die nationalen
Vorschriften zu beachten. Hinsichtlich der Bemessung der Sicherungsmittel sind mögliche dynamische Belastungen (Ruckkräfte) mit zu
berücksichtigen.
Bei Stativen ist vor allem die maximale Traglast zu beachten.
Außerdem sind die meisten Stative aus konstruktiven Gründen nur
für das Tragen von genau zentrischer Belastung zugelassen. Stative
müssen standsicher aufgestellt werden. Stative sind durch geeignete
Maßnahmen zusätzlich zu sichern, wenn zum Beispiel:
- ihre Aufstandfläche keinen sicheren Stand zulässt,
- ihre Höhen die Standsicherheit einschränken,
- mit zu hohem Winddruck zu rechnen ist,
- damit zu rechnen ist, dass sie durch Personen umgestoßen werden.
Besondere Maßnahmen können auch zur Vorsorge gegen gefährdendes
Verhalten von Zuschauern erforderlich werden. Stative dürfen nicht
in Flucht- und Rettungswegen aufgestellt werden. Bei Aufstellung
in Verkehrswegen ist auf die erforderliche Breite der Wege und auf
ordnungsgemäße Absperrung sowie Kennzeichnung zu achten. Beim
Auf- und Absetzen ist eine besondere Gefährdung gegeben. Hierzu
sind geeignete Hilfsmittel zu verwenden. Es sind hierbei die nationalen
Vorschriften zu beachten.
Während der Montage ist geeignete Schutzausrüstung (insbesondere Kopfschutz, Handschuhe und Sicherheitsschuhe) zu tragen und es sind nur geeignete Aufstiegshilfen (Leitern,
Gerüste, etc.) zu verwenden. Die Verantwortung dafür liegt alleine
beim ausführenden Installationsbetrieb.
ACHTUNG! Nach der Montage ist die Aufhängung des Systems
aus Halterung und Lautsprecher auf sichere Befestigung zu überprüfen.
Der Betreiber von Lautsprechersystemen (ortsfest oder mobil) ist
verpflichtet, alle Systemkomponenten unter Berücksichtigung der
jeweils nationalen Regelungen regelmäßig zu überprüfen bzw. prüfen
zu lassen und mögliche Schäden unverzüglich beseitigen zu lassen.
Weiterhin raten wir dringend zu einer ausführlichen Dokumentation
aller Überprüfungsmaßnahmen in Prüfbüchern o.ä.
Insbesondere die Lastaufnahmepunkte geflogener Systeme sollten hier
mit ausreichenden Sicherheitsreserven dimensioniert werden. Es sind
hierbei die nationalen Vorschriften zu beachten.
Professionelle Lautsprechersysteme sind in der Lage,
gesundheitsschädliche Schallpegel zu erzeugen. Selbst die Einwirkung
scheinbar harmloser Schallpegel über einen längeren Zeitraum kann zu
bleibenden Schäden am Gehör führen (ab ca. 95dBA SPL)! Daher raten
wir für alle Personen, die durch den Betrieb von Lautsprechersystemen
dem Einfluss hoher Schallpegel ausgesetzt sind, zum Tragen von
professionellem Gehörschutz (Ohrstöpsel oder Kapselgehörschutz).
Hersteller: Stamer Musikanlagen GmbH, Magdeburger Str. 8,
66606 St. Wendel, Deutschland
Version 2.8 08/2019
Page 11
POLAR 10
POLAR 10 1.1
Willkommen in der HK Audio Familie!
Vielen Dank, dass Sie sich für ein Markenprodukt aus unserem Hause entschieden haben, das mit größter Sorgfalt für Sie entwickelt und gefertigt
wurde.
Auch wenn Sie bereits eingehende Erfahrungen mit Beschallungsanlagen gesammelt haben – bei diesem Produkt wird es trotzdem einige
Dinge geben, die neu für Sie sind. Legen Sie deshalb diese Bedienungsanleitung nicht ungelesen beiseite und bewahren Sie sie zur späteren
Verwendung auf.
Wir wünschen Ihnen allzeit besten Sound!
Ihr HK Audio Team
Hinweis: Die Funktionalität dieses Produkts kann durch starke
elektromagnetische Felder oder elektrostatische Entladungen gestört
werden. In diesem Fall kann durch Ausschalten und erneutes Einschalten
die Funktionalität wieder hergestellt werden. Falls dies nicht hilft, muss
das Gerät von der Störquelle entfernt werden.
Garantie
Nutzen Sie die komfortable Online-Registrierung über www.hkaudio.com.
http://warranty.hkaudio.com
Die Registrierung ist nur gültig, wenn sie innerhalb von 30 Tagen ab
Kaufdatum erfolgte.
HK Audio
Technischer Service
Postfach 1509
66595 St. Wendel, Deutschland
Fax: +49 6851 905 100
1 Allgemeines
1.1 Lieferumfang
Bitte überprüfen Sie den Lieferumfang des Systems beim Auspacken auf
Vollständigkeit. POLAR ist in zwei Kartons verpackt und besteht aus einem
Subwoofer, einem Säulen-Topteil (Mid/High-Unit) und einem Distanzelement (Spacer). Im Subwoofer-Karton sind außerdem eine gepolsterte
Schutzhülle für den Subwoofer, eine Tragetasche für die beiden Säulenkomponenten und das Netzkabel enthalten.
1.2 Die Komponenten
Der Subwoofer
Der aktive System-Subwoofer beherbergt den Tieftonlautsprecher und die
Systemelektronik samt Endstufen. Auf der Oberseite befi nden sich der
signalführende Stecksockel zum Anschluss der Säulenelemente sowie ein
Tragegri . Eine weitere Gri mulde ist vorne in der Bodenplatte integriert,
so dass der Subwoofer sowohl mit einer als auch zwei Händen komfortabel
zu tragen ist. Das integrierte Bedienpanel mit
Display, Reglern und Anschlüssen ist leicht
nach hinten abgeschrägt, um die Bedienelemente vor Beschädigung zu schützen.
Auf der Vorderseite unten befi nden sich die
Bassrefl ex-Ö nungen, auf der Rückseite
Netzschalter und Netzbuchse.
Die Säule
• Die Säule besteht aus dem Topteil (Mid/
High-Unit) und dem Spacer.
• Der Spacer wird mittels der integrierten
signalführenden Steckverbindung in den
Stecksockel des Subwoofers eingesteckt.
Über das gleiche Stecksystem wird nun die
Mid/High-Unit auf den Spacer gesteckt.
• Mid/High-Unit und Spacer sind dann nicht
nur mechanisch, sondern auch elektrisch
verbunden, eine zusätzliche Verkabelung der
Lautsprecher wird nicht benötigt.
1.3 Aufbau und
Inbetriebnahme
Montage des Systems
• Platzieren Sie den Subwoofer auf ebenem, stabilem Untergrund.
• Verbinden Sie wie unter 1.2 beschrieben den Spacer und das Säulen-Topteil
mit dem Subwoofer.
• Achten Sie darauf, dass die Elemente fest miteinander verbunden sind.
• Stecken Sie das Netzkabel in die rückwärtige Netzbuchse.
Mid/high
unit
Spacer
Subwoofer
• English • Deutsch • Français • Italiano • Español
11
Page 12

POLAR 10 1.1
Info: Das System kann auch ohne Spacer betrieben werden. (z.B. bei Positionierung auf hohen Bühnen oder auf einem Tisch).
Achtung! Transportieren oder bewegen Sie POLAR nicht im
montierten Zustand. Das System könnte beschädigt werden oder Sachund Personenschäden verursachen!
Stereo-Aufbau
RL
2 Anschlüsse und Bedienelemente
Rückseite
Caution: To reduce
the risk of electric
shock, grounding of
the center pin of
this plug must
be maintained.
100-240 V~
50-60 Hz
0.8 A @ 1/8
output power
1
Mains
●
IEC-Netzbuchse zum Anschluss an die Spannungsversorgung. Bitte verwenden Sie das im Lieferumfang enthaltene Netzkabel.
Info: Das Netzteil ist ein automatisches Schaltnetzteil mit Weitbereichseingang und kann an Wechselspannungen von 100V bis 240V bei 50 oder
60Hz betrieben werden.
2
Power
●
Netzschalter zum Ein- und Ausschalten der Spannungszufuhr. Nach dem
Einschalten werden die zuletzt verwendeten DSP-Einstellungen geladen.
Nach wenigen Sekunden ist das System betriebsbereit, im Display erscheint
die Pegelanzeige der vier Kanäle sowie der Wert der eingestellten Gesamtlautstärke (Master).
Mains
1
Serial No.
Power
2
Caution: Risk of
electric shock!
Do not open!
Refer servicing
On
O
to qualified
service
personnel.
Kommen zwei POLAR als Stereosystem zum Einsatz, erhält das linke
System das linke Mischpultsignal, das rechte System das rechte. In dieser
Betriebsart sollten Sie darauf achten, dass die DSP-Klangeinstellungen
(Mode, EQ, Delay etc.) bei den beiden Systemen identisch sind, siehe
Kapitel3.
Dezentrale Beschallung als "Delay-Line" bzw. Stützlautsprecher
Dank der integrierten Delay-Funktion kann POLAR als Stützlautsprecher
(Delay-Line) eingesetzt werden, siehe Kapitel 3.2 "Delay". Ermitteln Sie die
Distanz zwischen Hauptlautsprecher und POLAR und geben Sie den Wert
in Metern über den Punkt "Delay" im DSP-Menü ein. POLAR übernimmt
automatisch die Umrechnung zur Laufzeit-Kompensation und verzögert die
Tonausgabe passend zur Schall-Laufzeit des Hauptlautsprechers.
Kanal 1 und Kanal 2 (Line/Mic)
Kanal 1 und 2 sind identisch ausgestattet und dienen dem Anschluss von
Mikrofonen sowie Instrumenten mit Line-Ausgang wie z.B. Keyboards.
3
Input
●
Symmetrisch beschaltete Combo-Eingangsbuchse XLR/Klinke. Der Anschluss ist per XLR-Stecker oder 6,35 mm-Klinkenstecker (symmetrisch
oder unsymmetrisch beschaltet) möglich.
Info: Soweit möglich, ist einem symmetrischen Signal immer der Vorzug
zu geben, da dies besser vor potenziellen Störungen und HF-Interferenzen schützt.
4
Line/Mic
●
Wahlschalter zur Anpassung von Empfi ndlichkeit und Impedanz der Vorverstärker. Stellung "Line" ist für den Anschluss eines Gerätes mit Line-Pegel,
wie Mischpult, Keyboard o.ä. vorgesehen – Stellung "Mic" für den Anschluss
eines dynamischen Mikrofons.
5
Volume
●
Drehregler zur Einstellung der Signallautstärke. In der Stellung "Linksanschlag" ist das Signal komplett abgedreht, in der Stellung "Rechtsanschlag"
ist die maximale Lautstärke erreicht.
12
Page 13
POLAR 10 1.1
24bit Digital Signal Processor
12
Master
13
Push
to edit
4
Line Mic Line Mic Instrument Aux +
5
1234
3
POLAR 10
4
5 7 9
3 6 8
SubMix Out
11
10
0 dB
+10 dB
Kanal 3 (Instrument)
Dieser Eingang dient zum Anschluss eines Instrumentes mit hochohmigen Ausgang (Hi-Z), z.B. elektrische oder akustische Gitarren und Bässe,
oder elektromechanischen Pianos. Der Eingang ist hochohmig ausgeführt,
damit das Instrument seinen vollen Klangcharakter und Dynamikumfang
entfalten kann.
6
Input
●
Unsymmetrisch beschaltete Eingangsbuchse 6,35 mm-Klinke zum Anschluss eines Instruments.
7
Volume
●
Drehregler zur Einstellung der Signallautstärke. In der Stellung "Linksanschlag" ist das Signal komplett abgedreht, in der Stellung "Rechtsanschlag"
ist die maximale Lautstärke erreicht.
Kanal 4 (Aux + Bluetooth)
Kanal 4 dient dem Anschluss von Stereo-Quellen wie z.B. DJ-Pulten, CD/
MP3-Playern oder Mischpulten, sowie der Wiedergabe von Musik über
Bluetooth-Audiostreaming. Bei Kanal 4 sind Aux- und Bluetooth-Signal
gleichzeitig nutzbar.
8
Input
●
Unsymmetrisch beschalteter Eingang (2x Cinch-Buchse) zum Anschluss von
Hochpegel-Audioquellen wie CD-/MP3-Player, Smartphone, DJ-Mixer oder
Computer.
9
Volume
●
Drehregler zur Einstellung der Signallautstärke. Dieser Lautstärkeregler
wirkt gemeinsam auf den Aux-Eingang sowie den Bluetooth-Eingang. In
der Stellung "Linksanschlag" ist das Signal komplett abgedreht, in der Stellung "Rechtsanschlag" ist die maximale Lautstärke erreicht.
Info: Wenn Aux-Eingang und Bluetooth-Audiostreaming gleichzeitig genutzt werden, kann die Lautstärke des Bluetooth-Signals im Verhältnis
zum Aux-Signal am Bluetooth-Zuspieler geregelt werden.
10
Sub
●
Drehregler zur Einstellung des Bassanteils des Systems. In der Stellung
"Linksanschlag" ist der Subwoofer komplett abgedreht, in der Stellung
"Rechtsanschlag" ist die maximale Subwoofer-Lautstärke erreicht. Über
den Sub-Regler kann der Pegel des Subwoofers separat eingestellt werden.
Drehen Sie den Regler auf 0 dB, um ein relativ ausgewogenes Lautstärkeverhältnis zwischen Säule und Subwoofer zu erreichen.
Tipp: Oftmals empfi ehlt es sich, den Bassanteil bei der Aufstellung in
einer Ecke oder bei sehr kleinen Veranstaltungsräumen etwas zurückzunehmen. Ebenso kann das Reduzieren des Bassanteils auch dazu genutzt
werden, die maximale Gesamtlautstärke des Systems zu erhöhen, ohne
dass die Limiterschutzschaltungen des Systems ansprechen.
11
Mix Out
●
Symmetrisch beschaltete XLR-Ausgangsbuchse. Über diesen Ausgang wird
das gemischte Summensignal aller Eingangskanäle ausgegeben.
Info: Der Mix Out-Ausgang dient zum "Weiterreichen" des Summensignals, z.B. an einen FOH-Mischer, zum Ansteuern weiterer Lautsprecher
(Monitorbox) oder für einen Live-Mitschnitt. Auch ein zusätzlicher,
aktiver Subwoofer kann hier angeschlossen werden, sofern dieser über
einen High-Cut- bzw. Low-Pass-Filter zur Unterdrückung hoher Frequenzen verfügt.
• English • Deutsch • Français • Italiano • Español
13
Page 14
POLAR 10 1.1
12
LCD-Anzeige
●
Das Display zeigt im Normalbetrieb die Pegel der Eingangskanäle und des
Master-Volume an.
Im DSP-Mode zeigt es die Parameter des gerade angewählten DSP-Menüs
an (siehe 3.2 DSP-Einstellungen).
Aussteuerungsanzeigen
Die vier Aussteuerungsanzeigen zeigen die Pegel der Eingangskanäle an.
Der Overload-Bereich signalisiert eine Übersteuerung des Eingangssignals.
Leuchtet Overload auf, reduzieren Sie die Eingangsverstärkung des Kanals
und/oder den Ausgangspegel des angeschlossenen Gerätes.
Info: POLAR verfügt über ausreichend Aussteuerungsreserven, um
gelegentlich auftretende Signalspitzen zu verkraften. Leuchtet eine
Overload-Anzeige jedoch konstant bzw. wird eine Übersteuerung hörbar,
sollte der Volume-Regler des entsprechenden Kanals zurückgeregelt
werden, um ein akustisches Verzerren des Signals und eine Überlastung
des Systems zu verhindern.
3.1 Bluetooth
Bluetooth
POLAR bietet Audiostreaming via Bluetooth. Es dient der kabellosen
Musikwiedergabe von Bluetooth-fähigen Zuspielern wie Smartphone oder
Tablet-PC.
Verbindung mit einem Bluetooth-Gerät herstellen
• Drücken Sie den Master-Regler einmal: der Menüpunkt "Bluetooth" wird
angezeigt.
• Drücken Sie erneut den Master-Regler, um den Bluetooth-Verbindungsaufbau zu starten ("Pairing"). POLAR ist jetzt für Bluetooth-fähige Geräte
sichtbar. Während eines Zeitfensters von 120 Sekunden für den Verbindungsaufbau signalisiert das Bluetooth-Symbol im Display durch langsames Blinken, dass eine Verbindung zu einem Bluetooth-Gerät hergestellt
werden kann.
• Wählen Sie im Bluetooth-Menü Ihres Bluetooth-Gerätes "HK Audio
POLAR", um die Verbindung herzustellen.
• Sobald die Verbindung erfolgreich hergestellt ist, leuchtet das BluetoothSymbol im Display des POLAR dauerhaft.
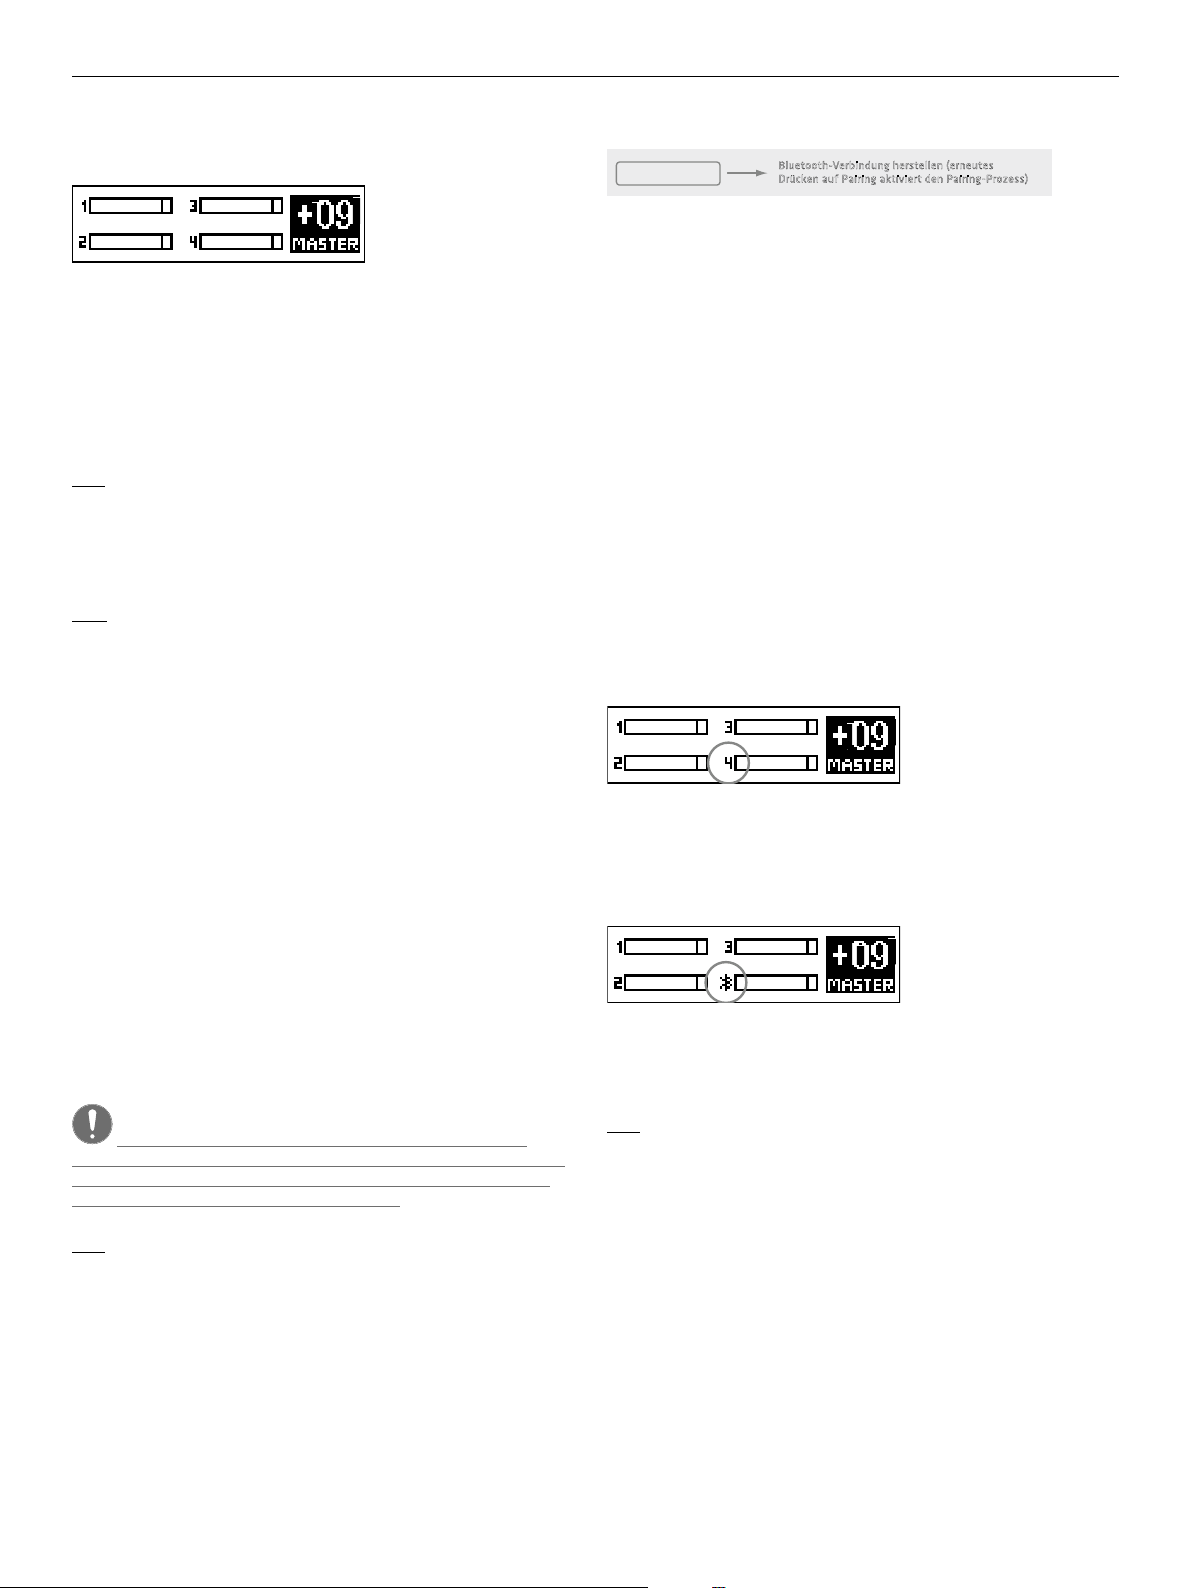
Bluetooth-Verbindung herstellen (erneutes
Drücken auf Pairing aktiviert den Pairing-Prozess)
Tipp: Um Rauschen zu vermeiden ist die korrekte Aussteuerung der Signale wichtig. Das bedeutet: Die Eingangskanäle so hoch wie möglich aussteuern (i.d.R. so aussteuern, dass beim lautesten Signal die OverloadAnzeige leuchtet, und dann soweit zurückregeln, dass sie gerade nicht
mehr leuchtet), und Master nur so weit aufdrehen, wie nötig.
13
Master (push to edit)
●
Der Master-Regler rechts neben dem Display hat primär die Funktion eines
Master-Volume, er regelt die Gesamtlautstärke des Systems. Der aktuelle
Wert wird im Display angezeigt. Regelbereich: –60 bis +10 in 1 dB-Schritten.
3 DSP-Menü
Durch Drücken des Master-Reglers ("push to edit") erhält man Zugri auf
verschiedene DSP-Parameter, die in einem Auswahlmenü angeordnet sind
und editiert werden können. Der aktuell angewählte Parameter wird im
Display angezeigt.
• Mittels Drehen des Master-Reglers navigiert man durch das Menü, durch
Drücken des Master-Reglers wird der aktuelle Menüpunkt ausgewählt
bzw. die Eingabe bestätigt.
Achtung: Erfolgt innerhalb 8 Sekunden keine Eingabe oder
Bestätigung, verlässt POLAR stets den angewählten Menü-Punkt und
kehrt automatisch in das Hauptfenster (Master-Volume) zurück, um
versehentliche Fehlbedienungen zu vermeiden.
Bluetooth-Status im Display:
• Kein Bluetooth-Symbol (Zahl 4 wird angezeigt)
Bluetooth nicht aktiv
• Langsames Blinken
Bluetooth-Verbindungsaufbau innerhalb von 120 Sekunden möglich
• Bluetooth-Symbol permanent sichtbar
Bluetooth erfolgreich verbunden
• Schnelles Blinken
Bluetooth-Verbindung fehlgeschlagen bzw. unterbrochen (z.B. Überschreitung der Reichweite)
Info: Wenn das Bluetooth-Symbol schnell blinkt, prüfen Sie, ob ihr
Bluetooth-Gerät sich in Reichweite befi ndet, Bluetooth aktiviert ist, und
POLAR in der Liste der Bluetooth-Geräte ausgewählt wurde. Falls POLAR
nicht in der Liste der Bluetooth-Geräte erscheint, führen Sie einen erneuten Verbindungsaufbau über Bluetooth-Pairing aus.
Info: Alle aktuellen DSP-Einstellungen verbleiben auch nach Ausschalten
des Systems permanent im Speicher und werden bei Neustart wieder
geladen.
Es stehen folgende Funktionen zur Auswahl:
14
Die Audiosignale des Bluetooth-Gerätes werden über Kanal 4 ausgegeben. Die Lautstärkeregelung erfolgt über den Volume-Regler von Kanal 4
bzw. am Bluetooth-Gerät selbst. Bevor Sie die Musikwiedergabe an Ihrem
Bluetooth-Gerät starten, ist es ratsam, den Volume-Regler von Kanal 4
zurückzuregeln.
Weitere Infos zu Bluetooth fi nden Sie in Kapitel 4.
Page 15
POLAR 10 1.1
3.2 Einstellungen
System-EQ
Hi EQ
Mid EQ
Mid Freq
Low EQ
POLAR bietet eine 3-Band-Klangregelung, um den Gesamtklang des Systems anzupassen. Hi-EQ und Low-EQ sind als Shelving-Filter ausgeführt,
der Mid-EQ ist semiparametrisch.
Tipp: Verwenden Sie den 3-Band-EQ, um den Gesamtklang je nach Anwendung und persönlichen Geschmack einzustellen. In kleinen Räumen
mit geringem Abstand zu Wand bzw. Publikum kann man die Bassanteile
oft etwas reduzieren. Gleiches gilt für die Höhenanteile, wenn durch Verwendung eines empfi ndlichen Mikrofons oder durch stark refl ektierende
Flächen wie z.B. Fenster die Rückkopplungsanfälligkeit erhöht ist. Mit
dem semiparametrischen Mittenband lässt sich etwa eine Störfrequenz
gezielt eliminieren, oder ein zu schwach vertretener Frequenzbereich
anheben.
Hi EQ: Mit diesem Parameter können hohe Frequenzen angehoben oder
abgesenkt werden. Regelbereich: +/–12 dB • Frequenz: 12 kHz
Mid EQ: Mit diesem Parameter können Frequenzen des Mittenbandes
angehoben oder abgesenkt werden. Regelbereich +/–12 dB
Mid Freq: Mit diesem Parameter kann die Center-Frequenz des Mittenbandes eingestellt werden. Frequenzbereich: 70 Hz – 12 kHz
Low EQ: Mit diesem Parameter können tiefen Frequenzen angehoben oder
abgesenkt werden. Regelbereich: +/–12 dB • Frequenz: 70 Hz
Info: Die EQ-Einstellungen wirken nur auf die Lautsprecherausgabe, sie
haben keinen Einfl uss auf den Mix Out.
Mode
Mode
Es stehen drei fest eingestellte Modes für die klangliche Grundabstimmung
des Systems zur Auswahl.
Music: Dieser Mode eignet sich generell für Live-Anwendungen und zur
Wiedergabe von Musik aller Art.
Voice: Für Sprachanwendungen sollte der Mode "Voice" gewählt werden,
der auf die menschliche Stimme optimiert ist.
DJ: Bei Wiedergabe von elektronischer Musik ist der Mode "DJ" die beste
Wahl.
Info: Die Einstellungen des Dreiband-EQs werden nicht durch einen
Wechsel zwischen Music-/Voice-/DJ-Mode überschrieben. Der DreibandEQ steht zusätzlich zu zur Verfügung.
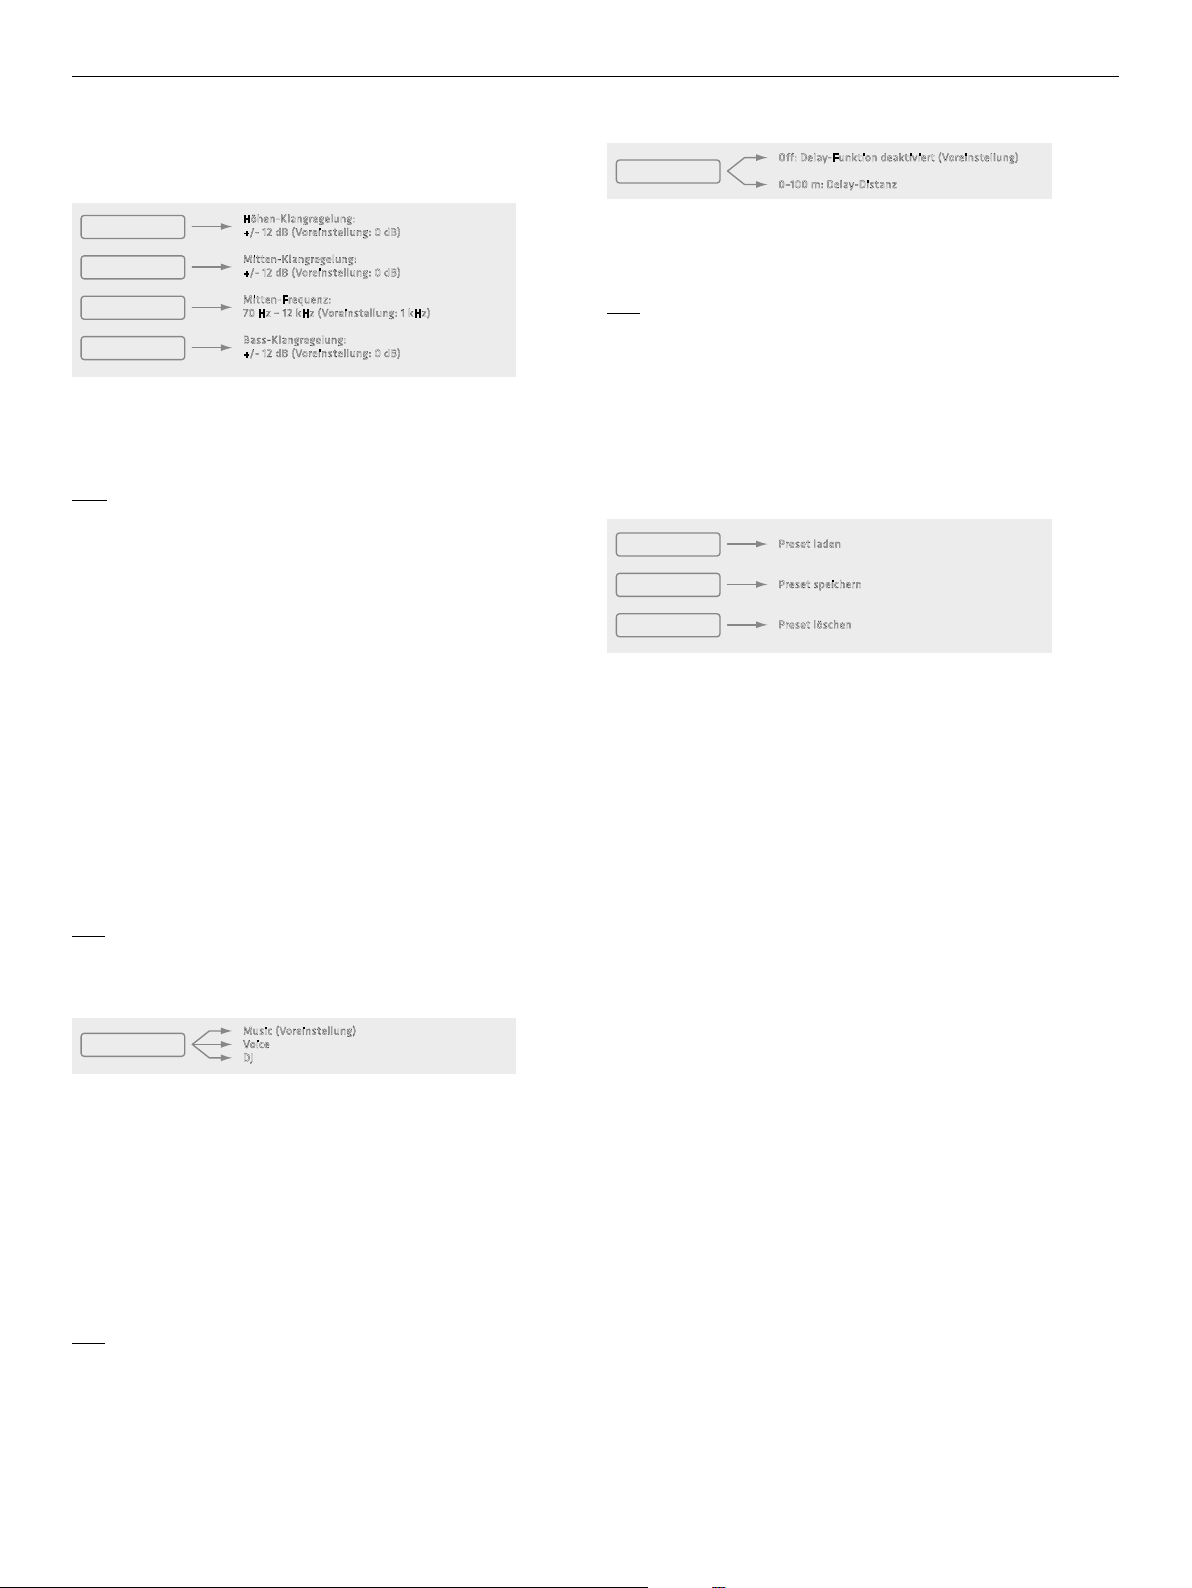
Höhen-Klangregelung:
+/- 12 dB (Voreinstellung: 0 dB)
Mitten-Klangregelung:
+/- 12 dB (Voreinstellung: 0 dB)
Mitten-Frequenz:
70 Hz – 12 kHz (Voreinstellung: 1 kHz)
Bass-Klangregelung:
+/- 12 dB (Voreinstellung: 0 dB)
Music (Voreinstellung)
Voice
DJ
Delay
Delay
Über den Menüpunkt "Delay" kann die Audiowiedergabe über die POLARLautsprecher zeitlich verzögert werden. Die Verzögerung lässt sich von 0
(o ) bis 100 m in 0,25 m-Schritten einstellen.
Info: Die Einheit Meter ist praktisch, wenn POLAR z.B. als Stützlautsprecher (Delay-Line) bei größeren Veranstaltungen eingesetzt werden soll.
So kann beispielsweise in akustisch schwierigen Räumen eine homogenere Schallverteilung mit besserer Sprachverständlichkeit bis in die
hinteren Reihen erreicht und die Lautstärke des Hauptbeschallungssystems an der Bühne reduziert werden. Sie brauchen lediglich die Entfernung zwischen POLAR und der Bühne in Metern einzustellen, um POLAR
akustisch zeitgleich mit der Hauptbeschallung spielen zu lassen.
O: Delay-Funktion deaktiviert (Voreinstellung)
0–100 m: Delay-Distanz
3.3 Verwalten der Presets
Load Preset
Store Preset
Erase Preset
Load Preset
Zum Verwalten von eigenen DSP-Einstellungen stehen fünf Speicherplätze
(U1 bis U5) zur Verfügung. "U" steht für "User-Preset". Ein User-Preset beinhaltet alle Parameter der im DSP-Menü gebotenen Einstellmöglichkeiten
(Mode, Dreiband-EQ, Delay, Display-Helligkeit etc.).
Durch Drehen am Master-Regler kann das zu ladende Preset U1 bis U5
ausgewählt werden, mit Bestätigung durch Drücken auf den Master-Regler
wird das Preset geladen. Über "Exit" kann das Menü verlassen werden, ohne
ein Preset zu laden.
Store Preset
Hier können die aktuellen Einstellungen des DSP-Menüs abgespeichert
werden. Durch Drehen am Master-Regler kann der Speicherplatz U1 bis U5
ausgewählt werden. Bei Bestätigung der Auswahl über Drücken auf Master
ö net sich ein Eingabefeld zur Vergabe eines Preset-Namens. Über "Exit"
kann das Menü verlassen werden, ohne ein Preset zu speichern.
Text-Editor: Durch Drehen am Master-Regler gelangt man in das Textfeld
und kann durch die Menü-Punkte "Save", "Clear" und "Cancel" navigieren.
Ist das Textfeld angewählt, kann durch Drücken die erste der 12 Stellen angewählt, und durch Drehen ein Buchstabe oder Zeichen ausgewählt werden.
Durch erneutes Drücken gelangt man zur nächsten der 12 Stellen und kann
weitere Buchstaben oder Zeichen auswählen. Das Textfeld verlassen kann
man über zweimaliges Drücken des Master-Reglers (ohne zu drehen!). Es
erscheint ein Enter-Symbol (Pfeil), jetzt kann man durch Drehen aus dem
Textfeld zu "Save", "Clear" und "Cancel" navigieren.
Save: Ist "Save" ausgewählt, wird mit Drücken auf Master das Preset
gespeichert, und man kehrt zurück in das Auswahl Menü U1 bis U5 um das
Preset auf einen weiteren Speicherplatz zu kopieren, oder über "Exit" das
Menü zu verlassen.
Clear: Ist "Clear" ausgewählt, wird mit Drücken auf Master das Textfeld
gelöscht und die Eingabe eines neuen Namens ist möglich.
Cancel: Ist "Cancel" ausgewählt, wird mit Drücken auf Master die Namensvergabe abgebrochen, und man kehrt zurück in das Auswahl-Menü
U1 bis U5, um einen anderen Speicherplatz zu wählen, oder über "Exit" den
Speichervorgang komplett abzubrechen.
Preset laden
Preset speichern
Preset löschen
• English • Deutsch • Français • Italiano • Español
15
Page 16

POLAR 10 1.1
Erase Preset
Hier kann das angewählte Preset gelöscht werden. Mit Drücken auf Master
wird jedoch noch kein Löschvorgang ausgelöst, es erscheint zuerst eine
Sicherheitsabfrage:
Confi rm Erase: Yes/No
Mit Drehen kann man zwischen "Yes" und "No" wechseln, mit Drücken des
Master-Reglers die Auswahl bestätigen. "Yes" löscht das Preset unwiderruflich, über "No" kehrt man in das DSP-Menü zurück.
3.4 Display
LCD Dim
Brightness
Contrast
LCD Dim: Ist die Funktion deaktiviert (O ), bleibt das Display in konstan-
ter Helligkeit. Ist die Funktion aktiviert (On), dunkelt sich das Display acht
Sekunden nach der letzten Bedienung des Master-Reglers ab, bleibt aber
weiterhin gut lesbar. Sobald der Master-Regler bedient wird, leuchtet das
Display wieder in der eingestellten Helligkeit.
Bright: Anpassung der Display-Helligkeit von 0 bis 10.
Contrast: Einstellung des Display-Kontrastes von 0 bis 10.
O: Display leuchtet konstant (Voreinstellung)
On: Display dunkelt nach Bedienung ab
Display-Helligkeit 0 – 10 (Voreinstellung: 5)
Display-Kontrast 0 – 10 (Voreinstellung: 5)
3.5 Factory-Reset
4 Bluetooth
Verbindung mit einem Bluetooth-Gerät herstellen
• Master-Regler drücken, bis im Menü "Bluetooth" erscheint
• nochmaliges Drücken startet den Verbindungsaufbau ("Pairing")
• Bluetooth-Symbol blinkt nun langsam und POLAR erscheint für 120sec. in
der Auswahlliste des Bluetooth-fähigen Geräts
• nun im Bluetooth-Gerät "HK Audio POLAR" wählen, um die Geräte zu
verbinden
Sobald die Verbindung erfolgreich hergestellt ist, leuchtet das BluetoothSymbol im Display des POLAR dauerhaft. Weitere Infos dazu fi nden Sie im
Kapitel3.1.
Automatisches Verbinden zu Bluetooth-Geräten
Nach erneutem Einschalten von POLAR wird für die Dauer von 120 Sekunden automatisch wieder nach dem zuletzt verbundenen Gerät gesucht und
eine Verbindung hergestellt, ein manueller Verbindungsaufbau über Bluetooth-Pairing ist nicht nötig. Nach Ablauf der 120 sec. kann der Suchvorgang durch erneutes Aus- und Einschalten von POLAR gestartet, oder ein
manueller Verbindungsaufbau über Bluetooth-Pairing ausgelöst werden.
Wechsel zwischen Bluetooth-Geräten
Es ist nicht möglich, zu einem anderen Bluetooth-Gerät zu wechseln,
solange ein Bluetooth-Gerät noch verbunden ist oder POLAR nach dem zuletzt verbundenen Gerät sucht. Führen Sie die Bluetooth Pairing-Funktion
erneut aus, um das aktuell verbundene Gerät zu trennen und ein anderes
Bluetooth-Gerät zu verbinden.
Factory Reset
auf Werkseinstellungen zurücksetzen
Reset
• Mittels "Reset" kann POLAR auf die werkseitigen DSP-Einstellungen
zurückgesetzt werden.
• Mit Drücken auf Master wird noch kein Reset ausgelöst, es erscheint
zuerst eine Sicherheitsabfrage:
Confi rm Reset: Yes/No
Mit Drehen kann man zwischen "Yes" und "No" wechseln, mit Drücken
des Master-Reglers die Auswahl bestätigen. Über "No" kehrt man in das
DSP-Menü zurück, "Yes" setzt unwiderrufl ich alle DSP-Funktionen auf
Werkseinstellung zurück: als Mode wird "Music" eingestellt, die BluetoothVerbindung wird gekappt, alle fünf User-Presets werden gelöscht.
Tipp: Diese Funktion ist z.B. sinnvoll, wenn das System oft im Verleiheinsatz ist. So kann es vor Ausgabe an einen neuen Kunden schnell in den
Werkszustand versetzt werden.
3.6 Verlassen des DSP-Menüs
Exit
Über diesen Menüpunkt kann man das DSP-Menü verlassen und zu MasterVolume zurückkehren. Dies geschieht automatisch, wenn während acht
Sekunden keine Eingabe über den Master-Regler erfolgt.
DSP-Menü verlassen
Achtung: Bluetooth-Pairing löst immer einen neuen BluetoothVerbindungsaufbau aus und trennt dabei eine eventuell bestehende
Verbindung!
Reichweite
POLAR unterstützt Bluetooth 5. Bei Verwendung eines Bluetooth 5-fähigen
Geräts sind Reichweiten bis zu 40 m möglich. Bei Geräten, die Blue tooth 5
nicht unterstützen, beträgt die Reichweiter i.d.R. bis zu 10 m, ist allerdings von verschiedenen Faktoren wie der Qualität und Sendeleistung
des Bluetooth-Geräts und den Eigenschaften der Umgebung abhängig
(beispielsweise Mauern als Hindernisse innerhalb der Funkkommunikationsstrecke oder auch eine Schutzhülle des Bluetooth-Gerätes). Wird die
Reichweite überschritten oder die Verbindung durch Wände oder Mauern
gestört, unterbricht die Audiowiedergabe (Bluetooth-Symbol im Display von
POLAR blinkt schnell).
Wird das Bluetooth-Gerät innerhalb 120 Sekunden erneut in Reichweite
gebracht, so wird die Verbindung automatisch wieder hergestellt, das
Bluetooth-Symbol im Display von POLAR leuchtet dann wieder dauerhaft.
Stottern oder Aussetzer bei Bluetooth-Audiostreaming
Audiostreaming per Bluetooth ist prinzipbedingt störanfälliger als eine
Kabelverbindung, da bei der Musikwiedergabe ein konstanter Datenstrom
ohne Unterbrechung gewährleistet sein muss.
Im Idealfall besteht direkter "Sichtkontakt" zwischen POLAR und dem
Blue tooth-Gerät, um eine störungsfreie Wiedergabe ohne Aussetzer zu
ermöglichen.
16
Tipp: Während der Bluetooth-Verbindung können möglicherweise auch
System-, Benachrichtigungs- und Klingeltöne des Bluetooth-Geräts
wiedergegeben werden. Deaktivieren Sie diese Funktionen an Ihrem
Bluetooth-Gerät, um unerwünschte Störungen bei der Audiowiedergabe
zu vermeiden.
Mehr Infos über Bluetooth fi nden Sie unter www.bluetooth.org.
Page 17

POLAR 10 1.1
5 Technische Daten
POLAR 10 System
Max. SPL peak calculated 126 dB Halfspace
Frequenzgang +/- 10 dB 38 Hz – 20 kHz
Endstufenleistung 2000 W
Endstufentyp Class D – biamped
Trennfrequenz 180 Hz, 24 dB/Okt.
Aktive Schutzschaltungen Undervoltage-, Thermo-, Short-Circuit-,
Overcurrent-Protection, Peak-, RMS-Limiter
Eingänge 2x Klinke/XLR-Kombibuchse (symmetrisch),
1x Klinke Instrument (Hi-Z), 2x Cinch,
Bluetooth Audio-Streaming
Ausgänge Mix Out
Max. Eingangspegel +4 dBu
Modes (Filter-Presets) Music, Voice, DJ
User Presets 5
EQ 3-Band, semiparametrischer Mid-EQ
System-Delay bis 291 ms (100 m)
Bluetooth 5.0
Gehäuse Birke-Multiplex / ABS
Oberfl äche 2K-Lack, schwarz
Gesamthöhe System 213 cm
Gewicht 26,9 kg / 59,3 lbs
Allgemeine Technische Daten
Stromaufnahme
nach EN 62368-1
Die Bluetooth-Wortmarke und -Logos sind Eigentum der Bluetooth SIG, Inc. Die Nutzung dieser Marken
durch HK Audio erfolgt unter Lizenz.
Alle erwähnten Warenzeichen und Copyrights gehören ihren jeweiligen Eigentümern.
0,6 A / 220-240 V AC
0,8 A / 100-120 V AC
POLAR 10 Subwoofer
Basslautsprecher 1x 10", 2" Schwingspule
Frontgitter 1,5 mm Metallgitter mit schwarzem Akus-
tikschaumsto
Abmessungen (BxHxT) 36,6 x 62,5 x 54,1 cm
Gewicht 21 kg / 46,2 lbs.
POLAR 10 Mid/High-Unit
Mitteltonlautsprecher 6x 3", 3/4" Schwingspule, Neodym
Hochtontreiber 1x 1", 1" Schwingspule
Horncharakteristik 120° x 30°
Frontgitter 1 mm Metallgitter mit schwarzem Akustik-
schaumsto
Abmessungen (BxHxT) 10,8 x 82,5 x 9,8 cm
Gewicht 3,9 kg / 8,6 lbs
POLAR 10 Spacer
Frontgitter 1 mm Metallgitter mit schwarzem Akustik-
schaumsto
Abmessungen (BxHxT) 10,8 x 82,5 x 9,8 cm
Gewicht 2 kg / 4,4 lbs
• English • Deutsch • Français • Italiano • Español
17
Page 18

Consignes de sécurité importantes! A lire avant
de se connecter!
Ce produit a été construit conformément à la norme IEC 62368-1 par
le fabricant et a quitté l’usine en bon état de marche. Pour garantir
son intégrité et un fonctionnement sans risque, l’utilisateur se doit de
suivre les conseils et les avertissements préconisés dans cette notice
d’utilisation. En cas d’utilisation de ce produit dans un véhicule terrestre,
un navire ou un avion, ou encore à une altitude supérieure à 2000
mètres, il convient de prendre en considération les normes de sécurité
suivantes, en plus de la norme IEC 62368-1.
ATTENTION: Afin d’éviter tout risque d‘incendie et d‘électrocution,
n‘exposez pas cet appareil à l’humidité ou à la pluie. N’ouvrez pas le
boîtier; les pièces se trouvant à l’intérieur ne nécessitent pas d’entretien
de la part des utilisateurs. Adressez-vous à un spécialiste qualifié pour
procéder à l‘entretien de l‘appareil.
Ce symbole, quel que soit l’endroit où il apparaît, vous signale
des pièces sous tension non isolées dans le boîtier. Une tension
suffisante pour présenter un risque d’électrocution.
Ce symbole, quel que soit l’endroit où il apparaît, vous signale des
pièces sous tension accessibles depuis l’extérieur du boîtier. Tous les
câbles extérieurs raccordés à un composant marqué de ce symbole
doivent être de type préfabriqués et conformes aux spécifications du fabricant ou doivent avoir été installés par des spécialistes qualifiés.
Ce symbole, quel que soit l’endroit où il apparaît, vous signale
des instructions importantes relatives à l’utilisation ou l’entretien de
l’appareil à lire dans les documents l’accompagnant. Lisez la notice
d’utilisation.
Ce symbole, quel que soit l’endroit où il apparaît, vous signale
un risque de brûlure dû à une surface chaude. Ne touchez pas cette
surface afin d’éviter de vous brûler.
Tous les appareils électriques et électroniques y compris les
piles doivent être éliminés séparément des déchets ménagers auprès des
points de collecte officiels prévus à cet effet.
Lisez ces instructions. Conservez ces instructions. Prenez en
compte tous les avertissements et toutes les instructions mentionnés sur
le produit ou dans cette notice d’utilisation.
• N’utilisez pas ce produit à proximité de l’eau. Ne le placez pas près de
l’eau, d’une baignoire, d’un bassin, d’un évier, d’une surface humide,
d’une piscine ou d’une pièce humide.
• Ne mettez pas d’objet contenant du liquide sur l’appareil, par exemple,
un vase, un verre ou une bouteille, etc.
• Nettoyez-le exclusivement avec un chiffon sec.
• N’enlevez pas le boîtier, ne serait-ce que partiellement.
• La tension de fonctionnement de l’appareil doit être réglée de manière
à correspondre à la tension d’alimentation de l’endroit où vous vous
trouvez. Si vous n’êtes pas sûr de connaître la tension d’alimentation,
demandez à votre revendeur ou à la compagnie d’électricité locale.
• Avant de brancher l’appareil, assurez-vous systématiquement que
l’installation électrique (alimentation) dispose de systèmes de protection suffisants contre les courts-circuits et les erreurs de mise à la terre
des appareils raccordés.
• Afin de réduire le risque d’électrocution, vous ne devez jamais
supprimer la mise à la terre de l’appareil. Utilisez uniquement le câble
d’alimentation fourni avec le produit et maintenez la broche centrale
de la prise (mise à la terre) en état de fonctionnement. Ne négligez
pas la sécurité offerte par les prises polarisées ou avec mise à la terre.
Assurez-vous que l’appareil est bien raccordé à une prise disposant
d’une terre de protection et que celle-ci est en ordre de marche.
• Protégez le câble d’alimentation afin d’éviter que quelqu’un marche
dessus ou qu’il soit pincé, notamment près de la prise, de la prise
murale ou à la sortie de l’appareil même! Les câbles d’alimentation doivent être tout le temps maniés avec précaution. Vérifiez régulièrement
que le câble n’est pas fendu ou qu’il ne présente pas de signe d’usure,
en particulier près de la prise et à la sortie de l’appareil.
• N’utilisez jamais de câble d’alimentation usé.
• Débranchez l’appareil en cas d’orage ou si vous ne l’utilisez pas
pendant une longue période.
• Débranchez l’appareil uniquement en le tenant par la prise au niveau
de la prise murale ou de la rallonge. L’appareil doit être placé de telle
manière à ce qu’il puisse être débranché facilement à tout moment.
• Les fusibles ne peuvent être remplacés que par des personnels qualifiés
et uniquement sous réserve d’utiliser des pièces de type et de valeur
nominale correctes.
• Confiez tous les travaux d’entretien à des spécialistes qualifiés. Il est
nécessaire d’effectuer de tels travaux lorsque l’unité a été endommagée, comme par exemple dans les cas suivants:
- Lorsque le câble d’alimentation est endommagé ou effiloché.
- Si du liquide a pénétré ou un objet est tombé dans le boîtier.
- Si l’appareil a été exposé à la pluie ou à l’humidité.
- Si l’appareil ne fonctionne pas correctement alors que vous avez suivi
toutes les instructions à la lettre.
- Si l’appareil est tombé ou que le boîtier est endommagé.
• En cas de raccordement de haut-parleurs à cet appareil, il faut veiller
à ne pas descendre sous l’impédance minimale indiquée sur ledit
appareil ou dans la présente notice. Les câbles employés doivent présenter une section suffisante, qui soit conforme aux réglementations
locales en vigueur.
• Ne l’exposez pas directement aux rayons du soleil.
• Ne l’installez pas à proximité d’une source de chaleur, telle qu’un radiateur, une grille de chauffage, un four ou tout autre appareil susceptible
de produire de la chaleur.
• Cet appareil est conçu pour une utilisation dans des zones climatiques
modérées. Il n'est pas adapté pour une utilisation dans des pays à climat
tropical.
• Ne masquez pas les bouches d’aération. Installez l’appareil conformément aux instructions du fabricant. Il ne doit pas être placé dans
un emplacement confiné, comme un rack ou une console, sauf si une
ventilation suffisante est garantie.
• Si vous déplacez l’appareil, attendez qu’il soit à température ambiante
avant de le démarrer, sinon de la condensation peut se former à
l’intérieur et endommager l’appareil.
• Ne posez pas de d’objet à flamme ouverte sur l’appareil, comme par
exemple une bougie allumée.
• L’appareil doit être placé à au moins 20cm/8" pouces du premier mur.
• Utilisez l’appareil uniquement avec un chariot, un support, un trépied,
des fixations ou une table recommandés par le fabricant ou vendus
avec le produit. Si vous utilisez un chariot, maniez-le avec précaution
afin d’éviter tout risque de blessure s’il se renverse.
• Utilisez uniquement les accessoires recommandés par le fabricant.
Cette consigne concerne toute sorte d’accessoires, qu’il s’agisse de
couvercles de protection, de sacs de transport, de supports ou de
dispositifs de fixation au mur ou au plafond. Si vous fixez un accessoire
à l’appareil, suivez toujours les instructions d’utilisation du fabricant.
N’utilisez pas d’autres points de fixation que ceux préconisés par le
fabricant.
• Cet appareil NE convient PAS aux personnes dont les capacités
motrices, sensorielles ou mentales sont déficientes (y compris les
enfants) ou aux personnes ne disposant pas de l’expérience ou des
connaissances nécessaires pour faire fonctionner le présent appareil.
Cet appareil doit dans tous les cas et être tenu constamment hors de
portée des enfants de moins de quatre ans.
• N’insérez jamais d‘objets à travers les grilles du boîtier, car ils pourraient toucher des pièces sous tension dangereuses ou provoquer un
court-circuit pouvant causer un risque d’incendie ou d’électrocution.
• Cet appareil est capable de délivrer un niveau de pression acoustique
de 90dB, pouvant ainsi causer des troubles irréversibles de l’audition!
L’exposition continue à une nuisance sonore peut provoquer une perte
d’audition permanente. Portez des protections auditives adéquates
si vous vous exposez de manière continue à un tel niveau de pression
acoustique.
• Le fabricant garantit la sécurité, la fiabilité et l’efficacité de fonctionnement de son produit uniquement si:
- l’assemblage, l’extension, le réajustement, la modification ou la
réparation de l’appareil ont été effectués par le fabricant ou par des
personnes agréées pour ce genre de travaux.
- l’installation électrique concernée est conforme aux normes IEC (ANSI).
- l’unité est utilisée conformément aux instructions d’utilisation.
• Ce produit a été optimisé pour une utilisation avec des signaux
musicaux ou voix. Une utilisation avec des signaux sinusoïdaux,
rectangulaires ou autres signaux de mesure risque de l’endommager
gravement.
Consignes de sécurité générales pour systèmes
de haut-parleurs
Les systèmes de fixation doivent exclusivement être employés
pour les systèmes de haut-parleurs fournis par le fabricant et avec les
accessoires de montage tels qu’évoqués dans la notice de montage. Dans
ce cadre, il convient de respecter scrupuleusement les indications de
montage du fabricant. En cas d’utilisation non conforme d’accessoires ou
d’installation d’accessoires de montage non d’origine, le dommage en
résultant éventuellement ne sera pas couvert par la garantie et la
responsabilité du fabricant ne pourra en aucun cas être engagée.
Si des modifications sont apportées aux haut-parleurs, aux accessoires
de montage, aux raccords et fixations ainsi qu’au matériel d’élingage, la
portabilité du système ne pourra plus être garantie et la responsabilité
du fabricant ne pourra en aucun cas être engagée.
Toute réparation d’éléments de sécurité ne peut être effectuée que
par le fabricant ou son représentant agréé, faute de quoi le permis
d’exploitation s’éteint.
L’installation sera exclusivement réalisée par un spécialiste, et ce,
uniquement dans des zones de montage présentant une capacité de
charge suffisante, un point à vérifier notamment par la prise en compte
des normes de construction appliquées. Le matériel de fixation prescrit
par le constructeur dans la notice de montage (vis, chevilles, etc.) doit
impérativement être employé. Les raccords boulonnés doivent être
assurés contre tout desserrement au moyen de mesures appropriées.
Les installations fixes ou mobiles (ici les haut-parleurs,
accessoires de montage compris) doivent être assurés contre la chute par
deux dispositifs indépendants l’un de l’autre. Les éléments supplémentaires lâches ou les pièces se desserrant doivent pouvoir être retenus par
des dispositifs adaptés. En cas d’utilisation de raccords, d’éléments de
fixation et de matériel d’élingage, il convient de respecter les
dispositions nationales en la matière. Le calcul du dimensionnement des
dispositifs de sécurité requiert la prise en compte des charges
dynamiques possibles (forces de recul).
En cas d’utilisation de trépieds, il faut surtout prendre en
considération la charge maximale supportée. En outre, de par leur
conception, la plupart des trépieds permettent uniquement de supporter
des charges parfaitement centrées. Les trépieds doivent dès lors être
disposés de façon stable. Il est nécessaire d’assurer les trépieds par des
mesures supplémentaires dans les cas suivants (liste non exhaustive) :
- lorsque leur surface de pose n’offre pas une stabilité suffisante;
- lorsque leur hauteur limite leur stabilité ;
- lorsque la force du vent risque d’être élevée ;
- lorsqu’ils risquent d’être heurtés par des personnes.
Des mesures particulières peuvent également s’avérer nécessaires, à titre
préventif, pour se prémunir contre des comportements dangereux de la
part de spectateurs. Les trépieds ne doivent donc pas être disposés dans
des voies d’évacuation ou des passages réservés aux secours. En cas
d’installation sur des voies de circulation, veiller à respecter la largeur de
circulation requise, à verrouiller le secteur de façon adaptée et à mettre
en place la signalisation idoine. Le montage et le démontage sont des
phases qui présentent des risques particuliers. Il faut dès lors employer
des moyens auxiliaires appropriés. Veiller également, lors de ces opérations, à respecter la législation nationale en la matière.
Lors du montage, il est indispensable de porter
des équipements de sécurité adaptés (en particulier un casque, des
gants et des chaussures de sécurité) et d’utiliser uniquement des
dispositifs d’aide à l’ascension adaptés (échelles, échafaudages, etc.).
La responsabilité dans ce domaine incombe uniquement à la société de
montage exécutante.
ATTENTION! À l’issue du montage, il y a lieu de contre-vérifier la
fixation ou la suspension du système (haut-parleurs et supports).
L’exploitant des systèmes de haut-parleurs (fixes ou mobiles) est tenu de
vérifier, ou de faire vérifier, tous les composants du système en fonction
des réglementations en vigueur dans le pays concerné, et de faire éliminer sans délai les éventuels défauts constatés.
En outre, nous recommandons fortement de constituer une documentation détaillée sur toutes les mesures d’inspection dans les registres de
contrôle ou similaires.
Dans ce cas, il convient en particulier de dimensionner avec des réserves
de sécurité suffisantes les points de support de charge de systèmes
suspendus. Veiller également, lors de ces opérations, à respecter la
législation nationale en la matière.
Les systèmes de haut-parleurs professionnels sont capables de
produire des niveaux sonores dangereux pour la santé. Même des niveaux
sonores a priori inoffensifs peuvent, en cas d’exposition prolongée, provoquer des pertes auditives irréversibles (à partir de 95 dBA SPL environ)
! C’est pourquoi nous conseillons à toutes les personnes soumises à des
niveaux sonores élevés en raison de l’exploitation de systèmes de hautparleurs, de porter des protections auditives professionnelles (bouchons
d’oreilles ou casques antibruit).
Fabricant : Stamer Musikanlagen GmbH, Magdeburger Str. 8,
66606 St. Wendel, Allemagne
Version 2.8 08/2019
Page 19

POLAR 10
POLAR 10 1.1
Bienvenue dans la famille HK Audio!
Nous vous remercions d’avoir opté pour un produit de notre marque, produit
que nous avons développé et fabriqué pour vous, avec le plus grand soin.
Même si vous avez déjà une longue expérience des installations de
sonorisation, vous constaterez que ce produit a che certaines caractéristiques qui seront nouvelles pour vous. C’est pourquoi nous vous conseillons
de lire la présente notice et de la conserver ensuite pour consultation
ultérieure.
Nous vous souhaitons le meilleur des sons!
L’équipe HK Audio
Conseil: La fonctionnalité de ce produit peut être perturbée par de
puissants champs électromagnétiques ou des décharges électrostatiques. Dans ce cas, il conviendra de couper l’appareil, puis de le
rallumer pour restaurer la fonctionnalité. Si cette mesure ne su t pas,
l’appareil doit être éloigné de la source perturbatrice.
Garantie
Vous pouvez utiliser notre service d’enregistrement en ligne convivial sur
notre site www.hkaudio.com.
http://warranty.hkaudio.com
L’enregistrement est uniquement valable lorsqu’il est e ectué dans les 30
jours qui suivent la date d’achat.
1 Généralités
1.1 Détail de livraison
Veuillez vérifi er l’intégrité du détail de livraison lors du déballage de
votre système. POLAR est emballé dans deux cartons et se compose
d’un subwoofer, d’une colonne satellite (Mid/High-Unit) et d’un élément
entretoise (Spacer). Le carton du subwoofer contient en outre une housse
de protection matelassée pour le subwoofer, un sac de transport pour les
deux éléments-colonne ainsi que le câble d’alimentation.
1.2 Les composants
Le subwoofer
Le système subwoofer actif héberge le hautparleur de graves ainsi que l’électronique
système, amplifi cateurs inclus. Sur le dessus,
on retrouve le socle transmettant les signaux
et permettant la connexion des élémentscolonne ainsi qu’une poignée de transport.
Une seconde poignée encastrée est intégrée
à l’avant dans le panneau de fond, si bien
que le subwoofer se transporte aisément
à l’aide des deux mains. Le panneau de
commande intégré avec écran d’a chage,
potentiomètres et connecteurs est
légèrement incliné vers l’arrière afi n d’éviter
d’endommager les éléments de commande.
Les ouvertures bass refl ex sont situées en
bas de la face avant, l’interrupteur et la prise
d’alimentation étant situés à l’arrière.
La colonne
• La colonne se compose du satellite (Mid/
High-Unit) et du Spacer.
• Le Spacer est inséré dans le socle du subwoofer à l’aide du connecteur
enfi chable conducteur de signaux intégré. La Mid/High-Unit s’emboîte sur
le Spacer à l’aide du même système enfi chable.
• La Mid/High-Unit et le Spacer sont alors non seulement reliés
mécaniquement, mais également électriquement, de sorte qu’un câblage
supplémentaire des haut-parleurs n’est pas nécessaire.
Mid/high
unit
Spacer
Subwoofer
HK Audio
Service technique
Postfach 1509
66595 St. Wendel, Allemagne
Fax: +49 6851 905 100
1.3 Montage et mise en service
Montage du système
• Placez le subwoofer sur un support plan et stable.
• Reliez en procédant comme décrit à la section 1.2 le Spacer et la colonne
satellite au subwoofer.
• Veillez à ce que les éléments soient parfaitement fi xés ensemble.
• Branchez le câble d’alimentation dans la prise d’alimentation située à
l’arrière.
• English • Deutsch • Français • Italiano • Español
19
Page 20

POLAR 10 1.1
Information : le système peut également être utilisé sans Spacer. (par ex.
lors du positionnement sur des scènes hautes ou sur une table).
Attention ! Ne transportez ou ne déplacez pas POLAR à l’état
monté. Le système pourrait être endommagé et des dégâts matériels ou
dommages corporels pourraient survenir !
Montage stéréo
RL
2 Prises et éléments de commande
Face arrière
Caution: To reduce
the risk of electric
shock, grounding of
the center pin of
this plug must
be maintained.
100-240 V~
50-60 Hz
0.8 A @ 1/8
output power
1
Mains
●
Prise d’alimentation de type IEC permettant le raccordement à la tension
d’alimentation. Veuillez utiliser le câble inclus dans le détail de livraison.
Information : L’alimentation est une alimentation à découpage
automatique avec entrée à large plage de tension fonctionnant avec des
courants alternatifs de 100 V à 240 V avec une fréquence de 50 ou 60 Hz.
2
Power
●
Commutateur d’alimentation permettant la mise en circuit ou hors
circuit de la tension d’alimentation. Après la mise en marche, les derniers
paramètres DSP utilisés sont chargés.
Après quelques secondes, le système est opérationnel, l’écran a che
le niveau sonore des quatre canaux ainsi que la valeur du volume global
paramétré (Master).
Mains
1
Serial No.
Power
2
Caution: Risk of
electric shock!
Do not open!
Refer servicing
On
O
to qualified
service
personnel.
Lorsque deux POLAR sont utilisés en qualité de système stéréo, le système
de gauche reçoit le signal gauche du pupitre de mixage, le système de
droite recevant le signal droit. Dans ce mode de fonctionnement, il convient
de s’assurer que les réglages du son DSP (Mode, EQ, Delay, etc.) sont bien
identiques sur les deux systèmes, voir chapitre 3.
Sonorisation décentralisée en qualité de «delay line» resp.
enceinte d’appoint
Grâce à la fonction Delay intégrée, POLAR peut être utilisé en qualité
d’enceinte d’appoint (Delay-Line), voir chapitre 3.2 Delay. Déterminez
la distance entre le haut-parleur principal et POLAR et saisissez la
valeur en mètres via l’option "Delay" dans le menu DSP. POLAR e ectue
automatiquement le calcul de la compensation et di ère la di usion sonore
de manière appropriée par rapport à celle du haut-parleur principal.
Canal 1 et Canal 2 (Line/Mic)
Les canaux 1 et 2 sont équipés de manière identique et permettent le
branchement de microphones ainsi que d’instruments équipés d’une sortie
ligne (Line-Out) tels que les claviers arrangeurs ou les synthétiseurs.
3
Input
●
Embase Combo XLR/jack symétrique. Le raccordement est possible
par connecteur XLR ou jack 6,35 mm (branchement symétrique ou
asymétrique).
Information : Il convient dans la mesure du possible de privilégier un
signal symétrique, étant donné qu’il protège mieux des parasites et
interférences HF potentiels.
4
Line/Mic
●
Sélecteur permettant d’ajuster la sensibilité et l’impédance des préamplifi cateurs. La position «Line» est prévue pour le branchement d’un appareil
avec un niveau ligne, tel qu’une table de mixage, un clavier, un synthétiseur
etc., la position «Mic» étant dédiée au branchement d’un microphone
dynamique.
5
Volume
●
Potentiomètre rotatif permettant le réglage du volume du signal. En
position « butée à gauche », le signal est complètement désactivé, en
position « butée à droite», le volume maximal est atteint.
20
Page 21

POLAR 10 1.1
24bit Digital Signal Processor
12
Master
13
Push
to edit
4
Line Mic Line Mic Instrument Aux +
5
1234
3
POLAR 10
4
5 7 9
3 6 8
SubMix Out
11
10
0 dB
+10 dB
Canal 3 (Instrument)
Cette entrée permet le branchement d’un instrument avec une sortie
haute impédance (Hi-Z), p. ex. des guitares et des basses électriques ou
acoustiques, ou des pianos électromécaniques. Cette entrée bénéfi cie d’une
exécution haute impédance afi n que l’instrument puisse révéler pleinement
son timbre et sa plage dynamique.
6
Input
●
Embase d’entrée jack 6,35 mm asymétrique pour le branchement d’un
instrument.
7
Volume
●
Potentiomètre rotatif permettant le réglage du volume du signal. En
position « butée à gauche », le signal est complètement désactivé, en
position « butée à droite», le volume maximal est atteint.
Canal 4 (Aux + Bluetooth)
Le canal 4 permet le raccordement de sources stéréo telles que les pupitres
DJ, lecteurs CD MP3 ou pupitres de mixage, ainsi que la di usion de
musique via streaming audio Bluetooth. Les signaux Aux et Bluetooth sont
utilisables simultanément sur le canal 4.
8
Input
●
Entrée asymétrique (2x embase jack) permettant le branchement
de sources audio haute impédance telles que les lecteurs CD-/MP3,
Smartphones, mixeurs DJ ou ordinateurs.
9
Volume
●
Potentiomètre rotatif permettant le réglage du volume du signal. Ce
potentiomètre de réglage du volume agit simultanément sur l’entrée Aux
et sur l’entrée Bluetooth. En position « butée à gauche », le signal est
complètement désactivé, en position « butée à droite», le volume maximal
est atteint.
Information : Lorsque l’entrée Aux et le streaming audio Bluetooth sont
utilisés simultanément, le volume du signal Bluetooth peut être ajusté
proportionnellement au signal Aux sur le périphérique Bluetooth.
10
Sub
●
Potentiomètre rotatif permettant d’ajuster la proportion de basses du
système. En position « butée à gauche », le subwoofer est complètement
désactivé, en position « butée à droite», le volume maximal du subwoofer
est atteint. Le potentiomètre Sub permet d’ajuster séparément le niveau
du subwoofer. Tournez le potentiomètre sur 0 dB pour obtenir un rapport de
volume sonore relativement équilibré entre la colonne et le subwoofer.
Conseil : Souvent, il est judicieux de réduire légèrement la proportion de
basses lors du montage dans un angle ou dans des salles très petites.
De même, la réduction de la part de basses peut aussi être utilisée pour
augmenter le volume global maximal du système, sans que les limiteurs
de protection du système déclenchent.
11
Mix Out
●
Embase de sortie XLR symétrique. Le signal cumulé mélangé de tous les
canaux d’entrée est di usé via cette sortie.
Information : La sortie Mix Out permet la «transmission» du signal
cumulé, p. ex. à un mélangeur FOH, pour gérer des haut-parleurs
supplémentaires (retour de scène) ou pour un enregistrement en
direct. Il est également possible de brancher ici un subwoofer actif
supplémentaire dans la mesure où celui-ci dispose d’un High-Cut ou d’un
fi ltre passe-bas pour l’atténuation des hautes fréquences.
• English • Deutsch • Français • Italiano • Español
21
Page 22

POLAR 10 1.1
12
A chage LCD
●
En fonctionnement normal, l’écran indique le niveau des canaux d’entrée et
du volume Master.
En mode DSP, il a che les paramètres du menu DSP actuellement
sélectionné (voir 3.2 Paramètres DSP).
A chages bargraphes
Les quatre a chages bargraphes indiquent les niveaux des canaux
d’entrée. La zone Overload signale une saturation du signal d’entrée. Si
Overload s'allume, réduisez l’amplifi cation d’entrée du canal et/ou le niveau
de sortie du périphérique branché.
Information : POLAR dispose de réserves d’énergie su santes pour
pouvoir supporter les crêtes de signal occasionnelles. Si un a chage
Overload reste allumé constamment ou si une saturation devient
audible, il convient de baisser le potentiomètre de volume du canal
correspondant afi n d’éviter une distorsion acoustique du signal et de
prévenir une surcharge du système.
Conseil : Pour éviter tout bruit, la modulation correcte des signaux est
importante. Cela signifi e : Les niveaux des canaux d’entrée doivent
être réglés sur la valeur la plus élevée possible (en principe pour que
l’indication Overload s’allume pour le signal le plus fort, puis les réduire
de manière qu’elle ne s’allume plus du tout) et de n'augmenter le Master
qu’autant que nécessaire.
13
Master (push to edit)
●
Le potentiomètre Master à côté de l’écran a principalement la fonction
d’un volume Master, il règle le volume sonore total du système. La valeur
actuelle est a chée à l’écran.
Plage de réglage : –60 bis +10, par pas de 1 dB
3 Menu DSP
En appuyant sur le potentiomètre Master («push to edit»), on a accès à
di érents paramètres DSP regroupés dans un menu de sélection et pouvant
être édités. Le paramètre actuellement sélectionné est a ché à l’écran.
Les fonctions suivantes peuvent être sélectionnées :
3.1 Bluetooth
Établir une connexion Bluetooth
Bluetooth
POLAR propose le streaming audio via Bluetooth. Elle permet la
reproduction musicale sans fi l à partir de périphériques compatibles
Bluetooth tels que les smartphones ou les tablettes PC.
Établir la connexion avec un périphérique Bluetooth
• Appuyez une fois sur le potentiomètre Master : l’option du menu
"Bluetooth" s'a che.
• Appuyez une nouvelle fois sur le potentiomètre Master pour démarrer
le processus de connexion Bluetooth («Pairing»). POLAR est désormais
visible par tous les périphériques Bluetooth. Pendant un intervalle de
temps de 120 secondes pour l’établissement de la connexion, le symbole
Bluetooth sur l’écran indique par un clignotement lent qu’il est possible
d’établir une connexion avec un périphérique Bluetooth.
• Sélectionnez «HK Audio POLAR» dans le menu Bluetooth de votre
périphérique Bluetooth pour établir la connexion..
• Dès que la connexion est établie avec succès, le symbole Bluetooth sur
l’écran du POLAR reste allumé en permanence.
État du Bluetooth sur l’écran :
• Pas de symbole Bluetooth (le chi re 4 est a ché)
Bluetooth non activé
• Clignotement lent
Établissement d’une connexion Bluetooth possible dans un délai de 120
secondes
• Symbole Bluetooth visible en permanence
Connexion Bluetooth établie
(une nouvelle pression sur Pairing active
le processus d’appairage)
• Une rotation du potentiomètre Master permet de naviguer dans le menu,
un appui sur le potentiomètre Master permettant de sélectionner l’option
actuelle du menu ou de confi rmer la saisie.
Attention : En l’absence de saisie ou de confi rmation dans un délai
de 8 secondes, POLAR quitte l’option sélectionnée du menu et revient
automatiquement à la fenêtre principale (Master volume) afi n d’éviter
toute manipulation involontaire.
Information : Les paramètres DSP actuels sont conservés de manière
permanente en mémoire, même après l’arrêt du système et seront de
nouveau chargés au démarrage.
22
• Clignotement rapide
Échec resp. interruption de la connexion Bluetooth (p.ex. dépassement de
la portée)
Information : Lorsque le symbole Bluetooth clignote rapidement, vérifi er
si votre périphérique Bluetooth se trouve à portée, si Bluetooth est activé
et si POLAR a été sélectionné dans la liste des périphériques Bluetooth.
Si POLAR ne fi gure pas sur la liste des périphériques Bluetooth, exécutez
un nouvel établissement de connexion via l’appairage Bluetooth.
Les signaux audio du périphérique Bluetooth sont di usés via le canal 4.
Le réglage du volume s’e ectue via le potentiomètre de volume du canal
4, resp. sur le périphérique Bluetooth. Avant de démarrer la reproduction
musicale sur votre périphérique Bluetooth, il est recommandé de réduire le
potentiomètre de volume du canal 4.
Vous trouverez des informations complémentaires sur Bluetooth au
chapitre 4.
Page 23

POLAR 10 1.1
3.2 Paramètres
EQ Système
Hi EQ
Mid EQ
Mid Freq
Low EQ
POLAR o re un réglage de la tonalité à 3 bandes, permettant d’ajuster la
tonalité globale du système. Hi-EQ et Low-EQ sont exécutés en qualité de
fi ltres en plateau, le Mid-EQ est semi-paramétrique.
Conseil : Utilisez l’EQ 3 bandes pour ajuster la tonalité globale en fonction
de l’application et de vos goûts personnels. Dans les petites salles
avec une faible distance par rapport au mur ou au public, il est souvent
possible de réduire légèrement la proportion de basses. La même chose
s’applique aux proportions début lorsqu’en raison de l’utilisation d’un
microphone sensible ou de surface fortement réfl échissantes telles que
les fenêtres la sensibilité à l’e et Larsen est accrue. Avec la bande des
médiums semi-paramétrique, il est par exemple possible d’éliminer une
fréquence parasite de manière ciblée ou de renforcer légèrement une
plage de fréquences trop peu présente.
Réglage de tonalité aigus :
+/- 12 dB (préréglage : 0 dB)
Réglage de tonalité médiums :
+/- 12 dB (préréglage : 0 dB)
Fréquence médiums :
70 Hz – 12 kHz (préréglage : 1 kHz)
Réglage de tonalité basses :
+/- 12 dB (préréglage : 0 dB)
Delay
O: O : Fonction Delay désactivée
Delay
(réglage par défaut)
0–100 m: Distance Delay
L’option du menu «Delay» permet de temporiser la di usion audio via les
haut-parleurs POLAR. La temporisation est réglable de 0 (o ) à 100 m par
pas de 0,25 m.
Information : L’unité de mètre s’avère pratique lorsque POLAR doit p.
ex. être utilisé en qualité de haut-parleur d’appoint (Delay-Line) lors
d’événements de plus grande ampleur. Ainsi, il est par exemple possible
dans des salles di ciles sur le plan acoustique d’obtenir une répartition
du son plus homogène avec une meilleure compréhensibilité jusque dans
les derniers rangs et donc réduire le volume du système de sonorisation
principal au niveau de la scène. Il vous su t de régler la distance
entre POLAR et la scène en mètres pour que le POLAR soit en parfaite
synchronisation acoustique avec la sonorisation principale.
3.3 Gestion des presets
Load Preset
Store Preset
Erase Preset
Charger preset
Enregistrer preset
Supprimer preset
Hi EQ: Ce paramètre permet d’accentuer ou d’atténuer les fréquences
aiguës. Plage de réglage : +/–12 dB • Fréquence : 12 kHz
Mid EQ: Ce paramètre permet d’accentuer ou d’atténuer les fréquences de
la bande des médiums. Plage de réglage +/–12 dB
Mid Freq: Ce paramètre permet de régler la fréquence centrale de la bande
des médiums. Plage de fréquences : 70 Hz – 12 kHz
Low EQ: Ce paramètre permet d’accentuer ou d’atténuer les basses
fréquences. Plage de réglage : +/–12 dB • Fréquence : 70 Hz
Information : Les réglages EQ n’agissent que sur la sortie haut-parleurs,
ils n’ont aucune infl uence sur la sortie Mix Out.
Mode
Music (préréglage)
Mode
Trois modes prédéfi nis peuvent être sélectionnés pour le réglage de base de
la tonalité du système.
Music: Ce mode convient de manière générale aux applications live et à la
reproduction des musiques de tout genre.
Voice: Pour les applications vocales, il convient de sélectionner le mode
«Voice » optimisé pour la voix humaine.
DJ: Le mode « DJ » est le meilleur choix pour la reproduction de musique
électronique.
Information : Les paramètres de l’EQ trois bandes ne sont pas écrasés par
la commutation entre les modes Music/Voice/DJ. L’EQ trois bandes est
disponible en complément.
Voice
DJ
Load Preset
Pour la gestion des paramètres DSP personnalisés, cinq emplacements
mémoire (U1 à U5) sont disponibles. «U» désigne «User-Preset». Un UserPreset comprend l’ensemble des paramètres des possibilités de réglage
o ertes dans le menu DSP (Mode, EQ trois bandes, Delay, Luminosité de
l’écran, etc.).
Le preset à charger U1 à U5 peut être sélectionné en tournant le
potentiomètre Master, le preset étant chargé après confi rmation par un
appui sur le potentiomètre Master. «Exit» permet de quitter le menu sans
charger de preset.
Store Preset
Il est possible d’enregistrer ici les paramètres actuels du menu DSP.
En tournant le potentiomètre Master, il est possible de sélectionner
l’emplacement mémoire de U1 à U5. La confi rmation de la sélection par un
appui sur Master provoque l’ouverture d’un champ de saisie permettant
d’attribuer un nom au preset. «Exit» permet de quitter le menu sans
mémoriser un preset.
Éditeur de texte : En tournant le potentiomètre Master, on accède au
champ texte et on peut naviguer à travers les options du menu «"Save»,
«Clear» et «Cancel». Lorsque le champ texte est sélectionné, il est
possible de sélectionner par un appui la première des 12 positions, puis
par une rotation une lettre ou un symbole. Une nouvelle pression permet
d’atteindre les 12 positions suivantes et de sélectionner d’autres lettres
ou symboles. Il est possible de quitter le champ texte par un double appui
sur le potentiomètre Master (sans le tourner !). Un symbole entrée (fl èche)
apparaît, il est désormais possible en e ectuant une rotation de naviguer à
partir du champ texte vers « Save », « Clear » et « Cancel ».
Save : Si «Save» est sélectionné, un appui sur Master déclenche
l’enregistrement du preset et l’on retourne au menu de sélection U1 à U5
pour copier le preset sur un autre emplacement mémoire ou quitter le menu
via « Exit ».
Clear : Si «Clear» est sélectionné, un appui sur Master permet d’e acer le
champ texte et la saisie d’un nouveau nom est possible.
• English • Deutsch • Français • Italiano • Español
23
Page 24

POLAR 10 1.1
Cancel : Si «Cancel» est sélectionné, un appui sur Master déclenche
l’interruption de l’attribution du nom et on retourne au menu de sélection
U1 à U5 pour choisir un autre emplacement mémoire ou interrompre
totalement le processus de mémorisation via « Exit ».
Erase Preset
Il est possible de supprimer ici le preset sélectionné. Un appui sur Master
ne déclenche cependant pas le processus de suppression, une invite de
confi rmation apparaît d’abord :
Confi rm Erase : Yes/No
Une rotation permet de commuter entre « Yes » et « No », un appui
sur le potentiomètre Master confi rmant la sélection. «Yes» supprime
défi nitivement le preset, «No» permet de revenir au menu DSP.
3.4 Display
O : L’écran est allumé en permanence
LCD Dim
Brightness
Contrast
LCD Dim : Si la fonction est désactivée (O ), l’écran conserve une
luminosité constante. Si la fonction est activée (On), l’écran s’assombrit
huit secondes après la dernière utilisation du potentiomètre Master, mais
reste cependant bien lisible. Dès que l’on utilise à nouveau le potentiomètre
Master, l’écran retrouve la luminosité réglée.
Bright : Ajustement de la luminosité de l’écran de 0 à 10.
(réglage par défaut)
On : L’écran s’assombrit après utilisation
Luminosité de l’écran 0–10 (valeur par défaut : 5)
Contraste de l’écran 0–10 (valeur par défaut : 5)
4 Bluetooth
Établir la connexion avec un périphérique Bluetooth
• appuyer sur le potentiomètre Master jusqu’à ce que «Bluetooth»
apparaisse dans le menu
• un nouvel appui lance le processus de connexion ("Pairing")
• le symbole Bluetooth clignote désormais lentement et POLAR s'a che
pendant 120sec. dans la liste de sélection du périphérique compatible
Bluetooth
• sélectionner maintenant «HK Audio POLAR» sur le périphérique
Bluetooth pour connecter les appareils
Dès que la connexion est établie avec succès, le symbole Bluetooth
sur l’écran du POLAR reste allumé en permanence. Vous trouverez des
informations complémentaires à ce sujet au chapitre 3.1.
Connexion automatique aux périphériques Bluetooth
Après une nouvelle mise en marche de POLAR, le dernier périphérique
connecté est recherché automatiquement pendant une durée de 120
secondes et la connexion est établie, un établissement manuel de la
connexion par appairage Bluetooth n’est pas nécessaire. Après l’écoulement
des 120 secondes, le processus de recherche peut être déclenché par un
nouveau cycle arrêt-marche de POLAR ou un établissement manuel de la
connexion via appairage Bluetooth.
Commutation entre périphériques Bluetooth
Il n’est pas possible de commuter vers un autre périphérique Bluetooth,
tant qu’un appareil Bluetooth est encore connecté ou que POLAR recherche
le dernier périphérique connecté. Exécutez de nouveau la fonction
d’appairage Bluetooth pour interrompre la connexion avec le périphérique
actuel et connecter un autre appareil Bluetooth.
Contrast : Ajustement du contraste de l’écran de 0 à 10.
3.5 Factory-Reset
Factory Reset
Reset
• Via «Reset», POLAR peut-être réinitialisé aux paramètres DSP d’usine.
• Un appui sur Master ne déclenche cependant pas le processus de
réinitialisation, une invite de confi rmation apparaît d’abord :
Confi rm Reset : Yes/No
Une rotation permet de commuter entre « Yes » et « No », un appui sur le
potentiomètre Master confi rmant la sélection. «No» permet de revenir
au menu DSP, «Yes» réinitialise défi nitivement toutes les fonctions DSP
aux paramètres d’usine : le mode est réglé sur «Music»», la connexion
Bluetooth est coupée, tous les cinq presets utilisateur sont supprimés.
Conseil : Cette fonction est par ex. judicieuse lorsque le système est
souvent utilisé en location. Il est ainsi possible de le remettre rapidement
aux paramètres d’usine avant de le confi er à un nouveau client.
Réinitialisation aux paramètres d’usine
3.6 Quitter le menu DSP
Exit
Cette option du menu permet de quitter le menu DSP et de revenir à Master
volume. Cela intervient automatiquement lorsqu’aucune saisie n’est
e ectuée via le potentiomètre Master pendant huit secondes.
Quitter menu DSP
Attention : L’appairage Bluetooth déclenche systématiquement un
nouvel établissement de connexion Bluetooth et coupe par conséquent
une éventuelle connexion existante !
Portée
POLAR supporte Bluetooth 5. Des portées jusqu’à 40 m sont possibles en
utilisant un périphérique compatible Bluetooth 5. Avec les périphériques
non compatibles Bluetooth 5, la portée s’étend en principe jusqu’à 10 m, elle
dépend cependant de di érents facteurs tels que la qualité et la puissance
d’émission du périphérique Bluetooth ainsi que des caractéristiques
de l’environnement (par exemple des murs en tant qu’obstacles sur la
ligne de communication sans fi l ou encore une enveloppe de protection
du périphérique Bluetooth). Lorsque la portée est dépassée ou que la
connexion est interrompue par des parois ou des murs, la reproduction
audio s’interrompt (le symbole Bluetooth sur l’écran du POLAR clignote
rapidement).
Si le périphérique Bluetooth est remis à portée dans un délai de 120
secondes, la connexion est rétablie automatiquement, le symbole
Bluetooth sur l’écran du POLAR reste alors allumé en permanence.
Bégaiements ou ratés lors du streaming audio Bluetooth
Le streaming audio via Bluetooth est en principe plus sensible aux parasites
qu’une liaison fi laire, étant donné qu’un fl ux de données constant sans
interruption doit être garanti lors de la di usion de musique.
Dans le cas idéal, il y a un «contact visuel» direct entre POLAR et le
périphérique Bluetooth pour permettre une reproduction sans parasites et
exempte de ratés.
Conseil : Pendant la connexion Bluetooth, il est possible que des tonalités
système, de notifi cation ou des sonneries du périphérique Bluetooth soit
reproduites. Désactivez ses fonctions sur votre périphérique Bluetooth,
afi n d’éviter les perturbations intempestives lors de la di usion audio.
24
Vous trouverez de plus amples informations sur Bluetooth sur
www.bluetooth.org.
Page 25

POLAR 10 1.1
5 Caractéristiques techniques
POLAR 10 System
SPL max. à 10% de THD 126 dB half space
Réponse en fréquence
+/- 10 dB
Puissance de l’étage de
sortie
Type d’étage de sortie Classe D – bi-amplifi é
Fréquence de rupture 180 Hz, 24 dB/oct.
Aktive Schutzschaltungen Limiteur de sous-tensions, thermique, de
Entrées 2x embase combinée XLR/jack (symé-
Sorties Mix Out
Niveau d’entrée max. +4 dBu
Modes (presets de fi ltres) Music, Voice, DJ
Presets utilisateur 5
EQ 3 bandes, Mid-EQ semi-paramétrique
Delay système jusqu’à 291 ms (100 m)
Bluetooth 5.0
Caisse Bouleau multiplex / plastique ABS
Surface Laque 2C, noire
Hauteur totale du système 213 cm
Poids 26,9 kg / 59,3 lbs
38 Hz – 20 kHz
2000 W
court-circuit, de surtension, de crête, RMS
trique), 1x embase instrument (Hi-Z),
2x jack, streaming audio Bluetooth
Caractéristiques techniques générales
Courant absorbé selon norme
EN 62368-1
La marque verbale et les logos Bluetooth sont la propriété de Bluetooth SIG, Inc. L’utilisation de ces
marques par HK Audio s’effectue sous licence.
Tous les produits et droits d’auteurs mentionnés appartiennent à leurs propriétaires respectifs.
0,6 A / 220-240 V AC
0,8 A / 100-120 V AC
POLAR 10 Subwoofer
Haut-parleur de basses 1x 10" avec bobine mobile 2"
Grille Grille métallique 1,5 mm avec mousse
Dimensions (l x H x P) 36,6 x 62,5 x 54,1 cm
Poids 21 kg / 46,2 lbs.
acoustique noire
POLAR 10 Mid/High-Unit
Haut-parleur de médiums 6x 3", 3/4" bobine mobile, néodyme
Moteur d‘aigus 1x 1" avec bobine mobile 1"
Caractéristiques de
pavillon
Grille Grille métallique 1 mm avec mousse
Dimensions (l x H x P) 10,8 x 82,5 x 9,8 cm
Poids 3,9 kg / 8,6 lbs.
120° x 30°
acoustique noire
POLAR 10 Spacer
Grille Grille métallique 1 mm avec mousse
Dimensions (l x H x P) 10,8 x 82,5 x 9,8 cm
Poids 2 kg / 4,4 lbs.
acoustique noire
• English • Deutsch • Français • Italiano • Español
25
Page 26

Istruzioni di sicurezza importanti.
Leggere prima di e ettuare il collegamento!
Il presente prodotto è stato fabbricato dal produttore in conformità
alla norma IEC 62368-1 ed è uscito dallo stabilimento in perfette condizioni di funzionamento. Per preservare tali condizioni e garantirne
l’uso sicuro, l’utente deve attenersi alle indicazioni e alle avvertenze
riportate nelle istruzioni per l’uso. Se volete usare questo prodotto su
veicoli, a bordo di navi o di aerei oppure ad altitudini superiori a 2000
m dovete badare alle rispettive norme di sicurezza suppletive alla
norma IEC 62368-1.
AVVISO: Per evitare il rischio di incendio o folgorazione, non esporre
l’apparecchio ad umidità o pioggia. Non aprire l’involucro poiché al
suo interno non vi sono parti riparabili dall’utente. Per la riparazione
rivolgersi a personale tecnico qualificato.
Questo simbolo segnala la presenza all’interno dell’involucro
di tensione pericolosa priva di isolamento sufficientemente alta da
costituire un pericolo di folgorazione.
Questo simbolo segnala la presenza di tensione pericolosa
accessibile dall’esterno. Il cablaggio esterno collegato ad un
qualunque morsetto contrassegnato da questo simbolo deve essere un
cavo preconfezionato conforme ai requisiti indicati dal produttore o
un cablaggio installato da personale qualificato.
Questo simbolo segnala importanti istruzioni per l’uso e la
manutenzione nella documentazione allegata. Leggere il manuale.
Questo simbolo ha il seguente significato: Attenzione!
Superficie calda! Non toccare per evitare scottature.
Apparecchiature elettriche o elettroniche di qualsiasi tipo,
batterie incluse, non appartengono nell'immondizia - smaltite questo
tipo di rifiuti presso gli ufficiali centri di raccolta.
Leggere queste istruzioni. Conservare queste istruzioni.
Attenersi a tutti gli avvisi e istruzioni riportati sul prodotto e nel
manuale.
• Non utilizzare il prodotto vicino all’acqua. Non collocare il prodotto
vicino ad acqua, vasche, lavandini, zone umide, piscine o stanze con
presenza di vapore.
• Non collocare sul prodotto oggetti contenenti liquidi, quali vasi,
bicchieri, bottiglie ecc.
• Pulire solo con un panno asciutto.
• Non togliere alcun coperchio o parti dell’involucro.
• La tensione di esercizio prescritta per il prodotto deve corrispondere
alla tensione di alimentazione della rete locale. In caso di dubbi sul
tipo di alimentazione disponibile, rivolgersi al proprio rivenditore o
all’azienda di fornitura elettrica locale.
• Prima di collegare l‘apparecchio, verificate che l‘impianto elettrico
sia munito di adatti dispositivi di protezione contro corto circuito e
errori della messa a terra in apparecchi collegati.
• Per ridurre il rischio di folgorazione, la messa a terra del prodotto
deve essere mantenuta. Utilizzare solo il cavo di alimentazione in
dotazione al prodotto e mantenere sempre in funzione il connettore
centrale (di terra) del collegamento alla rete. Non escludere la
funzione di sicurezza del connettore polarizzato o di messa a terra.
Collegate l‘apparecchio soltanto a prese di corrente con messa in
terra conforme alle norme vigenti.
• Proteggere il cavo di alimentazione affinché non venga calpestato o
pizzicato, in particolare in corrispondenza delle prese e degli innesti
e nel punto di uscita dal dispositivo. Maneggiare sempre con cura
i cavi di alimentazione. Controllare periodicamente la presenza di
tagli o usura sui cavi, soprattutto all’altezza della presa e nel punto
di uscita dal dispositivo.
• Non utilizzare mai il cavo di alimentazione se danneggiato.
• Scollegare il prodotto in caso di temporale o di lunghi periodi di
inutilizzo.
• Il prodotto si scollega completamente dall’alimentazione di rete solo
staccando la spina di alimentazione dall’unità o dalla presa a muro.
Il prodotto va collocato sempre in modo che sia possibile scollegarlo
dall’alimentazione con facilità.
• Fate sostituire i fusibili soltanto da un tecnico qualificato e usate
solamente fusibili dal corretto tipo e valore nominale.
• Per tutte le operazioni di riparazione, rivolgersi a personale
qualificato. L’unità va riparata nel caso abbia subito danni, come nei
seguenti casi:
- Il cavo o la presa di alimentazione sono danneggiati o usurati.
- È penetrato del liquido o degli oggetti all’interno del prodotto.
- Il prodotto è stato esposto a pioggia o umidità.
- Il prodotto non funziona correttamente seguendo le istruzioni.
- Il prodotto ha subito una caduta o l’armadio è stato danneggiato.
• Quando collegate altoparlanti badate di non scendere sotto
l’impedenza minima dichiarata sull’apparecchio oppure in questo
manuale. Usate sempre cavi dello spessore adatto e corrispondenti
alle vigenti norme locali.
• Non esporre ai raggi solari diretti.
• Non installare accanto a fonti di calore quali radiatori, bocchette
di diffusione d’aria calda, fornelli o altri dispositivi che generano
calore.
• Apparecchiature elettriche o elettroniche di qualsiasi tipo, batterie
incluse, non appartengono nell'immondizia - smaltite questo tipo di
rifiuti presso gli ufficiali centri di raccolta.
• Non chiudere le aperture di ventilazione. Installare l’unità seguendo
le istruzioni fornite dal produttore. Il prodotto non è adatto
all’installazione ad incasso, ad esempio in un rack, a meno di non
garantire un’adeguata ventilazione.
• Quando viene spostato all’interno di un locale, attendere sempre
che il dispositivo, se freddo, raggiunga la temperatura ambiente.
Qualora venga utilizzato senza che si sia riscaldato, sussiste il
rischio di formazione di condensa al suo interno e di conseguenti
danni.
• Non collocare sul prodotto fiamme libere, come ad esempio candele
accese.
• Il dispositivo va collocato ad almeno 20 cm/8" di distanza dalle
pareti.
• Utilizzare solo in abbinamento al carrello, supporto, piedistallo,
staffa o tavola specificati dal produttore o venduti insieme al
prodotto. Qualora si utilizzi un carrello, prestare attenzione nello
spostare il carrello/la combinazione di prodotto per evitare lesioni
causate dall’inciampamento.
• Utilizzare solo accessori consigliati dal produttore. Tale prescrizione
si applica a tutti i tipi di accessori, ad esempio coperchi di protezione, borse per il trasporto, supporti, dispositivi per il montaggio a
parete o a soffitto, ecc. In caso di applicazione di qualsiasi tipo di
accessorio al prodotto, osservare sempre le istruzioni per l’uso fornite dal produttore. Non utilizzare mai punti di fissaggio sul prodotto
diversi da quelli indicati dal produttore.
• Questo apparecchio NON è adatto all’uso da parte di persone (com-
presi i bambini) con capacità fisiche, mentali o sensoriali limitate o
da persone prive della necessaria esperienza e/o conoscenza. Tenere
sempre l’apparecchio al di fuori della portata dei bambini di età
inferiore ai 4 anni.
• Non inserire mai oggetti di alcun tipo all’interno del prodotto
attraverso le fessure dell’armadio, poiché potrebbero toccare punti
con presenza di tensione pericolosa o causare il cortocircuito dei
componenti, con il conseguente rischio di incendio o folgorazione.
• Questo prodotto genera livelli di pressione sonora superiori a 90 dB
in grado di causare danni permanenti all’udito. L’esposizione a livelli
di rumore estremamente elevati può causare la perdita permanente
dell’udito. In caso di esposizione continua, indossare protezioni per
l’udito.
• Il produttore garantisce la sicurezza, l’affidabilità e l’efficienza del
prodotto solo se:
- l’assemblaggio, l’ampliamento, la reimpostazione, le modifiche o le
riparazioni sono eseguiti dal produttore o da personale autorizzato.
- l’impianto elettrico dell’area interessata è conforme ai requisiti
specificati nelle norme IEC (ANSI).
- l’unità è utilizzata secondo le istruzioni per l’uso.
• Questo prodotto è stato concepito per un‘ottima riproduzione di
segnali vocali e musicali. Una riproduzione di segnali sinusoidali,
onde quadre o altri segnali di misurazione a livelli elevati può
gravemente danneggiare l‘apparecchio.
Avvisi di sicurezza per sistemi di altoparlanti
Usate soltanto sistemi di montaggio autorizzati dal produttore
per il rispettivo sistema di altoparlanti. Seguite attentamente le
istruzioni di montaggio ed usate soltanto accessori di montaggio
omologati. È escluso qualsiasi diritto di garanzia in caso di montaggio
improprio o se vengono usati accessori di montaggio non omologati.
Modificazioni agli altoparlanti, agli accessori di montaggio, agli
elementi di connessione e di fissaggio e alle imbracature potrebbero
alterare la stabilità del sistema e faranno decadere ogni forma di
garanzia.
La riparazione di componenti rilevanti dal punto di vista della sicurezza deve venir eseguita soltanto dal produttore o da un suo rappresentante autorizzato – altrimenti decadrà ogni forma di garanzia.
L’istallazione deve venir eseguita soltanto da personale
competente. Usate soltanto punti di montaggio con una sufficiente
capacità portante, considerando eventuali vincoli architettonici. È
assolutamente obbligatorio di usare il materiale di fissaggio (viti,
tasselli ecc.) indicato nelle istruzioni di montaggio del produttore.
Adottate provvedimenti adatti (frenafiletti, dadi autobloccanti) per
prevenire un allentamento dei raccordi filettati.
Assicurate istallazioni stazionarie e/o mobili (in questo
caso gli altoparlanti e gli accessori di montaggio) contro una caduta
dall’alto con due dispositivi indipendenti. Provvedete ad istallare dispositivi adatti per cogliere ogni elemento allentato prima che questo
possa cadere in terra. Assicuratevi che gli elementi di montaggio e di
fissaggio e le imbracature vengano scelti e montati nel rispetto delle
normative nazionali e locali vigenti. Tenete conto dei carichi dinamici
(forze di trazione-compressione) per calcolare le dimensioni dei
dispositivi di sicurezza.
Se usate stativi, badate che non venga oltrepassato il loro
carico massimo ammissibile. Badate inoltre che, per motivi costruttivi,
gli stativi di solito sono concepiti ed omologati soltanto per portare
un carico centrato. Gli stativi devono essere posizionati in modo
sicuro e stabile. Provvedete ad assicurare (o meglio ancora fissare) gli
stativi se per esempio:
- la loro superficie di appoggio non consenta un posizionamento
stabile,
- la loro altezza limita la stabilità,
- si potrebbero manifestare venti forti,
- potrebbero essere rovesciate da persone.
Prendete provvedimenti contro ogni forma di comportamento rischioso da parte degli spettatori. È vietato posare stativi che ingombrano
le vie di fuga e l’accesso soccorsi. Se volete posare stativi in una via di
comunicazione, verificate prima che la larghezza della via lo consenta
e badate in ogni caso ad una protezione (transenne, cordone ecc.) e
ad una segnalazione adeguata. Il montaggio e smontaggio degli altoparlanti significa un rischio elevato. Utilizzate sempre l’attrezzatura
adatta e assicuratevi che le attività vengano svolte nel rispetto delle
normative nazionali in vigore.
Durante il montaggio, indossate sempre indumenti protettivi appropriati (casco, guanti, calzature di sicurezza) ed
usate soltanto mezzi di salita adatti e sicuri (scala, ponteggio ecc.). Il
rischio è a esclusivo carico della ditta o del tecnico che esegue i lavori
di montaggio.
ATTENZIONE! Verificate dopo il montaggio del sistema di altoparlanti
che il montaggio e cablaggio sia avvenuto in modo corretto e che tutte
le giunzioni siano stabili.
L’operatore di un sistema di altoparlanti (stazionario o mobile) è obbligato a controllare o a fare controllare regolarmente ogni componente
del sistema nel rispetto delle normative nazionali e locali in vigore e a
fare riparare ogni danno immediatamente.
Vi consigliamo di documentare meticolosamente ogni missione di
controllo in un libretto di controllo.
Badate a dimensionare i punti di sollevamento per un montaggio in
sospensione prendendo in considerazione una sufficiente riserva di
sicurezza. Assicuratevi che tutto avvenga nel rispetto delle normative
nazionali in vigore.
I sistemi di sonorizzazione professionali sono in grado di
produrre livelli sonori nocivi alla salute. Anche essere sottoposto a
livelli apparentemente inoffensivi (a partire da circa 95 dBA SPL) per
un elevato periodo di tempo può provocare perdite dell’udito. Quindi
consigliamo che ogni persona sottoposta ad alti livelli sonori provenienti da un sistema di sonorizzazione porti un’adatta protezione per
l’udito (tappi auricolari o paraorecchie).
Produttore: Stamer Musikanlagen GmbH, Magdeburger Str. 8,
66606 St. Wendel, Germania
Version 2.8 08/2019
Page 27

POLAR 10
POLAR 10 1.1
Benvenuti nella famiglia HK Audio!
Grazie per aver scelto un prodotto di marca concepito e fabbricato nella
nostra casa secondo i nostri meticolosi criteri di qualità.
Anche se siete un utente esperto di sistemi di sonorizzazione questo prodotto vi o rirà alcuni aspetti che saranno nuovi per voi. Per
questo vi preghiamo di non ignorare questo manuale e di conservarlo in un
luogo sicuro per averlo sempre a disposizione.
Vi auguriamo il migliore suono in qualsiasi situazione!
Il vostro team HK Audio
Nota: Forti campi elettromagnetici o scariche elettrostatiche
possono disturbare la funzione del prodotto. In questo caso, basta
spegnere e riaccendere il prodotto per farlo funzionare nuovamente. Se
questo non aiuta a solvere il problema, dovete allontanare il dispositivo
dalla sorgente di disturbo.
Garanzia
Il modo più veloce e confortevole: la registrazione online sul nostro sito
www.hkaudio.com.
http://warranty.hkaudio.com
La registrazione è valida soltanto se avviene su internet ed entro
30 giorni dalla data d’acquisto.
1 Informazioni generali
1.1 Contenuto della confezione
Per favore, verifi cate che il contenuto della confezione del sistema sia
completo quando la aprite per la prima volta. POLAR è confezionato in due
cartoni ed è composto da un subwoofer, una colonna-satellite (mid/highunit) e un elemento da distanza (spacer). Il cartone del subwoofer contiene
anche una guaina protettiva imbottita per il subwoofer, una borsa per
trasportare i due elementi-colonna e un cavo rete.
1.2 Componenti
Il subwoofer
Il subwoofer attivo del sistema contiene un altoparlante bassi, il circuito
elettronico del sistema e le fi nali di potenza. Sul lato superiore trovate
lo zoccolo-connettore per collegare gli elementi colonna-satellite e una
maniglia. Una seconda impugnatura è integrata nella parte anteriore della
base in modo che il subwoofer possa essere comodamente trasportato
con una o due mani. L’integrato panello di
comando con display, controlli e connessioni
è leggermente inclinato verso il retro per
proteggere gli elementi di controllo da danni.
Sull’anteriore in basso si trovano le aperture
del tubo bass refl ex, sul retro l’interruttore
rete e la presa rete.
La colonna
• La colonna è composta dal satellite (mid/
high-unit) e dallo spacer.
• Lo spacer si lascia inserire nello zoccoloconnettore del subwoofer grazie al
connettore con integrata trasmissione di
segnale. La mid/high-unit viene poi inserito
sopra allo spacer tramite lo stesso sistema.
• Ora, mid/high-unit e spacer sono uniti
con una stabile connessione meccanica ed
elettrica, rendendo superfl uo l’uso di cavi
per collegare gli altoparlanti.
Mid/high
unit
Spacer
Subwoofer
• Français • Italiano • Español
HK Audio
Technischer Service (servizio tecnico)
Postfach 1509
66595 St. Wendel, Germania
Fax: +49 6851 905 100
1.3 Montaggio e messa
in funzione
Montaggio del sistema
• Piazzate il subwoofer su una superfi cie piana e stabile.
• Collegate lo spacer e la colonna-satellite al subwoofer come descritto
in1.2.
• Assicuratevi che gli elementi sono uniti in modo stabile.
• Inserite il cavo rete nella presa rete sul retro.
• English • Deutsch
27
Page 28

POLAR 10 1.1
Informazione: Potete usare il sistema anche senza spacer (per esempio
se piazzato su un palco alto o su un tavolo).
Attenzione! Non trasportare o muovere il sistema POLAR
assemblato! Altrimenti rischiate danni al sistema o potete causare danni
materiali o danni alle persone.
Assemblaggio stereo
RL
2 Caratteristiche dei jack e dei controlli
Pannello posteriore
Caution: To reduce
the risk of electric
shock, grounding of
the center pin of
this plug must
be maintained.
100-240 V~
50-60 Hz
0.8 A @ 1/8
output power
1
Mains
●
Presa rete IEC per connessione alla rete di corrente. Per favore usate il cavo
rete contenuto nella confezione.
Informazione: L’alimentatore è un alimentatore automatico con ingresso
ad ampio raggio permettendovi di collegare il sistema a correnti alternate
da 100 V a 240 V e con una frequenza di 50 o 60 Hz.
2
Power
●
Interruttore rete per azionare e interrompere l’alimentazione con corrente.
Dopo aver azionato l’alimentazione, saranno caricate le impostazioni DSP
usate l’ultima volta.
Dopo pochi secondi, il sistema è attivato e il display visualizza i livelli dei
quattro canali e il valore del volume Master.
Mains
1
Serial No.
Power
2
Caution: Risk of
electric shock!
Do not open!
Refer servicing
On
O
to qualified
service
personnel.
Se usate due POLAR come sistema stereo, il sistema a sinistra viene
alimentato col segnale sinistro del mixer e quello a destra col segnale
destro. In questo modo d’uso dovete assicurarvi che le impostazioni DSP
(Mode, EQ, Delay ecc.) dei due sistemi siano identiche, cfr. capitolo 3.
Sonorizzazione decentrale (di usore «Delay-Line»)
Grazie all’integrata funzione delay, potete usare POLAR come di usore
Delay Line, cfr. capitolo «3.2 Delay». Misurate la distanza fra il di usore
principale e POLAR e inserite il valore in metri nel DSP-menu usando il
sottomenu «Delay». POLAR calcola automaticamente la compensazione
del tempo di transito e ritarda l’emissione sonora per adattarla al tempo di
transito del di usore principale.
Canale 1 e canale 2 (Line/Mic)
I canali 1 e 2 presentano le stesse caratteristiche e servono a collegare
microfono o strumenti con uscita line, per esempio tastiere.
3
Input
●
Ingresso bilanciato combinato XLR/jack. Potete usare sia un connettore
XLR o un connettore jack da 6,35 mm (bilanciato o non bilanciato).
Informazione: Se possibile usate cavi per segnali bilanciati, perché
questi vi o riranno una migliore protezione conto potenziali disturbi o
interferenze di alta frequenza.
4
Line/Mic
●
Selettore per adattare la sensibilità e l’impedenza del preamplifi catore.
Scegliete la posizione «Line» per collegare dispositivi o strumenti con livello
line come mixer, tastiere ecc. – e «Mic» per collegare un microfono dinamico.
5
Volume
●
Controllo rotativo per regolare il volume del segnale. Girate questo controllo
completamente in senso antiorario per togliere il segnale – girandolo in
senso orario, potete alzare il livello fi no al volume massimo.
28
Page 29

POLAR 10 1.1
24bit Digital Signal Processor
12
Master
13
Push
to edit
4
Line Mic Line Mic Instrument Aux +
5
1234
3
POLAR 10
4
5 7 9
3 6 8
SubMix Out
11
10
0 dB
+10 dB
Canale 3 (Instrument)
Ingresso per collegare uno strumento con uscita ad alta impedenza
(Hi-Z), per esempio chitarre elettrice e acustiche, bassi, e pianoforti
elettromeccanici. L’ingresso presenta un’alta impedenza permettendovi di
dispiegare il tipico carattere tonale e completo spettro dinamico del vostro
strumento.
6
Input
●
Ingresso non bilanciato jack 6,35 mm per collegare uno strumento.
7
Volume
●
Controllo rotativo per regolare il volume del segnale. Girate questo controllo
completamente in senso antiorario per togliere il segnale – girandolo in
senso orario, potete alzare il livello fi no al volume massimo.
Canale 4 (Aux + Bluetooth)
Il canale 4 serve a collegare fonti di segnale stereo per esempio
console deejay, lettori CD/MP3 o mixer e per la riproduzione di musica
tramite streaming audio Bluetooth. Il canale 4 vi permette di usare
contemporaneamente i segnali Aux e Bluetooth.
8
Input
●
Ingresso non bilanciato (2x prese cinch) per collegare fonti audio a livello
alto come lettori CD/MP3, smartphone, console DJ o computer.
Informazione: Quando usate l’ingresso Aux e streaming audio Bluetooth
contemporaneamente, potete adattare il volume del segnale Bluetooth
a quello del segnale Aux regolando il volume sul vostro dispositivo
Bluetooth.
10
Sub
●
Controllo rotativo per regolare il livello dei bassi del sistema. Girate questo
controllo completamente in senso antiorario per togliere il segnale –
girandolo in senso orario, potete alzare il livello del segnale fi no al volume
massimo del subwoofer. Il controllo Sub serve a regolare separatamente
il livello del subwoofer. Mettete il controllo su 0 dB per ottenere una
bilanciata relazione dei volumi della colonna e del subwoofer.
Consiglio: In sale molto piccole o se il sistema è piazzato in un angolo,
sarà conveniente di ridurre un po’ il livello dei bassi. Riducendo i bassi,
potete anche alzare il volume massimo del sistema senza che si azioni il
limiter per proteggere il sistema.
11
Mix Out
●
Uscita bilanciata XLR Uscita per trasmettere il mix del segnale cumulativo
di tutti gli ingressi.
Informazione: Mix Out serve a trasmettere il segnale cumulativo ad altri
dispositivi, per esempio una consola FOH, per alimentare altri di usori
attivi (monitor) o per una registrazione dal vivo. Potete anche collegare
un addizionale subwoofer attivo, se questo dispone di un fi ltro High Cut o
Low Pass per togliere le frequenze alte.
• English • Deutsch • Français • Italiano • Español
9
Volume
●
Controllo rotativo per regolare il volume del segnale. Questo controllo
vale per i due ingressi Aux e Bluetooth insieme. Girate questo controllo
completamente in senso antiorario per togliere il segnale – girandolo in
senso orario, potete alzare il livello fi no al volume massimo.
29
Page 30

POLAR 10 1.1
12
Display LCD
●
Nel modo di funzionamento normale, il display indica il livello dei canali
d’ingresso e del volume Master.
Nel modo DSP invece, il display indica i parametri del menu DSP attivo (cfr.
3.2 Impostazioni DSP).
Indicatori di livello
I quattro indicatori visualizzano i livelli dei canali d’ingresso. La zona
Overload vi indica una sovramodulazione del segnale d’ingresso. Se
Overload si illumina, dovete ridurre il gain del canale e/o il livello d’uscita del
segnale proveniente dal dispositivo collegato.
Informazione: POLAR ha riserve su cienti per poter vivere con
occasionali peak di segnale. Se pero un indicatore Overload si illumina
permanentemente o se la sovramodulazione è udibile, dovete ridurre
il volume del rispettivo canale per evitare un segnale distorto e un
sovraccarico del sistema.
Consiglio: Per evitare ronzii, è necessario di ben confi gurare i livelli dei
segnali. Vale a dire: Alzare il volume dei canali d’ingresso il massimo
possibile (in modo che l’indicatore Overload si illumini durante il segnale
più alto per poi abbassarlo un po’ a nché l’indicatore non si illumini più)
e alzare il Master soltanto al livello necessario.
13
Master (push to edit)
●
Il controllo Master a destra del display serve a regolare il volume Master,
cioè il volume generale del sistema. Il valore attuale è visualizzato nel
display. Zona di regolazione: –60 fi no a +10 in passi da 1 dB
Avete a disposizione le funzioni seguenti:
3.1 Bluetooth
Bluetooth
POLAR vi o re lo streaming audio tramite Bluetooth, permettendovi
la riproduzione di musica proveniente da dispositivi Bluetooth come
smartphone o tablet-PC senza dover usare un cavo.
Creare connessione con dispositivo Bluetooth
• Premete il controllo Master una volta: il display indica la voce «Bluetooth».
• Premete nuovamente il controllo Master, per iniziare il setup della
connessione Bluetooth («Pairing»). Ora, POLAR è diventato visibile per
dispositivi Bluetooth. Durante un periodo di 120 secondi per il setup,
il simbolo Bluetooth nel display lampeggia lentamente indicandovi la
possibilità di stabilire una connessione con un dispositivo Bluetooth.
• Scegliete nel menu Bluetooth del vostro dispositivo «HK Audio POLAR»,
per stabilire la connessione.
• Quando la connessione è stabilita, il simbolo Bluetooth nel display del
POLAR s’illumina permanentemente.
Stato Bluetooth nel display:
• Nessun simbolo Bluetooth (numero 4 è indicato)
Bluetooth non attivo
Creare connessione Bluetooth (premendo nuovamente su Pairing, attivate il processo da pairing)
3 Menu DSP
Premendo il controllo Master («Push to edit») potete accedere ai vari
parametri DSP organizzati in un menu per editarli. Il parametro attualmente
scelto è indicato nel display.
• Girando il controllo Master, potete navigare il menu, premendo il controllo
Master, potete scegliere il parametro attuale del menu oppure confermare
una scelta.
Attenzione: Se non e ettuate una scelta o una confermazione
entro 8 secondi, il POLAR chiude il menu e ritorna automaticamente al
display normale (volume Master) per evitare di accidentalmente editare
una funzione.
Informazione: Tutte le impostazioni DSP attuali rimangono memorizzati
anche dopo aver spento il sistema e saranno caricati quando lo accendete
nuovamente.
• Lampi lenti
Setup della connessione Bluetooth possibile per 120 secondi
• Simbolo Bluetooth permanentemente visibile
Connessione Bluetooth stabilita
• Lampi veloci
Connessione Bluetooth fallita o interrotta (per esempio superando la
portata)
Informazione: Quando il simbolo Bluetooth lampeggia velocemente,
verifi cate se il dispositivo Bluetooth si trovi entro la portata, se
Bluetooth sia attivato e se POLAR sia scelto nella lista dei dispositivi
Bluetooth. Se POLAR non fi gura nella lista dei dispositivi Bluetooth,
dovete nuovamente stabilire la connessione tramite il pairing Bluetooth.
I segnali audio del dispositivo Bluetooth sono trasmessi via il canale
4. Potete regolare il volume col controllo Volume del canale 4 oppure
direttamente sul dispositivo Bluetooth. Vi consigliamo di abbassare il
controllo Volume del canale 4, prima di lanciare la riproduzione di musica sul
vostro dispositivo Bluetooth.
In capitolo 4 trovate addizionali informazioni su Bluetooth.
30
Page 31

POLAR 10 1.1
3.2 Impostazioni
System-EQ
Hi EQ
Mid EQ
Mid Freq
Low EQ
POLAR o re una sezione EQ a 3 bande per poter adattare il sound del
sistema. Hi-EQ e Low-EQ sono concepiti come fi ltri Shelving, Mid EQ è un
fi ltro semiparametrico.
Consiglio: Usate l’EQ a 3 bande per adattare il suono del sistema alla
situazione e al vostro gusto. In locali piccoli con poca distanza fra sistema
e parete o uditorio, conviene spesso ridurre le frequenze basse un po’.
Se invece usate un microfono sensibile o se sono presenti superfi cie
rifl ettenti come fi nestre conviene spesso ridurre le frequenze alte per
evitare feedback. La regolazione semiparametrica delle frequenze medie
serve a sopprimere una frequenza interferente o alzare una banda di
frequenza troppo debole.
Hi EQ: Parametro per aumentare o abbassare le frequenze alte.
Zona di regolazione: +/- 12 dB • frequenza: 12 kHz
Mid EQ: Parametro per aumentare o abbassare frequenze della banda
media. Zona di regolazione +/- 12 dB
Mid Freq: Parametro per scegliere la frequenza centrale della banda media.
Banda di frequenza: 70 Hz - 12 kHz
Low EQ: Parametro per aumentare o abbassare le frequenze basse.
Zona di regolazione: +/- 12 dB • frequenza: 70 Hz
Informazione: Le impostazioni dell’EQ riguardano soltanto la
riproduzione sonora degli altoparlanti e non infl uiscono sul Mix Out.
Mode
Mode
Avete tre modi fi ssi preselezionati per una sintonizzazione grezza del suono
del sistema.
Music: Questo modo è adatto per la sonorizzazione di musica live e per la
riproduzione di musica di qualsiasi genere.
Voice: Scegliete questo modo adatto alla riproduzione della voce umana se
volete sonorizzare un discorso, per esempio.
DJ: Questo modo e la scelta migliore per la riproduzione di musica
elettronica.
Informazione: Cambiando fra i modi Music/Voice/DJ, le impostazioni
dell’EQ a tre bande rimangono invariate. L’EQ a tre bande è un opzione
addizionale.
Regolazione alti:
+/- 12 dB (preselezionato: 0 dB)
Regolazione medi :
+/- 12 dB (preselezionato: 0 dB)
Frequenza centrale:
70 Hz – 12 kHz (preselezionato: 1 kHz)
Regolazione bassi :
+/- 12 dB (preselezionato: 0 dB)
Music (preselezionato)
Voice
DJ
Delay
Delay
La funzione «Delay» del menu serve a ritardare la riproduzione sonora degli
altoparlanti del sistema POLAR. Potete regolare il ritardo dei segnali da 0
(o ) fi no a 100 m in passi da 0,25 m.
Informazione: Calcolando il ritardo in metri conviene se per esempio
volete usare POLAR come di usore da Delay Line per la sonorizzazione
di grandi eventi. Questo vi permette – per esempio in ambienti con
un'acustica di cile – di ottenere una distribuzione del suono più
omogenea e una migliore intelligibilità del parlato fi no alle fi le posteriori
e ridurre il volume dell'impianto audio principale sul palco. Basta indicare
la distanza fra il sistema e palco in metri, e gli altoparlanti del POLAR
riproducono il suono nel momento esatto quando il suono proveniente
dal palco si sente in questa posizione.
O: Funzione Delay disattivata (preselezionato)
0–100 m: Distanza Delay
3.3 Gestione dei presets
Load Preset
Store Preset
Erase Preset
Load Preset
Per gestire le proprie impostazioni DSP, avete a disposizione cinque
locazioni di memoria (U1 – U5) «U» signifi ca «user-preset». Un user-preset
contiene le impostazioni di tutti i parametri del menu DSP (Mode, EQ a tre
bande, Delay, luminosità del display ecc.).
Girate il controllo Master per scegliere uno dei preset U1 a U5 e premete
il controllo Master per confermare la scelta e caricare il preset. Con «Exit»
potete uscire dal menu senza caricare un preset.
Store Preset
Per memorizzare le impostazioni attuali del menu DSP. Girate il controllo
Master per scegliere una delle locazioni di memoria U1 a U5. Se confermate
la scelta premendo il controllo Master, si apre una casella di testo nella
quale potete dare un nome al vostro preset. Con «Exit» potete uscire dal
menu senza caricare un preset.
Editore testo: Girando il controllo Master, entrate nella casella di testo
e potete navigare fra le voci del menu «Save», «Clear» e «Cancel». Nella
casella di testo, premete il controllo per selezionare la prima di 12 battute
e giratelo per scegliere una lettera o un simbolo. Premendo il controllo
nuovamente, selezionate la seconda delle 12 battute, scegliete una lettera
o un simbolo e così via ... Potete uscire dalla casella di testo premendo due
volte il controllo Master (senza girarlo!): Quando vedete un simbolo Enter
(freccia), potete girare il controllo per uscire dalla casella di testo e navigare
fra «Save», «Clear» e «Cancel».
Save: Se avete selezionato «Save», potete memorizzare il preset premendo
il controllo Master – ora, ritornate nel menu dove potete selezionare un’altra
locazione di memoria (U1 – U5) per memorizzare una copia del preset (Se
desiderato) o per uscire dal menu con «Exit».
Clear: Se avete selezionato «Clear», potete premere il controllo Master per
cancellare il contenuto della casella di testo e inserire un nuovo nome.
Cancel: Se avete selezionato «Cancel», potete premere il controllo Master
per interrompere la procedura di denominazione e tornare nel menu di
selezione U1 – U5, dove potete selezionare un’altra locazione di memoria o
cancellare il processo di memorizzazione con «Exit».
Caricare preset
Memorizzare preset
Cancellare preset
• English • Deutsch • Français • Italiano • Español
31
Page 32

POLAR 10 1.1
Erase Preset
Parametro per cancellare il preset selezionato Premete il controllo Master
per preparare la cancellazione e visualizzare la seguente richiesta di
conferma:
Confi rm Erase: Yes/No
Girando il controllo Master, potete scegliere fra «Yes» e «No», per poi
confermare la vostra scelta premendo il controllo Master. «Yes» cancella il
preset irrevocabilmente, con «No» ritornate nel menu DSP.
3.4 Display
LCD Dim
Brightness
Contrast
LCD Dim: Se la funzione è disattivata (O ), il display rimane
permanentemente acceso. Se la funzione è attivata (On), il display si
annerisce 8 secondi dopo aver usato il controllo Master, ma rimane ben
leggibile. Se azionate il controllo Master di nuovo, il display si riaccende.
Bright: Regola la luminosità del display tra 0 a 10.
Contrast: Regola il contrasto del display tra 0 a 10.
O: Il display rimane permanentemente acceso (preselez.)
On: Il display si annerisce dopo l’uso
Luminosità del display 0 – 10 (preselezione: 5)
Contrasto del display 0 – 10 (preselezione: 5)
3.5 Factory-Reset
4 Bluetooth
Creare connessione con dispositivo Bluetooth
• Premere il controllo Master, fi no a che il menu visualizza «Bluetooth»
• Premere nuovamente per iniziare lo setup della connessione («pairing»)
• il simbolo Bluetooth lampeggia lentamente e il POLAR è visibile nella lista
a discesa del vostro dispositivo Bluetooth per 120 secondi
• Selezionare nel vostro dispositivo Bluetooth «HK Audio POLAR» per
stabilire la connessione.
Quando la connessione è stabilita, il simbolo Bluetooth nel display del
POLAR si illumina permanentemente. Troverete informazioni addizionali in
capitolo 3.1.
Connessione automatica con dispositivi Bluetooth
Dopo aver riacceso POLAR, il sistema cerca automaticamente il dispositivo
che è stato connesso l’ultima volta (per 120 secondi) e stabilisce la
connessione, evitandovi di dover e ettuare un nuovo pairing Bluetooth. Se
la connessione non si stabilisce dopo questi 120 secondi, potete ricominciare
la ricerca spegnendo e riaccendendo POLAR oppure e ettuare un pairing
Bluetooth per stabilire la connessione manualmente.
Cambiare fra dispositivi Bluetooth
Non è possibile di connettersi a un altro dispositivo Bluetooth durante una
connessione stabilita o mentre POLAR sta cercando il dispositivo connesso
l’ultima volta. In questo caso, dovete e ettuare un nuovo pairing Bluetooth
per sospendere la connessione attuale e stabilire una connessione con un
altro dispositivo Bluetooth.
Factory Reset
Ripristino alle impostazioni di fabbrica
Reset
• «Reset» vi permette il ripristino alle impostazioni DSP di fabbrica del
POLAR.
• Premete il controllo Master per preparare il ripristino e visualizzare la
seguente richiesta di conferma:
Confi rm Reset: Yes/No
Girando il controllo Master, potete scegliere fra «Yes» e «No», per poi
confermare la vostra scelta premendo il controllo Master. Con «No» ritornate
nel menu DSP, «Yes» richiama le impostazioni di fabbrica di tutte le funzioni
DSP, cancellando irrevocabilmente le vostre impostazioni memorizzate nei
cinque user presets: inoltre, viene attivato il modo «Music» e sospesa la
connessione Bluetooth.
Consiglio: Questa funzione è un grande aiuto se il sistema viene
noleggiato, perché vi permette di semplicemente e ettuare un ripristino
prima di a darlo a un nuovo cliente.
3.6 Uscire dal menu DSP
Exit
Questa voce del menu serve a uscire dal menu DSP e tornare al volume
Master. La procedura si svolge automaticamente se non azionate il controllo
Master per più di otto secondi.
Uscire dal Menu DSP
Attenzione: Il pairing Bluetooth sospende sempre una connessione
esistente prima di iniziare un nuovo setup di connessione Bluetooth.
Portata
POLAR è compatibile con Bluetooth 5. Usando un dispositivo Bluetooth 5,
potete realizzare portate fi no a 40 m. Per altri dispositivi non compatibili
con Bluetooth 5, la portata di solito non sorpassa i 10 m, e dipende inoltre
da vari fattori come la qualità e la potenza trasmissiva del dispositivo
Bluetooth e dalle caratteristiche locali (per esempio un muro che si trova
in mezzo al percorso della trasmissione oppure una custodia contenente il
dispositivo Bluetooth). Se la portata viene sorpassata o se la connessione
è disturbata da muri o pareti, la riproduzione auto si interrompe (Il simbolo
Bluetooth nel display del POLAR lampeggia velocemente).
Se avvicinate il dispositivo Bluetooth entro 120 secondi, la connessione
viene stabilita automaticamente e il simbolo Bluetooth nel display del
POLAR s’illumina di nuovo permanentemente.
Stuttering o interruzioni durante lo streaming audio Bluetooth
Lo streaming audio tramite Bluetooth è più suscettibile a errori che una
connessione con un cavo, perché è necessario di garantire un constante
fl usso di dati durante la riproduzione di musica.
Nel caso ideale, il POLAR e il dispositivo Bluetooth si possono «vedere» per
poter permettere una riproduzione senza interruzioni.
Consiglio: Durante una connessione Bluetooth è possibile che saranno
riprodotti anche altri suoni del dispositivo Bluetooth come la suoneria o i
suoni indicando messaggi del sistema, notifi che ecc. Disattivate queste
funzioni sul dispositivo Bluetooth per evitare interferenze indesiderate
durante la riproduzione audio.
32
Troverete addizionali informazioni su Bluetooth su www.bluetooth.org.
Page 33

POLAR 10 1.1
5 Caratteristiche tecniche
POLAR 10 System
Max. SPL @ 10% THD 126 dB half space
Risposta in frequenza
+/- 10 dB
Rendimento amplifi catore 2000 W
Tipo d‘amplifi catore Class D – biamped
Frequenza di separazione 180 Hz, 24 dB/ottava
Circuiti di protezione attivi Undervoltage-, Thermo-, Short-Circuit-,
Ingressi 2x presa combinate jack/XLR (bilanciata),
Uscite Mix Out
Max. livello d’ingresso +4 dBu
Modi (preset dei fi ltri) Music, Voice, DJ
User Presets 5
EQ 3 bande, Mid EQ semiparametrico
System-Delay Fino a 291 ms (100 m)
Bluetooth 5.0
Custodia Compensato in betulla/ABS
Superfi cie Lacca bicomponente, nero
Altezza d’ingombro del
sistema
Peso 26,9 kg / 59,3 lbs
38 Hz – 20 kHz
Overcurrent-Protection, Peak-, RMS-Limiter
1x jack instrument (Hi-Z), 2x cinch, audio
streaming Bluetooth
213 cm
Caratteristiche tecniche generali
Assorbimento di
corrente in corrispondenza a EN 62368-1
Il marchio e i logo Bluetooth appartengono a Bluetooth SIG, Inc. e il loro uso da parte di HK Audio è
concesso su licenza.
Tutti i marchi di fabbrica e copyright menzionati appartengono ai rispettivi proprietari.
0,6 A / 220-240 V AC
0,8 A / 100-120 V AC
POLAR 10 Subwoofer
Altoparlante bassi 1x 10" con bobina 2"
Griglia frontale Griglia in metallo 1,5 mm con plastico
Dimensioni (L x A x P) 36,6 x 62,5 x 54,1 cm
Peso 21 kg / 46,2 lbs.
espanso speciale
POLAR 10 Mid/High-Unit
Altoparlanti medi 6x 3", 3/4" con bobina, neodimio
Driver acuti 1x 1" con bobina 1"
Caratteristiche della
tromba
Griglia frontale Griglia in metallo 1 mm con plastico
Dimensioni (L x A x P) 10,8 x 82,5 x 9,8 cm
Peso 3,9 kg / 8,6 lbs.
120° x 30°
espanso speciale
POLAR 10 Spacer
Griglia frontale Griglia in metallo 1 mm con plastico
Dimensioni (L x A x P) 10,8 x 82,5 x 9,8 cm
Peso 2 kg / 4,4 lbs.
espanso speciale
• English • Deutsch • Français • Italiano • Español
33
Page 34

Importantes instrucciones de seguridad.
¡Leer antes de encender!
Este producto ha sido elaborado por el fabricante de conformidad con
IEC62368-1 y ha salido de fábrica en perfecto estado. Para que se
mantenga en perfectas condiciones y asegurar que no exista riesgo
alguno, el usuario deberá observar los avisos y advertencias que se
encuentran en el manual de instrucciones. En caso de utilizar este
producto en vehículos, embarcaciones o aviones, así como a altitudes
superiores a los 2.000 m sobre el nivel del mar, además de la norma
IEC 62368-1 también se deberán cumplir las demás normas de seguridad aplicables
ADVERTENCIA: Para prevenir el riesgo de incendio y el peligro de electrocución, evite la exposición del equipo a humedad o lluvia. No abra la
cubierta: en el interior no hay elementos que deba manipular el usuario. El mantenimiento deberá quedar a cargo de personal cualificado.
La presencia de este símbolo advierte de la existencia de
tensión peligrosa sin aislar en el interior que podría ser suficiente para
provocar una electrocución.
La presencia de este símbolo advierte de la existencia de
tensión peligrosa accesible desde el exterior. Todo cableado externo
conectado con algún terminal marcado con este símbolo deberá ser un
cableado preelaborado que satisfaga las recomendaciones del
fabricante o deberá ser instalado por personal cualificado.
La presencia de este símbolo advierte de importantes
instrucciones de uso y mantenimiento en la bibliografía adjunta. Lea el
manual.
La presencia de este símbolo indica: ¡Precaución! ¡Superficie
caliente! No tocar para evitar quemaduras.
Todos los aparatos eléctricos y electrónicos inclusive las
baterías, se han de evacuar por separado de la basura doméstica, a
través de centros de recogida y reciclaje oficiales.
Lea las presentes instrucciones. Conserve las presentes
instrucciones. Observe todas las advertencias e indicaciones señaladas
en el producto y en las instrucciones.
• No utilice el producto cerca del agua. No coloque el producto cerca de
agua, baños, bañeras, fregaderos, zonas húmedas, piscinas o saunas.
• No coloque objetos que contengan líquidos sobre el producto, como
jarrones, vasos, botellas, etcétera.
• Limpie exclusivamente con paños secos.
• No retire ninguna cubierta ni elementos del armazón.
• La tensión operativa del producto deberá ajustarse a la tensión del
suministro eléctrico local. Si no está seguro del tipo de electricidad
disponible, consulte con su distribuidor o con la compañía eléctrica
local.
• Antes de conectar el aparato debe asegurarse de que la instalación de
alimentación de red tenga equipos de protección suficientes contra
cortocircuito y fallo de puesta a tierra de los dispositivos conectados.
• Para reducir el riesgo de una descarga eléctrica, no anule la conexión
de la toma de tierra del aparato. Utilice solo el cable de alimentación
eléctrica suministrado y mantenga siempre activa la función de los
contactos de protección laterales, puestos a tierra, de la conexión
de red. No desactive la función de seguridad del enchufe polarizado
o con puesta a tierra. El aparato solamente debe conectarse a
enchufes que tengan una puesta a tierra de protección que funcione
reglamentariamente.
• Proteja el cable de alimentación de pisadas o pinzamientos, especial-
mente junto a enchufes, soportes de dispositivos y el punto de salida
desde el equipo. Los cables de alimentación deberán manipularse
siempre con precaución. Compruebe periódicamente que los cables
no tengan cortes ni signos de desgaste, especialmente en el enchufe
y en el punto de salida desde el equipo.
• No utilice nunca un cable dañado.
• Desenchufe el producto durante las tormentas con aparato eléctrico o
cuando vaya a estar en desuso durante periodos prolongados.
• El producto solamente se puede desconectar por completo de la red
extrayendo el enchufe de red de la unidad o de la toma de la pared.
El producto deberá colocarse en todo momento de tal modo que su
desconexión de la red sea sencilla.
• Los fusibles sólo los debe cambiar personal técnico cualificado,
utilizando el tipo y valor nominal correcto.
• El mantenimiento deberá quedar a cargo de personal cualificado.
Será necesaria una revisión si la unidad resulta dañada de cualquier
forma, por ejemplo:
- si el cable de alimentación o el enchufe están dañados o deshilachados;
- si se han derramado líquidos sobre el producto o han caído objetos
en él;
- si el producto se ha visto expuesto a lluvia o humedad;
- si el producto no funciona con normalidad pese a seguirse las instrucciones de uso;
- si el producto ha sido salpicado o el cajetín ha sido dañado.
• Cuando se conecten altavoces a este aparato no se podrá sobrepasar
el límite de impedancia mínima especificado en el aparato o en las
presentes instrucciones. La sección de los cables empleados debe ser
suficiente en conformidad con la reglamentación local.
• Proteja de la luz solar directa.
• No instale cerca de fuentes de calor como radiadores, difusores de
calor, estufas u otros dispositivos que produzcan calor.
• Este aparato ha sido desarrollado para su uso en zonas climáticas
moderadas – y no para su uso en zonas climáticas tropicales.
• No bloquee ninguna abertura de ventilación. Instale de conformidad
con las instrucciones del fabricante. No deberá situarse el producto
en una instalación integrada, como una rejilla, a no ser que exista la
ventilación necesaria.
• Permita siempre que un dispositivo frío se caliente a temperatura
ambiente cuando se traslade a alguna sala. Pueden formarse
condensaciones en el interior del producto y dañarlo cuando se usa
sin precalentamiento.
• No sitúe fuentes de llama abierta, como velas encendidas, sobre el
producto.
• El dispositivo deberá situarse al menos a 20cm/8" de distancia de
las paredes.
• Utilice solamente con el carro, soporte, trípode, abrazadera o tablero
especificado por el fabricante o vendido junto con el producto.
Cuando se use un carro, deberá tenerse precaución al mover la combinación de carro/producto para evitar daños por vuelcos.
• Utilice solamente accesorios recomendados por el fabricante;
esto será de aplicación para todo tipo de accesorios, por ejemplo,
cubiertas protectoras, bolsas de transporte, pies, soportes murales
o de techo. En caso de instalación de cualquier tipo de accesorio en
el producto, siga siempre las instrucciones de uso suministradas
por el fabricante. Nunca utilice puntos de fijación distintos de los
especificados por el fabricante.
• El dispositivo NO es apropiado para su uso por parte de cualquier
persona o personas (niños incluidos) con las capacidades físicas,
sensoriales o mentales limitadas o sin la experiencia o el conocimiento suficientes con productos de este tipo. El dispositivo deberá mantenerse siempre fuera del alcance de los niños menores de 4 años.
• Nunca introduzca objetos de ninguna clase en el producto a través
de las ranuras del cajetín, ya que podrían tocar puntos de tensión
peligrosa, ni cortocircuite elementos que pudieran causar riesgo de
incendio o electrocución.
• El producto puede emitir niveles de presión sonora por encima de
90dB, lo que puede causar daños auditivos permanentes. La exposición a niveles sonoros extremadamente altos puede causar pérdidas
auditivas permanentes. Lleve protección auditiva si va a estar
expuesto de forma continua a dicho tipo de elevados niveles.
• El fabricante solamente garantiza la seguridad, la fiabilidad y la
eficiencia del producto si:
- el montaje, la extensión, el reajuste, las modificaciones o las reparaciones son realizados por el fabricante o por personal autorizado;
- la instalación eléctrica del área interesada es conforme con los
requisitos de las especificaciones de IEC (ANSI);
- la unidad se utiliza conforme a las instrucciones de uso.
• Este producto está optimizado para el uso de señales de música y
voz. El uso de señales senoidales, rectangulares o de medición de
otro tipo con nivel superior puede dañar seriamente el aparato.
Instrucciones generales de seguridad
para sistemas de altavoces
Los sistemas de fijación deben usarse exclusivamente para los
sistemas de altavoces autorizados por el fabricante y con los accesorios
de montaje indicados en las Instrucciones de montaje. Deben tenerse
en cuenta obligatoriamente las Instrucciones de montaje del
fabricante. No puede garantizarse la carga indicada y el fabricante no
asume ninguna responsabilidad en caso de montaje inadecuado o uso
de accesorios de montaje no autorizados.
No puede garantizarse la capacidad de carga del sistema y el fabricante
no asume ninguna responsabilidad si se realizan modificaciones en
los altavoces, los accesorios de montaje, los elementos de unión y de
fijación, así como los medios de sujeción.
Los reparaciones en las piezas relevantes para la seguridad deben ser
realizadas sólo por el fabricante o personas autorizadas por él, de lo
contrario se extinguirá la autorización de funcionamiento.
La instalación tiene que realizarla exclusivamente un experto
y sólo en puntos de montaje con una capacidad de carga suficiente, si
procede, teniendo en cuenta las servidumbres de construcción. Debe
usarse el material de fijación (tornillos, tacos, etc.) estipulado por el
fabricante en las Instrucciones de montaje. Las uniones atornilladas
deben asegurarse contra aflojamiento con las medidas apropiadas.
Las instalaciones estacionarias o móviles (altavoces incluidos
accesorios de montaje) deben asegurarse contra caídas por medio de
dos dispositivos de actuación independiente entre sí. Las piezas adicionales sueltas o las que se aflojen deben sujetarse con los dispositivos
apropiados. Si se usan elementos de unión y de fijación, así como
medios de sujeción, deben tenerse en cuenta las normas nacionales.
Respecto a la medición de los medios de seguridad, deben tenerse en
cuenta las posibles cargas dinámicas (fuerzas a sacudidas).
En los pies de soporte debe tenerse en cuenta principalmente
la carga máxima. Además, por motivos constructivos, la mayoría de
los pies de soporte sólo están autorizados para soportar la carga
exactamente centrada. Los pies de soporte deben instalarse de forma
estable. Los pies de soporte tienen que asegurarse adicionalmente con
las medidas apropiadas, por ejemplo cuando:
- su superficie de apoyo no permita un apoyo estable,
- sus alturas limiten la estabilidad,
- se espere una presión del viento excesiva,
- se prevea que puedan ser volcados por personas.
Pueden ser también necesarias medidas especiales como precaución
contra el comportamiento peligroso de los espectadores. Los pies de
soporte no deben instalarse en las vías de escape y de emergencia. En
caso de instalación en vías de circulación debe tenerse en cuenta la
anchura necesaria de las vías y el bloqueo y señalización reglamentarios. Existe un peligro especial al colocar y apilar. Para ello deben usarse
los medios auxiliares adecuados. Deben tenerse en cuenta las normas
nacionales.
Durante el montaje debe usarse equipo protector
adecuado (especialmente casco protector, guantes y calzado de seguridad) y sólo deben usarse ayudas para subir apropiadas (escaleras,
andamios, etc.). La responsabilidad exclusiva será de la empresa que
realice la instalación.
¡ATENCIÓN! Después del montaje tiene que comprobarse la suspensión
del sistema en el soporte y la fijación segura de los altavoces.
El explotador de los sistemas de altavoces (estacionarios o móviles)
está obligado a comprobar o hacer comprobar regularmente todos los
componentes del sistema teniendo en cuenta las regulaciones nacionales respectivas y hacer solucionar inmediatamente los posibles daños.
Además, recomendamos una documentación completa de todas las
medidas de comprobación en los libros de inspección o similares.
En especial, los puntos de sujeción de la carga de los sistemas suspendidos tienen que dimensionarse con reservas de seguridad suficientes.
Deben tenerse en cuenta las normas nacionales.
Los sistemas de altavoces profesionales pueden crear niveles
acústicos perjudiciales para la salud. La influencia de un nivel acústico
aparentemente inofensivo durante un periodo prolongado puede
causar daños permanentes en la audición (desde aprox. 95 dBA SPL).
Por ello, aconsejamos que todas las personas expuestas a un nivel
acústico alto debido al funcionamiento de sistemas de altavoces usen
protección acústica profesional (tapones para los oídos o auriculares
protectores).
Fabricante: Stamer Musikanlagen GmbH, Magdeburger Str. 8,
66606 St. Wendel, Alemania
Version 2.8b 10/2019
Page 35

POLAR 10
POLAR 10 1.1
¡Bienvenido a la familia HK Audio!
Muchas gracias por haberse decidido por un producto de una de nuestras
marcas, que hemos desarrollado y cuidado con el máximo esmero.
Aunque tenga ya una amplia experiencia con instalaciones de sonido,
en este producto encontrará novedades para Ud. Por lo tanto, debe leer este
manual del usuario y guardarlo para su consulta posterior.
¡Le deseamos que disfrute del mejor sonido que haya oído nunca!
El equipo HK Audio
Nota: La funcionalidad de este producto puede verse perturbada
por los campos electromagnéticos intensos o las descargas
electrostáticas. En este caso, el problema puede solucionarse apagando y
volviendo a encender el aparato. Si no se soluciona así, debe alejarse de la
fuente de interferencias.
Garantía
1 Generalidades
1.1 Volumen de suministro
Compruebe al desempaquetar si el volumen de suministro del sistema
está completo. POLAR está embalado en dos cajas de cartón y consta
de un subwoofer, una parte superior de columna (unidad Mid/High) y un
elemento distanciador (separador, «spacer»). La caja del subwoofer incluye
también una cubierta protectora acolchada para el subwoofer, una bolsa de
transporte para los dos elementos de la columna y el cable de red.
1.2 Los componentes
El subwoofer
El subwoofer de sistema activo alberga el altavoz de graves y la electrónica
del sistema más las etapas fi nales. En la parte superior se encuentran el
conector hembra con señal para la conexión de los elementos de la columna
y un asa. En la parte frontal hay integrado otro asidero, en la placa inferior,
de modo que el subwoofer puede sujetarse cómodamente con una o con
dos manos. El panel de mando integrado
con display, reguladores y conexiones está
ligeramente inclinado hacia atrás para
proteger los elementos de mando contra
posibles daños. En la parte frontal inferior se
encuentran las aberturas del refl ex de graves,
en la parte trasera están el interruptor y el
conector de red.
Mid/high
unit
Hágalo cómodamente online en www.hkaudio.com.
http://warranty.hkaudio.com
El registro solo es válido si se realiza online en un plazo de 30 días desde
la fecha de compra.
HK Audio
Technischer Service
Postfach 1509
66595 St. Wendel, Alemania
Fax: +49 6851 905 100
La columna
• La columna está formada por la parte
superior (unidad Mid/High) y el separador.
• El separador se enchufa en el conector
hembra del subwoofer por medio de la
conexión enchufable integrada que conduce
señal. Por medio del mismo sistema
enchufable se conecta ahora la unidad Mid/
High en el separador.
• La unidad Mid/High y el separador no
solo se conectan mecánicamente de este
modo, sino también eléctricamente, no
es necesario cableado adicional de los
altavoces.
Spacer
Subwoofer
1.3 Composición y puesta en servicio
Montaje del sistema
• Instale el subwoofer sobre una base nivelada y estable.
• Conecte el separador como se describe en 1.2 y la parte superior de la
columna con el subwoofer.
• Compruebe que los elementos estén fi rmemente unidos entre sí.
• Enchufe el cable de red en el conector hembra de red posterior.
• English • Deutsch • Français • Italiano • Español
35
Page 36
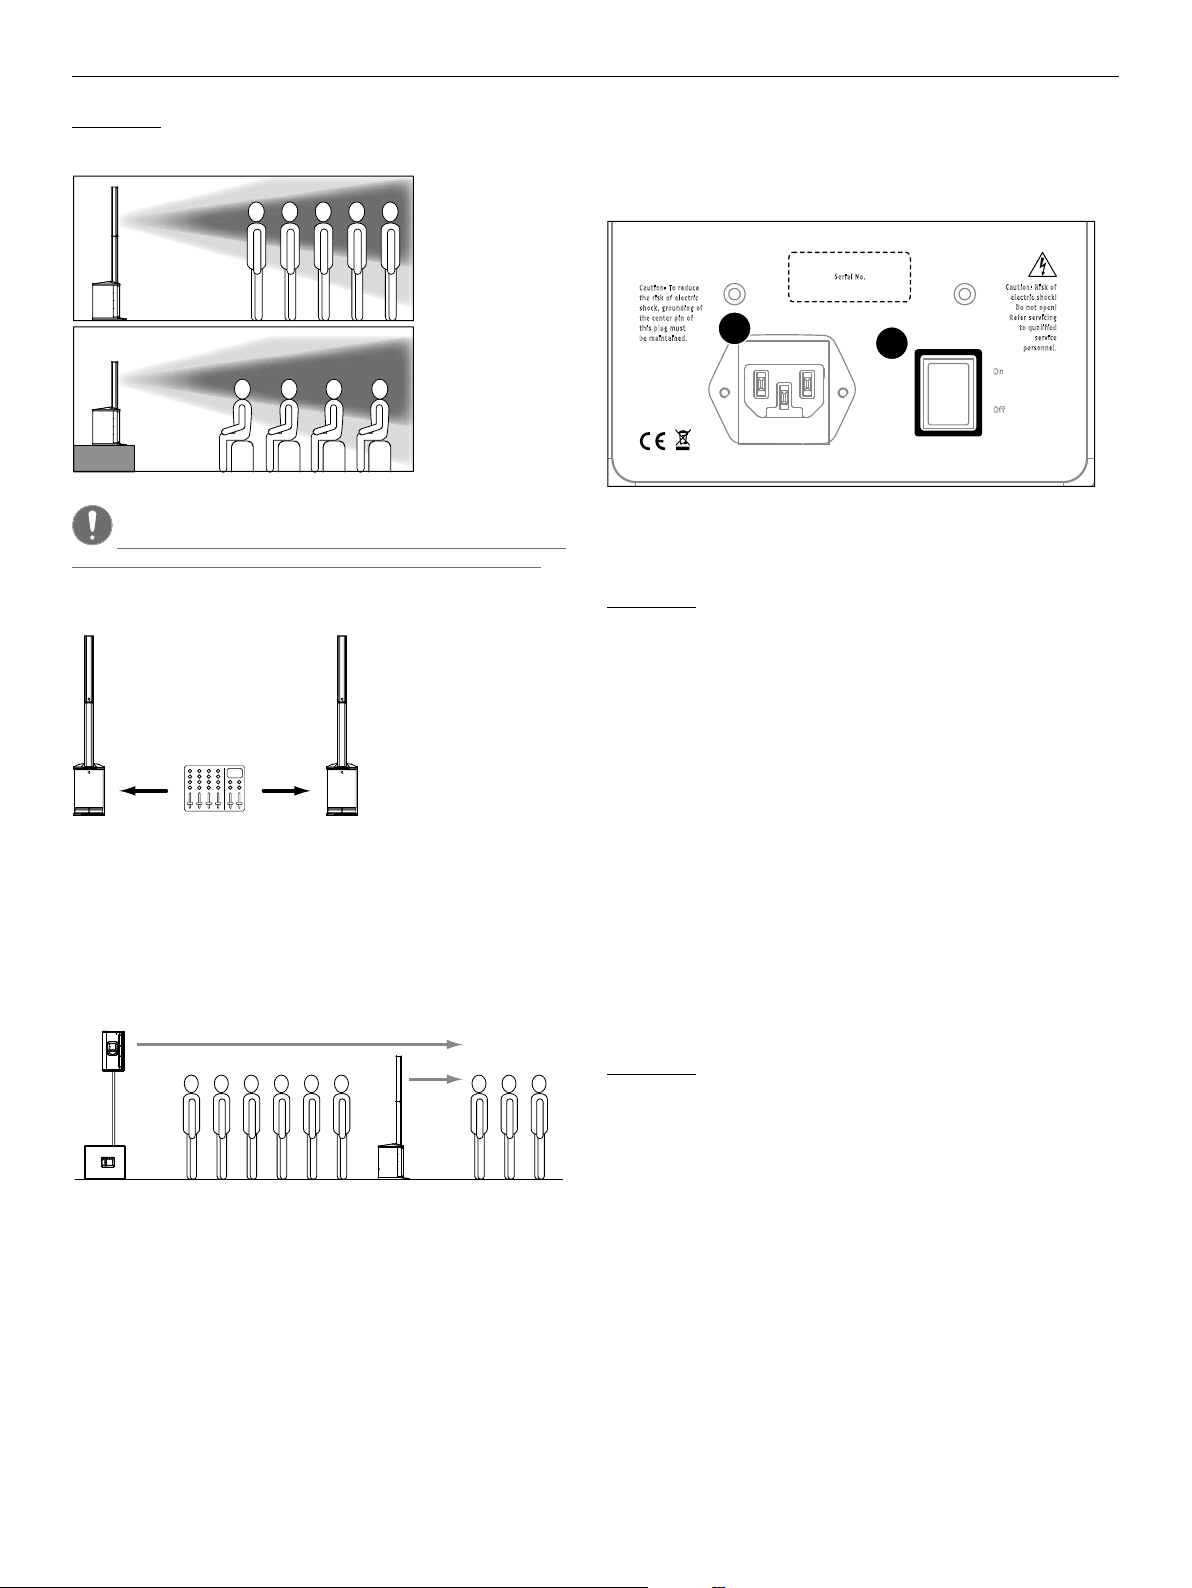
POLAR 10 1.1
Información: El sistema también puede utilizarse sin separador. (p. ej. al
poscionarlo sobre un escenario alto o bien sobre una mesa).
¡Atención! No transporte ni mueva POLAR estando montado.¡El
sistema podría dañarse o producirse daños materiales y personales!
Composición estéreo
RL
2 Conexiones y elementos de mando
Parte trasera
Caution: To reduce
the risk of electric
shock, grounding of
the center pin of
this plug must
be maintained.
100-240 V~
50-60 Hz
0.8 A @ 1/8
output power
1
Mains
●
Tomacorriente de red IEC para conectar la alimentación de tensión. Utilice el
cable de red contenido en el suministro.
Información: La fuente de alimentación es una fuente conmutada
automática con entrada de rango amplia, aplicable a tensiones alternas
de 100V hasta 240V a 50 ó 60Hz .
2
Power
●
Interruptor de red para conectar y desconectar el suministro de tensión.
Después de conectar se cargan los ajustes últimos DSP utilizados.
Transcurridos unos segundos el sistema está listo para usarse, en el display
aparece la indicación de nivel de los cuatro canales así como el valor del
volumen total ajustado (maestro).
Mains
1
Serial No.
Power
2
Caution: Risk of
electric shock!
Do not open!
Refer servicing
On
O
to qualified
service
personnel.
Si se utilizan dos POLAR como sistema estéreo, el sistema izquierdo recibe
la señal izquierda de la mesa de mezclas, el sistema derecho la derecha. En
este modo de funcionamiento debe asegurarse de que los ajustes de sonido
de DSP (Mode, EQ, Delay, etc.) son idénticos en los dos sistemas, véase el
capítulo 3.
Sonorización descentralizada como «Delay-Line» o altavoz de
soporte
Gracias a la función Delay integrada, POLAR puede utilizarse como altavoz
de soporte (Delay-Line), véase el capítulo 3.2 «Delay». Calcule la distancia
entre el altavoz principal y POLAR e indique el valor en metros en la opción
«Delay» del menú DSP. POLAR realiza automáticamente la conversión para
la compensación del tiempo de funcionamiento y retrasa la salida de sonido
de acuerdo con el tiempo de funcionamiento acústico del altavoz principal.
Canal 1 y Canal 2 (Line/Mic)
Los canales 1 y 2 están equipados de manera idéntica para conectar
micrófonos así como instrumentos de salida de línea, tales como p.ej.
teclados.
3
Input
●
Conector hembra de entrada combinado XLR/jack conectado
simétricamente. La conexión se realiza por medio del conector XLR o el de
jack de 6,35 mm (conectado simétrica o asimétricamente).
Información: Si es posible, debe concederse prioridad siempre a una señal
simétrica, ya que ésta protege mejor contra interferencias potenciales y
de HF.
4
Line/Mic
●
Selector para adaptar la sensibilidad y la impedancia del preamplifi cador.
La posición «Line» esta prevista para la conexión de un aparato con nivel de
línea, tales como mesa de mezclas, teclados o similar – La posición «Mic»
sirve para conectar un micrófono dinámico.
5
Volume
●
Regulador rotativo para el ajuste del volumen de la señal. En la posición
«tope izquierdo» la señal está completamente apagada, en la posición
«tope derecho» se alcanza el volumen máximo.
36
Page 37

POLAR 10 1.1
24bit Digital Signal Processor
12
Master
13
Push
to edit
4
Line Mic Line Mic Instrument Aux +
5
1234
3
POLAR 10
4
5 7 9
3 6 8
SubMix Out
11
10
0 dB
+10 dB
Canal 3 (Instrumento)
Esta entrada sirve para conectar un instrumento con salida de alta
impedancia (Hi-Z), p. ej. guitarras y bajos eléctricos o acústicos o pianos
electromecánicos. La entrada está ejecutada con alta impedancia, para
que el instrumento pueda desplegar todo su carácter acústico y volumen
dinámico.
6
Input
●
Conector hembra de entrada conectado asimétricamente, tipo jack de
6,35mm, para conectar un instrumento.
7
Volume
●
Regulador rotativo para el ajuste del volumen de la señal. En la posición
«tope izquierdo» la señal está completamente apagada, en la posición
«tope derecho» se alcanza el volumen máximo.
Canal 4 (Aux + Bluetooth)
El canal 4 sirve para conectar fuentes estéreo como, p. ej. mesas de DJ,
reproductores de CD/MP3 o mesas de mezclas, así como la reproducción de
música mediante transmisión de audio a través de Bluetooth. En el canal 4
pueden utilizarse simultáneamente la señal Aux y la de Bluetooth.
8
Input
●
Entrada conectada asimétricamente (2 conectores hembra RCA) para
conectar fuentes de audio de alto nivel como un reproductor de CD-/MP3,
un smartphone, un mezclador de DJ o un ordenador.
9
Volume
●
Regulador rotativo para el ajuste del volumen de la señal. Este regulador
de volumen actúa conjuntamente sobre las entradas Aux y Bluetooth. En
la posición «tope izquierdo» la señal está completamente apagada, en la
posición «tope derecho» se alcanza el volumen máximo.
Información: Si se utilizan simultáneamente la entrada Aux y la
transmisión de audio Bluetooth, puede regularse el volumen de la señal
de Bluetooth en relación a la señal Aux en la fuente sonora Bluetooth.
10
Sub
●
Regulador rotativo para el ajuste de la proporción de graves del sistema. En
la posición «tope izquierdo» el subwoofer está completamente apagado, en
la posición «tope derecho» se alcanza el volumen máximo del subwoofer.
Por medio del regulador Sub puede regularse independientemente el nivel
del subwoofer. Gire el regulador a 0 dB para lograr una relación de volumen
relativamente equilibrada entre la columna y el subwoofer.
Consejo: Con frecuencia, se recomienda reducir la proporción de graves
cuando se realiza la instalación en un rincón o si la sala de conciertos es
muy pequeña. Asimismo, la reducción de la proporción de graves puede
utilizarse también para aumentar el volumen total máximo del sistema
sin que reaccionen los circuitos protectores limitadores del sistema.
11
Mix Out
●
Conector hembra de salida XLR conectado simétricamente. A través de esta
salida se emite la señal de sumas mixta de todos los canales de entrada.
Información: La salida Mix Out sirve para «pasar» la señal de sumas, p.
ej. a un mezclador FOH, para controlar otros altavoces (caja de monitor)
o para la grabación en directo. Aquí puede conectarse también un
subwoofer activo adicional, si dispone de un fi ltro High-Cut o Low-Pass
para suprimir las altas frecuencias.
• English • Deutsch • Français • Italiano • Español
37
Page 38

POLAR 10 1.1
12
Pantalla LCD
●
Durante el funcionamiento normal, el display indica el nivel de los canales
de entrada y del volumen del maestro.
En el modo DSP indica los parámetros del menú DSP seleccionados (véase
3.2 Ajustes DSP).
Indicaciones de sobremodulación
Las cuatro indicaciones de sobremodulación indican el nivel de los canales
de entrada. El rango de Overload indica una sobremodulación de la señal
de entrada. Cuando se enciende Overload, se reduce la amplifi cación de
entrada del canal y/o el nivel de salida del dispositivo conectado.
Información: POLAR posee reservas de sobremodulación sufi cientes
para resistir los picos de señal que se produzcan ocasionalmente. Sin
embargo, si se ilumina constante una indicación Overload o se escucha
una sobrecarga, el regulador de volumen del canal correspondiente debe
reducirse para evitar una distorsión acústica de la señal y una sobrecarga
del sistema.
Consejo: Para evitar ruido de fondo es importante la sobremodulación
correcta de las señales. Esto signifi ca: Los canales de entrada deben
sobremodularse lo más altos que sea posible (normalmente, deben
sobremodularse de modo que con la señal más alta se ilumine la
indicación Overload y reducirse hasta que se apague) y el maestro solo
abrirse lo necesario.
13
Master (push to edit)
●
El regulador del maestro de la derecha, junto al display, tiene principalmente
la función de un volumen maestro que regula el volumen total del sistema.
En el display se muestra el valor actual. Rango de regulación: –60 hasta +10
en pasos de 1 dB .
Están disponibles para su selección las funciones siguientes:
3.1 Bluetooth
Bluetooth
POLAR ofrece transmisión de audio a través de Bluetooth. Sirve para la
reproducción inalámbrica de música desde reproductores compatibles con
Bluetooth, tales como teléfonos inteligentes o tablet PC.
Establecer conexión con un dispositivo bluetooth
• Pulsando una vez el regulador del maestro: se indica la opción de menú
«Bluetooth».
• Pulsando de nuevo el regulador del maestro se inicia el establecimiento de
la conexión Bluetooth («emparejamiento»). POLAR resulta ahora visible
para los dispositivos Bluetooth. Durante una ventana de tiempo de 120
segundos para el establecimiento de la conexión, en el display parpadea
lentamente el símbolo Bluetooth, indicando que puede establecerse una
conexión con un dispositivo Bluetooth.
• Seleccione en el menú Bluetooth su dispositivo Bluetooth «HK Audio
POLAR» para establecer la conexión.
• En cuanto se ha establecido con éxito la conexión, el símbolo Bluetooth se
ilumina fi jo en el display del POLAR.
Estado de Bluetooth en el display:
• No se muestra el símbolo Bluetooth (se indica el número 4)
Bluetooth no activo
• Parpadeo lento
Posibilidad de establecer una conexión Bluetooth en unos 120 segundos
Realizar la conexión Bluetooth (al volver a pulsar
en Pairing se activa el proceso de emparejamiento)
3 Menú DSP
Pulsando el regulador del maestro («push to edit») se obtiene acceso a
diferentes parámetros DSP dispuestos en un menú de selección y que
pueden editarse. El parámetro seleccionado actualmente se muestra en el
display.
• Girando el regulador del maestro se navega a través del menú, si se pulsa,
se selecciona la opción de menú actual o se confi rma la entrada.
Atención: Si no se realiza ninguna entrada ni confi rmación en un
plazo de 8 segundos, POLAR sale siempre de la opción de menú
seleccionada y vuelve automáticamente a la ventana principal (volumen
del maestro) para evitar manejos incorrectos involuntarios.
Información: Todos los ajustes DSP actuales se mantienen
permanentemente en la memoria también después de desconectar el
sistema y se cargan de nuevo al volver a conectar.
• Símbolo Bluetooth visible permanentemente
Bluetooth conectado con éxito
• Parpadeo rápido
La conexión Bluetooth ha fallado o se ha interrumpido (p. ej. se ha superado
el alcance)
Información: Si el símbolo Bluetooth parpadea rápidamente, compruebe
si su dispositivo Bluetooth se encuentra en el alcance, está activado
Bluetooth y se ha seleccionado POLAR en la lista de dispositivos
Bluetooth. Si no aparece POLAR en la lista de dispositivos Bluetooth,
realice un nuevo establecimiento de conexión mediante emparejamiento
de Bluetooth.
Las señales de audio del dispositivo Bluetooth se emiten a través del canal
4. La regulación de volumen se realiza a través del regulador de volumen del
canal 4 o en el propio dispositivo Bluetooth. Antes de iniciar la reproducción
de música en su dispositivo Bluetooth, es aconsejable reducir el regulador
de volumen del canal 4.
Encontrará más información sobre Bluetooth en el capítulo 4.
38
Page 39

POLAR 10 1.1
3.2 Ajustes
Sistema EQ
Hi EQ
Mid EQ
Mid Freq
Low EQ
POLAR ofrece una regulación acústica de 3 bandas para adaptar el sonido
general del sistema. Hi-EQ y Low-EQ están ejecutados como fi ltro Shelving,
el Mid-EQ es semiparamétrico.
Consejo: Utilice el EQ de 3 bandas para ajustar el sonido general según la
aplicación y el gusto personal. En las salas pequeñas con una distancia
reducida a la pared o el público, con frecuencia pueden reducirse algo
las proporciones de graves. Se aplica lo mismo para las proporciones
de agudos si al usar un micrófono sensible o debido a superfi cie
muy refl ectantes como, p. ej. ventanas, se aumenta la propensión
al retroacoplamiento. Con la banda media semiparamétrica puede
eliminarse selectivamente una frecuencia residual o aumentarse una
gama de frecuencia con muy poca presencia.
Hi EQ: Con este parámetro puede subir o bajar las frecuencias altas.
Rango de regulación: +/–12 dB • Frecuencia: 12 kHz
Mid EQ: Con este parámetro puede subir o bajar las frecuencias de la banda
media. Rango de regulación +/–12 dB
Mid Freq: Con este parámetro se puede ajustar la frecuencia central de la
banda media. Rango de frecuencia: 70 Hz - 12 kHz
Low EQ: Con este parámetro puede subir o bajar las frecuencias bajas.
Rango de regulación: +/–12 dB • Frecuencia: 70 Hz
Información: Los ajustes de ecualizador actúan sólo sobre la salida de
altavoces y no infl uyen en el Mix Out.
Mode
Mode
Pueden escogerse tres modos ajustados fi jos para la sintonización acústica
del sistema.
Music: Este modo es idóneo, en general, para aplicaciones en vivo y para
reproducir música de todo tipo.
Voice: Para aplicaciones de voz debe seleccionarse el modo «Voice» que está
optimizado para la voz humana.
DJ: Cuando se reproduce música electrónica, la mejor elección es el modo
"DJ".
Información: Los ajustes del EQ de 3 bandas no se sobrescriben por
un cambio entre los modos Music/Voice/DJ. El EQ de 3 bandas está
disponible adicionalmente.
Regulación de sonido - agudos:
+/- 12 dB (Preajuste: 0 dB)
Regulación de sonido - medios:
+/- 12 dB (Preajuste: 0 dB)
Frecuencia medias:
70 Hz – 12 kHz (Preajuste: 1 kHz)
Regulación de sonido - graves:
+/- 12 dB (Preajuste: 0 dB)
Music (Preajuste)
Voice
DJ
Delay
Delay
Por medio de la opción de menú «Delay» puede retrasarse la reproducción
de audio a través del altavoz POLAR. El retardo puede ajustarse de 0 (o ) a
100 m en pasos de 0,25 m.
Información: La unidad metro es práctica si POLAR tiene que utilizarse,
p. ej. como altavoz de soporte (Delay-Line) en grandes eventos. De este
modo puede lograrse, por ejemplo, en salas con una acústica difícil, una
distribución, homogénea del sonido con una mejor comprensión de voz
hasta las fi las traseras y reducirse el volumen del sistema de sonorización
principal en el escenario. Solo es necesario ajustar la distancia entre
POLAR y el escenario en metros para que POLAR funcione acústicamente
de forma simultánea con la sonorización principal.
O: Función Delay desactivada (Preajuste)
0–100 m: Distancia Delay
3.3 Gestión de los presets
Load Preset
Store Preset
Erase Preset
Load Preset
Para administrar los ajustes DSP propios hay disponibles cinco espacios
de memoria (U1 a U5). «U» signifi ca «Preajuste de Usuario». Un preajuste
de usuario contiene todos los parámetros de las posibilidades de ajuste
ofrecidas en el menú DSP (Mode, EQ de 3 bandas, Delay, brillo del display,
etc.).
Girando el regulador del maestro pueden seleccionarse los preajustes de
carga U1 a U5, cuando se confi rma pulsando el regulador maestro se carga el
preajuste. Con «Exit» puede salirse del menú sin cargar un preajuste.
Store Preset
Aquí puede guardar los ajustes actuales del menú DSP. Girando el regulador
del maestro pueden seleccionarse los espacios de memoria U1 a U5. Al
confi rmar la selección pulsando en maestro se abre un campo de entrada
para adjudicar un nombre de preajuste. Con «Exit» puede salirse del menú
sin guardar un preajuste.
Editor de texto: Girando el regulador del maestro se accede al campo
de texto y puede navegarse por medio de las opciones de menú «Save»,
«Clear» y «Cancel». Cuando está seleccionado el campo de texto, pulsando
puede seleccionarse la primera de Ias 12 posiciones y girando puede
seleccionarse una letra o un carácter. Pulsando de nuevo se accede a las
12 posiciones siguientes y pueden seleccionarse otras letras o caracteres.
Puede salirse del campo de texto pulsando dos veces el regulador del
maestro (¡sin girar!). Aparece un símbolo Intro (fl echa), ahora puede
navegarse girando desde el campo de texto a «Save», «Clear» y «Cancel».
Save: Cuando se selecciona «Save», al pulsar en maestro se guarda el
preajuste y puede volverse a la selección del menú U1 a U5 para copiar el
preajuste en otro espacio de memoria o salir del menú por medio de «Exit».
Clear: Cuando se selecciona «Clear», pulsando en maestro se borra el campo
de texto y puede introducirse un nuevo nombre.
Cancel: Cuando se selecciona «Cancel», pulsando en el maestro se cancela
la adjudicación de nombre y se regresa al menú de selección U1 a U5,
para seleccionar otro espacio de memoria o se cancela completamente el
guardado mediante «Exit».
Cargar Preset
Guardar Preset
Borrar Preset
• English • Deutsch • Français • Italiano • Español
39
Page 40

POLAR 10 1.1
Erase Preset
Aquí puede borrarse el preajuste seleccionado. Sin embargo, cuando se
pulsa en el maestro, no se borra nada todavía, ya que primero aparece una
pregunta de seguridad:
Confi rm Erase: Yes/No
Girando puede cambiarse entre «Yes» (Sí) y «No», pulsando el regulador del
maestro puede confi rmarse la selección. Seleccionando «Yes» se borra el
preajuste de forma irreversible, mediante «No» se vuelve al menú DSP.
3.4 Display
LCD Dim
Brightness
Contrast
LCD Dim: Si está desactivada la función (O ), el display mantiene el brillo
constante. Si está activada la función (On), el display se oscurece ocho
segundos después del último manejo del regulador del maestro, pero sigue
siendo bien legible. Cuando se opera de nuevo el regulador del maestro, el
display se ilumina de nuevo con el brillo ajustado.
Bright: Adaptación del brillo del display entre 0 y 10.
Contrast: Ajuste del contraste del display entre 0 y 10.
O: El display se ilumina de forma constante (preajuste)
On: El display se oscurece después del manejo
Brillo del display 0 – 10 (preajuste: 5)
Contraste del display 0 – 10 (preajuste: 5)
3.5 Restaurar la confi guración de fábrica (Factory reset)
4 Bluetooth
Establecer conexión con un dispositivo bluetooth
• Pulsar el regulador maestro hasta que aparezca el menú «Bluetooth»
• Pulsando de nuevo se inicia la conexión («emparejamiento»)
• Ahora, el símbolo de Bluetooth parpadea lentamente y POLAR aparece
durante 120seg. en la lista de selección del dispositivo apto para
Bluetooth
• Seguidamente, seleccionar «HK Audio POLAR» en el dispositivo Bluetooth
para conectar los dispositivos
En cuanto se ha establecido con éxito la conexión, el símbolo Bluetooth
se ilumina fi jo en el display del POLAR. Encontrará más información en el
capítulo3.1.
Conexión automática con dispositivos Bluetooth
Después de encender de nuevo POLAR se busca de nuevo automáticamente
durante 120 segundos el último dispositivo conectado y se establece una
conexión, no es necesario establecer la conexión manualmente por medio
del emparejamiento Bluetooth. Una vez transcurridos 120 seg. puede volver
a iniciarse la búsqueda apagando y volviendo a encender POLAR o activando
una conexión manual mediante el emparejamiento Bluetooth.
Cambio entre dispositivos Bluetooth
No se puede cambiar a otro dispositivo Bluetooth mientras haya todavía
conectado un dispositivo Bluetooth o POLAR busque el último dispositivo
conectado. Ejecute de nuevo la función de emparejamiento Bluetooth
para desconectar el dispositivo conectado actualmente y conectar otro
dispositivo Bluetooth.
Factory Reset
Restablecer los ajustes de fábrica
Reset
• Por medio de «Reset», POLAR puede restablecer los ajustes DSP de
fábrica.
• Cuando se pulsa en el maestro, no se reinicia nada todavía, ya que primero
aparece una pregunta de seguridad:
Confi rm Reset: Yes/No
Girando puede cambiarse entre «Yes» (Sí) y «No», pulsando el regulador del
maestro puede confi rmarse la selección. Si se selecciona «No» se regresa al
menú DSP, con «Yes» se restablece irreversiblemente el ajuste de fábrica de
todas las funciones DSP: en Mode se ajusta «Music», se corta la conexión
Bluetooth y se borran los cinco preajustes de usuario.
Consejo: Esta función es útil, por ejemplo, cuando el sistema se usa con
frecuencia en alquiler. Así, antes de entregarse a un nuevo cliente, puede
restablecerse rápidamente al estado de fábrica.
3.6 Salir del menú DSP
Exit
Por medio de esta opción de menú se puede salir del menú DSP y volver a
Master Volume. Esto se produce automáticamente cuando no se realiza
ninguna entrada por medio del regulador del maestro durante ocho
segundos.
Salir del menú DSP
Atención: ¡El emparejamiento Bluetooth activa siempre una nueva
conexión Bluetooth y desconecta una eventual conexión existente!
Alcance
POLAR es compatible con Bluetooth 5. Si se utiliza un dispositivo apto para
Bluetooth 5 son posibles alcances de hasta 40 m. En los dispositivos no
compatibles con Bluetooth 5, normalmente, el alcance es de hasta 10 m,
sin embargo, depende de diferentes factores como la calidad y la potencia
de envío del dispositivo Bluetooth y las características del entorno (por
ejemplo, obstáculos como paredes dentro del tramo de comunicación por
radio o también si el dispositivo Bluetooth lleva una funda protectora). Si
se supera el alcance o la conexión está perturbada por paredes o muros, se
interrumpe la reproducción de audio (el símbolo de Bluetooth en el display
de POLAR parpadea rápidamente).
Si el dispositivo Bluetooth vuelve a estar dentro del alcance en un plazo de
120 segundos, la conexión se restablece de nuevo automáticamente y el
símbolo de Bluetooth en el display de POLAR se ilumina de nuevo fi jo.
Irregularidades o fallos en la transmisión de audio de Bluetooth
La transmisión de audio mediante Bluetooth, por su propia naturaleza,
es más propensa a los fallos que una conexión por cable, ya que en la
reproducción de música debe garantizarse un fl ujo de datos constante sin
interrupciones.
En un caso ideal existe un «contacto visual» directo entre POLAR y el
dispositivo Bluetooth para conseguir una reproducción sin interferencias ni
fallos.
40
Consejo: Con la conexión Bluetooth, posiblemente pueden reproducirse
también sonidos del sistema, notifi caciones y timbres del dispositivo
Bluetooth. Desactive estas funciones en su dispositivo Bluetooth para
evitar interferencias no deseadas en la reproducción de audio.
Encontrará más información sobre Bluetooth en www.bluetooth.org.
Page 41

POLAR 10 1.1
5 Datos técnicos
POLAR 10 System
Máx. SPL@10% THD 126 dB medio espacio
Respuesta de frecuencia
+/- 10 dB
Potencia de la etapa fi nal 2000 W
Tipo de etapa fi nal Class D – biamped
Frecuencia de separación 180 Hz, 24 dB/Oct.
Circuitos protectores
activos
Entradas 2 conectores hembra combinados jack/XLR
Salidas Mix Out
Nivel de entrada máx. +4 dBu
Modos (preajustes de
fi ltros)
User Presets 5
EQ EQ de 3 bandas, medias semiparamétrico
System Delay hasta 291 ms (100 m)
Bluetooth 5.0
Carcasa Abedul-Multiplex / ABS
Superfi cie Pintura 2K, negro
Altura total del sistema 213 cm
Peso 26,9 kg / 59,3 lbs
38 Hz – 20 kHz
Undervoltage-, Thermo-, Short-Circuit-,
Overcurrent-Protection, Peak-, RMS-Limiter
(simétricos), 1 jack de instrumento (Hi-Z), 2
transmisiones de audio RCA, Bluetooth
Music, Voice, DJ
Datos técnicos generales
Consumo de corriente
según EN 62368-1
La marca y los logotipos Bluetooth son propiedad de Bluetooth SIG, Inc. HK Audio utiliza estas marcas
bajo licencia.
Todas las marcas comerciales y los copyrights mencionados son propiedad de sus propietarios
respectivos.
0,6 A / 220-240 V AC
0,8 A / 100-120 V AC
POLAR 10 Subwoofer
Altavoz de graves 1x 10" con bobina oscilatoria de 2"
Rejilla frontal Rejilla metálica de 1,5 mm con espuma
negra acústica
Dimensiones (AxAxP) 36,6 x 62,5 x 54,1 cm
Peso 21 kg / 46,2 lbs.
POLAR 10 Mid/High-Unit
Altavoz de medios 6x 3", 3/4" Bobina oscilante, Neodimio
Altavoz de agudos 1x 1" con bobina oscilatoria de 1"
Característica de difusor 120° x 30°
Rejilla frontal Rejilla metálica de 1 mm con espuma negra
acústica
Dimensiones (AxAxP) 10,8 x 82,5 x 9,8 cm
Peso 3,9 kg / 8,6 lbs.
POLAR 10 Spacer
Rejilla frontal Rejilla metálica de 1 mm con espuma negra
acústica
Dimensiones (AxAxP) 10,8 x 82,5 x 9,8 cm
Peso 2 kg / 4,4 lbs.
• English • Deutsch • Français • Italiano • Español
41
Page 42

POLAR 10 1.1
42
Page 43

POLAR 10 1.1
43
Page 44

POLAR 10 1.1
44
Page 45

POLAR 10 1.1
45
Page 46

POLAR 10 1.1
46
Page 47

POLAR 10 1.1
47
Page 48

POLAR 10
9840xxx D-3114
HK Audio® • Postfach 1509 • 66595 St. Wendel • Germany • info@hkaudio.com • www.hkaudio.com
International Inquiries: fax +49-68 51-905 215 • international@hkaudio.com
Subject to change without notice • Technische Änderungen vorbehalten
Copyrights 2019 Music & Sales GmbH • 11/2019
 Loading...