

HK Audio Linear 5, L5 LTS, L5 LTS A Installation Instructions Manual
RCS Art. No. 1007648
Set of 2 pcs. Rain Covers for
LINEAR 5: L5 LTS • L5 LTS A
• Optional Rain Cover Set to protect the speaker cabinet’s internal
electronics from rain
• Optionales Regenschutz-Set, um die Elektronik der Box vor Regen
zu schützen
Installation Instructions / Montageanleitung 1.1
• Please read these instructions before
installation and keep them for later
reference.
• Bitte vor Gebrauch lesen und für
späteren Gebrauch aufbewahren!
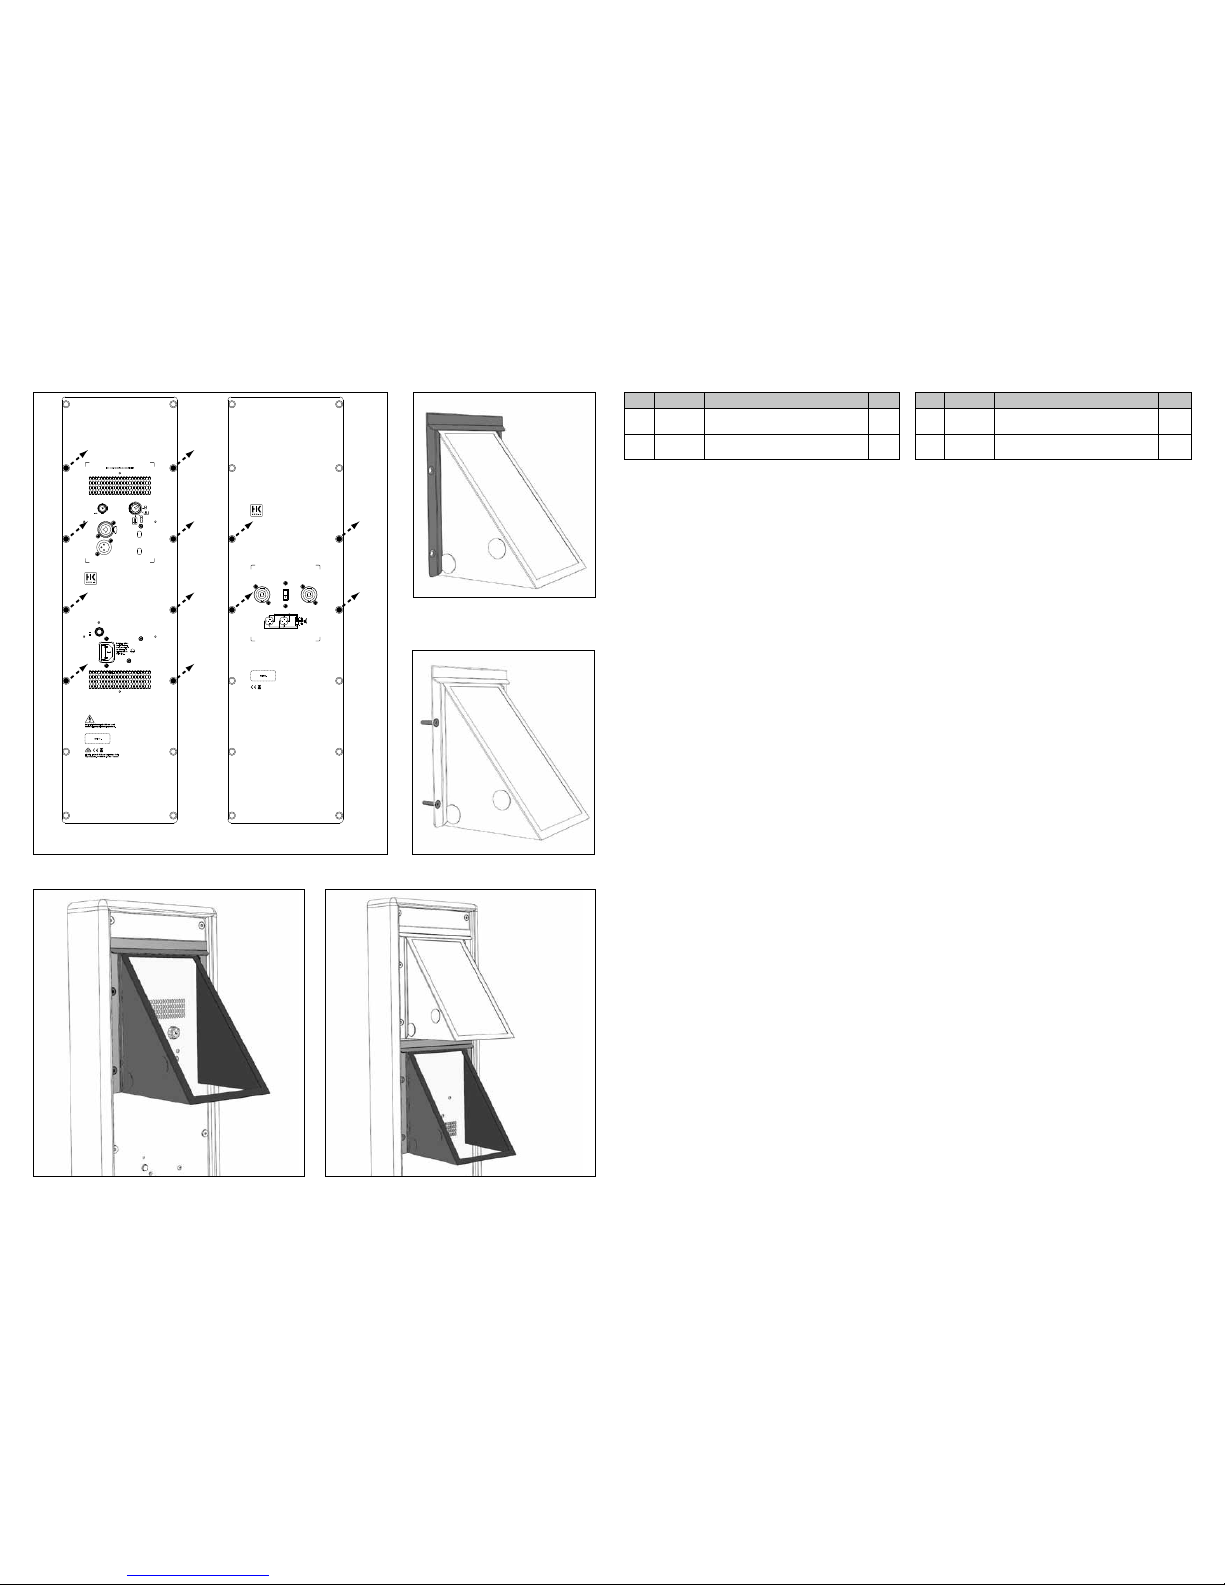
Pos. Art. No . Descript ion Qty.
●
1
9820 625 Rain cove r 2
●
2
97005 24 Metal fra me 2
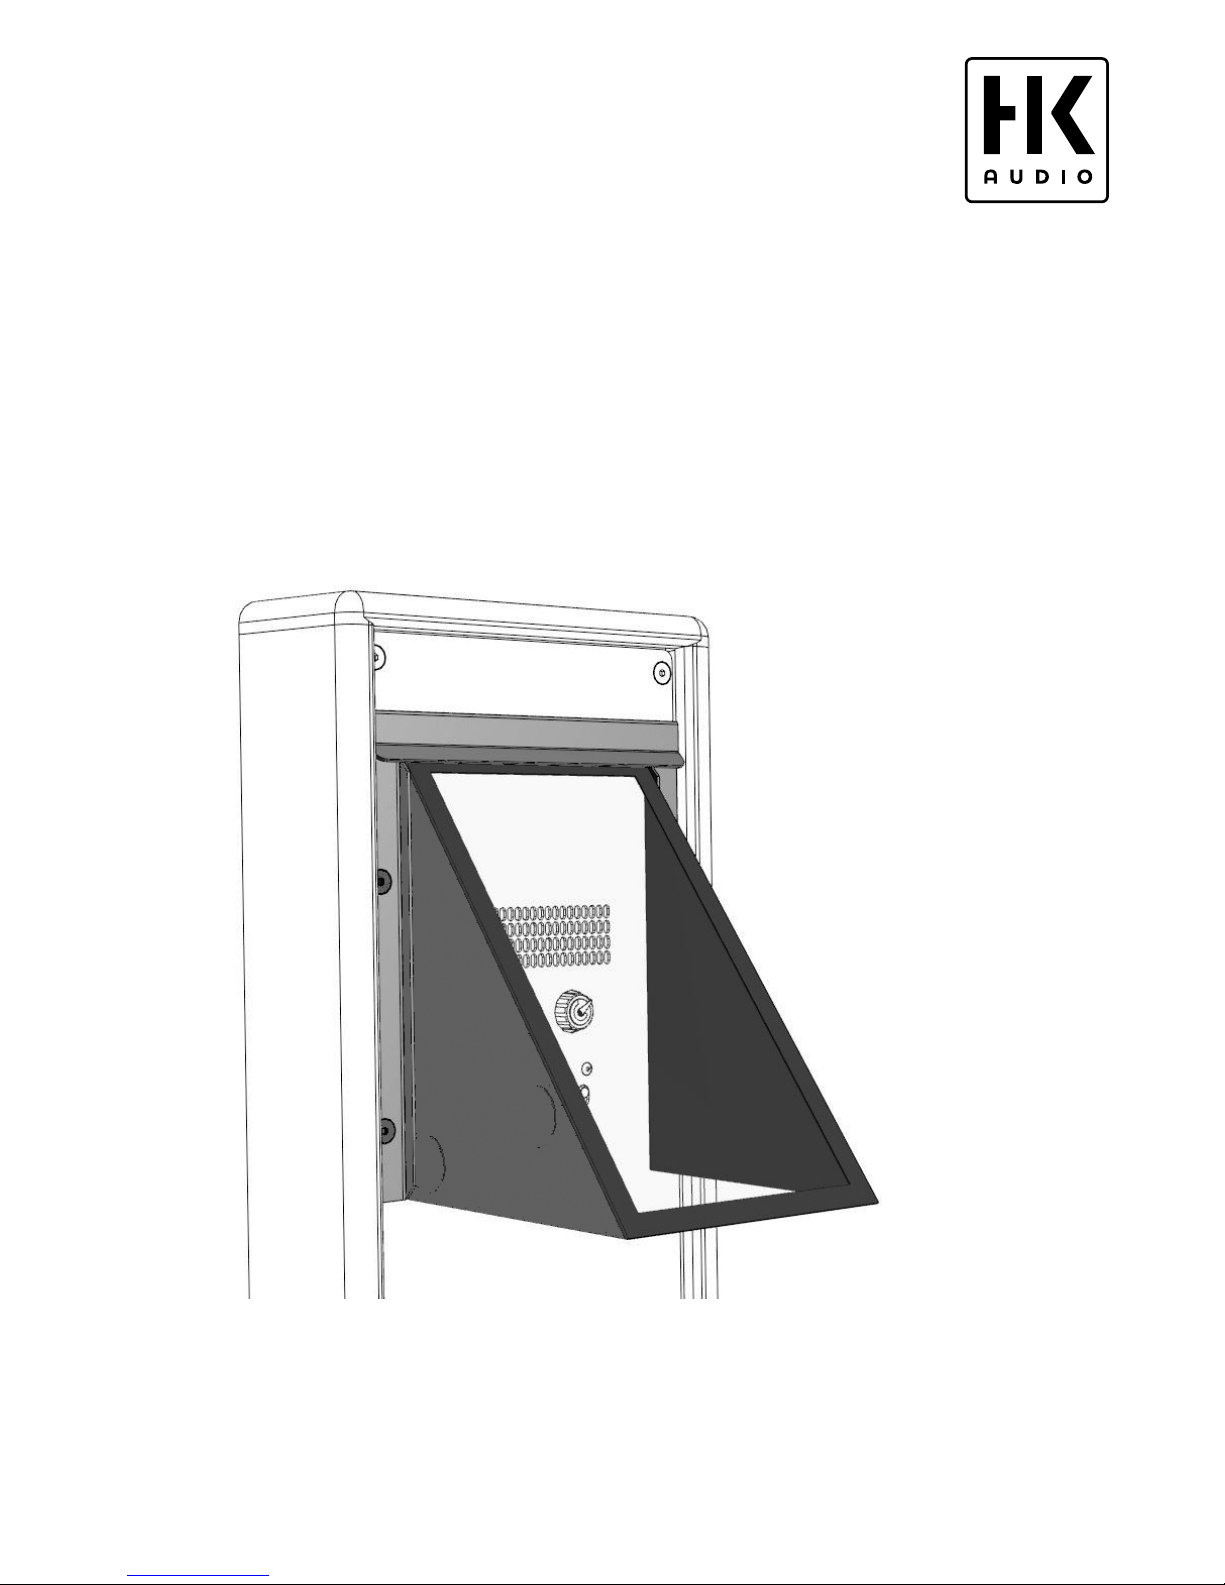
Installing the rain cover
1. Place the cabinet on a stable surface.
2. Remove the four (L5 LTS) or eight (L5 LTS A) countersunk hex-head screws from the rear panel using a 3-mm
hex key or screwdriver bit as shown in Fig. 1 .
3. Place one metal frame ●2
each on the rain cover ●1
with the flat side down (Fig. 2) and the transparent side
of the cover facing up. Make sure the holes on the metal
frame and rain cover are properly aligned. The frame‘s
drip edges should face outward.
4. Pass the hex-head screws that you had removed earlier
through the holes in the metal frame
●
2 to position the
rain cover properly on the frame. This makes it easier to
mount it to the cabinet (Fig. 3).
5. Attach the two rain covers to the back of the cabinet
using the hex-head screws (four per rain cover; Fig. 4
& 5). Make sure the rain cover lies flat on the cabinet‘s
sheet metal without any wrinkles or creases. We
recommend fastening the screws with a tightening
torque of 10-15 Nm.
6. You can flip the rain cover around 180° to stack the
LTS cabinet on its head. To do this, simply rotate the
enclosure by 180° and follow steps 1 through 5.
7. You don‘t have to remove the rain cover for transport. It
folds down to save space.
Pos. Art.-Nr. Beschre ibung Anz.
●
1
9820 625 Regens chutz abdeck ung 2
●
2
97005 24 Metall rahmen 2
Montage des Regenschutzes
1. Die Box auf einen festen Untergrund stellen.
2. Auf der Rückseite die vier (L5 LTS) bzw. acht (L5 LTS A)
Senkkopf-Schrauben mittels 3 mm-InnensechskantSchlüssel oder Schrauberbit herausdrehen, wie in Abb.1
dargestellt.
3. Legen Sie jeweils einen Metallrahmen ●2
mit der
flachen Seite auf die Regenschutzabdeckung ●1
(Abb.2). Die transparente Seite der Abdeckung zeigt
nach außen. Achten Sie darauf, dass die Lochpaare
des Metallrahmens und der Regenschutzabdeckung
übereinander liegen.
4. Führen Sie nun die zuvor entfernten SenkkopfSchrauben durch die Löcher des Metallrahmens.
Dadurch wird die Regenschutzabdeckung am
Metallrahmen
●
2 genau positioniert. Das erleichtert die
Montage an der Box (Abb.3).
5. Verschrauben Sie nun die beiden Regenschutzabdeckungen mittels der Senkkopf-Schrauben (4
Stück pro Regenschutzabdeckung) auf der Rückseite
der Box (Abb.4 & 5). Achten Sie darauf, dass die
Regenschutzabdeckung keine Falten schlägt und glatt
auf dem Blech der Box aufliegt. Es wird empfohlen, die
Schrauben mit einen Drehmoment von 10-15 Nm zu
befestigen.
6. Die Regenschutzabdeckung ist so konzipiert, dass sie
auch um 180° gedreht montiert werden kann, wenn LTS
im Headstack verwendet wird. Hierfür drehen Sie die
Box um 180° und befolgen Schritte 1-5.
7. Für den Transport muss die Regenschutzabdeckung
nicht demontiert werden, sondern kann platzsparend
zusammengeklappt werden.
Gain
Input
Sensitivity
Thru
Mid/High
Preset
Leave enoug h sp ace f or pr op er ve nt il ati on !
+6 dB
0 dB
+4 dBu
L5 System
Flat
Contour
Power
Mains
Green = On
Red = Error
On
O
EQ
LINEAR 5
LTS A
MADE IN GERMANY
LTS A LTS
Serial No.
LINEAR 5
LTS
MADE IN GERMANY
Serial No.
2
1
12
2
1
12
1 1
2 2
1+/1–
2+/2–
Pin assignment
For use with HK Audio filter pres ets only!
8 Ohms • 600 W RMS • 120 0 W Pro gram
Input Output
Caution: To r ed uce
the risk of e le ctr ic
shock, grou nd in g o f
the center pi n of
this plug m us t be
maintained.
220-240 V~
50-60 Hz
3 A rated
current
Caution: Ri sk o f e le ct ric s ho ck! D o not o pe n!
Refer servi ci ng to q ua lifi ed s erv ic e per so nn el.
HK Audio is a b ran d of St am er Mu si ka nla ge n Gmb H
Magdeburger S tr . 8 • 6 660 6 St . W en de l • G er man y
Fig./Abb. 1
Fig./Abb. 4 Fig./Abb. 5
Fig./Abb. 2
Fig./Abb. 3
 Loading...