

Page 1
Page 2
1
TO THE OWNER
Thank you for purchasing our quality screen uses excellent matte white fabric and
mechanical components to give you trouble free enjoyment for years. Please read
this specification detailedly before installation and usage.
Design and specifications are subject to change without notice.
SAFETY GUIDE
1. When assembling, it is forbidden to stand underneath the screen to avoid any
hazard. Expansive bolt should be firmly punched and fixed into the wall or ceiling.
2. Be sure the screen is connected with grounded outlet to avoid any possibility of
electric shocking.
REMARK
1. Do not run the screen continuously over 4 mins (Overheat protection feature
would stop the motor in case of overheat. You may operate the screen again after
the motor cooled down in about 20 minutes).
2. Do not scratch or fold up the fabric.
3. After usage, please check and confirm the cleanness of the screen, surface before
retracting the fabric.
4. Matte white surface is washable with a soft towel moistened with water or weak
alkaline detergent diluted liquid (Do not use alcohol or ether liquid to wash).
Parts Ash
Impurity
Brush the dirty with cotton cloth
Casing
Rid the little dusty
with feather duster
Clean with a mild soap solution,
then dry with cotton cloth,
take care to avoid casing scratching
Fabric
Clean the dusty
with feather duster
Page 3
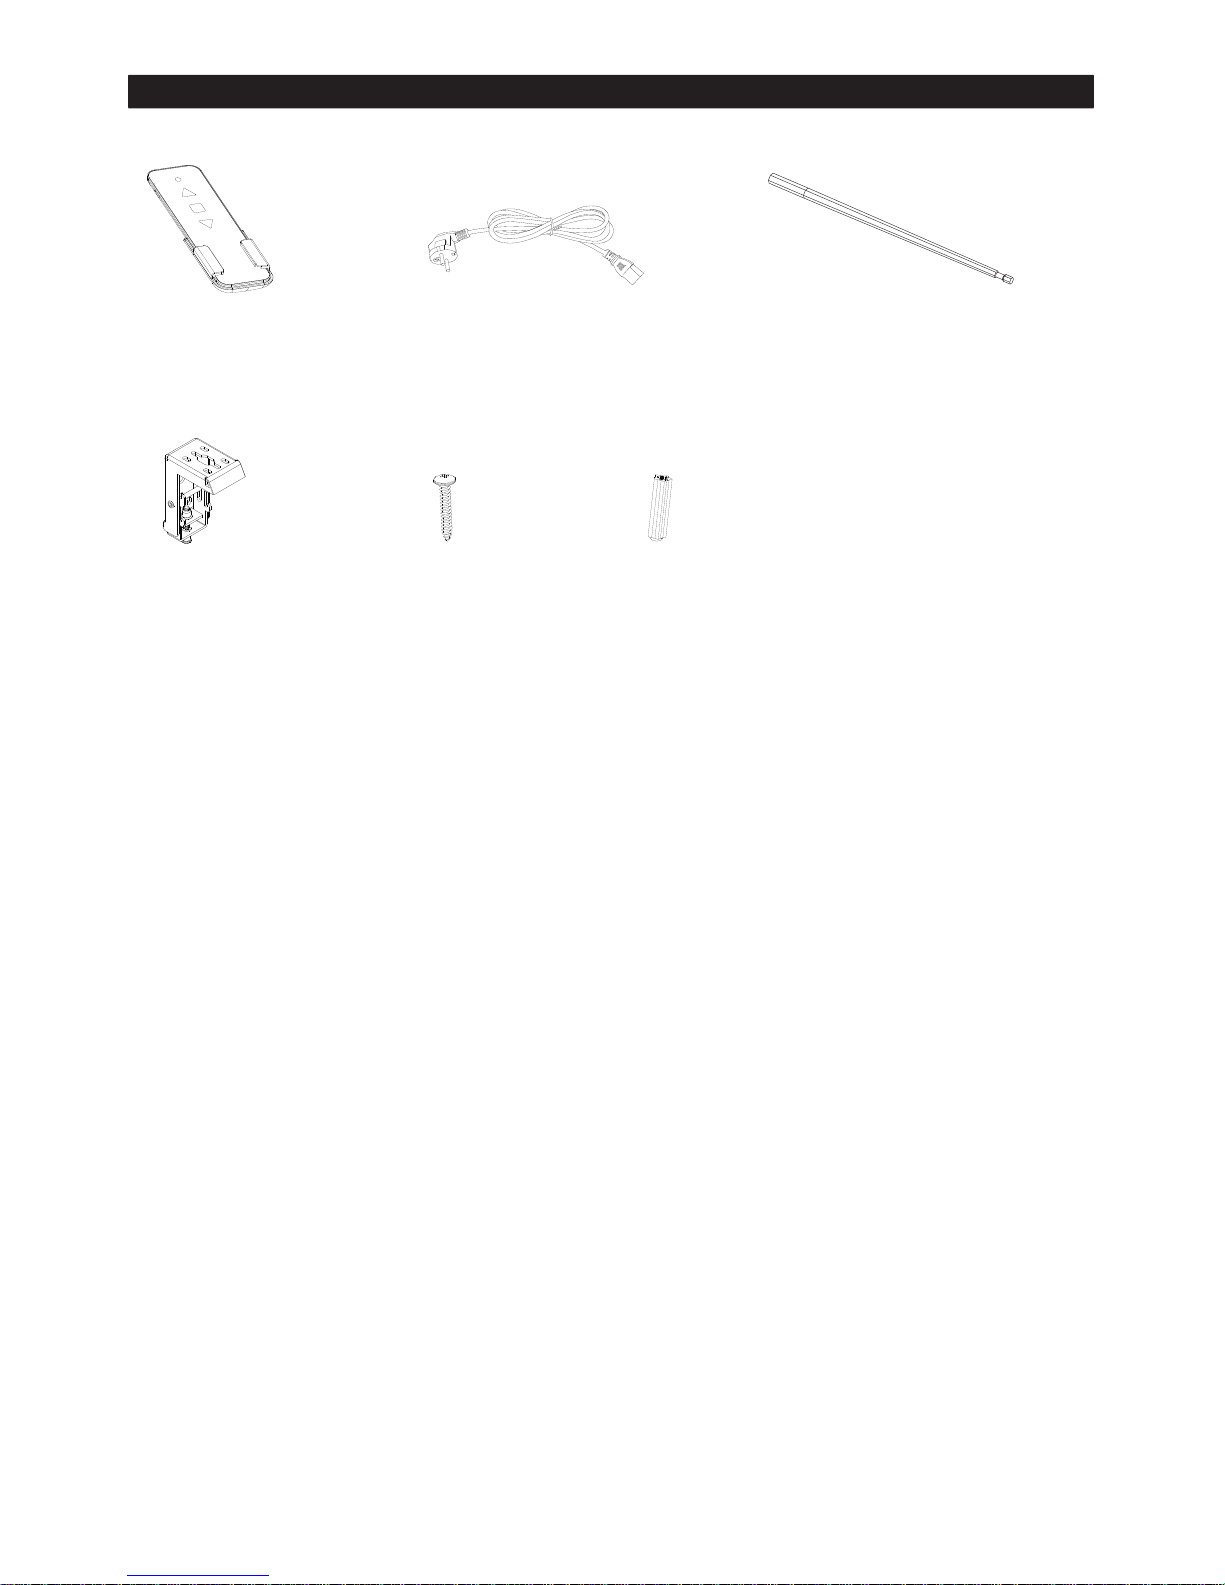
ACCESSORIES
2
x1
D.00 03.00 05.0
x1
D.02 .01.0 000.0
x1
S.99 .07.0 001.0
x10
B.99 .0080 00.0
x10
B.33 .0503 00.6
x2
J.97 .04.0 00 3.0
Page 4
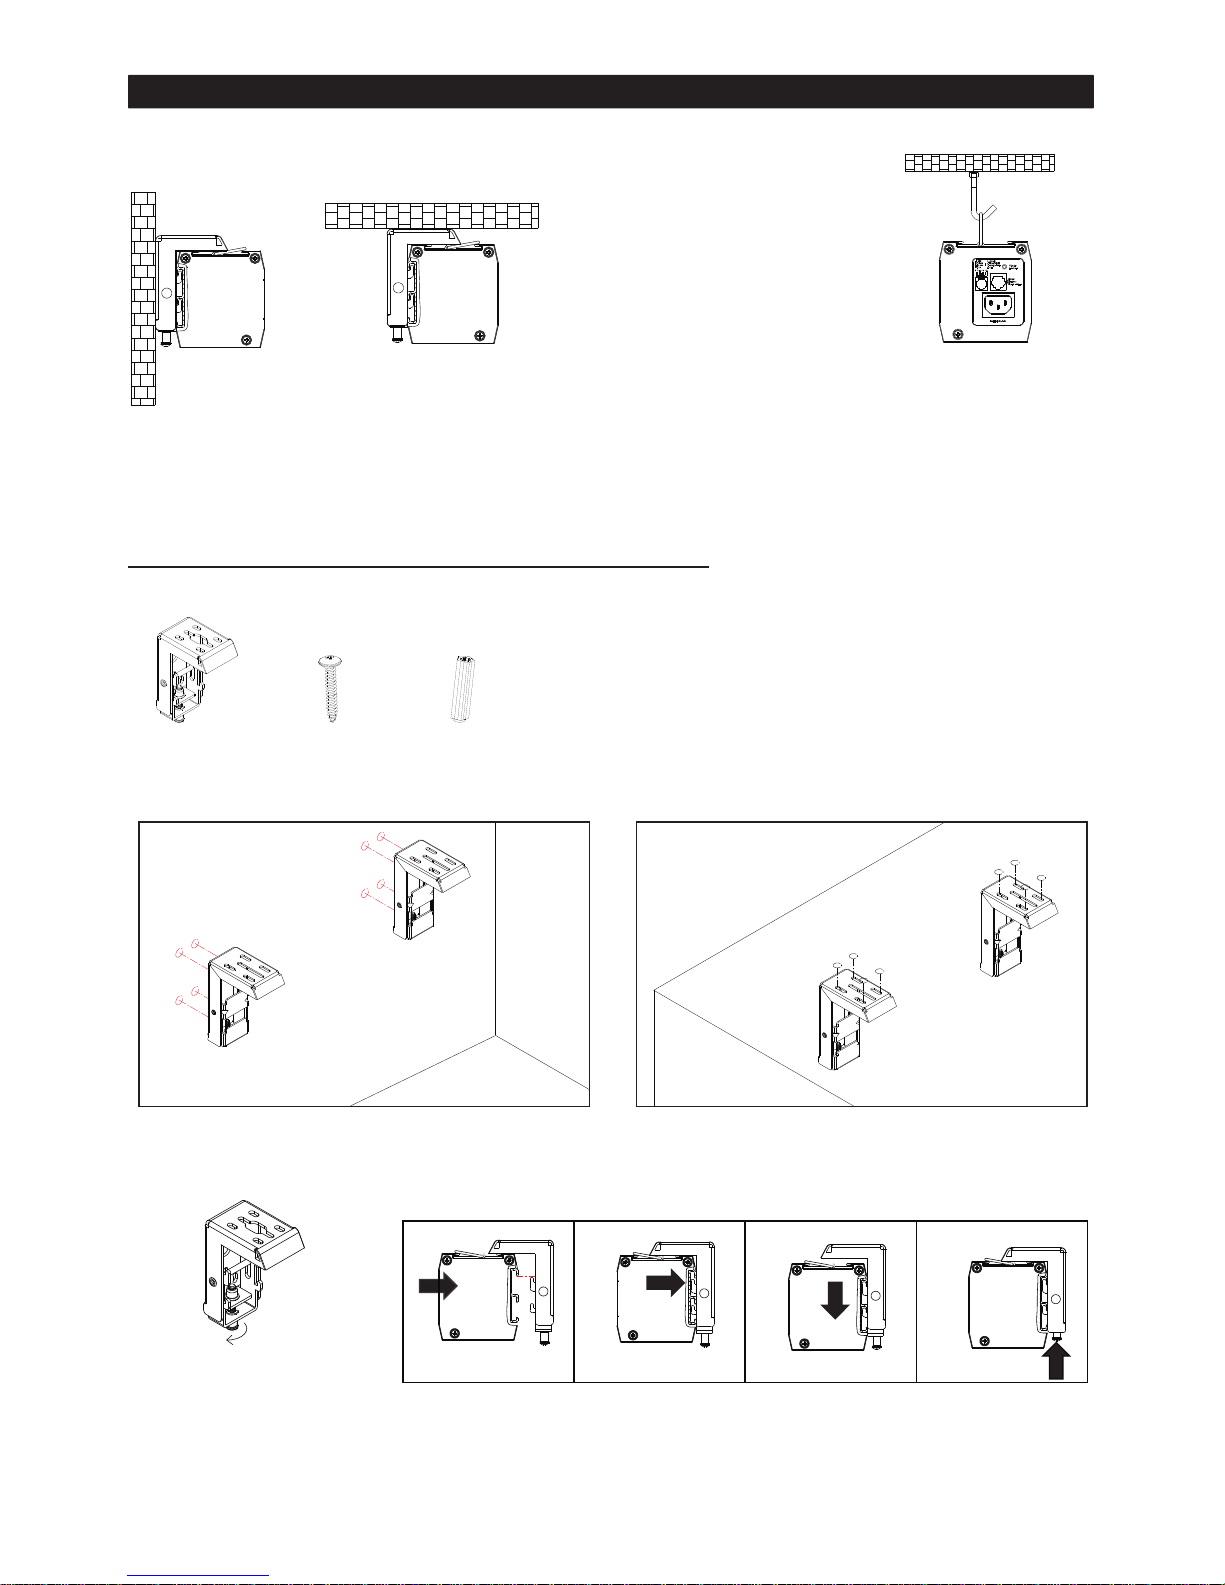
ASSEMBLING
A. Wall Mounting/Ceiling Mounting
Looseing the screw
3
A
B
x2
x8 x8
Page 5
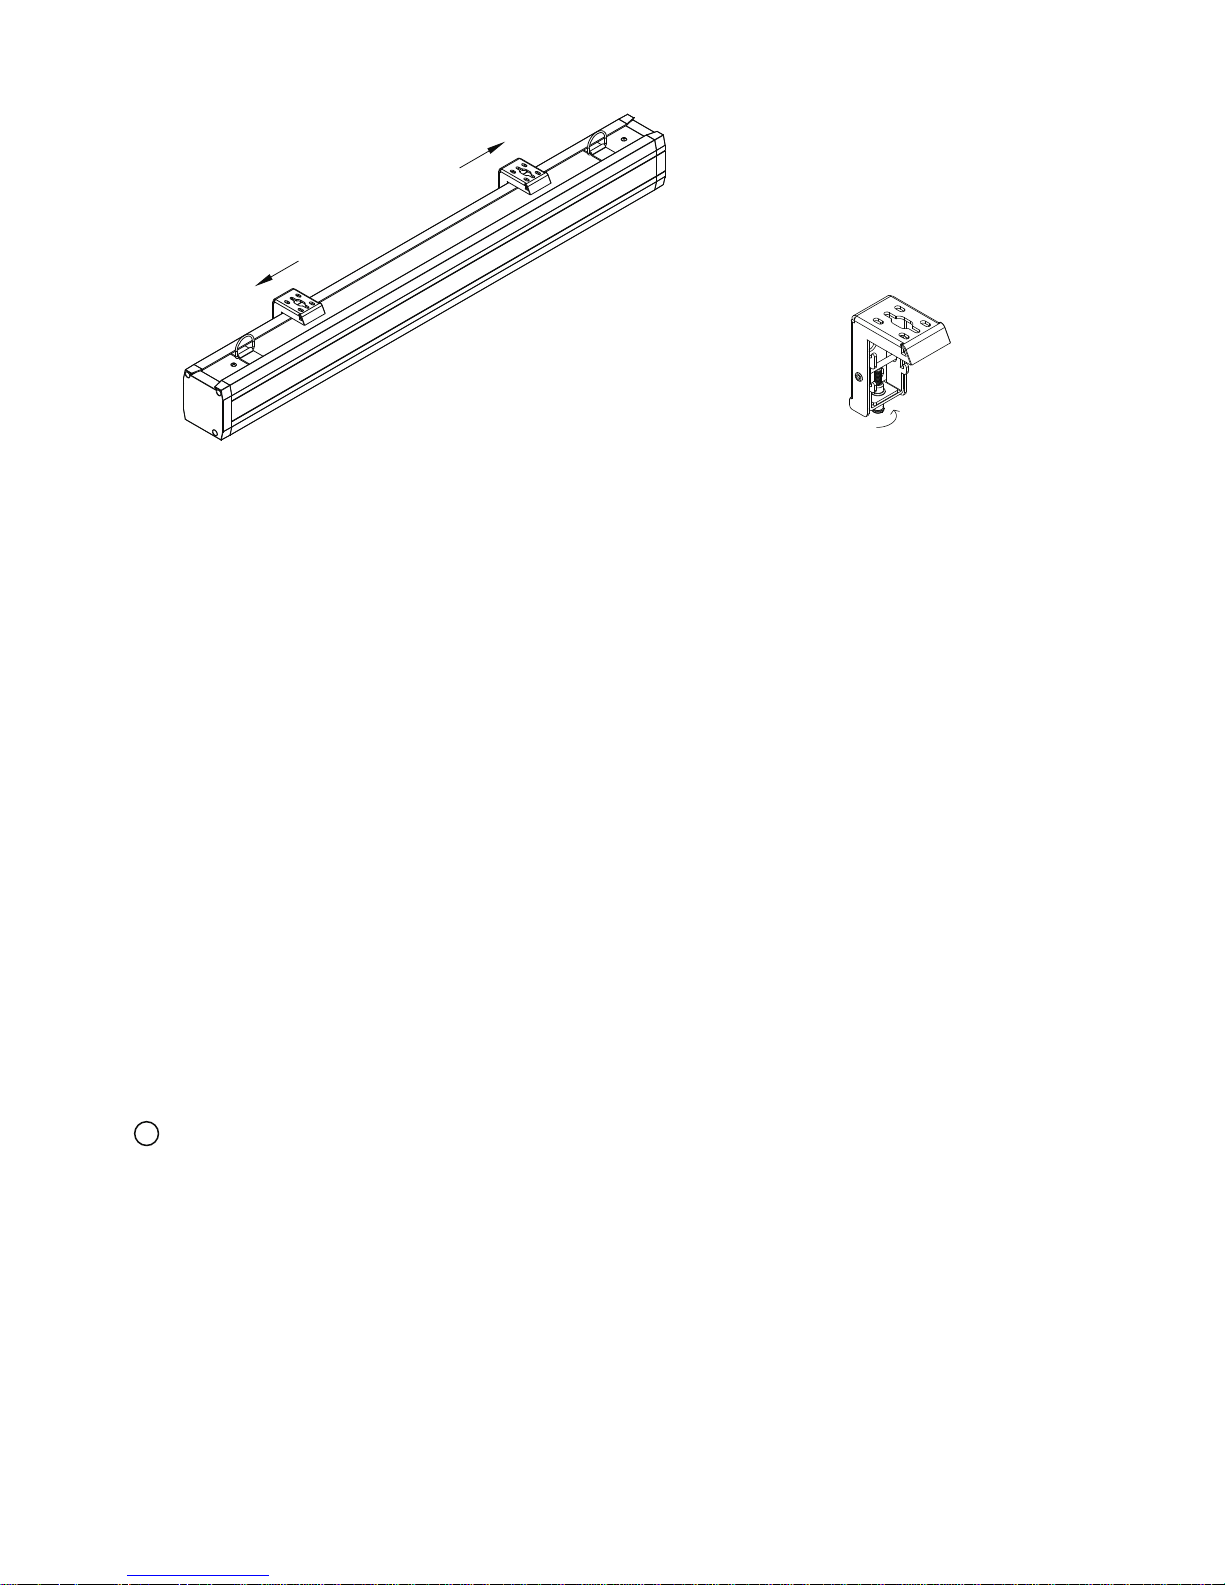
Adjust screen at the suitable place
Tighten the Screw
4
!
NOTE:
Please keep the screen casing and assembing plates in horizontal direction and
install firmly.
Page 6
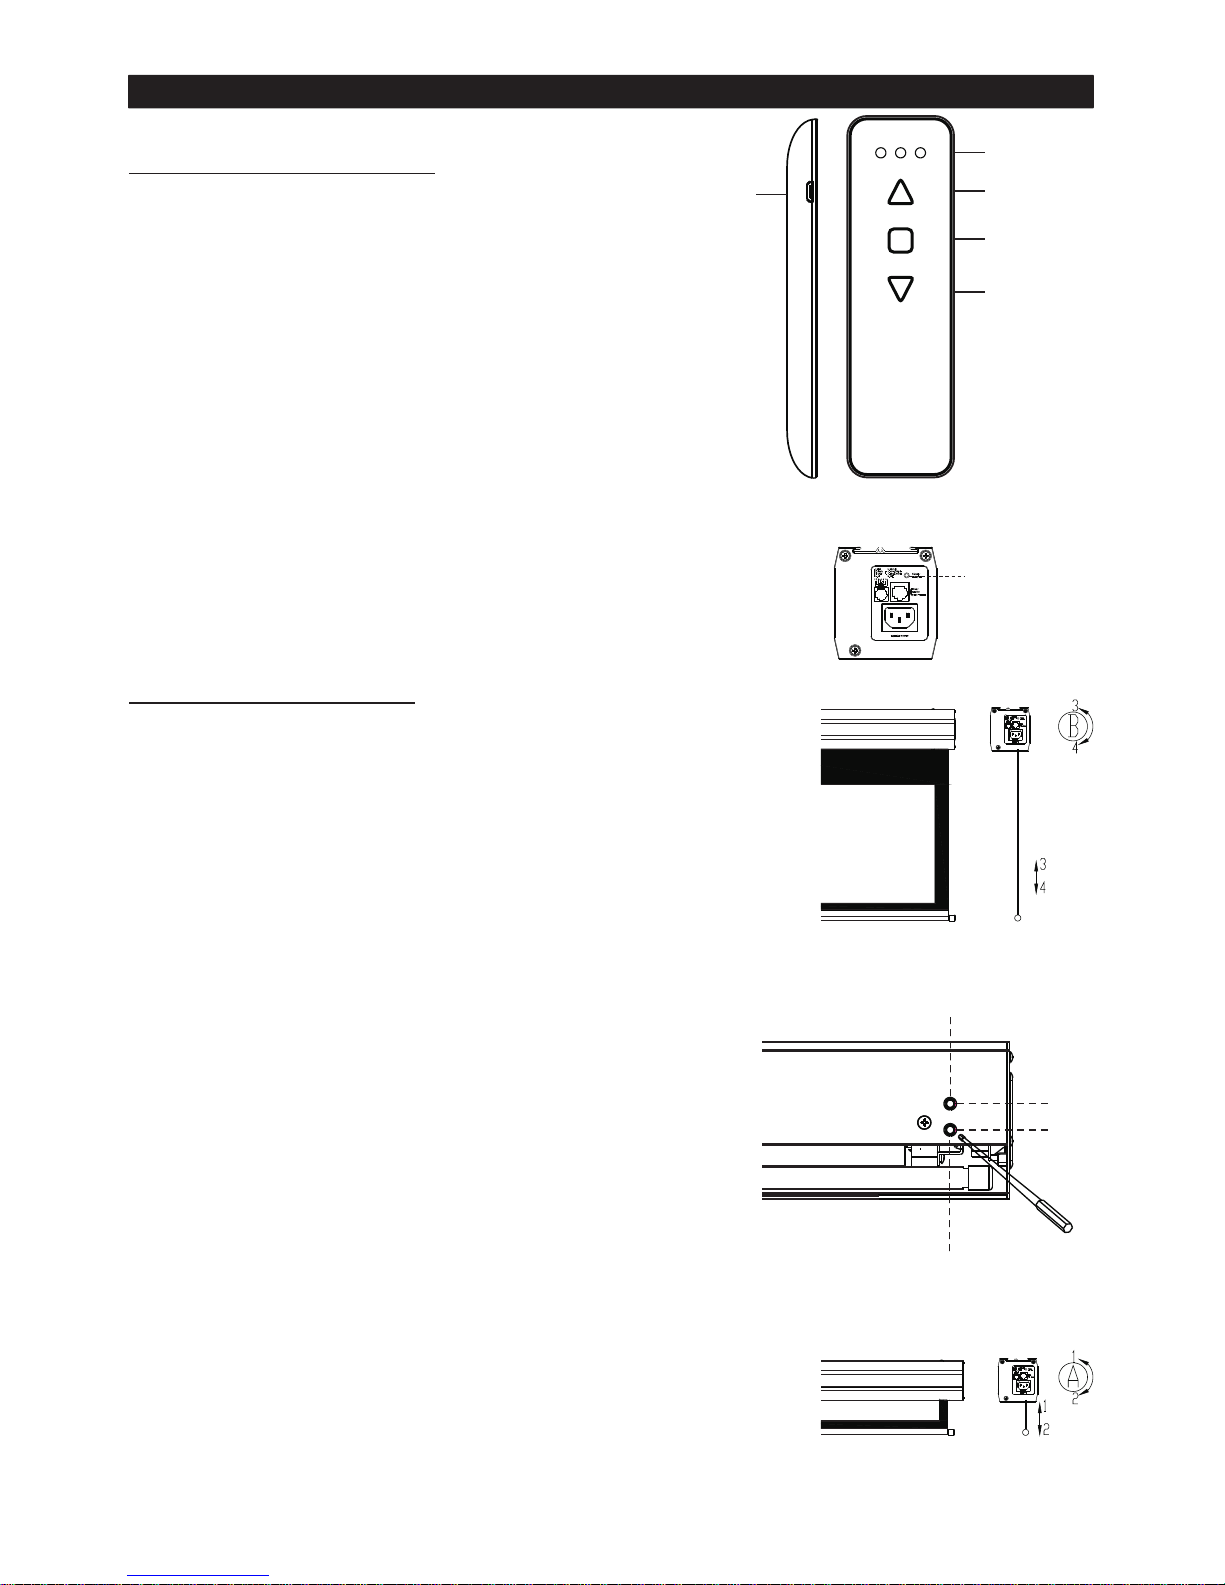
ADJUSTMENT AND USAGE
A
B
Indicator
Light
Up
Stop
Down
bottom limited position
up limited position
Learning
button
Charging port
Fabric Position
A. Up Limited Position
When the fabric in the stage of drawing back and
the bottom weight bar is not in the right place,
please insert the adjusting stick into "A" hole:
I. Upward adjusting for weight bar position: Rotate
adjusting stick on "1" direction , then operate
screen up and down by handset until the screen
is in the right place.
II. Downward adjusting for weight bar position:
Rotate adjusting stick on "2" direction , then
operate screen up and down by handset until the
screen is in the right place.
B. Bottom Limited Position
When the fabric completely open up, while the
top black border is not in right place, please
insert the adjusting stick into "B" hole:
I. Increase the top black border(downward
adjusting for weight bar):Rotate adjusting stick
on "4" direction, then operate screen up and
down by remote control until the top black border
is in the right place.
5
Remote Handset
A. Code Learning:
I. Pressing the LEARNING button at the end cap
of screen for 3-5sec to make screen up and
down once.
II. Press the UP button of for 3-5
sec to make screen up and down again. Code
learning is complete.
B. Code :
Pressing the LEARNING button for 7sec to
make screen up and down twice.
Release the button and original code erased.
Remote Handset
Erasion
C. Charging Status:
Green Light: Low battery
Red Light: Charging
Light off: Charged completely
II.Decrease the top black border(upward adjusting
for weight bar):Rotate adjusting stick on "3"
direction, then operate screen up and down by
remote control until the top black border is in the
right place.
Page 7
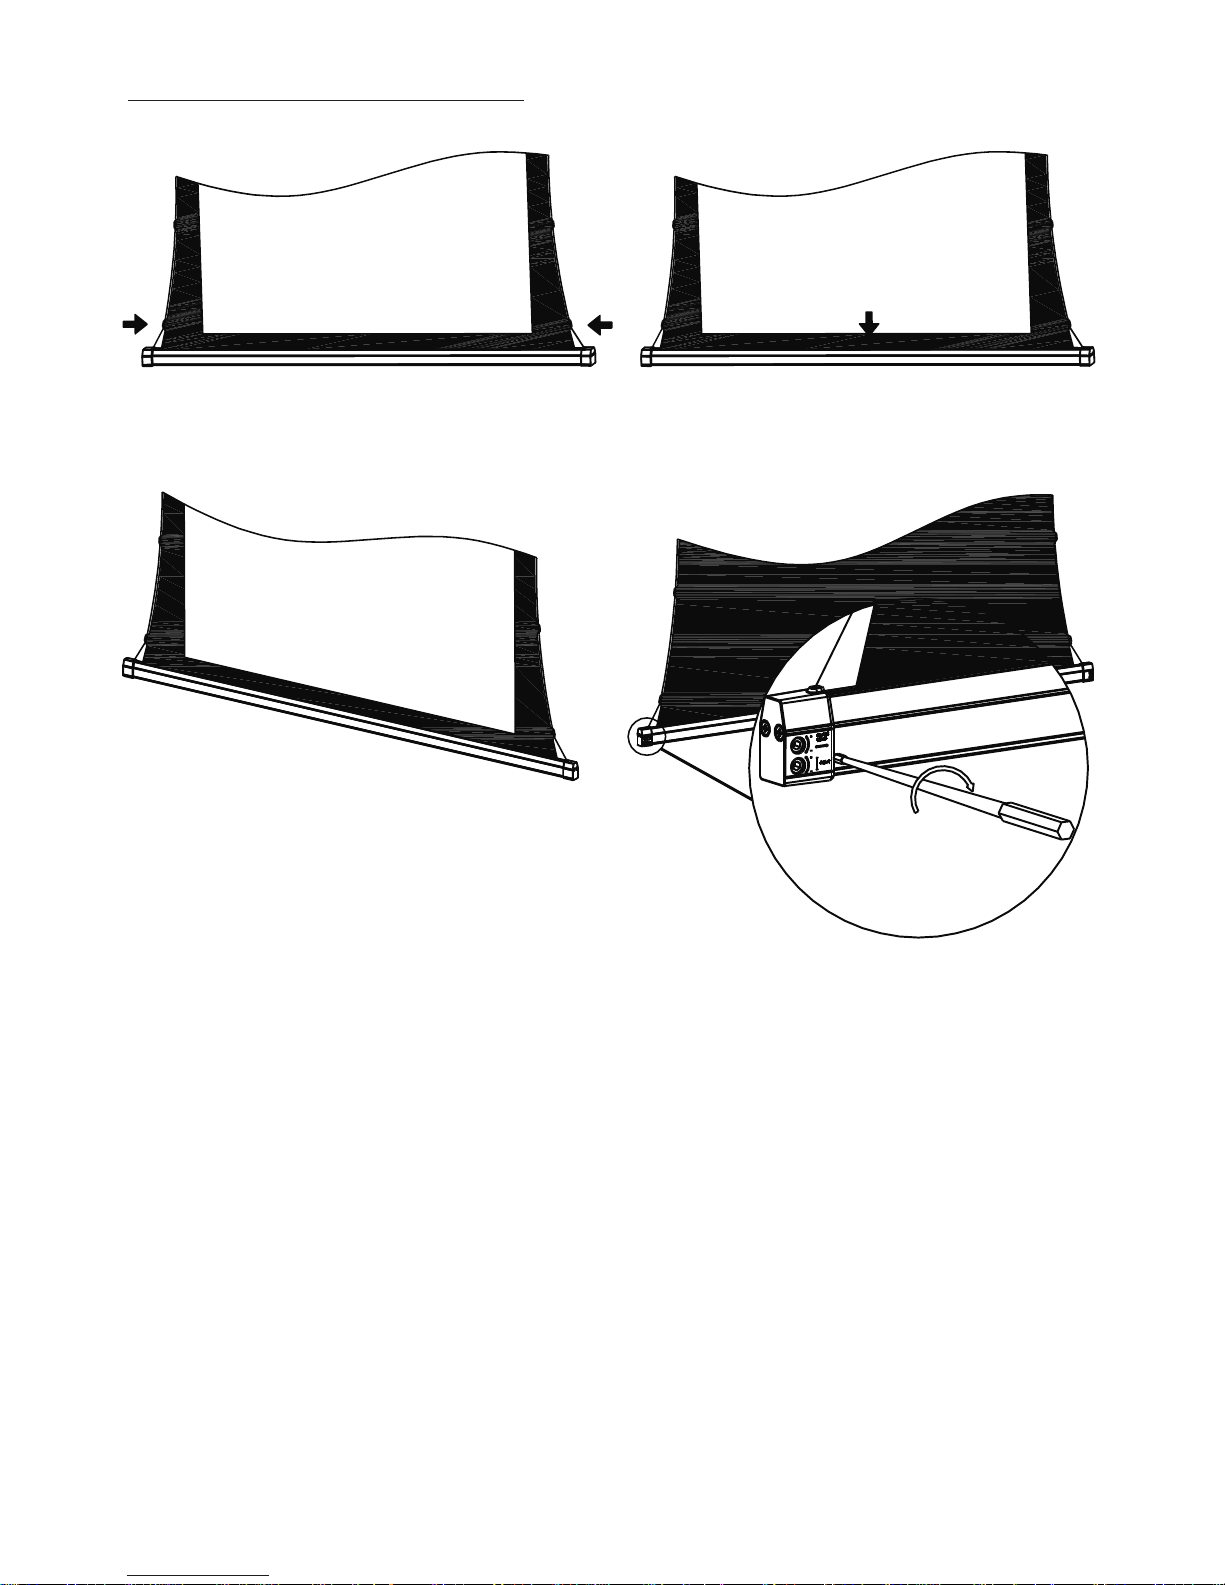
Screen Flatness
6
L/T: LEFT Tension
R/T: RIGHT Tension
BWT: Bottom Weight Bar
Page 8
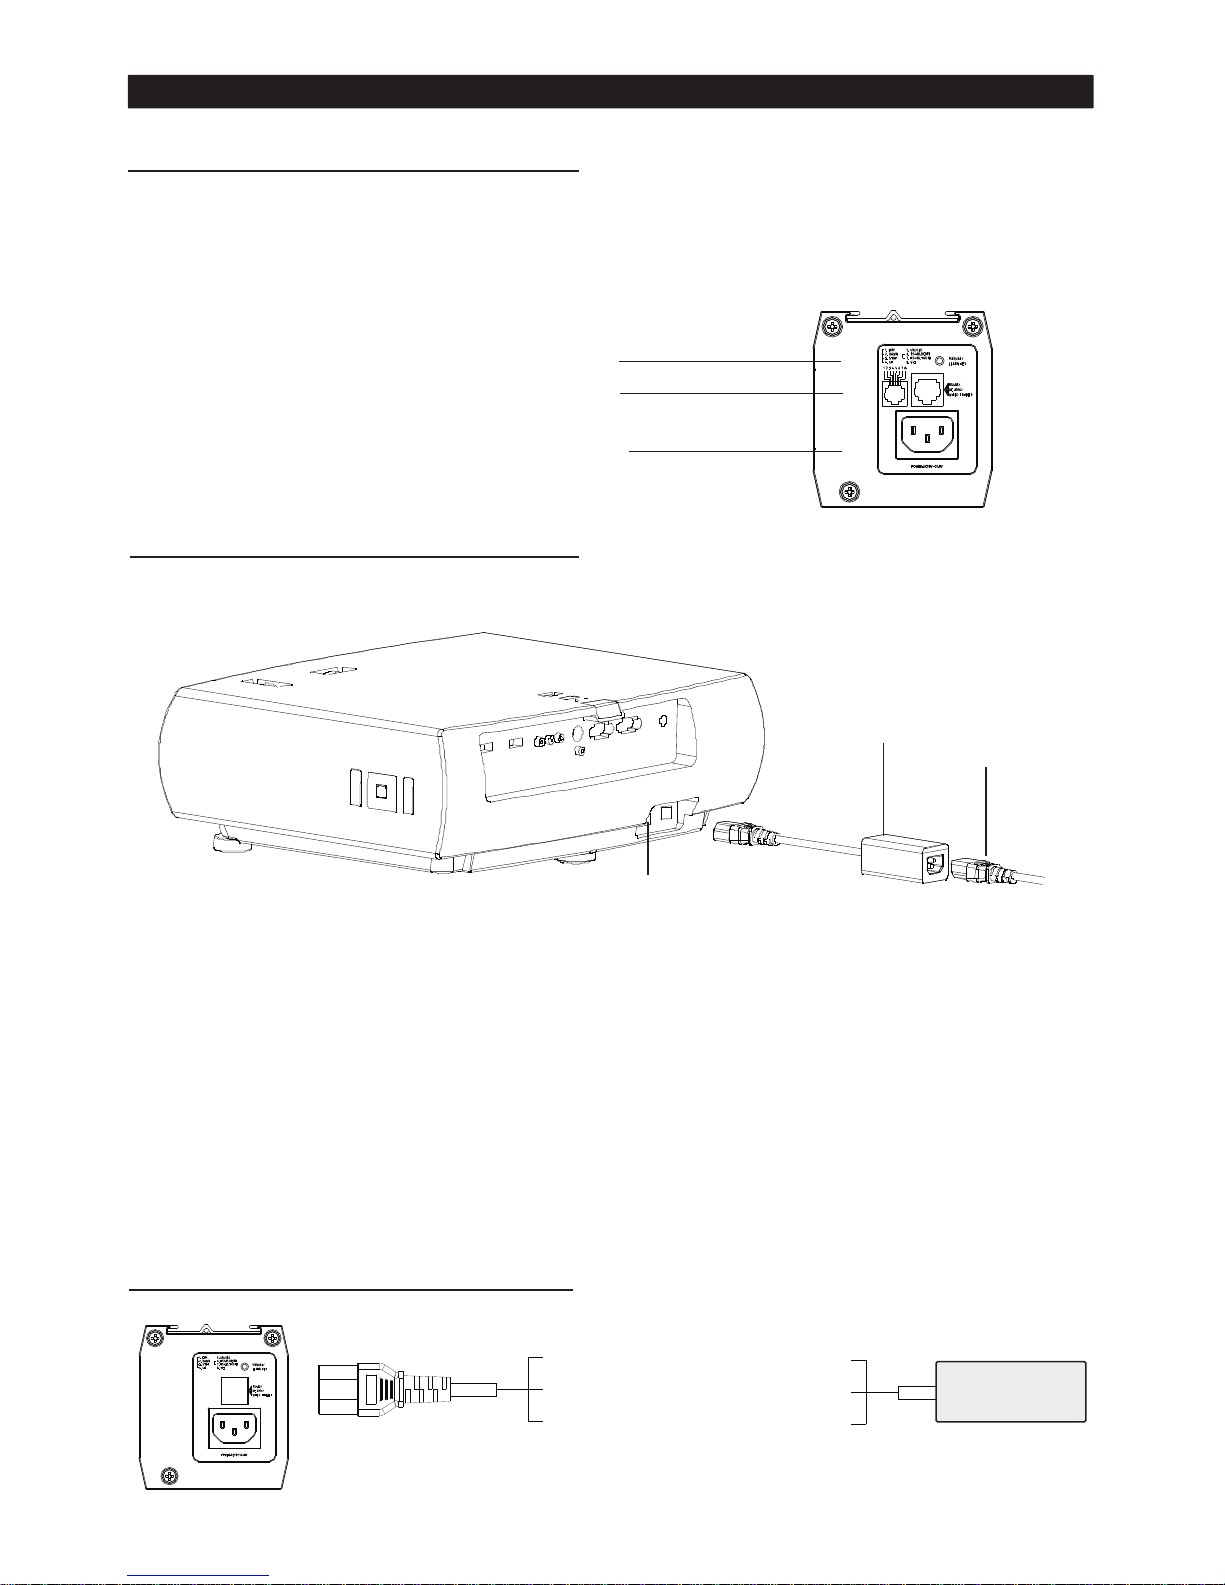
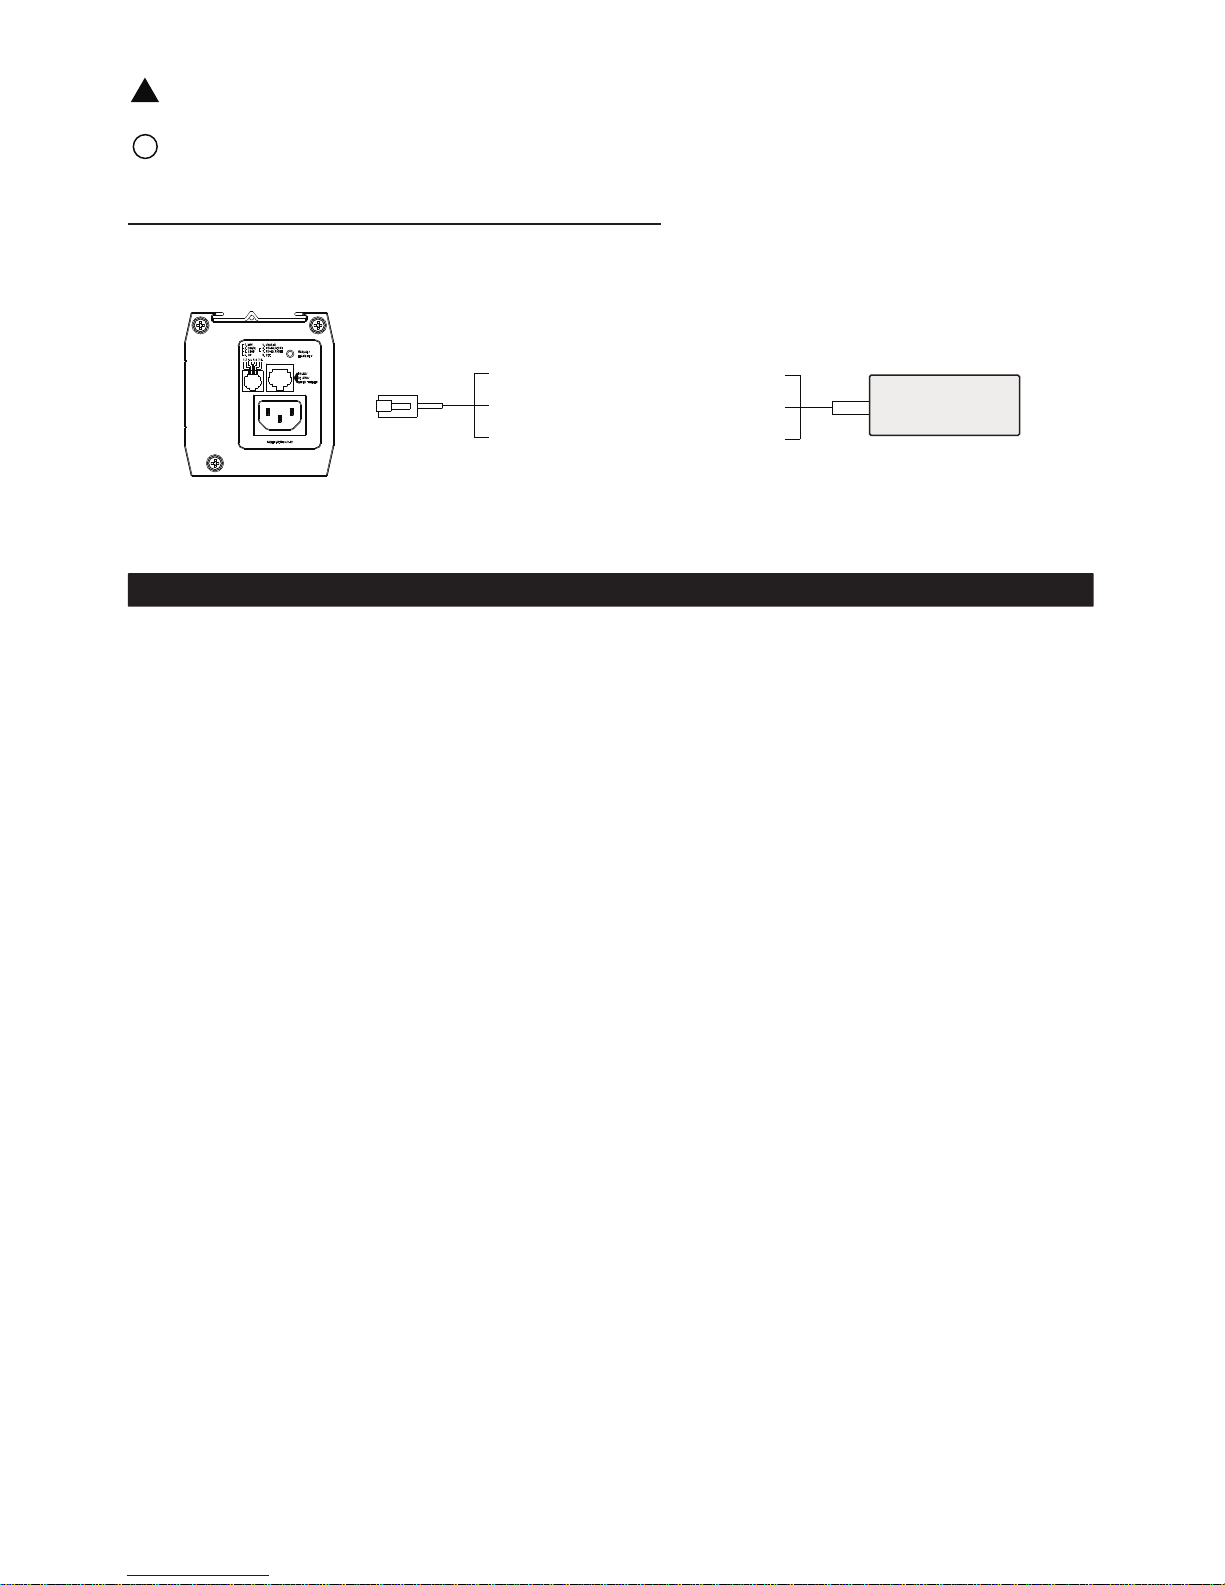
P O W ER J A C K
S Y N CH R O N I Z A T I O N
T R I GG E R
P R O J E C T O R
P O W ER P L U G
CONTROL METHODS
Learning button
DC/manual control port/RS485 port
AC port AC110V~240V
7
Blue(up)
Yellow and Green(down)
Brown(common wire)
AC central
control
868 MHz Inner Wireless Control
868 MHz inner wireless control system can be connected to RS 485 control , DC
central control (DC5V-12V)and manual control. This device applicable to
multivoltage(AC110V- 240V)
Synchronizer(optional)
AC Central Control Circuit Diagram
Code Learning:
Connect the Sync- Trigger with projector and power cable,then switch on.Press the
LEARNING KEY(on the end cap)for 4s then loose. The screen will automatically
going up and down once. Press the SET KEY on the Sync-Trigger, Screen
automatically up and down once while the LED LIGHT flashing, code learning is
completed.
Code Erasion:
Press the learning button at the end cap for 7 seconds, then press again, screen
automatically move up and down twice, original code has erased. Refer to point A in
page 4 to reset new code.
Page 9
8
FAULT ANALYSIS AND REMOVAL
Black(up)
Green(down)
Yellow(common wire)
DC central
control
DC Central Control Circuit Diagram
!
!
NOTE: For your safety, live line(L) control screen up and down, concentric line is
neutral line(N).
AC central control can't be connected to receiver board.
A. Press "UP", "DOWN" or "STOP" button on the remote handset, if the instruction
light fail to
response, connect your remote handset to an USB cable, then plug your cable
into a powered USB hub, docking station, or other accessory to recharge.
B. If remote handset can't learn the code, please delete the code and learn the code
afresh.(For detailed methods, please refer to Code Erasion in page 7.)
C. When screen can not work by remote handset, relay of receiver board has "click"
sound, please open end cap and check whether wiring is good or not, if wiring has
no problem, please replace motor. If the relay of receiver board has no response,
please replace receiver board.
D. When screen can't work with projector Synchronizer(optional), press the learning
button at the end cap of the screen, the screen will auto-matically up and down
once, press the SET KEY on the Synchronizer, check whether the LED LIGHT
flashing or not. If no response, please replace the Synchronizer.
Page 10
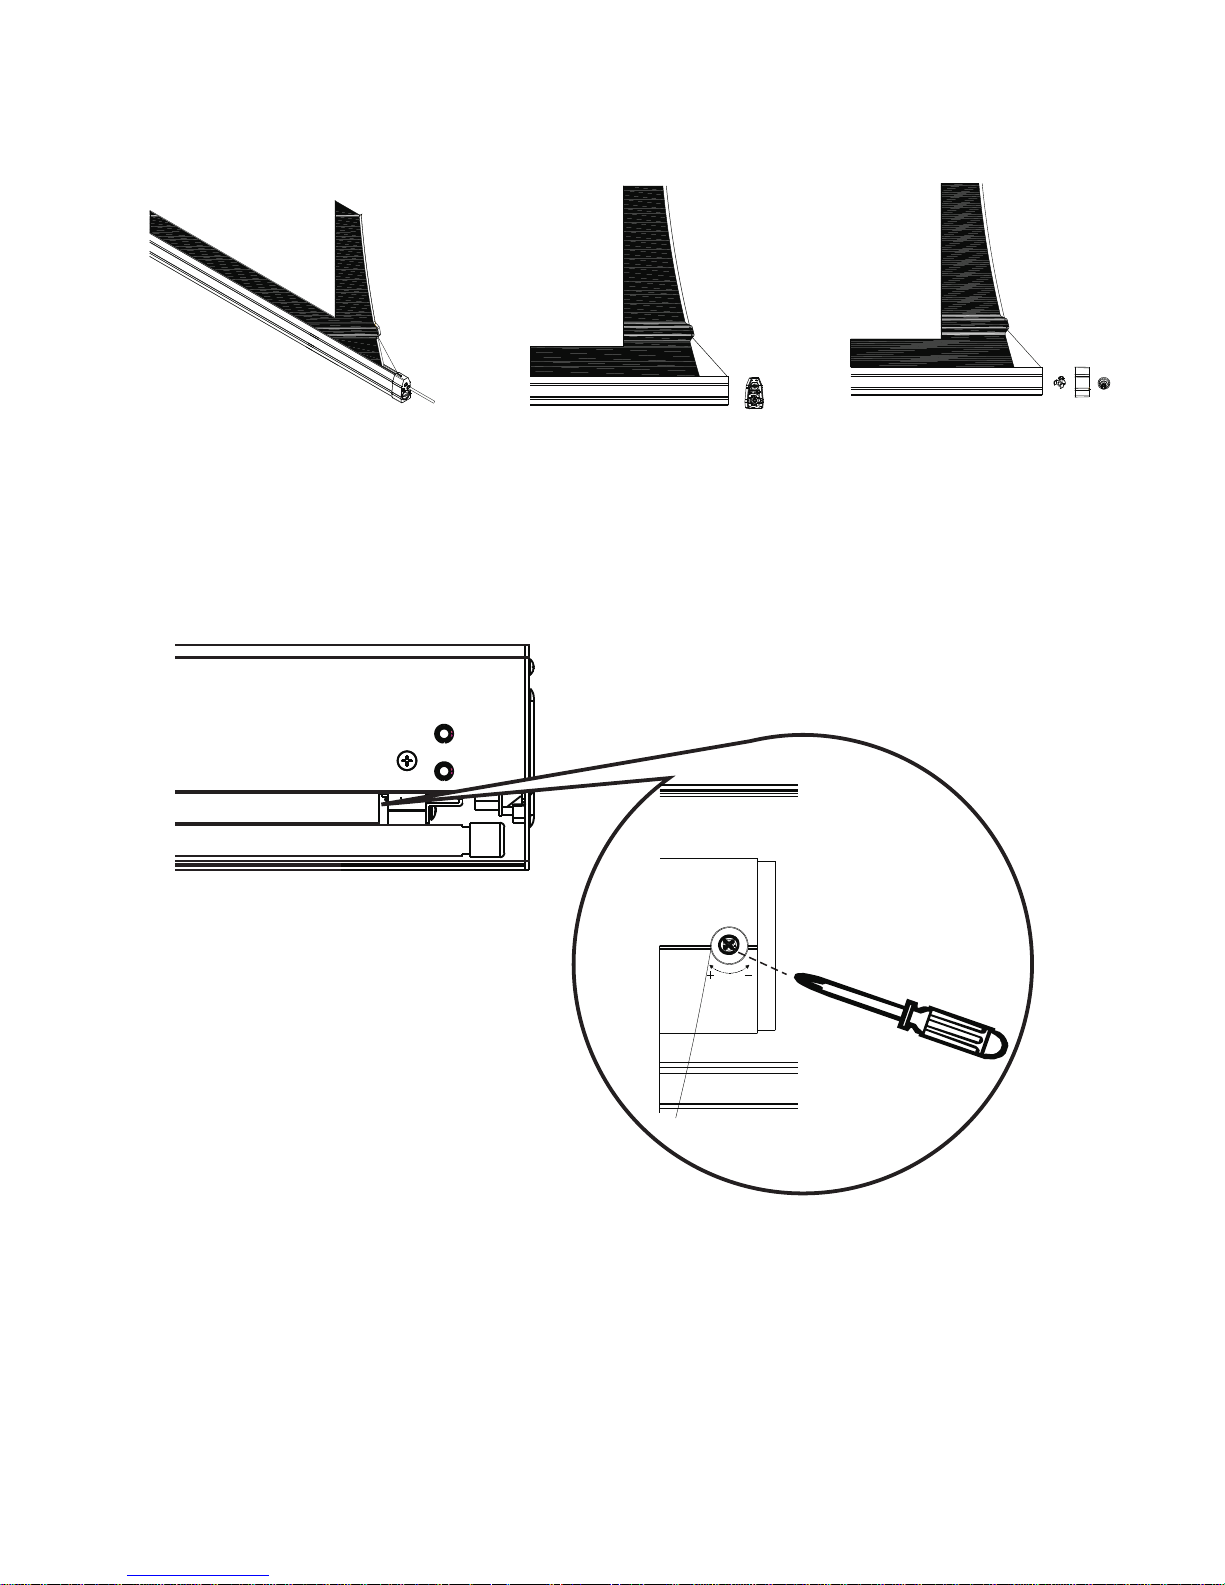
If the pull wire is broken in the using process, please deal with it as following:
A.If the lower end of pull wire is broken, please handle it as following:
Ⅰ. Remove the fixed
screw and the screw
of bottom weight bar ,
take the end cap of
weight bar down.
Ⅱ. Remove the limited
position screw and
related parts.
Ⅲ. Pull the knob out and
stay the wire again.
B.If the upper end of pull wire is broken, please stay the pull wire as following:
9
Get the screw out and
stay the pull wire again.
Page 11
 Loading...