

OWNER’S MANUAL
INSTALLATION AND OPERATION
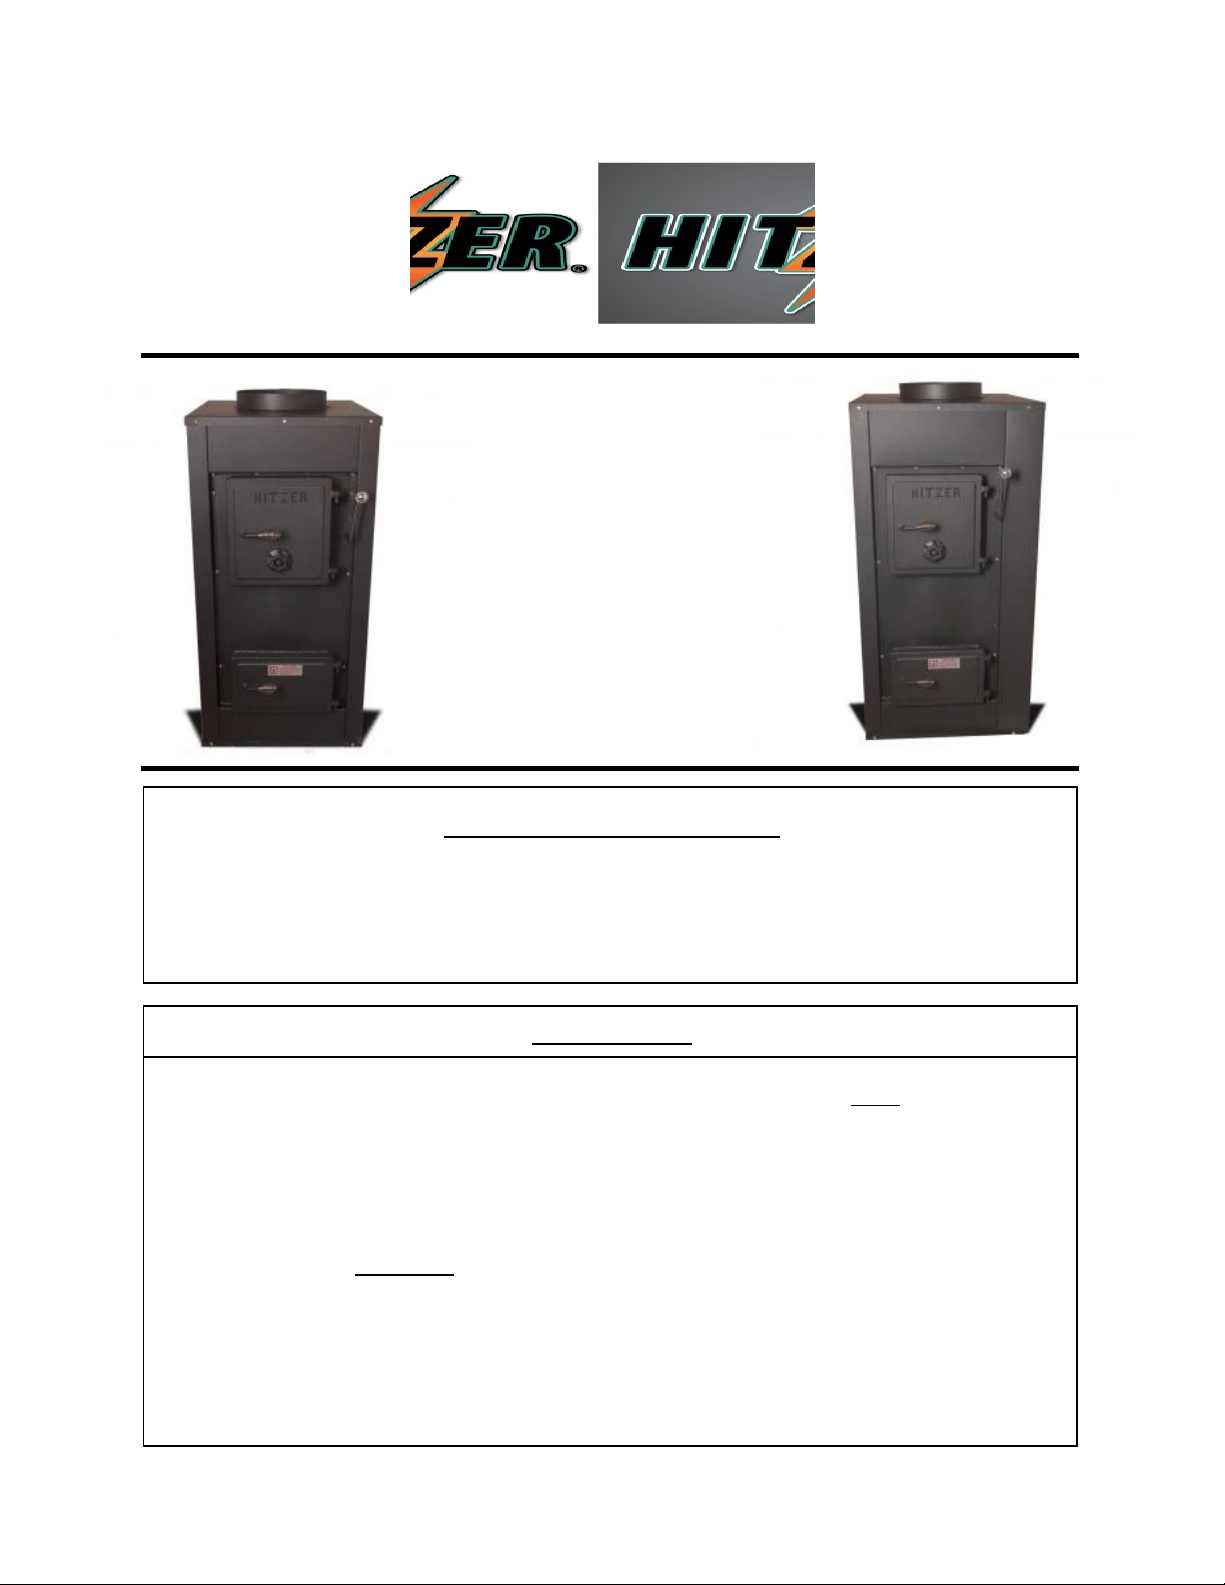
Model 55 Furnace
Model 82 Furnace
Model 55 Model 82
Save this Manual
· Operating Instructions and Maintenance Enclosed.
· Thoroughly Read and Understand Instructions.
· Always Leave this Manual with Stove Owner.
Warning
· Follow the instructions within this manual. If instructions are NOT followed, a fire
may result causing property damage personal injury, or death.
· Stove surfaces may become HOT while in operation. High stove temperatures may
ignite clothing or flammable material.
· For use of solid fuels, wood or coal only. Other fuel sources can result in poisonous
gas emission and/or fire.
· Carbon Monoxide and Smoke Detectors in home must be present and working
properly.
Page 1

Table of Contents
I. Welcome to the Hitzer Family
A. Safety Notice
II. Flue System
A. Existing Masonry Flue System
B. Factory Built Systems
C. Flue Requirements
1. Flue Size
2. 10 foot / 2 foot / 3 foot minimum rule
3. One Appliance per Chimney
III. Location and Installation
A. Typical Installation
B. Floor / Wall Protection
C. Clearance Reduction
IV. Basic Rules and Regulations for Safe and Efficiency Operations
A. Cautions
B. Local Codes
C. NFPA 211
V. Start Up, Operations, and Maintaining Appliance
A. Start Up
B. Basic Instructions
C. Ash Removal
Page 2

I. Welcome to Hitzer Family
Hitzer Inc. welcomes you to a proud and unified team of Hitzer stove owners. Thank
You for your recent purchase of a Hitzer Furnace. We can assure that your Hitzer stove
has the finest Swiss Amish Craftsmanship. The Hitzer Furnace is built with premier
quality materials to ensure safety, durability, and performance. These are all top
priorities in the Hitzer line of products.
We would like to personally thank you again and welcome you into our continually
growing Hitzer Family. We wish you and your family an extended amount of warmth and
comfort, provided by your new Hitzer Stove. Thanks for choosing Hitzer as “Our Stoves
Make Warm Friends.”
Safety Notice
Safety Notice: If this Hitzer Stove is not properly installed a house fire may result. For
your safety and to reduce the risk of fire, follow the installation instructions carefully.
Failure to follow these instructions may result in property damage, bodily injury, or even
death. Contact your local building inspector or fire officials about the need for a permit,
restrictions, or installation inspection required in your area. Save these instructions for
future reference.
UL Tested/Label: Follow the information and clearance charts located on each Hitzer
Stove Model. These stoves have been tested to UL 391-2006, approved, and labeled
on the rear of each stove.
It is strongly recommended to have this Hitzer Stove installed by an educated and
certified installation professional. Please refer to a NFI (National Fireplace Institute)
Certified Installer for your installation needs and questions. Locate an NFI professional
at www.nficertified.org.
II. Flue Systems
Page 3

Masonry Flue System: A good chimney is essential. A masonry chimney must be built
with a low heat masonry material. It is important to make sure that the masonry
chimney is structurally sound and on a solid foundation. The masonry chimney must
have a liner installed with in the chimney construction. An unlined chimney is not safe
with solid fuel systems, and may result in a house fire. The liner may be constructed
with a structurally sound clay liner or a stainless steel liner. If using an existing masonry
chimney, be sure to have the chimney examined and cleaned by a chimney
professional. The structural foundation of the chimney and liner is important. If existing
clay liner is cracked or damaged, it is recommended to re-line the chimney with a
stainless steel liner. Be sure the masonry chimney is compatible with the local building
codes and requirements. It is important to note that you can only have one solid fuel
appliance per chimney, and it is not permissible to connect the Hitzer Stove to a
chimney that is servicing another unit.
Factory Built System: A good chimney is essential. The factory built chimney must be
a Class A High Temperature UL tested chimney UL 103 HT. It is required for this Class
A chimney to be listed and labeled under the UL standards. If using an existing factory
built Class A chimney it must be inspected and cleaned by a certified chimney
professional, before use. With Factory Built Chimneys clearances and distance
requirements are required per chimney style. Be sure to follow the manufacturer’s
clearances and regulations. It is also important to abide by the rules and regulations of
local jurisdictions upon chimney installation. Like masonry chimneys, you can only have
one appliance per chimney, and it is not permissible to connect the Hitzer Stove to a
chimney that is servicing another unit.
Flue Requirements: It is required to have your chimney inspected and cleaned by a
certified chimney professional before Hitzer Stove installation, and at least twice
monthly during the heating season. If material has accumulated, it should be removed
immediately to reduce the risk of a chimney fire. If a chimney fire does occur the fire
department should be called immediately and the draft controls should be closed on the
stove. It is also required to have a chimney that is built according to the manufacturer’s
specifications and meet local building codes.
Flue Size: The proper flue size is very important. The proper flue size is essential in
order to have the correct amount of draft required to operate the Hitzer Stove. The
diameter of the flue size including chimney liner should never be less than the diameter
of the flue exhaust collar on the Hitzer Furnace. The flue size for the 55 furnace should
be a minimum of 6 inches in diameter. The flue size for the 82 furnace should be a
minimum of 7 inches in diameter.
Flue Size (Continued): The flue size also has a maximum size of inches in order to
sustain the desired draft. For an interior chimney the flue and chimney liner size
cannot be larger than 3 times the square inches of the flue exhaust collar on the Hitzer
stove. For an exterior chimney that has at least one side exposed to the exterior of the
house the flue and chimney liner cannot be more than 2 times the square inches of the
flue exhaust collar of the Hitzer Stove. Also keep in mind the warmer the chimney is the
better the draft.
Page 4
Model Flue Size (Sq. Inch) Minimum (Sq. inch) Maximum (Sq. Inch)Int/Ext
55 FA 6” 28 sq. in. 6” 28 sq. in. 84 sq. in. interior
55 FA 6” 28 sq. in. 6” 28 sq. in. 56 sq. in. exterior
82FA 7” 38.5 sq. in. 7” 38 sq. in. 115.5 sq. in. interior
82FA 7” 38.5 sq. in. 7” 38 sq. in. 77 sq. in. exterior
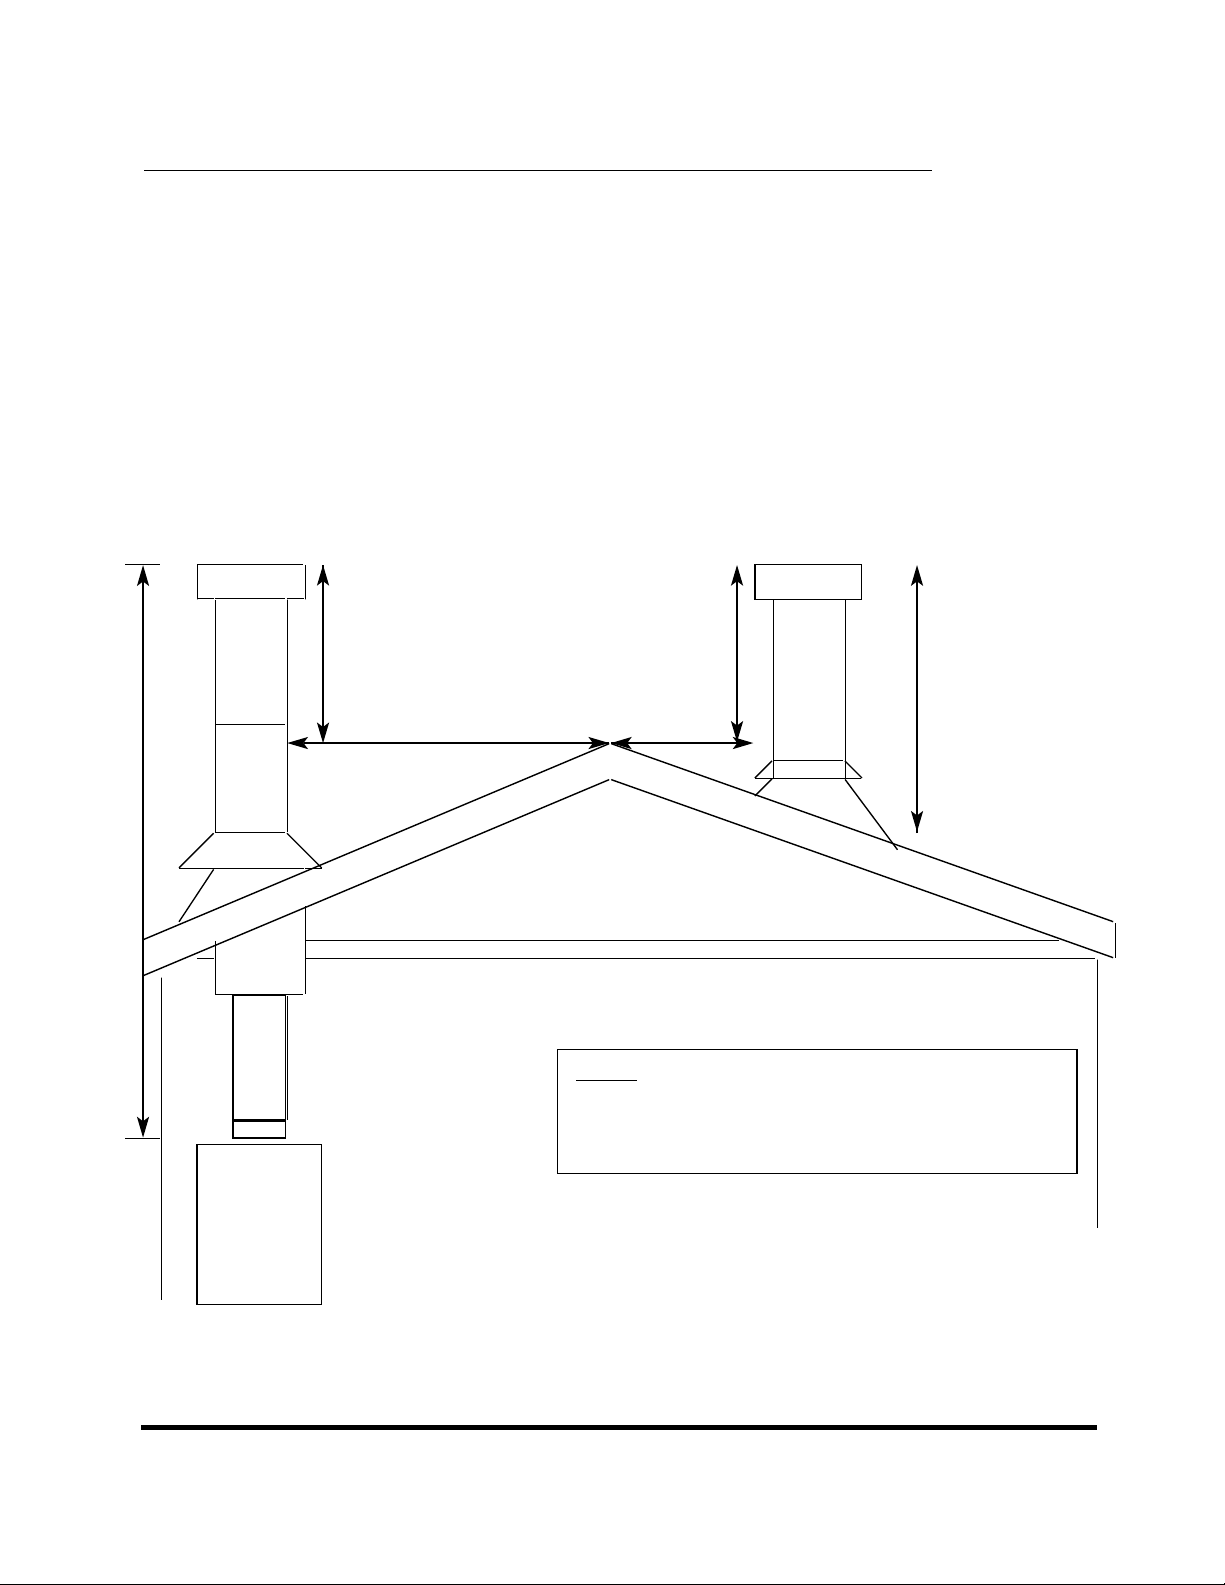
Chimney Height Requirements: The minimum height of a chimney system for the
Hitzer Stove is 15 feet. The chimney must exceed the roof of a house a minimum of 3
feet at any point of exit. In pitched roof installation the chimney must be 2 feet higher
than anything within a 10 foot radius of the chimney. It is important to have a chimney
draft of .03 - .06 It is required to abide by the manufacture’s instructions on class A
chimney’s as well as local building codes.
Note: All illustrations are for design purposes
only.
Actual installations may vary.
Illustrations are not drawn to scale.
III. Location of Stove and Installation
Page 5

The location of the stove is very important for optimum stove performance as well as
safety assurance. When searching for the location of the stove be sure to strictly follow
manufactures guidelines, clearance to combustible material requirements, local building,
and fire codes. Failure to follow manufacture’s instruction and local jurisdiction codes
may result in bodily injury, property damage, fire, or death. Locate the stove where
there is sufficient air supply for proper operation to occur. It is vitally important to locate
the stove next to existing forced air furnace as well as next to the chimney. The closer
placement to these two items the better the stove will perform, and achieve maximum
heat flow. The longer the chimney connector pipe (stovepipe) and farther away the
stove is from the chimney the less performance is achieved from the stove. Please
consider the construction and layout of the home to be heated and make placement of
the stove to achieve maximum heat benefit produced by the stove.
It is mandatory to abide by clearance to combustibles regulations provided by the Hitzer
Stove Manufacture. Failure to abide by the clearance requirements may result in a fire.
Clearance to Combustible Material: Floor Protection
Unit to Side Wall: 28” Front: 16”
Unit to Back Wall: 28” Side: 8”
Chimney Connecter to Back Wall: 18” Side: 8”
Chimney Connecter to Side Wall: 39” Rear: 8”
The installation of the Hitzer Stove Furnace is a vital part to performance and safety.
Requirements in regards to installation:
· Only one appliance is to be used per chimney, and cannot have multiply appliances per
chimney.
· Flue must be the same size as stove flue collar or within requirements of flue size
maximums (see page 5).
Page 6

· Chimney connector pipe (stove pipe) must be made of at least 24 gauge metal
U.L. tested pipe and be attached with crimped ends facing the stove. A minimum
of 3 screws is required at each connection point.
· Masonry or manufactured thimble must be longer than the thickness of the wall
and does not intrude into chimney more than 2”.
· Thimble may be constructed of approved clay liner thimble tested and labeled.
With a 12” non-combustible clearance zone on each side of thimble. Please use
NFPA 211 instructions and requirements in regarding thimble information.
· Thimble may be a manufactured thimble or class A chimney pipe. A
manufactured component must be installed with listed components accessories
and meet manufacturer’s specifications.
· It is required to have thimble clearances to combustible material as required by
manufacturer and NFPA 211.
· NFPA 211 codes must be followed and an 18” clearance to combustible material
is required for chimney connectors.
· At least 2” clearance of fireproof material is required for protection through the
wall thimble of Class A insulated chimney pipe and follow manufacturers
specifications.
· A protective and UL listed and labeled floor pad must be used if placed on a
combustible floor material. This protective floor pad must have an insulating
factor of K-0-84. A solid non-combustible material such as brick or concrete
does not require an additional pad.
· DO NOT install in a garage.
Connecting Stove to Chimney: Connection of stove to the chimney should be
made as direct as possible. Not recommended to use more then 2 elbows for
venting. The pipe connecting the stove to the chimney should be at least 24 gauge
single wall pipe. Thicker gauges and double wall pipe may be used. A ¼ inch slope,
back toward the stove, per foot of horizontal run is required. This allows any
condensation forming in the pipe to flow back toward the stove. The connection pipe
should be installed so the upper pipe fits inside the lower pipe. Horizontal run pipe
should have the seam turned up. Note the point at which the flue passes through a
wall to the chimney. This penetration should be made with a class A chimney pipe
and used with the listed proper accessories according to manufacturer’s instructions.
Chimney connector (stove pipe) CANNOT pass through a ceiling, wall, concealed
space, or enter the chimney. Three screws must be attached at each connection
point of the chimney connector. When the Class A chimney pipe connects to the
masonry, it must be cemented to the chimney, or a thimble must be connected to the
chimney and the pipe should be tightly inserted into the thimble without cementing.
WARNING: FIRE RISK
Follow Chimney Connector Manufacturer’s
Instructions for Proper Installation
Page 7

ONLY use connector within the same room between
appliance and ceiling or wall
Chimney Connector shall not pass through:
attic or roof
closet or concealed space
floor or ceiling
Typical Installations
Below are typical ways of approved installation formats. Note: these illustrations reflect
typical installations and are for design purposes only. Illustrations and diagrams are for
informational purposes only. These diagrams are not drawn to scale. Actual installation
procedures may vary
NOTE: It is always best to run the supply duct up. The supply duct must be
constructed of material with a minimum 250° temperature rating. In the case of a power
outage the stove can still be utilized. With the supply duct up, this will allow gravity heat
to still rise into the system. The plenum on the stove must be constructed of metal.
Page 8

Page 9

Typical Wrong Installation
Do not have supply hot air flow downward as this will not allow the Hitzer Furnace to
operate properly without electricity
Do not have the supply air flow back into the blower of existing oil or gas furnace. This
will damage the existing furnace controls and/or void any warranty.
Do not have hot air from gas or oil furnace flow downward into the Hitzer Furnace and
flow out the Hitzer Furnace to existing duct work.
Air Duct Calculation Chart
Page 10

It is important to have the correct size of duct work that corresponds with the Hitzer
Furnace in order to achieve maximum performance of the Hitzer Stove. The 82 FA can
be equipped with a 960 CFM Blower, and the 55 FA can be equipped with a 460 CFM
Blower. In order to achieve maximum performance and heat, it is important to make
sure the duct work is sized properly and not too large for the blower assembly. If the
duct work is too large the Hitzer Furnace won’t achieve full potential. NOTE: These
calculations are based on a .10 static pressure.
Supply Duct Size Shape Approximate Capacity(CFM)
6” round 120
8” round 240
10” round 420
12” round 680
8”x12” rectangle 480
8”x16” rectangle 700
8”x 20” rectangle 910
8”x 22” rectangle 1000
8”x 24” rectangle 1200
Note: Return duct should be 12% larger than the supply
Floor/Wall/Ceiling Protection
Floor: A protective and UL listed and labeled floor pad must be used if placed on a
combustible floor material. This protective floor pad must have an insulating factor of K0-84. See figures on page 6.
The floor protection must be placed underneath the stove and extend at least 8 inches
on each side of the stove and 16 inches from the front fuel door of the stove. See
figures on page 6.
The floor protection must also be placed underneath the chimney connector (stove pipe)
and extend at least 2 inches on either side of the chimney connector.
If the floor surface is constructed of non-combustible material with a K value of 0-84,
such as a concrete floor, masonry, marble, or ceramic tile then a protective floor pad is
not required.
Wall/Ceiling: Wall/Ceiling protection must be place on the wall or ceiling if chimney
connector pipe is less than 18 inches away from combustible material. The clearance
reduction chart must be followed (See Figure Below) for the required percentage
reduction per non-combustible protection.
Page 11

Clearance From Combustibles Reduction Chart:
Type of Protection As Wall Protector As Ceiling Protector
a.)3 ½ ” Masonry Wall
no ventilation 33% ----
b.)1/2 ” noncombustible
insulation board over 1”
glass fiber or mineral
wool batts, no ventilation 50% 33%
c.)Minimum 24 gage sheet
metal spaced out 1” 66% 50%
d,)3 ½ masonry wall spaced
out 1” 66% ----
e.)1/2” noncombustible wall
spaced out over 1” 66% 50
NOTE: After reduction of listed clearances, clearances shall not be less than 12
inches to combustible walls and not less than 18 inches to combustible ceiling.
IV. Basic Regulations for Safe Operations
Standard Cautions:
CAUTION- Hot Surfaces WARNING-Risk of Fire
-Keep children away Do NOT operate with fuel or ash door open
-Do not touch during operation Do NOT store fuel or other combustible
material within marked installation clearances
DANGER-Risk of Fire/Explosion
-Wood/Coal Only
-Do NOT burn garbage, gasoline, Do NOT connect this unit to a chimney flue
oil, or any other flammable liquids serving another appliance.
CAUTION WARNING
Use caution when opening loading door. Have chimney inspected. The chimney
Avoid opening loading door rapidly. This is a very important part of your heating
could cause flame to flash out door. This system. It must be the right size,
occurs when there is unburned gas at the properly constructed, and in good
top of the fire box. When the door is condition. Chimney must be at least 15’
opened, oxygen combines with gases high and exceed the roof a minimum of
and ignites. 3 feet.
WARNING-Risk of Fire WARNING-Over Fire Unit
-Comply with all minimum clearances to Do NOT over fire your unit.
Page 12

combustibles as specified. This will cause warping of fire box parts,
-Failure to comply may cause fire. damage the stove, and void all warranty.
Local Codes:
All local codes should be strictly followed and inspected by local officials. Please follow
local building codes, manufacture codes, and fire codes. Local codes vary depending
on location and regulations. Communication and inspection in accordance with local
building and fire officials must be present and installation must successfully pass the
local professional inspection.
NFPA 211:
Installation procedures must be followed and required with strict correlation with NFPA
211.
V. Stove Operation, and Maintaining Appliance
Start up:
After installation has occurred by a certified professional and local building inspection
are completed and passed, stove ignition may precede. Make sure chimney is clean
and clear upon start up. Check the stove to make sure all parts are correctly positions
and functioning, as they may have been moved around during the installation process.
Once this has occurred, you may now begin to build a fire in your Hitzer Furnace.
When setting up the stove with blower and filter it must be assembled together. The
blower box must be fastened to blower flange on back of the stove. When using filter(s)
place 20 x 20 x1 filter in at least one, preferably two, of the sides of the removable
blower filter box sides. Remove the metal sides and slide the 20 x 20 x1 filters in the
place of the metal sides. It is suggested when hooking cold air return straight to the
Hitzer Stove to cut a hole in the blower filter box side to the adequate return air duct
size.
Note: For the first fire in your new Hitzer Furnace, create a small hot fire to allow paint
to cure to the stove. This may create a slight odor as paint cures to the stove. Let this
small fire burn for at least 2 hours before you fully load the stove to maximum heating
potential. NEVER USE: gasoline, kerosene, charcoal lighter fluid, or any other type of
flammable liquid to start your fire.
Burning Wood:
Page 13

Begin by opening all air inlet draft controls to the fully open position. To start a wood fire
cover the whole grate area with newspaper and small dry kindling. Next light the
newspaper with a match or lighting device. Create a hot kindling fire by adding more
kindling the hotter and longer the fire burns. Once a good hot kindling fire is
established, proceed to add larger wood splits. Start with a couple log splits on top of
you kindling fire. As the fire progresses add more log splits until the fire box is full.
Over a span of time you should now have created a warm fire inside your Hitzer
Furnace capable of your heating needs. Once fire is at the desired temperature close
the air inlet drafts, to moderate the temperature desired. Continue to add wood when
the fuel supply decreases if continuous burn is preferred.
Burning Anthracite Coal: (See Attached Burning Coal Paper)
Begin by opening all air inlet draft controls to the fully open position. Create a hot
kindling fire that has high temperatures. Next, layer coal over the grate area layering
coal on the entire firebox grate surface. Allow this first layer of coal to begin to burn.
After the first layer of coal is burning successfully, add another layer of coal on top of
the first layer. Allow enough time for the second layer to burn successfully. Then add a
third layer of coal over the entire grate area. Once the third layer has successfully
begun to burn, you may now fill the grate area to the top of the fire brick. This creates a
deep bed of coal. When the coal is successfully burning you may now close the air
intakes down to moderate the temperature desired.
Basic Instruction:
In order for the fuel inside the furnace to burn properly it must have air flow for
combustion to occur. Air can enter the Hitzer Furnace in two ways.
1. The primary air for combustion enters through the draft air inlet box at the rear of the
stove. This air inlet is controlled by the Dial-Heat Regulator. The air that is drawn into
the stove flows up through the grate area and into the firebox from the bottom. This is
important for proper combustion to occur. With the Dial-Heat Regulator it will
automatically adjust itself to how much air it needs, to maintain the stove temperature
for the Dial-Heat Number setting. The higher the number the Dial-Heat Regulator is set
on the more air is drawn into the stove, creating a warmer fire.
2. The second air intake is located on the fuel door, via spinner knob. This air intake
insures complete combustion as secondary air enters through these intakes. This
secondary air mixes with unburned gases and completes the combustion process.
Direct Draft Damper:
In front of the fuel door is the operating handle for the direct damper. When this rod is
up the damper is open. This direct damper should normally be closed except when the
door is open for fueling. It may be suggested to leave the damper up and open at times
in the fall and early spring to help prevent creosote or soot. The direct damper’s
purpose is to reduce heat loss up the chimney.
Page 14

Adjusting Temperature or Control:
When the room temperature reaches the desired temperature, turn the control knob on
the draft regulator until the draft damper just barely closes. The heater should then
maintain a uniform temperature without further attention as long as fuel supply is
sufficient. Sudden changes in exterior temperature may make it necessary to turn the
control knob slightly toward warmer or cooler from time to time. We do not advise
turning the regulator more than one number a day as it takes a while for the house
temperatures to stabilize to the new stove temperature.
Ash Removal:
Ash removal is an essential part of the Hitzer Furnace Operation. Too much ash build
up can restrict the air flow, crippling the combustion process causing a weak fire or the
fire to go out. Too much ash build up may cause damage to the Hitzer Furnace and
warp the parts located within the fire box.
Ash Removal (continued):
Ash removal is essential when burning Anthracite Coal. Anthracite coal requires a clear
air flow up through the grate area and through the coal. This requires ash removal to be
quite frequent. It is recommended to remove ash with anthracite coal at least once
daily, and often times more frequently depending on the amount of coal used and the
exterior temperature.
When burning wood, ash removal is not quite as frequent, as the stove operates best
with a layer of ash on the grates. Ash removal is still essential! Too much ash can
cause damage to the Hitzer Furnace and warp the parts located within the fire box.
To remove ashes simply open the ash door. Shake the grates with the shaker handle.
Use short, fast, vigorous strokes. Watch the ash fall into the ash pan. Continue
shaking the grates until red hot coals fall into the ash pan about the length of each
grate. Close the ash door and let the ashes cool in the ash pan. Never let ash in ash
pan build up against bottom of grates. If left in this position the ability of the grates to
perform properly will dissipate because of the insulating properties of the ash. Leaving
in this position will cause the grates to warp and become unusable. Make sure grates
are never turned upside down (center rib facing upward) or in a vertical position causing
the fire to surround the whole grates. All of these situations will warp and destroy the
grates.
Once hot coals are cool and ash pan is full you can now safely remove the ash pan
from the Hitzer Furnace. Dump the ashes in a metal container with a lid, such as a
Hitzer Ash Tote, that is placed on a non-combustible surface. Replace the ash pan back
into the Hitzer Furnace for future ash removal.
CAUTION CAUTION
Never let ashes build up to grate level Never use anything but a metal
Page 15

from ash pan.This will reduce the life of grate. container to put ashes in.
CAUTION-Hot Contents
CAUTION-Hot Contents
Wear protective gloves when
removing ash, and emptying
ash pan.
Further Information:
You may also contact your Hitzer dealer or Hitzer Inc., for questions or more information
regarding stove installation and operation. Hitzer Inc.
269 E Main St.
Berne, IN 46711
(260) 589-8536
Page 16
 Loading...