

HiTi Digital 640Amphi Quick Start Manual

Quick Start
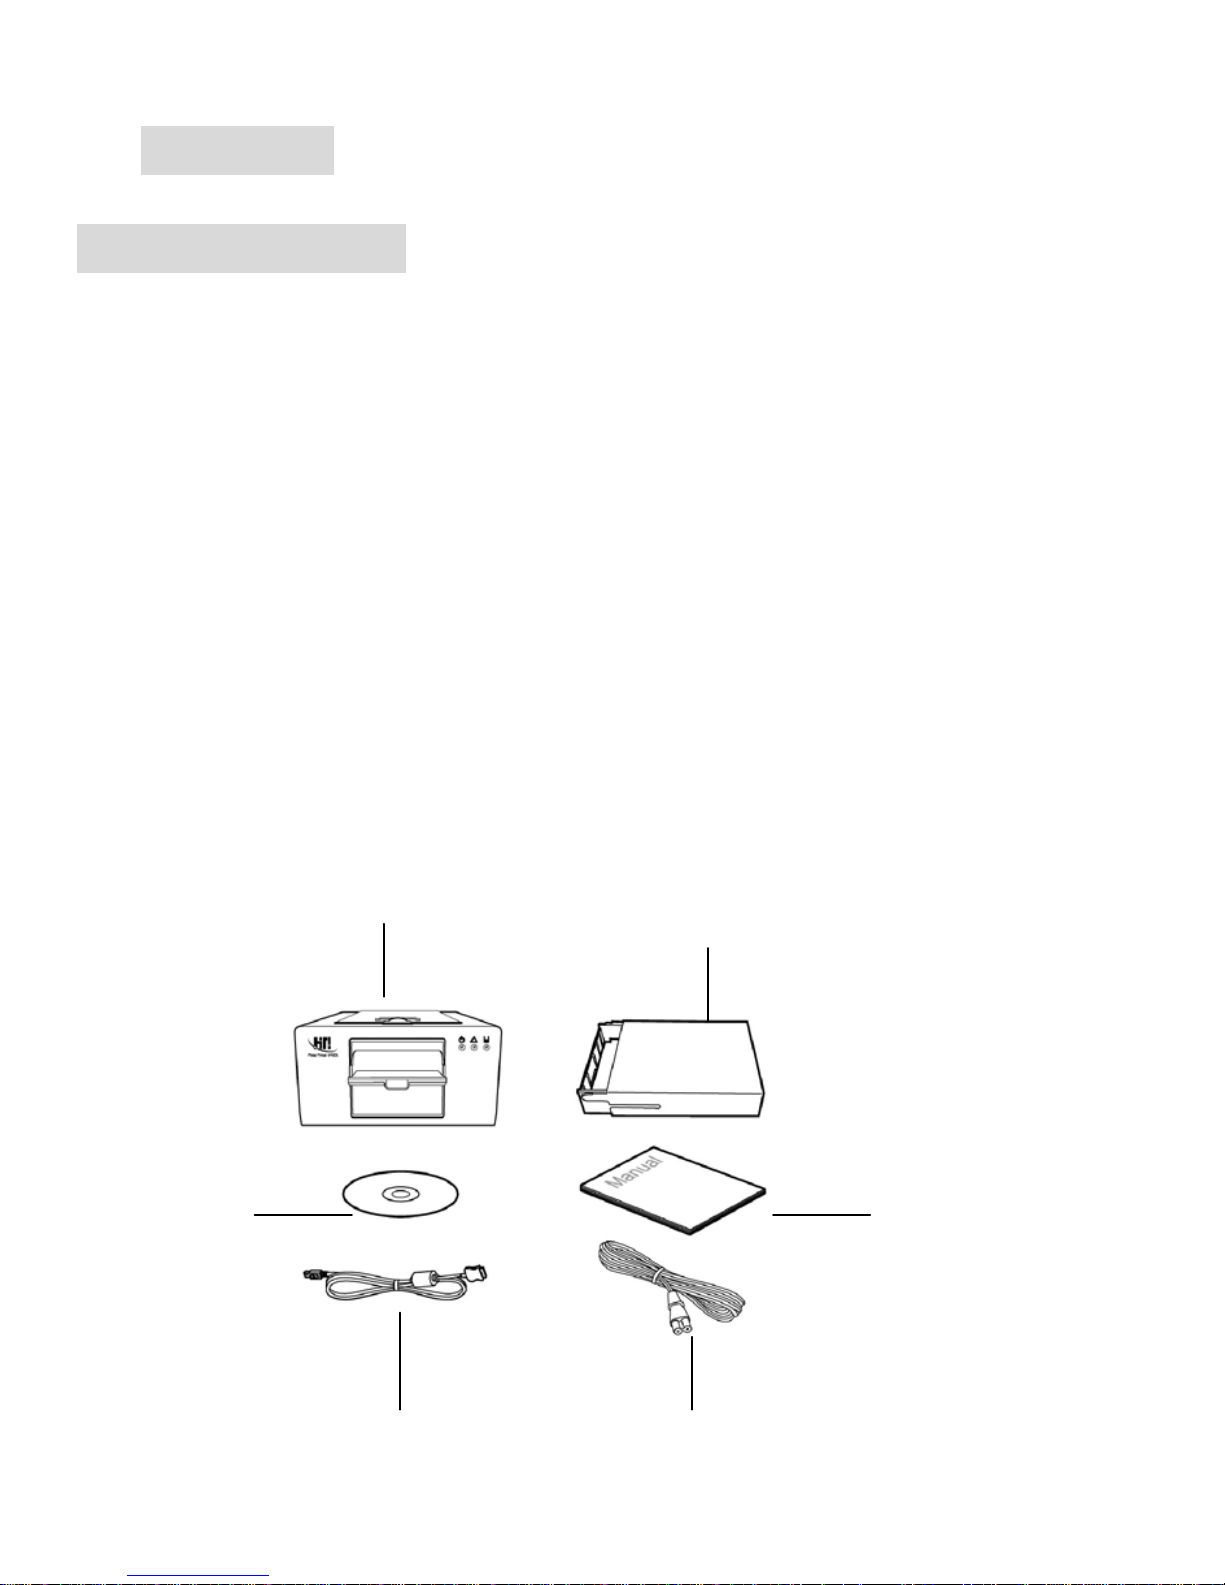
Contents in Carton
Setting Your Printer
Installing Ribbon Cartridge
Installing Card/ Photo paper
System Requirements
Installing Driver
Customer Service
Contact Information
About PhotoDesiree
Installing Software
User Interface
Printing Photo
Quick Start
Contents in Carton
Before you begin to install printer, please check you have the following
items.
HiTi Photo/ Card Printer 640Amphi x 1
Plastic Card Cassette x 1
Photo Paper Cassette x 1
Power Cord x 1
USB Cable x 1
CD (Windows Driver, PhotoDesiree, CardDesiree) x 1
Printer/ Software User Manual x 2
Trial Clean Kit (2 sheets clean paper) x 1
Warranty Card x 1
640Amphi
Plastic Card Cassette
Photo Paper Cassette
Power CordUSB Cable
CD
Printer/Software
User Manual
X 2
X 2
Quick Start
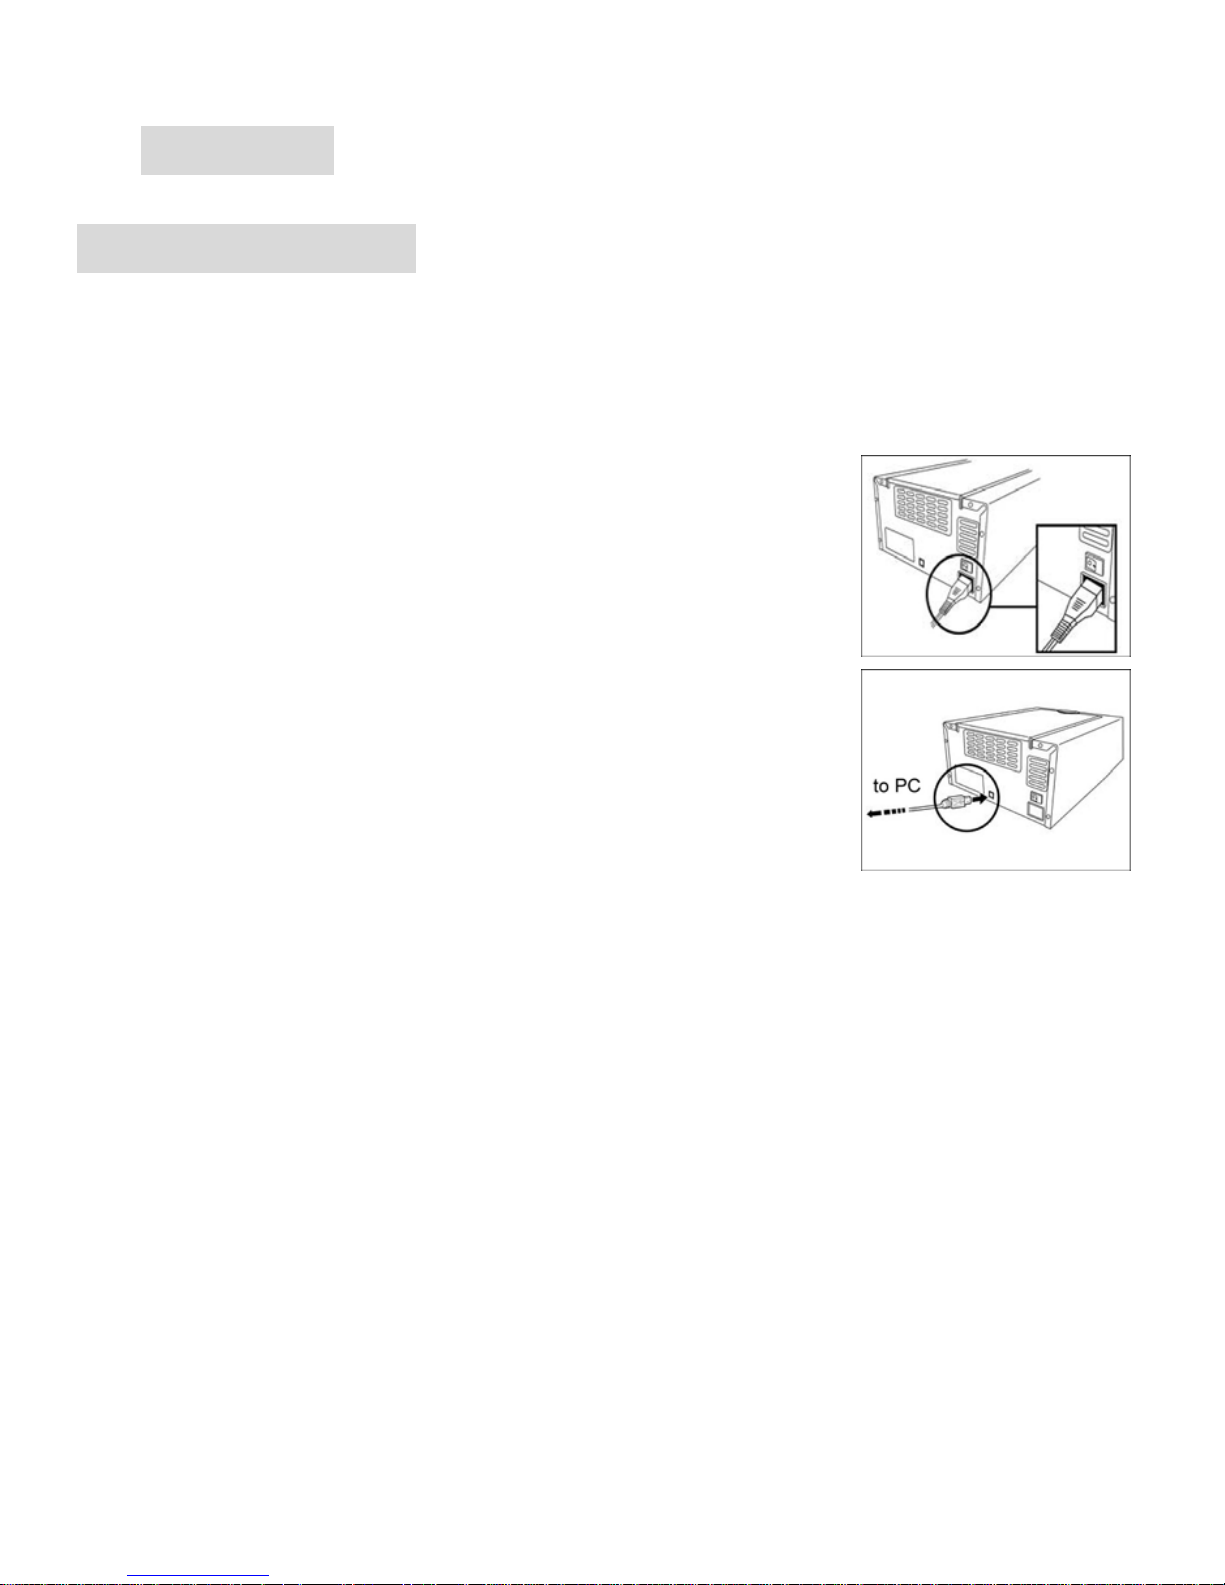
Setting Your Printer
You may setup HiTi 640Amphi printer in the following steps.
1. Connect the power cord to the printer.
2. Connect the printer to your computer using the
USB cable.
3. Insert the ribbon cartridge into the printer; please see P.XX for more
information.
4. Place photo paper or plastic card into the cassette; please see P.XX
for more information.
5. Turn the printer power switch on. The green LED will blink for 5
seconds and then stay on. Before you turn on the power switch,
please make sure the printer driver software is installed in your
personal computer. Please see P.XX for more information about
driver installation.
6. The New Hardware Found message dialog will appear on the screen
of your computer. Windows will begin to install the printer driver.

Notice!!
Please always turn the power switch off before connecting or
disconnecting the printer from the power source.
Quick Start
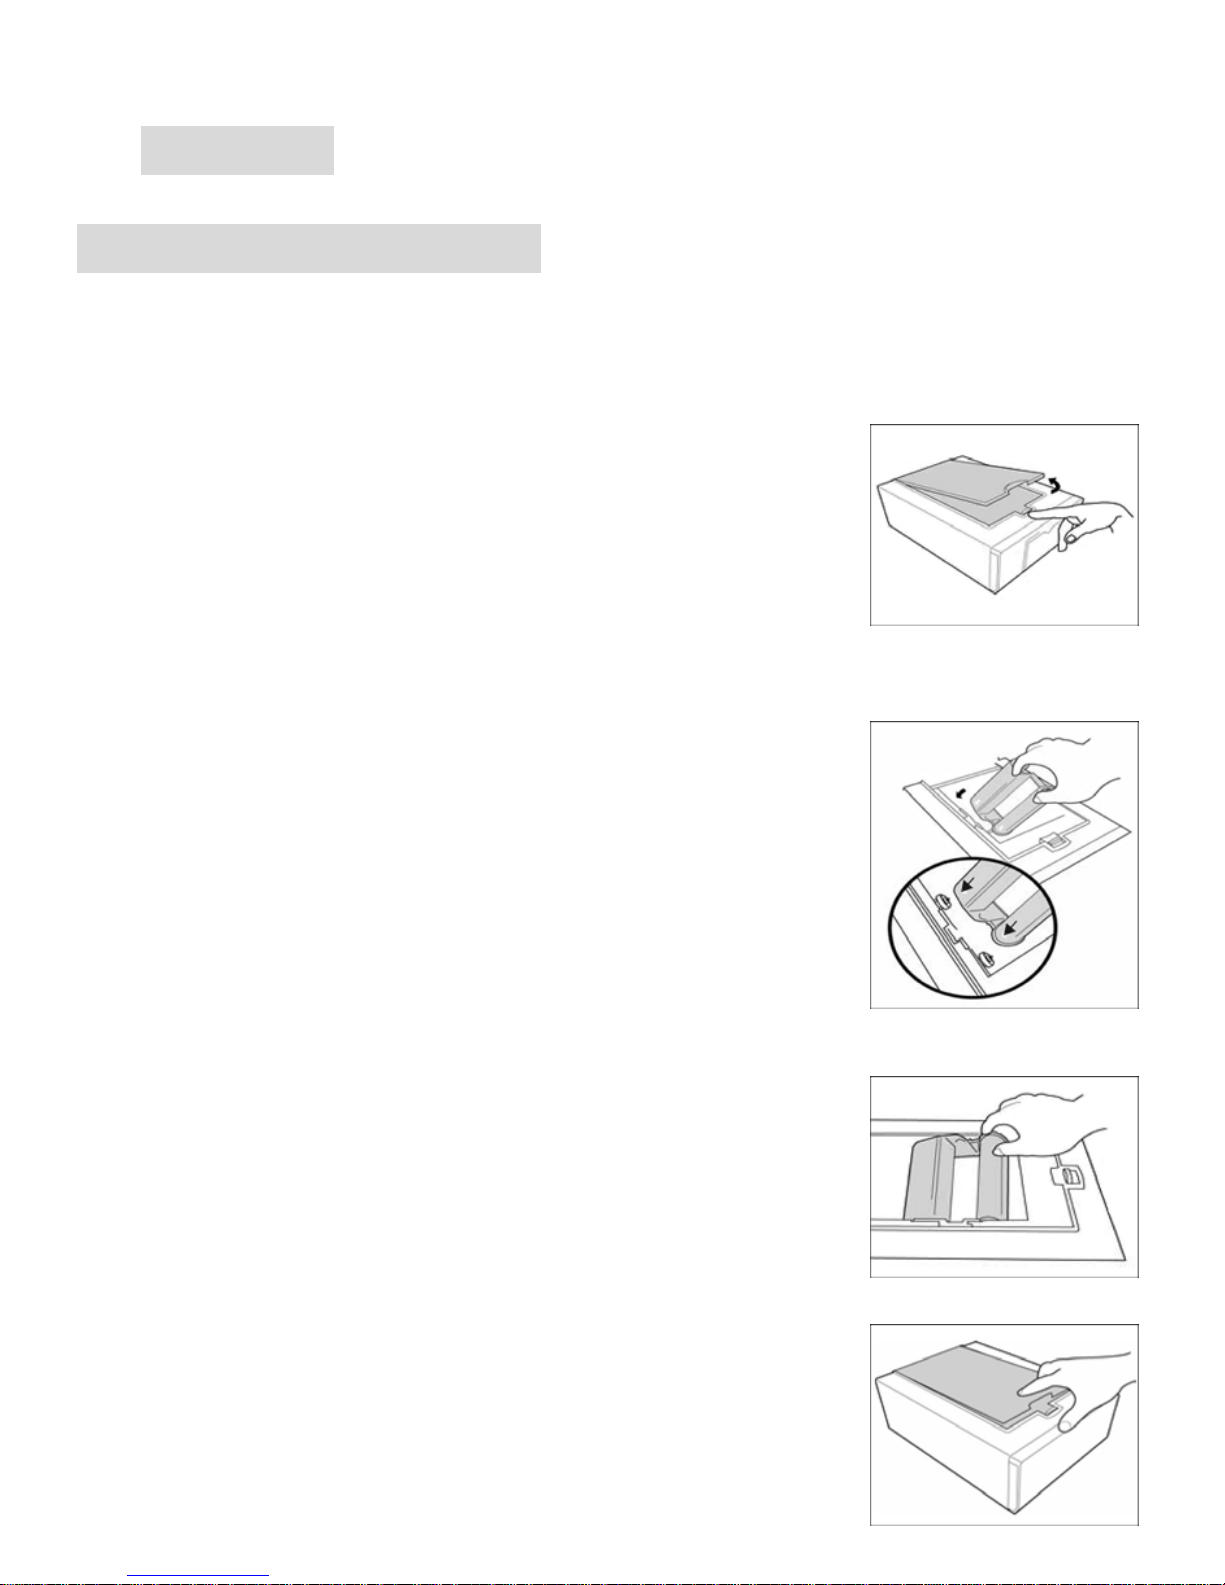
Installing Ribbon Cartridge
You may install the ribbon cartridge in the following steps.
1. Push the slider to open the top cover of the
printer.
2. Hold the ribbon cartridge as the figure illustrated.
Be sure to point the arrow sign towards the
left-hand side of the printer.
3. Insert the cartridge all the way into the printer
until it is properly seated.
4. Close the top cover.
 Loading...