

Page 1
USER MANUAL
The pictures, diagrams, and certain functions
described in this manual may differ from the actual
product due to different models
Visit www.hittusa.com for a revised user manual
or troubleshooting tips
1
Page 2

PREFACE
We express our sincere thanks for
purchasing our MP3 Player! Before
operating this MP3 Player, be sure to read
this user manual carefully. After reading it,
please keep it in a safe place for future
reference.
We reserve the right to make changes to
this MP3 Player and/or this user manual
without notice. Please visit our support
website www.hittusa.com
for additional
product information and/or updates.
NOTE: The pictures, diagrams, and certain
functions described in this manual may
differ from the actual product due to
different models.
2
Page 3

SAFETY AND GENERAL INFORMATION
READ THIS INFORMATION BE FORE USING
THIS MP3 PLAYER
A. Loud music may harm your hearing if
you listen to it for a long time.
B. New battery can reach its best
performance after it has completely
charged and discharged for two or three
times.
C. Please charge the new battery for no
less than 10 hours for the first three
times you are charging, then from the
fourth time on, just charge it for six hours
and it can reach its best performance.
D. Do not operate this MP3 Player in
extremely cold, hot, dusty or damp
environment.
E. Avoid putting this MP3 Player under
direct sunlight
F. Do not scrub this MP3 Player with a hard
object; it may result in scratches on the
screen and/or damage to the hardware.
Use a damp cotton cloth to gently wipe
the shell of the player. Using other
chemical cleaning solutions is strictly
prohibited.
G. Keep this MP3 Player and all
accessories out of children’s reach
under 3 years old.
H. Charge the MP3 Player when:
The battery capacity icon is
empty and flashing
The MP3 Player powers off
automatically, immediately
3
Page 4

after it is turned on.
I. Avoid operating this MP3 Player under
very dry environment to prevent damage
from static-shock.
J. Do not disconnect the USB cable while
formatting, uploading or downloading
files; disconnecting USB cable will result
in file corruption and may require
reformatting – resulting in data loss.
K. When used as a removable disk, users
should backup important data. Our
company is not responsible for loss of
data.
L. This MP3 Player does not have any
user-serviceable parts or accessories.
DO NOT TRY TO DISASSEMBLE THIS
MP3 Player. Use an AC charger with
5V & 500mA output.
M. Use battery charger and accessories
permitted by the manufacturer. Using
other accessories or charger may be a
safety hazard or affect product
performance and/or void product
warranty.
N. Please properly dispose of the obsolete
player and its accessories following your
local environmental laws.
O. If you have any problem using this player,
please visit www.hittusa.com
NOTE: Please charge the player for at
for help
or email
least 10 hours BEFORE fi rst time use.
4
Page 5

NOTES REGARDING FCC COMPLIANCE
Users are not permitted to make changes or
modify the device in any way. Changes or
modifications that are not authorized by the
party responsible for compliance could void
the user’s authority to operate the equipment.
This device complies with part 15 of the FCC
Rules. Operation is subject to the following two
conditions:
This device many not cause
harmful interference, and
This device must accept any
interference received, including
interference that may cause
undesired operation.
5
Page 6

TABLE OF CONTENT
PRODUCT FEATURES ........................... 7
KNOW THE PLAYER .............................. 9
MAIN MENU……………….....………….. 13
MUSIC ................................................... 13
AMV (Video) .......................................... 17
RECORD (Voice Recording) ................ 21
VOICE (Listen to Voice Recording) ..... 22
FM RADIO………………………………... 25
PHOTO .................................................. 27
SETUP……….…………………………….29
E-BOOK….……………….……………….31
USB DISK .............................................. 34
TROUBLESHOOTING ........................... 35
TECHNICAL SPECIFICATIONS ............ 37
WARRANTY INFORMATION...……..…. 39
6
Page 7

PRODUCT FEATURES
● Clip-on design with 1.5 inch TFT full color
display with G-Sensor for automatic display
orientation
● Multi file format support - supports MP3,
WMA (non-DRM) & WAV audio files - AVI &
AMV (128x128 resolution only) video files –
BMP, JPG & GIF picture files (up to 12 Mega
Pixels)
● FM Radio - with 20 channels preset and FM
recording
● e-Documents - Read text files (.TXT)
● Voice Recorder - Voice can be recorded
and saved in WAV file format
● Equalizer Settings - 7 Equalizer settings -
Natural, Rock, Pop, Classic, Soft, Jazz & DBB
– Also included is SRS-WOW for user
selectable 3D and TruBass effects
● Music Play Mode Settings - Once, Repeat
7
Page 8

One, Folder, Repeat Folder, Repeat All,
Random and Intro
● Power Save Mode - User selectable sleep
(power save) and shut down timings
● Graphic User Interface - Menu with icons for
a user-friendly interface
● G-Sensor – Player automatically changes
display orientation when the player is rotated
● The Player can be charged by connecting
the USB cable to computer’s USB port or an
optional Power Charger
8
Page 9
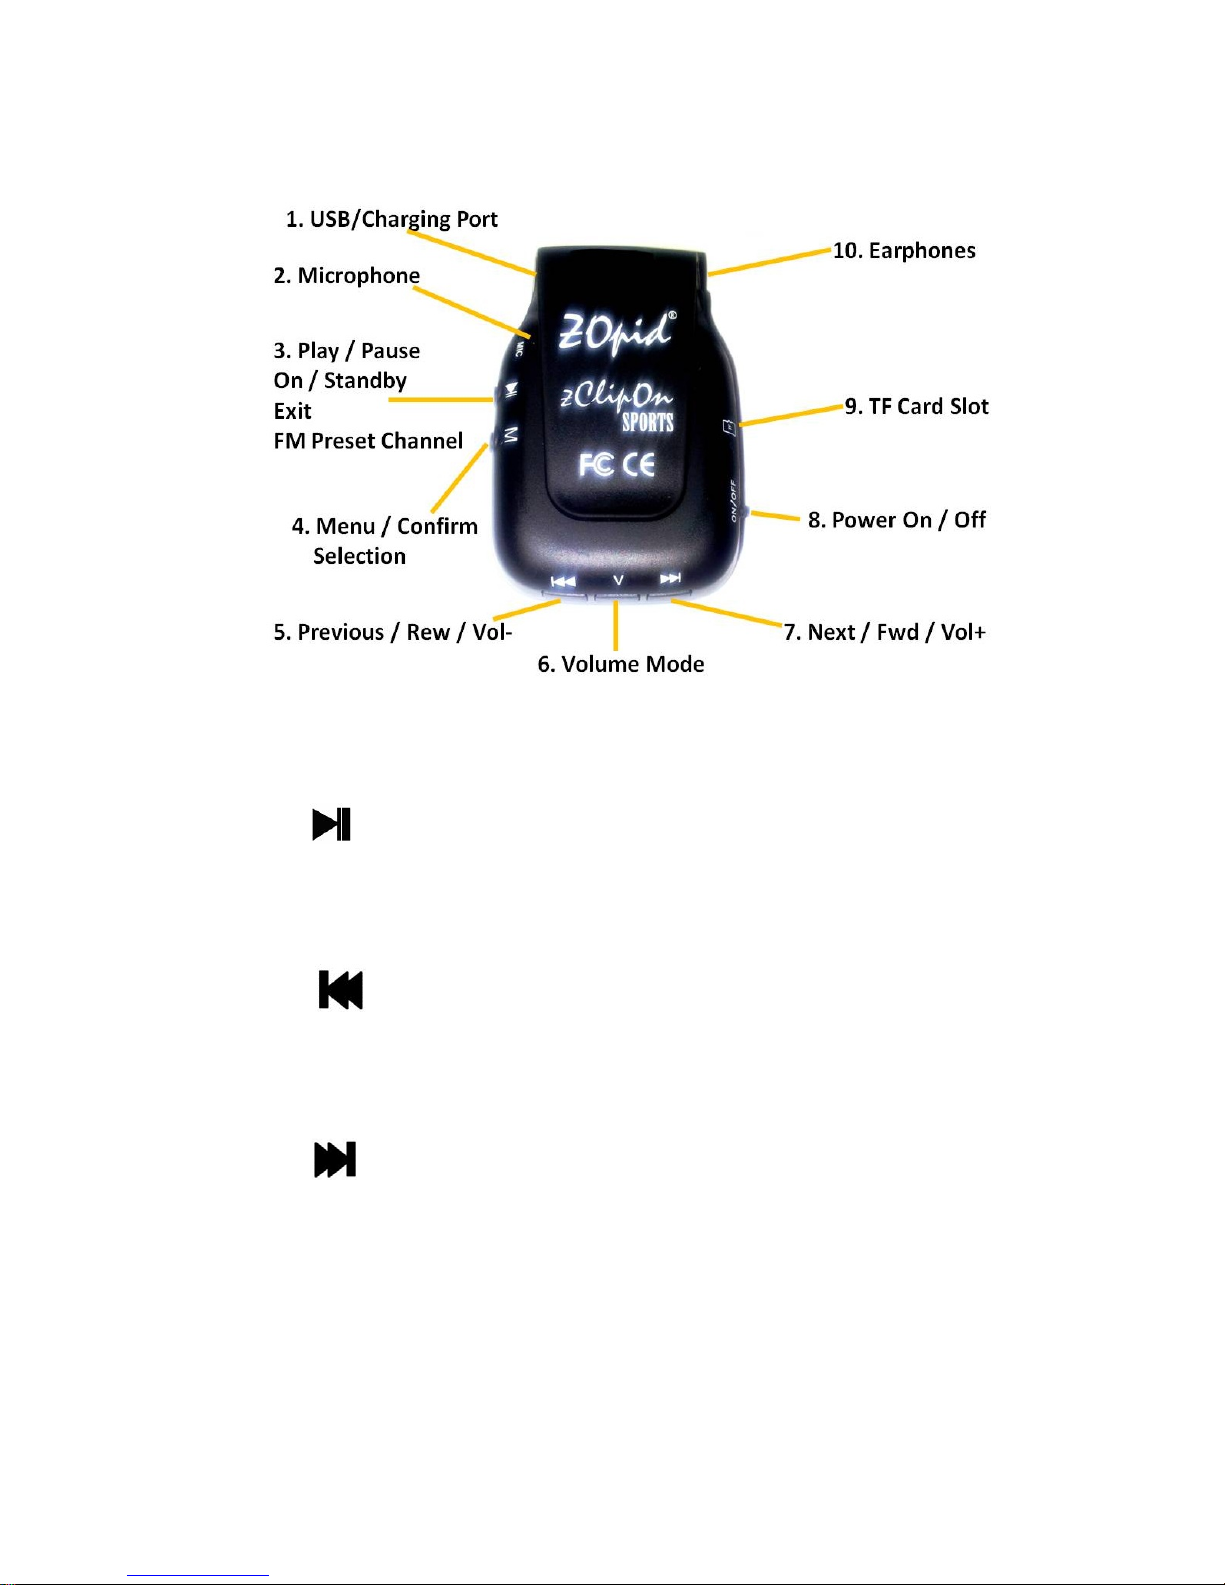
KNOW THE PLAYER
Appearance and Buttons
1. USB/Charging port
2. Built-in microphone
3.
Fast Exit from sub-menus
4. M: Menu button & Confirm Selection
5.
Volume -
6. V: Switch to volume adjustment mode
7.
8. ON/OFF power button (NOTE: Turning this
switch off resets the player and the clock)
: Play/ pause & Confirm selection and
: Previous song or Menu selection,
: Next song or Menu selection, Volume+
9. TF (Micro-SD) Card Slot (up 32GB)
10. Earphones: Earphone jack
9
Page 10
Definition of buttons operations:
Button operations include, Short Press,
Long Press, and Press & Hold.
1. Short-press: Result is achieved as
soon as the button is pressed
2. Long-press: Press the button for more
than a couple of seconds to achieve
desired result
3. Press & release: Result is achieved
when the button is released after
pressing it
4. Hold: Keep holding the key until the
desired result is achieved, e.g. keep
holding the
Rewind/Fast Forward
Charging Battery
The Player can be charged by connecting the
USB cable to computer’s USB port or an
optional Power Charger
● A solid battery icon means the battery is fully
charged; as the player is used the battery level
or keys for Fast
indicator will be partially filled
● A blank battery indicator means the battery
charge is low and must be plugged in to
10
Page 11

charge the battery.
IMPORTANT: When the player is plugged in to
charge, make sure that the ON/OFF switch is
in ON position
IMPORTANT: When the player is not going to
be used for an extended period of time, please
turn power switch to OFF position – Please
note that turning switch to off position will reset
the player and the clock.
Basic Functions
“M” button is used to display different menus
including:
Main Menu - press & release “M” button to
open the menu and Long-press to exit from
the menu
Sub-Menu - press and release “M” to open
the sub-menu
Navigation Keys
Use navigation keys (
or ) to select
menu options, and when playing music, to
select Previous or Next song, and Fast
Rewind or Fast Forward
11
Page 12
Various Functions (Modes)
Select different functions through the Main
Menu. Press & release “M” button to open
Main Menu and then use Navigation keys to
select the different functions; short press “M”
button to confirm the selection
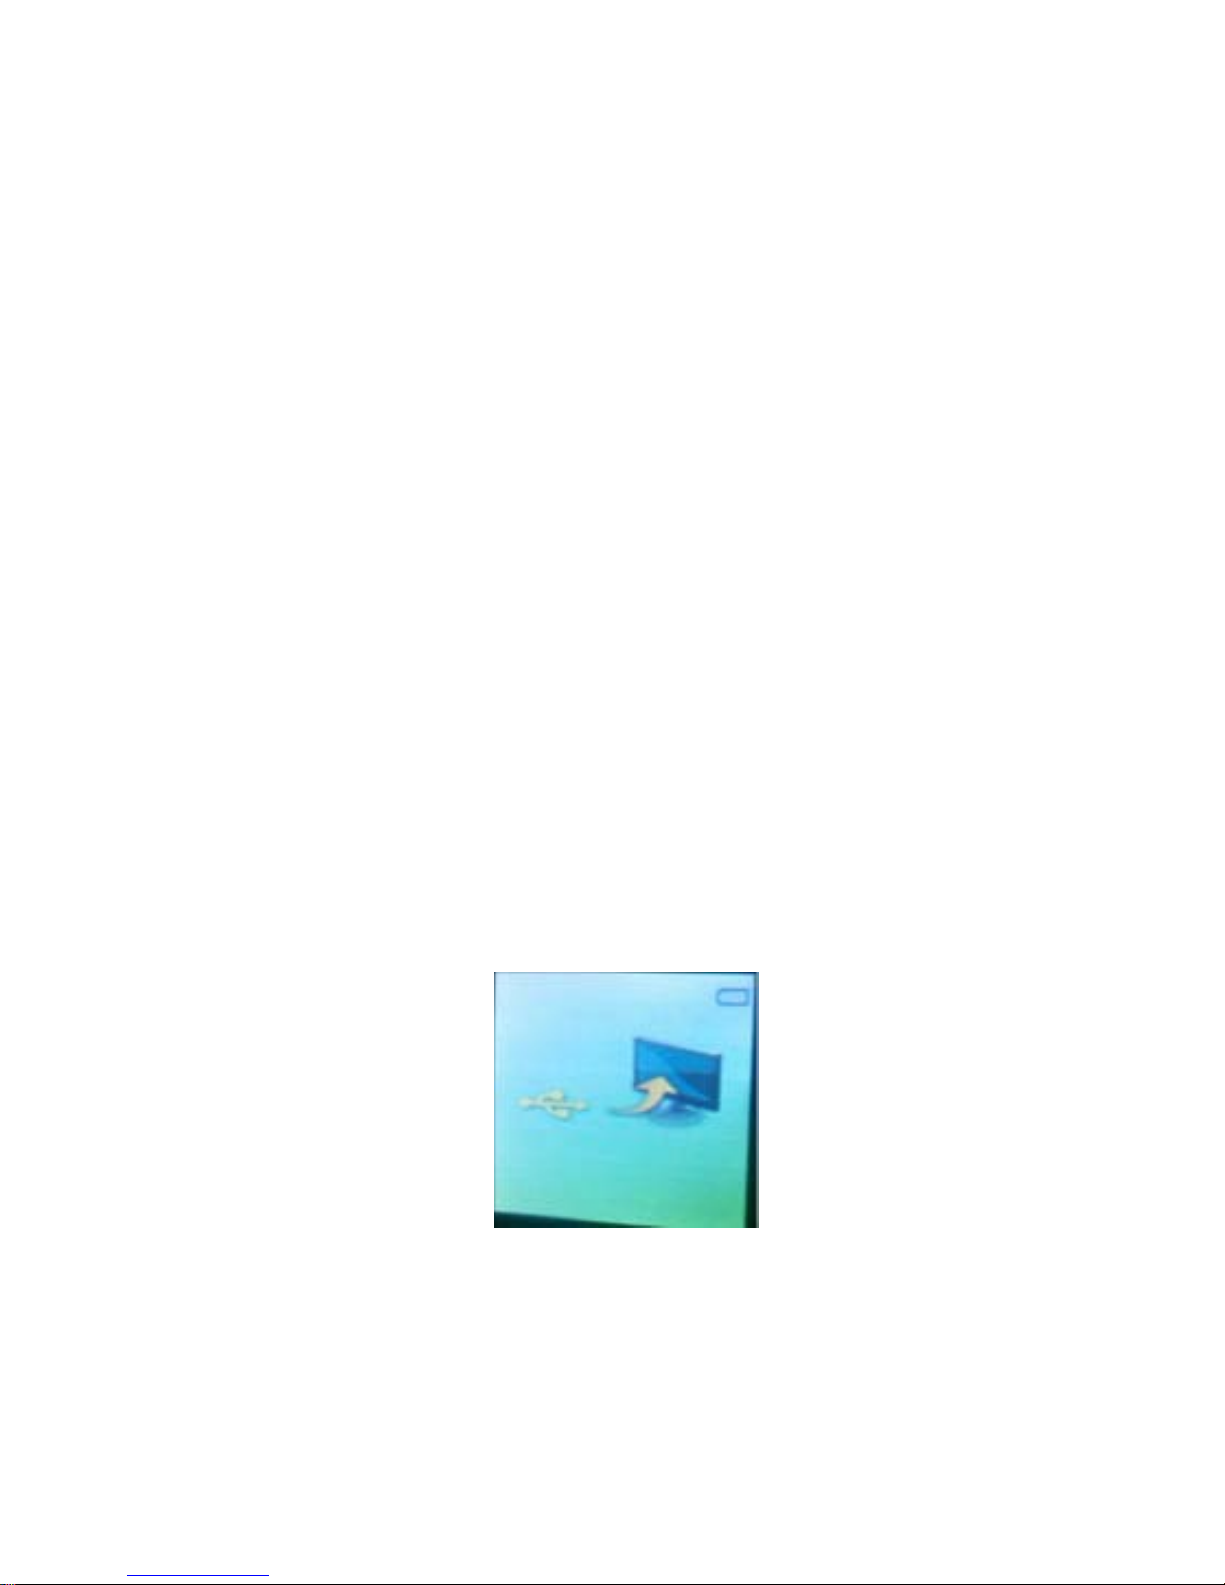
Connecting pla yer t o a computer and
copying files
Insert smaller end of the USB cable in the
USB port on the player and the bigger end
into an available USB port on your computer.
Once recognized as a USB device the
following icons will be displayed on the
player’s screen:
Once player is recognized as a removable
disk, users can copy files from computer’s
hard disk to player’s memory using file
12
Page 13

manager application from the computer
Volume adjustment
Press “V” button to enter volume
adjustment mode and then short press
or
Turn Player ON or OFF:
Long press
switch must be in ON position)
Long press : to turn player OFF
MAIN MENU
to decrease or increase the volume.
to turn player ON (ON/OFF
● Music
● AMV (Video)
● Record
● Voice
● FM radio
● Photo
● Setup
● e-Book
13
Page 14
MUSIC
Select Music from the Main Menu using
or
Music Play Mode
Press
Press “V” button to switch to Volume Adjust
mode while playing a music file - Use
volume.
button and Press “M” button to enter
button to Play Music file
or
button to decrease or increase the
Press and quickly release
to skip to previous or next song respectively
Press and Hold
rewind or fast forward the song
Press
Press and Hold “M” button for a couple of
seconds to exit Play Mode and go back to the
Main Menu
File Management Sub-Menu
button again to Pause
or button to fast
or button
When Player is in Pause State - Press “M”
14
Page 15
button to display File Management sub-menu
Use
and then Press “M” button to confirm selection
Use
navigation and selection
or button to highlight an option
or and “M” buttons for
● Local folder (use this option to select
different file or folder from player’s
memory)
● Delete file
● Delete folder
● Exit
Music Setti ngs Sub-Menu
When Player is in “Play” State - Press “M”
button to Enter Music Settings sub-menu
Use
and then Press “M” button to confirm selection
or button to highlight an option
Use
or and “M” buttons for
15
Page 16
navigation and selection
● Repeat [Normal, Repeat One, Folder,
Repeat Folder, Repeat All, Random,
Intro]
● Equalizer [Natural, Rock, Pop, Classic,
Soft, Jazz, DBB]
● SRS WOW [SRS WOW, User Setting
(SRS 3D, TRUBASS, FOCUS, Exit),
Disable SRS WOW]
● Replay Mode (A-B Repeat)
● Replay (Select Replay then
press
Point A and then press
again to mark Ending point B)
● Replay Times (1-10 number
of times to repeat A-B segment
to mark Starting
selected)
16
Page 17
● Replay Gap(1-10 – number of
seconds gap between each
replay of A-B segment selected)
● Exit
Lyrics synchronization
The player supports *.lrc lyric files to display
synchronized lyrics. If lyric file is found, the
small red circle in the lower left corner will be
replaced with a small green circle
NOTE: Long Press “M” button to display lyrics
while the song is being played.
AMV (Video)
Select AMV from the Main Menu using
button and Press “M” button to enter Video
Play Mode
Press
Press “V” button to switch to Volume Adjust
or
button to Play Music file
17
Page 18
mode while playing a music file - Use or
button to decrease or increase the
volume.
Press and quickly release
to skip to previous or next song respectively
Press and Hold
rewind or fast forward the song
Press
Press and Hold “M” button for a couple of
seconds to exit Play Mode and go back to the
Main Menu
When Player is in Pause State - Press “M”
button again to Pause
or button to fast
or button
button to display file management sub-menu
Use
and then Press “M” button to confirm selection
File Management Sub-Menu
Use
navigation and selection
or button to highlight an option
or and “M” buttons for
18
Page 19

● Local folder (use this option to select
different file or folder from player’s
memory)
● Delete file
● Delete folder
● Repeat [Normal, Repeat One, Folder,
Repeat Folder, Repeat All, Random,
Intro]
● Exit
Convert AVI files to AMV format files
This player can only play video files in AMV
format with 128 x 128 resolution. To convert
files from other format to AMV file in 128 x 128
resolution, please visit our support website
www.hittusa.com
conversion utility. Click on “Manuals &
and download a file
Downloads” and look for model number
zClipOn-Sports under MP3 & Media Players.
1. Download and install the conversion utility
19
Page 20
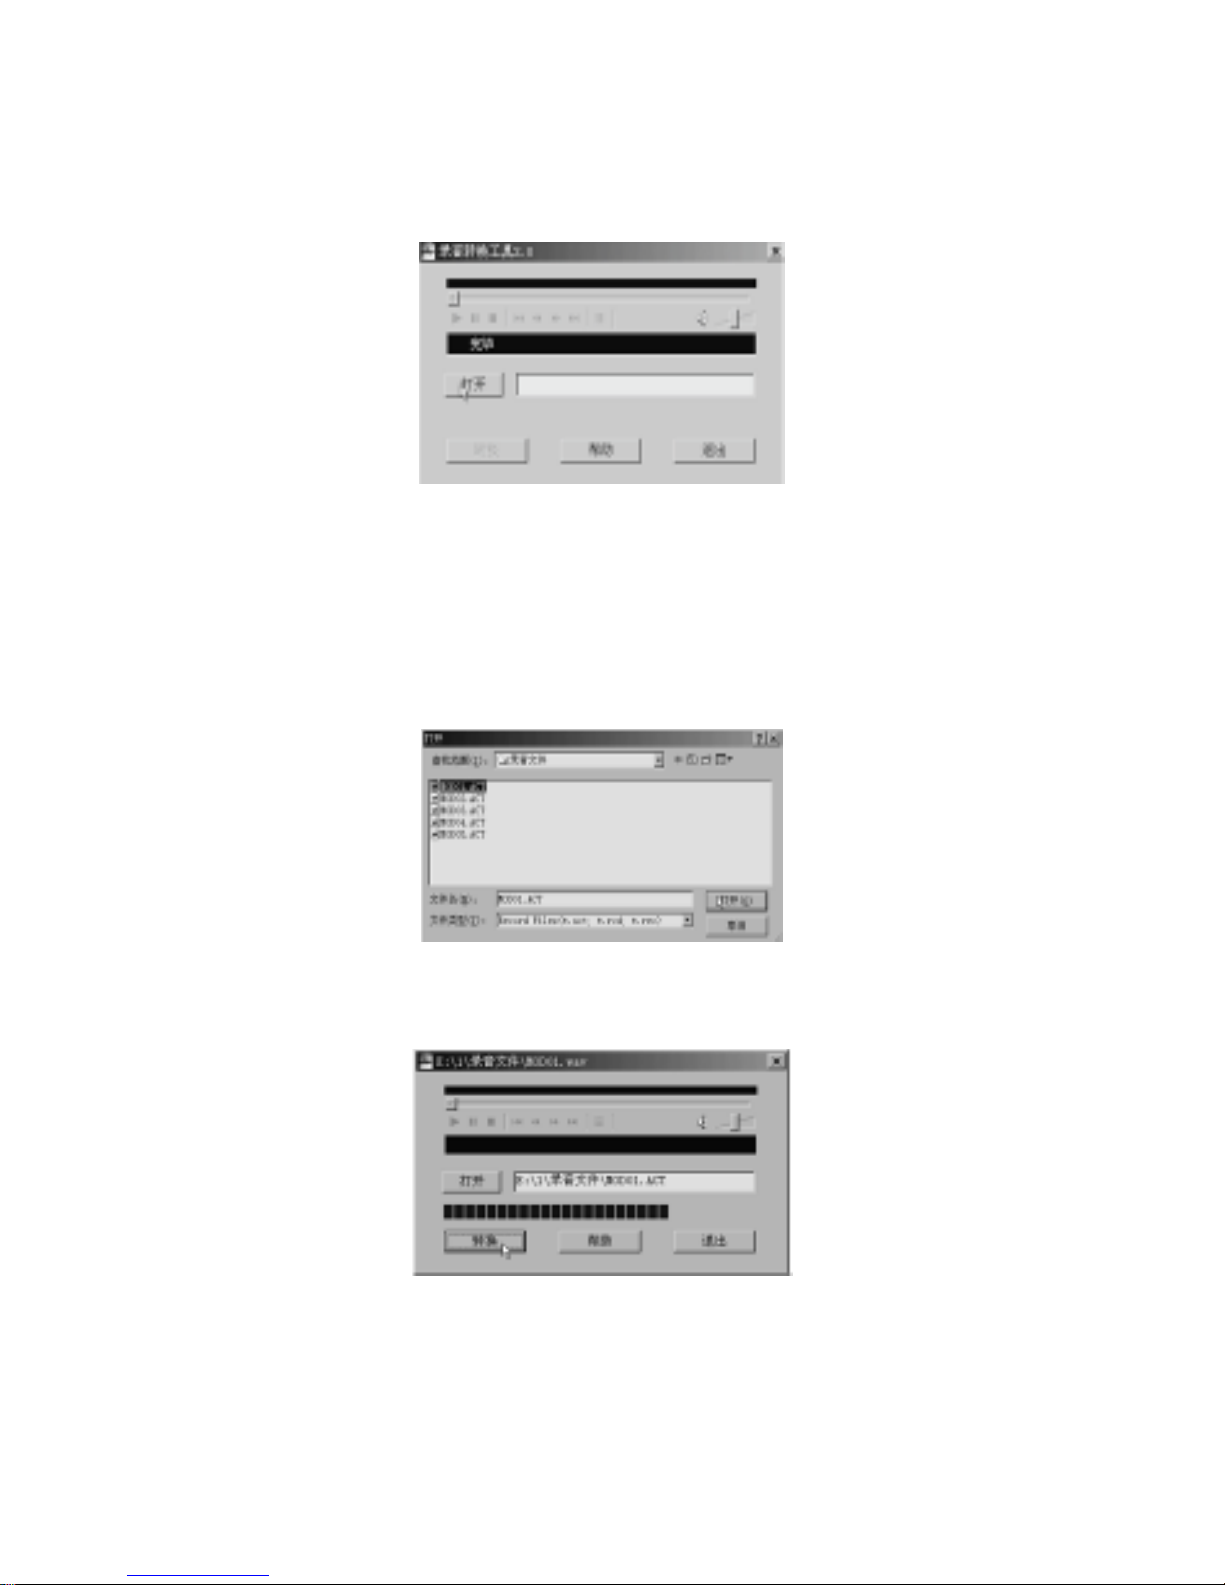
on your PC – Click on Help link to see online
user manual to use the utility.
2. Choose a video file to convert to .AMV
format (make sure the file resolution is set to
128x128)
3. Click “Convert” button, the conversion starts
4. Copy converted .AMV file to player’s
memory to play it on the player
20
Page 21
RECORD (Voice Recording)
Select Record from the Main Menu using
or
Voice Recording Mode
Press
Press
Press and Hold “M” button for a couple of
seconds to Stop/Save Recording and Exit to
the Main Menu
button and Press “M” button to enter
button to Start recording
button again to Pause recording
When Player is in Pause State - Press “M”
button to display Recording sub-menu
Use
and then Press “M” button to confirm selection
Recording Sub-Menu
Use
navigation and selection
or button to highlight an option
or and “M” buttons for
21
Page 22

● Local Folder (use this option to select
different file or folder from player’s
memory to save voice recordings)
● Rec. Type
● Long Rec (approximately 60
hours of recording per GB of
memory)
● Fine Rec (approximately 15
hours of recording per GB of
memory)
● Exit
VOICE (Listen to Voice-Recording files)
Select Voice from the Main Menu using
button and Press “M” button to enter Voice
Mode
or
Press
Press “V” button to switch to Volume Adjust
mode while playing a music file - Use
button to Play Voice Recording
or
22
Page 23
button to decrease or increase the
volume.
Press and quickly release
to skip to previous or next song respectively
Press and Hold
rewind or fast forward the song
Press
Press and Hold “M” button for a couple of
seconds to exit Play Mode and go back to the
Main Menu
When Player is in Pause State - Press “M”
button again to Pause
or button to fast
or button
button to display File Management sub-menu
Use
and then Press “M” button to confirm selection
File Management Sub-Menu
Use
and selection
or button to highlight an option
, and “M” buttons for navigation
23
Page 24
● Local folder (use this option to select
different file or folder from player’s
memory)
● Delete file
● Delete folder
● Exit
When Player is in “Play” State - Press “M”
button to Enter Voice Settings sub-menu
Use
and then Press “M” button to confirm selection
Voice Settings Sub-Menu
Use
navigation and selection
or button to highlight an option
or and “M” buttons for
● Repeat [Normal, Repeat One,
Folder, Repeat Folder, Repeat All,
Random, Intro]
● Replay Mode (A-B Repeat)
24
Page 25

● Replay (Select Replay then
press
A and then press
mark Ending point B)
● Replay Times (1-10 number of
times to repeat A-B segment
selected)
● Replay Gap(1-10 – number of
seconds gap between each
replay of A-B segment selected)
to mark Starting Point
again to
● Exit
FM R ADIO
Select FM Radio from the Main Menu using
or button and Press “M” button to
enter FM Radio Mode
Press and quickly release
to skip to previous or next radio frequency
or button
Press and Hold
or button for a couple
25
Page 26
of seconds to auto scan for radio channels –
Press and release
auto scan
Press
Radio Channel
Press and Hold “M” button for a couple of
seconds to exit FM radio Mode and go back to
the Main Menu
When Radio mode is ON - Press “M” button
button to go to (next) Saved Preset
or button to stop
to display FM radio Settings sub-menu
FM Radio Settings Sub-Menu
Use
navigation and selection
● Save (Save a radio channel as a
Preset)
● Record (Record radio channel)
or and “M” buttons for
● Delete (Delete a Preset channel)
26
Page 27
● Delete All (Delete all Preset channels)
● Auto Search (Start channel Auto
Search – same as pressing and holding
or button for a couple of
seconds to auto scan for radio channels
– Press and release
to stop auto scan
● Normal Band (select this option if
using this player in Americas & Europe
(Radio Frequency between 87MHz and
108Mhz)
● Japan Band (Select this option if using
this player in Japan – Radio Frequency
between 76MHz and 90MHz)
or button
● Exit
PHOTO
Select Photo from the Main Menu using
or
button and Press “M” button to enter
27
Page 28
Photo View Mode
Use
from the list and then Press
view the picture
Press
list
Press and Hold “M” button for a couple of
seconds to exit FM radio Mode and go back to
the Main Menu
When file list is displayed Press “M” button to
or button to select a picture file
button to
button again to go back to the file
display Photo Settings sub-menu
Photo Settings Sub-Menu
Use
navigation and selection
● Local Folder (use this option to select
different file or folder from player’s
memory)
or and “M” buttons for
● Playback Set
28
Page 29
● Manual Play
● Auto Play (Slide show mode -
Set each picture display time
from 1 to 10 seconds)
● Delete File
● Delete All
● Exit
SETUP
Select Setup from the Main Menu using
or
Player Setup Mode
Use
option and then Press
selection
Press and Hold “M” button for a couple of
button and Press “M” button to enter
or button to highlight a setup
button to confirm
seconds to exit Setup Mode and go back to
the Main Menu
29
Page 30
Player Setup Sub-Menu
Use
and selection
, and “M” buttons for navigation
● System Time (Use “V” button to switch
between fields - using
to change field values)
● Power save (Display black screen to
extend battery usage - Use
button to adjust time between 0 to 50
seconds –to disable this feature change
or button
or
setting to 0)
● Language (see Technical
Specifications for list of languages)
● Auto Shut Down (Automatically turn of
the player if it’s not in use - Use
button to adjust time between 0 to
200 seconds –to disable this feature
change setting to 0)
or
● Memory Info
30
Page 31
● Format Device – Warning: using this
option will delete all the data on the
player’s memory
● Firmware Version
● Firmware Upgrade
● Keys Sound Level (Adjust volume
level for sound generated when player
buttons are pressed - Use
button to adjust time between 0 to 40 –to
disable this feature change setting to 0)
● G-Sensor (ON, OFF - Enable or
disable change in display orientation
when player is rotated)
● Exit
E-BOOK
or
Select E-book from the Main Menu using
or
E-book reading Mode
button and Press “M” button to enter
31
Page 32
Press button to view text (.TXT) file
Press and quickly release
to skip to previous or next page respectively
Press and Hold
rewind or fast forward the pages
Press and Hold “M” button for a couple of
seconds to exit E-book Mode and go back to
the Main Menu
When Player is in Pause State - Press “M”
button to display File Management sub-menu
or button to fast
or button
Use
and then Press “M” button to confirm selection
File Management Sub-Menu
Use
and selection
or button to highlight an option
, and “M” buttons for navigation
● Local Folder (use this option to select
different file or folder from player’s
memory)
32
Page 33
● Playback Set
● Manual Play
● Auto Play (Automatically go to
next page - Set each page
display time from 1 to 10
seconds)
● Delete File
● Delete All
● Exit
When Player is in text file view mode - Press
“M” button to Enter e-Book Settings sub-menu
Use
and then Press “M” button to confirm selection
e-Book Settings Sub-Menu
or button to highlight an option
Use
and selection
, and “M” buttons for navigation
33
Page 34

● Bookmark Select (View list of saved
bookmarks)
● Bookmark Delete (Delete saved
bookmarks)
● Bookmark Add (Save a new
bookmark)
● Exit
USB Disk
The player can be used as a standard USB
disk, supports the following operating systems:
Windows 2000/ME, XP, Vista, 7 & 8, Mac OS
10.3 or higher, Linux, Redhat 8.0 or higher.
The player also supports USB charge, and it
can be used while it’s getting charged (in USB
mode, short press “M” to exit to the Main menu
and use the player.
NOTE: In USB Disk mode the player’s
memory appears as Removable Disk under
computer’s File Manager (Windows Explorer
or Finder). You can drag and drop supported
34
Page 35
files from your computer’s hard drive to
removable disk.
Upgrade Player’s Firmware
Please check our support website
www.hitusa.com
or email
to check if a new
firmware is available for this player. If a
new firmware is available it will be emailed
to you with instructions to upgrade the
firmware.
TROUBLESHOOTING
No power Make sure the
battery is charged
and ON/OFF switch
is in ON position
No sound in
earphone
Abnormal words
displayed on the
screen
Can not download
music successfully
Check to make sure
the volume level is
not set to “0”and the
earphone is properly
inserted into the
earphone jack
Check if you’ve
chosen the right
language
Check USB cable is
connected properly
to the computer and
MP3 player. Make
35
Page 36
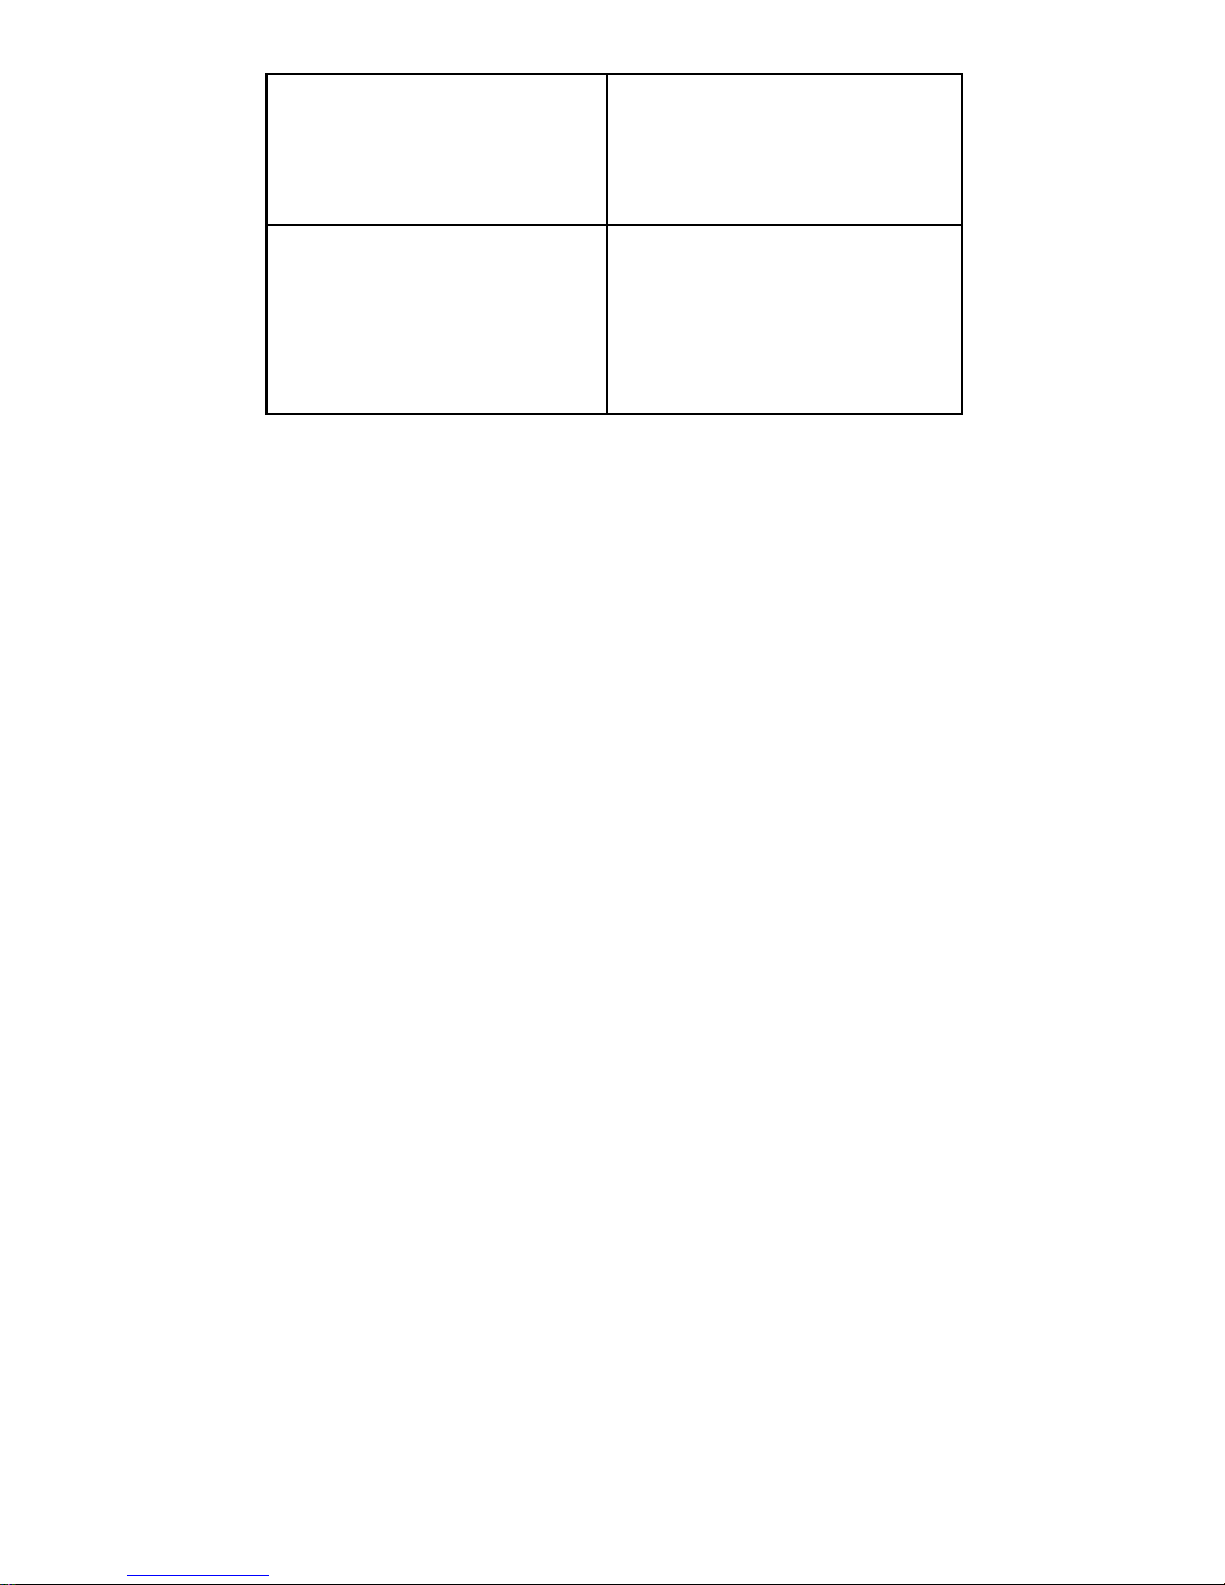
sure there is free
space on the
player’s memory to
store new files
Some or all of the
songs I downloaded
cannot be seen on
the player when
playing songs
Make sure the songs
files are in one f the
supported music file
formats.
36
Page 37
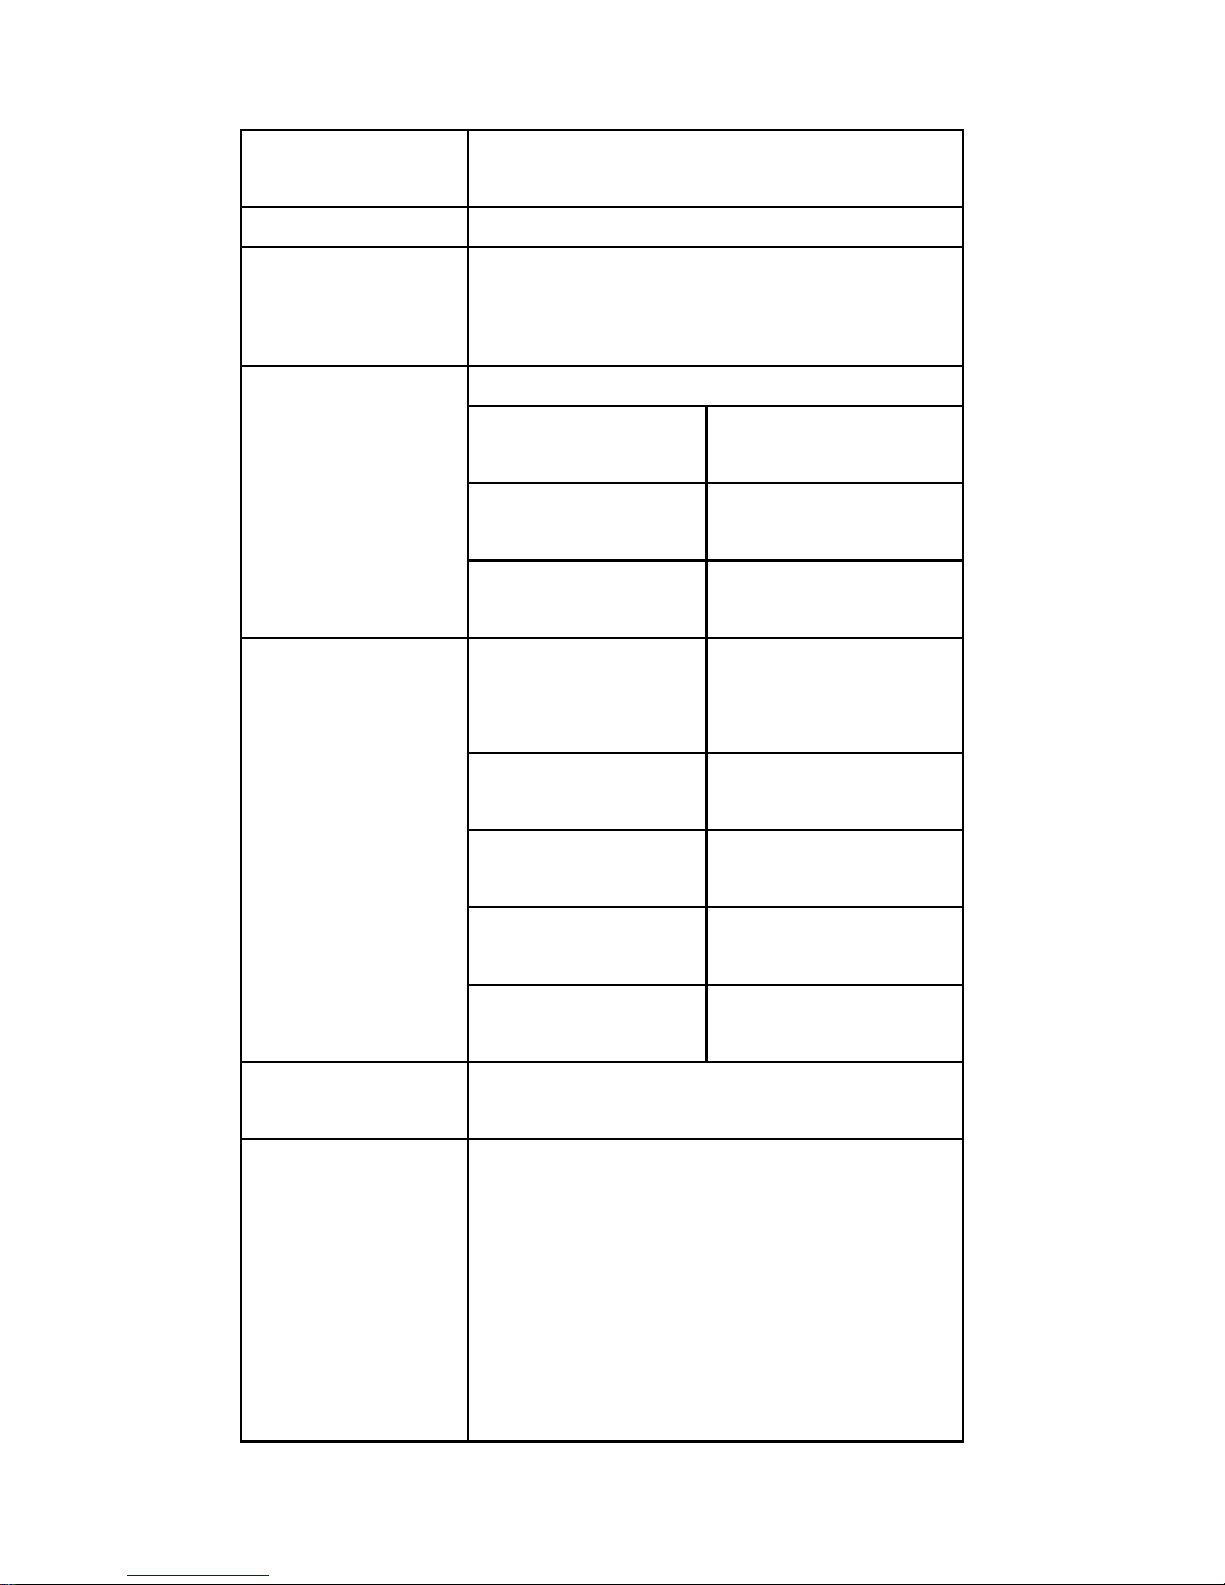
TECHNICAL SPECIFICATIONS
Screen 1.5” color CSTN display
(128x128) 65K
PC connection USB2.0 (HIGH SPEED)
Memory
Power
MP3, WMA
2GB - 8GB
Lithium battery
Sampling
rate
Recorded
file format
Recording
time
Earphone
output
MP3 bit rate 8Kbps to
8KHz
WAV(32Kbps)
ACT(8Kbps)
15 hours - 60
hours per GB
(L)5mW+ (R)
5mW
(32ohms)
320K bps
Supported File
formats
Language
select option
WMA,WMAV
,ASF bitrate
Frequency 20Hz to
Signal-to
noise rate
MP3, WMA, AMV, JPEG, GIF,
BMP, TXT
French, English, Italian, Dutch,
Portuguese, Spanish,
Russian, Arabic,
Simple-Chinese,
Traditional-Chinese,
Japanese, Korean, Thai,
Swedish, Danish, Czech,
Polish, Slovakian, Hungarian,
5Kbps to
384Kbps
20KHz
85dB
37
Page 38
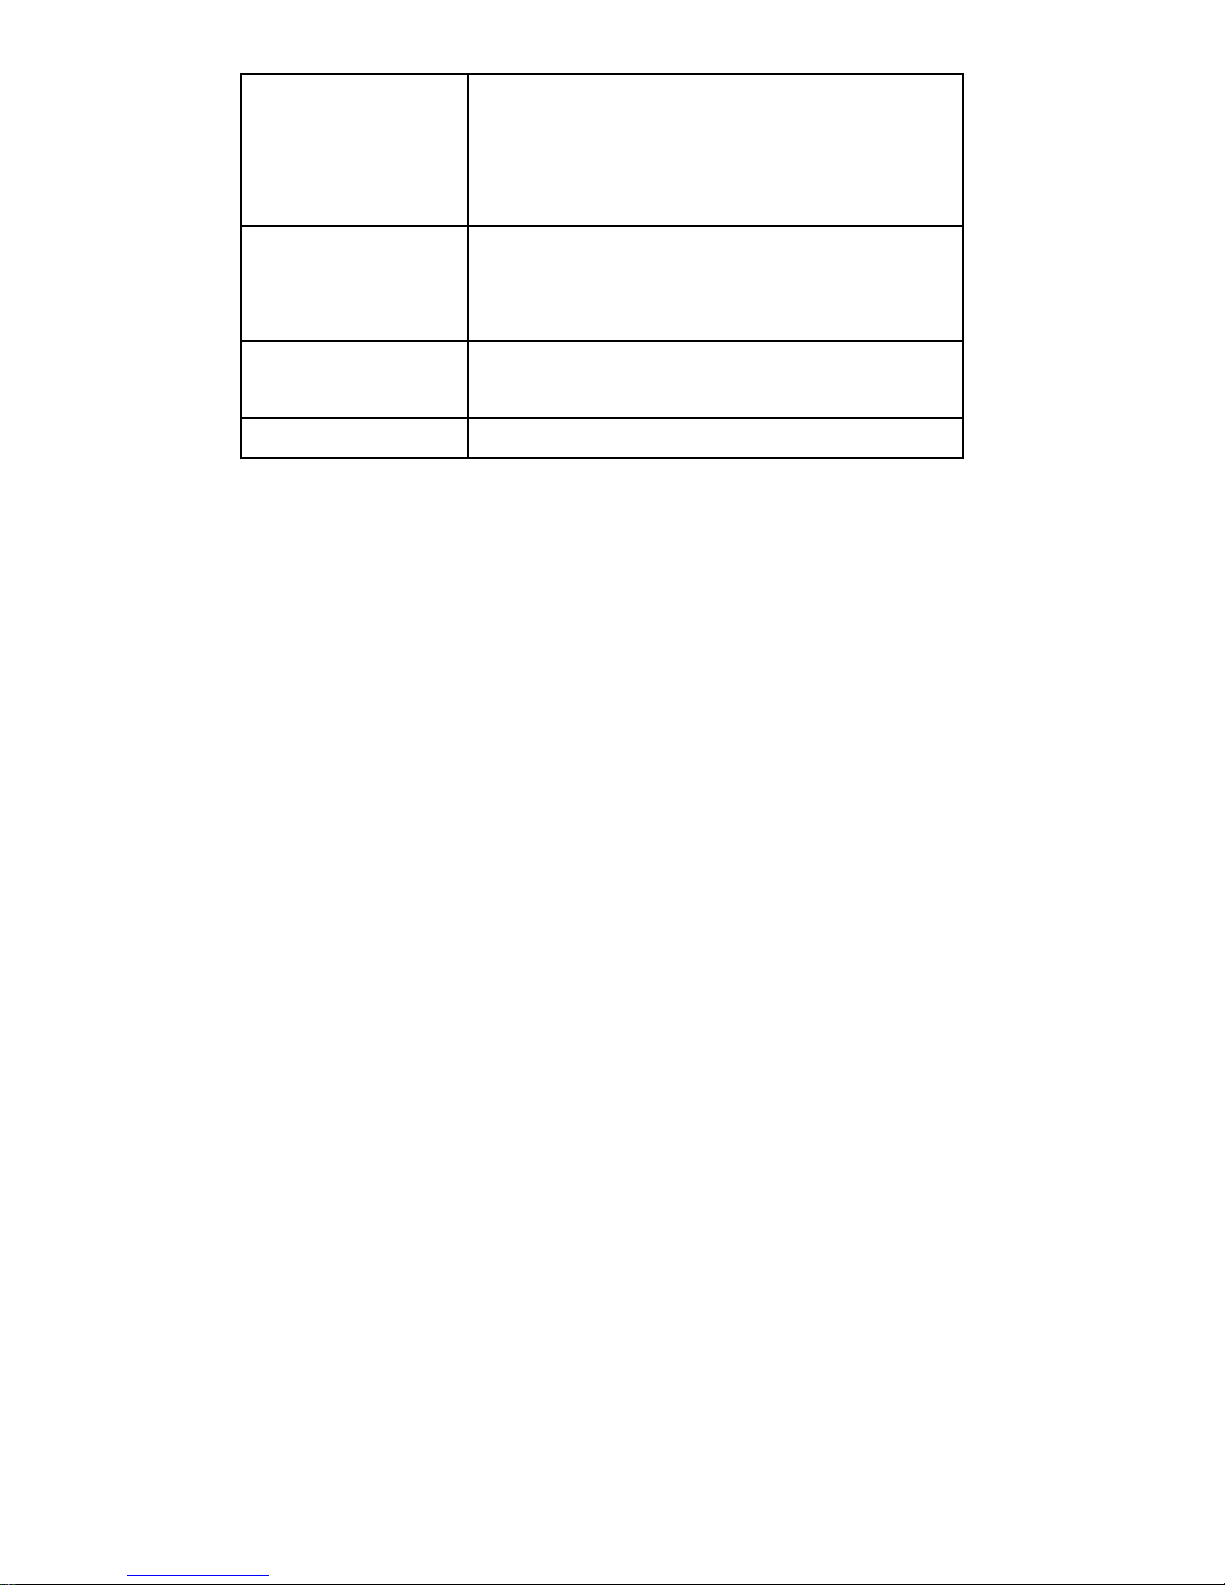
Romanian, Turkish,
Slovenian, Hungarian,
Romanian, Turkish,
Slovenian & Hebrew
Operation
system
Operation
temperature
Dimensions 58.5*41*15mm
NOTE: Product design and specifications may
change without prior notice
Windows98/SE/ME/2K/XP/7/8,
MacOS X or higher, Linux
2.4.2 or higher
-5°C to 40°C degree
38
Page 39

LIMI TE D 90-DAY WARRANTY
Coverage: Hi-Tech Trading (USA), Inc.
(“HiTT”) warrants this product (“product”)
against defects in materials and
workmanship under normal consumer use
for 90 days from the date of purchase. HiTT,
at its option, will at no charge repair, replace
or refund the purchase price of this product
should it not conform to this warranty. This
limited warranty is a consumer’s exclusive
remedy, extends only to the first consumer
purchaser, is not transferable and is valid
only on products purchased by consumers
in the United States or Canada.
Exclusions:
Normal Wear and Tear: Periodic
maintenance, repair and replacement of
parts due to normal wear and tear are
excluded from coverage.
Batteries: During warranty period, only
the batteries whose fully charged capacity
falls below 80% of their rated capacity or
the batteries that leak are covered by this
limited warranty.
Miscellaneous: This warranty does NOT
cover defects or damage that result from: (a)
improper operation, storage, misuse or
abuse, accident or neglect, such as
physical damage (cracks, scratches, etc.)
39
Page 40

to the surface of the Product resulting from
misuse; (b) contact with liquid, water, rain,
extreme humidity or heavy perspiration,
sand, dirt or the like, extreme heat, or food;
(c) use of the Product for commercial
purposes or subjecting the Product to
abnormal usage or conditions; (d) service,
installation, alteration, or modification in any
way by someone other than HiTT and, (e)
other acts which are not the fault of HiTT.
Obtaining Service: To obtain service or
information, please send email to
[email protected]. You will receive
instructions on how to ship the Product, at your
expense, to a HiTT Service Center. To obtain
service, you must include a copy of your
receipt.
40
Page 41

COMPANY & CONTACT INFORMATION
Hi-Tech Trading USA Inc
P.O. Box 179
Woodbury, NY 11797 U.S.A.
Web: www.hittusa.com
Email: [email protected]
ZOpid and the Stylized Logo are registered
in the US Patent & Trademark Office. All
other product or service names are the
property of their respective owners.
© 2012 Hi-Tech Trading USA Inc
The information contained in this User
Manual is believed to be correct at the time
of printing. HiTT reserves the right to
change or modify any information or
specifications without notice. The contents
of this User Manual are provided “as is.”
Except as required by applicable law, no
warranties of any kind, either express or
implied, including, but not limited to, the
implied warranties of merchantability and
fitness for a particular purpose, are made in
relation to the accuracy, reliability, or
contents of this guide.
41
 Loading...